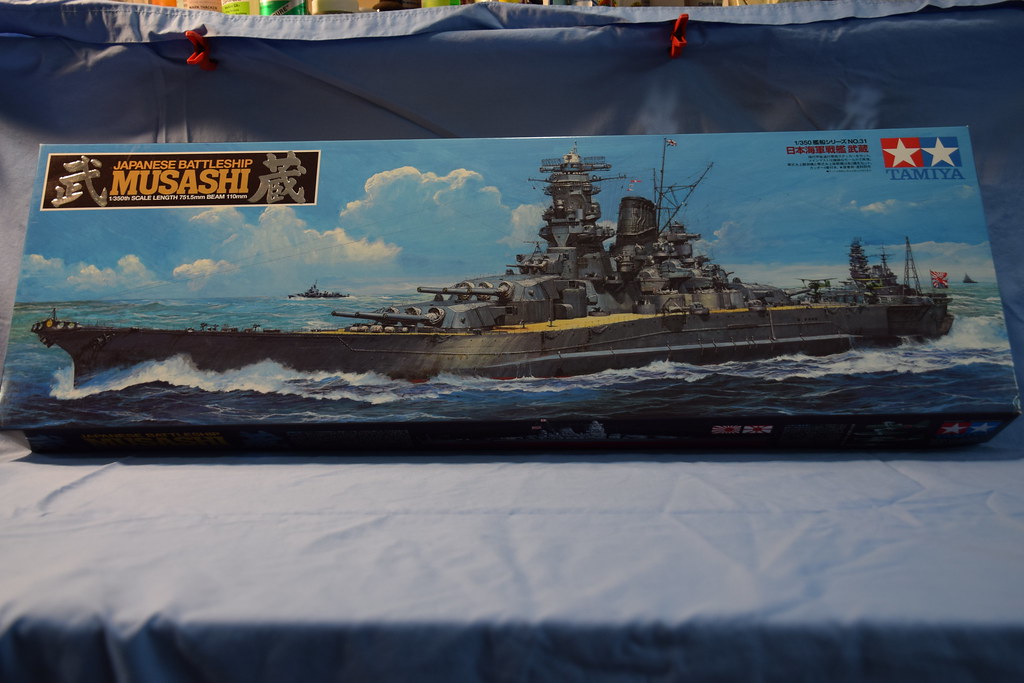
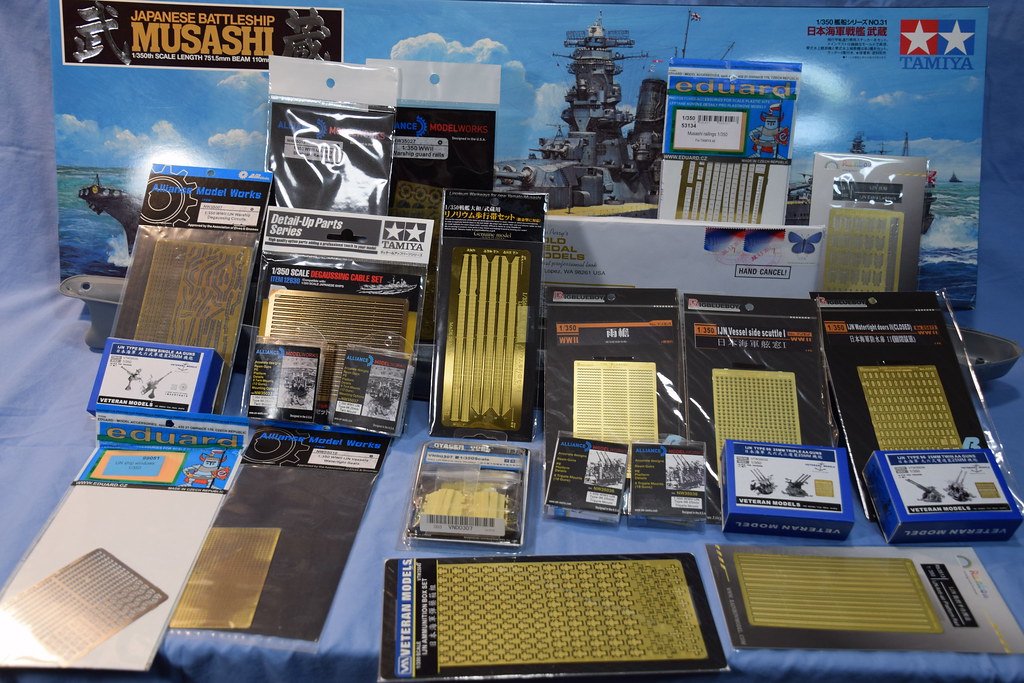
Been holding on to this kit for that past three years while slowly collecting aftermarket hardware. Now I beleive I have enough to get started.
There is also a wooden deck but at this time I am not sure if I will use it. I not really a fan of them and prefer to paint the decks.
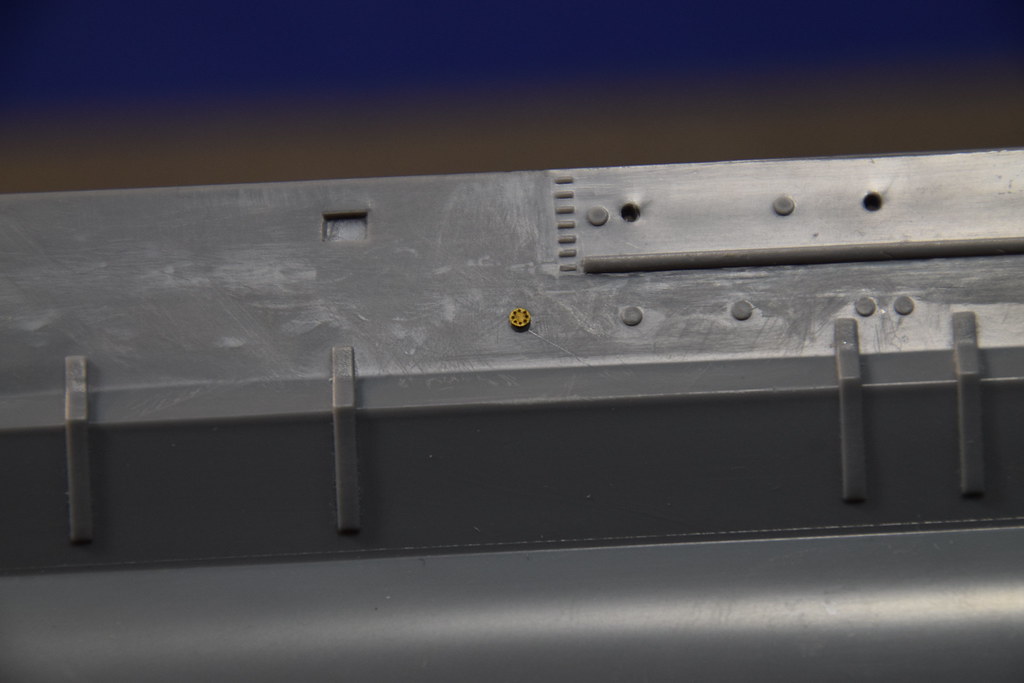
I already started on the hull by drilling out the portholes and sanding off the deguassing cable moded on the hull. Removing the cable was easy, cleaning up the hull has been a real pain in the back side.
I also purchased this reference book on the Musashi and Yamato. It filled with technical drawings on their construction and modifications they went through until their sinking. The author claims the book is based on new photos and records discovered in the Japan archives. The 3D drawings I believe are based on a model of the ship the author built or had commissioned.
I have not been very good at posting work progress in past builds, but those were on group builds where I felt pressure to meet the deadline and I only had a IPAD for a camera. Will post pictures as I progress thru each step except for this week as I will be in Omaha for the IPMS National Convention starting tomorrow. Heading Downtown to Omaha!
I have a base for it. Plan on having it sitting on blocks as if she was in drydock. As for cover I have a enclosed shelve reserved for her in the office.
I too am looking forward to seeing this Marcus. And that is a lot of beautiful brass your got there!
Question on the mounting. I am building a 1/200 scale Arizona for a client and I too am going to mount it like it is in dry dock. What I am not sure of is whether I follow the contour of the hull with the blocks or have them the same size all along the length of the hull?
Thank you for the link on drydock procedures it should come in real handy.
The Musashi has a flat bottom hull so it will be pretty straight forward has to how to place the blocks. The blocks will be placed along the length of the keel and then under the frames unless I find something different in the ASCE handbook. The Musahsi reference book I have has detail drawings of where each frame placement is located along the hull. That will be a big help in placing them on the base. The fun part (or not) will be cutting all of blocks, staining them and placing them.
The question I need an answer from the drydock procedures is how high do I make the stacks? Should they be tall enough for a average height man to be able to walk under the hull?
Unfortunately if you are going to use the latest AOTS reference book extensively, then a much better (as in less work required) starting point would be the Tamiya new tool Yamato + Pontos Musashi upgrade (intended for the new tool Yamato). The old Tamiya Musashi (as well as the old tool Yamato) are a fair distance from an accurate model, that will require a lot of scratch building to just complete the ‘detail’ department not to mention non-obvious profile issues. Sorry, I think the best option is just to super detail what you have and don’t research too much, as it will just lead to more headaches.
I agree with you about doing the detailing with what I have but there are little things that I can make changes to without a great effort. For one, now I know where the ship’s bell was located and will be able to add it to the build.
USS Texas, a smaller ship, “by book” uses 572 keel blocks. The under keel blocks are at least 5’ tall–but, that’s driven by the way the ship is drydocked.
In a graving dock, the bottom elevation is known, and the ships draft is known, so, you can pick a height that still allows the ship to float in. In a floating drydock, the AFD can only submerge a given distance. In which case you rig the blocks for the best average fit that allows access to ship’s hull, as required.
Which is why the “cheat” is to cut wood strips square, about 2x the boot topping, or to some convenient dimension like 1/8" or 10mm square. Then lay those thwartwise (parallel to the beam) and something near 1.161 the width the blocks (call it 5/16"/26-27mm on center. These are then cut about the same length as the beam of the ship’s main deck above them.
Only had a little time to spend on the hull. Installed one of the PE porthole covers to see how it looks compared to the flat covers molded on the hull. I like how it looks.
There is one interesting fact about Musashi that few mention, let alone include on a model of the ship. She was fitted with 2x2 depth charge racks during her 1943 refit. I believe that these are shown in the newest incarnation of the AOTS book.
I will have to check my references about the depth charges. Some reason in the back of my mind you are right but they made have been removed during a AA upgrade in 1944.
You are right about the depth charge racks. The book I have states that the racks were in installed during a 1944 refit. The author does not say what part of the year, but seeing how she was sunk in October 44 it had to be the April refit I believe.