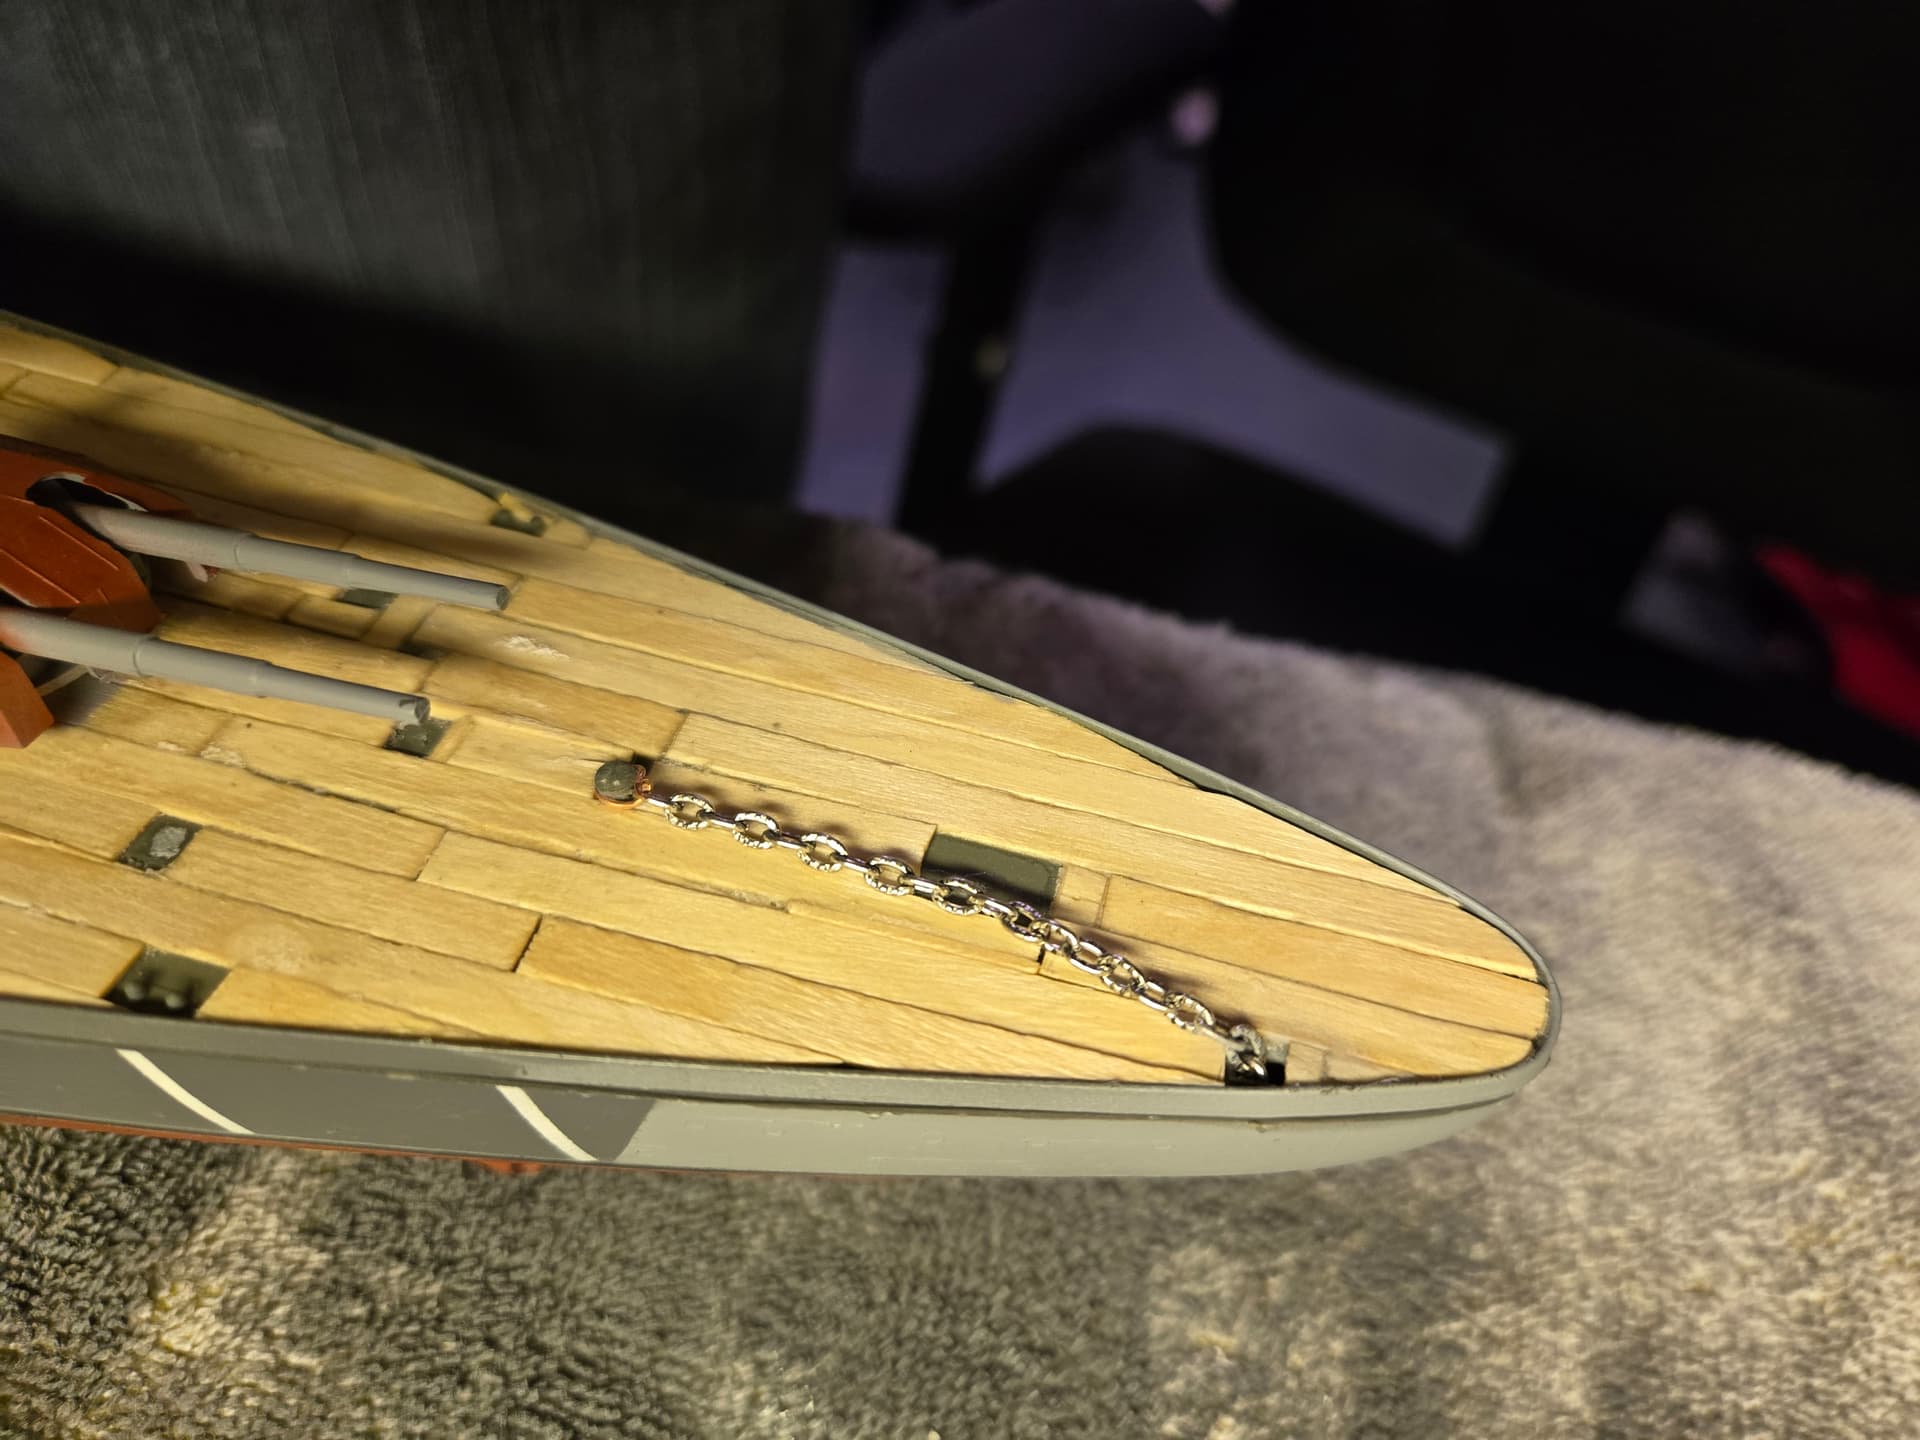
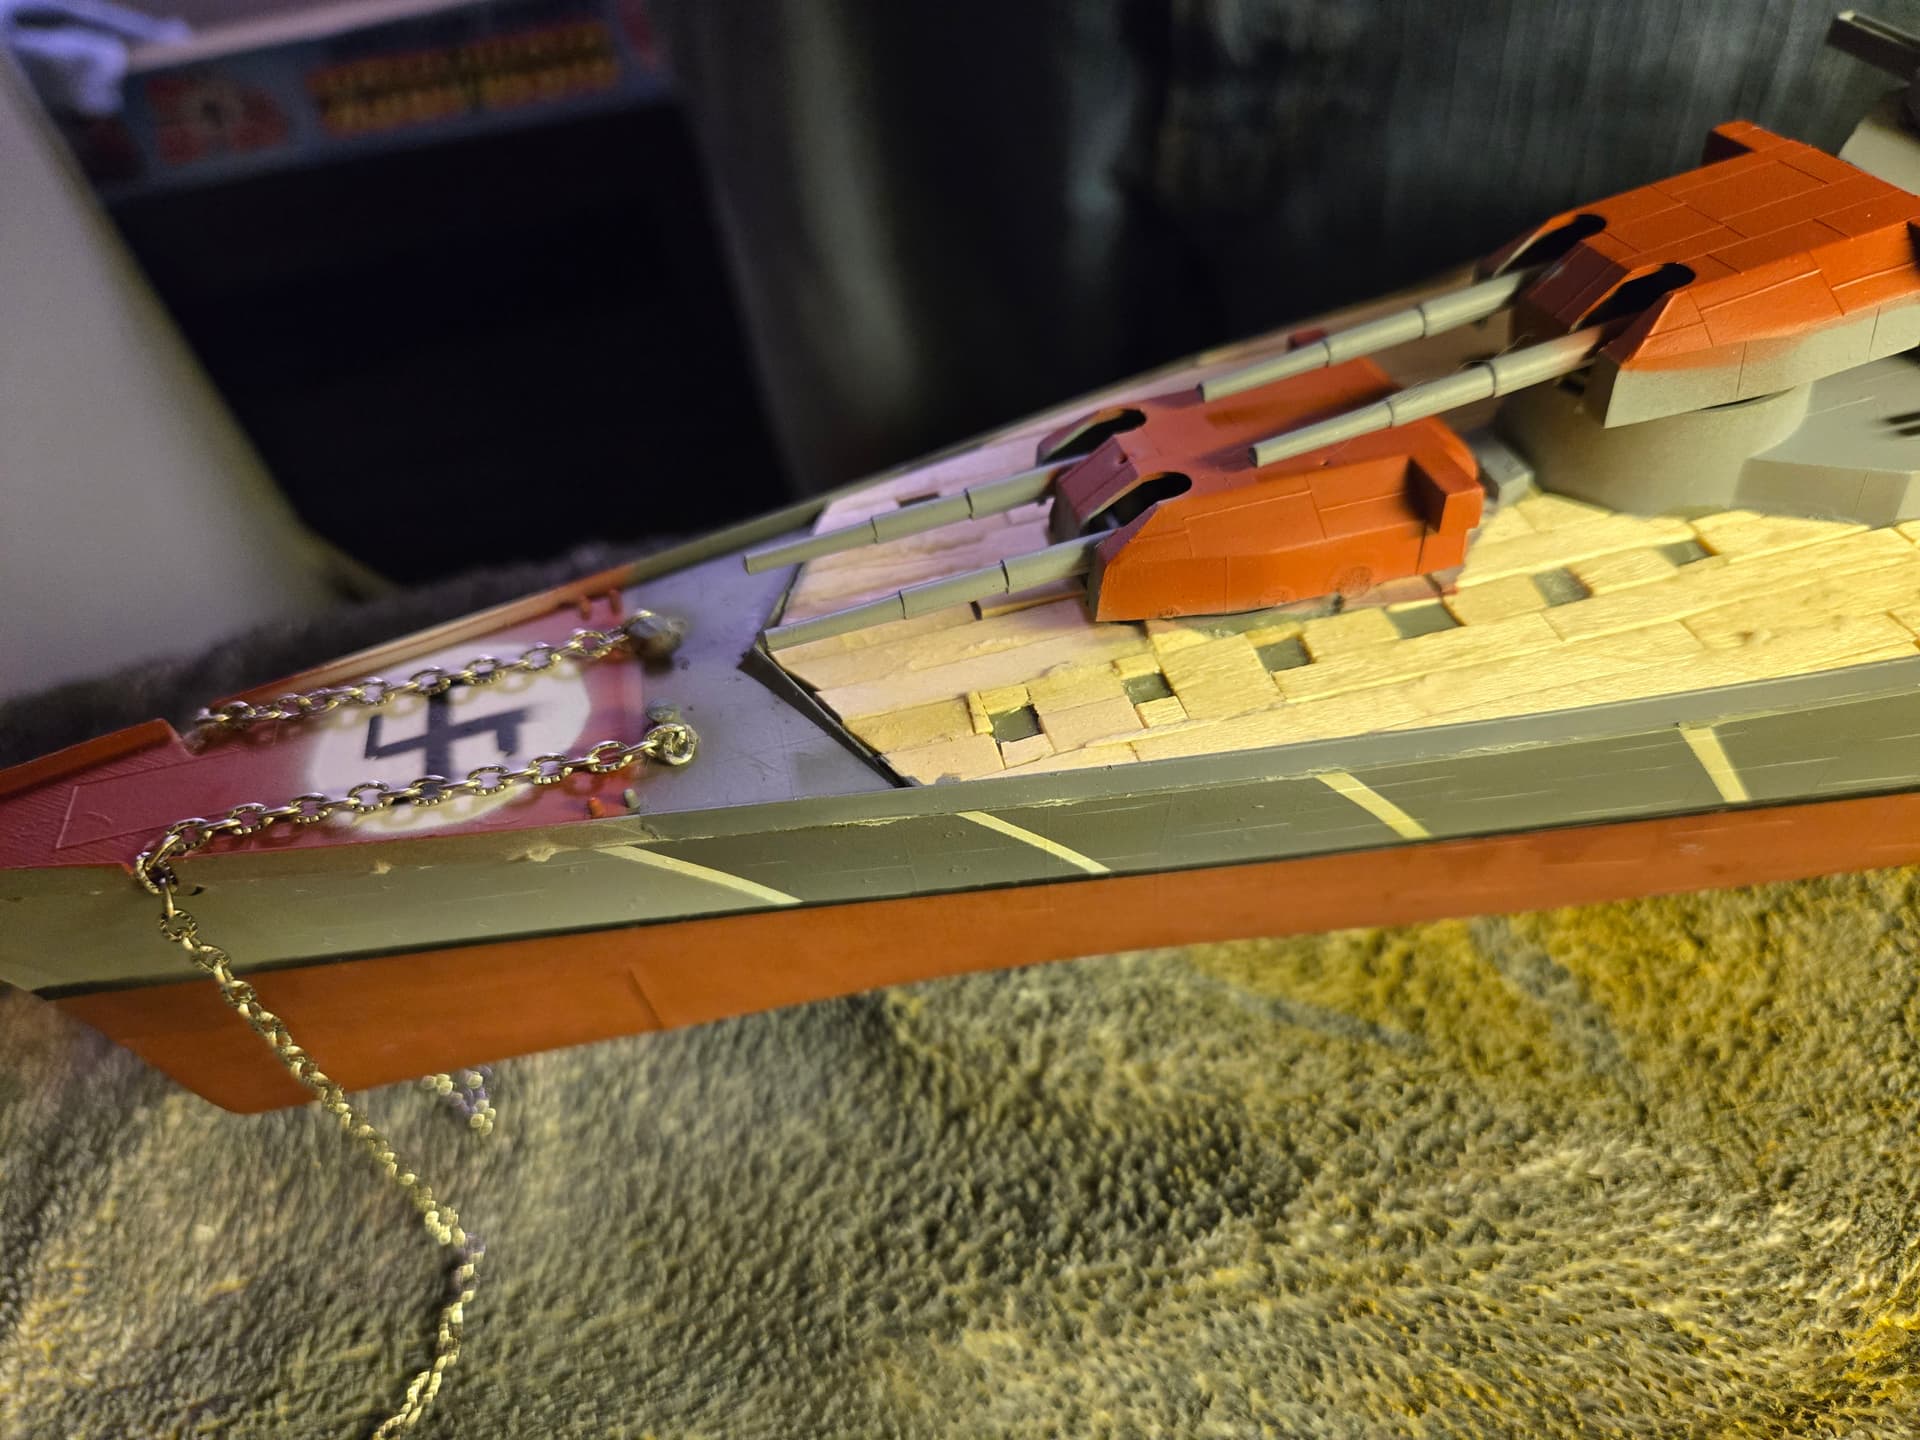
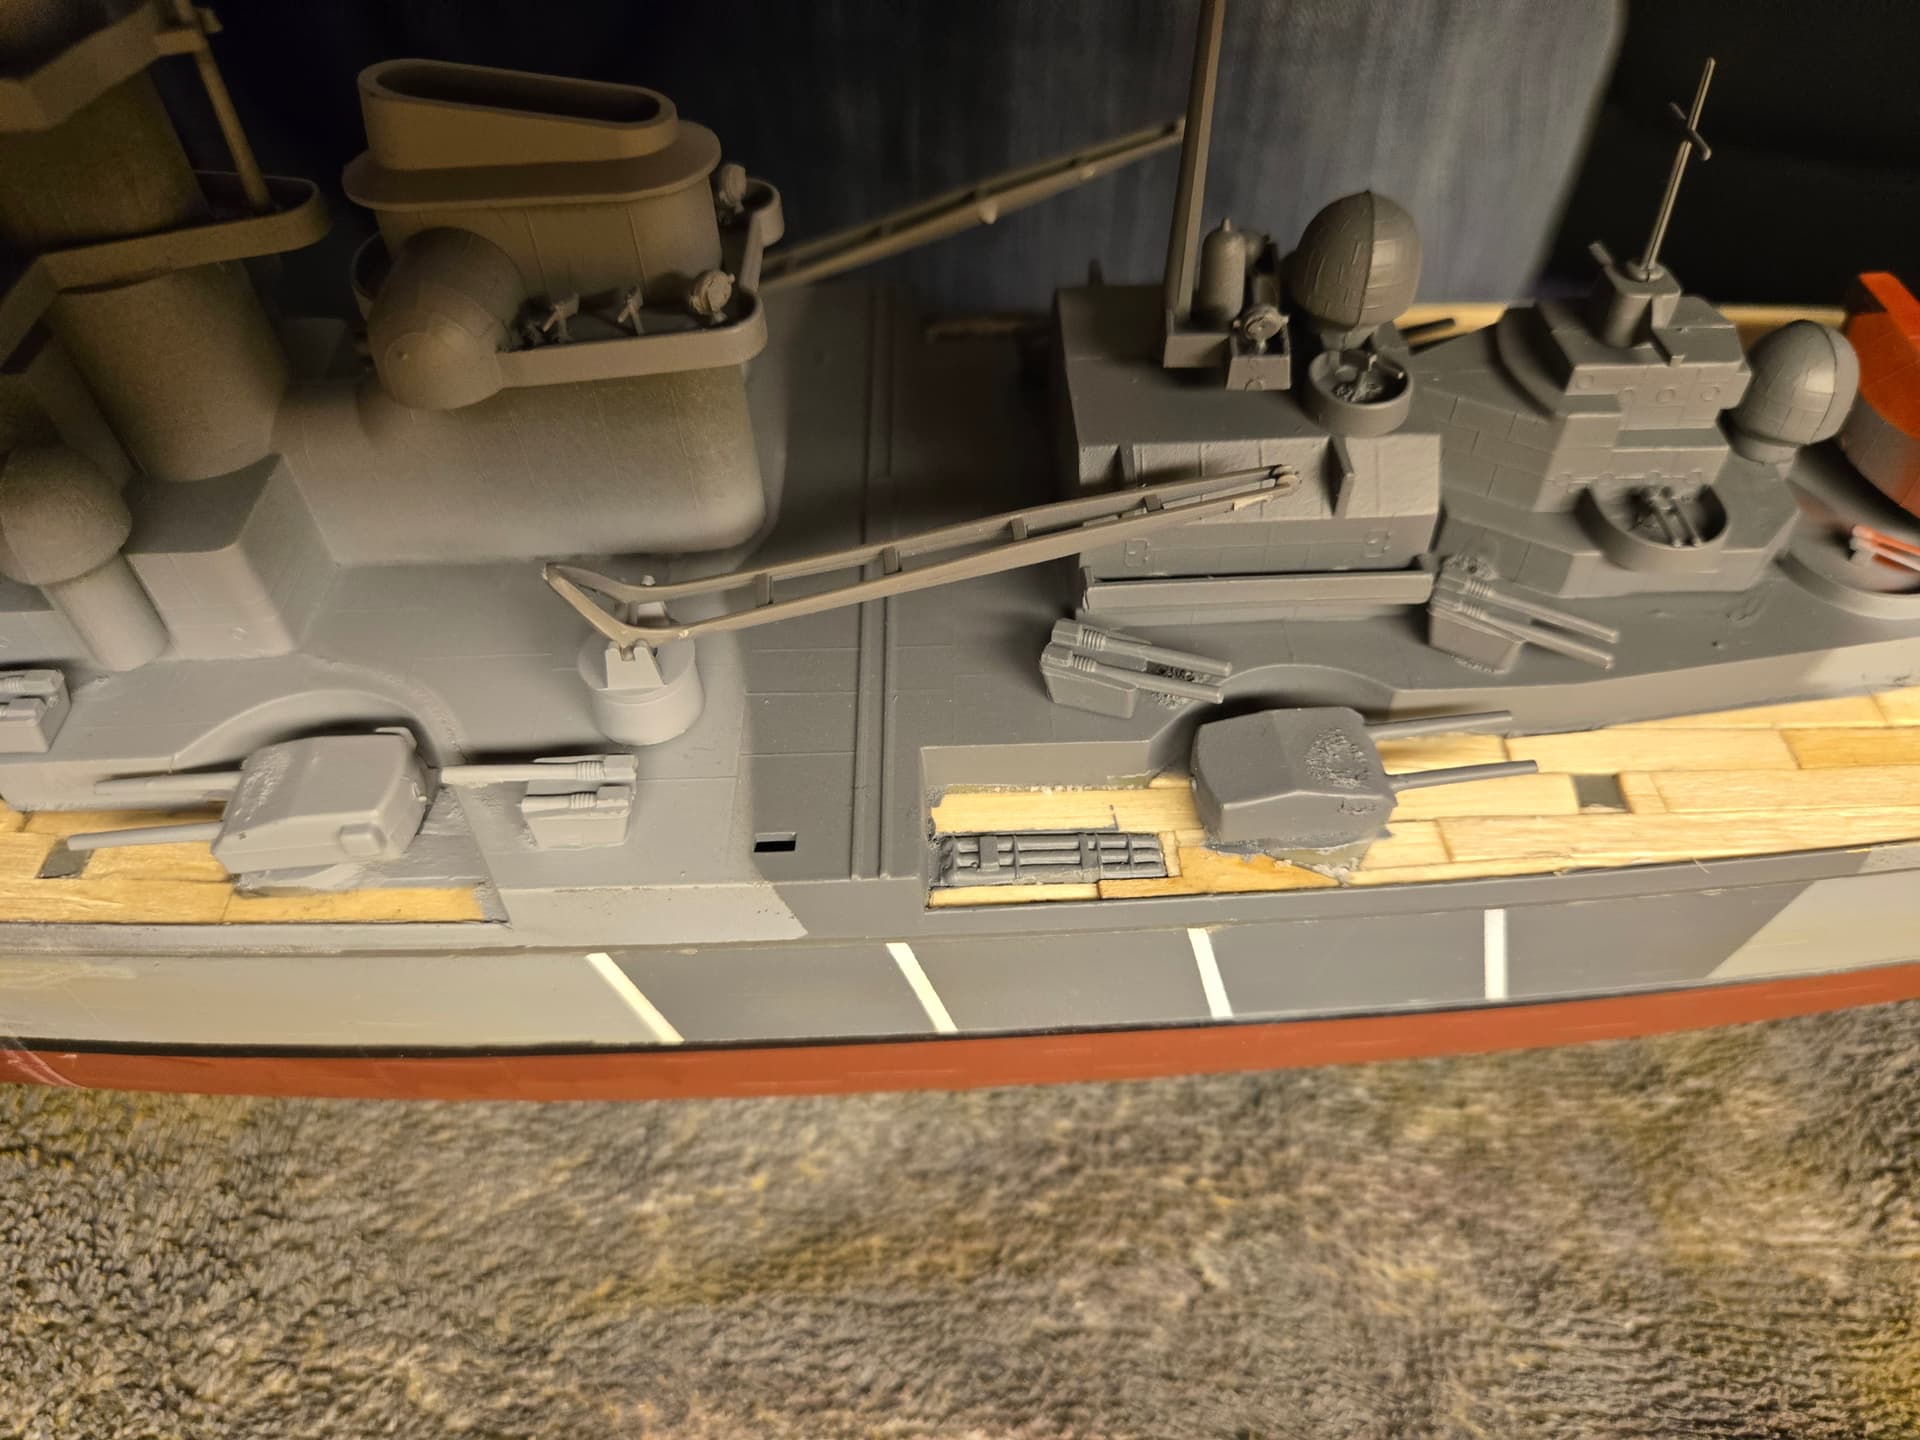
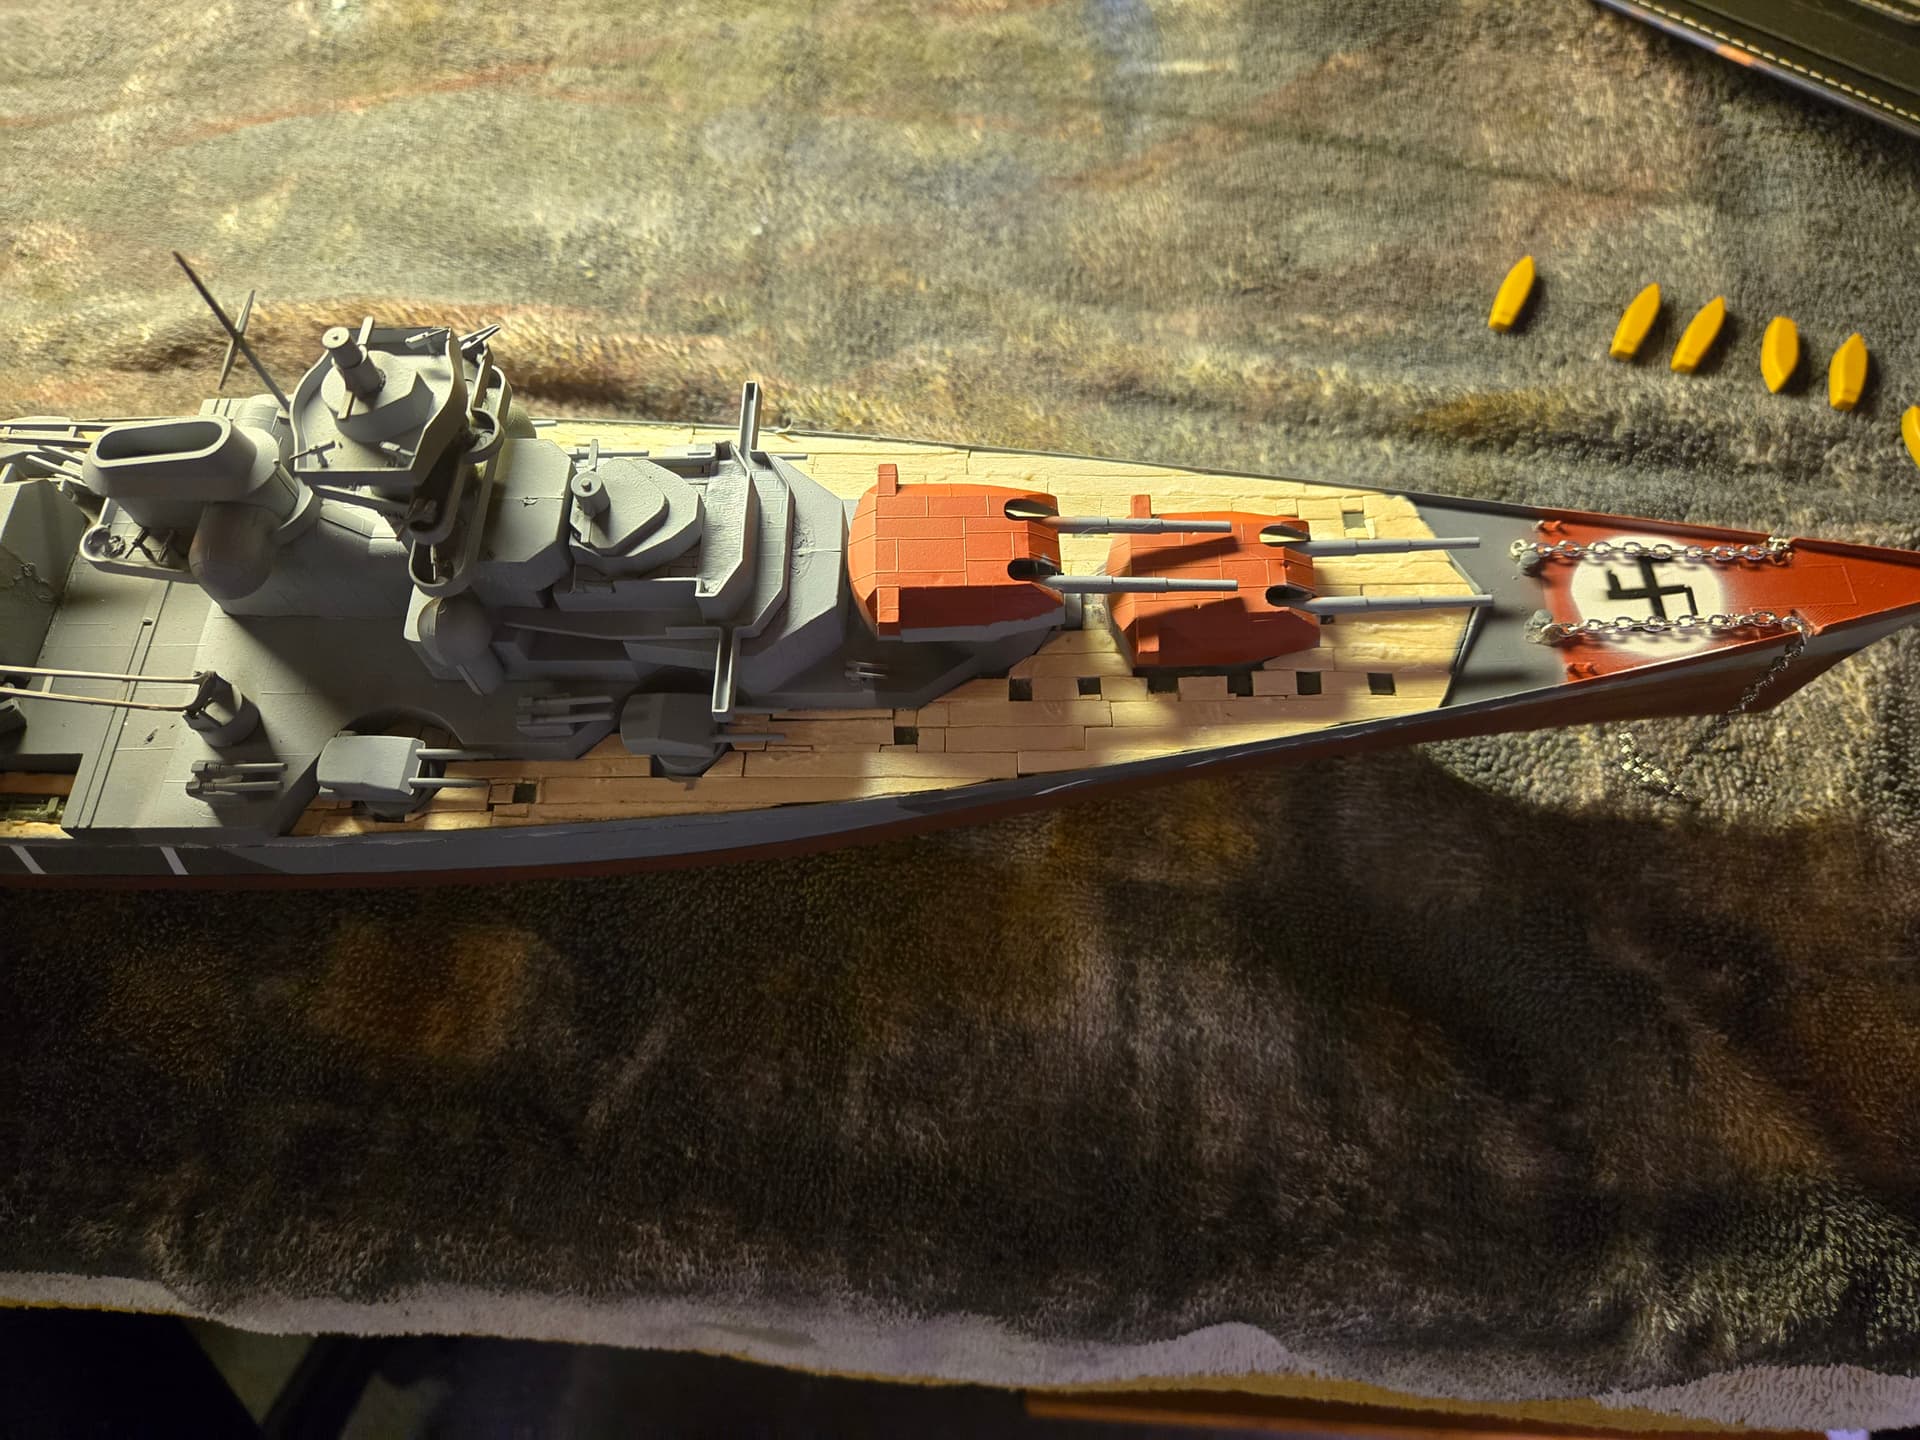
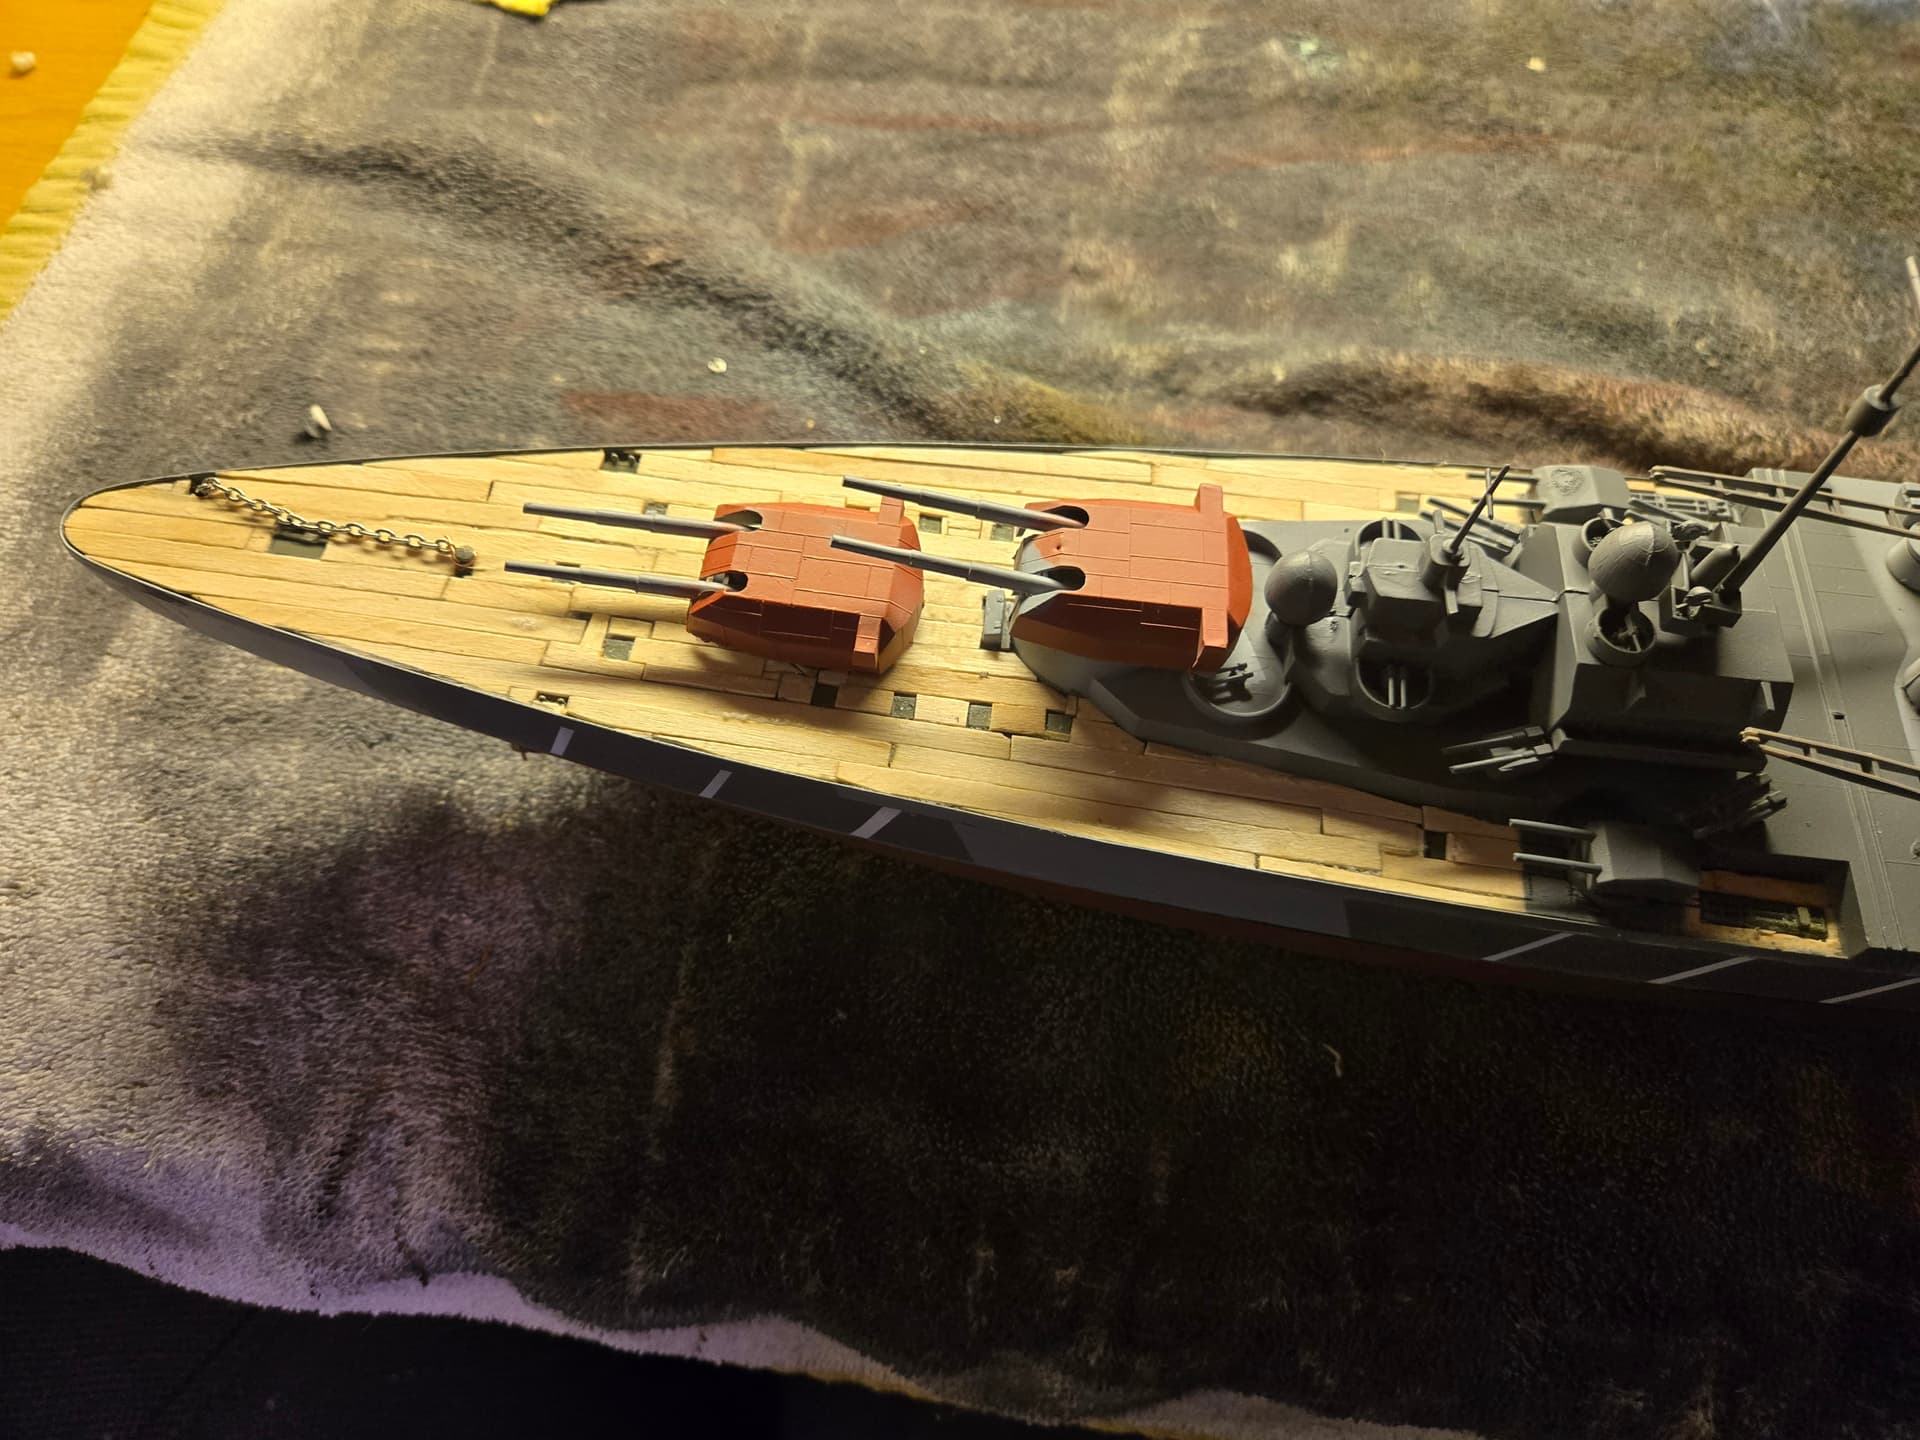
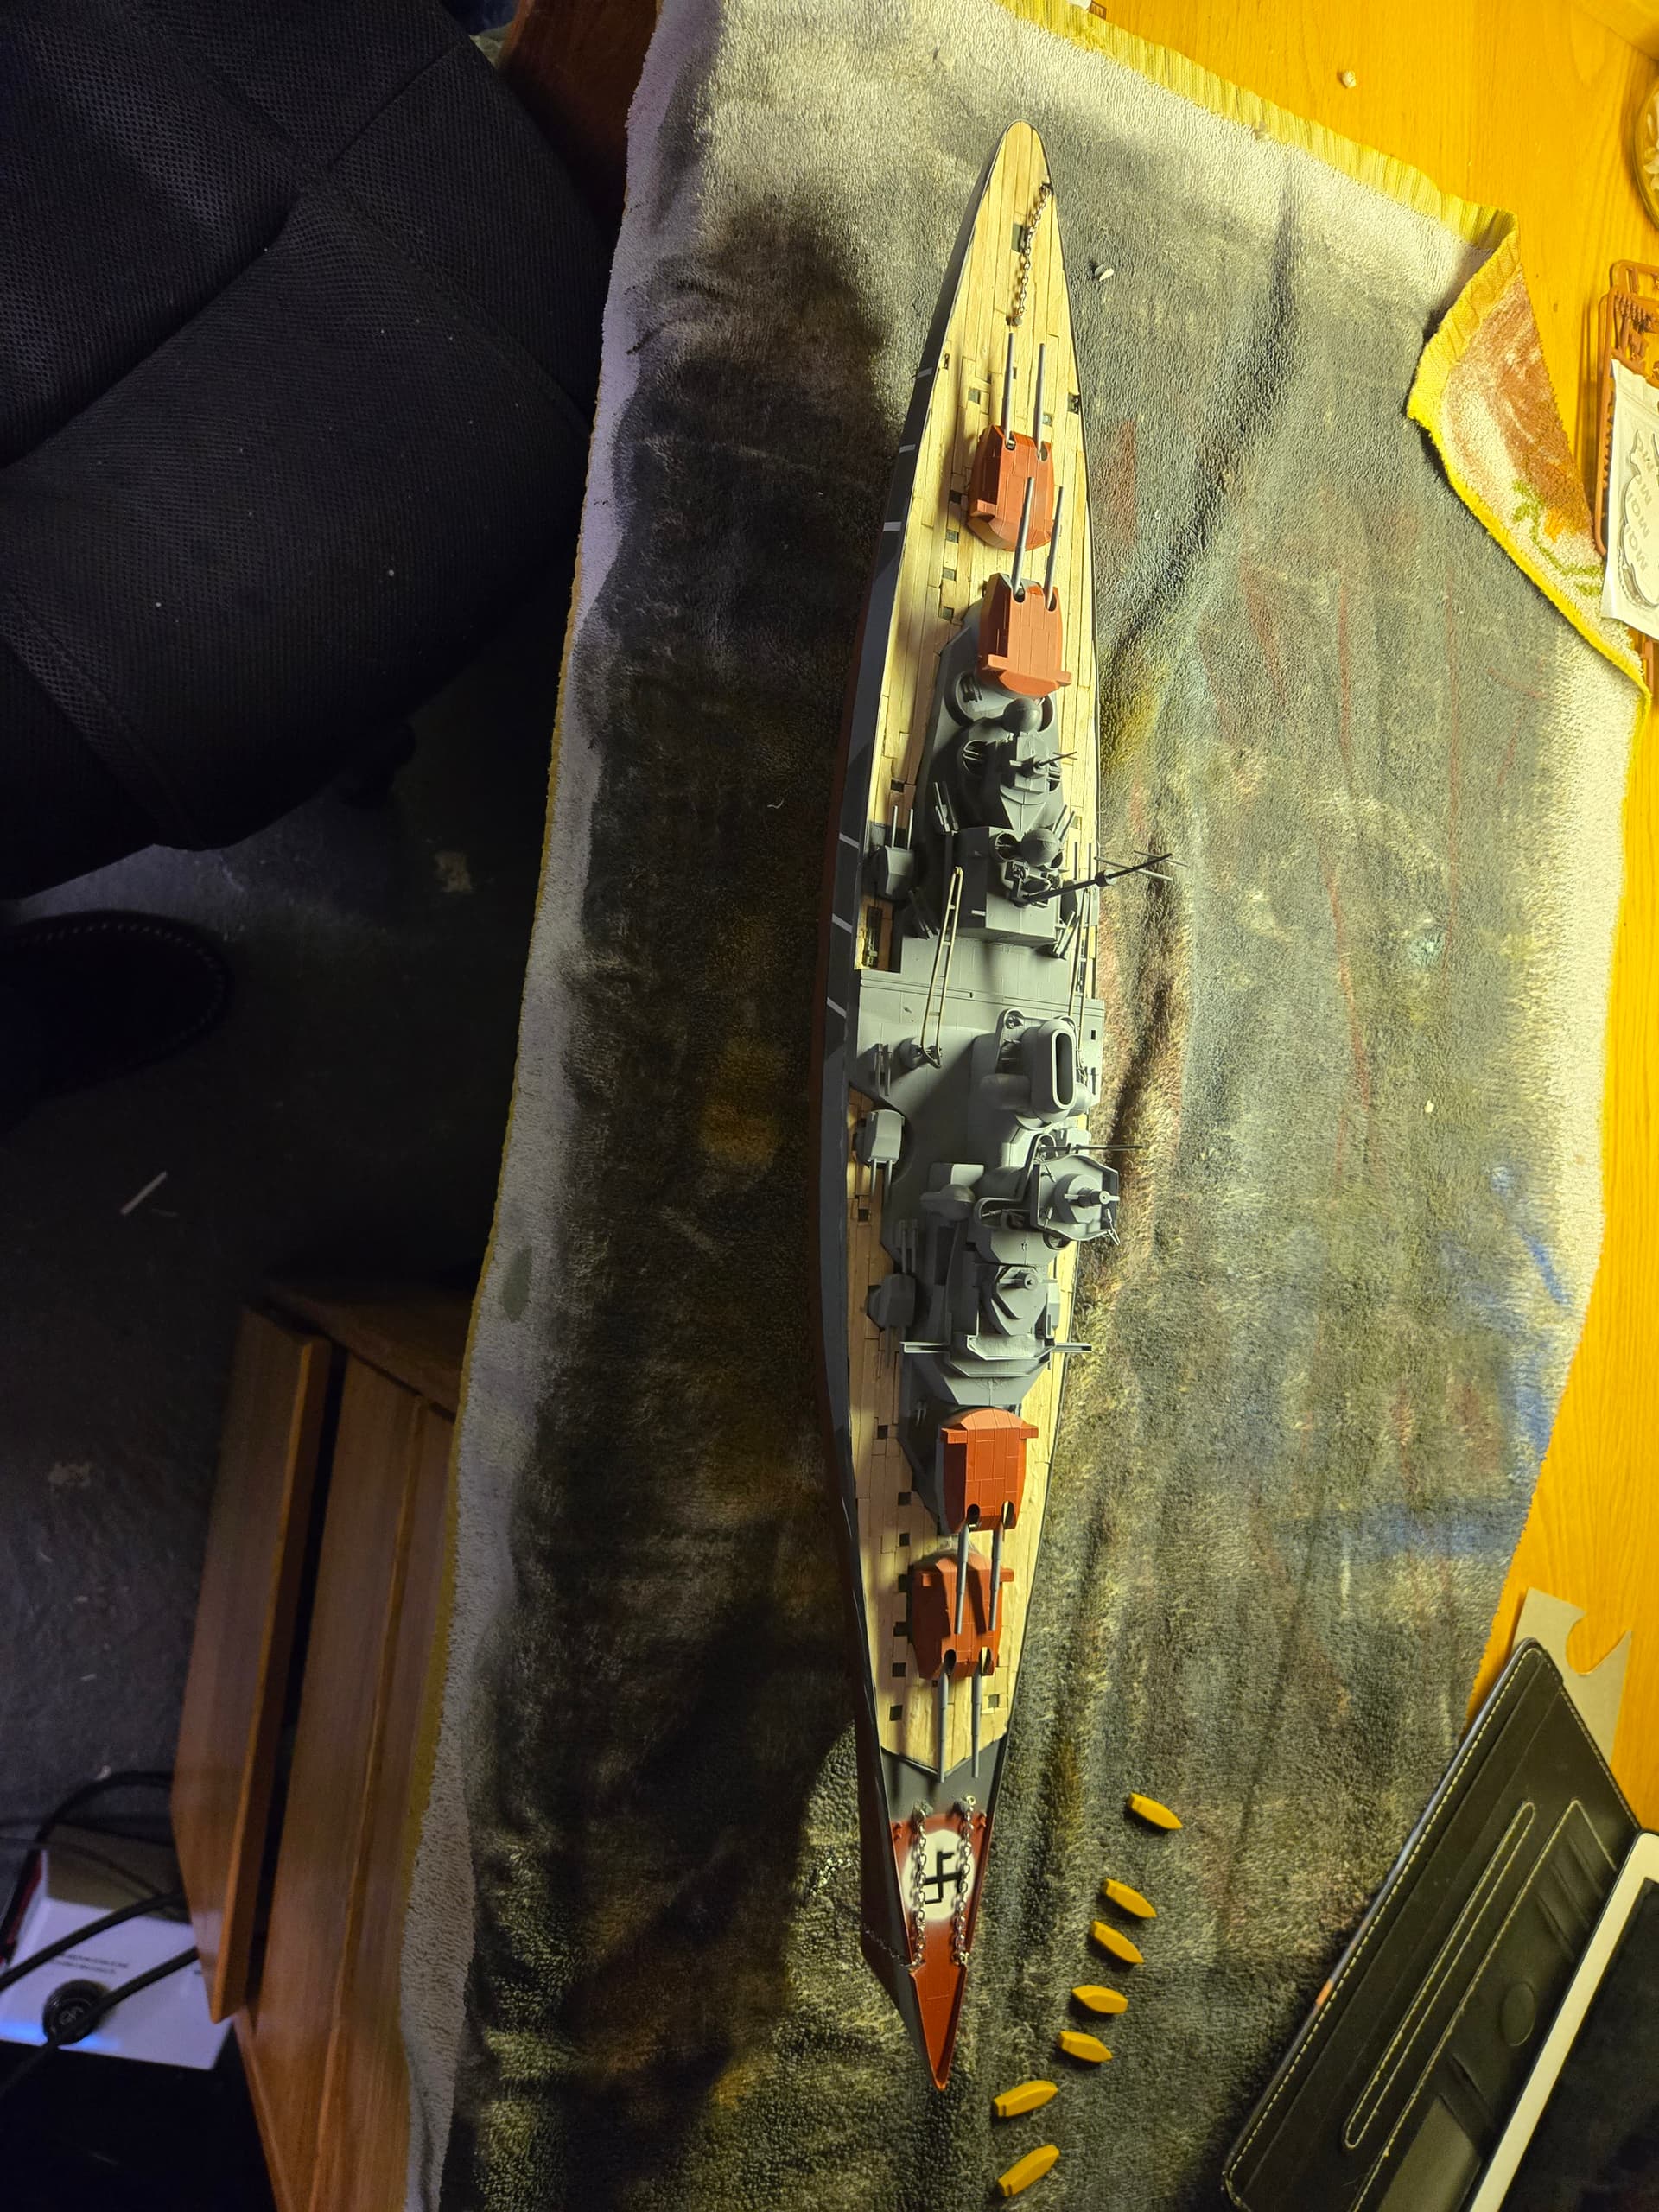
What is everyones thought. Not done yet but close.
4 Likes
I’m certainly no shipbuilding expert, having never built one or even given much thought to deck planking until today! But this looks like quite an undertaking, especially at 1/350 scale. I’m interested to see how it all comes together, so I’ll be following along for future updates.
A lot of work for sure,but the planks look out of scale,way too thick.Swatiska needs more of a tilt to it,maybe chains out of scale too.
3 Likes
Thank you for the criticism I am still new to modeling and this was the first ship i ever built so not a expert yet didnt even think of scaling with the planks or chain. Every book i looked at though showed the swastika straight bot curved.
2 Likes
Not just criticism,constructive criticism,you asked for thoughts,and the planking on the the actual ship is a lot thinner.
You are right about the swatiska,it is suppose to be straight,my bad,it just didnt look right,but on further review you got it.
2 Likes
Like i said thank you. I was looking at the materials available and I was going to pick a normal slab of thin wood or popsicle stick style.
2 Likes
As Tojo72 mentioned, scale is very far off. That said, I’m not sure how to ‘properly’ scale either the planks OR the chain at 1:350 (for future references: Scale is usually printed as either 1/350 or 1:350, both of which mean 1" equals 350" – also it could be ANY scale).
In this case, you’re most likely better off using another material entirely for both, because the scale of ‘actual’ materials will not allow you to use them at that scale and make them seem, “realistic.” In my particular case, I have been working on some cereal box paperboard to mimic a wooden flight deck at 1:48 scale. At that scale, a 6" wide plank (the size used in the real thing) a single plank is only 1/8" wide. So, using wood for my material is pretty much out of the question even at that more generous scale.
The same with chain. I’d suggest that with both of these items, you might be better off attempting to find some other material or possibly see if you can hunt down someone who can make them. I’m not sure at that scale if even resin 3D printing will provide you a good product.
Anchor chain at that scale might be more likely to get printed as those chains are, in real life, HUMONGOUS, compared to a person. Each link’s chain had a 72mm thickness (which, for us U. S. folks is a little under 3 inches thick [25.3mm per inch] ). So finding some very fine link chain might be possible (like super fine necklace chain, for example), though getting something like THAT 3D printed might be a definite possibility.
As for wood plank decking, my personal experience in making tiny things by hand is telling me, that you might be best off attemping to scribe the planking onto a very thin sheet of styrene, using a straightedge and a very fine tipped scribe of some sort. Even a razor blade type utility knife might be useable if handled with an extremely delicate touch.
When just getting started in my model making way back when (I was 6 or 7 for my first one) that sort of thing didn’t even enter into my calculations. As I got older and more experienced, the idea that I could add detail to my models sort of opened my eyes to those very cool and well done jobs I saw in the magazine “Fine Scale Modeler,” back in the mid 1970’s when I first saw it at my local hobby store.
I am one of those, “I’ll do it myself,” sorts in the first place, so the concept of adding extra details was something of a launch point for me. As a kid of a Navy NCO, my means were modest and most things I had to make myself anyway, because, even then, most things were priced beyond my grasp without a lot of turned in bottles, car washing and lawn cutting to have enough just to get the model kit, the glue and paint for them. Extra detail wasn’t something I could purchase in most cases, even when they were available for sale.
Leading me back to this post. I applaud your attempts and the intent is very worthy. As you said, this is your first attempt, so please do NOT get discouraged. In fact, take heart, because you have taken the first step to the part of model building that will probably consume the better part of your experience, skill and efforts: adding extra detail that is not included in the kit.
You will find moments of your day filled with, “Now how can I make that look like…” where you will be thinking things through and you’ll look around and see a material and think, “Maybe that will work for making a [insert item here], let me see if I can do it with that.”
Me? Well, suggestions abound. You will be amazed at what you can make from cheap toilet paper, cotton swabs, cotton balls, thin paper, cardboard, sprue material, bits of bottle tops, plastic caps, clear styrene packaging, telephone wire, ethernet wire, bits of glass, glass beads and so many other things when you apply yourself to asking, “How can I…?”
Lastly, when you are doing this, you may find yourself going down the rabbit hole of using a search engine, going to a library and talking to other hobbyists in order to gain more information on how to make things, how the real things looked from photos and feed your imagination into things well beyond just adding deck planking or chain to your models.
For me, the adding extra details and using things no-one would think of as other than trash in most cases, is the true joy of making models. I wish you the best on this journey and you should know that pretty much everyone here is rooting for you.
2 Likes
Umm what maker of the kit? Doesn’t look like Tamiya is it the 1/400 Airfix kit?
1 Like
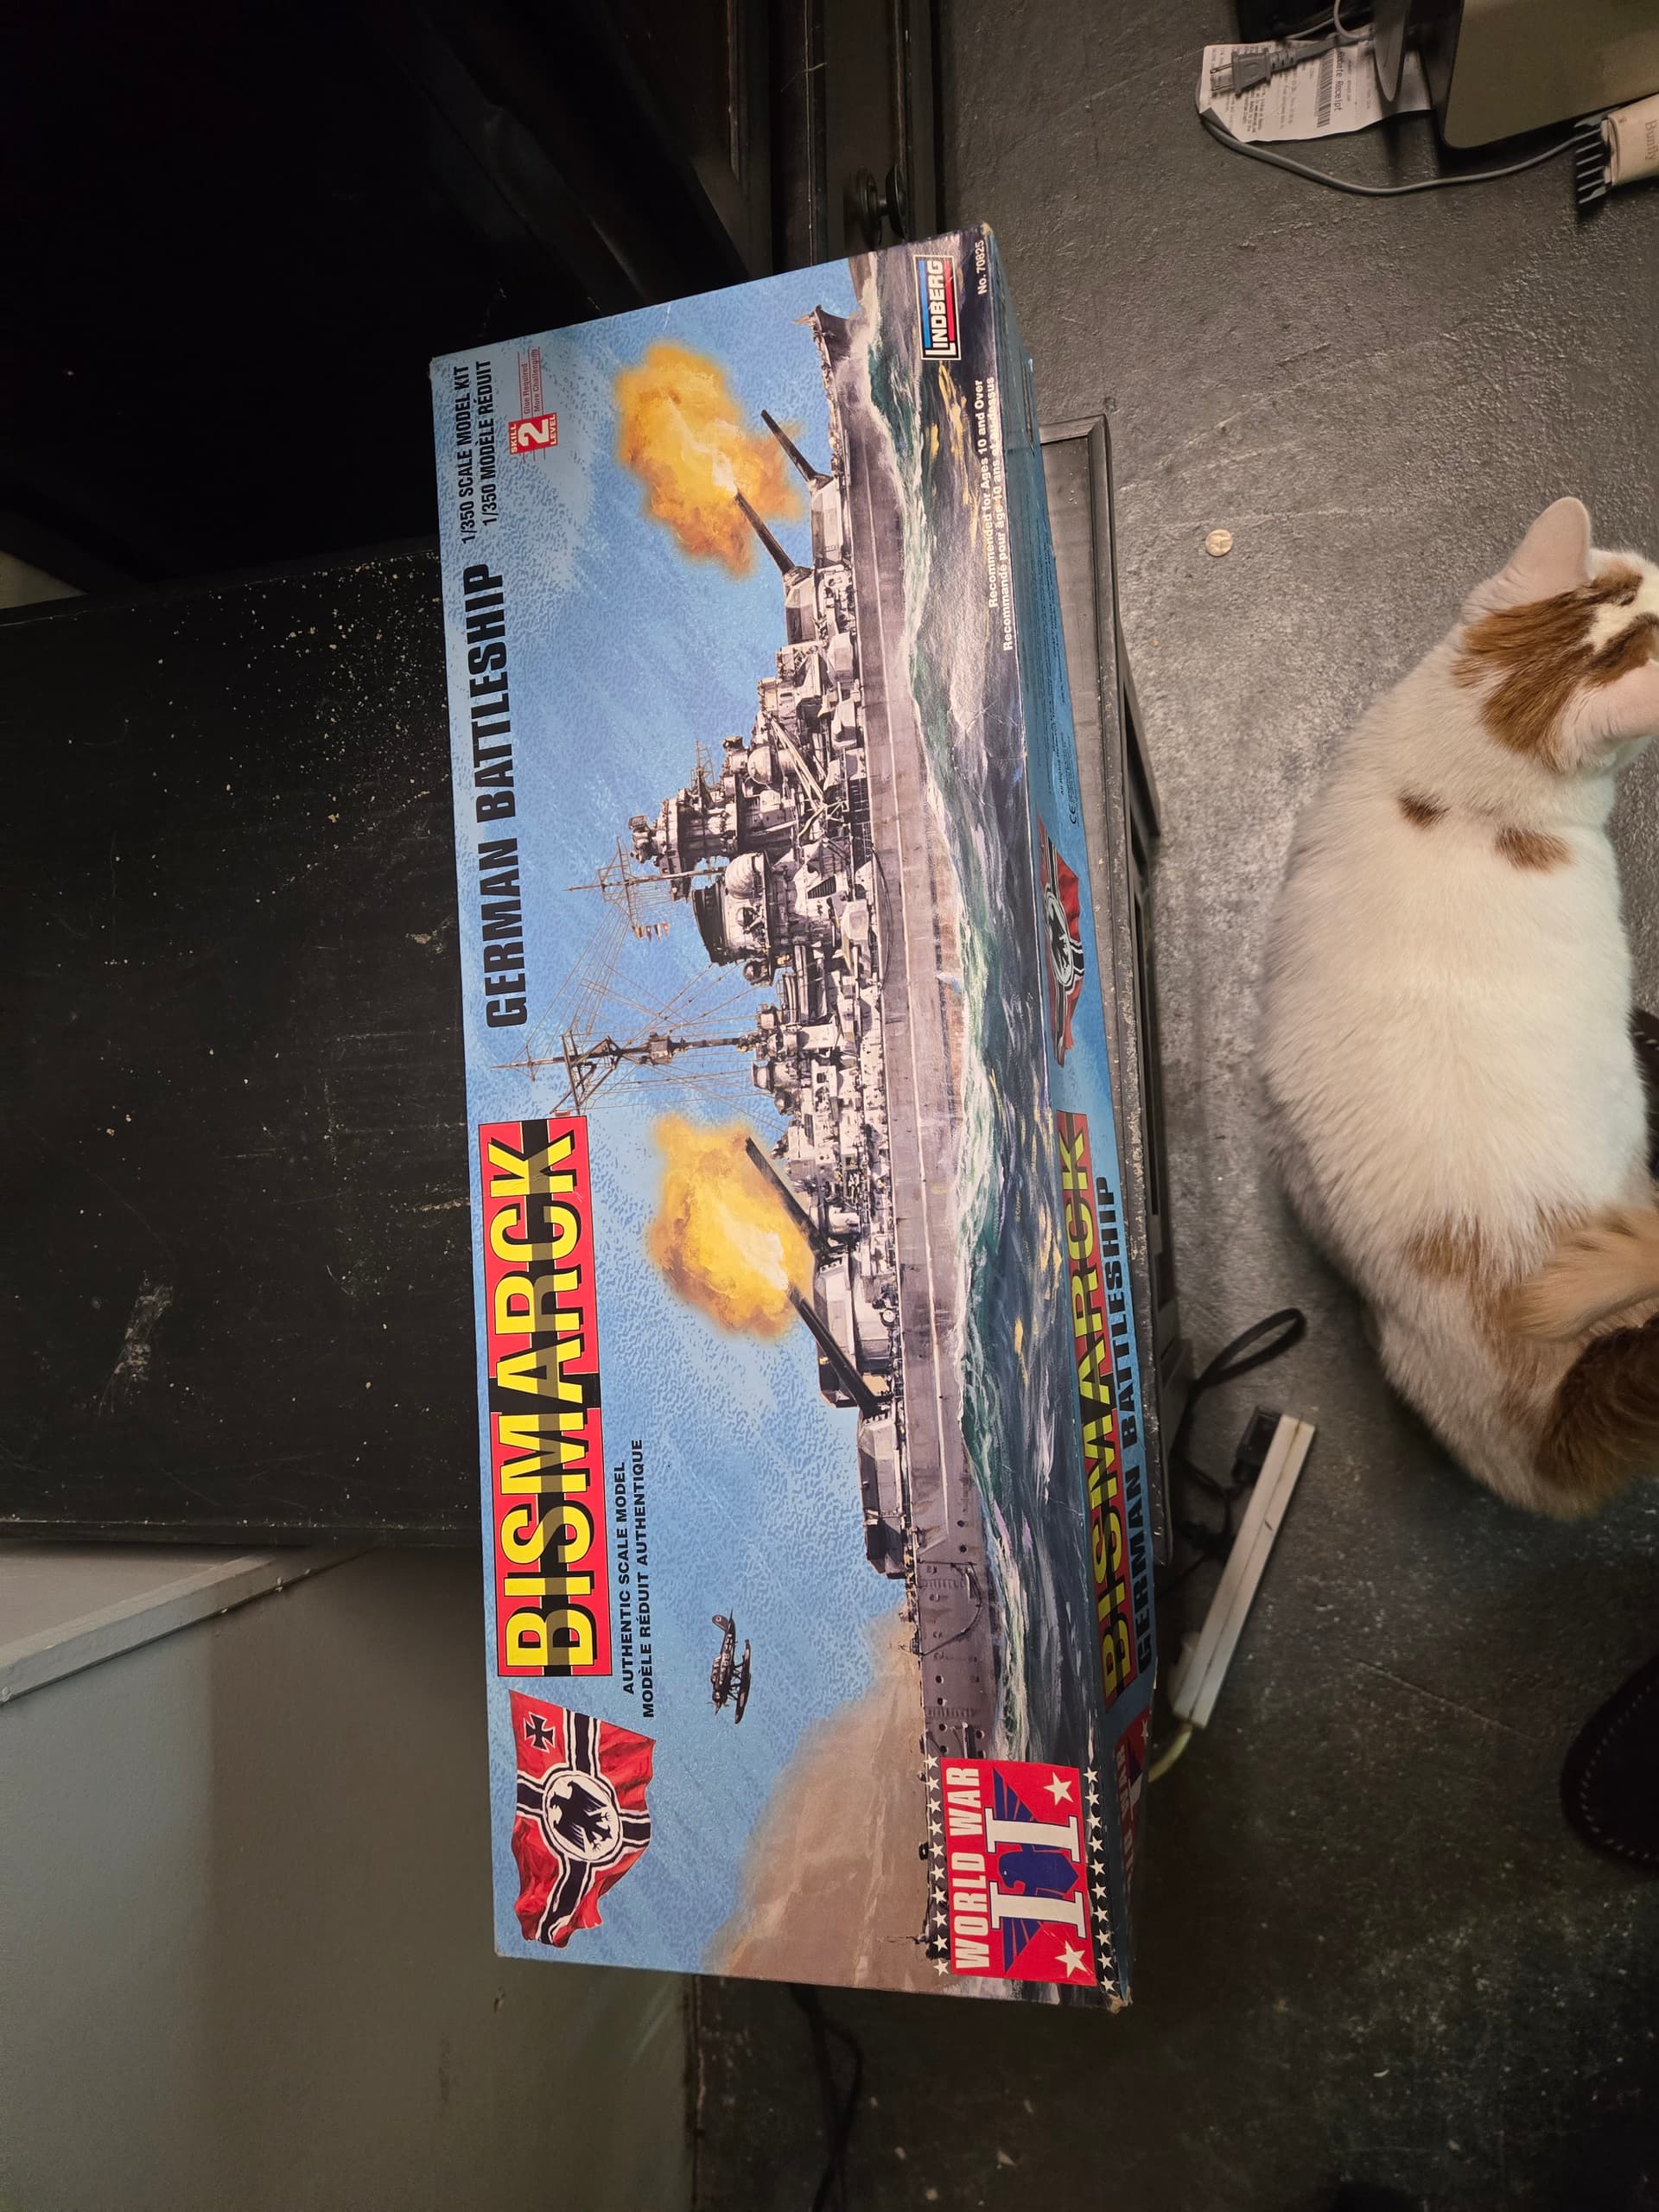
A great job to learn on and from what I’ve seen on here in my few days as a member there’s heaps of great experienced modellers here who can help you. I think your ideas were great, wood for wood etc, it’s just the scale that’s caught you out. When I started work as a draughtsman I was lucky to get involved in architectural model making for my bosses and that taught me a lot. Access to a zoom photocopier in those days meant you could draw bricks or whatever and “shrink them” till they measured or looked right. Printed on card ment you could colour or paint them as needed. You could try the same trick with a modern scanner / printer I guess. Just don’t be scared to ask for ideas and don’t be scared to try something and then go ^£?<!>£<? that didn’t work. The fantastic thing is that you’re trying to modify a kit and not just accept it as it is out of the box. That’s the true enjoyment of the hobby !! I’m 73 and if you look at some of my recent posts you’ll see how I’ve messed for days just trying to get 1/25 shock absorbers to look good (well I think they look good anyway !). Keep up the great work, keep trying and keep asking, I’m not a ship builder but I’d be happy to help if I can. Well done !! Cheers. Derek
1 Like
Good attempt there. But for future reference deck planking on battleships are narrow width and actually thinner. Actual thickness on real deck planks are 3/4 to 1/2 inch basically around the thickness of your typical hardwood flooring. Find the thinnest Balsawood sheets you can find and cut narrow strips.
1 Like
That looks like an enormous amount of work to get those wood planks down. Keep at it. Impressive scratch work for popsicle sticks!
1 Like
There are aftermarket kits available for 1/350 Bismarck decking, if you are so inclined. If not, research it anyway and it would give you an idea, from the images you see, regarding the width of the boards.
Hope this helps.
Cheers,
Mark
1 Like