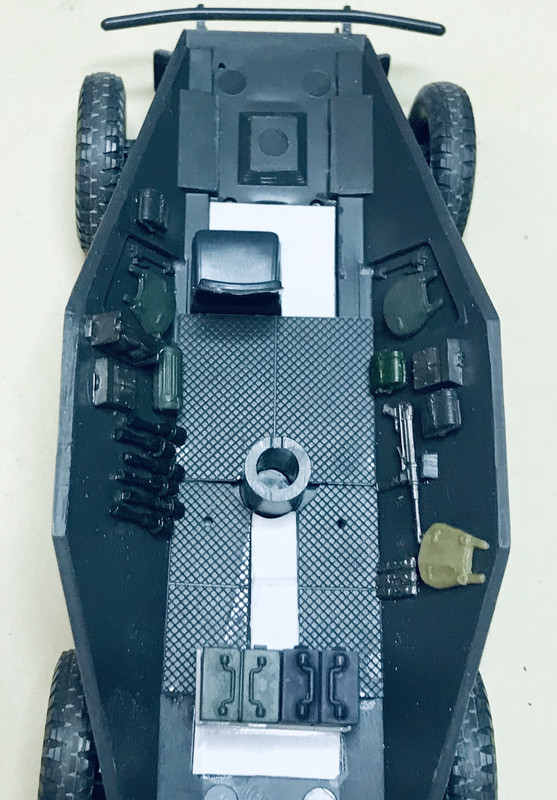
This is a smallish kit and should go quickly if I can stay on task lol. The first thing you have to complete is the gun carriage. I added an extra support bracket between the gunner/loader seats to keep the turret race and gun carriage from binding when rotated. It’s not in my technical drawings, but I chose function over accuracy in this case.
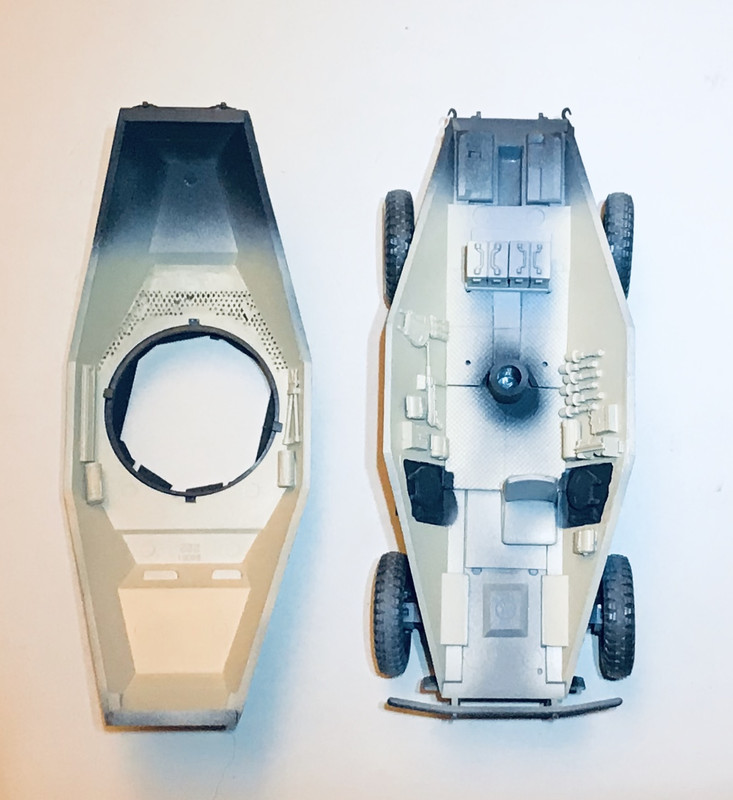
Once I had this painted up I closed the body halves and made sure all was in alignment.
From here I’m going to sand and mate the armor slopes along the sides and square those up before I proceed with more parts additions.
The only things missing, from my technical drawings are a tiny radio behind the gun and some brush guards for the lights.
I might scratch build the radio because it is somewhat barren in the turret lol. They don’t even have padding for the gunner or loader. I imagine they had a lot of head and shoulder injuries in there lol.
Inside any AFV there are always bumped head and shoulders… [whstl] The radio you’re referring to is most likely an intercom box. WWII era radios were quite bulky due to the technology of the time.
I added some basic stowage inside of mine to liven up the interior based off of what reference I could find
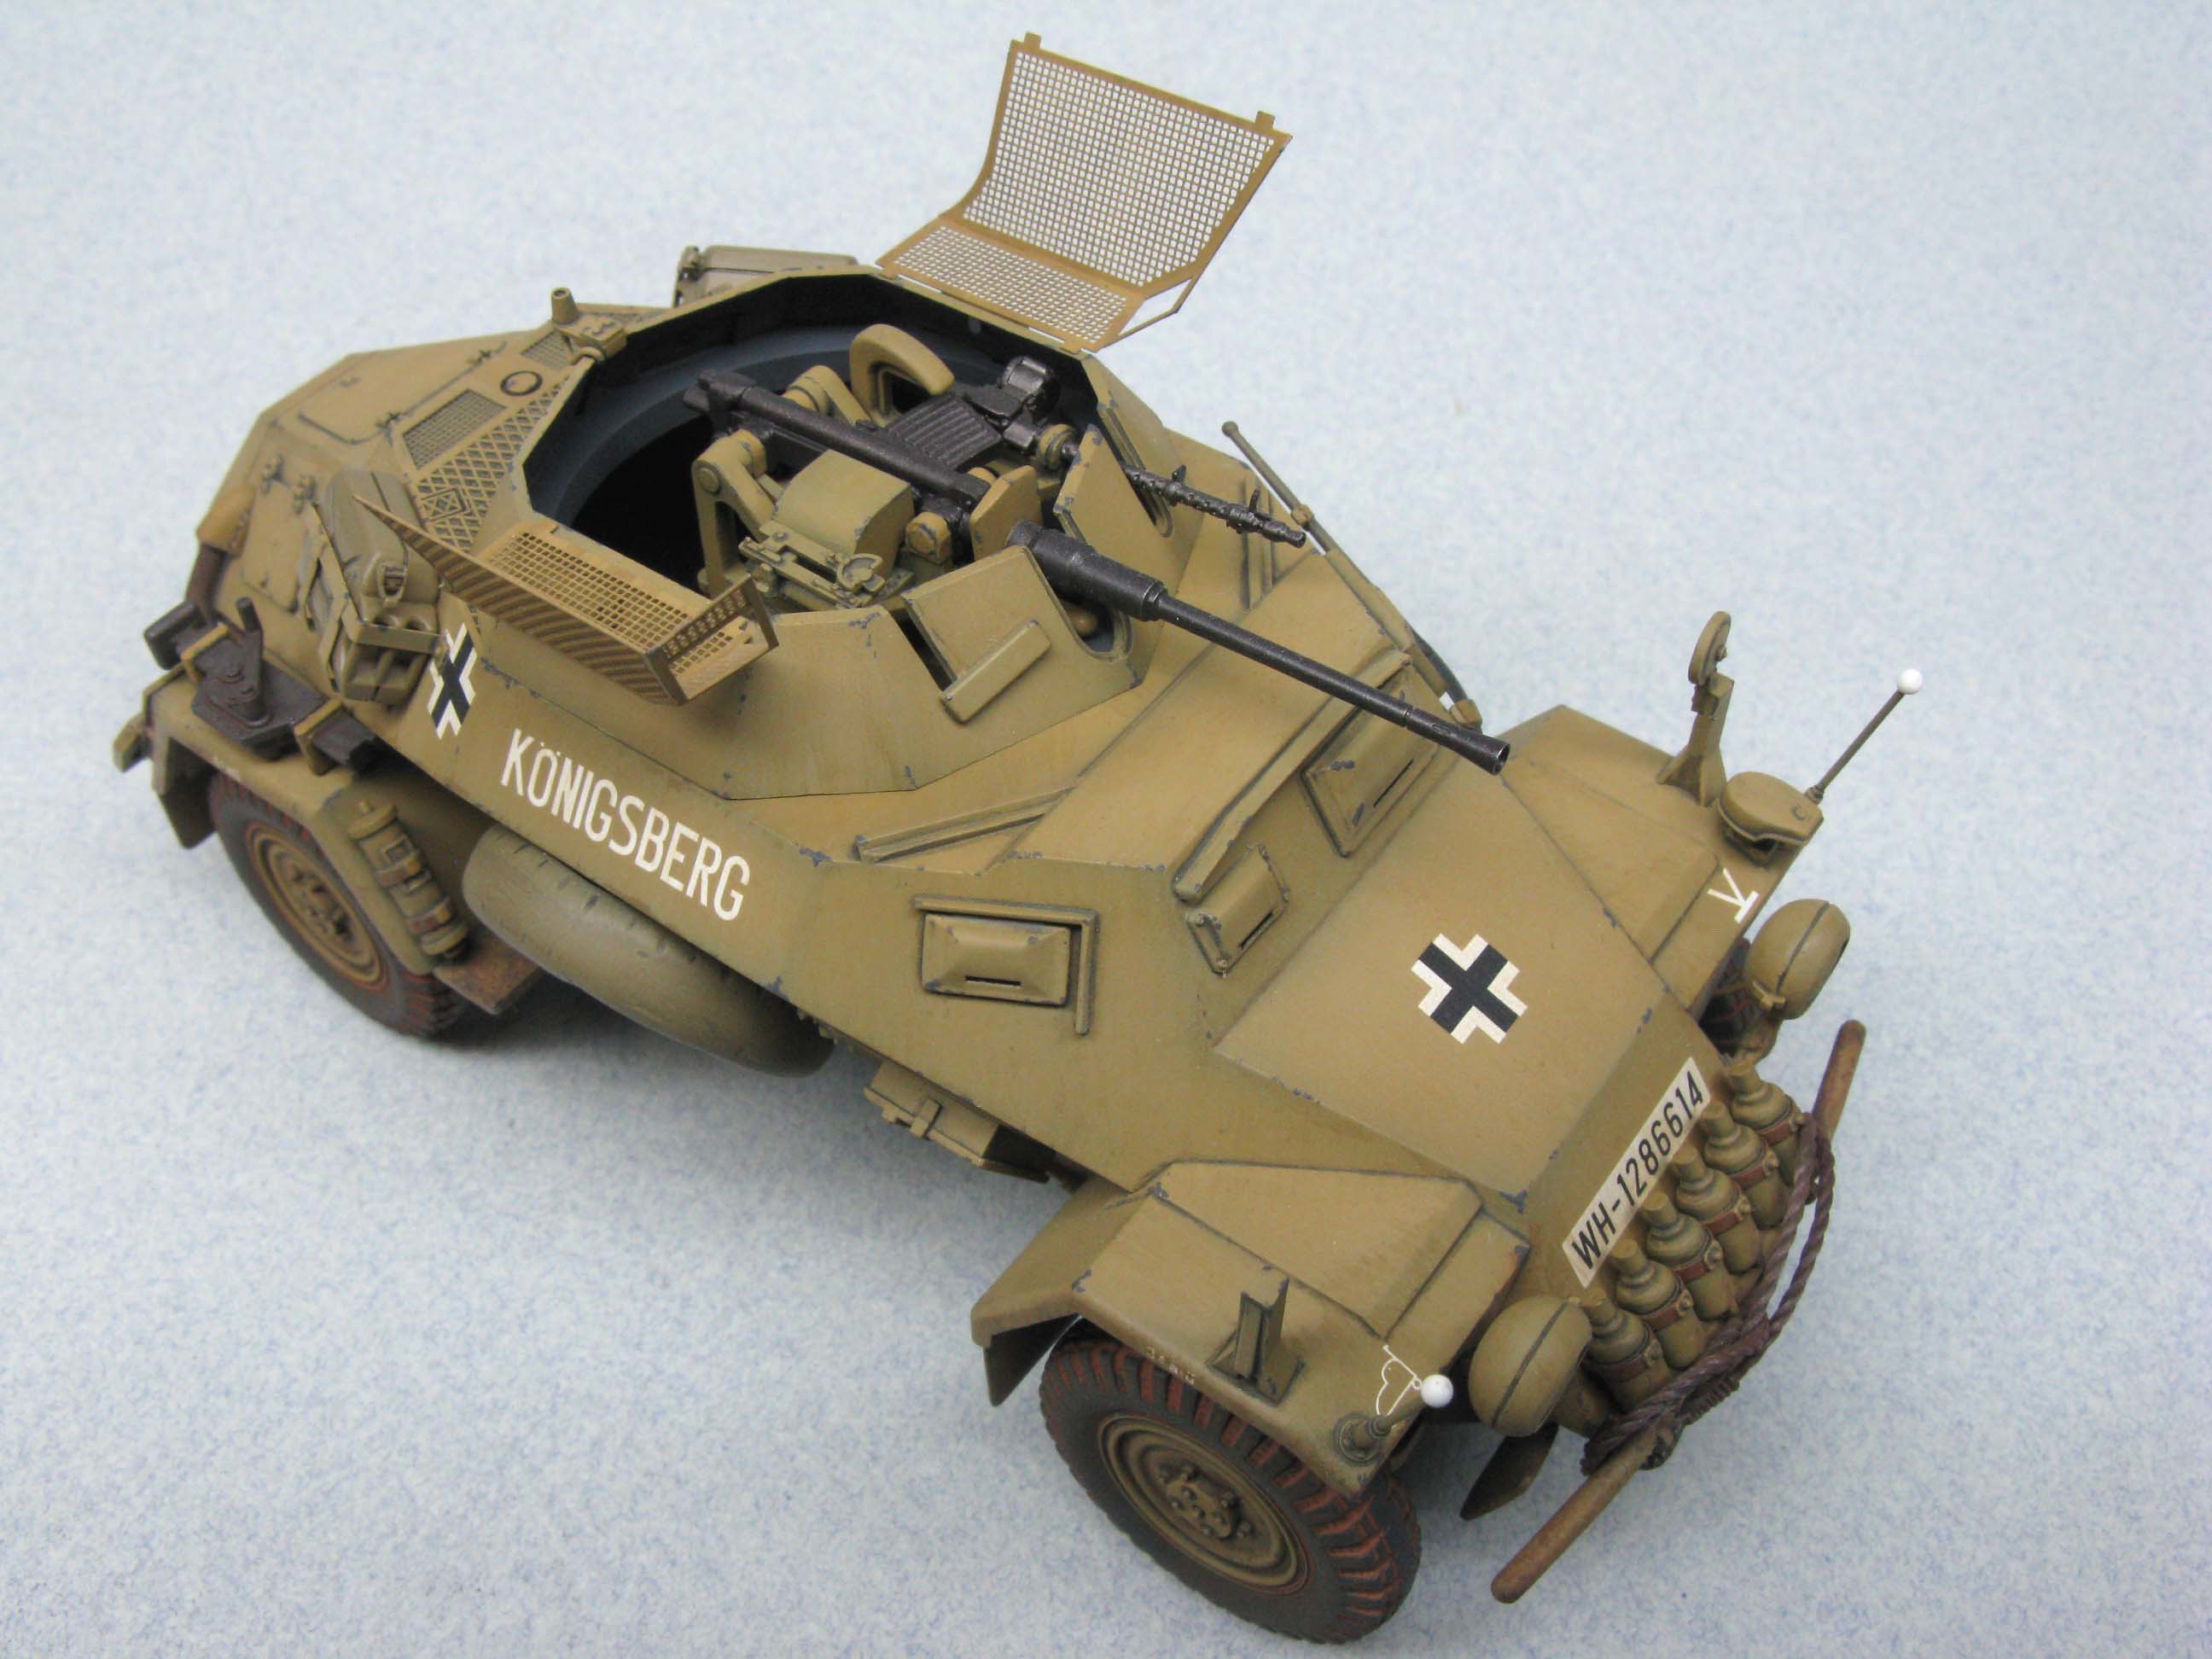
Looks cool Mike! Nice work on your’s too SP! I like the PE anti-grenade screens, don’t think theres much way of doing those in plastic without them being overscale.
Are you going with a Battle of Poland look Mike? I think someone said around here that by the Battle of France the Germans were camoing their stuff with large brown blotches over the grey.
I can see the whole giant radio thing, I think everything back then was vacuum tubes. Not only large but you needed a lot of ventilation because they cranked out enough heat to cook the thing if you didn’t get good air circulation.
That’s an oldie-but-goodie kit Mike! Basic in details, but easy and fun to build - the Tamiya experience all the way! I also built one, a later boxing with the nice PE screens and new figures (which I haven’t put together [:$]).
My only mods were to replace the coaxial MG with one from the spares box, some leftover nylon string for the tow cable, and used the newer Jerry cans in the kit with brackets made from an old tube of glue.
Yes, from the start of the war until June 1940, the official color scheme specified was brown over gray. In June, the change over to solid gray was directed.
You guys know me, I’d love to add an interior, and I seriously thought about it. However I just want to just complete this one lol. I’ll get mired down and lose focus like I usually do otherwise lol.
But to answer the question about which time frame, I’m thinking of France. I’ve got the old boxing of the Tamiya Pz IV D and I don’t have anything from that period and these two kits fit the bill perfectly.
As to the 222, this is the kit with the aluminum barrel and the PE screens. If I do this right it should be a nice clean build with minimal weathering just to park next to my tanks. Kinda like my “California Special” Kübelwagon.
Thanks, Gam. I rescued it from my teenage collection of broken junk. It was missing one wheel, one seat, one headlight, and the windscreen.
I sourced out the bucket seats (not seen) and the wheels from some random box scale Corvette. I had to scratch build the windscreen.
Then I attached it to the motor pool as some kind of, “what are we going to do with this old beat up parts car?” project with future parts lol.
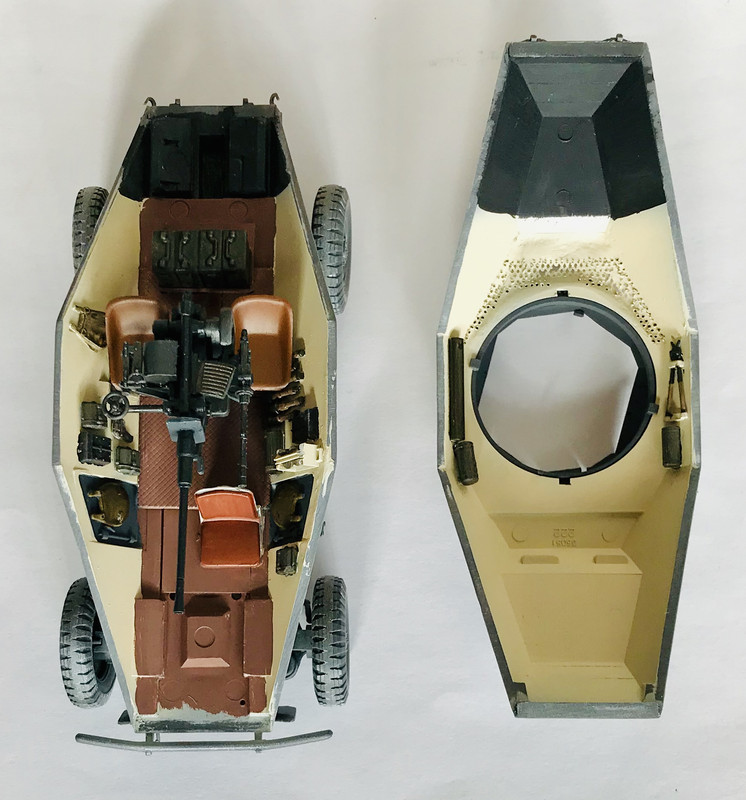
Anyways, I’ve put together a kind of coms box measured from the scale plans. It was lacking details so I invented my own, but the dimensions are right lol.
PE screens came next, which weren’t difficult once I torched them a bit. It warped the mesh a bit, but it’s not inaccurate for such thin meterial. My attempt at soldering failed but super glue should solve the issue of attaching the corners.
I just need to run some putty around the inside turret ring to make it look a bit more clean. Then it’s off to step 9 in the instructions where I finally attach the fenders.
I’m going to go and scratch up some fuel can holders as the stock ones are aweful. Thanks for that idea! The kit comes with spare cans that have much better details.
So far it’s a pleasant build. I’m enjoying it a lot.