The M114A1 began development in the late 1930s as a replacement for the aging M1918 howitzer. Introduced in early 1942 as M1 155mm howitzer, the carriage was also used in limited production to mount a 4.5 inch gun. The howitzer went thru some modifications thru time to the brake system and firing pedestal becoming the M1A1. By the Korean War the weapon was also mounted on a M26 Chaffee chassis to be the M41 155mm HMC. In 1962 the M1A1 was re-designated the M114A1 howitzer. It had a few more changes in the mid 70s to become the M114A2 which included a newer barrel. The howitzer remained in service until the mid 1980s when it was phased out by the new M198 155mm howitzer which has recently been phased out for the new M777 155mm howitzer.
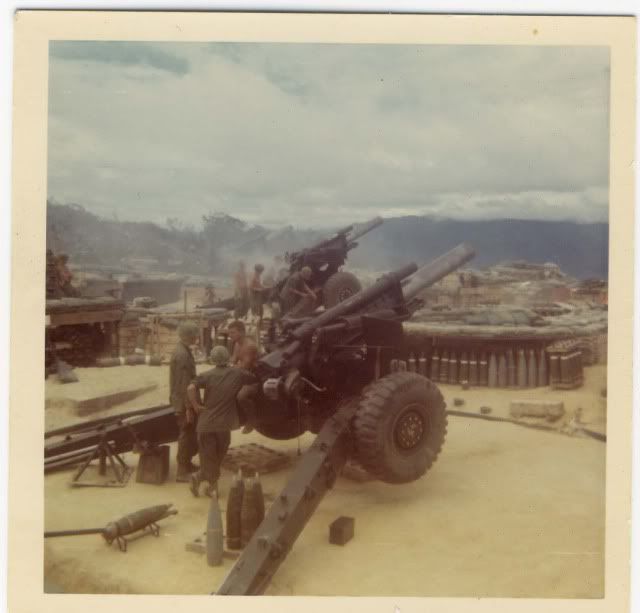
Known affectionately as “the pig” the M114A1 was a notable site on many firebases in Viet Nam.
The Kit
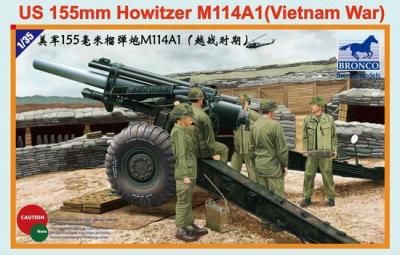
I will be using the new Bronco M114A1 155mm Howitzer kit. The kit is far superior to the old Italeri kit with much more detail. The kit has 8 sprues, two for the tires, two for projectiles and powder cans, a small sprue of powder bags and the rest for the howitzer. It also includes a small PE fret. As usual I will be adding other items to emplace the howitzer when finished.
The Build
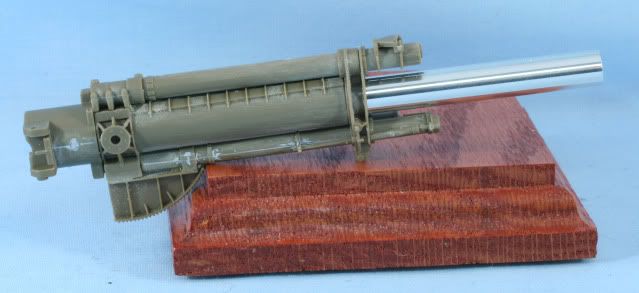
The first five steps in the instructions involve assembling the breech, barrel and recoil cylinders. I will be using the Bronco metal barrel. You need to use the Bronco barrel for the M1 to be correct for the M114A1. Their metal barrel for the M114A1 is actually for the M114A2.
As for the kit assembly, all of the recoil cylinders and the rear barrel sleeve are all split cylinders. Also the plastic is hard and when removing from the sprue leaves a divot in the plastic. Needless to say all the cylinders needed to be sanded and seams sealed with Mr. Surfacer. The forward brackets had pin marks which would be visible and had to be filled and sanded. The breech though cast as one piece had a bad mold seam and a divot from removing from the sprue. The heat vanes on the side of the barrel also had a few pin marks which were a royal pain to fill and sand.
After a bunch of time spent filling and sanding here is he cannon assembly with breech.
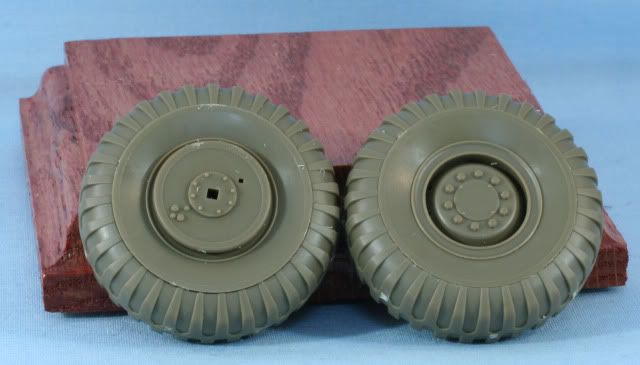
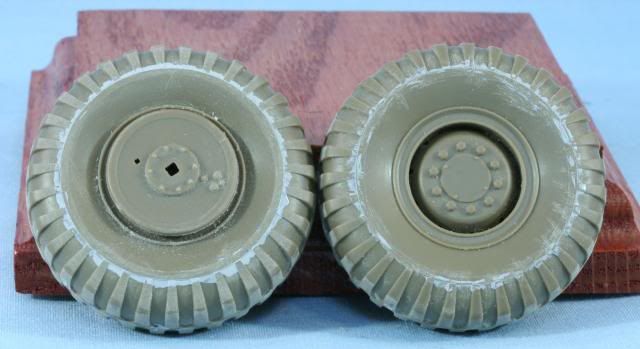
While waiting for coats of the Mr. Surfacer to dry on the cannon parts, I decided to assemble the tires. The M1 kit uses a number of rings to create the tire with treads. The M114A1 used a military tire so Bronco went with a solid cast tread ring. The rim is actually the rim and part of the tire side wall. After careful assembly there is still a fine seam on the sidewall portion which will need Mr. Surfacer. The inside rim is not quite flush and will require some sanding before sealing. These will be a project while waiting for other parts to dry as I go along. Here is what the assembled tires look like.
We are off and running. Next I will skip forward to the lower carriage assembly.
As always if you have any comments, please feel free to drop in.
Gotta love the cannon-cockers in this forum. Get on it, redleg!
Are you planning on doing the tire and wheel details like in the top photo? It would seem that these artillerymen had a little extra time on their hands.
Subfixer - I have not decided yet on the final markings. I have a bunch of photos from different units. Trying to decide what markings I have the best shots of to reproduce.
Gunner - Aiming point identified…thanks for the comment
Tojo - Always a pleasure to have you stop in
Gamera - Thanks and no, the kit does not include a crew. Though I am not a figure person, Master Box just cane out with a new kit of US Artillery Crew. Now it will be more for WWII but a bit of creativity and you can make them for VN. Otherwise if you want correctness you need to look resin
Actually RedLeg the Master Box set would really be for between Korea and Vietnam as the gun in the background looks like a Long Tom and Long Tom was used in Vietnam.
Mike - the M1 155mm gun was first deployed in 1942 and used extensively during WWII. The early war versions used a civilian tread tire. Late in the war, 1944’ the army began the change to military tread. The Long Tom was towed by the Mack NO 7 1/2 ton truck. By Korea the M1 used military tires and was pulled by the M4 18 ton tractor in the late 50s t was redesign acted the M59. I have not seen any evidence of the US using the Long Tom in Vietnam Nam. It may have been given to the ARVN but early use. By the time the US deployed combat troops, the M107 175mm gun was deployed
As for the figures, look at the boots and leggings on the box photo. These are WWII or early Korea.
Lastly you are correct that they are a Long Tom crew since you have a soldier holding a 95 lb. projectile.
If it was the M1 (later M115) 8 inch howitzer, a single soldier was not going to hold the 200 lb. projectile.
I figure Mike if you want a more appropriate Vietnam crew you could always use the HobbyFan M102 crew it looks like they could be used with the 155mm projectiles and powder bags.
I’ve been waiting for this one! Gary (squeakie) already told me about the thing with the barrels - could I ask you for a side by side comparison? I would like to build this kit some day and I guess I’ll have a hard time finding the correct barrel, so maybe I could convert it some way? Apart of that I wish you good luck with this build and I’ll be watching (for a splash! See? I’ve got the terminology on [:D]) Have a nice day
Mike - Yep the Hobby Fan crew would be much better for the period.
Pawel - I was waiting for you!!!. Gary is following along on another forum. As for the barrel, the metal barrel I am using is the add on Bronco barrel for the M1 version. The M114A1 metal barrel from Bronco is actually the A2 barrel and not correct for VN. As for exact length, I am not going there.
One thing for sure…this kit is FAR superior to the old Italeri/UPC//Peerless Kit.
Karl - As always thanks for stopping by. You know artillery is my life blood…love is an interesting word. Passion is the way I feel. Thanks for noticing!
It has been awhile since my last update. Spring always brings lots of distractions.
First, here are the tires with Mr. Surfacer to close up the seams. This photo gives you a better idea where the seam is on the tire.
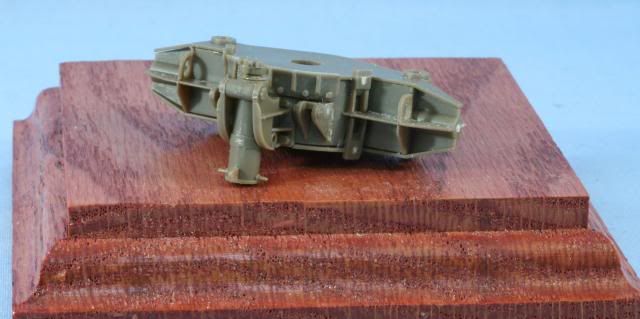
Began work on the lower carriage. The base for the lower carriage involves two steps of the instructions. No real fit or seam problems with this assembly.
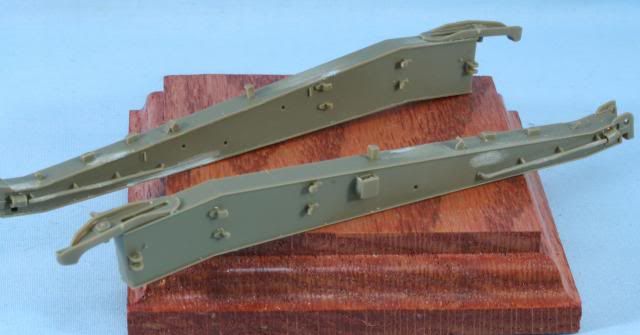
The trails also involve a few steps in the instructions. After the main assembly of each trail, only minor seam sealing was required on each. I have added some of the hanger brackets. I will have to fabricate empty ramming staff/aiming post brackets as the kit brackets come with the staffs in them. Here are the partially completed trails.
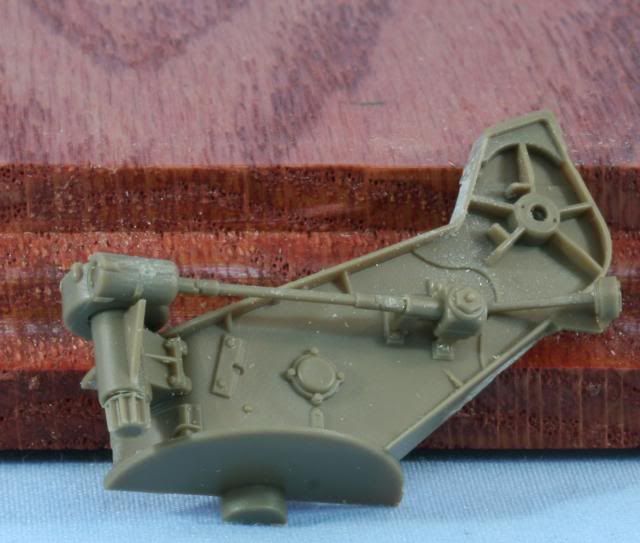
Also worked on the upper carriage assembly, which is split into two halves. The right half has a bunch of items to be added. I left off the sights which will be painted a slight shade different and will be added once the howitzer is mounted so the sights are level and pointing in the correct direction. What is added is all the gearing and gear boxes for the traversing and elevating mechanisms.
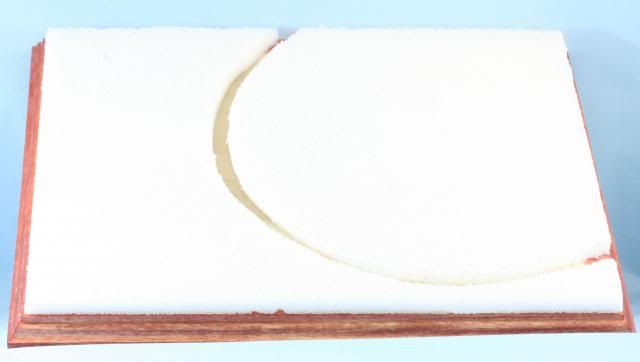
In between glue and filler drying, I also went off to the wood shop. I made the base and after staining and sealing, I applied 3/8 inch Styrofoam with the cutout for the spades to allow 6400 mil (360 degree) traverse. On the wider solid side I will scratch build an ammunition bunker. Here is the start of the base.
That’s it for now. Hope to keep going thru completion now that I am back at the bench. Time for some primer soon as the assemblies come together.
As always if you have any comments, please feel free to drop in.
Rounds Complete!!