1/35 Italeri M108 105mm SP Howitzer, WIP, 05/30/11 Finished

When I get into my Vietnam arty phase I will be a callin’ ya for sure.

I removed those posts for reasons some people cannot understand. It was a personal issue with myself and my feeling that fighting people with a keyboard is futile unless you can whack them over the head with it. I don’t do nasty and I talk to people on the internet the same way I do in person, as a gentleman with respect. If I have to be any other way I disengage before it escalates. I just erase everything I wrote, the end, nothing to fight about, simple. It seems to work very well for me. I can take constructive criticism and welcome it but I will not ever take rudeness, blatant attempts to be drawn into immature internet fights and condescending comments. I am the same person whether in person or with a keyboard. I have found the majority of people online are nice people.

But there is a minority who seem to have a dark side that comes out on their keyboard that would never even think of it to your face. If they did they would have spent their lives getting the crap beat out of them, maybe they did and still haven’t figured it out. They take kindness for weakness and that is a mistake. I was told when I was a younger man if you punch-out every A Hole you meet you will be doing it every 15 minutes for the rest of your life and not make a dent in the amount of them in the world.

Hey Mike you better get busy man,your thread is nearing the edge of the known world.[aln]

Tony Lee[:)]

Coming soon!!..Thanks my friend

Rounds Complete!!

This was a week of cleaning up the turret and moving into the mundane tasks of armor building.

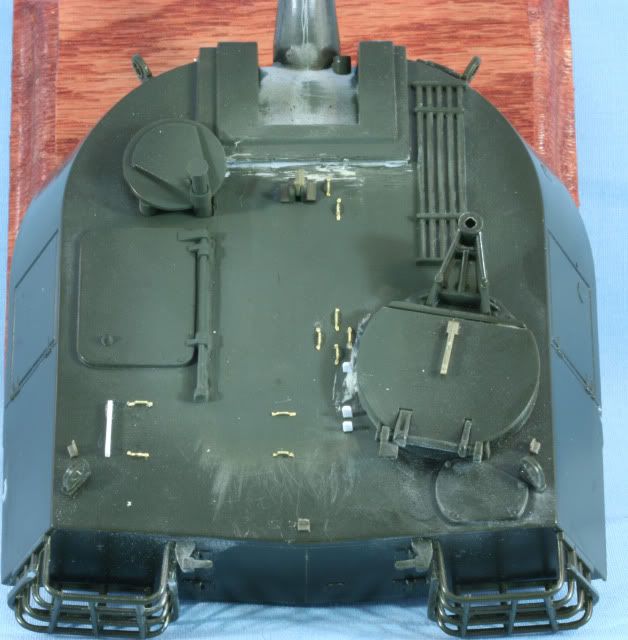
After multiple coats of putty and Mr. Surfacer, the turret roof was back in service. I then added details from a number of photos. These details included a number of tie downs using leftover PE, TC hatch handle from the parts bin, some .020 styrene to make some stops and mounts for tools and the M2 tripod, some mount parts for the tow cable from the parts bin and a latch assemble on the forward part of the turret also made with parts from the bin.

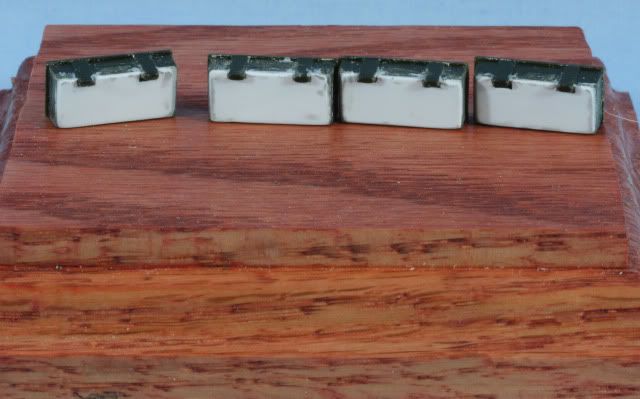
The storage boxes for the bustle racks have a hollow back which needed to be covered. This was done with some .010 styrene.

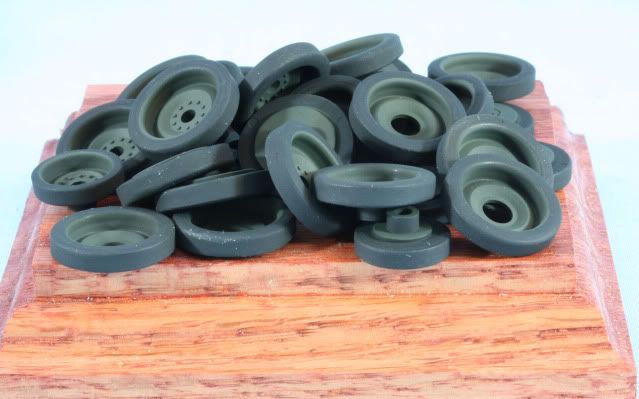
At this point the hull and turret are ready for paint. While all the putty drying was happening, the road wheels were painted with a tire black (50/50 Flat and NATO black) then the rims were painted with XF74 JSDF OD.

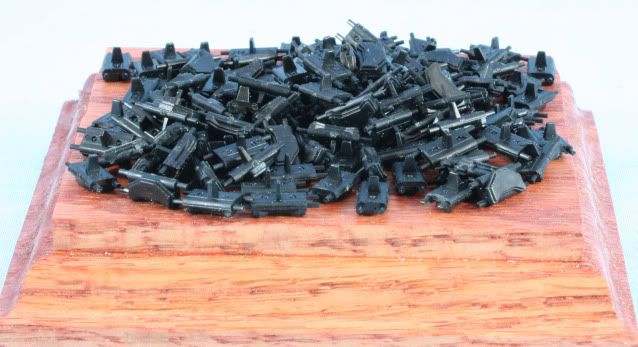
Now I was onto the tracks. I am using AFV club T126 individual track set. First order of business is to remove them from the trees and clean up all the nubs.

I have to clean up some of the pin marks on the track links. I will be working on those as I let paint dry. Not a lot visually but a lot of hours on the bench.

As always thanks for stopping by. Your comments good or bad are always appreciated.

Rounds Complete!!

Mike looks like you’ve been a busy man buddy.[C]

Nice work you’ve done.[t$t]

Thanks for the progress report.

Tony lee[:)]

Those tank treads look intense!

WOW, Mike-- I completely missed this build! I have to remember to get out of the garage when I’m engrossed i my latest project! lol!

This was one of the very first models I’d ever built, so it’s nice to see it happening with the proper details and standards to it that you are applying. Kinda brings a tear to my eye! [:$]

[Y][Y]

Looks So fine… he doin’ the VVD

301lgrrjpg9.gif image by JWselamat
Vecchio Victory Dance **(**kind’a looks like ‘im don’t it…leakage an’ all ? )


showoff.gif image by luigimanultra7

Look at that…[

](http://media.photobucket.com/image/off%20smileys/luigimanultra7/smileys/showoff.gif?o=11)[

](http://media.photobucket.com/image/off%20smileys/luigimanultra7/smileys/showoff.gif?o=11)[

](http://media.photobucket.com/image/off%20smileys/luigimanultra7/smileys/showoff.gif?o=11)
Snoopy Animationflawless…
[

](http://media.photobucket.com/image/nice%20smileys/JWselamat/Smileys/301lgrrjpg9.gif?o=4)

!http://i177.photobucket.com/albums/w226/redleg12/M10820.jpg

It’s first rate work here folks…

!http://i20.photobucket.com/albums/b232/gluetank/Animated/th_1-Animated-Disastermaster.gif?t=1296616998

Tony - I’m trying!! Thanks for the peek

Karl - No problem…I know how it is, your eyes are on the computer but your head is still working on the last project. Thanks for stopping in and for the comments.

Beav - Yep…indy tracks are “fun”…76 links per side and 152 connectors…lots of little parts. Thanks for the peek

Steve - Thank you sir…I am honored that snoopy has turned out…Nothing like detals!! Always a pleasure and a LMAO bonus!

Thanks guys

Rounds Complete!!

These builds are very inspirational, it makes you want to take the kit you have and fix it. Any kit, just make it right. So many things on these models are wrong or out of scale. Some you can fix and some require you to completely scratch build. But it seems most modern kits are a good base.

It’s amazing when you see someone make a vehicle the way it was when really being used. Out of the box is OK, but when it’s being done to spec as much as possible it seems to add something. Although unfortunately when the model is done some of those little things that were fixed will be lost when the paint and other stuff go on. But a lot won’t and will show up, even knowing it’s there and correct means a lot.

Some of the models I see done here and other places on the internet amaze. The realism is fantastic. It looks like this one is going into that category. I still like looking at the Ontos you did, I compare it to real photos and it’s right on in so many ways, a real joy and inspiration to look at.

As I work on my stuff I strive to make every detail correct. It does add time and some frustration but it’s worth it. Once it’s done you can see the difference.

That is the best praise possible for a builder.

Its looking great Mike. The roof correction came out perfect. Great job as usual.

I have to ditto Gino’s comment Mike. I could’ve never got that cut to come out as smoooooth as you have!

[dto:] I figured you would have sworn off AFV Club tracks from you experience with them in your M40 build.

Actually, other thean the T80 and T84 tracks, AFV Club’s indi-link tracks are great. I use them often. The M108/109 tracks are really nice and go together well.

Very nice work on this one Mike, up to your usual standards and looking good! [B]

Noah – I am touched by your comments. I will admit you can see some amazing builds here and on some other sites.

Details are what I enjoy. Yes, it takes time but it is enjoyable and valuable. Thank you for your thoughtful comments.

Steven – Thanks for stopping by and for the comments

Gino – Thanks….it was a female dog but it was worth it.

Also thanks for the supporting fire with Macattack

Kevin – As I have said the holy trinity….Dremel, putty and sand paper….putty and sandpaper……putty and sandpaper….check!!! [:(]…putty and sandpaper……hope [bnghead]……putty and sandpaper……luck [H]….YEAH [whstl]

Just time….some sanding and putty every night for a week

Kevin – As my brother Gino states, I have sworn off indy link styrene tracks with a center pin….T80 & 84. As for the AFV T126, they are not bad. Some slight ejector pin marks on the back side….a little work cleans them up. They fit well and look a 1000 times better than the kit supplied track. Also, no one else makes an AM T126 track

Thanks for stopping by and for the comments

Bill – Always a pleasure to have you drop in. Thanks [;)]

Rounds Complete!!

I say it the way I see it. Some times that might not sit right with people but I am always honest.

Your work is really outstanding.

The art of modeling is to do what you are doing, making it real. There is a certain amount of artistic license with any art form but very little leeway when modeling actual weapons and vehicles used in specific war down to the unit and time frame. Something I am trying very hard to accomplish myself. I am really happy I found the unit of that dual 50 cal Sheridan…I can’t wait to do that one.

Bring to life a piece of plastic, that is the art. That’s what I am studying now, how to bring to life a piece of plastic, brass and whatnot stuff you have laying around and making it life like. When you have achieved that you are then a true artist to me. My uncle after WWII moved to France to paint even though he lost an eye in the war, many others from my fathers side were/are artistic. So I have a good family DNA strain for art.

It does mean taking chances some times and not playing it safe. Am I adding to much of this or not enough of that. I have noticed that many of the so called professional modelers leave me cold some times because they tend to play it safe, I GUESS they have to. Museum quality probably has very high standards. And some not so professional modelers tend to over do it or are afraid to go to the next level. The way you build seems to have found that happy medium, like the Goldilocks of modeling for lack of a better analogy.

One issue I do have with many professionals is their models lack figures. I am ignorant to the actual guidelines as to what constitutes a professional museum quality model. I just know what I like as a person who loves art and has always been an artist in some way, I was a professional musician.

To me a tank without it’s TC is just a vehicle in the motorpool…LOL. I think if many modelers realized just how much of an art form what they are doing is they might consider taking it to another level of perfection. Look at the great painters of history, Da Vinci (who loved drawing tanks…LOL), Rembrandt, Rubens, Van Gogh, Picasso, Cezanne they all took it to another level that distinguished their work. All different styles from the most lifelike to the least lifelike, apply that to your modeling and make a work of art. That is my philosophical approach to this who some would consider even childish. No art is childish, not even finger painting.

I’ll add that Doog also inspired me greatly too. The kid did a great job on that M48A3. Having never served nor ever been on the vehicle it was an amazing piece of work. A tribute to knowing good technique, doing research and not being egotistical as to not listen to constructive criticism. Also having the guts to take a dremel to the hull and turret…[:)]

I am doing only Vietnam era US vehicles and weapons. There’s enough of them to keep me busy for a long time. I am going to do a report very soon on some Models from that era and conversion kits I was able to find. I hope that helps those interested in that era.
Noah - First thank you for the complements…I am [:$] and overwhelmed.

There are many good “artists” on this site and on other sites. Karl (Doog) is one of them. Most of us are all different and build in different ways. Some like Karl are complete diorama builders while someone like WBill sticks with the equipment only. I fall somewhere in between though I am not a big figure person.

Like the many styles of art, we all have our style and appreciate each other’s art.

Again I thank you for the comments and appreciate your support.

Rounds Complete!!

Yes it’s a personal choice, I dig the whole statement thing. Like this is a so and so and this is how it was used. Or even during a combat scene as though it was a still cut from a video which is my favorite.

I love finding pictures of oddball stuff, like an M113 pulling an 105MM howitzer in Nam, with it’s crew on top. Or the dual 50 Sheridan. Or the M151A1 with a 50cal ring mount in the back. Just different stuff and how it was used.