Wow, what a model!, with the figures you can see the size as you mentioned.
Looks cool to me, from the photos the dot filtering looks really nice.
Mike, I think it looks fine, and I’m a but dubious about filtering over gloss. I filter over a light “satin” which is just shy of flat. Even filtering over flat is going to get you a better impression of what the outcome is going to be than gloss. You know how gloss tends to darken and alter the actual color of the paint? I tried it once, and while the dispersion is easier to control, it’s also a lot harder to accurately judge where you are with the depth. I would suggest trying a acrylic wash with the base coat color if you think it’s too “green”. The more layers you put on it, the more varied the finish will be too, which doesn’t hurt. ![]()
Karl - I’ve been using a Krylon “Matte” clear and it comes out as a semi gloss. I suppose I should be more clear about that. I do have a can of gloss which is excellent for the coverage and was thinking of using it for the next round of filters, but you’ve just convinced me otherwise.
I’ll stick with the Matte.
Garzonh and Gam, thank you guys! Thank you for the support ![]()
Update time again. ![]()
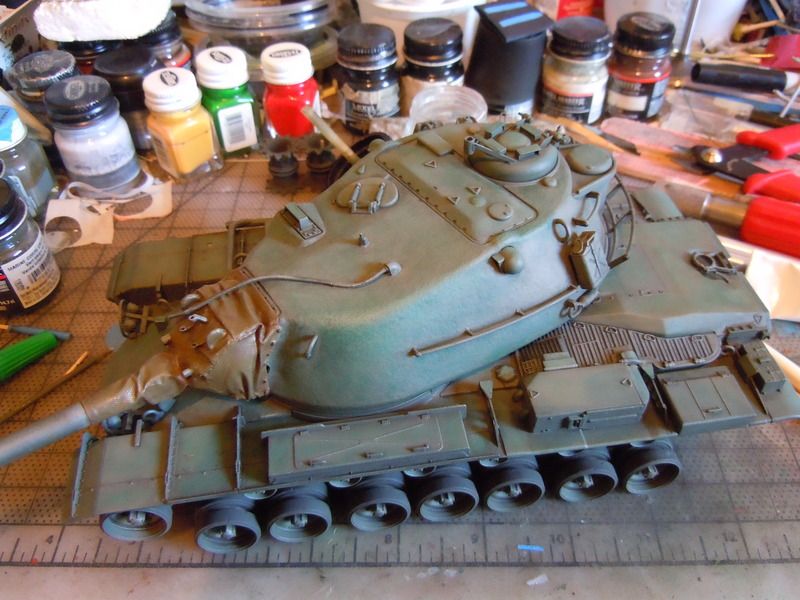
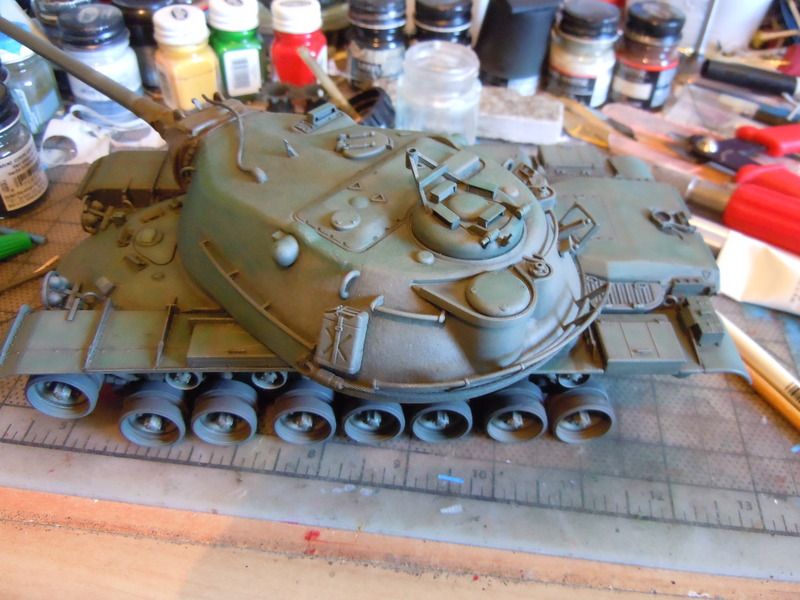
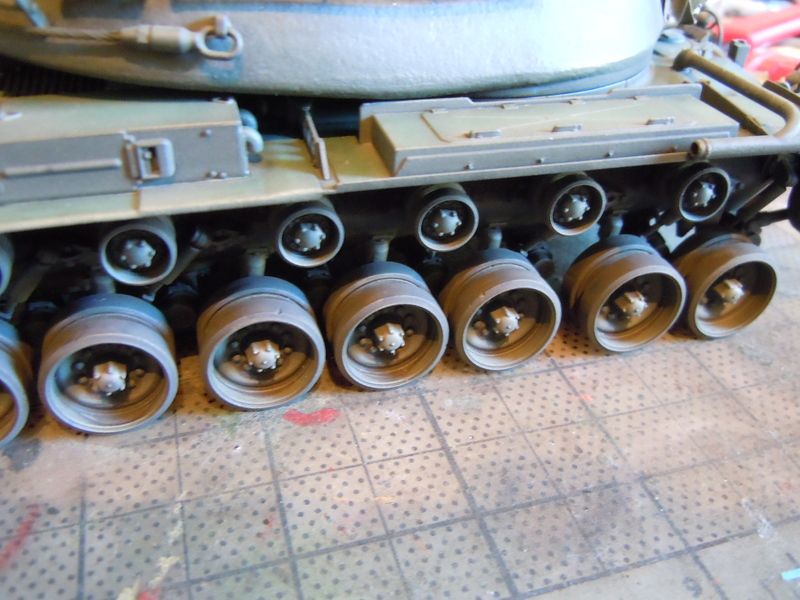
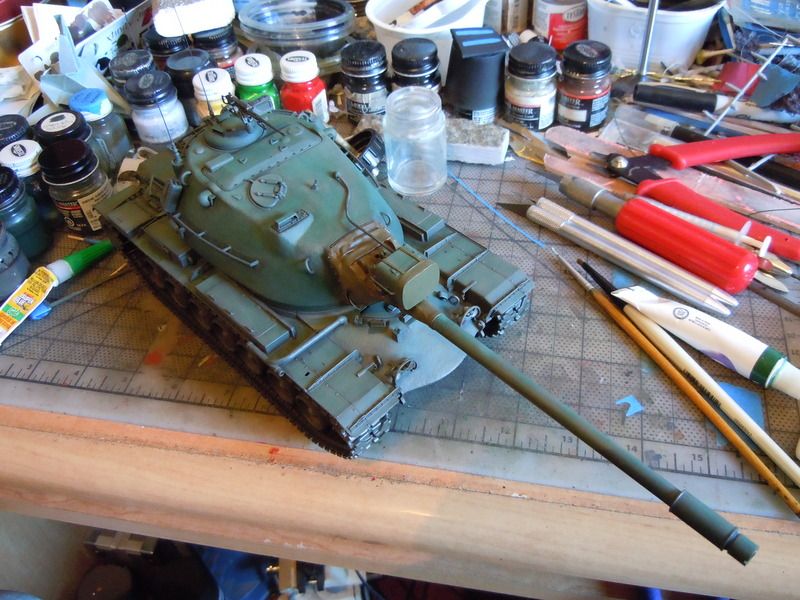
I’ve been getting the dot filtering done on the turret. You can see what progress I’ve made on that part. I’ve also got the faded gray rubber painted onto the road wheels and return rollers. They’re needing a bit of touch up to the green as there is some worn paint on some of the edges due to me not clear coating the finish before all of this handling going on right now. I keep having to spot repair the fender edges too. Which is okay because they actually did that a lot in the real world.
I’ve got a bit too carried away on the one side with the Verridian Green oil I’m using for the filter. No worries though because it’ll all work out in the end I’m sure.
The model is looking good, Mike.
Do you decant your clear coats and airbrush them? I hope so, because I’ve found that spraying them out of the can nozzle itself lays it on waaaay thicker than you would want it.
No Karl I don’t decant them. ![]()
But now I’m thinking about it.
I do like my clear cotes to be a good thickness to protect the paint underneath, but I see what you’re saying. I’ll let you know if I do finally decant the canned clear. I’m curious about how well that works now.
Thanks for that info. I’ll get back to you on that. ![]()
Here’s an update. I’ve just finished the dot filtering and I’m going to give that a day to dry a bit before laying down a satin finish.
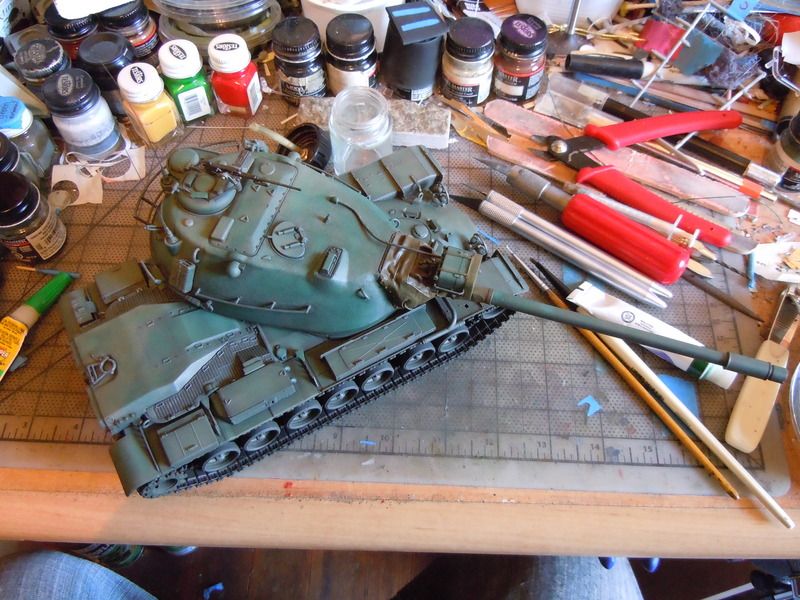
I’d say that “greened” it up pretty good. This is how the tank should look after a “gasoline” wash that both the regular Army and the Marines would do the “Liven” up the paint after they washed them (I forget which one of you guys had mentioned that and I had to ask My Dad if they really did that. Confirmation from an ex tanker of that era says yes.). It worked well but faded the paint even faster.
My Dad has lots of pictures of M-60’s in his private stash that show how the MERDC camo scheme faded shortly after being applied. The tan would last the longest, but the other three colors almost faded into one shade. I want to try replicating that effect later, and hopefully on something in a smaller scale lol.
Edit: I really like this effect now that its done. The color changes depending on the lighting and source. It goes from a bright green to faded pale green even in the pictures. Pretty neat! lol
Mike, in my opinion, it’s not worth laying down a thick coat unless you’re painting in enamels. Tamiya paints don’t need a clear coat; they’re nearly indestructible as is, and Model Master MAYBE need one if you’re really aggressive with your washes or doing some kind of scrubbing action over them.
In any case, what paint erosion you might see from handling is far better corrected with a touch-up rather than a thick coat of clear, Depending on the details and molding, you’ll have places where the washes – especially pin washes–won’t get into the crevices and corners in the way that nicely define the smallest stuff and look proper. And don’t forget, lacquer “yellows” over time. Hell, I don’t even really clear coat my finished models half the time. As long as I’m playing with them on the rug, the don’t really get touched much after I put them in the display case. [:)]
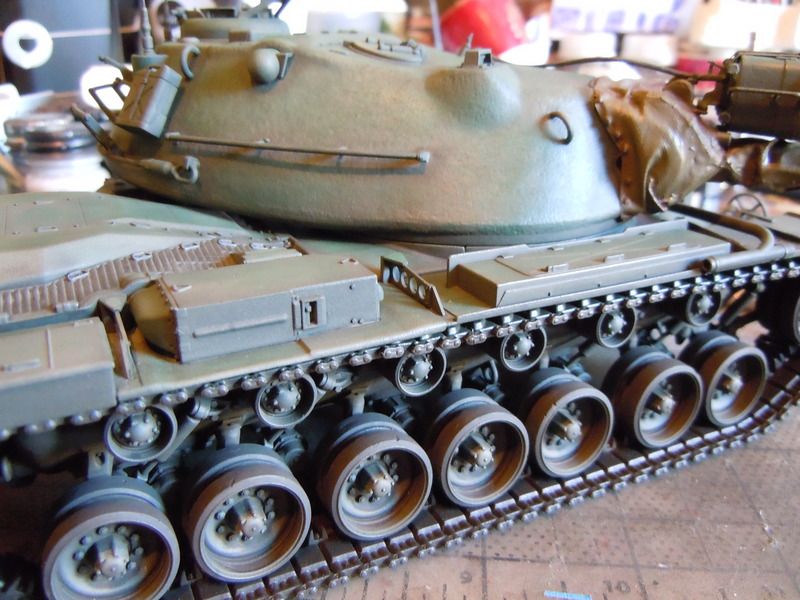
That coat is looking pretty “green” in the first two pics; the bottom one looks more in-the-ballpark, Don’t forget to monkey around with your White Balance too on your camera, if you have one. You can really alter the tone of a photo with that sometimes. [Y]
This is looking really good. I recall these beasts at Camp Pendleton way back when.FYI Tamiya XF-74 JGSDF OD is a good match for Marine green from that era.
Thanks Karl. This effect occurs even without the camera. But yes it’s a bit too green in some areas, but I’ll be toning that down with the next layers of washes and if that doesn’t do it I can add a touch more pale to it later.
I thought it was great that I captured the effect in pictures lol. Usually if you can see it with the cam, you can’t see it with your eyes, and vice-versa.
I’m going to keep my clears thinner after talking to you about it. I feel you have the right of it in this case.
Wow, I’d read here about Cold War olive drab being darker than the Second World War but didn’t know about ‘gasoline washes’ and being this green. Thanks guys!
I believe that the Cold War era O.D. was definitely darker and leaned more towards the brown side of the color than the previous O.D that leaned more towards the green side of it.
I’ll be adding more dirt tones to the paint pretty soon. The dirt from boots did grind into the paint and tone it differently where the crews walked on the tank most often. I’ll be taking this into account while I work more on this paint scheme as I did on the little M-48.
Marine Corps Green was more like a medium green when freshly applied. This effect I just got should be pretty close to how it should look, but since I’ve had it only described to me and have never seen it for myself I’m not going to say with 100% certainty that this is an authentic paint job. I can’t back this one up, but it sure does look cool. lol
I come here every now and then just to find this amazing build.
I like the color and the shadows you achieved, also the “dusty” layer looks very convincing.
Thanks Garzonh. I’m having fun with it. First I don’t like it, then I finish the layer and think, “Okay, that’s neat” lol.
[QUOTE=rbrindos]Michael, I probably should have clarified what I said about washing tanks with diesel. It was never done, unless there was a reason. The only time I remember ever doing it was at Ft. Lewis when we officially activated the 2/77th Armor Battalion. We had a ceremony with the tanks driving by the review stand. We washed and dieseled up the side that was seen by the stands. It was considered a safety hazard and, on a personal note, made the front slope very slippery.[/QUOTE]
I just got this over on Genessis. I will tone this paint effect way down now as it is incorrect. Bummer, that was looking cool.
Ah yes, making stuff look good for the dog & pony shows. I always wondered how they got the vehicles on the parade field looking so. Usually the ones we had out there looked like they just came out of the paint shop at the Support Battalion. Although I do remember in one of my units how our supply clerk was putting brake fluid on the sidewalls of his M35A2 Deuce and Half tires after the wash rack to give a nice “armor all” look to them. Shiny black tires on a beat to snot MERDC Temperate Spring truck…
I finally pushed through a serious slump recently and got back to work on the Beast. I toned down the bright green quite easily by sponging on the base color over everything. That really randomizes the tones while giving the original color more life. After going through my reference books I realized my canvas color was too much on the brown side of the spectrum and I corrected that to better match the photos I have, adding 50% RLM 70 to my MM Olive Drab.  The decals were on the thin side, but with some liquid cement went on as if painted on. I brushed a bit of lightened yellow in the numbers to add to the effect. I lost the serial number on the left side after one swipe of the LC brush took it completely off and it dissolved on the brush. That is exactly why I can’t ever recommend that anyone use that trick and why I hesitate to fully describe its usage. It can really screw things up. I added the TC’s sight vane and did some washes on the .50 cal.
  I think another wash may be in order to deepen some of the recesses, but otherwise I need to start weathering the wheels and tracks. I’m getting close to the finish line.
oh yeah. “… original color more life” I agree
Thanks Sprue. ![]() its not quite so bright now.
its not quite so bright now.
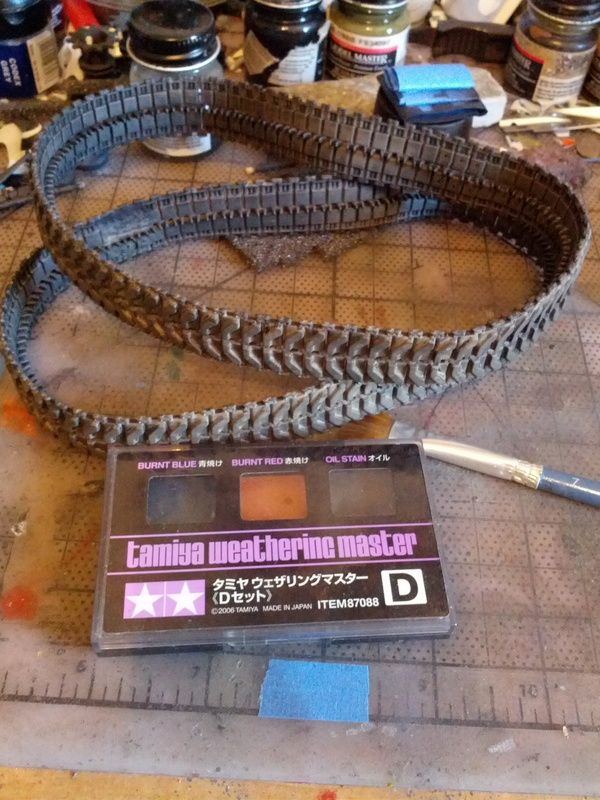
Tracks have their first wash of Tamiya Weathering Master “Oil Stain” on them. I like how versatile this stuff is. Wet or dry.