I finally dug into this build and holy cow, what a load of work! I’m nearly finished with the suspension. I have one side finished and i haven’t even started the road wheels yet. There are 16 of those to build and the outer rims and tires are separate from the inner hubs. Yikes!
Okay, so here’s the pics. So far the searchlight has taken me the longest to get built up. It comes in 9 10 separate pieces and the assembly is a bit tricky. Two parts, J26 and J27, are not actually shown in the directions and if you leave them out there will be nothing to attach it to the tank with. Unlike the Tamiya searchlight with fewer pieces this bit of mini kit does build up to a rather accurate replica of the real thing. I could only find ONE photo for reference that showed the light without the cover on it. So that’s what I used to paint it with. The instructions do not include a detailed paint guide for this part, in fact there is no painting guide for it at all. Just assemble with missing parts and continue to the next step.
They only mention painting the entire tank Olive Drab, but it’s actually painted in Marine Corps Green, which is closer to German Black-Green.

^ These are the correct three slotted drive sprockets that no kit ever includes but were present on all of these series of tanks, from the M-48A1 to the M-60A3. These are made by Def-Models and they are a perfect fit after the resin flash is removed.

^ The plastic on the upper and lower hull of this kit are thick. Probably the heaviest chunk of plastic I’ve ever assembled lol. To get a good match of texture on the join between the upper and lower hull I used a very simple trick here. I softened the join with extra glue, let it cure for a few minutes,
and then pressed the surface of my rough sanding stick into the plastic and mushed it about a bit.

^ There is no casting texture on the upper part of the hull above the Bogie Wheel line so I added some with Bondo. Yeah it’s meant for cars, but it works very well. You can even soften it up with liquid cement and mush it around. Its actually one of the best putties I’ve ever used lol.

^ Its not bad. I didn’t need a lot of this texture here and I don’t need it to be accurate either. Unless you go looking in here with a flashlight after I’m done you really won’t be seeing this.

^ Here is one of the very few areas where the EP marks were actually exposed. I ran some Bondo in there and filled in the depressions. This is one of the best representations of an actual tow hook I’ve ever seen modeled. I’ve seen these in real life on actual military vehicles and this is almost perfect.

^ Bogie Wheel factory. I glued them together first so that when I sanded them down they would come out even and have the wear in the same places on each side. I left the texture rough as they should be.

Edit for clarification:

^ I began the searchlight by removing the EP marks and assembling the back end of the housing. Look closely if you need this for reference for parts J26 and J27.

(First attempt)

^ My first attempt with the Bare Metal Foil was less than satisfactory, leaving what looked like cracks in the mirrored surface of my reflector. I tried painting this piece, but it just would not reflect correctly. So stripped the BMF off and had another go at it and was much more successful the second time.
According to the reference photo the center of the reflector should look similar to this. Light grey-silver around the outside with black in the middle. I painted an eyeball on the back of the bulb as you see here. I was hoping that it would lend a bit of blue cast to the reflection, but you can’t even tell it’s there. I know this bulb should be painted silver, but the white gave a better reflection when viewed from the front. The silver didn’t really work and was much more dull in reflecting the light.

^ The unfortunate side of having some many parts in the assembly of this piece. Lots of filling to do.


^ A good reflection. Not the best reflection, but this is the ambient room lighting bouncing off the reflector and return reflecting the light off of the white painted bulb. If you catch it just right (this isn’t the best picture as the camera was getting in the way for the shot) it looks like it glows from within the searchlight.


^ No seams and the correct Marine Corps Green. Looking good so far.
So there is still a ton of stuff to do with this kit. I’ve finally made it to page 3 in the instructions lol.
Thanks for looking guys. Any questions? Ask me.
Build Log update!

^ I’ve gotten past the tedious suspension assembly. Make sure you get the friction snubbers (shock absorbers) located properly with the control arm attachment placed on the back of the control arm. The directions don’t specifically tell you to do that and if you don’t get them placed right they will interfere with the road wheels… and look dumb as well.

^ This is how the friction snubbers should be placed. It is also somewhat critical when placing the control arms to align them on the model before you glue them on. I noticed when I had them all on the one side that just pressing them on did not guarantee that they had proper alignment. The second side went easier after knowing that would be an issue. So be sure to align them properly before gluing them in position. There will be a bit of play in the fit so the alignment is really simple.

^ Upper hull assembly completed. Watch out for the Barrel Travel Lock, it can be a bit fiddly and if the alignment is not quite right it will look broken.

^ After I sorted out the suspension I started the even more tedious task of assembling the 4 part road wheels. Fortunately they are somewhat self aligning as long as the glue is evenly applied around the rims. If you get a spot where the glue did not get into the liquid tension of the glue will pull the rim off center. It’s not a major misalignment, but if you’re picky then it will bother you like it did me. At this point I will mention that the Bogie Wheels and the Idler Tension Wheels do not get rock chips or scratches like the road wheels do because they’re not “in the dirt” like the road wheels are. For those of us who like to add such small details to our builds that is important to note at this stage of the build. Also the tires keep most of their seam lines as they do on the real tank so it is okay to leave some of the seams showing on the wheels if you’re interested in such accuracy.
So far I’m still working on the wheels and I have the tiny nubs that the wheels attach to masked along with the Drive Sprocket spindles in preparation for primer which I hope to be able to get sprayed on this weekend.
Thanks for checking in!
Update complete. ![]()
Edit:
I glued the turret together this morning. Happy Valentines Day.
Here are a couple of good test fits with the ginormous 120mm AA gun they put in this thing;

My Dad shared a story about this gun the last time he was over for a visit. “That gun was a monster. It was so powerful that the recoil system took up half of the front of the turret. That’s why it’s so huge. (to see if they could make the turret smaller) They had a test where the gun was solid mounted in the turret. The Commander said, “I’m not sitting in that thing to fire it”, so they rigged up an external firing cord. When they fired that thing it blew strait out of the back of the turret and left a hole in it.” LOL

Dragon, in their infinite wisdom, has molded the barrel in one piece, which may not seem like a terrible idea until you realize they molded the end of the barrel crooked. You can’t see it in the pictures, but the extractor is warped and curves slightly to the right. I bent it back mostly into the right shape, but the extractor is out of round because of the molding process. I can fix it, but I shouldn’t have to
Thanks Dragon.
Edit:
I’ve fixed the crooked barrel and you can still slightly see it if you know it’s there. There’s not much more I can do about it. It looks straight if you aren’t looking for the curve so that will have to do. After fixing that I went about the task of fixing the seam lines on the turret and adding the casting texture back to the seam lines. I think I’ve done a fairly good job of making it convincing lol.
After all that I decided to tackle the gun mantlet. I first added the casting texture to the sides of the mantlet and then the hollowness of the mantlet got to me. You can’t even see this but if the gun is in full depression you can see down inside the mantlet. Raising my personal bar of attention to detail significantly for this build I could not let this escape my notice.

^ First thing I had to do was to fill the space (18cm x 6cm) with sheet styrene.

^ Next came the Bondo. This was roughly applied and then softened with liquid cement before I stippled the surface with a hard bristled brush.

^ After that was done then I went over it with a fine sanding stick. You just want to bring down the texture enough to get an uneven surface. You don’t want to sand it all flat and smooth. I then brushed some primer over the area to check how it turned out.

^ I could still see some of the gaps left over so I ran more Bondo over it with my finger and then ran my finger over that once it dried and ran more primer over it.

^ Here is where I had to add some texture to the front of the turret. I didn’t like the way it looked and this picture was taken after a tad bit more sanding and just before I applied more primer.

^ After jumping ahead in the instructions I noticed that there were more steps for adding things to the hull. Dragon doesn’t seem to have any rime or reason to the steps in their instructions. I think I really do have the hull complete now.
Anyways, I was working on the mantlet and adding the searchlight brackets and lifting rings. The picture washed out and so I will have to take it over again later. Dragon did not provide any solid means of attaching the center searchlight bracket and I decided to drill it out and shore it up with some stiff wire. I don’t want the searchlight falling off later with a light bump so this I deemed a necessity.
So that’s where I’m at right now.
Update;


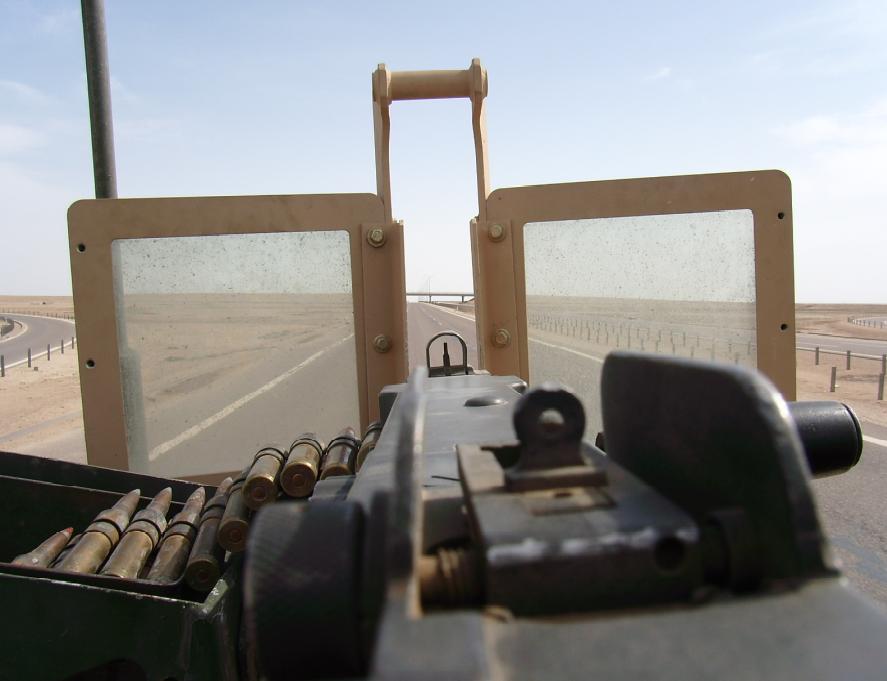
^ That .50 has a lot of detail.

^ Here are some of the welds I made. Look just around this loader’s hatch retaining hook. This is so simple you’ll wonder how you didn’t think of it yourself.
You’ll need some stretched sprue and cut lengths to fit your weld area. Next you wet the area with liquid cement that you want to drop these into and let it sit for a few minutes to soften up. If it needs more after a few minutes then slop more glue on there. Then all you do is press into the softened sprue with your hobby knife, or toothpick, or anything you think will simulate a good weld line. Just press into the weld and shape it. It’s that easy. (credit to Disastermaster)

^ Wheels on!

^ Here you can see the weld I added to the MG mounting bracket. There were feint gaps here where the part didn’t fill the hole completely. Making weld seams for areas like this is just perfect!

^ A few more welds around the TC’s hatch latch. lol


^ Sourcing out the correct size for this power cable was a little troublesome. But in the end I found the right gauge.

^ Hull is ready for more work later.


^ See what I mean? It’s starting to look like a huge heavy monster. It just looks like it has a lot of weight, doesn’t it?
So far that .50 cal was the most fun of all the fiddly crap I’ve had to build. It moves freely and stays where you aim it without any trouble. Dragon inexplicably managed to get the weight balanced out really well and although it’s not stiff it stays put quite well. I thought I was going to have to glue it together to make it stay, but nope. A nice happy accident from Dragon for once.
Update;
SO I ran into a snag. The Searchlight storage mount ended up being too far to the left and wouldn’t be functional as it would interfere with the turret basket. Not something I can just let go.


^ You wouldn’t be able to store the searchlight here if you just trust Dragon on this one. ![]()

^ So off it came and I started to retexture.

^ Moved and mounted where it should be.

^ Welds added.

^ and fixed.

So yeah… those tracks… I don’t like them. They cracked and almost were an unrecoverable mess until I clamped them. That worked on one set, but then the other set was squished out of form and I had to cut parts out. Fortunately you can’t see where all this damage happened and I’d like to think it has a lot to do with my skills, but man these tracks suck. I’m still preferring the single link tracks to this rubbery mess.


