If this helps, here’s the JU-88D they have at the USAF museum.
https://www.nationalmuseum.af.mil/Visit/Museum-Exhibits/Fact-Sheets/Display/Article/196268/junkers-ju-88d-1trop/
I’m really impressed by the cockpit pics they have.
If this helps, here’s the JU-88D they have at the USAF museum.
https://www.nationalmuseum.af.mil/Visit/Museum-Exhibits/Fact-Sheets/Display/Article/196268/junkers-ju-88d-1trop/
I’m really impressed by the cockpit pics they have.
Thanks for that link. I had come across that one previously but had forgotten about it during this build. You are correct - some great photographs of that busy cockpit.
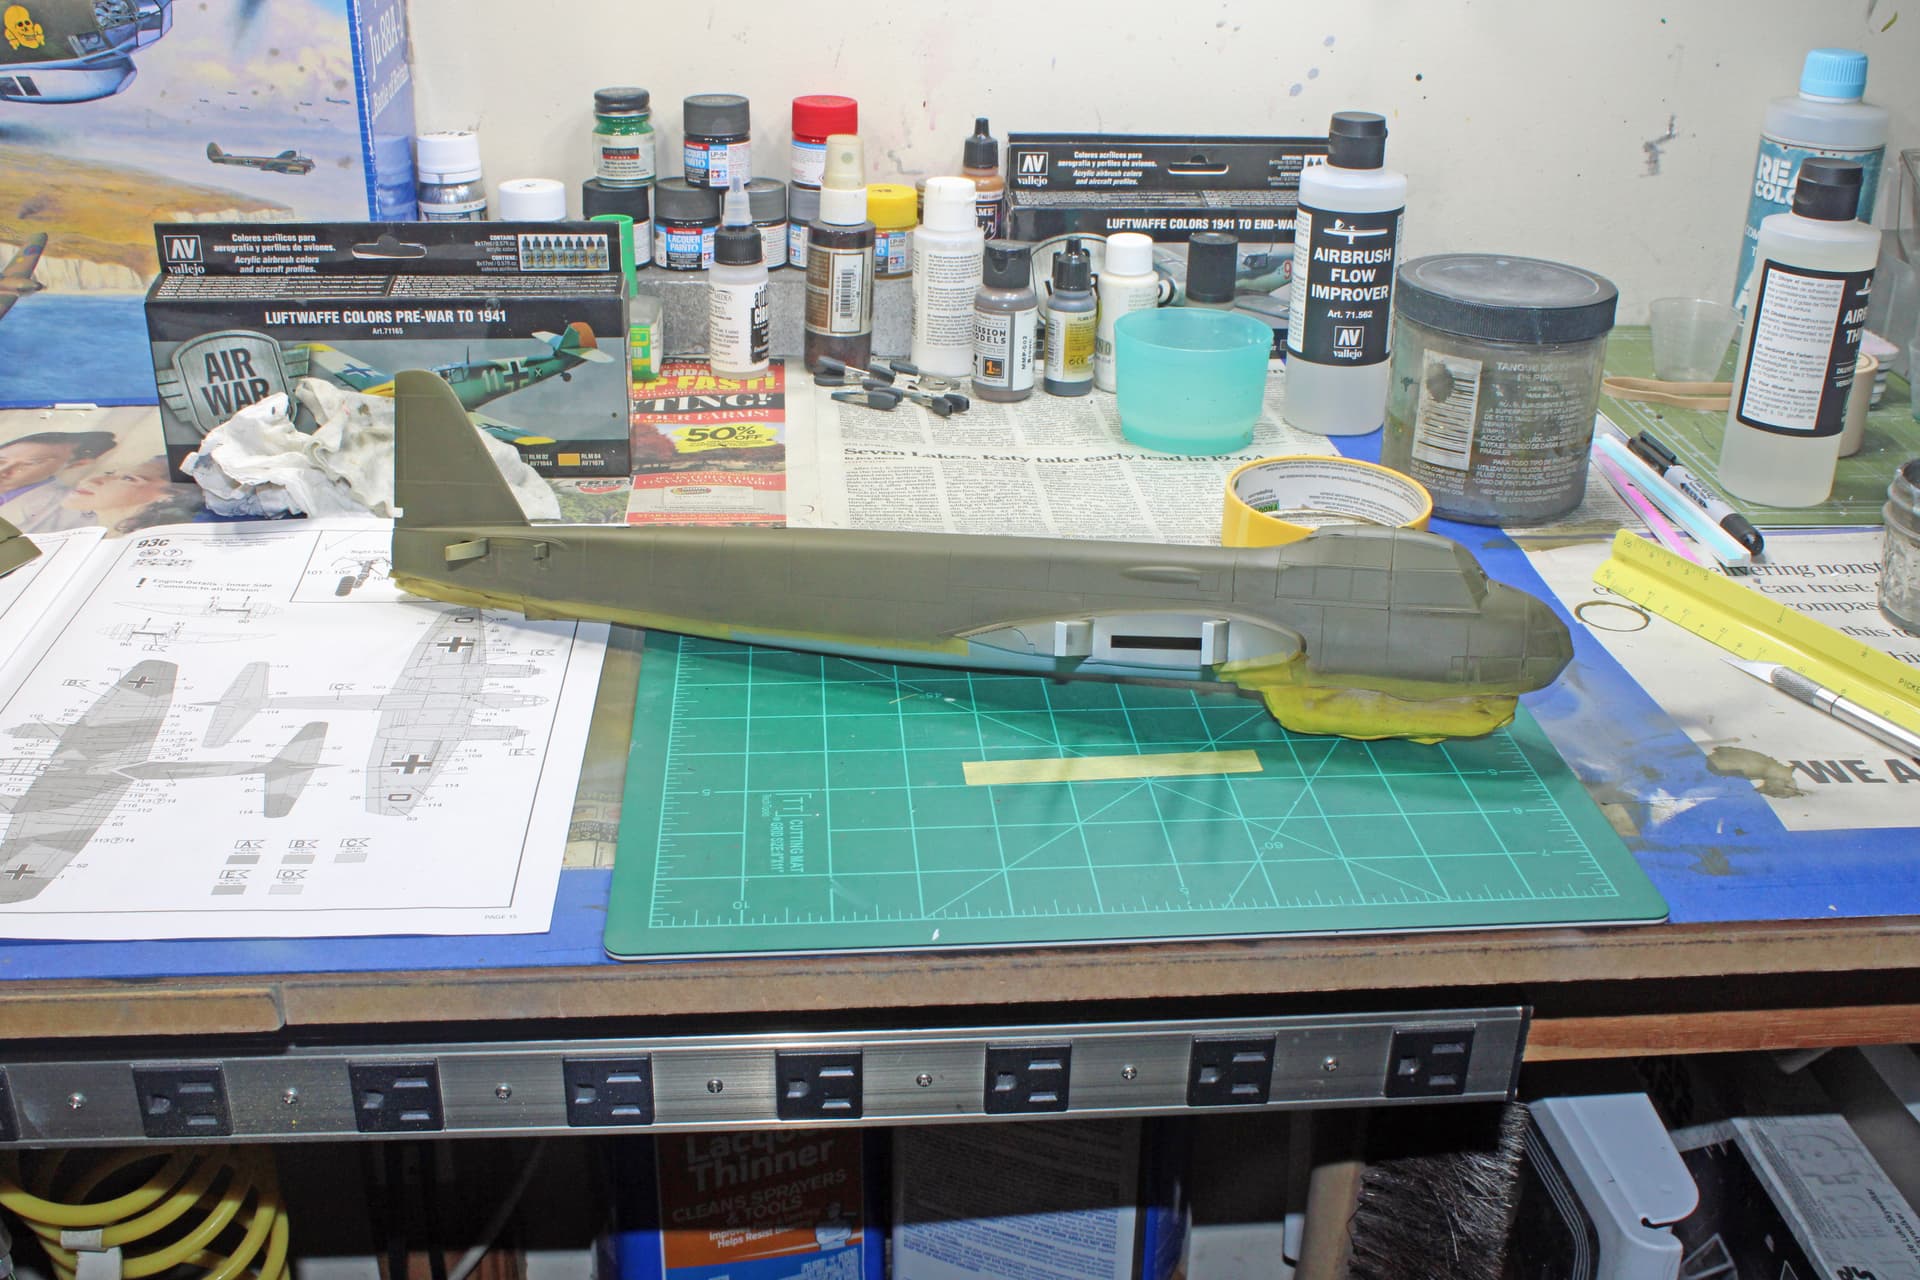
This morning I woke up earlier than normal. I have church at 8 CST, but had a few hours to kill, so off to the bench I went. I was able to add brake lines to the gear struts. I also took a look at the painting work to come, seeing that those prop spinners have a yellow tip. My normal process for painting yellow involves first putting down a coat of white, letting that set, then coming back with the yellow, in this case RLM04 (Gelb).
Painting these parts now will ensure I don’t have to backtrack later, as the rear portion of the spinners will be RLM71. So while I’m at church and running errands today with the wife, that yellow will have a chance to dry sufficiently to allow for masking (always fun to mask such parts). I hope to get some more bench time later today to start the RLM71 (Dunklegrun).
Aggieman, the work that you’ve done on this kit is awesome! Your research such as the wood floors and your attention to the fine details like the brake lines and exhausts just add so much to this project and sets it apart. Are you going to use pre-cut masks for the canopies or do it “Old School” by cutting your own tape? Can’t wait to see the finished build.
Fantastic work with all the details. The tires, and landing gear strut’s alone are stunning. Keep the updates coming!!!
Thanks everyone!
Welp, today I learned something. Some may recall all the trouble I had spraying through any number of my Iwata airbrushes on my last build (Airfix 1/24 Hellcat). For this build, I had not had any trouble. I had learned some lessons, or in most cases, re-learned forgotten lessons, and was spraying the Vallejo paints I am using for the 88 with no issues. Until today. Today I learned that it doesn’t matter to Vallejo how well you thin their paint. It doesn’t matter if you follow the directions on the bottle of their flow improver to the letter - their paint will still clog your airbrush, forcing you to stop what you’re doing and strip everything apart to enact cleaning - and then finding little evidence of a clog.
So I’m spitting mad. I have a number of bottles of Vallejo paint. I have a new bottle of flow improver, as well as Vallejo’s airbrush thinner. I have several box sets of their paint, which I was using for this build. And I am never going to use their products again.
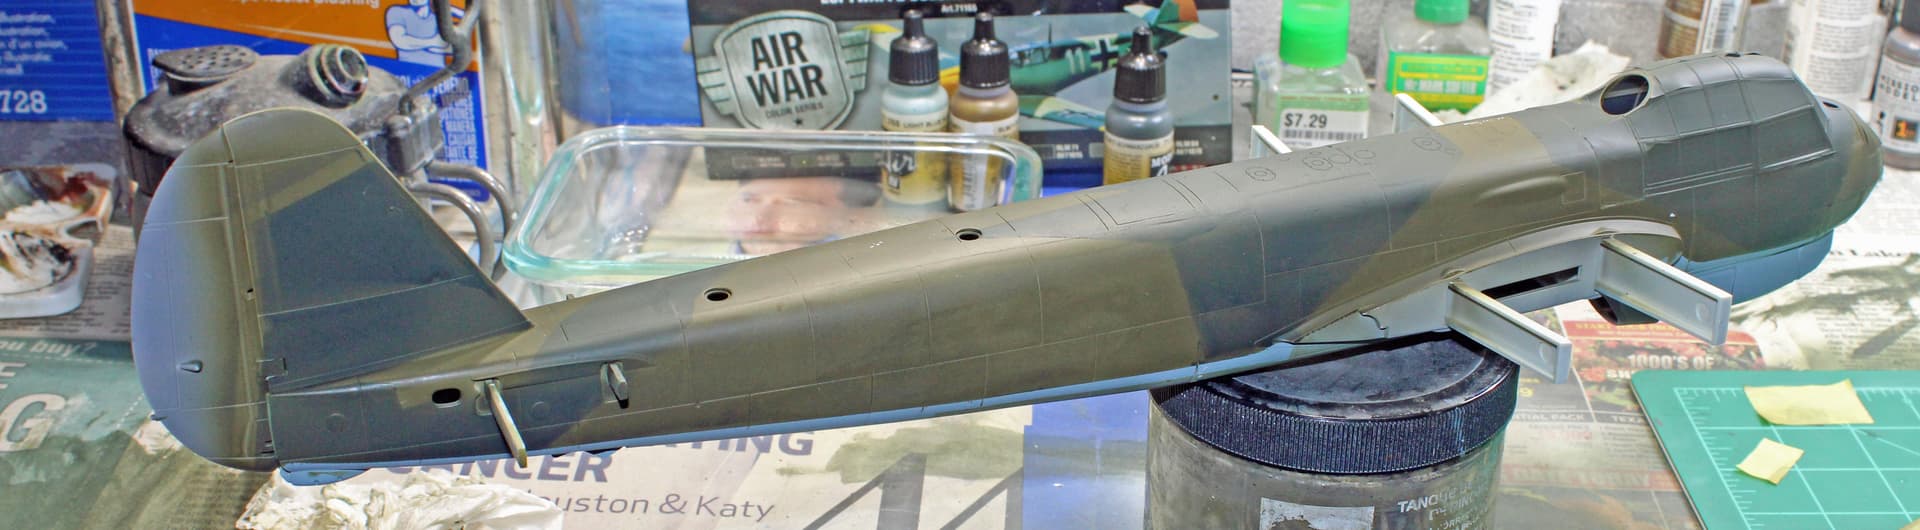
This is a hobby. It is supposed to be relaxing and fun, but today was anything but. I was able to finish painting the prop spinners and put down a coat of Vallejo RLM71 across all the upper surfaces. By the time I got to the fuselage, I was already ticked off beyond belief, just trying to coax it across the finish line. But I ran out before I could fully cover portions of the fuselage.
I have many of the old Model Masters (enamels and acryl) paints in German colors, so will be using those going forward. Tomorrow I will try to repaint the fuselage and hope that the color modulation is equivalent (but I have a suspicion it won’t be).
On a different topic, as a movie lover, today was supposed to be a pleasant day watching a few of my favorite movies while working on this Junkers. May 25th is the date on which a couple of the best movies ever made - Star Wars and Alien - were released to theaters initially in 1977 and 1979. I did watch both today, and might have concluded with Return of the Jedi, also released on this date in 1983, but after all that happened with the paint and airbrush, I just don’t have a third movie in me.
Sorry to hear about your Vallejo trouble. I know that Vallejo paints require a lot of thinning. I use them mostly for brush painting, but often find it better to use regular craft paint. Hope you find something better suited to your airbrushes!
Gary
Man, that stinks!. Nothing worse than paint issues to foul up ones mood. Hope that your next session is stress free. I’m not airbrushing expert, but I’ve had those same issues. I started to purchase their “Air” line of paints. Pre-thinned for you.
I know I have some bottles that are not “Air” but the paints I’ve been using for this build are included in Luftwaffe boxed sets they market. These are “Air”.
The frustrating thing is that I’ve used these paint sets over many builds, and I have never had any problem with them. I got my first airbrush when I returned to the hobby in the 1990s, a cheap single action Testors airbrush. I moved up to the Testors Aztek brush with their weird tips and used that for probably a decade before I discovered Badger’s Universal 360 brush. There was a Paasche in there somewhere that I never really liked, and then I came across the Iwata, which I have been using for 14 years now. All that to say, I’m certainly not an amateur at using an airbrush.
I didn’t always need to thin the paint I was using, or when I did, it was sparingly thinned. Historically, I primarily sprayed Model Master (enamels and acryl), with occasional Tamiya. But with my recent Hellcat build, it was as if a switch flipped over, and now all of a sudden, I can’t operate this thing. Frustrating.
Pulled out my stash of Model Master paints. Oh, they are older than I thought. I was able to stir them, but the colors didn’t look right. I opted to not spray any of that through my airbrush. Instead, I went back to the Vallejo. I ended up thinning it to a 10%-90% ratio (roughly) of paint to Vallejo airbrush thinner.
This was at least successful in allowing me to redo the fuselage to a satisfactory level. But even toward the end of the painting session, I was getting a lot of splattering out of the paint cup when I pulled the trigger back initially. I even pulled out a Vallejo paint worm, which indicated how badly this stuff coagulates.
I will start masking for the RLM70 (schwarzgrun) to finish out the splinter scheme, but I think I’ll thin it even more, maybe 95%-5%, and use the paint cup cap to limit that dadgummed splattering.
I’m getting there. I didn’t go 95%-5%, but rather 90% thinner, 4% flow improver, and 6% paint, and this worked mostly well. I was able to get all of the colors painted*.
Aggieman - I sympathize with your Vallejo problems. When Testor’s ceased ModelMaster enamel production I decided to switch to Acrylics. Like you, I bought a bunch of paint sets. Never could get them to work. Finally dumped the lot in the trash.
I switched to Mission Models acrylics, initially buying them from Model Paint Solutions, later from my LHS in St Charles Mo. Once you learn how use MisMod acrylics they work beautifully. Thin coats, hard finish and the colors seem to be accurate.
MPS website has a bunch of “how to” recommendations on the site. Much more specific than MisMod’s FAQ web page.
Good luck and I am enjoying your Ju 88 build.
@Aggieman sorry to hear about your issues with Vallejo paints. I use them with varying degrees of success. In addition to Vallejo, I use Tamiya and Mission Model paints. Mission Model would be my current favorite if I could get all the colors I need.
I have to agree with the last two post on the Mission Models Paint. I would look into those. I painted some rc foam jets with them. Worked out great. They are very tough.
I have Mission Models paints and their thinner in my supplies, but I’ve never had good luck using them. I quit using them in my airbrush and just use them with a brush. I’ll give them another go. Perhaps thinning them more is what I needed to do.
@Aggieman what’s the air temperature when you’re painting? I seem to recall that you might paint in the garage and it gets super hot in there?
@dadoffour My workshop is in fact a third bay of my garage. No air conditioner out there. Just fans - a couple of ceiling fans and also a couple of floor fans. They basically just move hot air around. But I suppose this depends on how you define “super” hot. As a native Texan, I’m accustomed to the heat and humidity.
        I’m in the same boat. I have to airbrush out in my garage. The summertime in Kentucky can be brutally humid. I was having a lot of problems with water even after I cleaned out the water trap. I decided to go and get a dehumidifier for the garage. It was around 150 bucks.. if it’s humid outside, I turned the dehumidifier on 30 minutes before I start airbrushing. I’ve been able to get the humidity down to 45%.
         I rarely have any issues now.
@Cbowling Well that’s one of those things that when you see it, you can’t unsee it. Why I have never thought of that is beyond me, but I’ll look into getting a dehumidifier. I do have a water trap attached to my compressor line, never noticed any water buildup in it that seemed more than a normal state. But I can imagine that spraying conditions would be better if there was less humidity (and I tend to open the garage doors whenever I am out there, therefore allowing in more outside humid air but also allowing built-up heat to escape outside).
@Cbowling you got to my point first. I model in my basement which has a dehumidifier set up permanently. My basement temp varies between 62 and 68 year round. (that feels great in the summer but is HORRIBLE in the winter). If you look at the recommendations for most acrylic paints, they will want temps in the 60s to 70s and low humidity. I can pour Mission paints directly into my airbrush without thinning and paint with it and rarely have any issues. When I do have issues, it means that I need to tear my airbrush down and give it a deep clean. Once I do that, it works perfectly again. I may have to empty out my water trap a couple of times a month at most. I often forget about it because I have to do it so rarely. When I do empty it, it’s probably less than a tablespoon of water in it.