Incredible pit! Now if we could get an A-1 in 1/48th scale.
I love 1/32 scale WW2 aircraft and have one of these in the stash. For now I am building 1/72 and 1/48 with my son and really liking it!!
BUT
He has the yearning to try his hand at a 1/32nd kit.
I have a bunch of Hasegawa 1/32 Hellcats I picked uo years ago at a swap meet as well as a few Revell 1/32 History Maker ME-110’s I’ll have him experiment with those before I let him go near the expensive stuff
Build still coming along nicely. I am just about ready to add the camo. Been a long process to just get the seems filled and sanded the way I wanted. Went back and fourth adding Tamiya Fine Primer on three different occasions to get it to an acceptable level. My biggest problems were around some of the seems on the top of the plan and the bombay doors (altough the latter will mostly be hidden by the Dio base). But the biggest challenge of them all was aroound the nose and some of the lower glass. I couldn’t simply putty those areas in with white putty since then it would be seen as not matching the interior paint. Thus, I figured my water based Perfect Putty could be mixed with tamiya acrylics to “tone” it to match the interior cockpit. Worked pertty well. Thus all gaps around the clear plastic fuesalage were filled this way. Filler with gray color. Some is Mr Surfacer 500 too. We will see how it looks when I remove the masking tape.
I do have a question about dio bases. What are people using to seal off the material used to build up the groundwork. Say I want to use balsa foam, styrofoam or foam coare to build up a slight hill/ditch around the aircraft parking area. What do you spray or spread across this to seal it from water based paints. I was even thinking of adding a small drainage ditch with clear acrylic as water. Any thoughts?
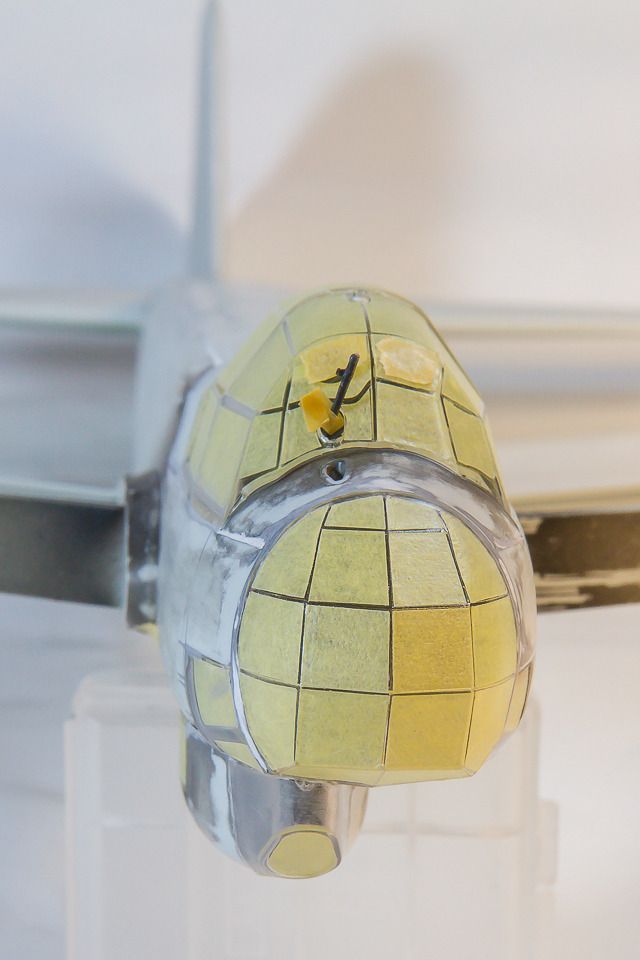
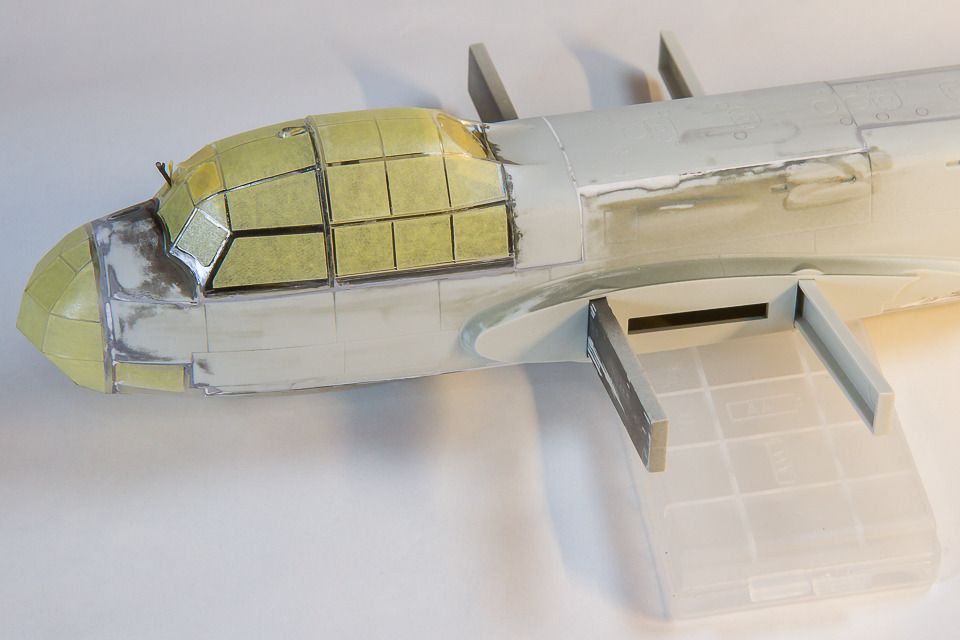
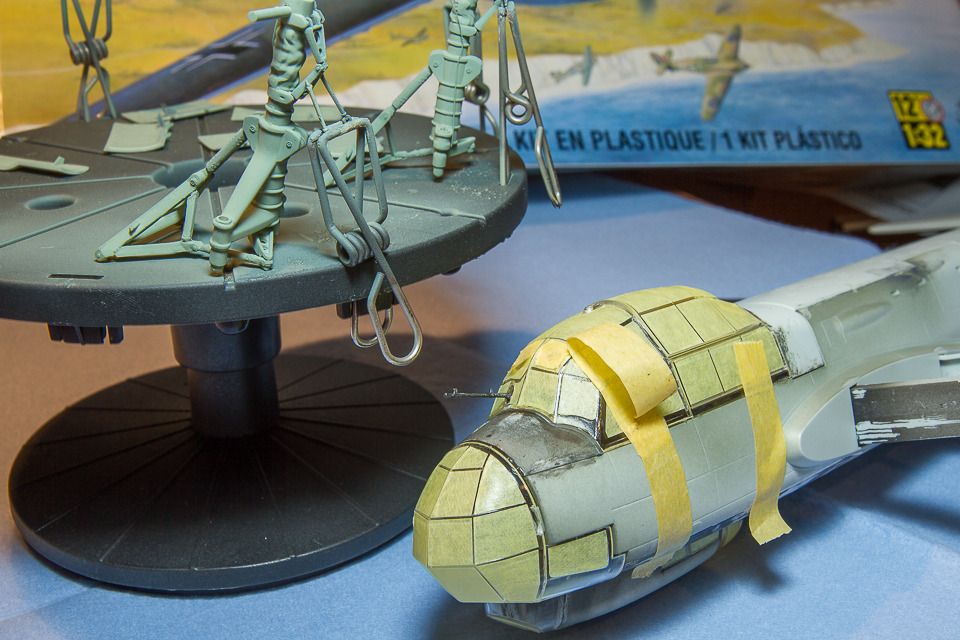
Some nice progress, she is looking good.
In regards to your base question. Are you planning on adding anything on top of the foam or what ever you decide to use or just use that as your ground work.
What a great idea. I’ll have to give that a try. And, the kit is coming along nicely. Looking forward to the paint.
BK
del.
Sorry was a double post. Used my cell phone to post this while wathching my Panthers pull off another win!
Thanks. I am adding several water based materials such as celluclay, acrylic paint and may have a drainage ditch using clear acrylic or something else to simulate water. I had read you need to seal your buildup materials such as foam core, Styrofoam, Balsa core, etc. from water based materials.
yes was very happy how easily the Tamiya paint mixed with the perfect putty. Added just a touch of water too. Those were some significant gaps i had to fill. Took a few layers too. Hopefully it will look very close when I pull off the masking tape.
I normally coat my surface with paper maches and then celluclay. I have never had issues with the water in the paper mache effecting the styrofoam.
Man, oh man, oh man, Panzer
Looks like you opened the box and poured a brand new, king size can of whoopass inside. What a fine job you’re making of this, I’ll be watching your progress with great interest.
And about your airbrush, if the 200 is good enough for Aaron Skinner, (FSM Editor,) it’s good enough for any of us. My 200 is the most often used in my inventory, love that old workhorse, tough as a hammer.
Thank you for the post and photos.
Patrick
Okay, maybe answering my own question but wanted to post some of my research here on what I am looking at doing to see if you guys have any thoughts or experience with any of these methods to getting some realistic tarmac down in 1/32 scale.
Youtube has several vids on some different products. Besides using sandpaper and painting it like we discussed above, another good option maybe to use cork tiles, a plaster of paris product like hydracal, polly filler, a product by Woodland Scenes called Smooth It, and even Tamiya has a product called diorama texture paint (http://www.tamiya.com/english/products/87116lightgray/index.htm).
Obviously all of these options would need to be painted/weathered to pull it off convincingly. I don’t think 1/32 scale would work for the cork tiles so I have pretty much eliminated that one. The other products similar to plaster of paris that you mix with water and smooth over in place seem to have a realistic edge in that you could scribe lines in it while still wet (or dry) to simulate expansion gaps and cracks/potholes in the concrete. Plus the fact that it is so similar to the real thing should work nice. There are several how to vids that the model railroad guys have out there showing these products.
The Tamiya Texture Paint looks promising too. However, I am not sure how easy it is to simulate cracks, joints etc. and also have never heard of anyone using it. Any thoughts? I will continue with my research and post back.
Those German greenhouses are fun aren’t they? Looking good. Regarding bases, here’s how I do it.
http://cs.finescale.com/fsm/modeling_subjects/f/2/t/165668.aspx
oops, update pics didn’t upload. Will update soon
Wow, I feel it has been forever since I updated my build. I am getting very close to the end now and will be starting the diorama scene soon.
So here is an update on the JU88. Last I left off I was discussing some of the areas I needed to add a bit of filler, especially around the clear nose area due to all that PE! This has really been a great kit so I was not to concerned about having to add some putty here and there. But due to the design of the plane itself, sanding the putty will remove some of those adjacent recess lines. For areas along the fuselage and wings, I initially used some plastic putty and/or Mr. Surfacer 500; depending on how deep or wide they were. The Mr. Surfacer 500 worked best for small gaps. However, the biggest problems were areas where I needed to correct the gaps but still leave a small line for the recess panels. After trying to use Perfect Putty, Squadron Green, Mr. Surfacer etc., these gaps could not be carved out using my scriber without digging in and making unrealistic jagged edges. So I was back to square one on several of them (the previous pics were taken before I tried to rescribe them). So after doing a bit of research on filling gaps that needed to be rescribed, I picked up some gap filling slo Zap a Gap CA glue and some microballons. I added the CA glue to the gap then sprinkled the microballons on top of it. If you do this be warned as it makes a mess. I used paper underneath to capture the microballons that fell off the model. Some of the larger/deeper gaps took a few layers using this approach. It’s bit of a trial and error on how much microballons to add (the more you get in there the easier it is to rescribe). But the CA glue sets very quickly so you will know pretty fast if you need more or not.
I basically filled all my gaps that doubled as panel lines using this method and then sanded and rescribed them with my Trumpeter Scriber. For long straight panel lines, I lined them with Dymo Tape to keep the lines straight. I would use a course sanding stick initially to tackle any large areas the CA/microballons stuck out from the surface. But for all medium to fine sanding, I switched to using the Tamiya Sanding Sponge sheets of 400, 600, 1000 and 1500. These were great at conforming to the rounded corners of the wings and fuselage without creating flat spots. I also found that they hold up really well compared to some of the sanding sticks.
More updates and pics to come.
Now for an update on base painting.
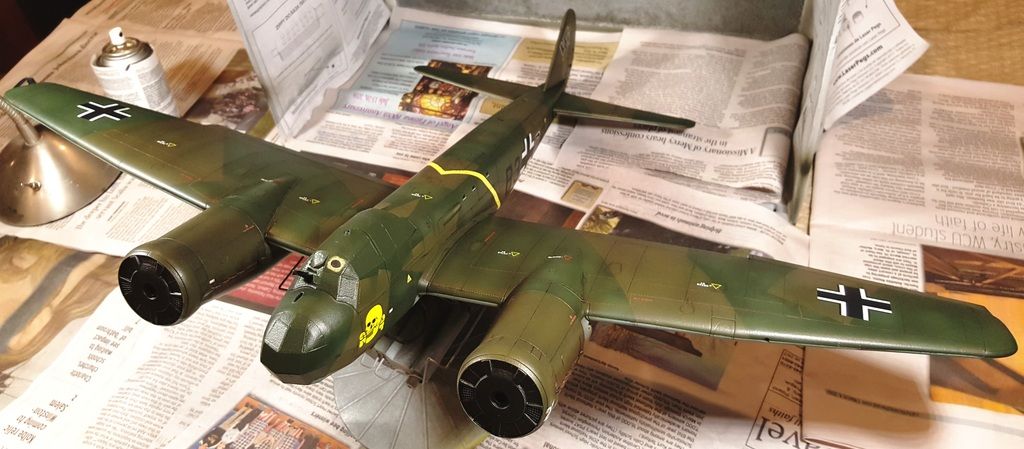
After using Tamiya Fine Coat Primer from a rattle can I used both the Tamiya 1500 sanding sponges and the Micro Mesh pads to do a final sanding/polishing. Then I did some pre-shading along the panel lines and recess areas using Tamiya Black and my old venerable Badger 200 I had bought back in the 80s! I found this rather difficult to use for fine lines and control so for the three color camo scheme I decided to invest in an Infinity Harder & Steenback airbrush with 0.4 mm nozzle to spray my Tamiya paint base paints. Although my Badger probably needed a rebuild; wow what a difference. I am looking forward to more airbrush work just to practice all the new ways of airbrushing that this Infinity brings (never used a double action before). I have to admit, it took a little trial and error to get the camo pattern down at the coverage I wanted. Especially getting use to the lower PSI settings that I could now use. I sprayed most of the model around 10 to 15 PSI, which was a big change from how I used an air brush in the past. I even tried my hand at a little post shading using lighter shades of the green colors within each camo pattern.
I also picked up a Master Airbrush Portable Spray Booth. However, in between coats and paint schemes I was finding a bit more dust and debris than I was comfortable with, which was probably due to fact I was attempting this in my garage. Luckily a little fine sanding/polishing using the Micro Mesh pads and even the Tamiya 1500 sanding sponge were usually enough to correct the problems. In the end I learned that simply cleaning around my paint booth; including turning on the fan about 10 mins early and putting down wet newspaper around the surface where the plane was to sit made a huge difference. I barely got any debris in the finish after trying this. I also found that the final clear coats covered those areas I polished with no signs of scouring – shew…
I wanted to add a gloss clear coat in preparation for the decals and weathering after the base colors dried. However, I did run into a bit of a problem at this point. I initially wanted to use an acrylic gloss so I could weather with enamels without any fear of paint reaction. I decided to try the MM Acrylic Gloss in my air brush. Looking back, I think I sprayed it at too high a pressure and from too far away. I think that caused it to dry prior to hitting the surface and made the coating a little rough. That would explain why some of it would rub off just by handling the model. Next time I will just spray it at a low pressure close to the model like I did the base Tamiya colors. I was pretty happy with those base paints and feel I can duplicate that technique with their clear coat product.
Thus, after doing a bit of sanding again using the MM pads to smooth the rough surface I switched to an old standby, the Model Master Lacquer based Glosscoat in a rattle can. I will say this, yes you have no control over it but it did a great job of covering my prior imperfections…. as at one point I thought I had actually ruined the model with my poor covering of the acrylic clear.
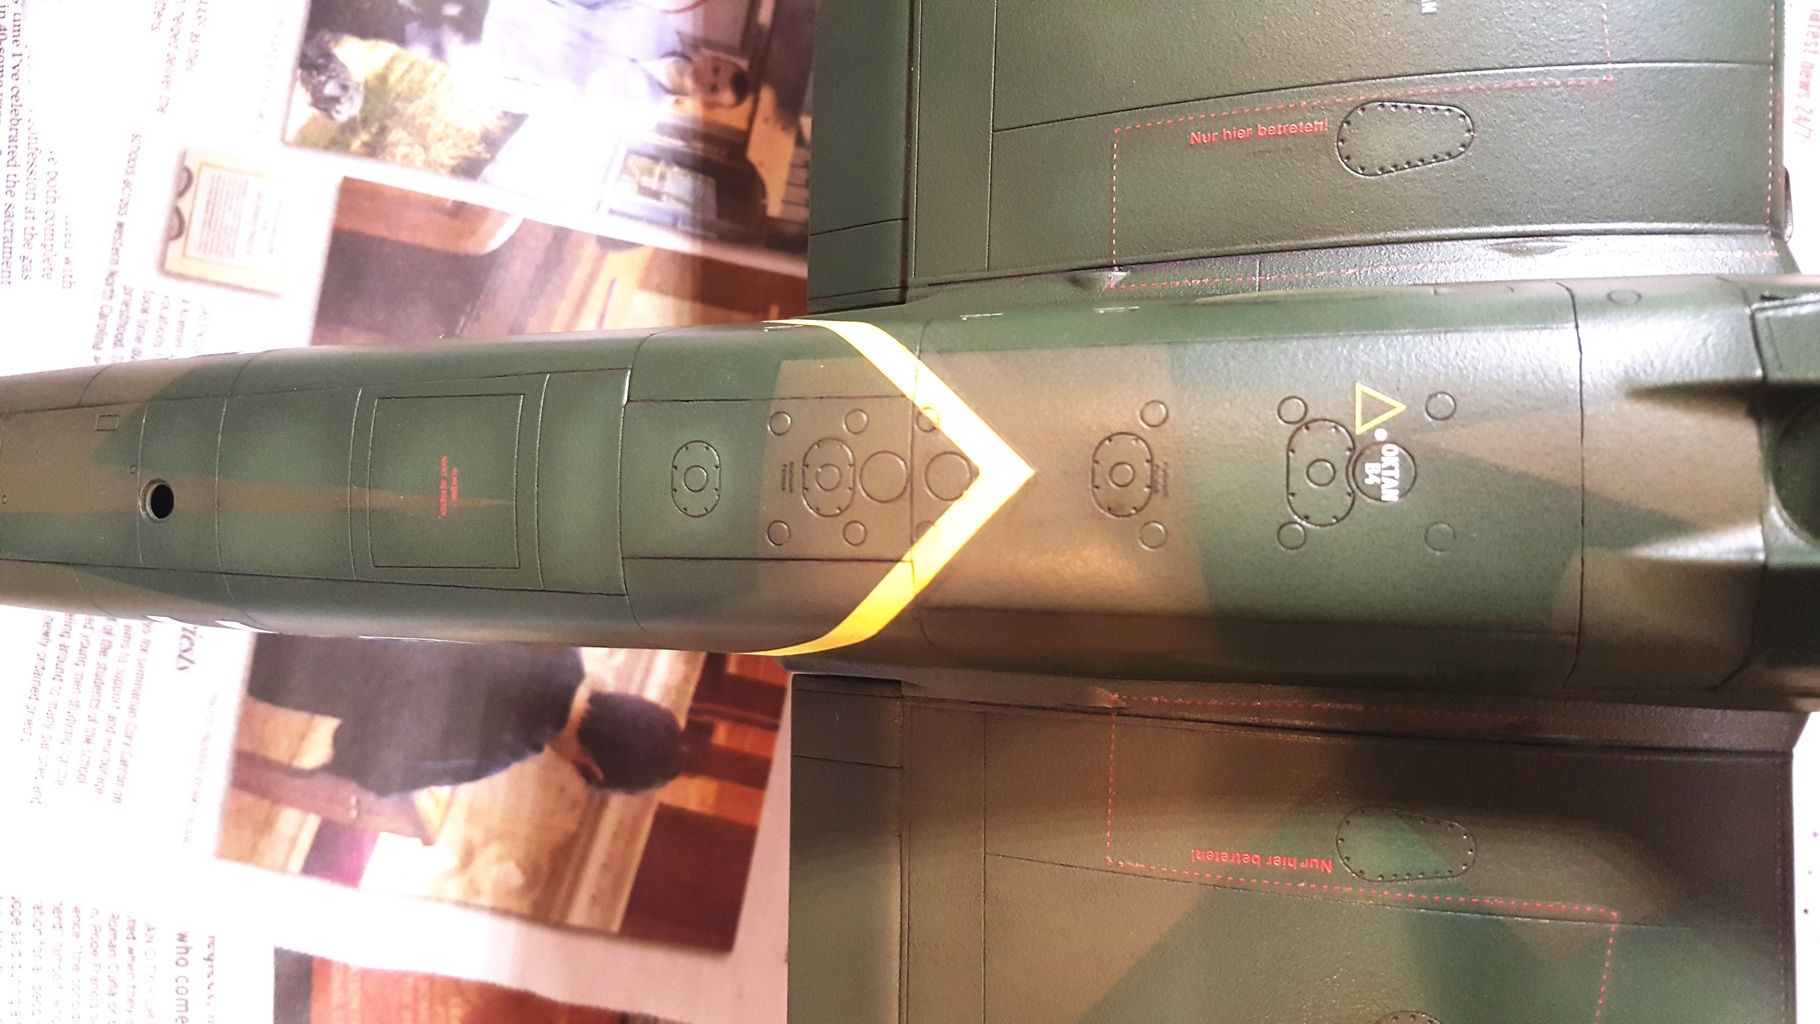
Most decals went on without to many problems using Microsoft Set and Sol. I did repaint the long V-shaped yellow marking that cuts thru the center of the fueslage using my airbrush and Tamiya Tape due to problems with final placement of the decal. I also wanted to give it a slightly faded look so mixed some white with yellow for the final top coat.
After the decals had fully dried and knowing I still would be safer with an acrylic based clear coat in preparation for an enamel based wash, I decided to try my hand at using Pledge Floor Care Multi-Surface Finish. . This time I made sure to spray it at a much lower PSI than I used with the MM acrylic gloss at around 10-15 PSI. This worked great and was very easy to control. I did 2-3 light coats. Although it still seemed super thin after it dried. I weathered the plane first using AMMO MIG DARK BROWN WASH FOR GREEN VEHICLES and then did several pin washes using various dark brown and black Windsor and Newton oil paints thinned with mineral spirits. I found that I needed to darken even more of what I had done with Mig’s dark brown wash for areas of the camo that were dark green to better bring out the recess lines, etc.
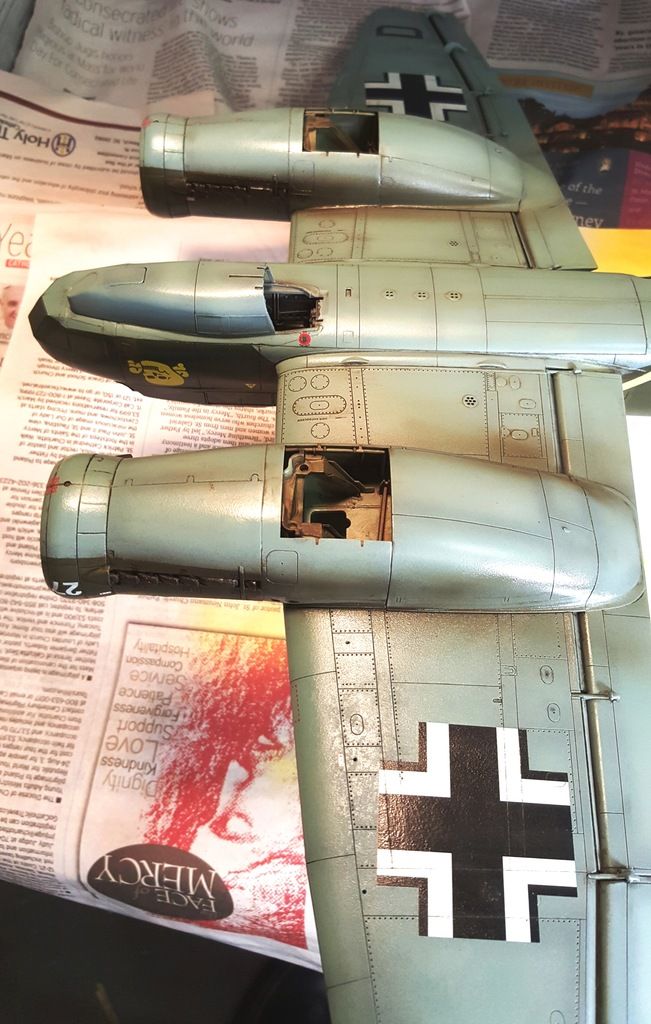
The next day I decided to use my Airbrush again for the exhaust stains using a very thin mix of Tamiya Smoke and Dark Brown along the exhaust and back underneath the wings and a little on top of the wings. I then sealed the model using my other old standby, Testors dullcote in a rattle can. I then did several pin washes for fuel stains, oil streaks, stains, etc. by sweeping back with cotton swabs in direction of wind. I also did some gravity runs along panels near the wheel wells. Below are some pics before I did the detailed pin wash steps. I will try to take more pics soon as it looks a bit “more used” than these show.
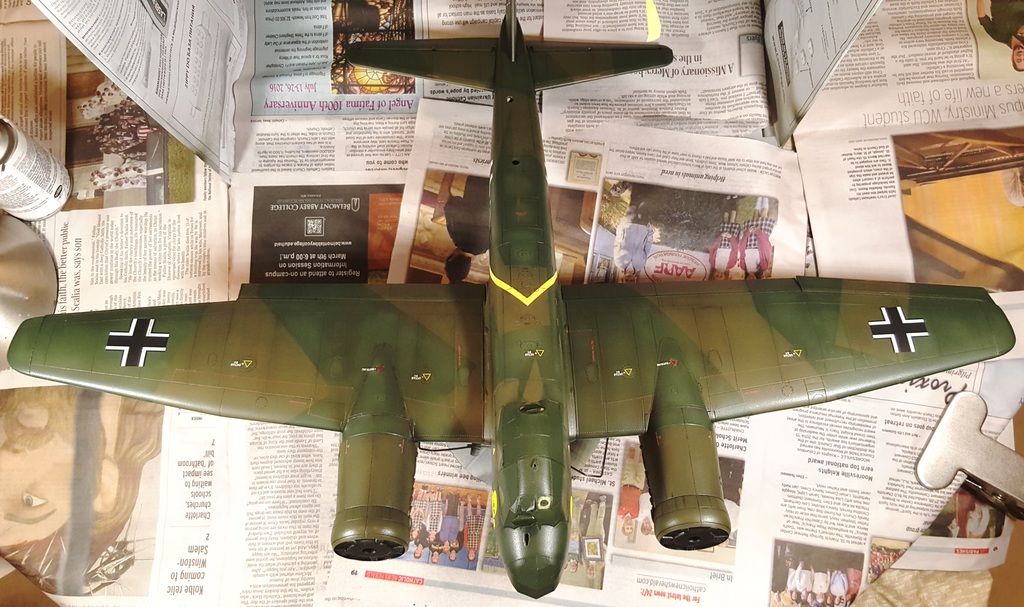
Details were painted mostly using Tamiya paints but for the tires I used Model Master enamels using flat black mixed with a little white. The props were carefully masked (this took two attempts) to get the Tamiya yellow correct on the cones. The metal areas of the landing gear were first painted black but then heavily drybrushed using AK Interactive’s True Metal Wax Aluminium. I really liked this waxy paint for its metallic look.
I used Master Models machine brass turned barrels and etched sights (MASAM32013) for the two upper guns (only comes in a pack of two so decided the lower gun barrel I would keep stock). Because I wanted to avoid thick paint ruining the detail in these gems thru hand painting, I used my air brush to base paint them Tamiya Gun Metal (pics of them later). I did have an extra gun sight left over for the stock machine gun. I will later drybrush them using a metallic color and try some newly purchased Mig Pigment too.
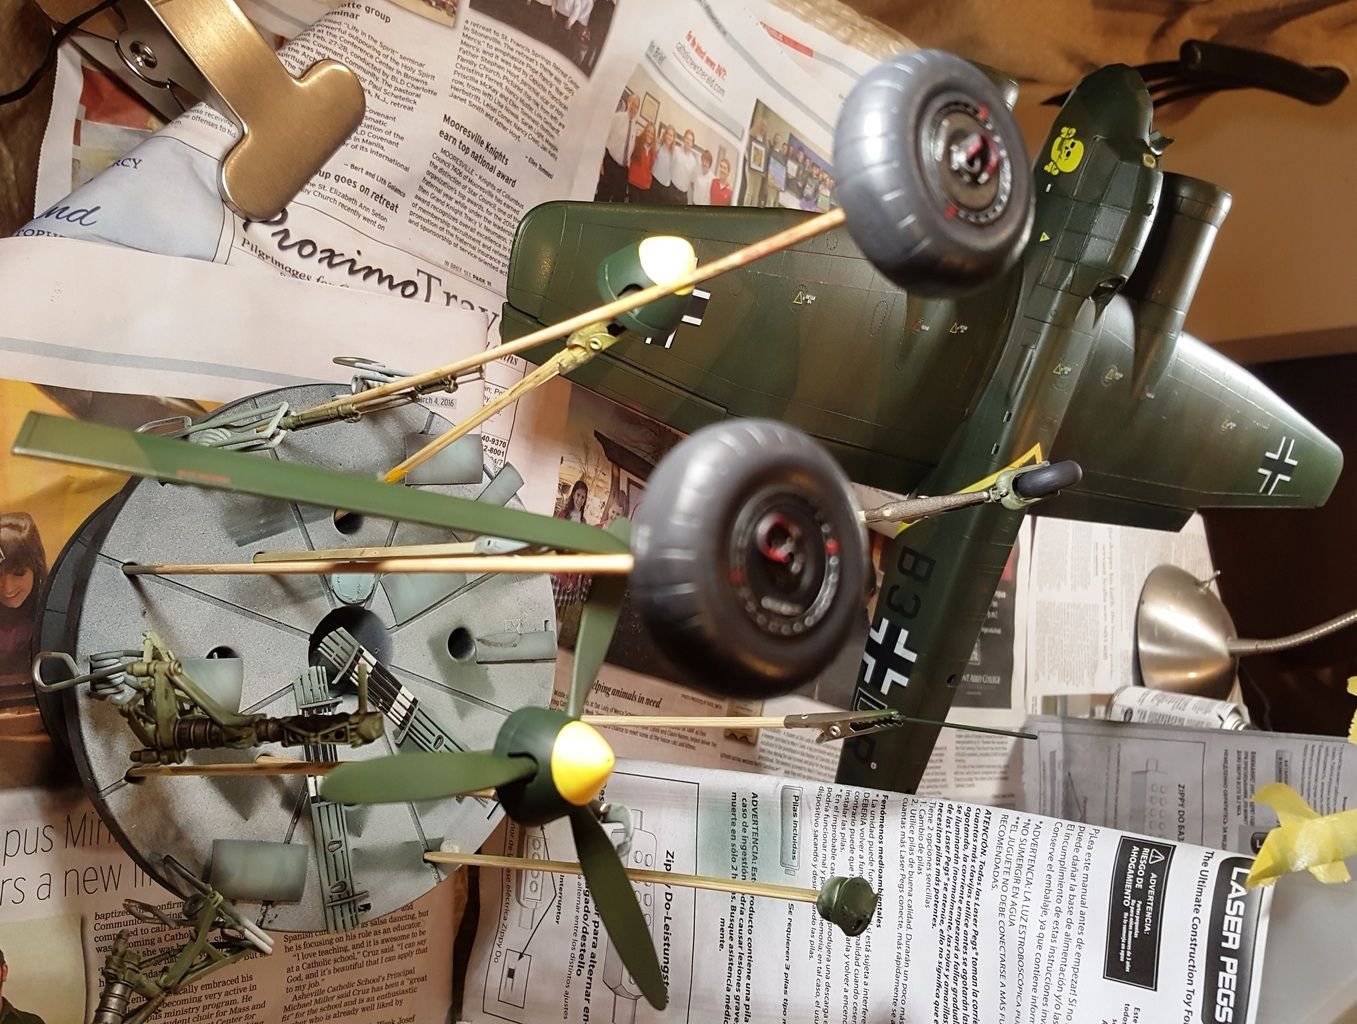
Next step will be to pull off the canopy masks and hope that all those layers of paint come off in a straight line. I will do some chipped paint using a metallic color and some pastel weathering after I mount the landing gear, antenna and guns.
I did take a break from the JU88 for a bit to start to work on a couple of secondary/support vehicles that I plan on using in the dio. As many of you know, not much is available accessory wise in 1/32 scale. But I did find two resin Luftwaffe kits that I thought would work nicely. One is a drum cart and the other an oil cart. Both are my first attempt at full resin kits. The drum cart is built by Verlinden and is a pretty straight forward build. It includes 4 drums although one was damaged I guess in shipping and not really usable. It takes much longer to sand off all the resin blocks and other flash than actually putting it together. See durm cart and drums below on the left below prior to primer.
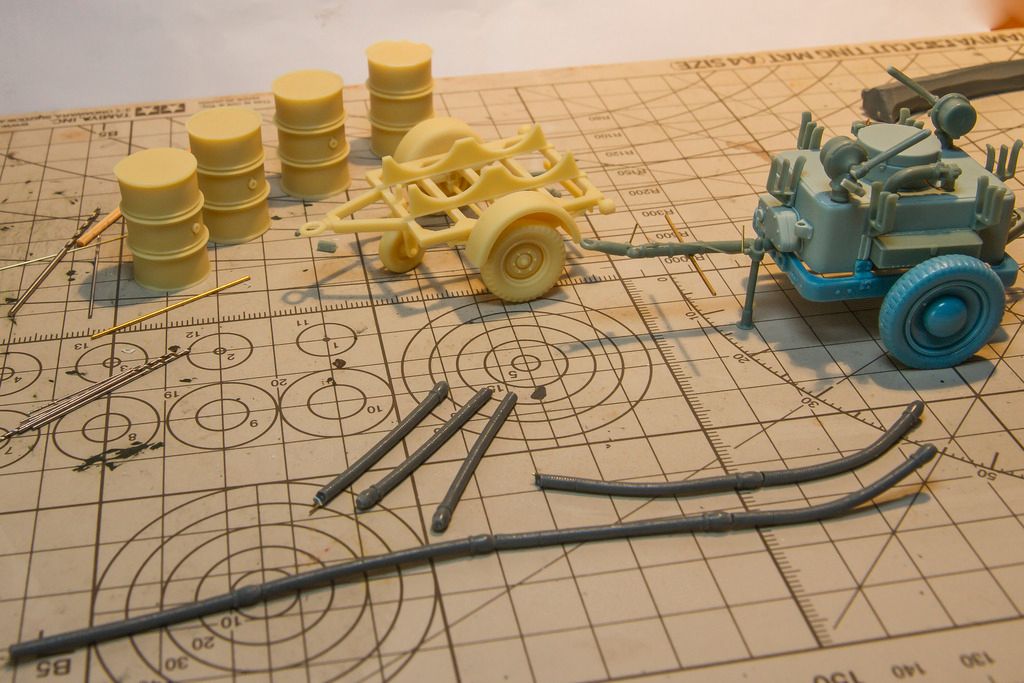
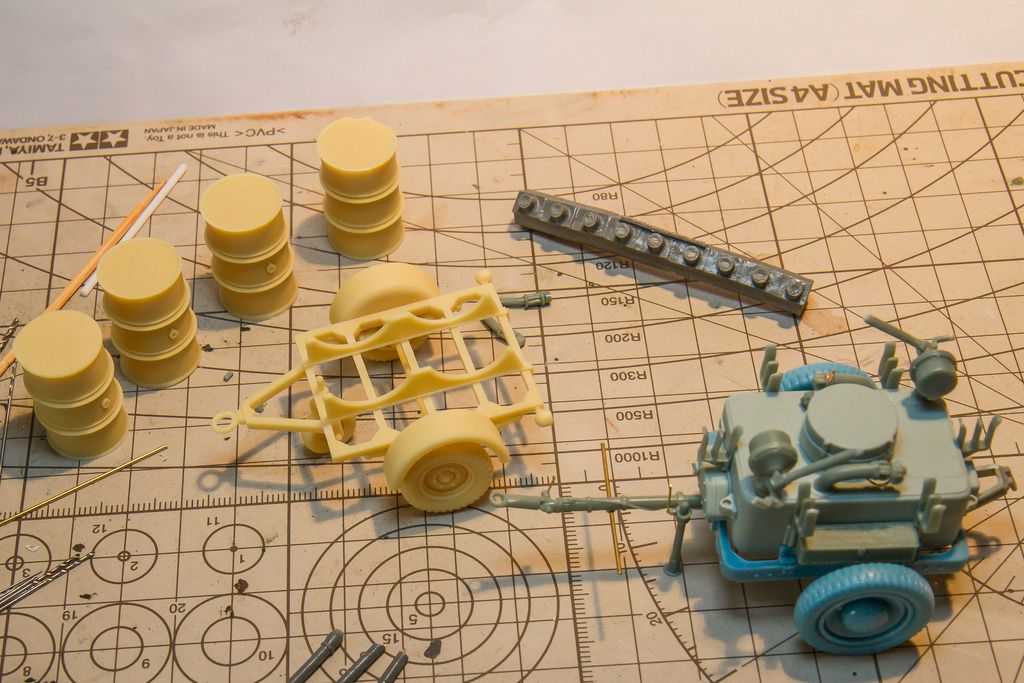
I could have also purchased the oil cart made by Verlinden. However, while researching these kits and what to use, I came across a small company from France called Signifier that also makes a 1/32nd scale version of the oil cart. I liked this kit a lot better than the pics I saw of the Verlinden version since it seemed to have more detail in the parts and the hose is so much more realistic. For the latter, it actually has a metal/brass rod through the center so you can bend it to shape.
Like the Verlinden, this kit took longer to clean up the parts than actual glueing. But that extra work in part preparation really pays off for a nice build. See this review of it for more info: http://aeroscale.kitmaker.net/modules.php?op=modload&name=Reviews&file=index&req=showcontent&id=1282
More detailed pics of the oil cart below. Note the several brass parts that add a nice touch.
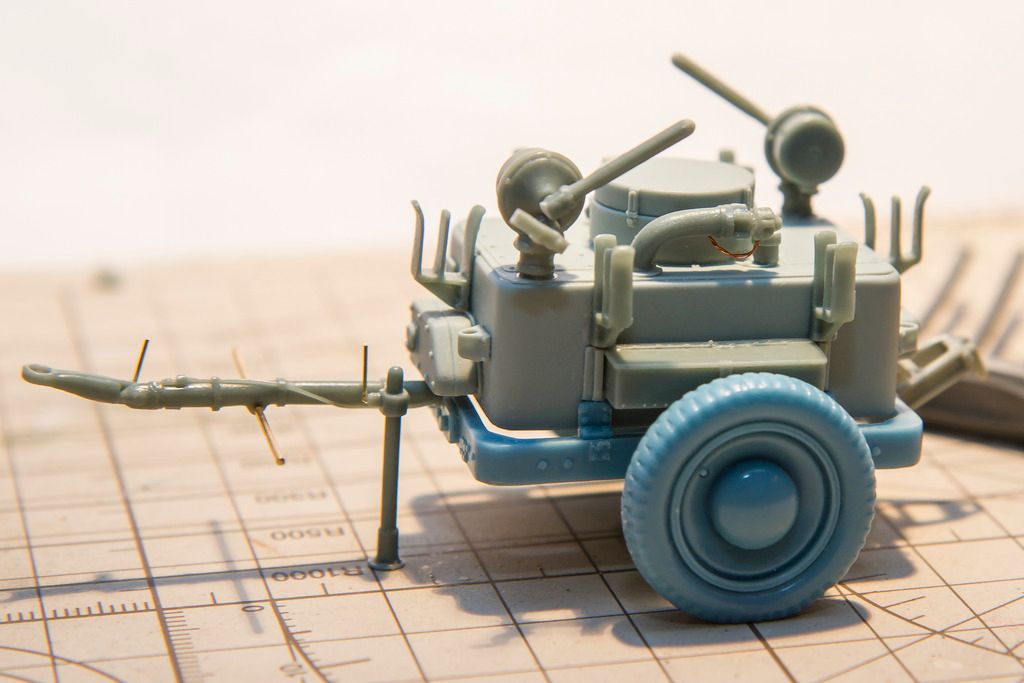
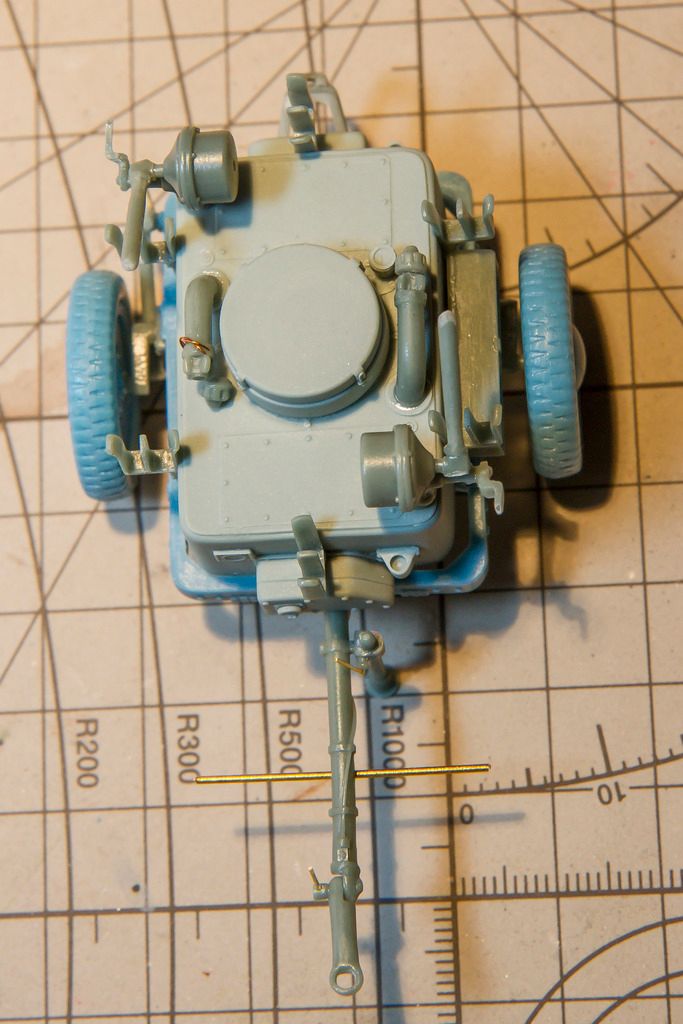
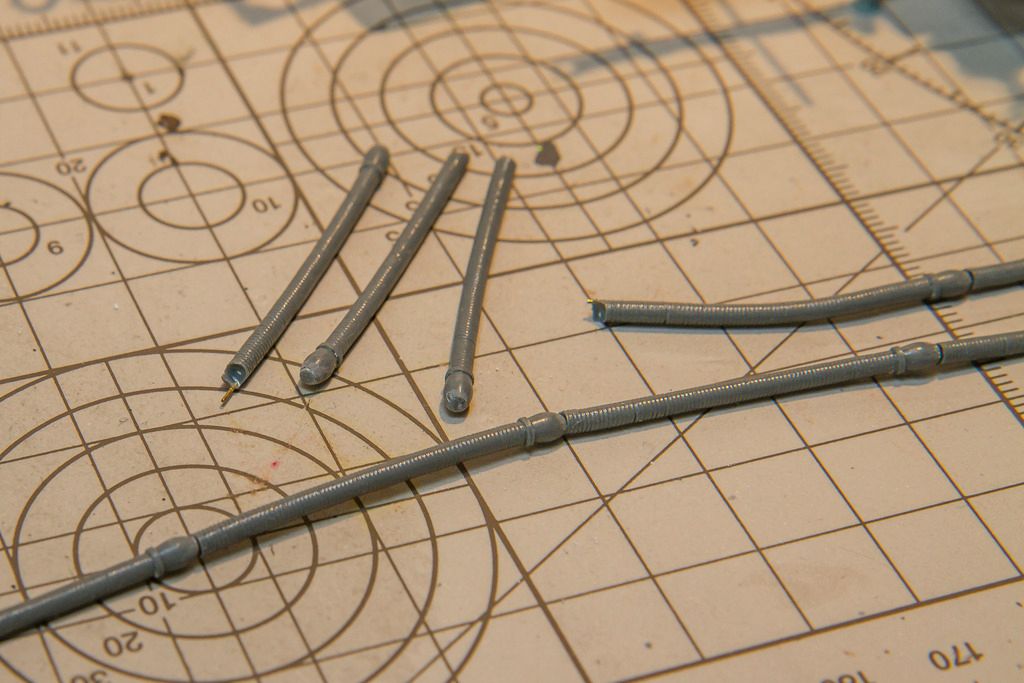
Below is a detailed shot of the flexible hose prior to any paint. I did use a pin vise to drill out small holes to accept the metal rod. I may need to add a bit of putty in between the hose sections and the jury is still out on how it will flex with paint on it. I may decide to set it in position and paint later. Will post an update about this.
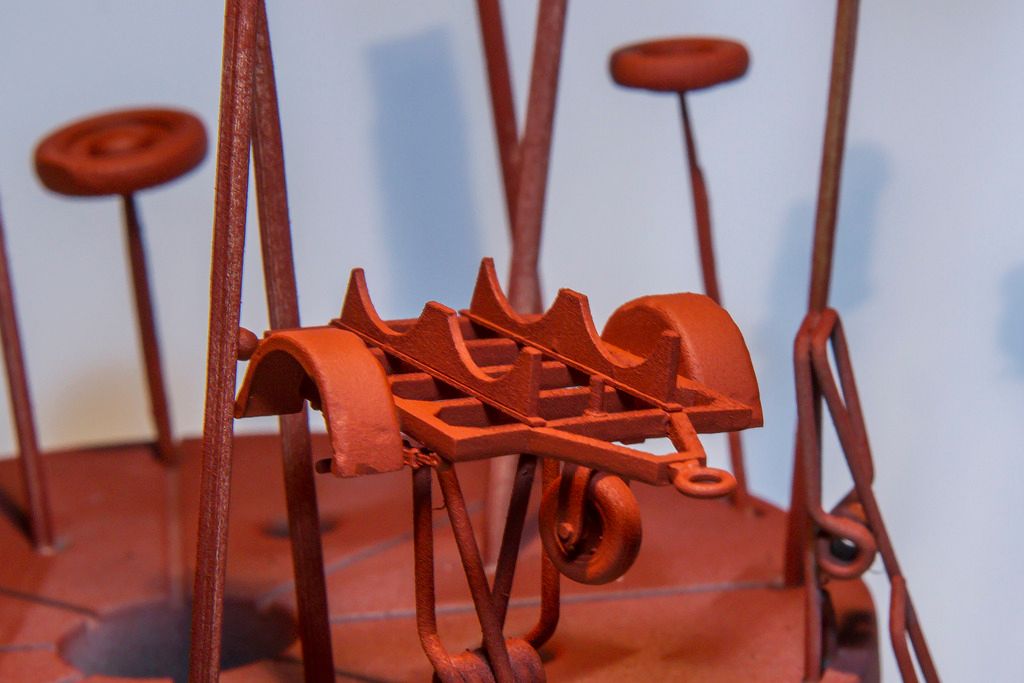
Below are some pics I took last night after adding primer to the oil cart and drum cart. For the first time I wanted to try one of the “newer” techniques and use some paint chipping fluid from Mig to simulate a very worn vehicle with signs of rust. As a first step, I added a bit of damage to the drum cart’s fenders using my dremel tool to simulate dents/dings. For the primer I decided to save a step and just purchase a red brown/rust colored primer for the initial coat prior to adding the chipping fluid and base colors. Therefore, I purchased the only rust colored primer I could find at an autoparts store. It surprisingly went on well for a rattle can. Next I plan on spraying darker brown shades using my air brush in the recess areas and to give it some variation in the rust color. It will probably need a bit of sanding too to smooth out some rough spots in the primer and dremel work…
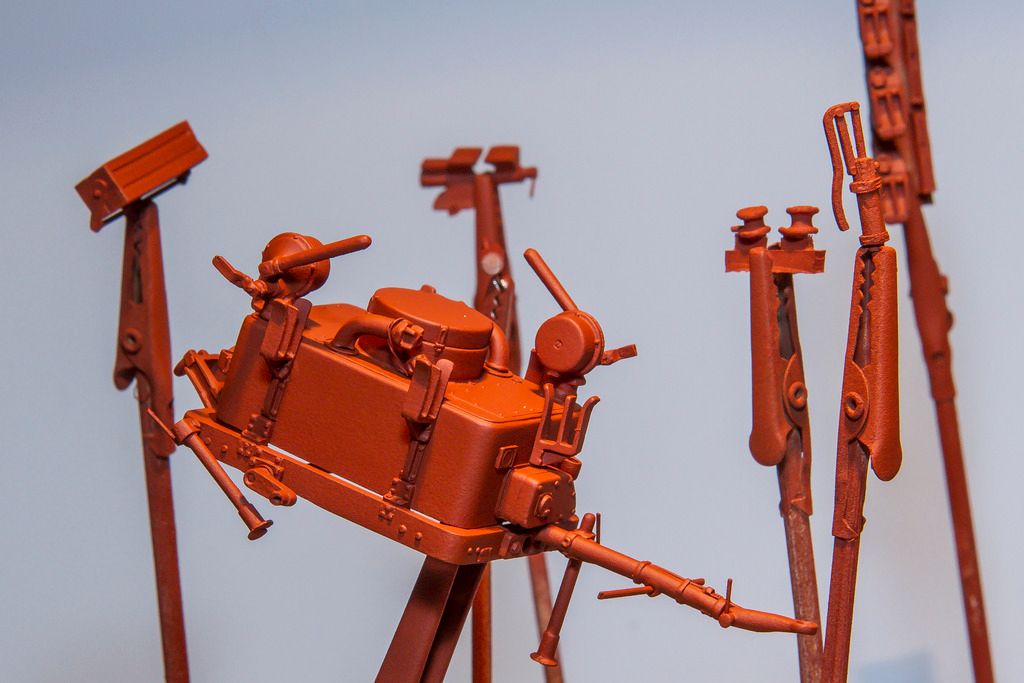
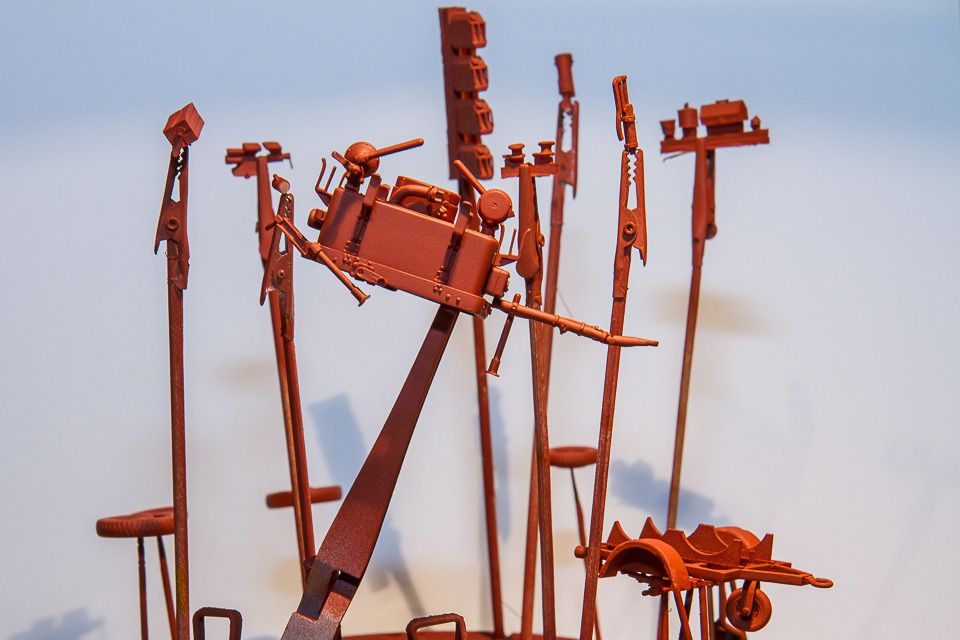
The other parts on the Tamiya Paint stand are some accessories from Verlinden’s Luftwaffe repair section kit. See here:
https://www.verlindenonline.com/2774-luftwaffe-repair-section1-32-scale.html
The kit includes jerry cans, buckets, tools, more drums, table, and some engine parts. I may or may not use the figures in the kit as I also purchased some from another manufacture. My goal will be to have 2 to 3 figures in the dio that appear to be discussing some badly needed repairs!
Looking really really good panzer.
I’ve got the PROmodeler JU-52 coming up next and your cockpit work is going to keep me shooting high.
I was wondering how this was coming…obviously very well. Looking fantastic…