1/232 Encore USS Olympia Build Log

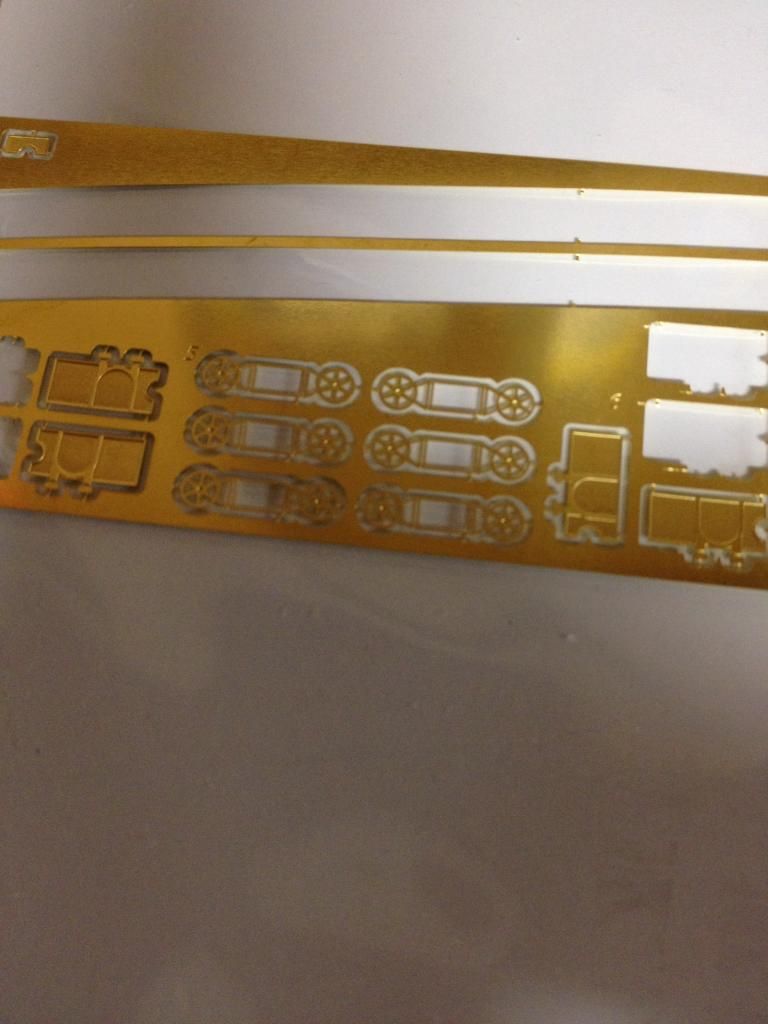
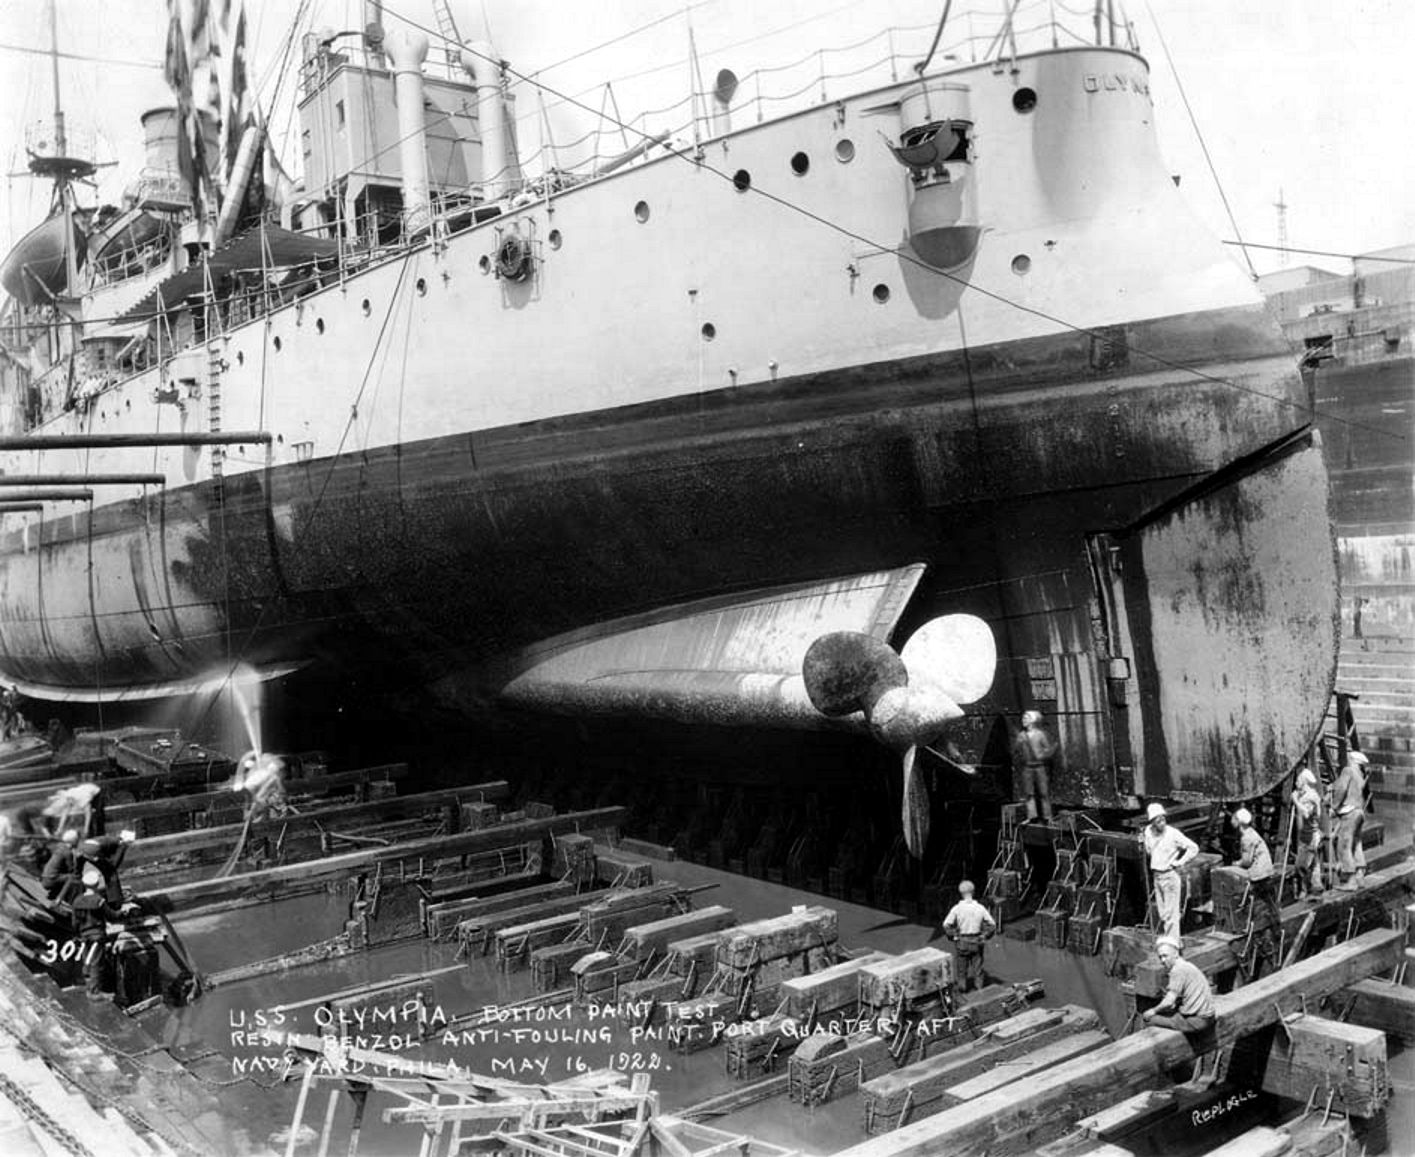
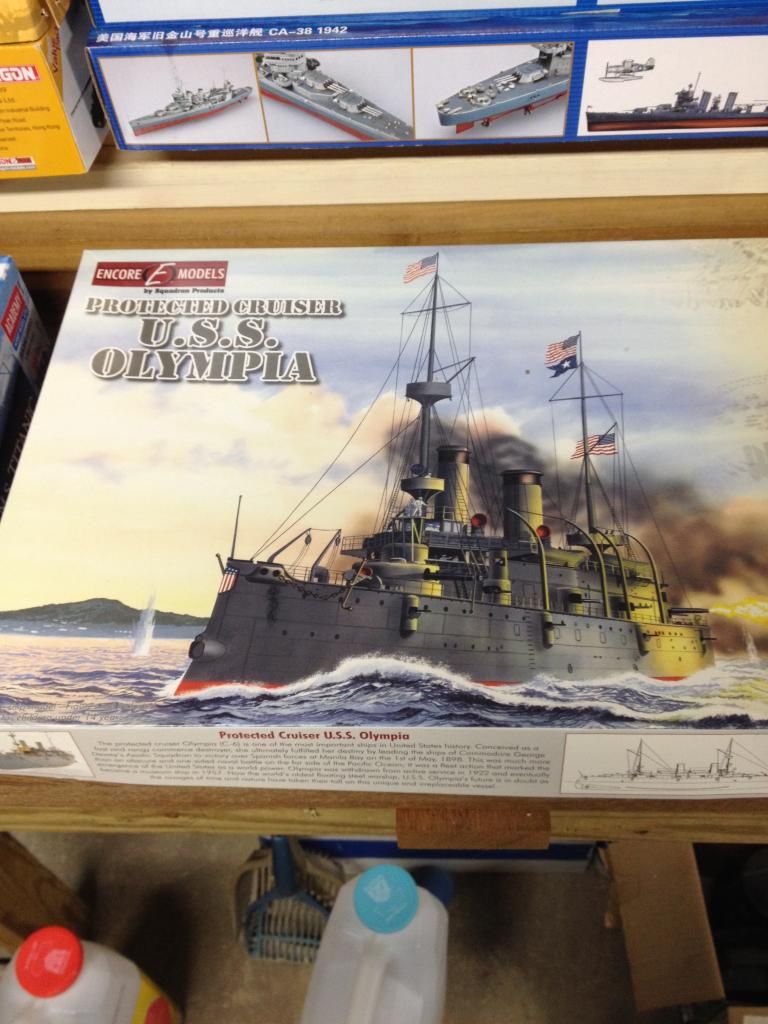
So this last Christmas I was putting together a list of models that friends and relations could pick from if they wanted to add to my stash, and I found myself drawn to pre-WWII stuff. Having visited the USS Olympia in Philly last year, the Encore was a must-have; all the better that the wood decks, PE and other add-ons were included.

There’s a bunch of reviews of the web and they are all generally favorable, but I have to say that it is pretty primitive after the Trumpeter and Dragon stuff I’ve been building since coming back to the hobby after 25 years away. This is more like what remember back in the day. That having been said, it is going together nicely, and I’m enjoying it.

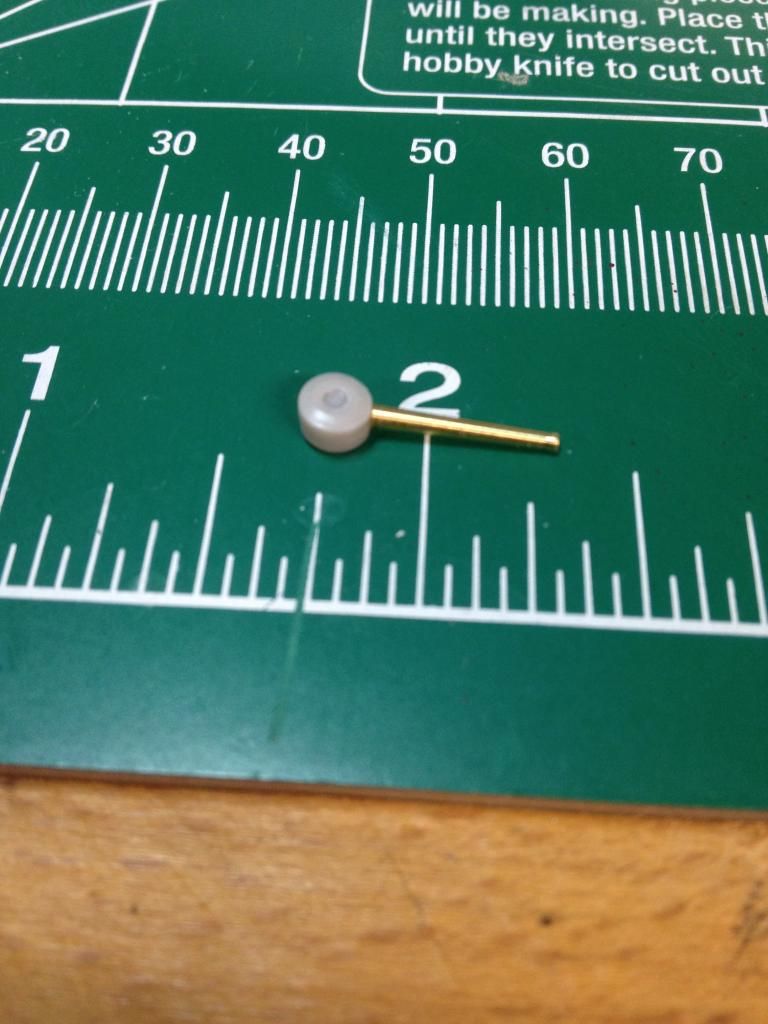
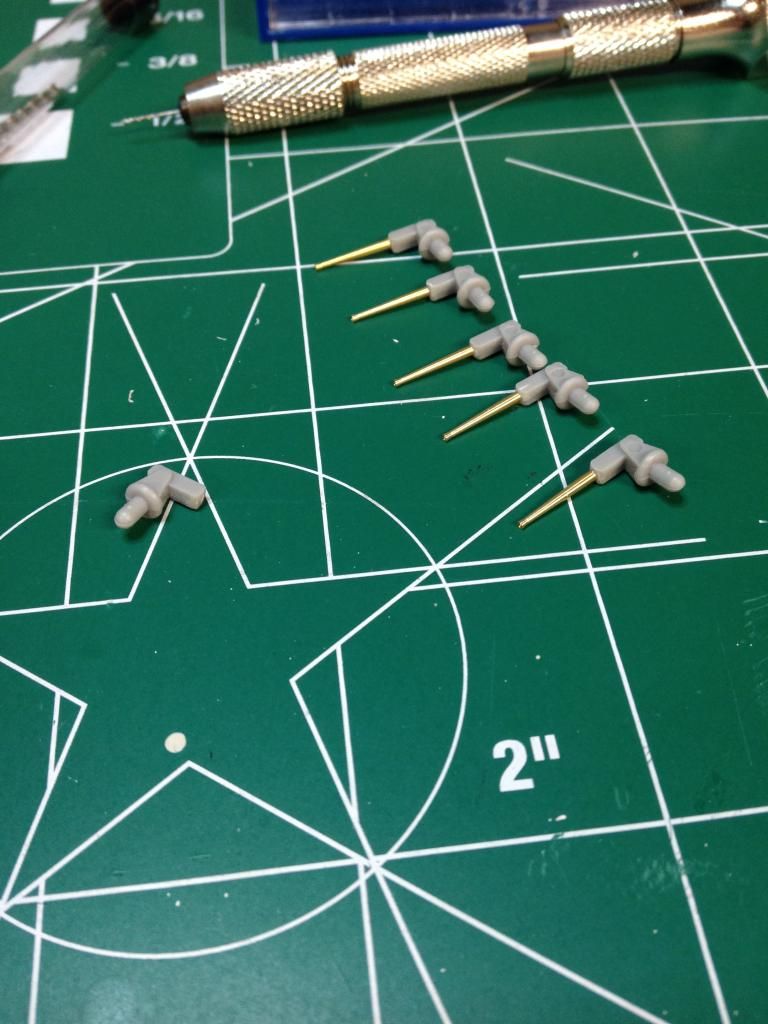
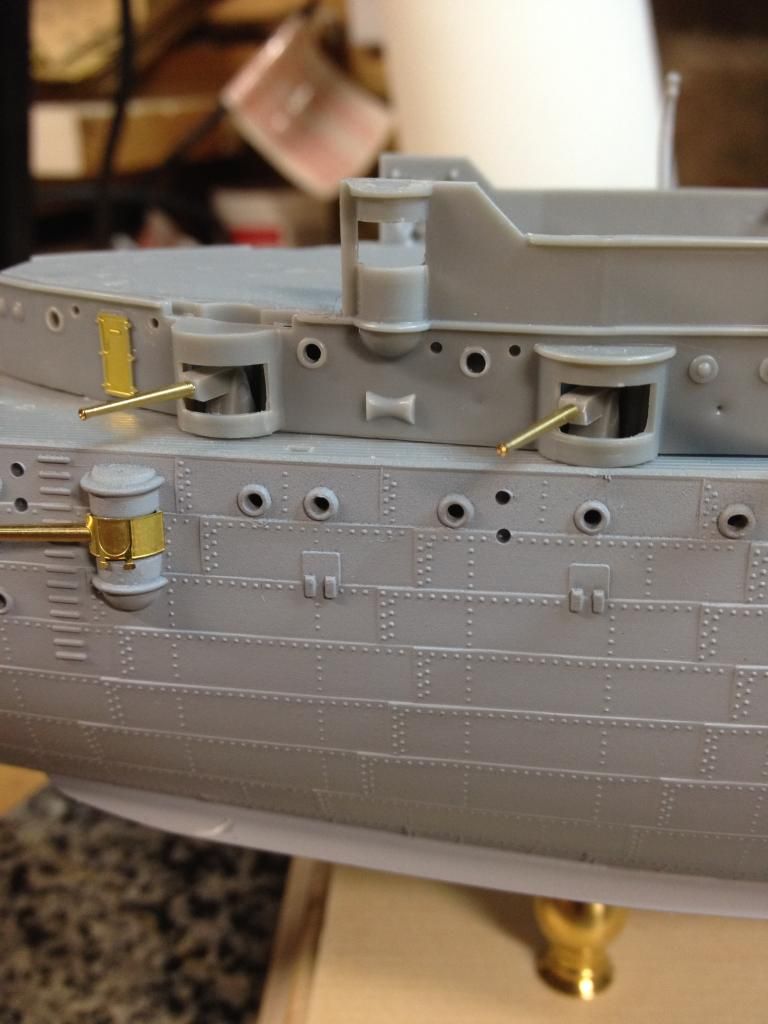
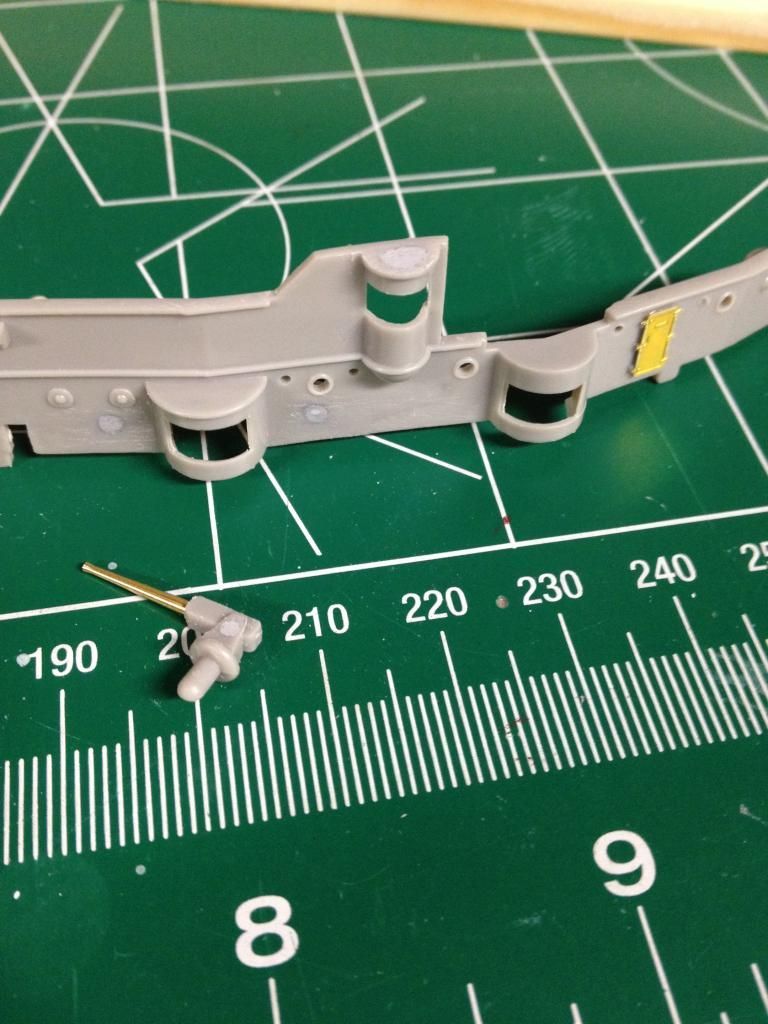
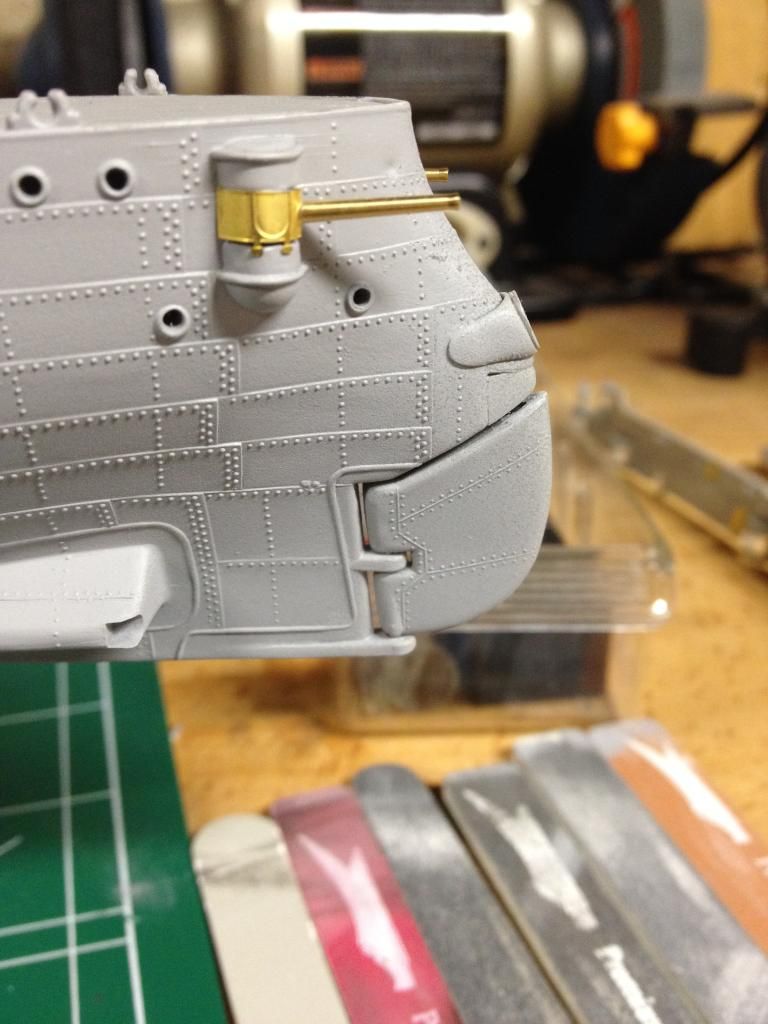
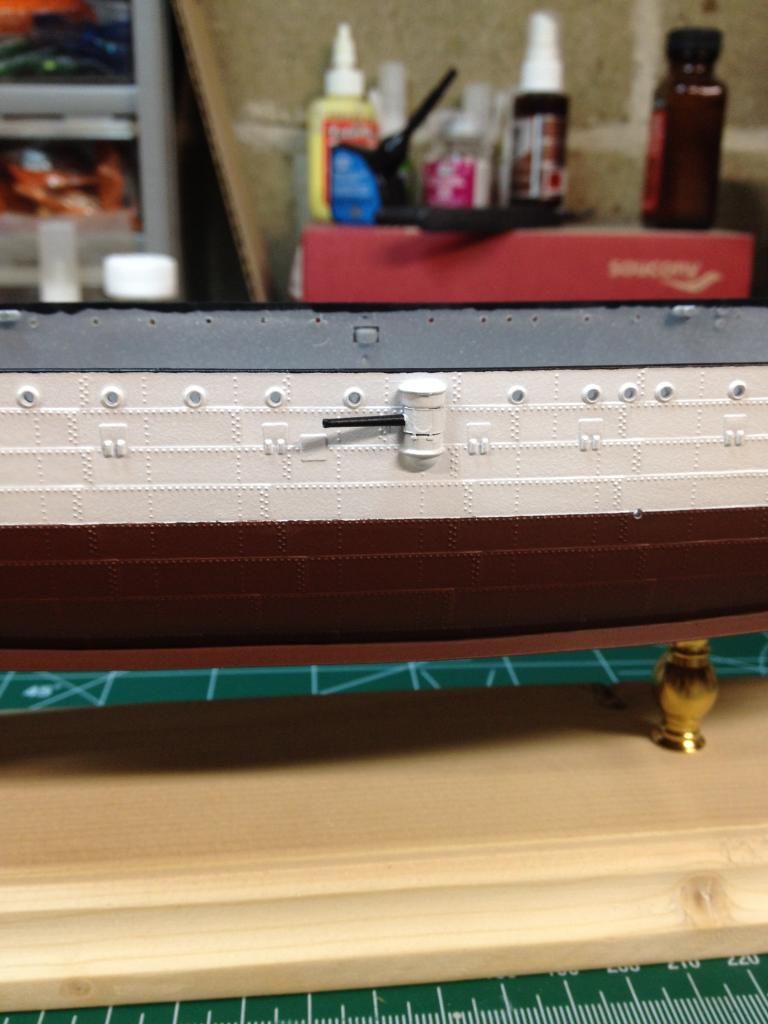
This was my firs experience with turned barrels, and drilling out the 8-pound guns for the upper hull was the first order of business. I started by cutting off the existing gun, and then trying to hold and drill the resulting disk, but then it occurred to me that I could use the molded gun as a handle and cut it off after the new one was in place. I’m slow, but I get it eventually.

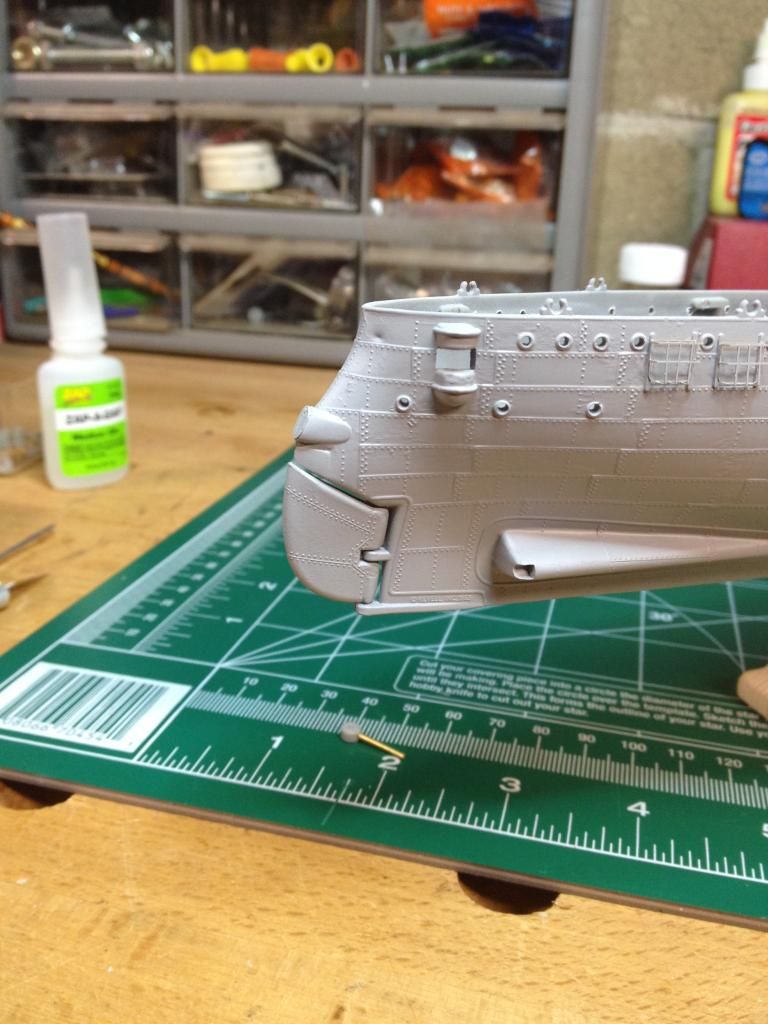
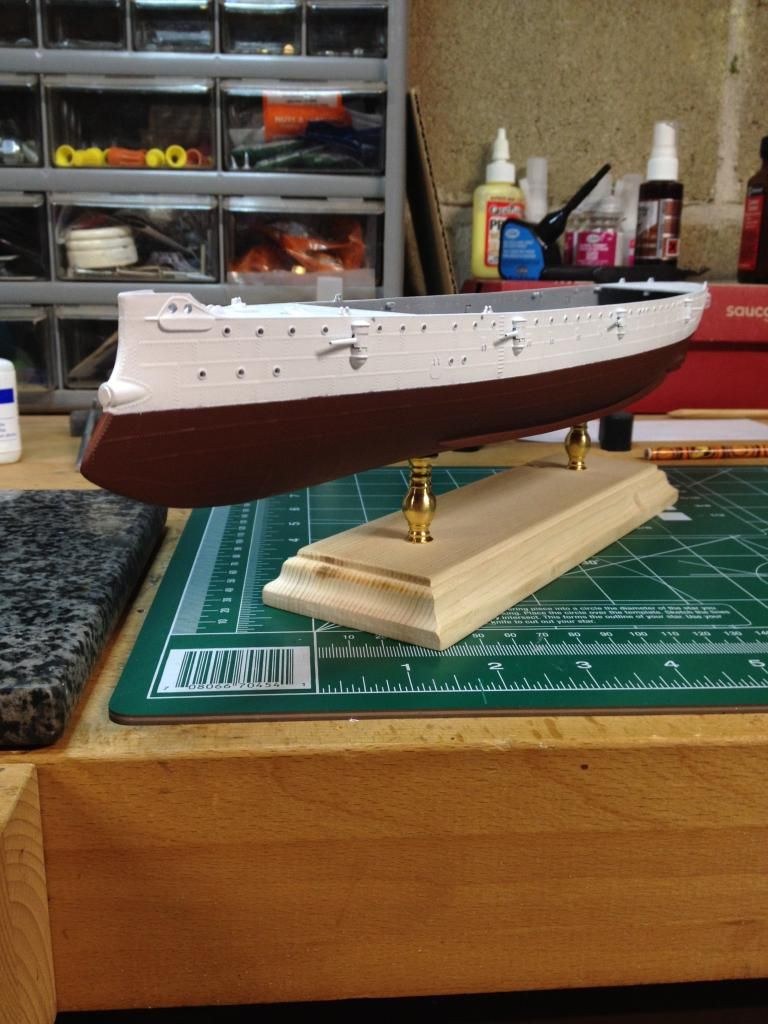
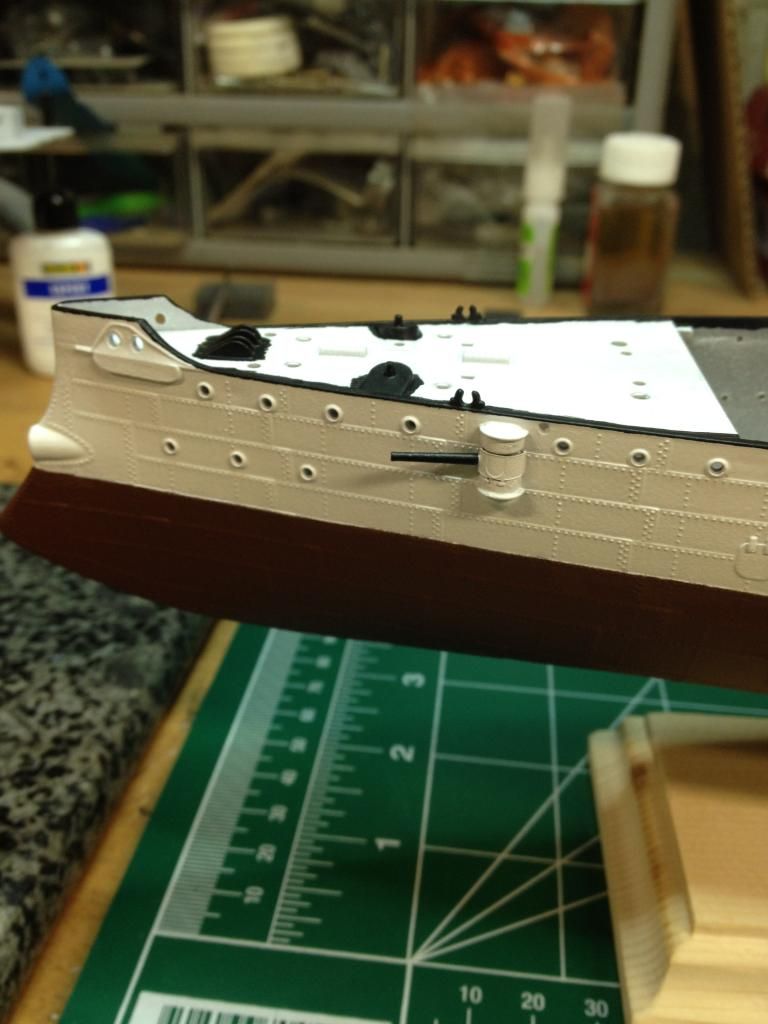
The hull halves went together in stages starting from the stern as they were slightly warped and needed to be finessed. I then carved off a number of hull details and added the resin filler and aft torpedo tube, and folded and added the life preserver cages.

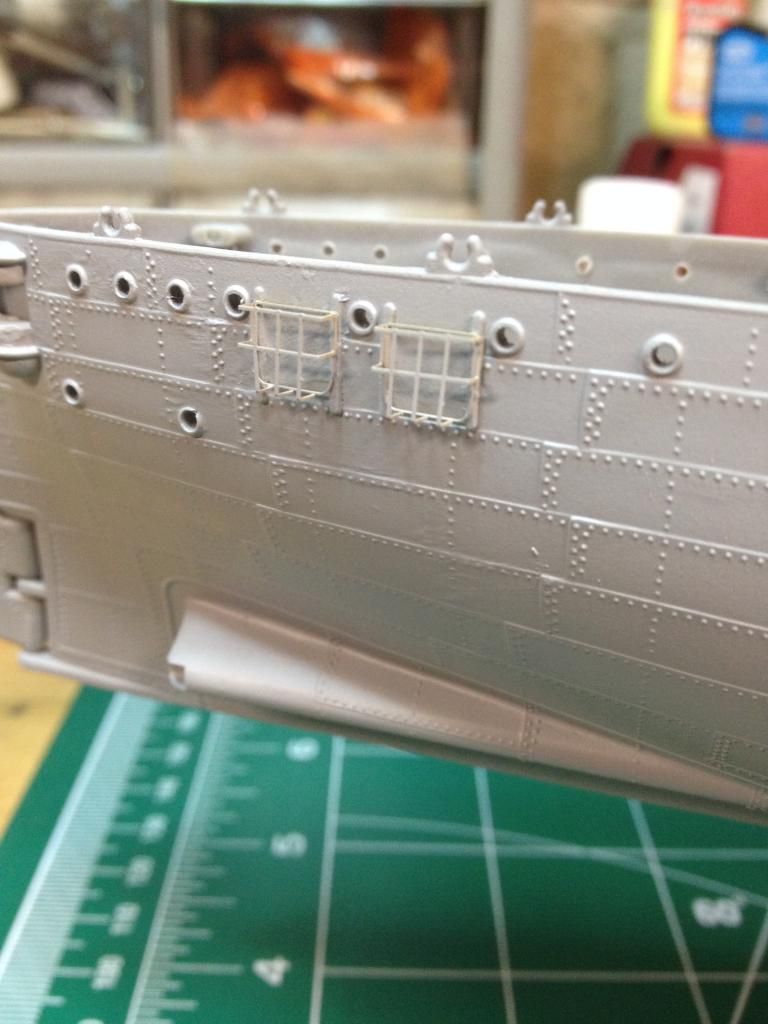
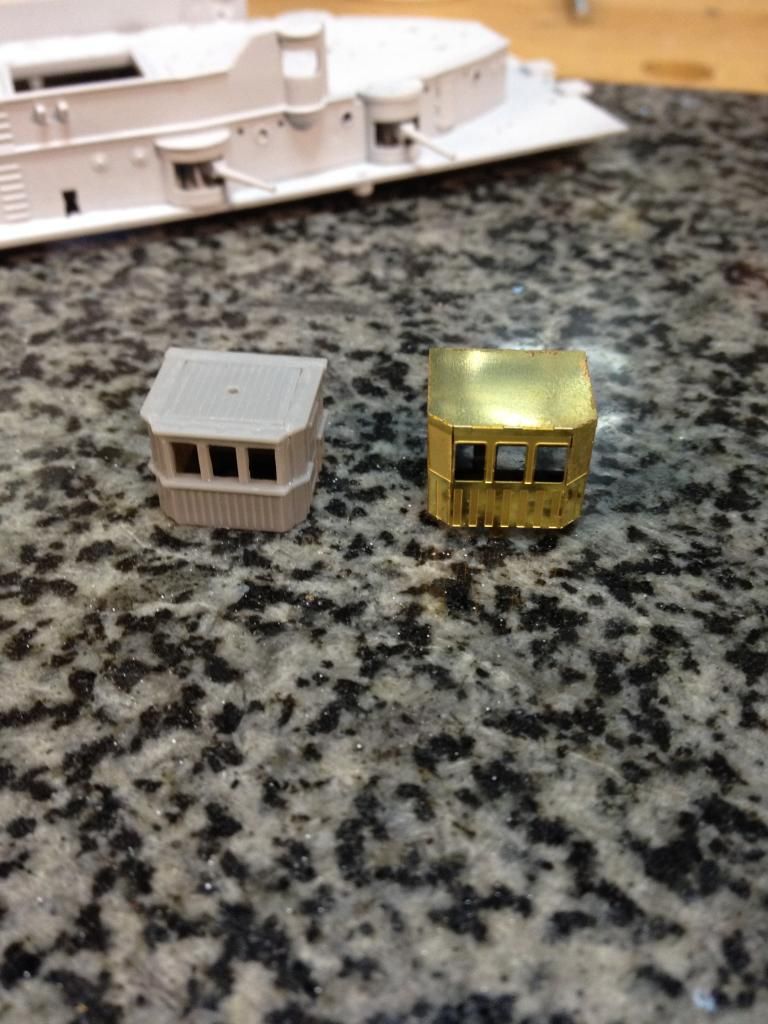
The 8-pound guns and their PE were up next. The PE was bent around a paint brush to get the right shape and some fidgeting was needed to get them all horizontal as the fit is pretty loose. They’re not perfect, but I’m happy. I have to keep reminding myself that the more details you add, he less obvious little imperfections become…

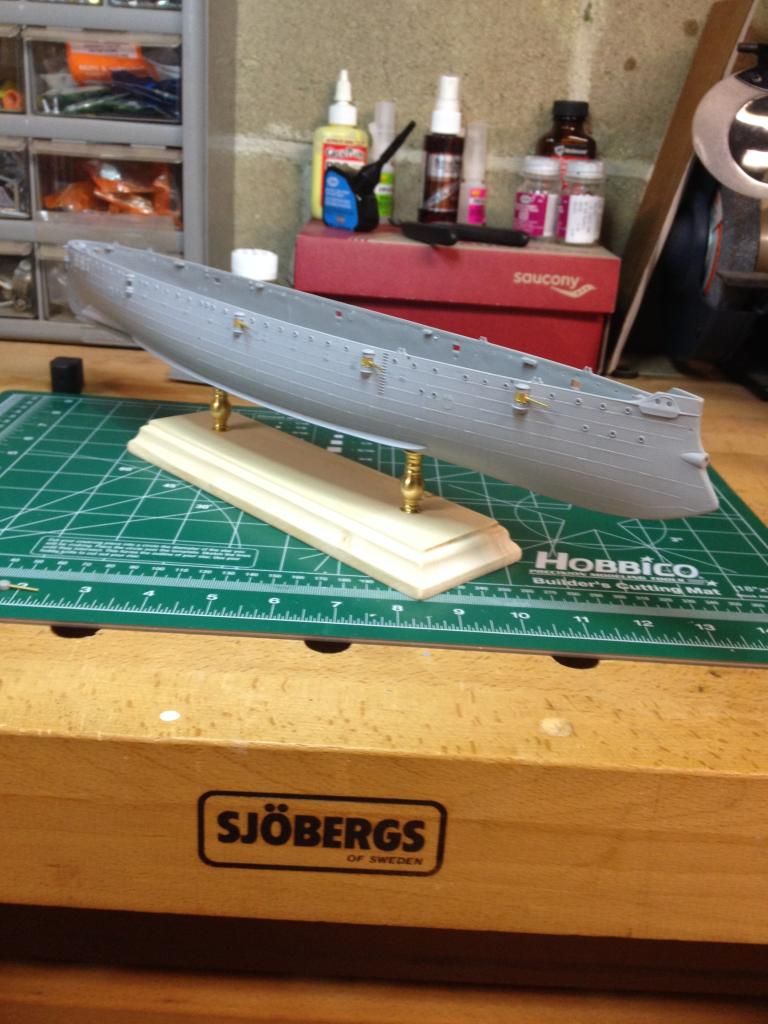
I shot the whole thing with some rattle-can Tamiya primer, but overdid it on the starboard aft and had to go at it with thinner and steel wool. From now on I’m using the air brush.

Compared to the Titanic, I’m really chugging along on this one. We’ll see if I can keep it up. I’m finding that I keep switching between projects - I’ve got 6 builds going right now and I work on one until bored and then switch to another. I’ve committed myself to not buy another until one of these are done, so eventually one has to finish.

Built the Encore Olympia about a year and a half ago. Very nice kit and turned out great. Enjoy!

BrianL, I’m green with envy - of not only your model but your work area. I’ve dreamed for years of having a Sjoberg workbench - with plenty of space around it!

Ha! It’s not as glamorous as it looks - I’m in the laundry room with the litter boxes. The Sjoberg is left over from my last house where I had converted the detached garage into a woodworking studio to build cabinets and Windsor chairs. No room for the wood working in the new house, so the bench is on model duty…

Impressive work, Brian! Thanks for sharing

Did just a little more work today - scraped off the seams on the 6-pound guns, chopped the barrels, and began drilling and installing the turned units. The instructions said to use a #70 drill, but I ended up having to go lower than that to get the right size (unless my pin vice set is incorrect?). Did 5 tonight and plan to knock off the other 5 next time I sit down.

And test-fitted them in the next pic. I’ll disassemble everything for priming and painting when the time comes. I also still need to fill the ejector pin marks or sand the sides so they don’t show anymore.

The turned barrels are pretty sharp - I’m thinking I’ll be using them on all future builds…

Last night I took a few minutes to wash and rinse all of the photo etch on the bench: 11 cards total for the Titanic, San Fransisco, Olympia and Dreadnought. I was going to soak everything in vinegar as well, but I got to wondering if I should do this right before painting instead – does it matter? Does PE oxidize in some way if etched and not primed immediately?

More progress: I carved out the webbing in the gun bulkheads and then began puttying the multiple dimples on the bulkheads, guns, and one or two areas on the hull from where they were attached to the sprues. I also scaped and sanded the top of hull where there was a faint mold seam.

Back in the day I never used putty – I wasn’t patient enough to do the prep work that ultimately makes for a better model. Consequently, I’m building these skills now. I also need to Milliput the resin piece that replaces the upper part of the rudder, but I didn’t get to it.

Speaking of the rudder: On the web, I’ve found two logs where the builder cut off the upper part of the rudder and replaced it with the resin piece. Both looked odd; I had assumed that the rudder wasn’t supposed to have the upper portion and that the resin restored the hull profile above it. Did I screw up?

In searching through internet pics, I saw that the 4 bowtie-shaped moldings on the superstructure bulkheads (see last pick in the previous post) are supposed to be hose reels and wondered why they didn’t replace them with PE. But wait – aren’t these them?

No reference to them in the directions, and they don’t seem to be in the PE placement pics, but what else could they be? And so I trimmed off the molded bowties and plan to use them. I’ve seen a number of comments about how the directions for the kit are vague w/r/t the PE, and I agree. In looking closer at the etch, it appears that there is also a second piece to the hull gun sponsons that I didn’t see when I installed them, and the directions don’t point them out. What else is hidden on the etch sheets? All of the etch parts have numbers – it would have been nice if the directions had used them.

Finally, I added the fore and aft deck sections and called it a day. It occurred to me that the workbench is the only place I listen to classical music, and baroque music sets the mood best. I never listed to the stuff otherwise – I wonder why it works so well for me here?

Great work! I’ll be following along with great interest.

I have this in my stash and hope to build her soon after my Old Ironsides…

Be sure to have a good look at Tim Reynaga’s build if you’ve not done so already:

www.modelshipwrights.com/modules.php

Evan

Brian,

I really like what you are doing with this ship. Like Evan, I have the Premium kit in my stash but have not queued it up yet, but maybe I will after I finish the Dreadnought, Nina, Pinta…etc…

I think there was a thread around here that asked what kinda of music, TV and or movies we put on while building. For myself, I have numerous playlists on Rhapsody that range from classical to Indie with numerous varieties smashed in there. It really depends on my mood and what I am actually working on at the time, such as rigging or painting…

Evan,

Thanks for posting that link, Tim did an amazing job on her and I bookmarked the link for future reference.

Steve

Evan - great link! I’ve been looking for builds to give me ideas, and this one is pretty comprehensive. I’ve got a book coming in today and I found the Library of Congress photos yesterday. I’m in Connecticut, so I’ve been playing with the idea of an overnight to Philly to visit the real thing, but I’m not sure I need to anymore…

Steve - I’ll search for that thread; I’ve been wondering how others pass the time while building.

Update: I now know that I guessed right on the resin part to replace the upper portion of the rudder…

Some nice work there, will be following along.

Mike

Bryant,

First, you are doing a great job! Keep it up!

Second, where in CT do you live? I live in the Groton/New London area.

Bill Morrison

My older sister lives in New Haven. Out there this winter.

I’m in Trumbull - right above Bridgeport. Opposite end from Groton, but not too far from New Haven.

So I spent time reading through the Model Shipwright’s build suggested above. At first I was excited, but as the build got more and more detailed I found myself discouraged. “I’m never going to build anything close to this,” was my thinking, followed by “I’m not sure I even want to build anything that detailed”.

Beautiful work, though. And – to my thinking, anyway – perhaps the definitive online build of the Olympia. It got me to wondering why I am bothering to post – I’m not going to build a diorama, I’m likely to take shortcuts, I’m probably not going to do anything that hasn’t been done already, and I’m certainly not going to approach the level of detail in the MS post. I don’t have an answer, except that I like the idea of sharing my work. So…

I’ve been fiddling with the hull, adding a forward torpedo tube cover, filling, sanding, priming and painting. Still have the props, name plate and shield to add, remaining paint work includes the black line at the top of the hull, the gun barrels, and some touch-up along the waterline.

The anti-fouling paint is a Rustoleum spray that is ‘scale effect correct’ for the Titanic (of which I’ve built 1 and have another 2 in process). I used it here as I had no red on hand - and despite the fact that I am unlikely to correct the remaining colors for scale. See what I mean? Shortcuts already.

Assembly, prepping and priming of the superstructure has been the other effort the last few evenings, along with test-fitting decks and miscellaneous fitting.

One of those fittings is the bridge, for which a PE replacement was provided. Looking at the two of them, I can’t honestly say I prefer the PE. The kit part feels like it has more texture to it – the PE part looks too flat. Haven’t decided yet, but I may use the remaining PE bridge parts on the plastic version…

Brian -

Excellent progress… I hate to think that anyone would be discouraged in their own effort after following a detailed build log like Tim’s. That should serve as an example of the possibilities, but not give an inferiority complex to the rest of us!

Your log will help us all understand the various challenges faced with this kit and give a great example of how to approach the myriad of details that can be incorporated. I already agree with your first decision - use the kit provided wheel house and skip the dimensionless PE version.

Good stuff!

Evan

Seems like the three of us can meet up in New Haven. I’d like to meet both of you!

Bill Morrison

I second the motion for the kit part. Definitely has more detail. Whoda thunk?

Alright, I’m convinced - the kit part it will be! The last two nights have been dedicated to the black stripe at the top of the hull and cleaning up the line between the white and anti-fouling paint. I started with the normal Vallejo flat black but found it to thick to hand-paint and get a clean line. I switched to Vallejo Air and - with a very steady hand - got a pretty good result. I still had to clean up a number of sections with Vallejo Air white, thought - again, I found the regular version of the paint more difficult to work with.

I’ve begun test-fitting the wood decks, and found them much more difficult than than the ones I have have for the Titanic, Dreadnaught and San Fransisco; they need a lot of trimming and adjusting to fit correctly. This is going to slow progress, but they look so good I’m going to spend the time.

Evan: I don’t currently have the time or skills to do what Tim did, but I’m a perfectionist at heart, so posts like his affect me the wrong way. They are giving me ideas, though - and helping me to decide what I want out of this second/later-life go at the hobby. I’m still astounded at how different it is from the early '80s.

Bill: Let me know when you are around!