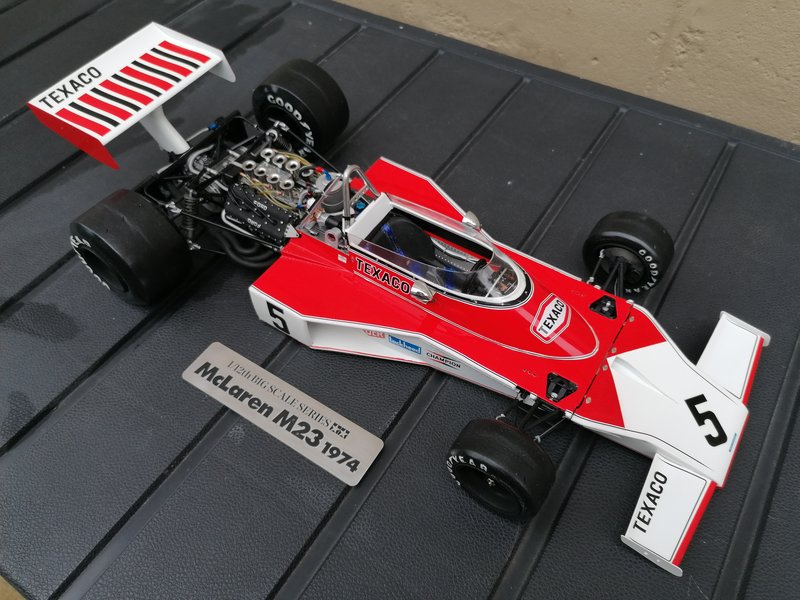
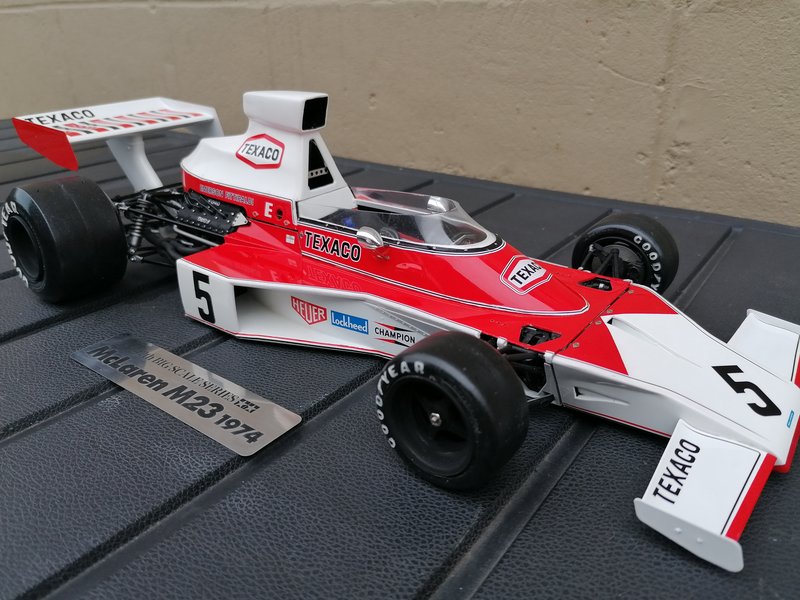
Hi all, this is going to be the build thread for my new commission project. A Tamiya 1/12 Mclaren M23
The build is going to include quite extensive detailing, especially around the engine with all the rubber hoses included in the kit replaced with braided hoses and aftermarket connections.
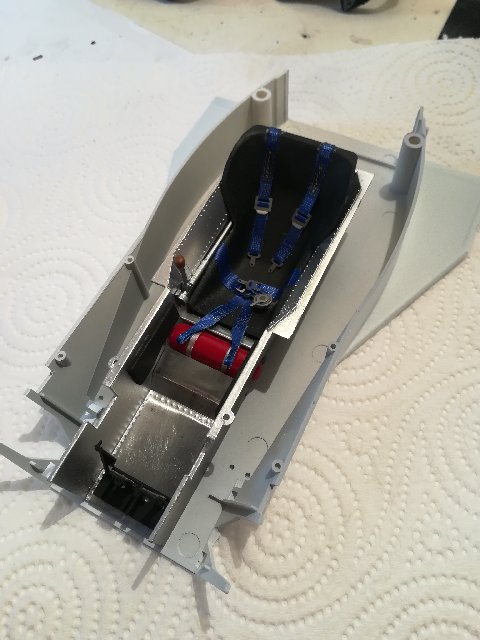
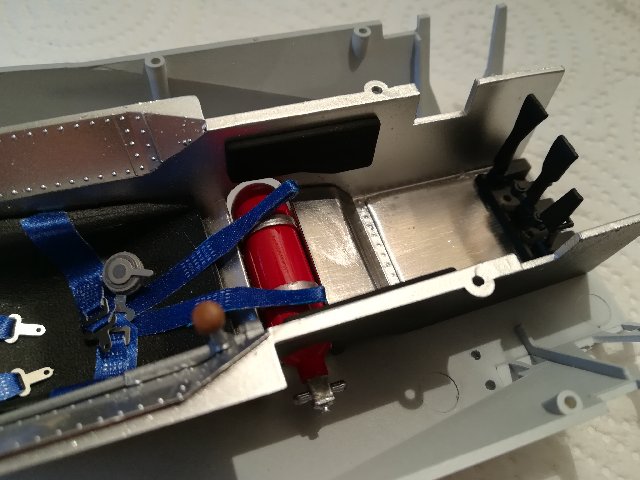
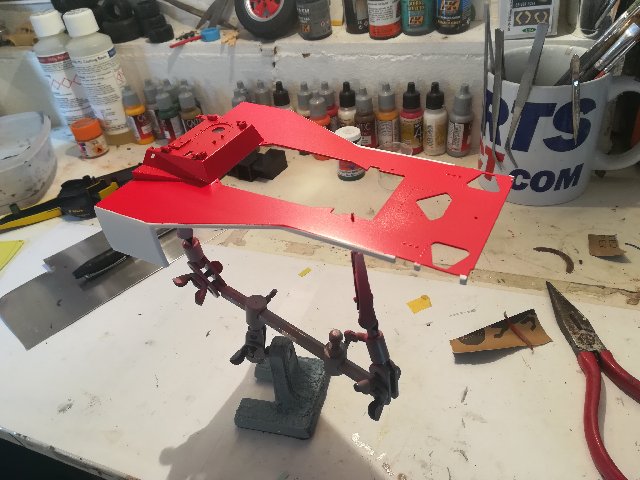
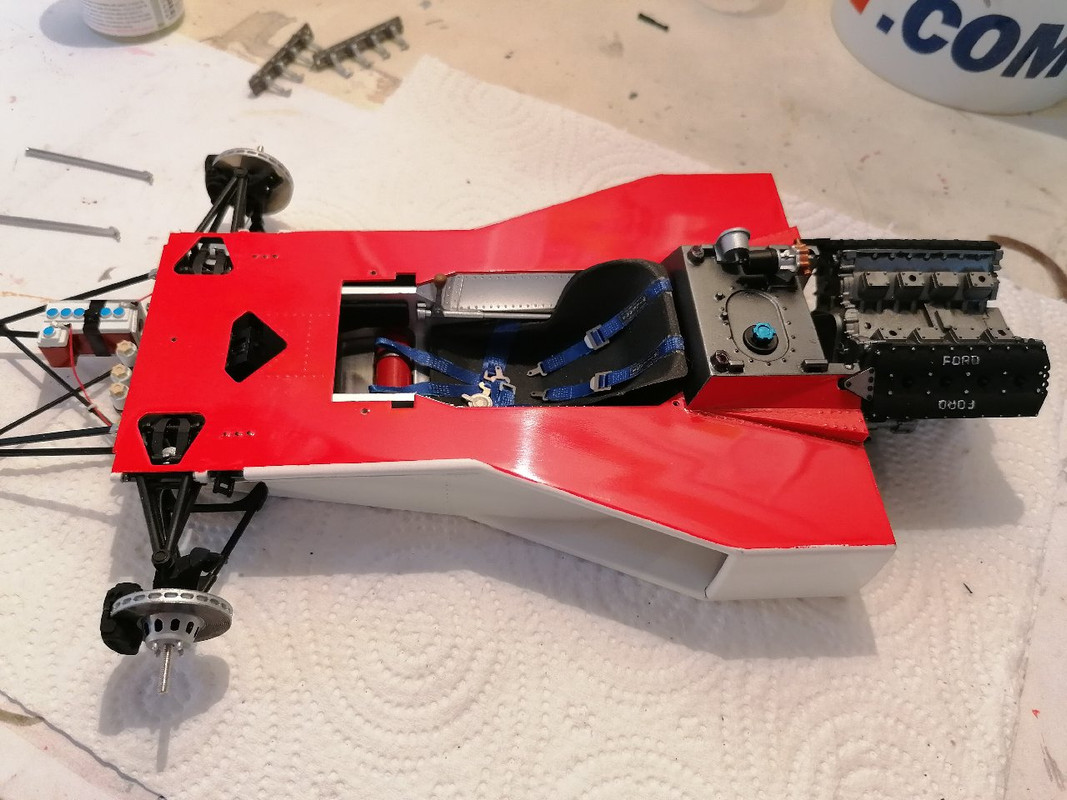
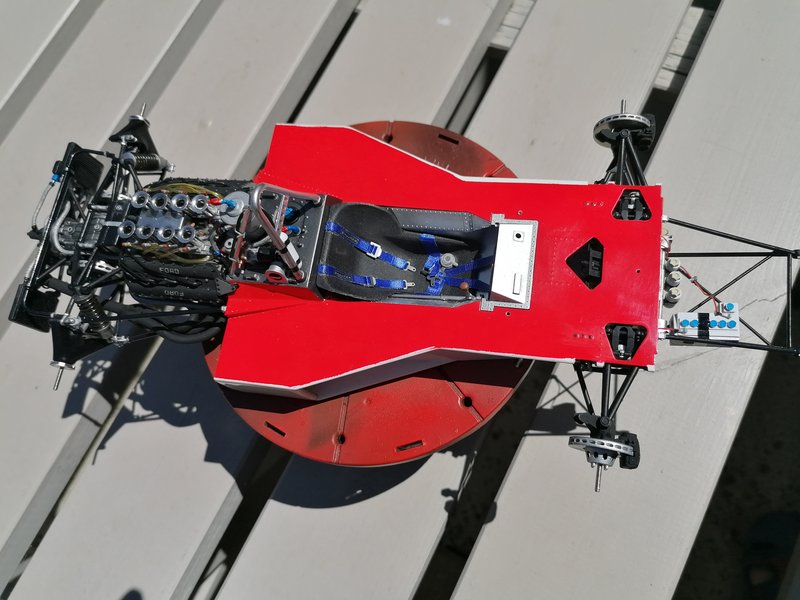
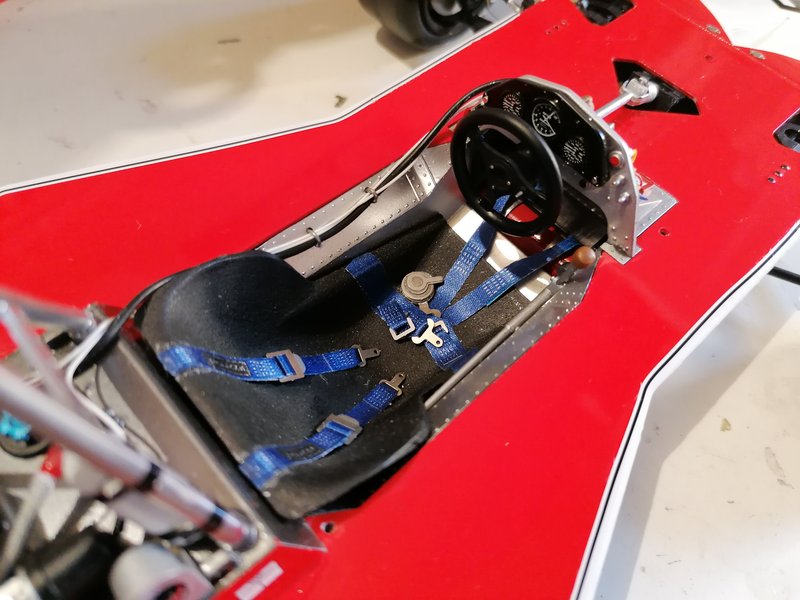
I have made an initial start on the project, putting together the tub which was painted in Alclad II polished Aluminum. Regular aluminum for the gear lever. I have also added some thin modeling tin on the floor of the tub for a little contrast.
The seatbelts are standard from the kit as are the PH fitting.
Very early stages of this one but I hope to have some further updates very soon.
Ohh so cool, I have 2 Tyrell 6 wheelers in my stash, one is original boxing and the other is a recent re-release. Very nice kits indeed. I will try to watch this build…may bump me to build one of mine.
Ohh I’m looking forward to this! Have always wanted to build one so will plan on doing that through your build as I’m not adding to my stash anytime soon [;)]
Another fan eager to watch this, and you’re off to a fine start.
I’ve had a return of interest in these race cars (do we still call them formula cars or is there some new-fangled name now?), and have added a couple to my stash so far.
I love the Tamiya 1/12 F-1 cars and can’t wait to see how yours turns out. I built the McClaren and the Williams severals years ago and enjoyed every minute of it. Best of luck and don’t forghet to keep us up to date.
Little update for you on the progress of the M23. I got the lower half of the body work cleared, wet sanded and polished which then allowed me to start the front end suspension, which is going together well. Next step is to build the bottom wishbones and hubs. Going to run a brake line along the bottom wishbone attached with some zip straps for extra detailing.
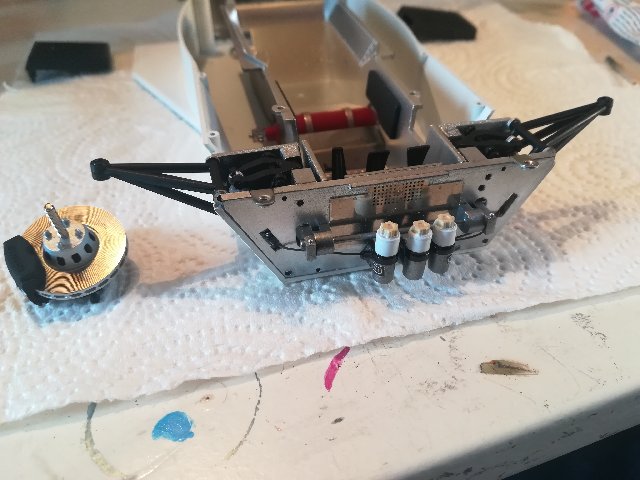
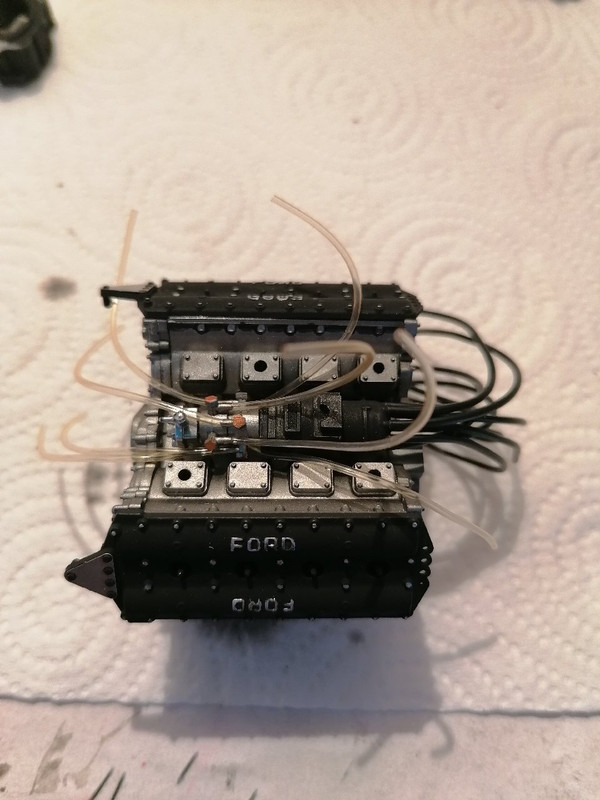
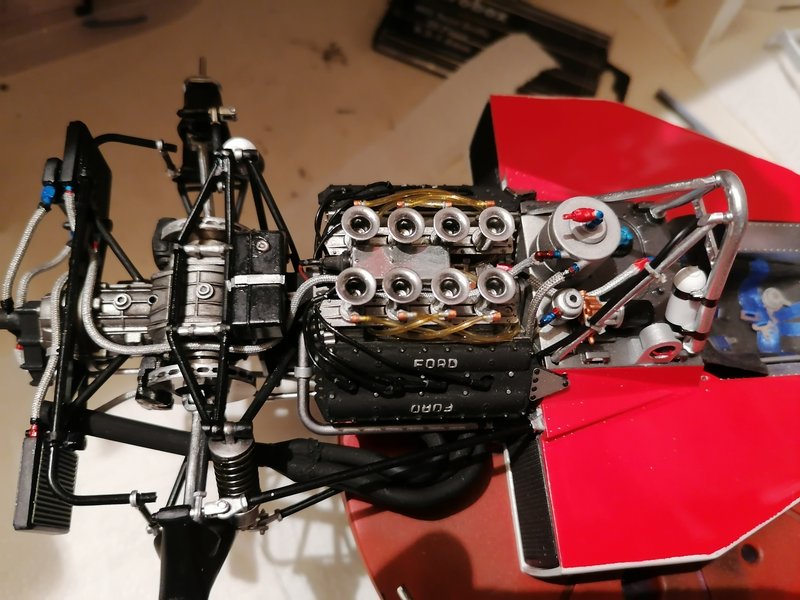
I have added some lines from the cylinders for a little extra detailing.
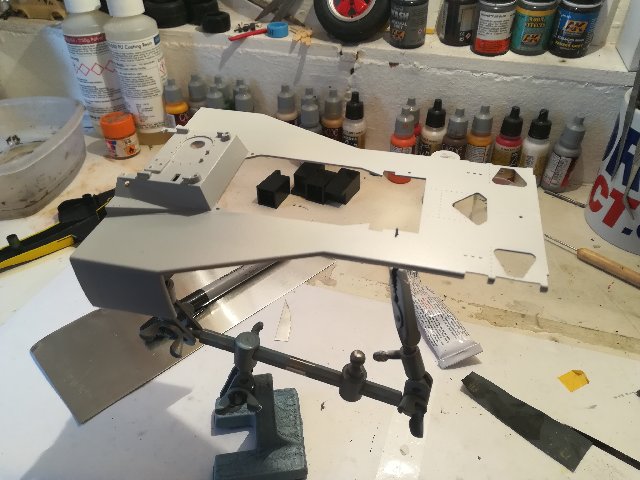
Also I have made a start on the upper half of the body. Primed and painted, still to be clear coated.
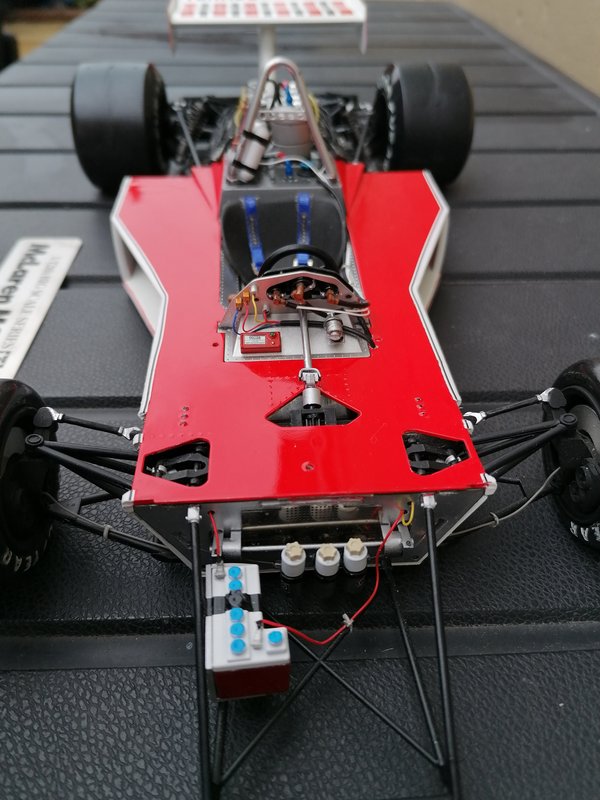
Hello everyone, hope you are all well and staying safe. Here is a progress report on the Tamiya Mclaren M23 build.
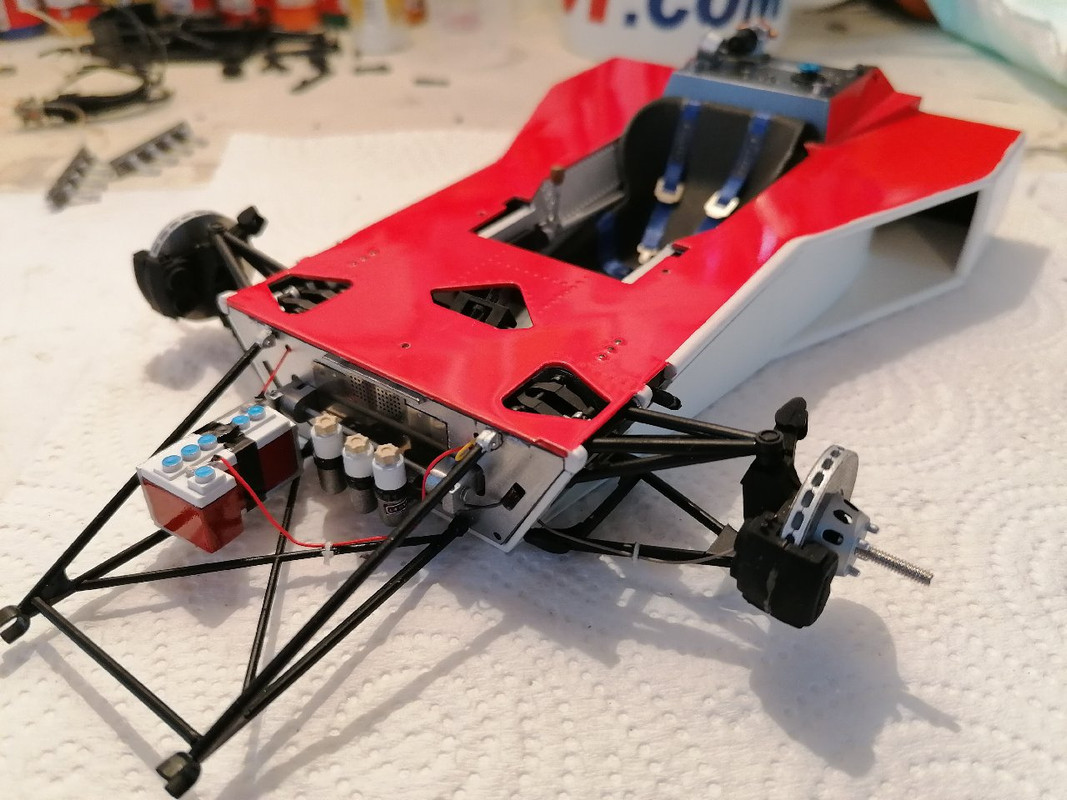
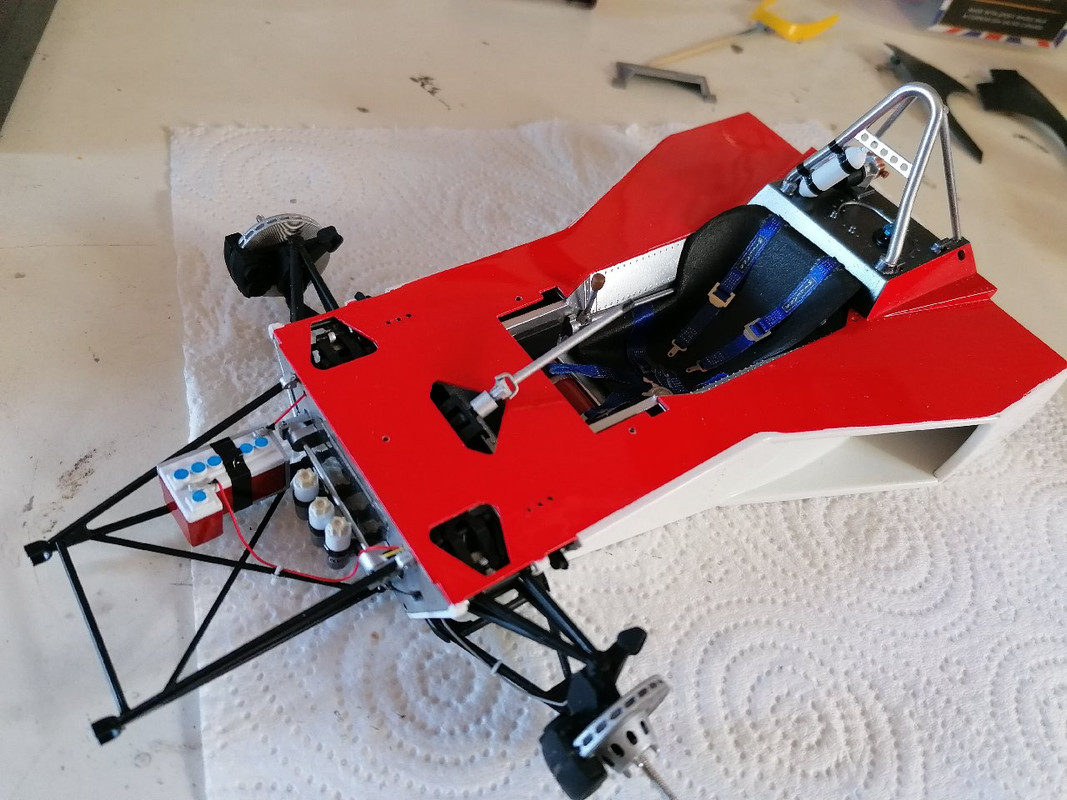
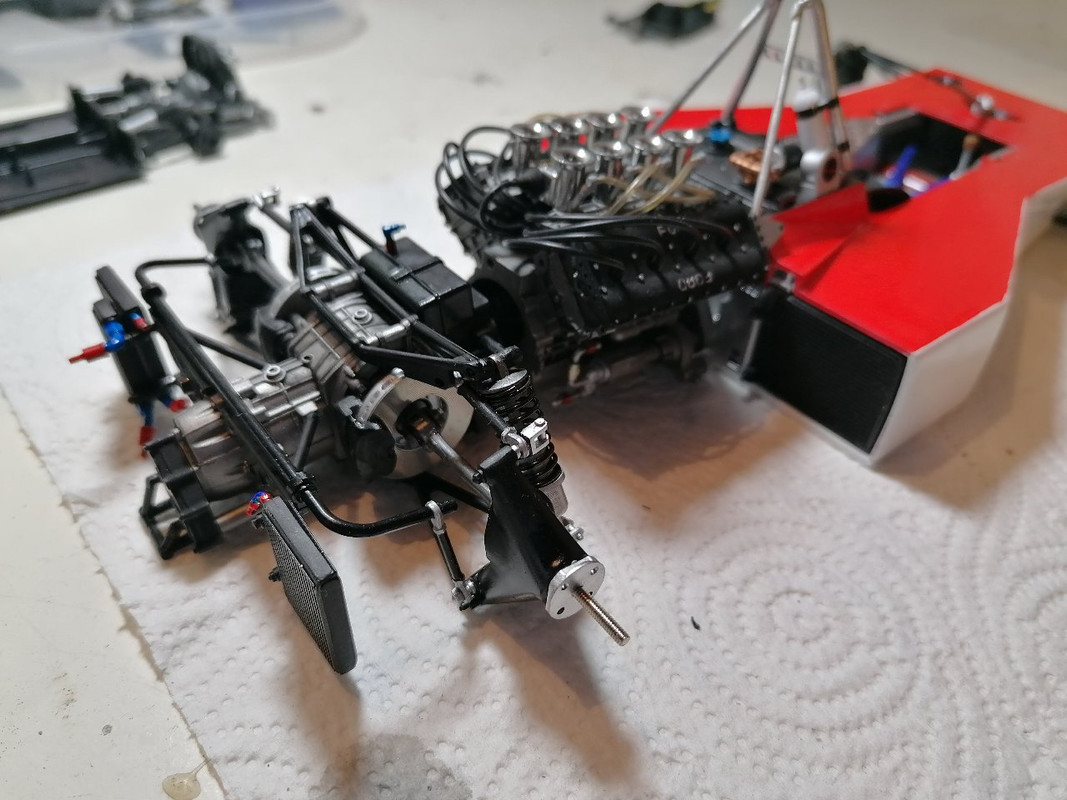
The front end chassis/suspension is just about finished now. I added two brake lines running on the lower wishbones attached with a couple of MFH zip clips. The nose frame is attached and I’ve added some further detailed wiring to the battery. I’ve gone with kit instructions for positioning of the battery, rather than what I believe was the historically correct position as I just prefer it this way.
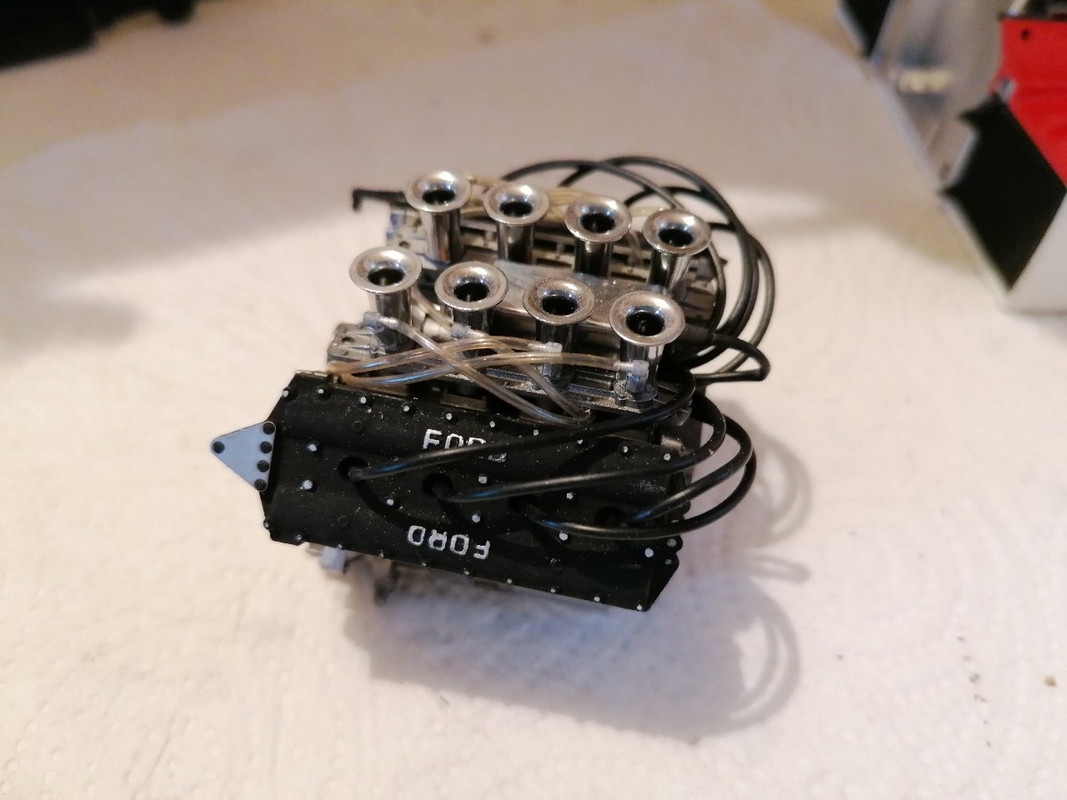
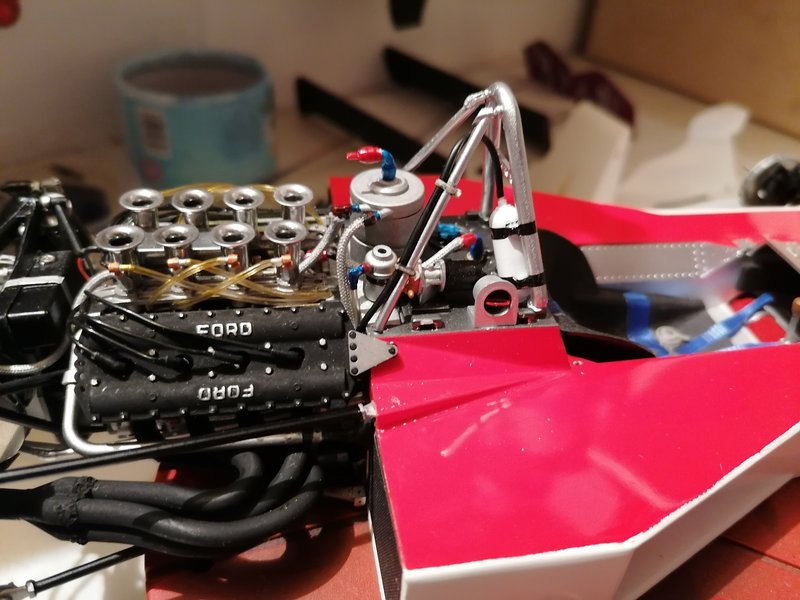
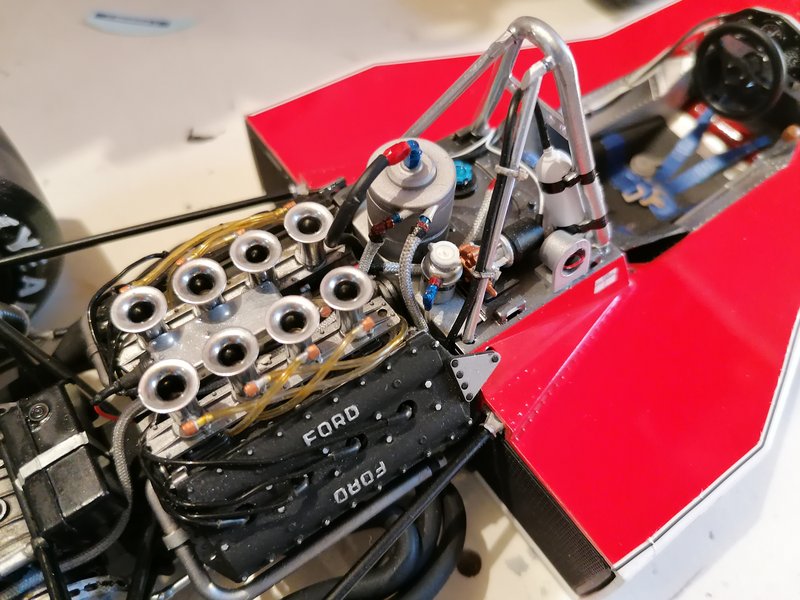
Now the front end is complete I’ve started to work on the engine and gearbox, painting them and using line paint to highlight the lower areas. These will go together next then the rear suspension will be built off those. I’ve repainted the engine trumpet stacks and roll hoop in alclad chrome and polished aluminum as the pre chromed kit pieces just didn’t look very good. The plug wiring and clear tubes are both from the kit, these will be the only kit parts used around the engine for plumbing/detailing.
That’s all the works up to date, hopefully in the next batch of photos I will have the rear end finished.
That’s looking good Chris! How old is this molding? The reason I ask is that I’m building a 1/24 Mini Cooper and have run into a problem with the decals The kit I’m building is at least five years old (most likely older) and the decal I was using wouldn’t release from the backing paper (soaked it for over four hours by accident, still wouldn’t move). This isn’t the first time this has happened to me with old Tamiya decals, just a heads up. If needed, aftermarket decals should be easy to source. Looking forward to more.
The decals for this kit are in perfect condition. I didnt purchase the kit as its a commission build and the kit was supplied by the customer.
I might have a little trick for you with your old decals. Ive had the problems you mentioned many times and this usually works.
Soak them for 10-15 minutes, take them out and place them face down on a clean surface, very carefully with a new sharpe blade lightly scrap away at the paper from the back of the decal. Be careful not to go through but you will need to start to tear the wet paper away. This will unlock the glue that has set into the paper. Place them back in the water and they should release, you might need to go through the process a couple of times. Hope it works for you.
Here is the next update on the M23 project. Moving along pretty nicely and getting close to the end.
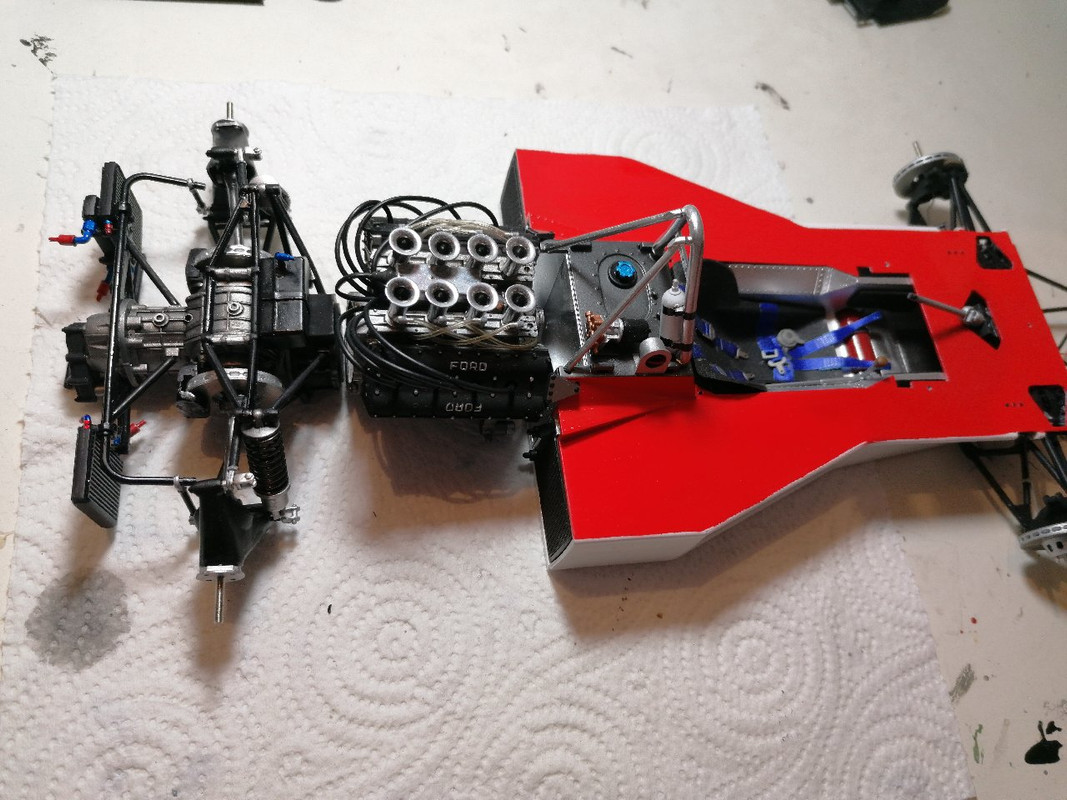
Engine is now finished with kit tubing parts, trumpets have been repainted in Alclad II chrome over gloss black. All that is left are the exhausts which i’m currently working on, quite a lot of mould lines on those parts which need to be removed.
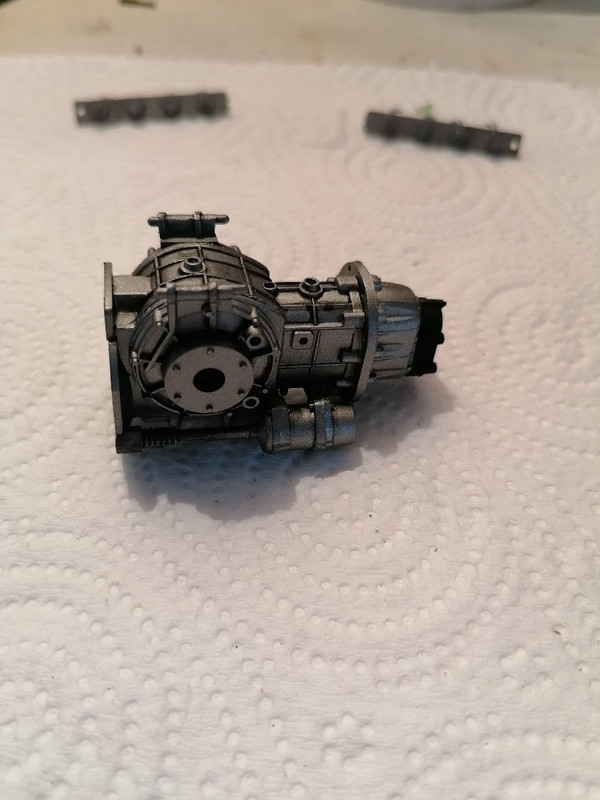
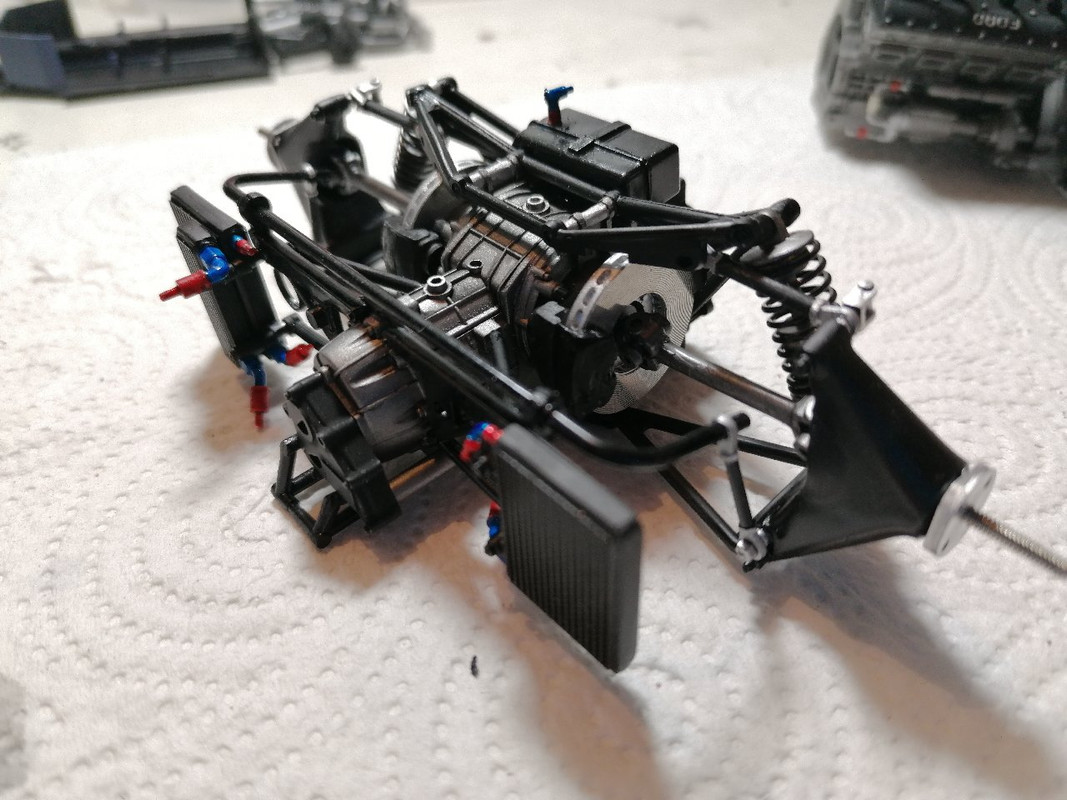
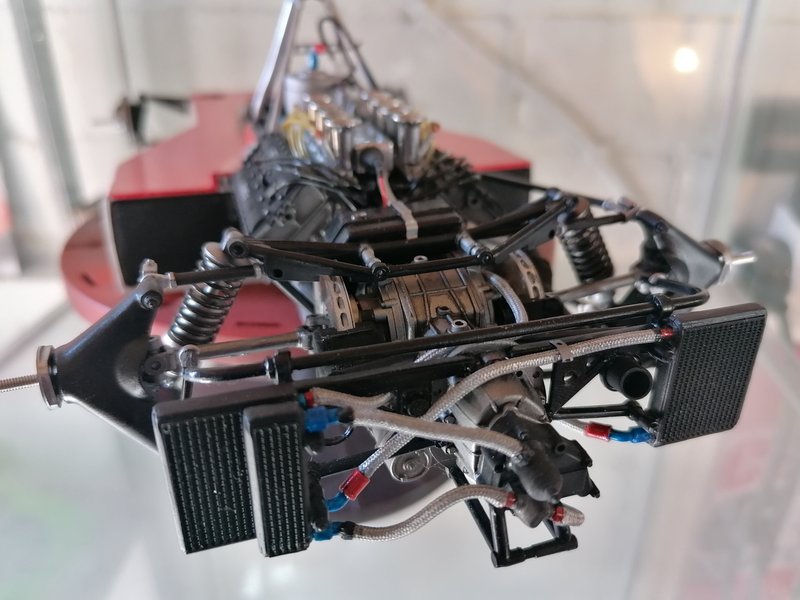
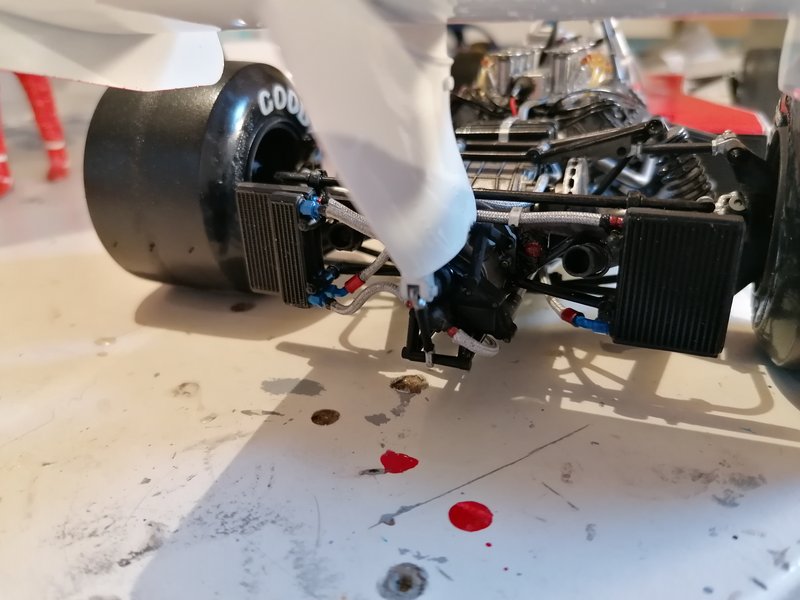
The rear suspension has been added to the gearbox, along with the rear brake discs and drive shafts. I’ve added some Top Studio hose fitting to the rear radiators which will have braided hose replacing the kit tubing here.
Looking forward to getting the gearbox and engine together and attached to the chassis so final detailing of plumbing and wiring can begin, maybe not so close to the end after all!!!
I have the final bodywork pieces in prime, so next update will have those finished and then the decals can go on which should really bring it to life. Im really enjoying this one, its a great kit, a little tricky in places but i would highly recommend it.
Nice progress on your build. I’m working on a 1/2 scale ELF six wheeler. It is amazing how many hundreds of parts there are in 1/12 scale kits. Every part needs to be individually painted. Sometimes I work on the kit for a couple of hours and it looks like I accomplished nothing. I always need to get into a certain mindset before working on that kit.