Thanks for the comments, wbill76!
Yeah, I know it’s been awhile since I last posted an update, due to the fact I got sidetracked by my Universal Carrier. But with that completed, I can once again start work on this build.
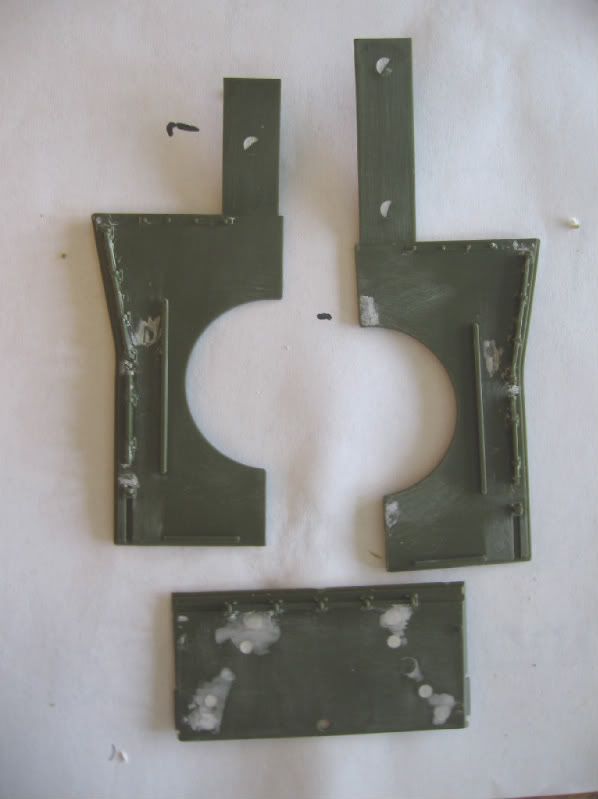
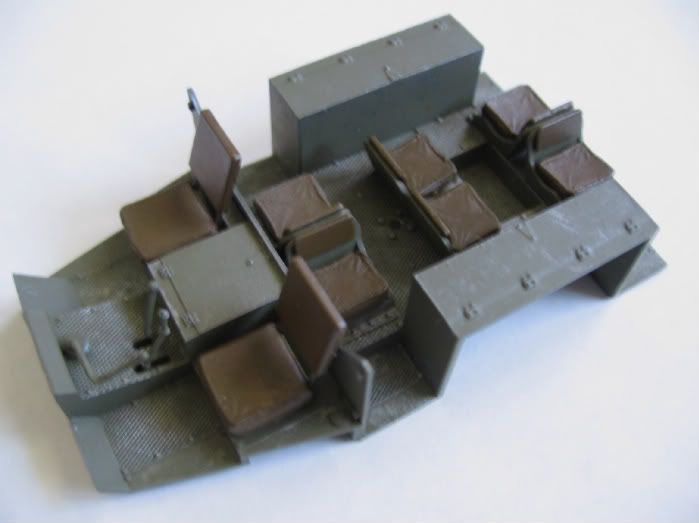
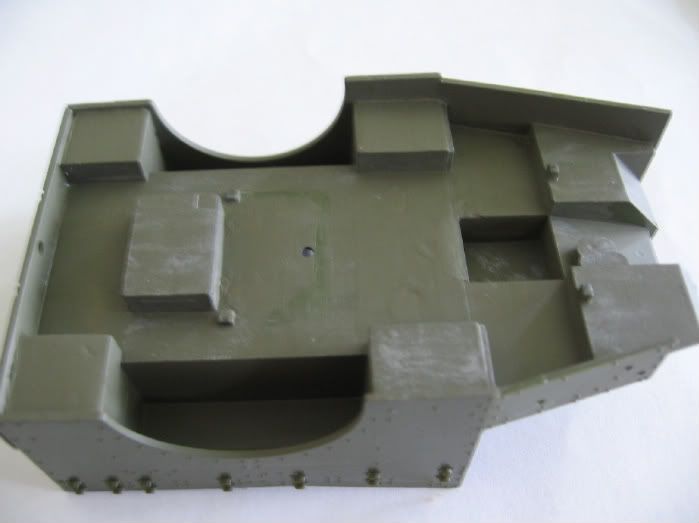
I started the upper hull parts of the scout car. I think the pic below says it all. It needs massive sanding, and a ton of putty. These pieces that are just plain riddled with ejector pin marks. And I mean riddled, heck some of the ejector pin marks almost seem to be in places impossible to sand without wrecking the detail. If their’s a carpet monster, then theirs one that’s ten times as grim, and that’s the ejector pin monster. This one bites…hard.[}:)]
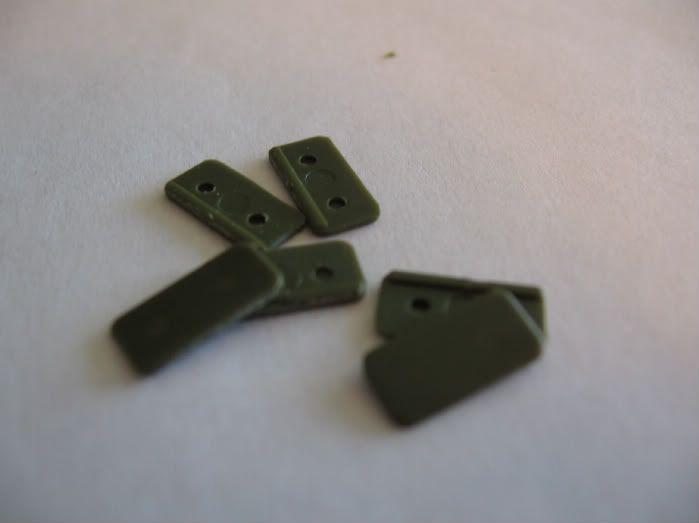
The head rests for all the seats have two holes(not all the way through, but almost), like for positioning on each one. However there’s no positioning marks on the seats(geez) so I gotta be careful when gluing so it doesn’t melt the thin plastic.
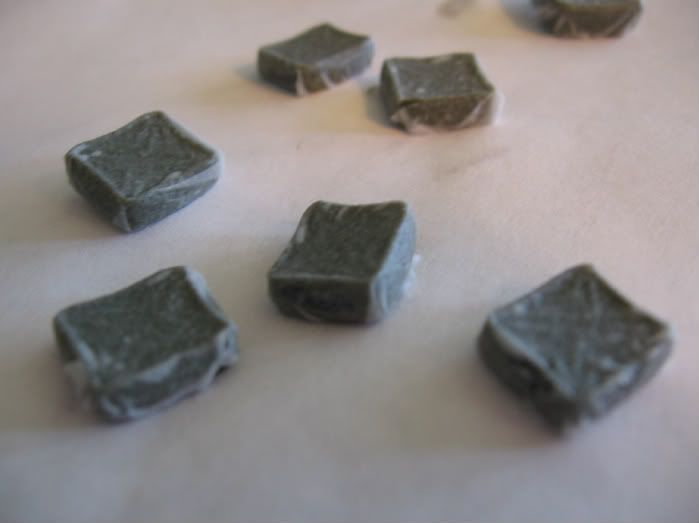
As for the seat cushions themselves, I finally put on the tissue to give them more texture. But you gotta remove a pestering seam that can show even through the tissue.
Finally the seats themselves, a little flash had to be removed. However here is where the kit’s aging molds shows once again.[xx(] The tops of the seats have just plain bad molding(it’s an old mold), so quite a bit of sanding is neccessary, of which you can see also in the pic.
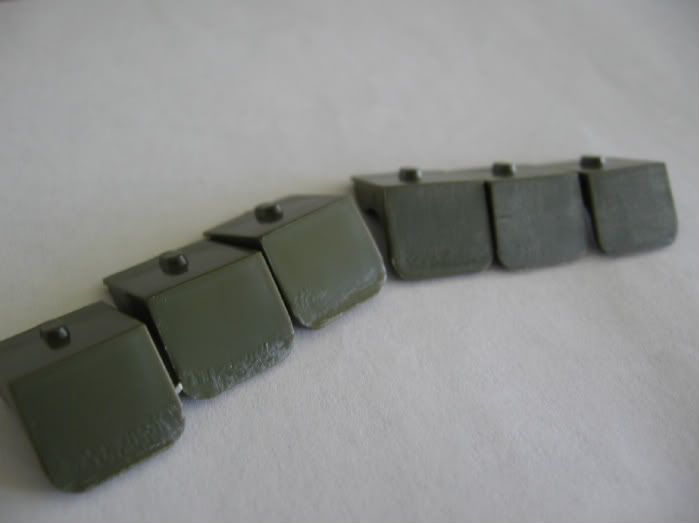
MG the seats are coming along well and wow those pin marks look vicious. Progress is slow on this one, looking forward to seeing you progress further.
Good luck,
Terry.
Thanks for lookin’ in! Hopefully I’ll get alot of work done this week, since I’m on vacation aka spring break…hopefully.
Looking good thus far, but a few look-outs that I found on mine. The bulged out sides on the cushions didn’t fit right, so I ground off the bulges to fit the profile of the rolled upholstery seam on the top. They fit much better this way.

Really nice touch on the tissue paper, I can’t wait to see how that looks painted and weathered. I’m going to remember this for the future!
I had fit issues with the top hood panel meeting the side panels evenly, so that got glued down in sections for a seamless appearance. Also watch the decals, while they’re OK and in register, they sure didn’t want to go down over all of those tie-down lumps on the sides or over the hinges on the top hood panel. Lots of Solvaset and pin-pricks later, they still don’t ‘lay down’ the way other decals do- a thinner decal with a little more elasticity would have been nice. If you have any spare Soviet stars and slogans from a better source, I’d use them over the kit supplied decals.
Dry fitting the wheels on mine showed that only two wheels would touch ground at any time, so I loaded up the body with weights (3 Tamiya paint bottles!) to force all 4 wheels flat and even when I glued them on. That actually worked out well and didn’t give any of the wheels a nasty camber! I guess that the plastic is soft enough to absorb the difference.
Hope these help and looking forward to seeing your’s finished!
Thanks a million for the tips, Dre![bow] Thanks for lettin’ me know about the decals, I think I have some decal sheets left over from a Katyusha build that’s filled with Ruskie stars and etc. I guess I better go find it. As for the wheels, I noticed the same thing, and I’m still trying to figure out how I’m gonna solve it. But thanks to your tip, I might just do what you did.
Here’s my progress so far on the scout, going a bit slower then I woud like(probably due to the fact every, single piece needs massive cleanup[|(].) Anyways I got all the seats in finally, and I got all the locating hulls on the bottom of the hull filled in(you got to remeber to do this or it will be impossible later.) The seats are painted with a mixture of Testor’s enamel brown & black. As for the drybrushing on the floor and etc. I used a mixture of Testor’s Steel & black.
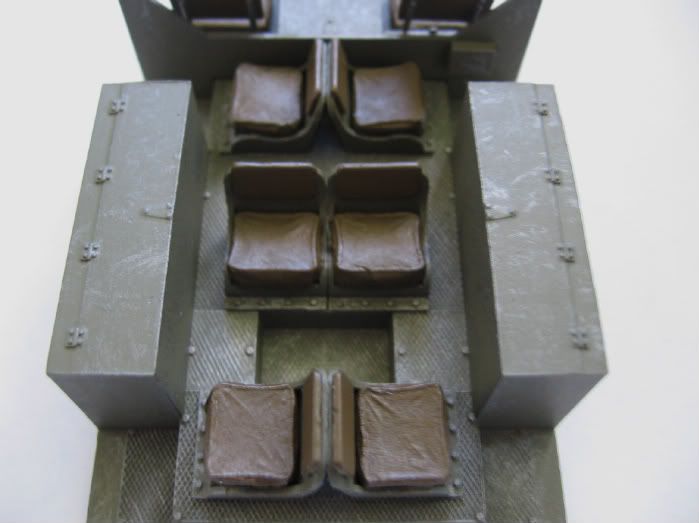
For the upper hull pieces, the marks have been cleaned up and painted. Now I’m just test fitting them, because I just know their’s gonna be problems. The fender pieces have also been put together, but they obviously need a ton of cleaning up. Plus on those two small pieces I decided I’m gonna scratch the springs that react w/the counterweight (so some modification had to happen, such as the filling in of locating holes for the kit piece.)
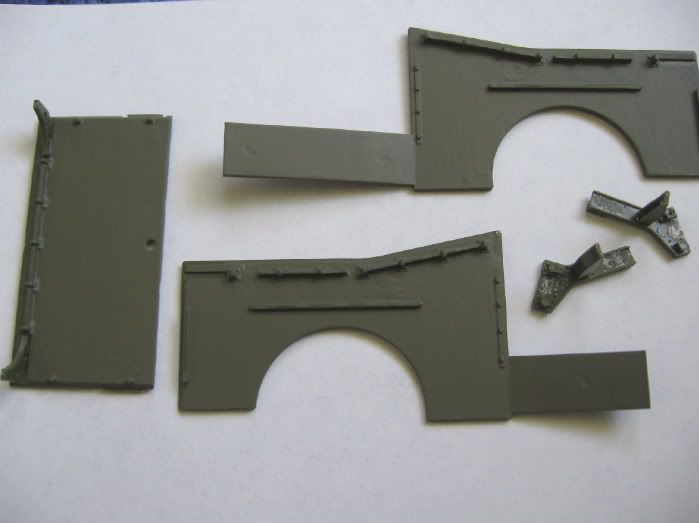
All comments, questions, and suggestions, welcome as always![:)]
Looking good so far, mg. I like the tissue paper texture- that worked out well. How did the seats fit?
Very nice work on the seats and added texture. [tup] I hear you about the added time due to clean-up and it’s a common thing with the EE kits unfortunately, especially the older ones. Looks like you’re tackling it fine though, look forward to the next update. [;)]
Dre- You were right about the seats, the bulge had to be completley trimmed off for the seat cushions to fit. That I did with spure cutters, that’s seriously the amount of stryene that had to be removed.[:O]
wbill76- Thanks for the comments and for lookin’ in![8D]
I built this kit way back when! I always liked it thought it was really a great detailed and sharp model even by todays standards! Your doing steller work on it! [tup]
sfcmac- Thanks for the very supportive comments! Hope I don’t disappoint.[:)]
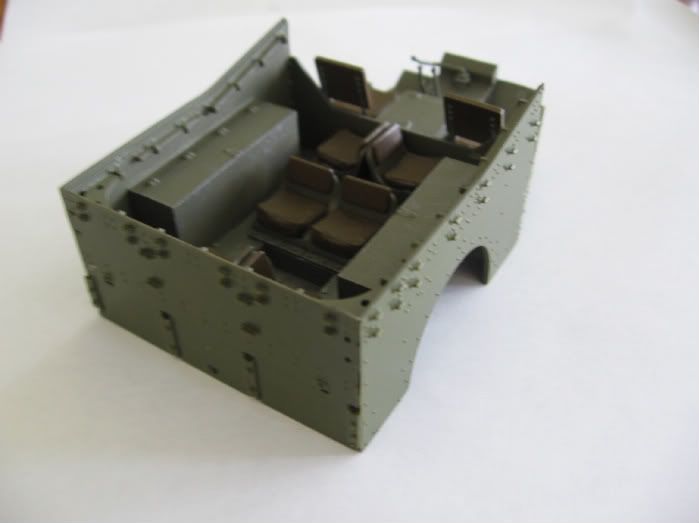
I finally got around to having a good modeling session and did some major work on my build. Yipee![:D] I connected three of the hull sides to the fighting compartment. Suprisingly they went together like a dream, compared to some of the other parts. Just a slight seam has to be filled and some excess glue removed and sanded(but that was my mistake). Then I have to start weathering the bottom of the hull. For some reason the instructions say that the fighting compartment should have been glued on to the main frame a few steps back, but if you do that, you just made weathering a hundred times harder for yourself.
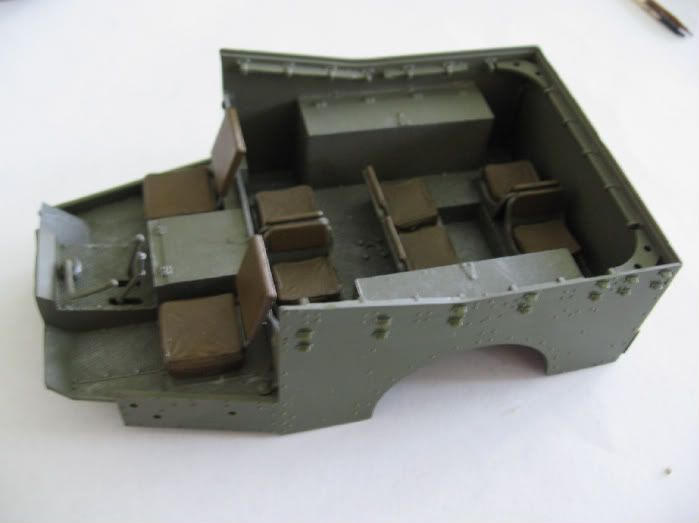
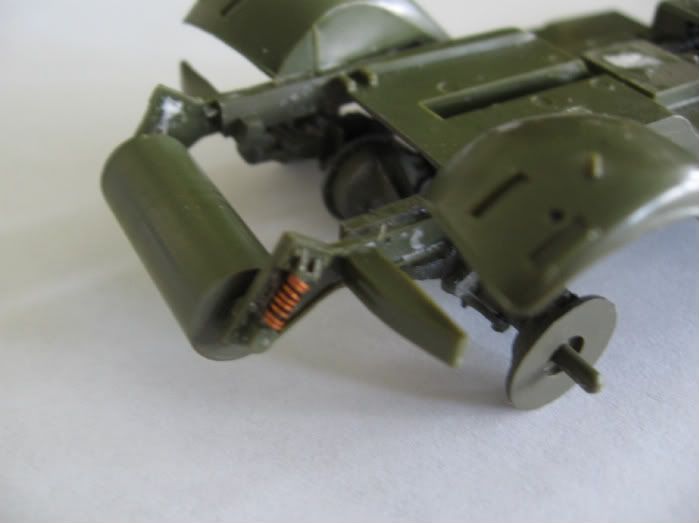
The counterweight in the front of has been connected. Scratched the springs out of some copper wire, and filled in a few holes and etc. However the fit of the counterweight holders to the main frame is terrible.[:(] I started filling in some gaps with crazy glue, because it’s next to impossible to get putty in between the parts and actually sand it smooth. Argh! I can see this will take alot of time and some luck.
All comments, questions, and suggestions welcome!
Your right you did get a good session at the bench. Great progress with the work. Good luck.
Terry.
terry35- Thanks for checking out the scout car and for the comments! Lookin’ forward to seeing that resin Minenraumer 100% finished, weathering and all.[8D]
Yep, it’s been awhile since my last update(about two weeks)…probably because I got lazy with fixing all the imperfections on this kit, so it’s been sittin’ to the side of the bench for awhile. However, I finally got around to doing some much needed work on the scout car.[:)]
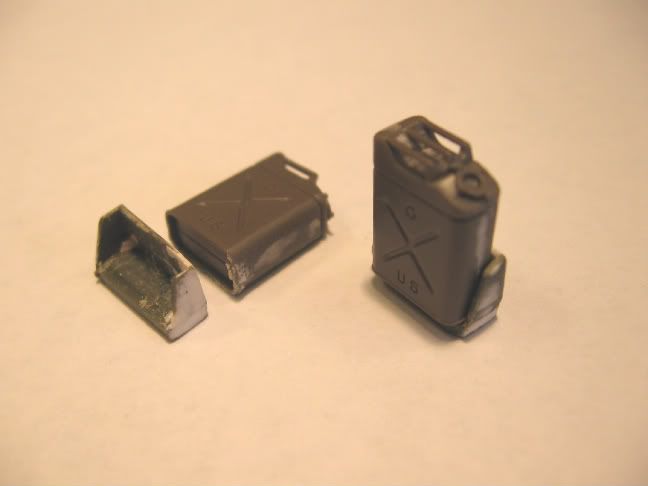
I was pretty dissapointed with the kit supplied jerry cans that were pre-attached to the holder(poor detail & bad molding), plus they would be a prominent piece on the hull, thus they had to be replaced. So I scrapped those pieces, only after using one of them as a guide to scratching my own. Used some Tamiya jerry cans, then scratched the holder out of some stryene and alot of putty. Not to worried abot the interior of the holder, since the jerry can will hide any imperfections when it’s glued on.(the jerry can straps will be scratched at a later time)
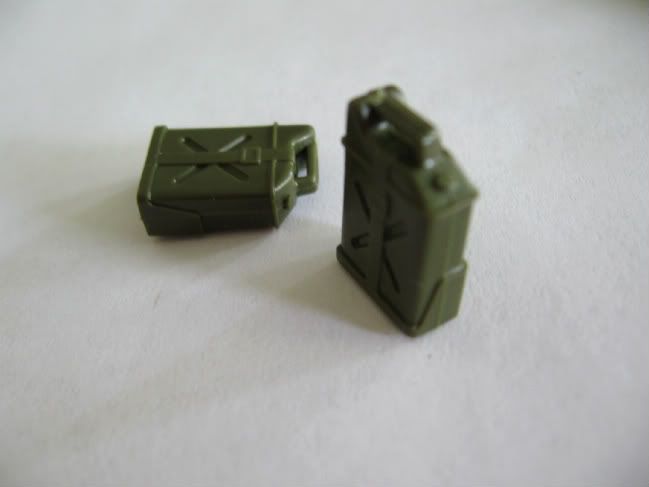
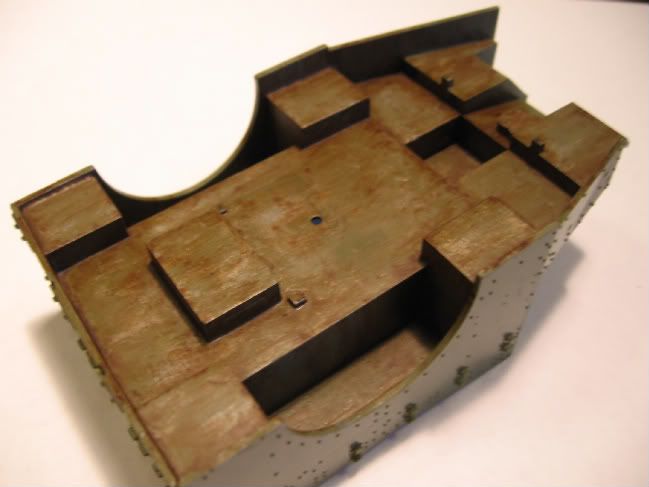
I also started the weathering process on the bottom of the passenger compartment. First had to apply a coat of Future to protect the enamel paint dry-brushed on. Then two washes went on, first was a burnt umber/burnt sienna, over that went another burnt umber wash.
All comments, questions, and suggestions welcome!![8D]
Michael would the jerry cans still have the [U.S.] on them? I really don’t don’t know about that one, ie. if the Soviets would have had a different one.
I’m pretty sure that since it was a Lend-Lease vehicle, the Soviets would have recieved the vehicle with the US jerry cans. (the very crude kit supplied jerry cans seem to american in design) Plus, after I scratch the straps that hold in the jerry can, the “US” mark won’t even be visible, so I’m not worried about it.[;)]
That’s a nice touch on the gas cans. I really want to see how you finish this off, so hurry up already![:)] What kind of junk are you going to stuff in it or on it?
Very cool and unusual build, MG, I like it and your tires look photorealistinc in the pictures. That silly putty realy has a million uses, huh?
Bill