Wow!! Absolutely amazing. This is one heck of a WiP, and your skill level is awesome. So well planned and executed. I can’t wait to see it done.
Hmmmmm;
All I can say , is in capitol letters .WOW ! !
T.B.
Hello! Do you have finally solved the dimensioning of the wheels of the Famo? I am also looking for a certain value.
did you understand what 12.75 R20 means ?!
Thanks and kind regards
Fabio
Hi Fabio,
your post is long time ago but the lack of time (became father a second time) and trouble with my account delayed my activities.
But some days ago I found what you (and me to confirm my model) where looking for.
While I was walking with my son I saw a excavator with writings on his wheels : 12.5 - 20 → I was electrified - almost the same writing like on Famos wheels. The next day I put a folding rule in the bag to take dimensions.
The problem I had until now was: actually I understand how to calculate tyre dimensions but the result does not fit to the dimensions I figured out via checking the Tamiya 1/35 wheel and lots of pics. The rule is: 12.75 is the width of the tread and the thickness is 80% of the width. So the diameter should be 50.8 cm (20 inches) + 2 x 80% of 32.385 cm(12.75 inches) which is 102.6 cm. This is too small. One day I found that the additional writing “EXTRA” means some modification of the dimensions but no exact rule.
Now I’m sure this means 100% of the width instead of 80%. So the diameter is 50.8 cm + 2 x 32.385 cm = 115.57 cm. And this fits very well to the dimension of my model tyre.
Additional I found this info paper from 1939 which has measures of all kinds of tyres used in Germany in this time : http://delibra.bg.polsl.pl/Content/28300/BCPS_31954_1939_Technisches-Handbuch.pdf
Page 49 !!!
I will post some progress on my project very soon.
Bye Matt
Matt how is your 1:10 Famo project proceeding? I was working with a fello in Germany to build one of these but he had to stop for health reasons. I have the parts from his progress and they are quite good so far but I do not know how they compare to your standards.
You had asked who might be interested in a group project. I have some metal casting and metal forming capabilities and would definitely like to work with you on this project. I read your progress on Panzer.de with interest.
Jerry Carducci
Hi Jerry,
late reply but there was some trouble with my account. I tried to login from time to time, tried to reset my password without getting some mails, tries to call the service desk (they hung up as soon as I explained I’m not a regular customer…). But today, it worked ! I clould reset my password. So I dont want to create a new account.
Do you talking about Uli in Germany ?
Maybe you will find some progress on rcpanzer.de ![]()
I’ll issue the group project idea in my new post here.
Bye
Matt
Hi everyone,
after a long break I’m happy to be able to report on some progress. Actually I continued working on my model early 2022 but I stuck on a problem - but let me tell you step by step.
Last year I had my 50th Birthday, time to think about: it is possible to finish this model in my life. So I focused on the front axle as a delimited module of the whole model to see how long it takes and if I can finish this.
Some parts I wanted to be created by a 3D-print service (Shapeways) so I had to model these parts. Also for the other parts I continued to complete my 3D-model. Again hours of research, analysing images, modeling and correcting. Shapeways is able to produce parts in a great variety of materials including metals like brass and steel. So I could’nt wait to order my parts after I finished modeling. When I got the delivery I was overwhelmed.
So here are some pictures:
Original Axle (Koblenz)
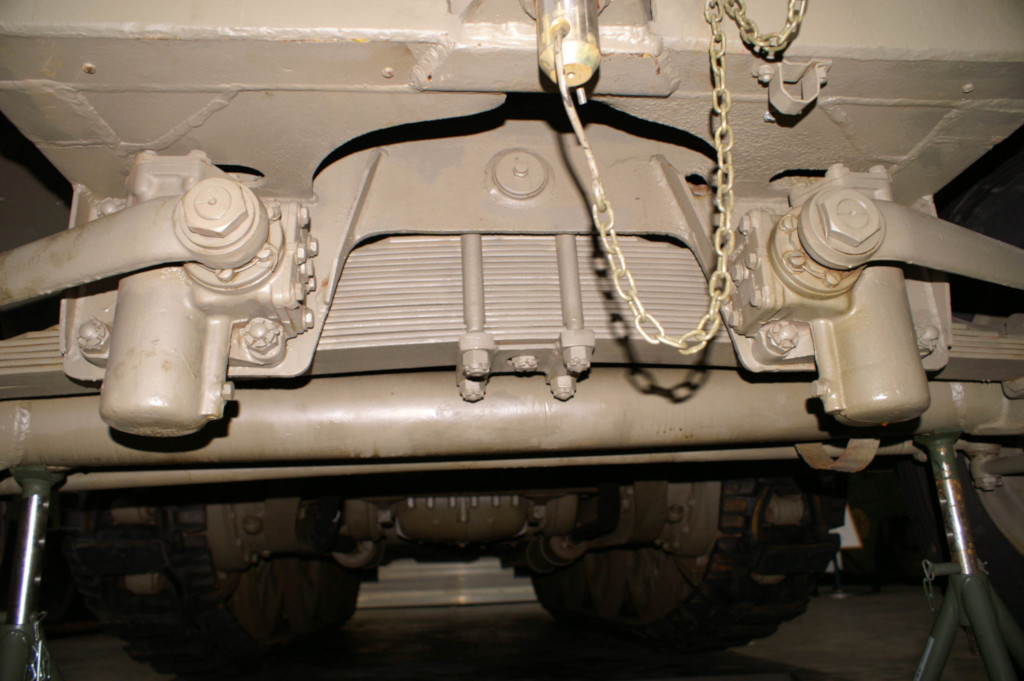
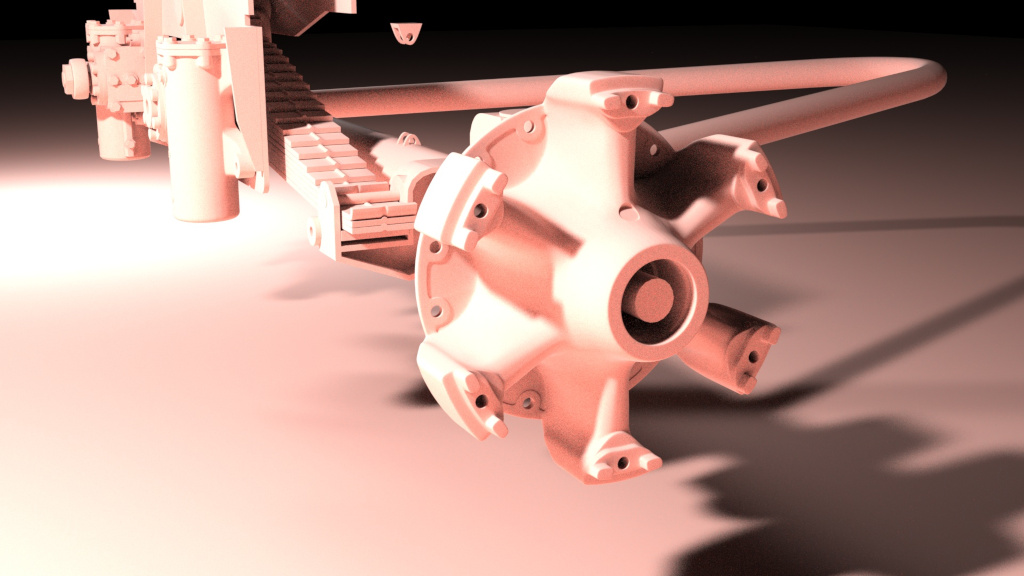
My 3D-Model of that
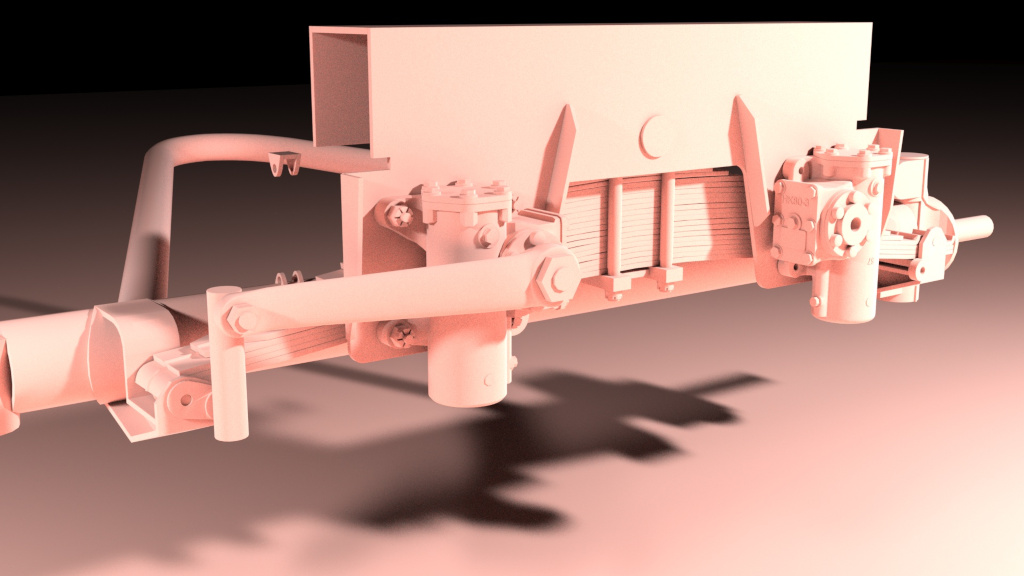
Original (unknown)
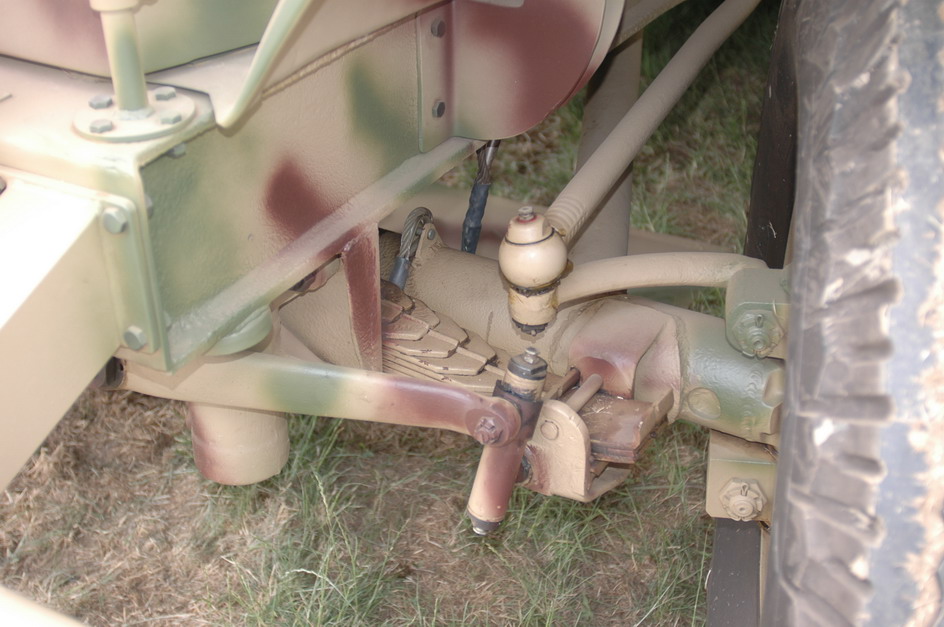
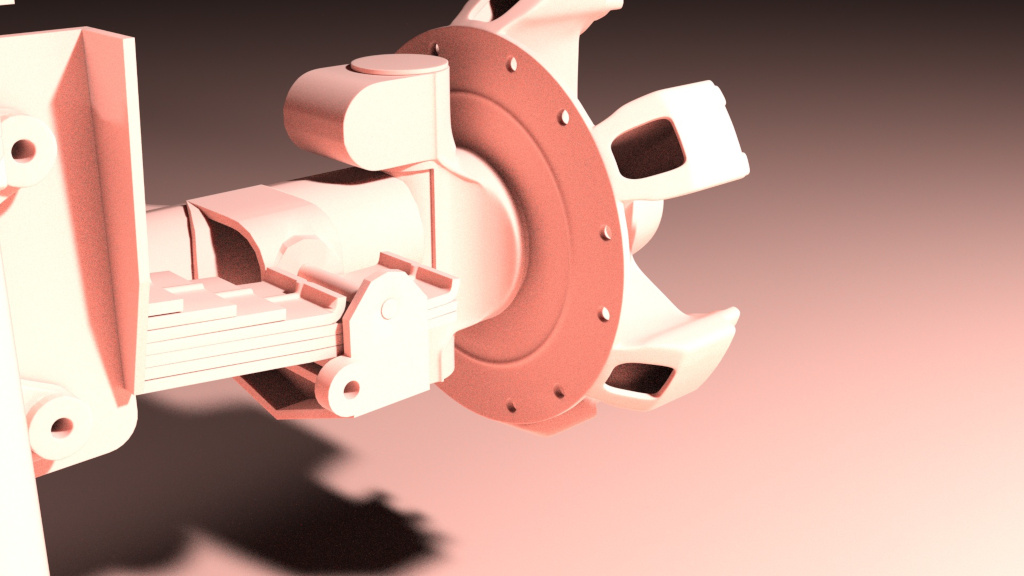
My 3D-Model of that
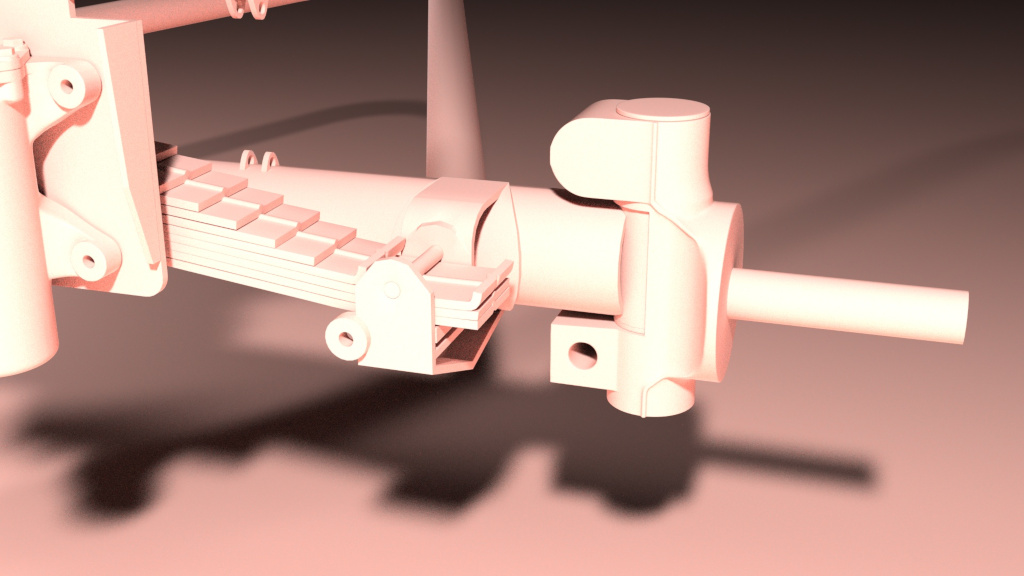
Original (unknown)

My 3D-Model of that
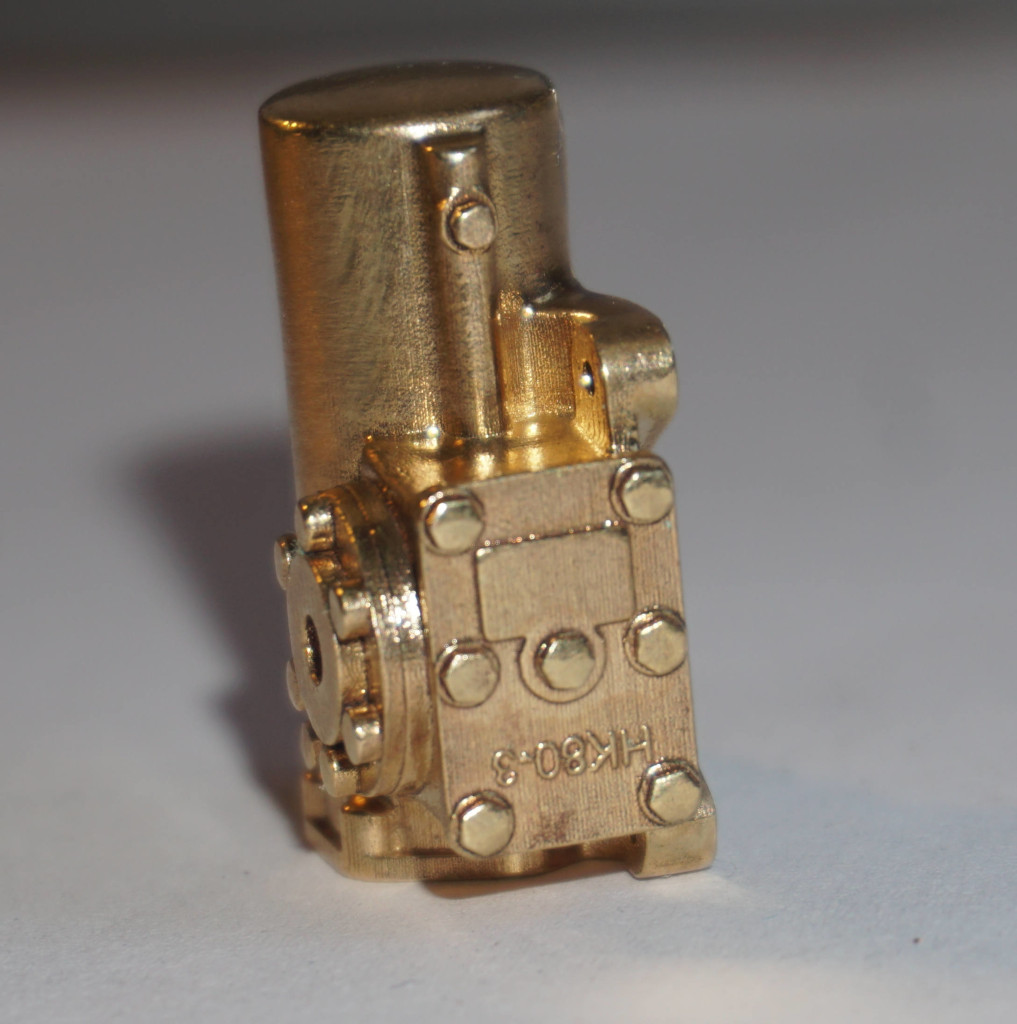
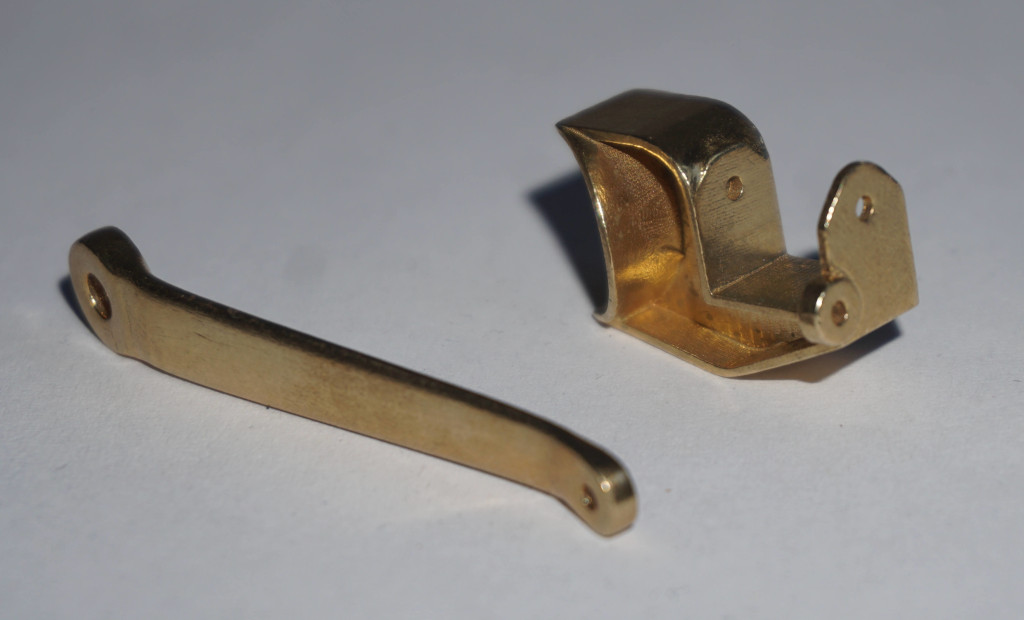
Now the metal parts from shapeways. Here the left damper can with cap (brass)
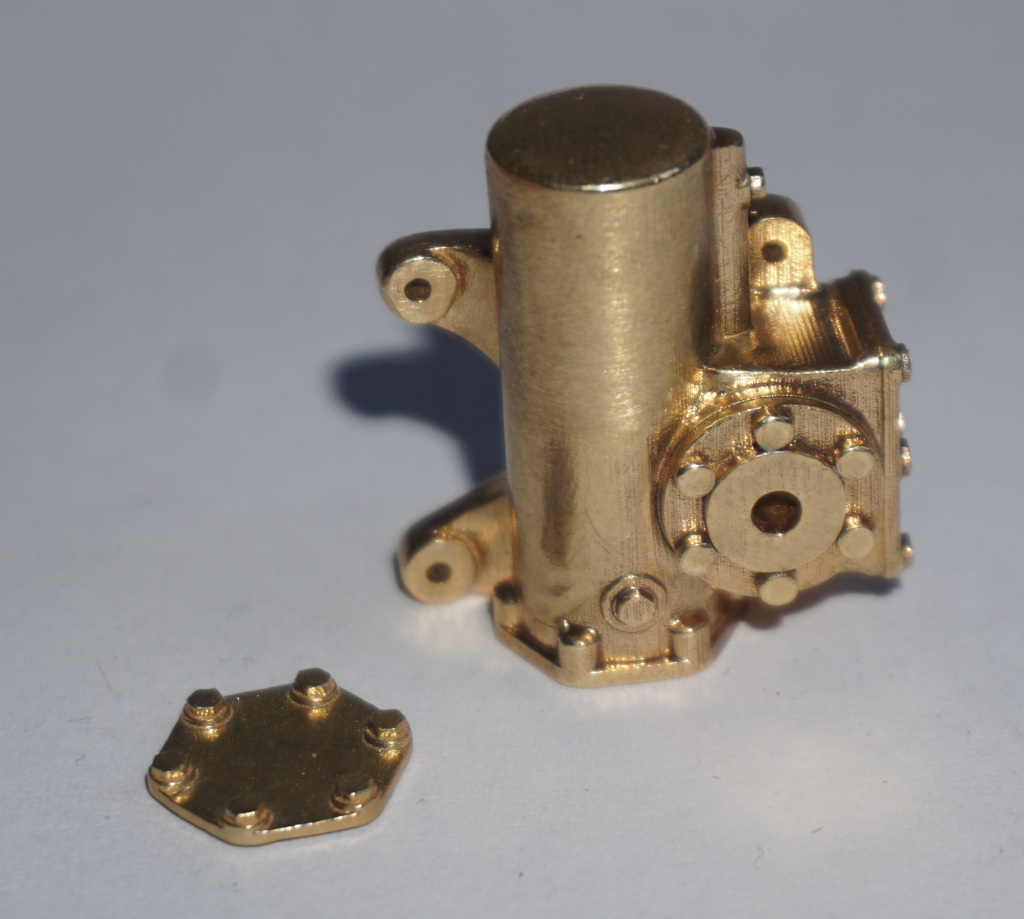
The writing are greatly visible
A spring mount and a damper lever
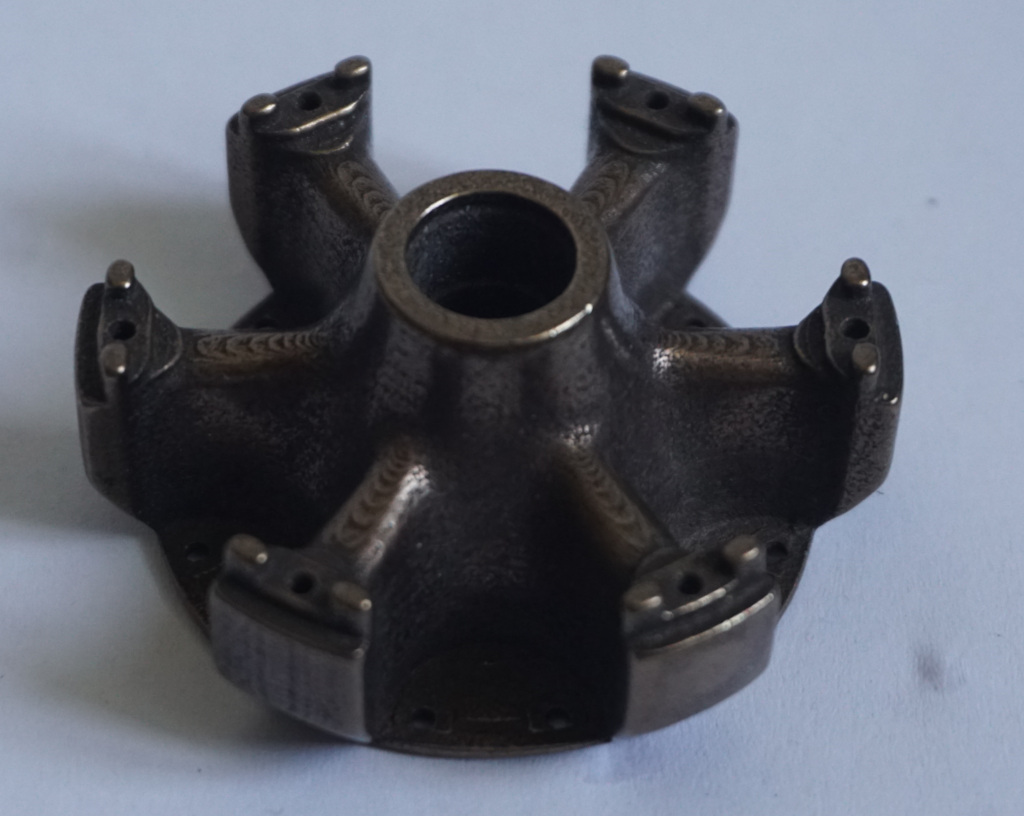
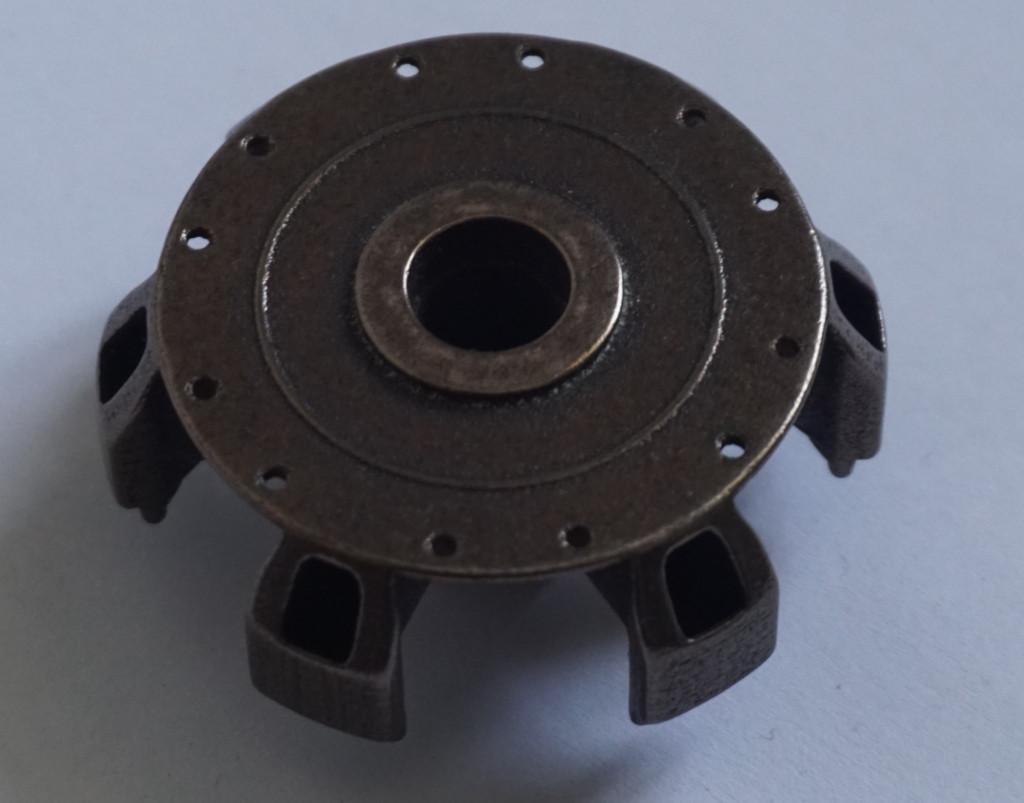
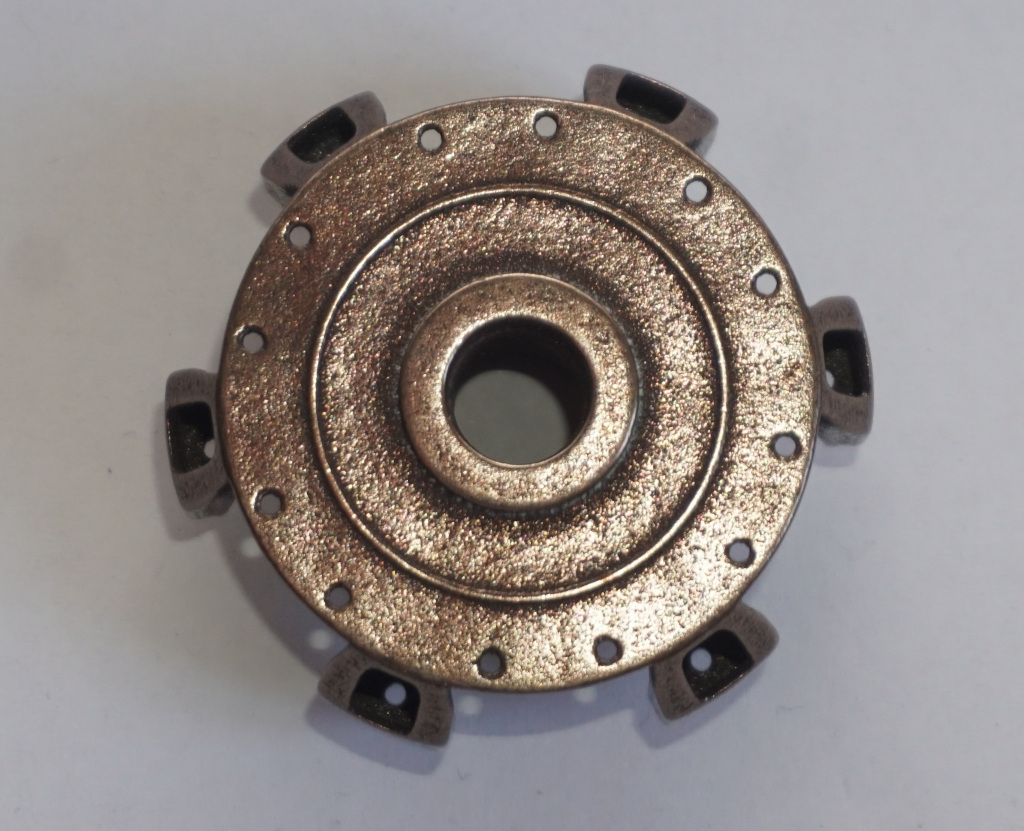
The rim made of steel saturated with bronce
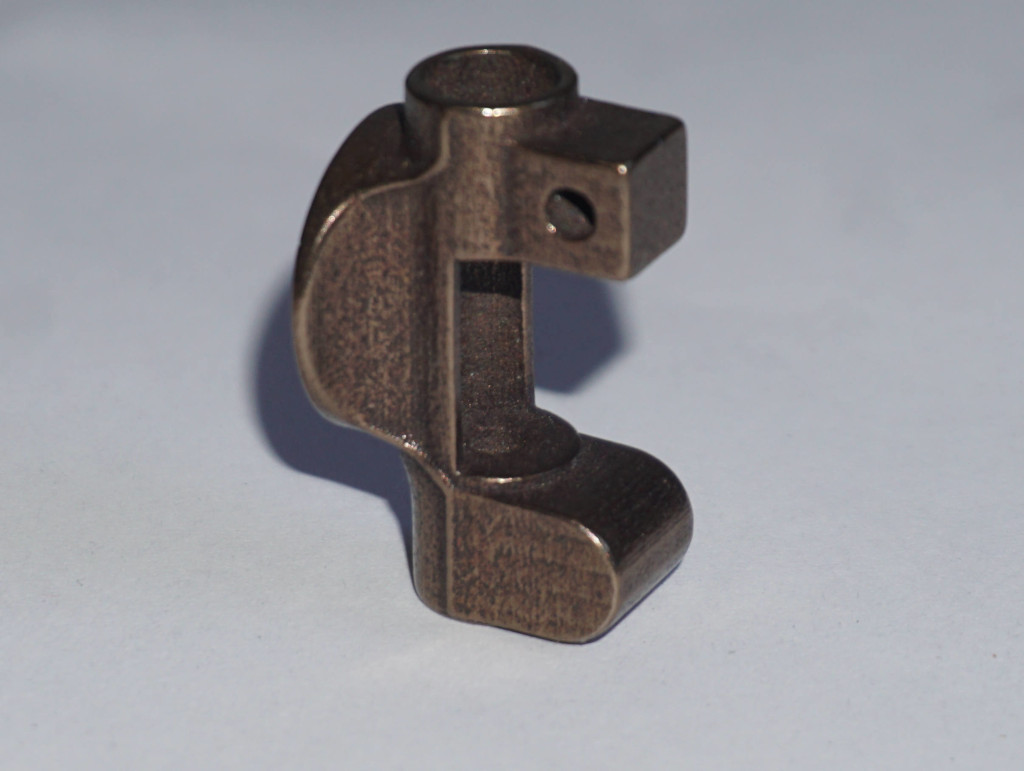
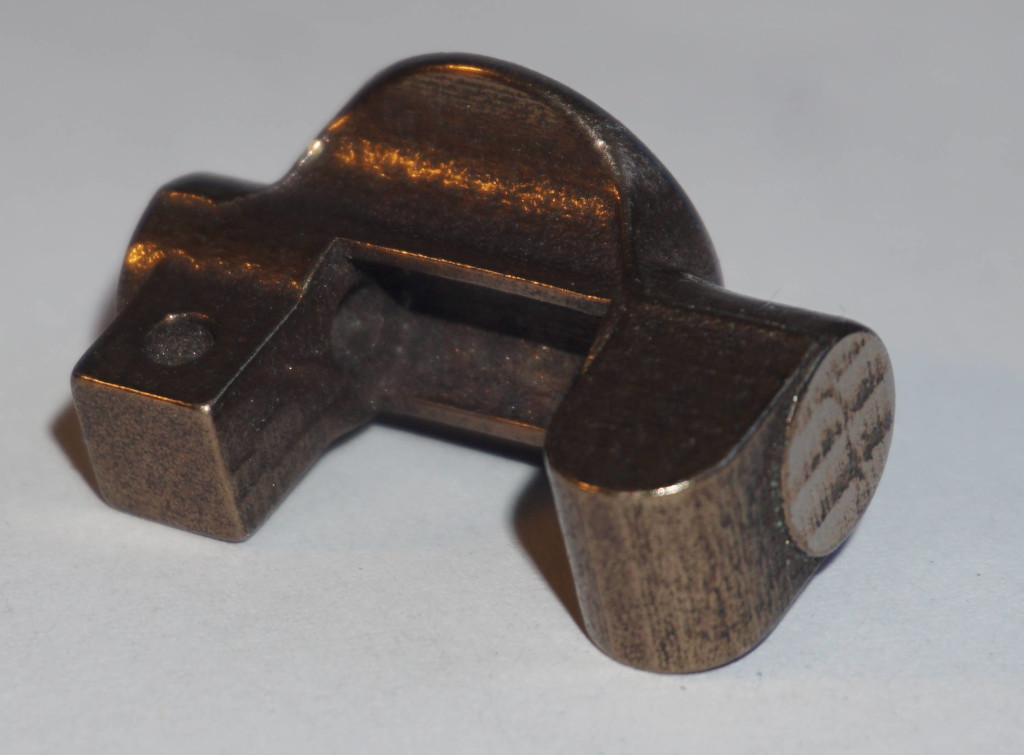
Knuckle
Some notes to the prices of theese parts. In May 2022 the costs for the rim was 30 EUR and 15 EUR for the spring mount. Now the prices are 70 EUR for the rim and 18 EUR for the spring mount.
The steel parts have to be machined to mount the wheel axle on the knuckle and to fit ball bearings in the rim. Hope they will by machinable.
I’ve been working on the leaf spring and will report very soon about its progress.
Bye
Matt
Simply amazing work! I’m having trouble discerning the real parts from your fabricated parts in 1/10 scale. Awesome!
Hi CrashTestDummy,
thanks for your reply.
with this post I would like to show whats going on besides creating parts with 3d printing.
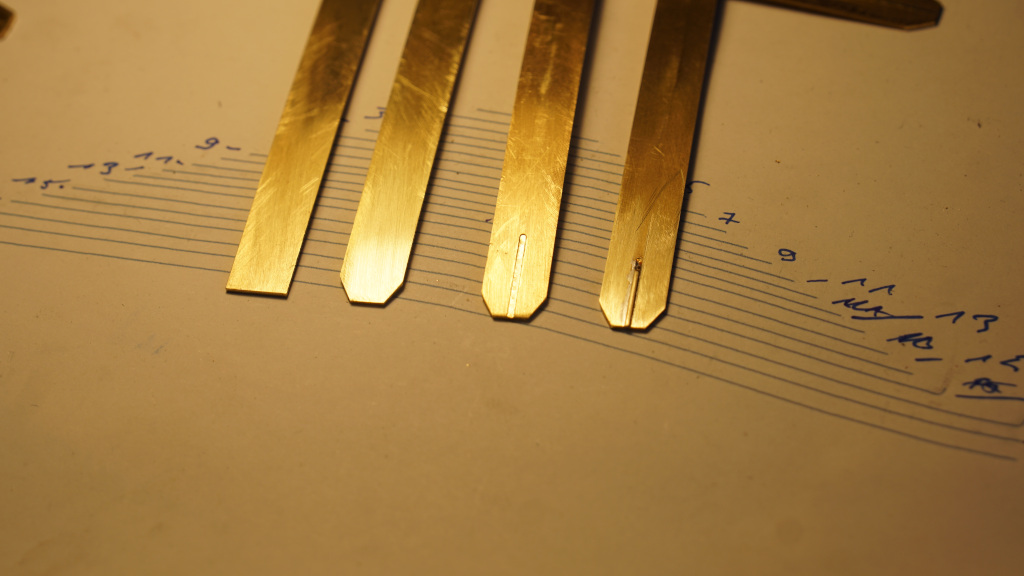
There were 3 different types of the leaf spring. One with flat springs bound by metal belts to keep the whole thing in shape (a very common way), one with a special profile wich keeps the leafs in place and a version of this with chamfered ends.
Here you can see all thoose variants from left to right:
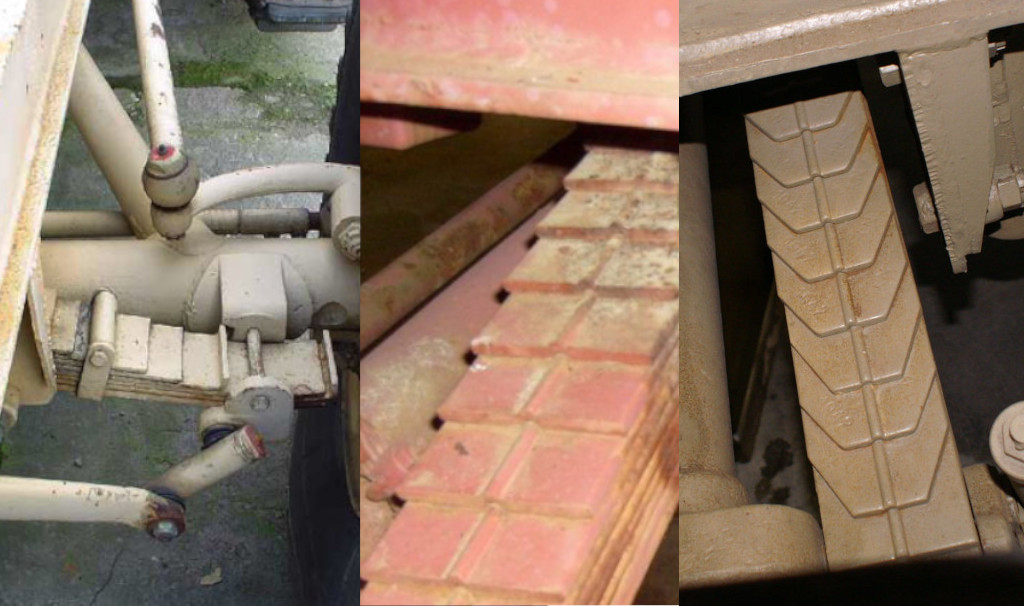
Dont ask me why but I decides to build the most complicated version - the right one.
After cutting the 9mm stripes out of brass and bronce sheets I used a self made chissel to scratch a groove at the underside of the stripes. Actually I wanted to mill the tongue at the upperside but after milling the 0.2 mm raw tongues I found that it was not possible to bring them to a round shape to fit to the grooves. Have a look at this video to see some work on the milling machine :
So I was in need of an plan B. I had to remove the 0.2mm raw tongues to get a flat upperside. Then a very fine groove was made at the ends to place and solder a half rounded brass wire. Althoug it was lot of work I’m very happy with the result.
Here are some pictures.
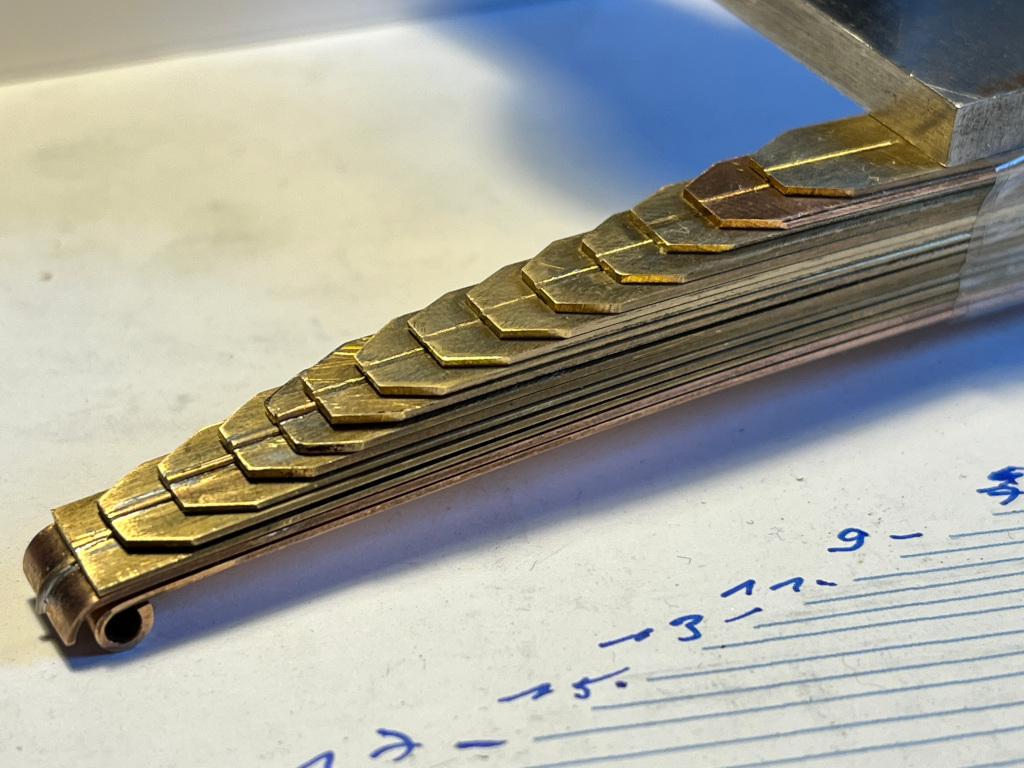
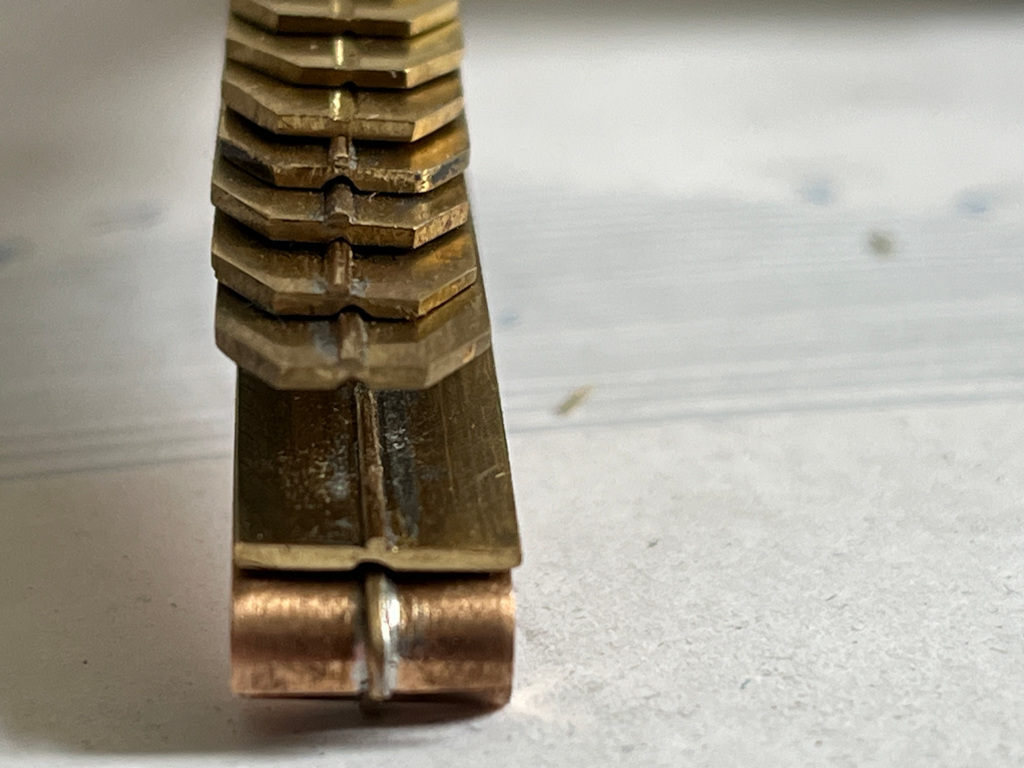
Here you can see the shape of the tongue und groove very well:
Here you can see all the springs in different processing stages:
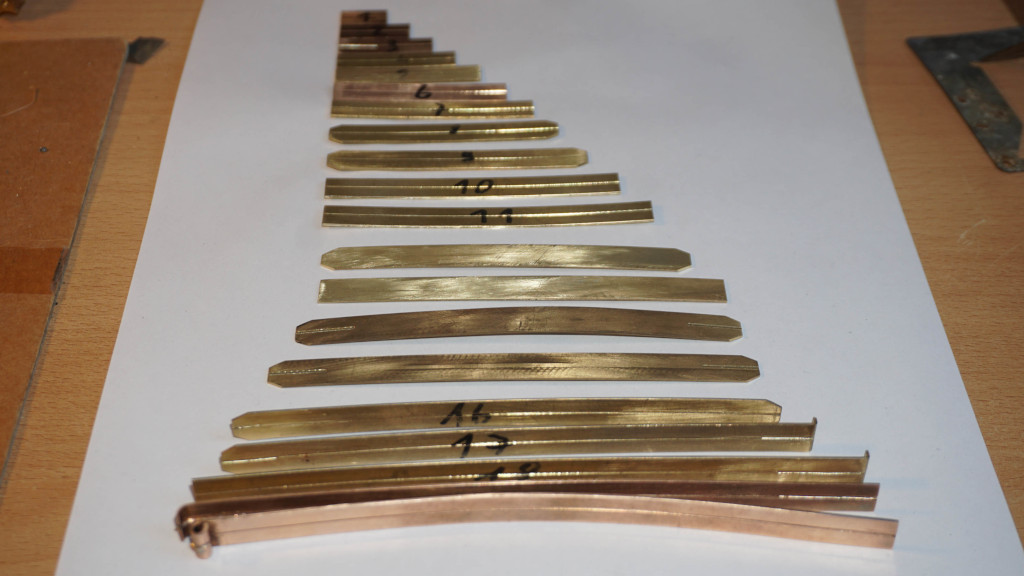
To get an overall impression I stacked all the springs:
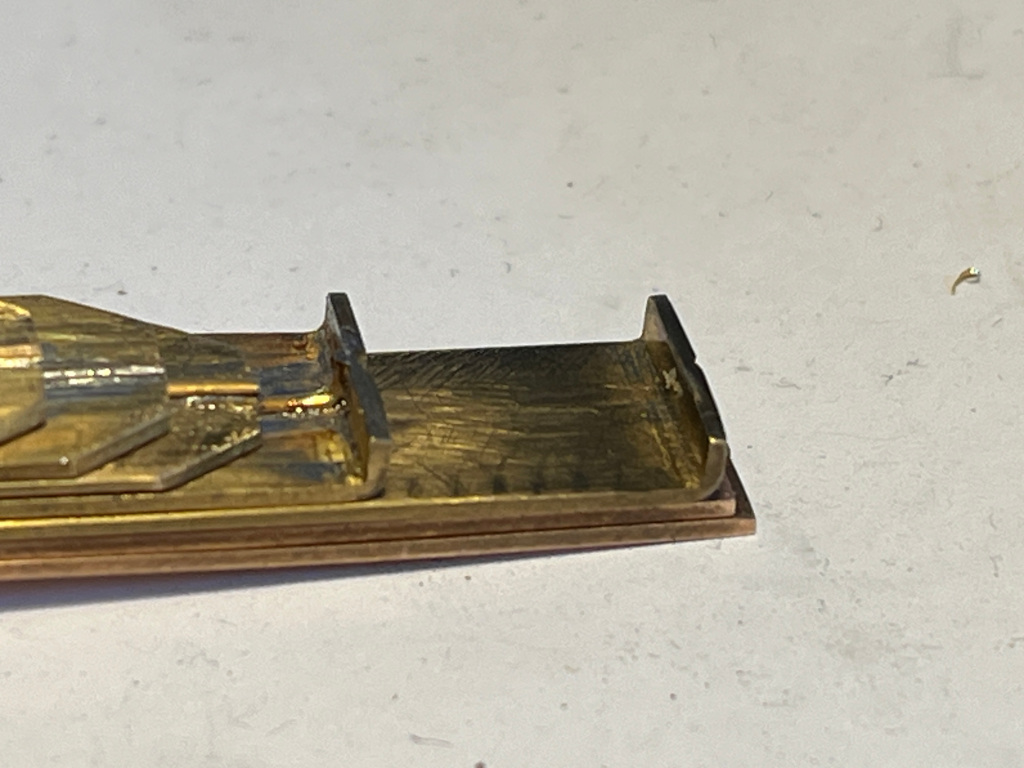
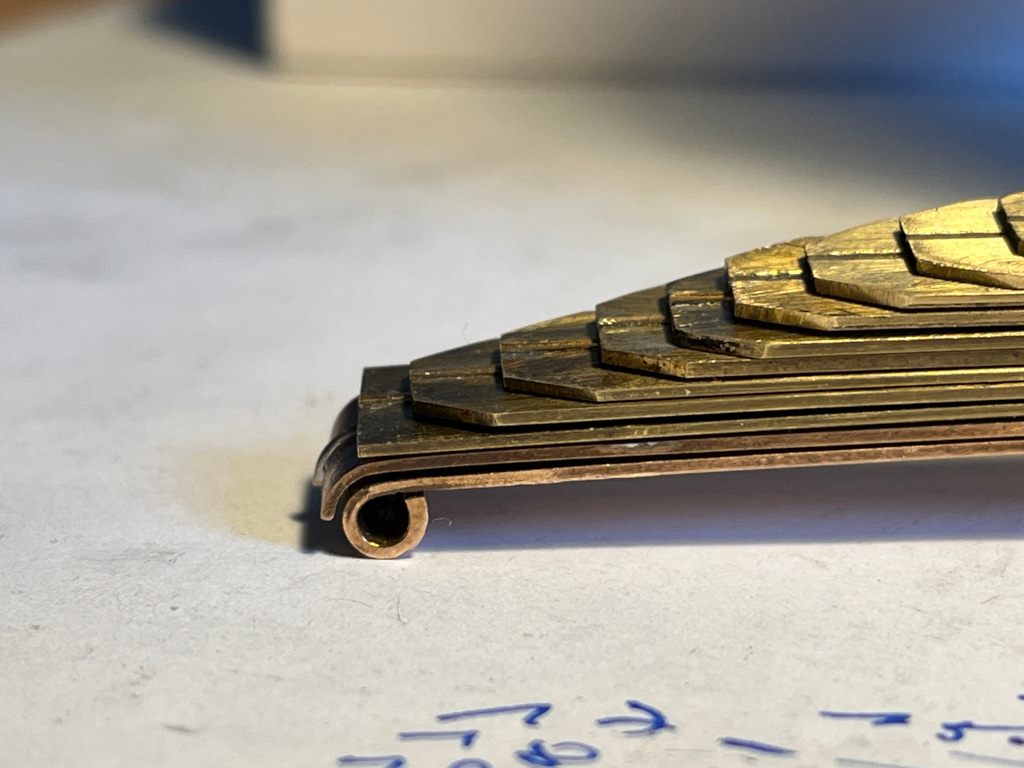
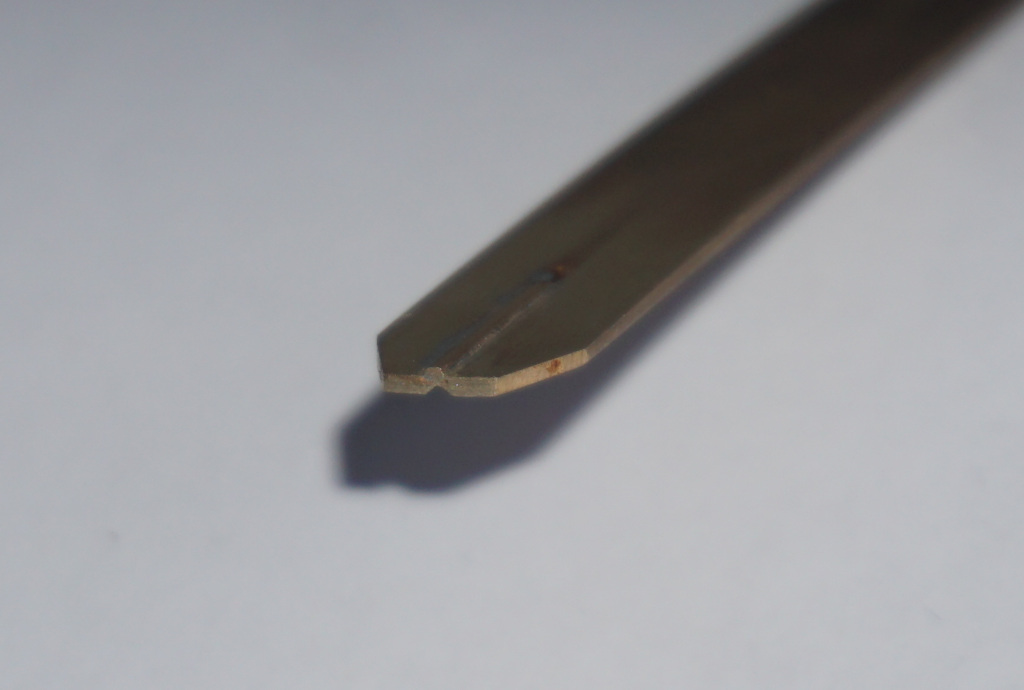
The last 2 pictures show how I marked the chamfer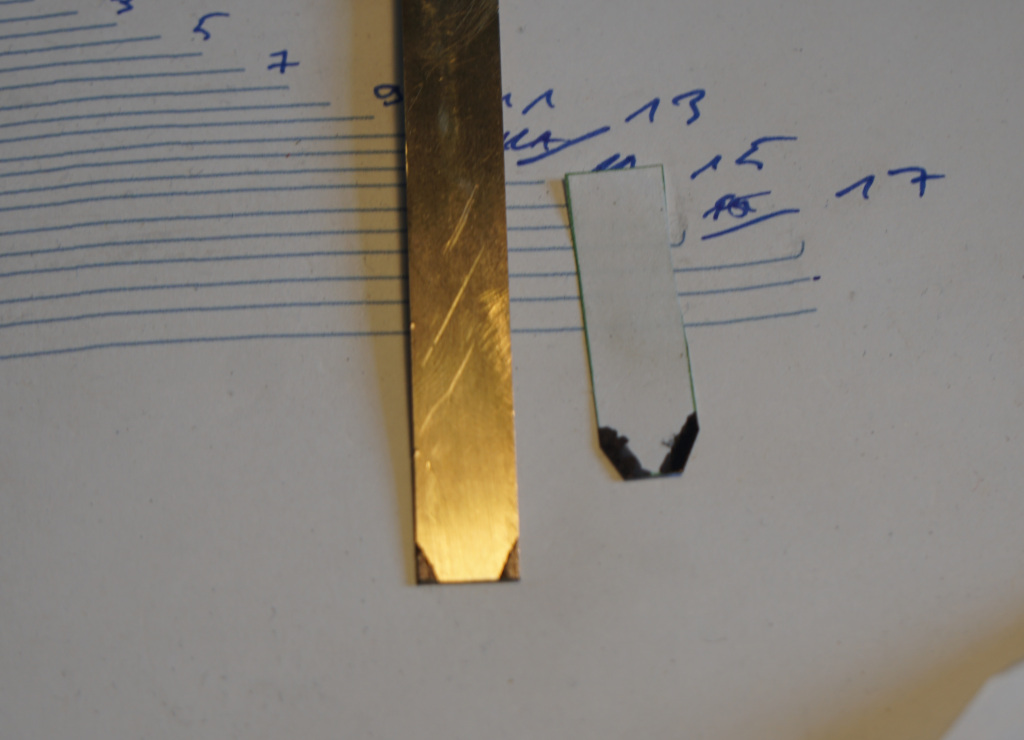
and the stages of processing the ends.
Now I have to finish all the leafes and mount them together.
Bye
Matt
OMG!!! This is an amazing build! That gearbox looks awesome!