Excellent work so far Gino.
Thanks feldgrau23.
The build continues. I have completed the interior and it is ready for paint.
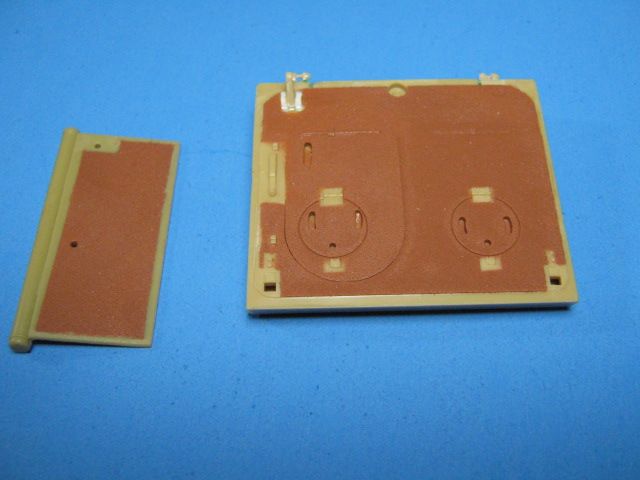
I added non-slip to the interior floor using Rustoleum Terra Cotta spray paint that I decanted and brushed on.
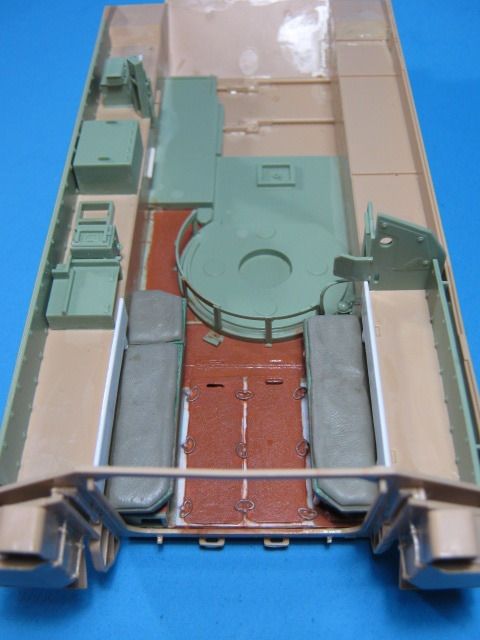
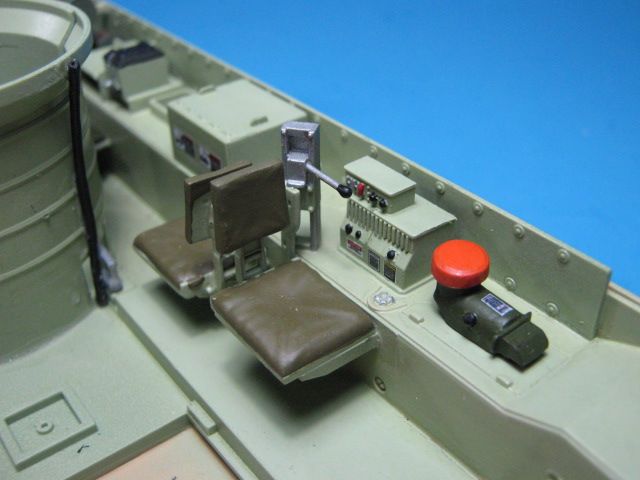
I built the rear bench seats as well. The main bottom part is from an M113 side skirt, with “L” angle styrene sides, and square rod stock for the legs. The cushions are from A & B putty and the back cushions will be from the kit seat backs, on new plates.
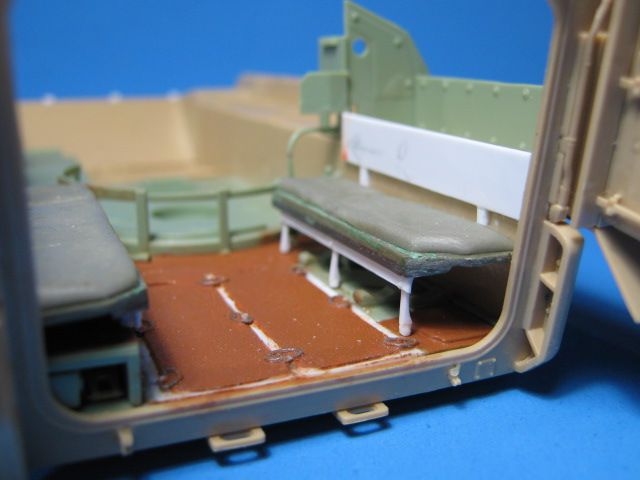
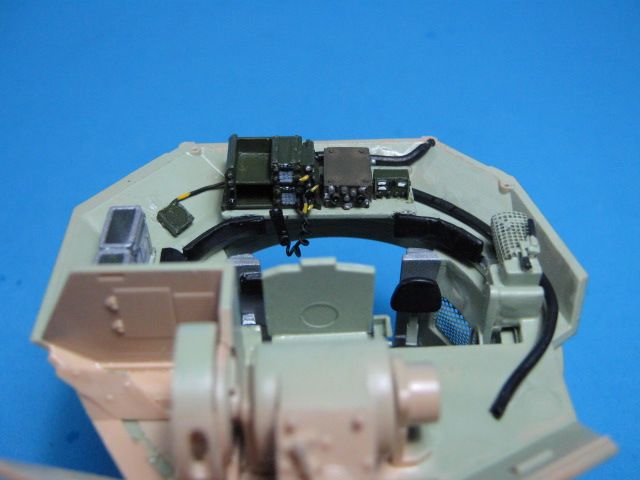
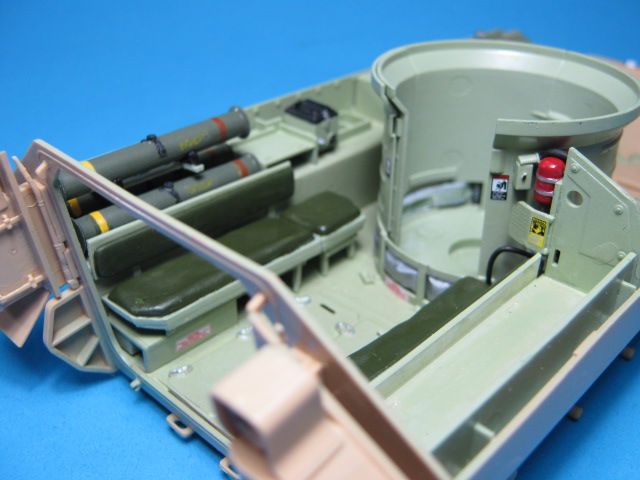
I detailed the ceiling a bit by adding mounting plates for the intercom J-boxes and speakers, the cables and handle to release the ramp locks, and a mount for an AT-4 on the right side.
I also added non-slip to the Academy roof section and hatch, as well as to the inside of the Academy M2A2 rear ramp and to a work platform which will be added below the TOW launcher.
Off to the paint booth next, then detail painting. Lots more to do.
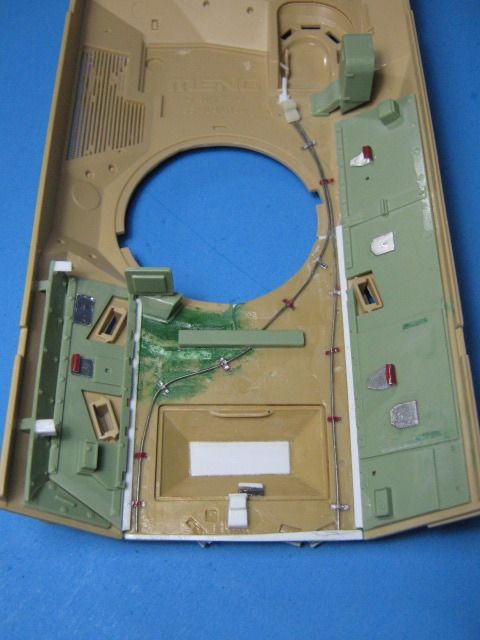
The rest of the turret and interior parts ready to go as well.
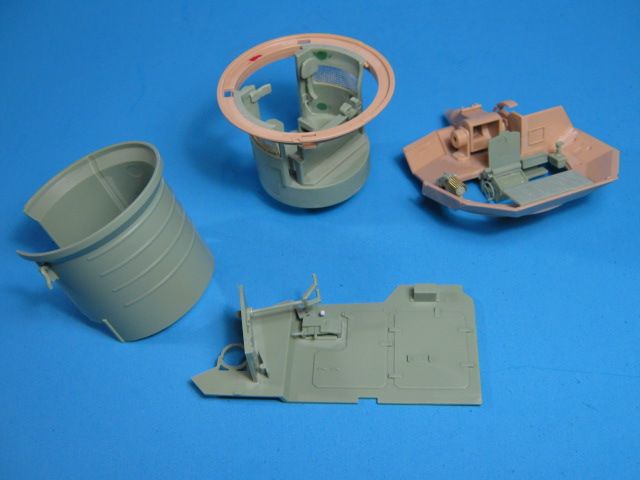
Of note, I removed the radios off the shelf in the rear of the turret. The kit radios are older, series 46 radios. They were replaced by SINCGARS in the early to mid '90s. I have a set of SINCGARS ASIP radios from Pro Art to install in their place.
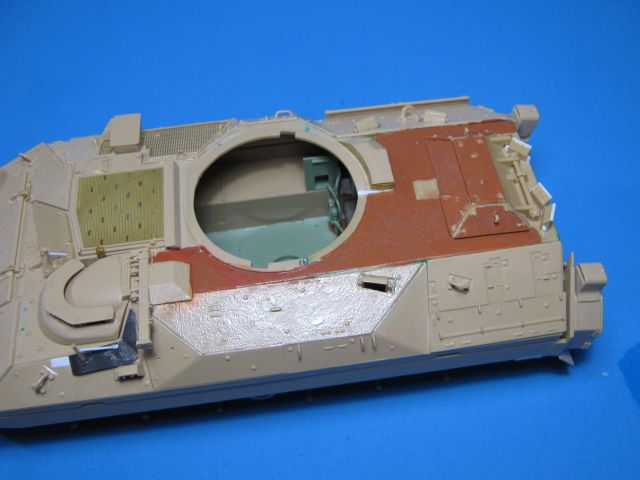
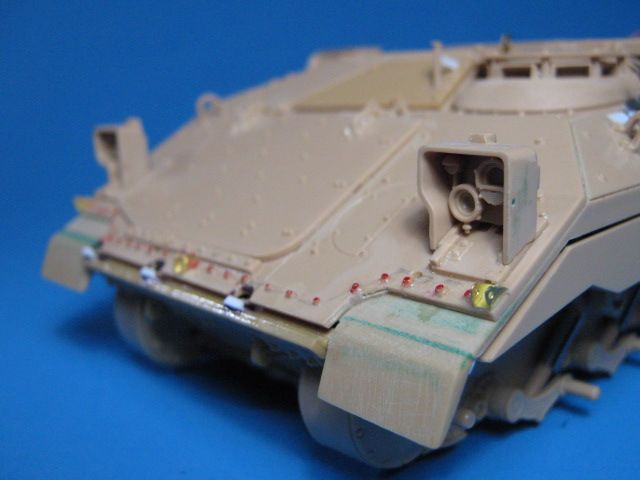
Also a shot of the completed front glacis that shows the added swim barrier attachment pieces.
HeavyArty: That is some outstanding and diligent workmanship! Those details will really make this thing shine once the paint flies!
Question: Are those to-scale bolts something you bought or created yourself?
SMJmodeler - Thanks for the compliments. I have started painting and adding details to the interior already. More progress pics probably by the weekend.
As to the bolts, I used bolts that come on the sprue runners of some kits. I save these sections of sprue for later use. I think these came off a runner from the Orochi M3A3 kit.
There are many sources for nut/bolt heads out there. Many kits have extra bolts included on the runners (esp. Academy kits). You can also buy bolt sets from Meng and a few others. Grandt Line, a model train company, also sells bolts of various sizes. You can also buy plastic hex rod from Plasrtuct in various diameters that can be sliced to make bolt heads. Lastly, you can harvest them from old kits. I have a bunch of left over original M2 side skirts from Academy/Tamiya M2A2s (the old parts are still on the sprues) that are covered in bolts that I shave off and use as needed. I use bolts from all these sources often in my builds.
She is looking really nice Gino, some great detail there.
Very cool Gino, I love the bucketloads of extra detail you’re packing in there!
HeavyArty: Thanks for the ideas about the nuts/ bolts…I already thought about the Plastruct route but never thought of “harvesting”. That’s why I like the forum so much!
Looking forward to those progress pic’s![Y]
Thanks guys. Still working on detailing the interior.
The usual outstanding details. When it is finished, how will it display so you can see the great internals??
Rounds Complete!!
Thanks Mike. You know I like adding the smallest details. Unfortunately, as usual, most will probably not be seen. I will keep all the hatches open. Hopefully you will be able to see most of it in the back at least.
Wow, superb detailing, Gino–really a showcase!
Thanks Doog. The interior detailing is just about done. I will try to get some more pics up this weekend. Now to add all the personal gear and make it look lived-in.
I have completed detailing the interior.
In the turret, I had to lower the radio shelf at the rear by about 1mm to get the SINCGARS mount to fit w/out hitting the periscopes. I also added the arm pad in front of the TC’s joystick and kidney pads on both sides behind the seats. Additionally, I added the TC’s lower seat, left off by Meng, they have the TC’s stand, but there is also a fold-up seat that goes over it for when he is seated.
I added the two missing 25mm ammo chutes from the ammo box in the lower left side of the turret up to the shelf under the gunner’s sight. They were left off by Meng. I used a couple sections of an Eduard .50 cal feed chute for them, folded around a piece of 0.040 sheet styrene to make it larger for the 25mm shells.
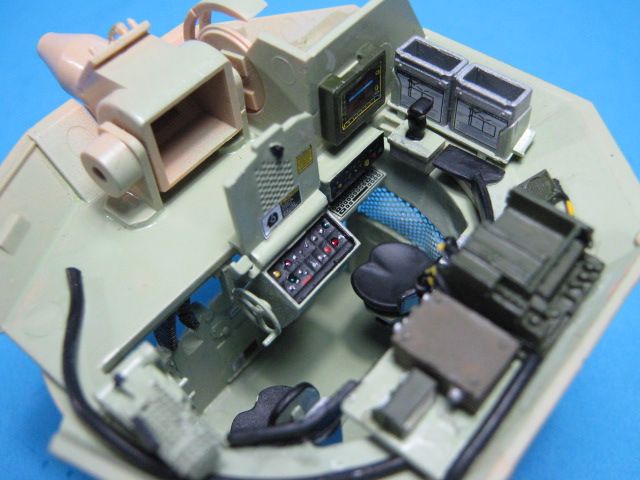
I added an intercom control box, a couple J-boxes, and a speaker box to the walls of the upper turret as well. In the turret I only added a few wires since they can’t really be seen once it is assembled, but I know they are there.
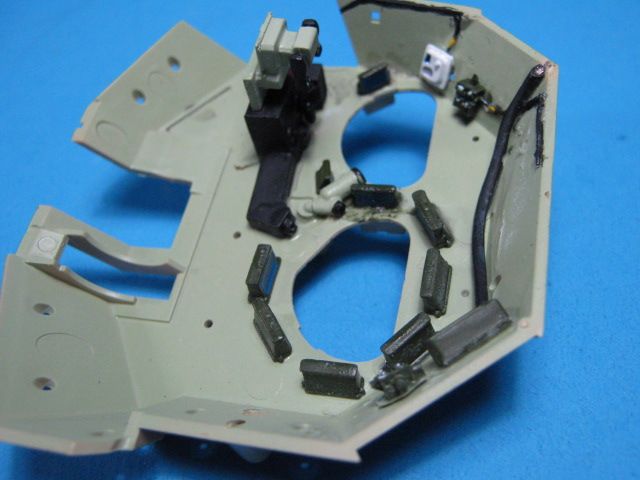
On the hull roof, I added J-boxes, speakers, and lights, all wired up with thin solder. I also added the AT-4 and fire extinguishers.
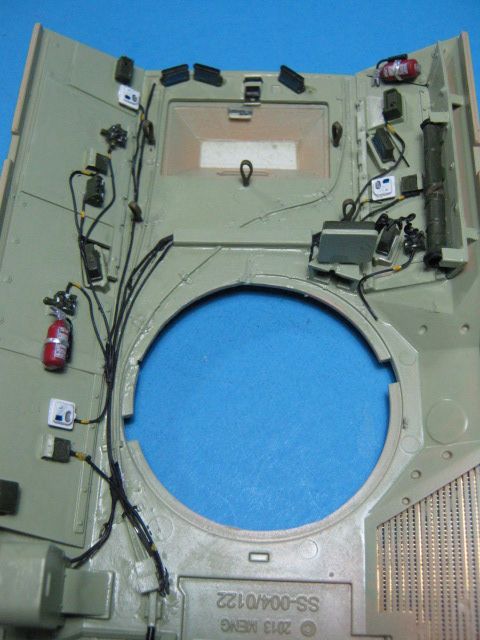
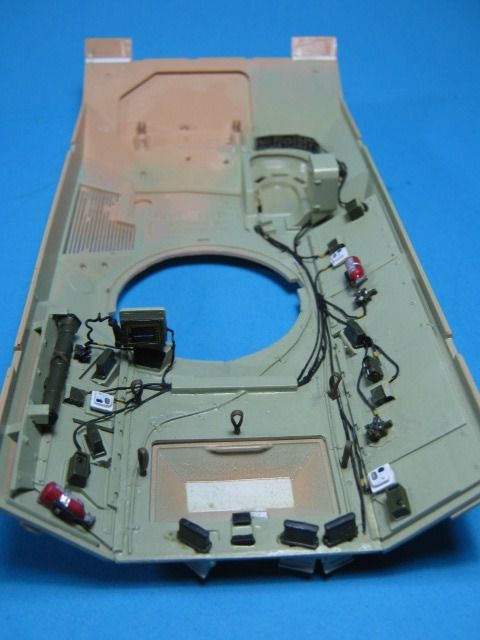
In the back, I added the TOW rounds on the left sponson and under the right seat. I scratched up the correct mount for the TOW round on the top of the stack on the left side. It is actually on a rack that folds up so you can access the rounds below it.

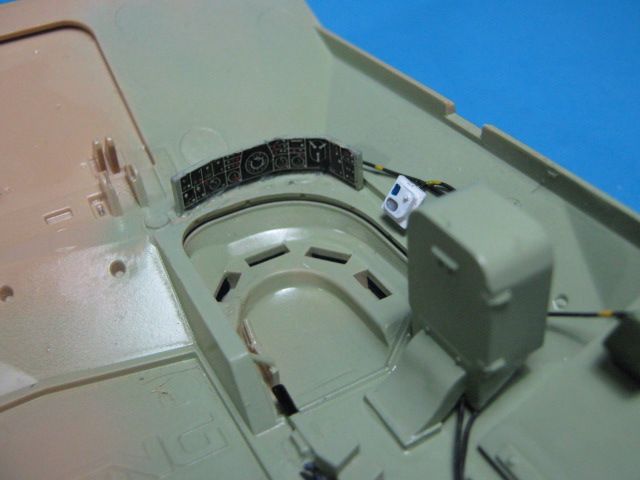
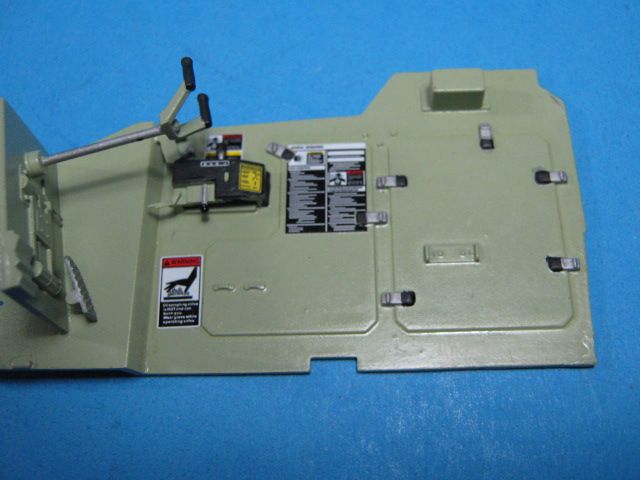
Up front I added the instrument panel and decal from the Tamiya M2 kit. I also used the driver’s IR periscope with orange lens cover. I added a lever/handle for the driver’s seat adjustment as well.
The rest of the decals are from the kit. They went down really well and look great. I really like how the interior went together and like how it looks.
Next up is to weather the interior and fill it up with gear to make it look lived-in.
I just found 25mm ammo cans from Djiti’s Productions from France to go inside.
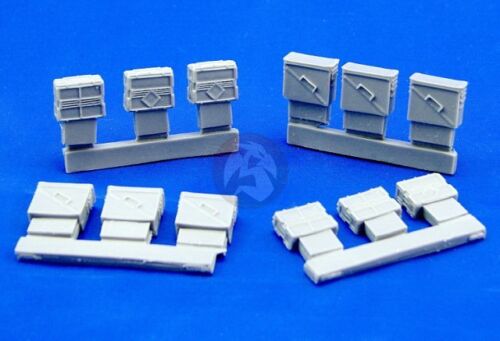
I also found the decals for them from Archer. The whole right side of the sheet (w/the orange diamonds) is for the 25mm cans.

Some of these will go on the interior.
Wow, I love all the extra hardware and wiring. Only question I have are you adding a breech to the main gun or does it not show when the Brad is closed up?
Thanks Gamera. The breech area will not be seen once the turret is closed. The small wall with vent holes across the front, above the gun control panel (see below), and the gunner’s primary sight box, block that area when all closed up.
Thanks Gino, maybe it was a stupid question but I was wondering [:(DD]
Not a stupid question at all.
HeavyArty: With all that interior detailing I’d leave every hatch and door open as possible![;)] That is some spectacular work…and there’s weathering still to come, WOW!!![Y][Y]