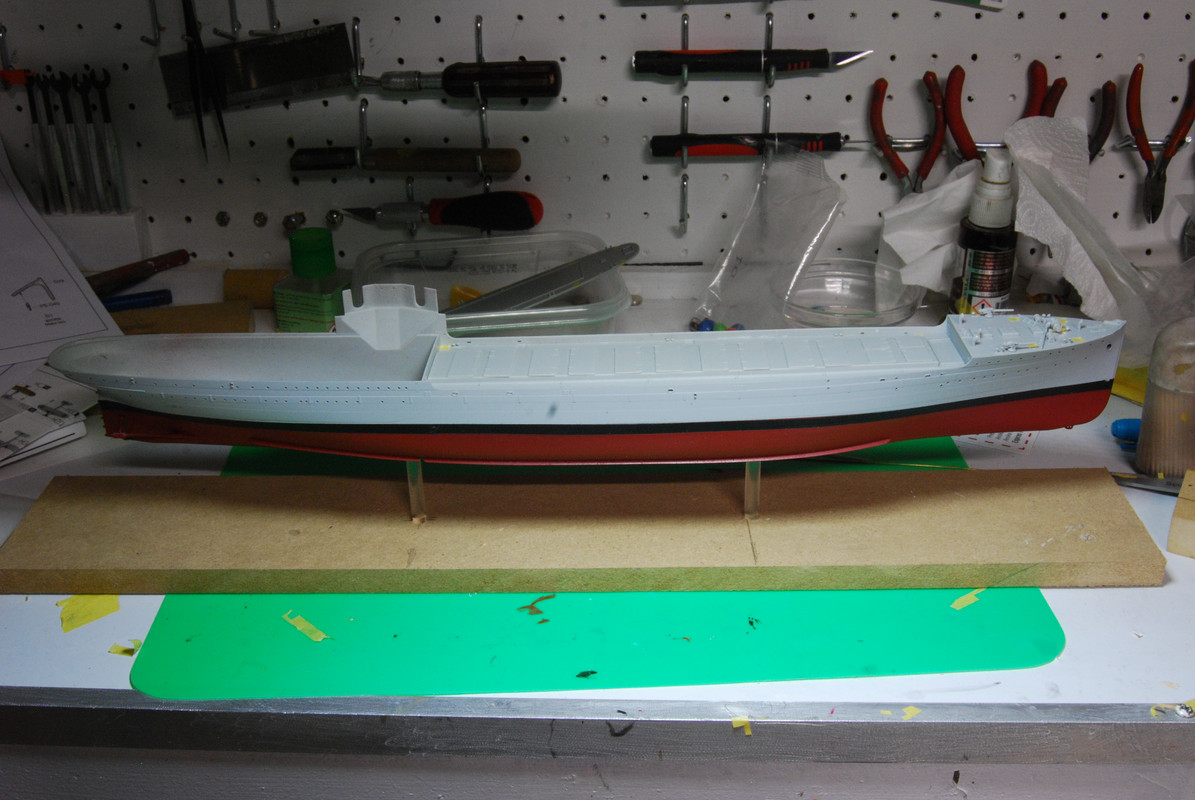
There is some deck sheer, but very little.
Have you seen the build over on Model Shipwrights? https://forums.kitmaker.net/t/seaplane-tender-uss-langley-av-3-1-350/11857/74 Some really impressive etchwork going on there.
Don, see if the bow sheer matches these plans.
AC-3 – USS Jupiter – Plans, 1913, Collier (later converted to USS Langley CV-1), https://www.hnsa.org/wp-content/uploads/2014/08/ac3.pdf
Well, remember that she was an experiment, as were most of her contemporaries, the “firsts” around the world. At that time, I think more objections were raised about having anything sticking up out of her flight deck, than about having a raised control platform on the flight deck. I think the question of an island was effectively settled by her early operations, and the answer carried forward to the Ranger’s design.
This is a subject that I’d love to see someone bring out in injection-molded styrene in 1/700. I know there was a resin kit of the Langley (Corsair Armada?) but I’d prefer styrene. I’ve held out hope that Trumpeter would scale this one down to 1/700.
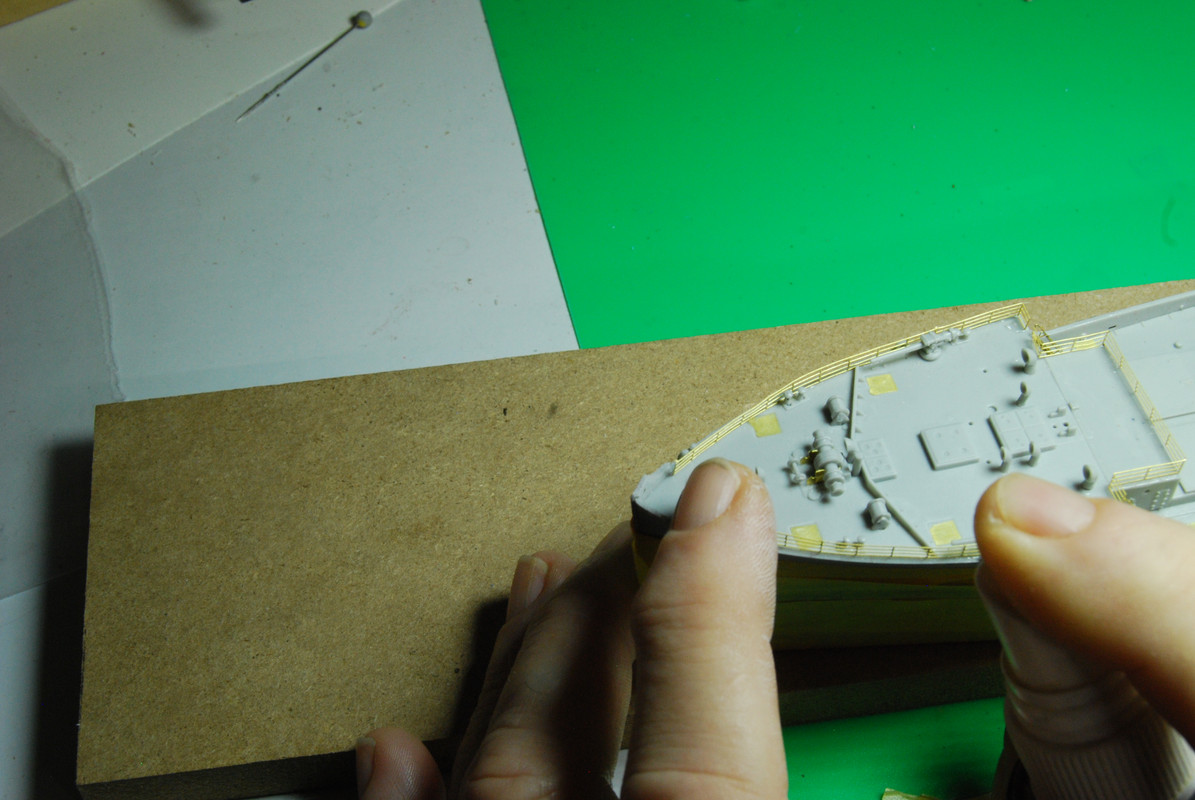
Got the deck painted, and now doing PE (from the kit, not the aftermarket stuff yet) on foredeck and quarterdeck.
I have some concerns about the optional PE (the flight deck support girders). It looks like there is a lot of butt joints (but I am NOT going to solder them all), some at critical angles. I am not confident of getting those angles correct when I glue those girders together.
I am making a jig with a piece of white cardboard and scrap wood. I have measured the locations where that structure glues to main deck, and transferred marks to that jig. But I am not confident of my transfer of measurements alone. I am going to build up that structure with the kit plastic pieces. They look like they have well- designed joints. Then, I will place that structure over the jig to correlate my measurements and the plastic structure. The jig will then help me keep alignment when building up the PE girder work.
Sometimes I say things like that and wish I’d been listening.
I would suggest you rethink that.
Bill
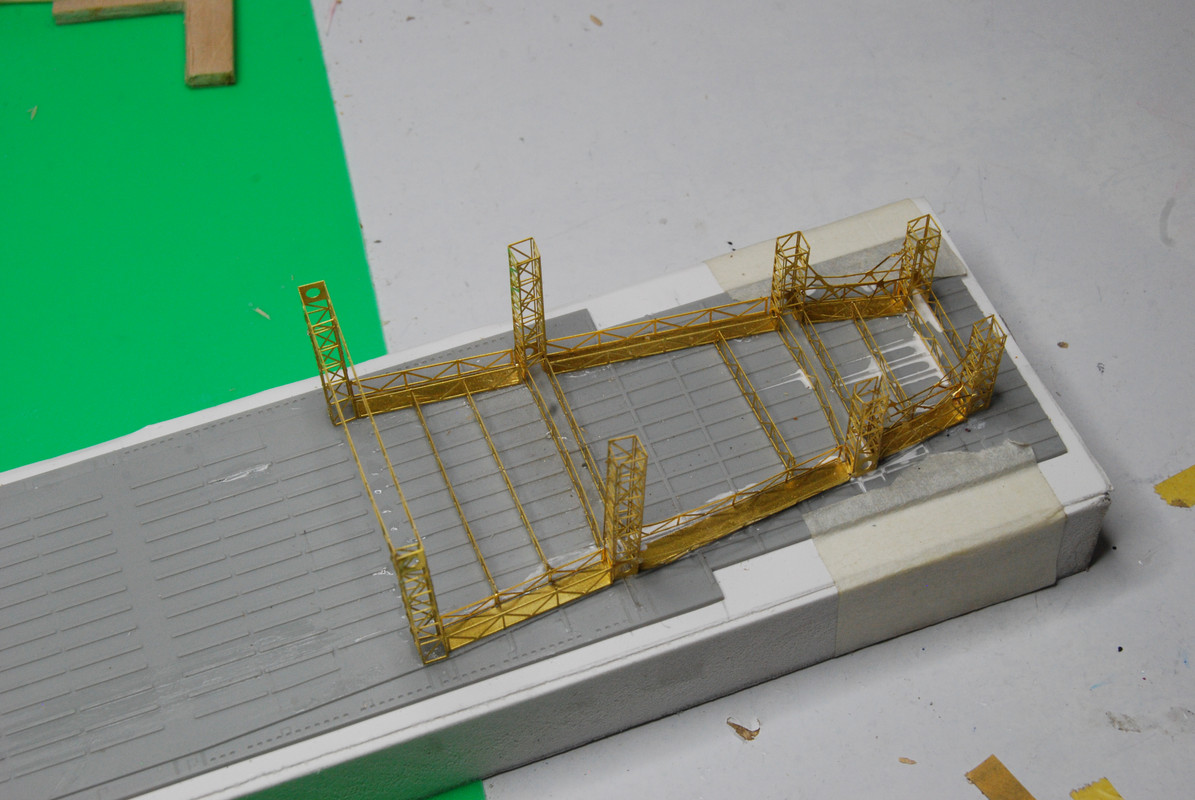
I have scrapped the jig I was making- I found a better way to make sure the grid work matches up to the right alignment. I taped the flight deck down to a scrap of wood, with the bottom side showing. The molding of the deck clearly shows the right position where the girders go, with good precision. I am gluing each girder or girder assembly to the spot where it goes. There is lots of glue area on the brasswork where it attaches to the flight deck, so the assembly is getting strong (I also glue each girder to other ones).

The structure so far is looking pretty good. The white streaks is where I used a bit too much accelerator.
Problem is, that angle is so small I do not have a good way to measure it accurately, especially with the junk on the deck. It certainly looks appropriate.
I believe the instructions for the Trumpeter photo-etch optional package. Each bay of the girder structure consists of two longitudinal girders between two transverse structures. Many bays also contain one or two smaller transverse beams going between the longitudinal girders within the bay. The PE instructions show fastening these little beams to the longitudinal girders as the first step in doing that bay.
But, some bays also have some external additional sections (four per bay) that are installed later to the inside and outside of the longitudinal girders. And these cannot be installed to the inside face of those girders if these transverse girders are already installed! I find I must build up the bay and put these pieces in first- do not install those transverse beams within the bay until after those longitudinal supports are applied. These are the supports like C-5, C-9, etc.
I believe it was Loose Cannon
Really nice work, Don.
I find the PE work the most difficult I have ever done. I shudder to thick of doing it half that size. I would not use pe for girder work- stay with plastic girders in 1:700!
I am at a standstill, going nowhere. There are PE patterns I am trying to glue in place, and going nowhere. Here is a picture of one of these pieces. The sheet is only .006, and the line widths are .016. The temper is like semi hard or semi soft, sort of in-between.

Keeping the piece flat is almost impossible. I have tried keeping the piece on the clear plastic backing while I glue it on. Then trying to remove the backing after the glue sets distorts the piece terribly. In fact the lightest touch bends, twists or curls parts. Have you ever tried to shape a piece of Christmas tinsel foil?
The latest problem I am facing is when I do manage to get it in place the CA glue I am using will not adhere! My theory is that in doing the handling to get it flat and in place I cannot do it all with tweezers. This stuff is so thin that tweezers do not hold all that well, in spite of cleaning and resurfacing the ends frequently. I think I am getting skin oil on the pieces, which is limiting the stickiness of the glue. I am going to try using gloves- will test whether cotton or plastic will be best. I am afraid cotton may stick to any glue spots and trying to tear it away will ruin the piece (no extras given). I will also have a small bowl of lacquer thinner nearby and will soak each piece before applying.
I’m a complete amature with PE, most ends up flying off into space. But perhaps something like this might help

Have you considered soldering?
Bill
[Y]
Yes, I have considered it. However, seems to me it would take three hands- one to hold piece in place, one to hold iron, and one to hold solder. Maybe I could just tin the structure with a little bit of solder and not hold solder to the joint.
Other concern is that pieces are so small and light and have zilch thermal capacity I am not sure I could solder one joint without loosening a bunch of others.
Would one of those “third hand” tools like this one help?
https://www.micromark.com/Triple-Grip-Third-Hand
(Not an advertisement or endorsement of MicroMark, it was just the most convenient link I could find at the time. I have one of these, that I bought at a show.)
I know well the pain of PE, I’ve only done one model that was heavy on PE and after I finished it I was pretty sure I’d never do another.

Seemed like I could hold the CAed PE against the spot I wanted it for a minute and it would not take. But let it touch anything else for a fraction of a second and I’d end up ruining it trying to pry it apart, frustrating stuff. My go to fail was ruining the PE because it stuck to the tweasers, that happened a lot.
I’d say about 20% of the PE included never made it on the model…
I had the most success when using the least amount of CA possible. I did get a bit better with practice but I’ve never found working with PE enjoyable.
Perhaps compromise and use more of the kit where the PE is a real bear.
Hope it all works out!