Thats a great piece of info Adrian. That will be an immence help when making cuts! If you should choose to thread cut, just take a length of thread, wrap around a piece of stick or something similar, do the same to the other end, then just start pulling back and forth, allowing the friction to cut through the plastic. You’ll fast learn how fast and how much pull preasure to put on it to keep cutting smoothly. As I said befor, it will likely break a number of times, (always does) but it should give you a good clean cut in the end. Good Luck! Can’t wait to see the end results. I’ll be starting mine soon… I hope. Take care!
Thanks for your words add emotion to the project !! And I like your words very much!!
I will prepare the documentation to show the tool that I will use to cut the submarine-model.
In a few days I will upload the plan or stages that I will follow to cut, and a few days later (I just prepare the documentation) I will show the mechanism that I will use to cut it.
The mechanism is very simple and easy to use but I need to explain it because it has its foundation.
Very ambitious and unique project Adrian! I’m curious, do you intend to do a cutaway on any of the sections to show some of the interior? I have the type IXC Revell kit with a full interior (resin and pe kits). I’m sure I can learn some tips and techniques watching your wip. Looking forward to it.
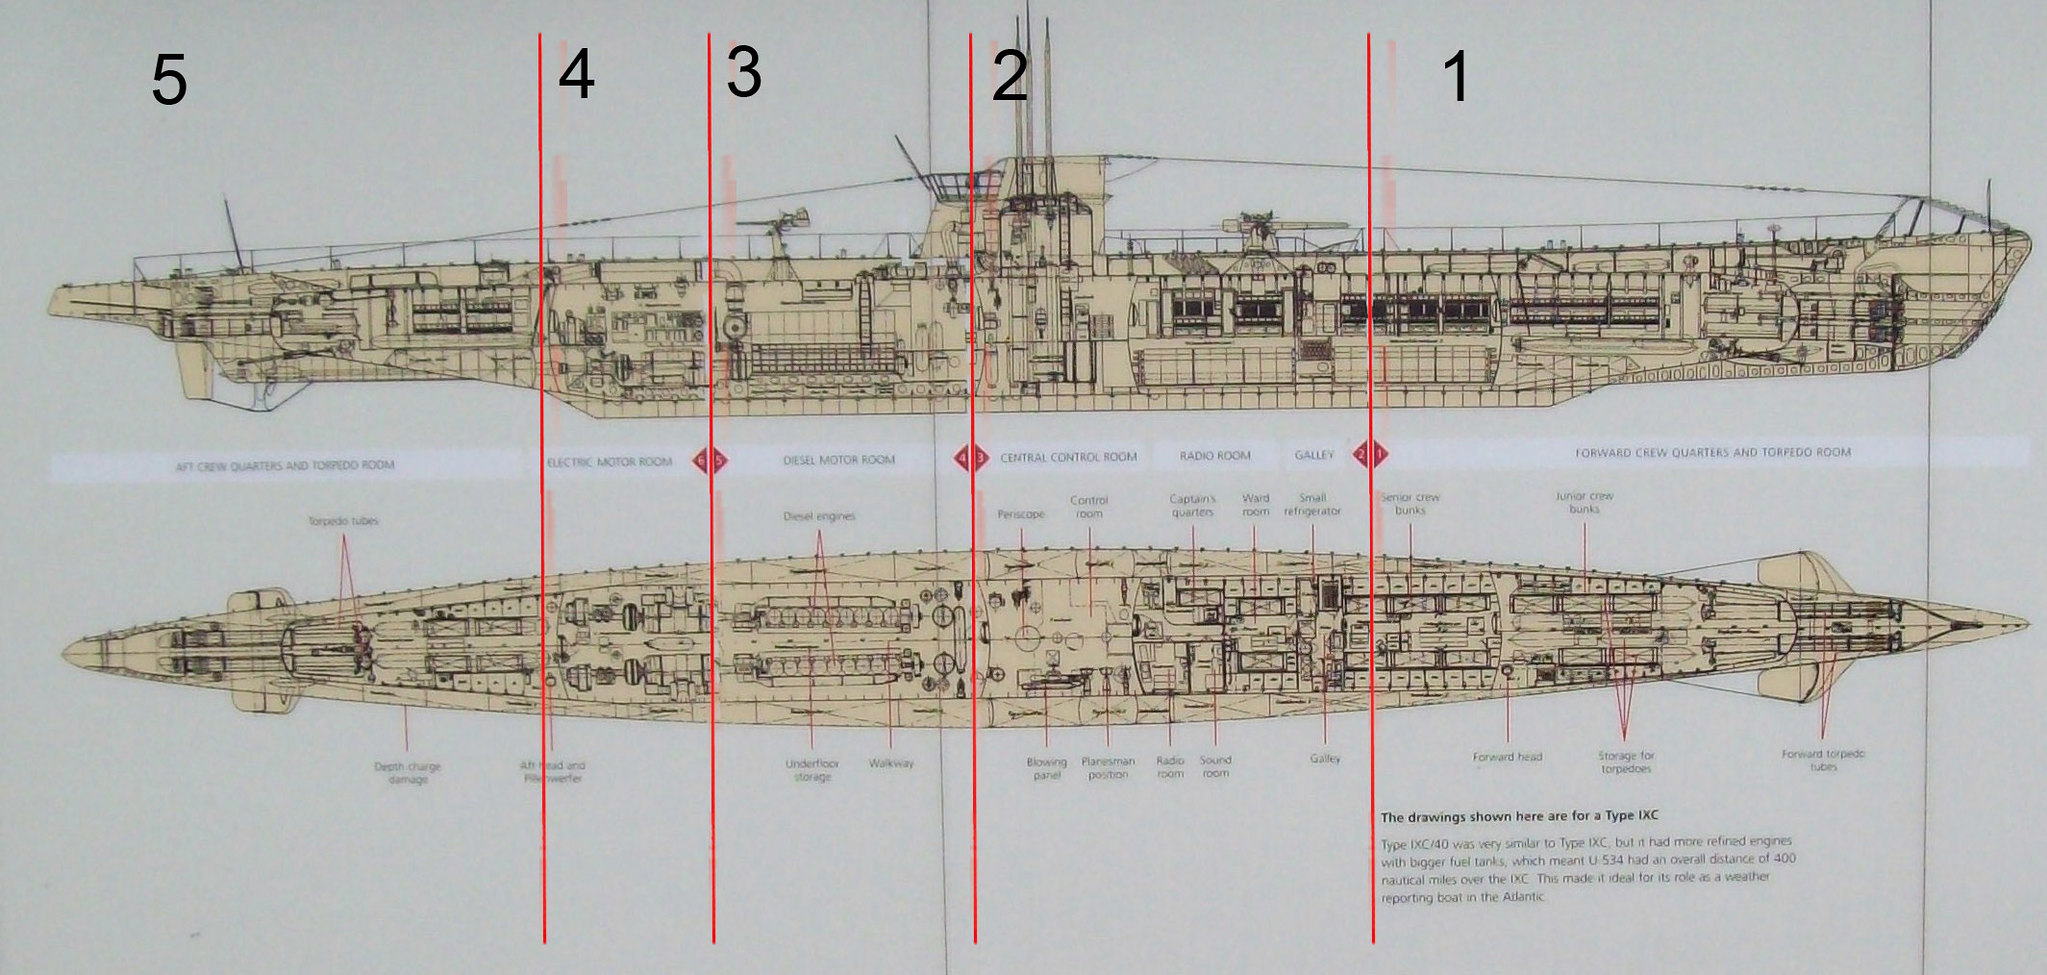
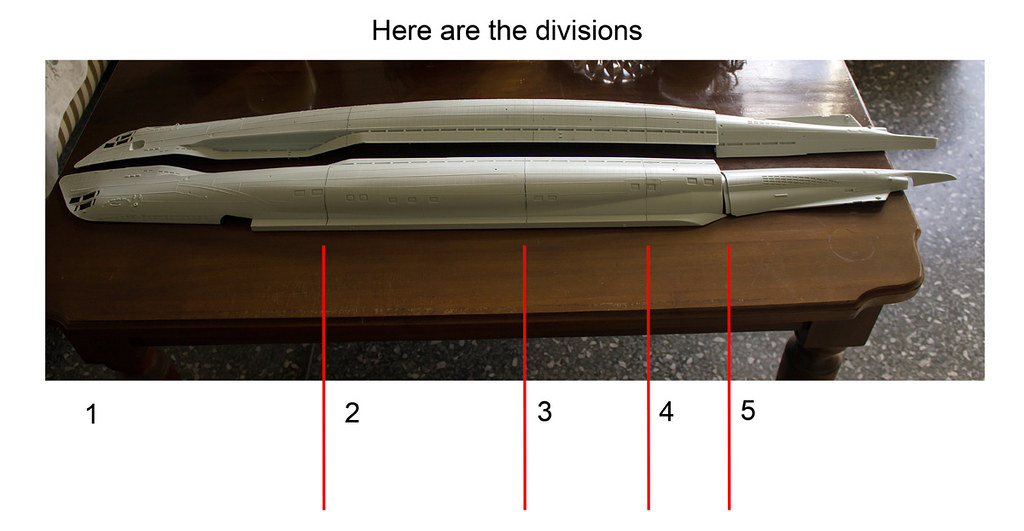
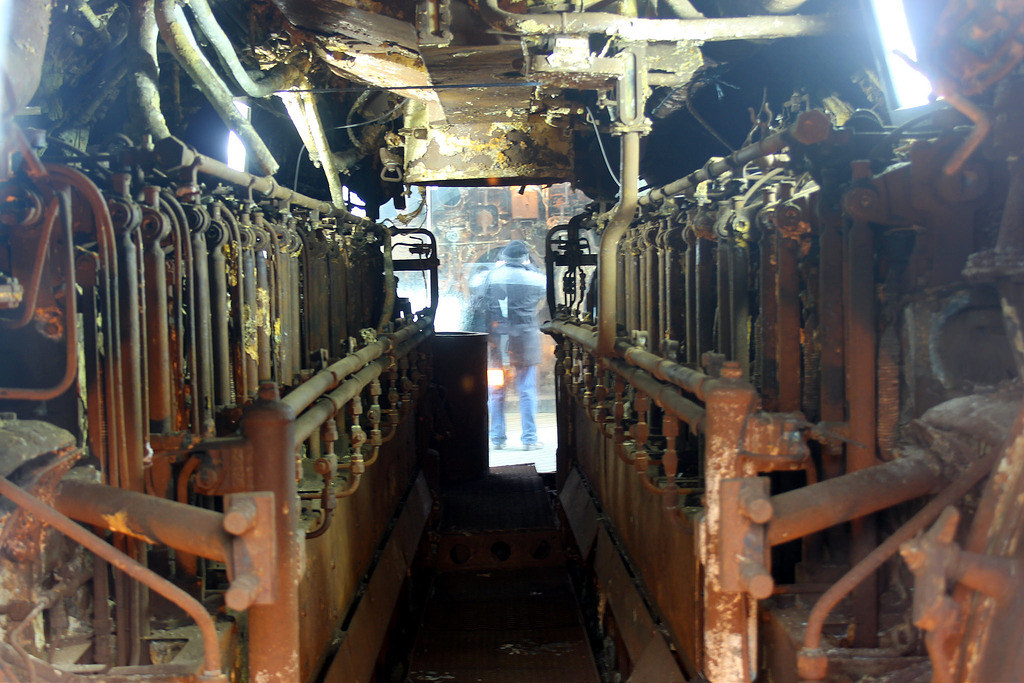
Exactly to cutaway some seccion , no, but some seccion show his interior like the part where the machine is (seccion number 3). Oher parts like the front seccion shows us about 25% of his interior.
All the sections show us something of their interior transversally. And it’s going to be another challenge to do.
if you do some of the type IXC Revell kit with a full interior, I wonder to see your work because I will like to study each part.
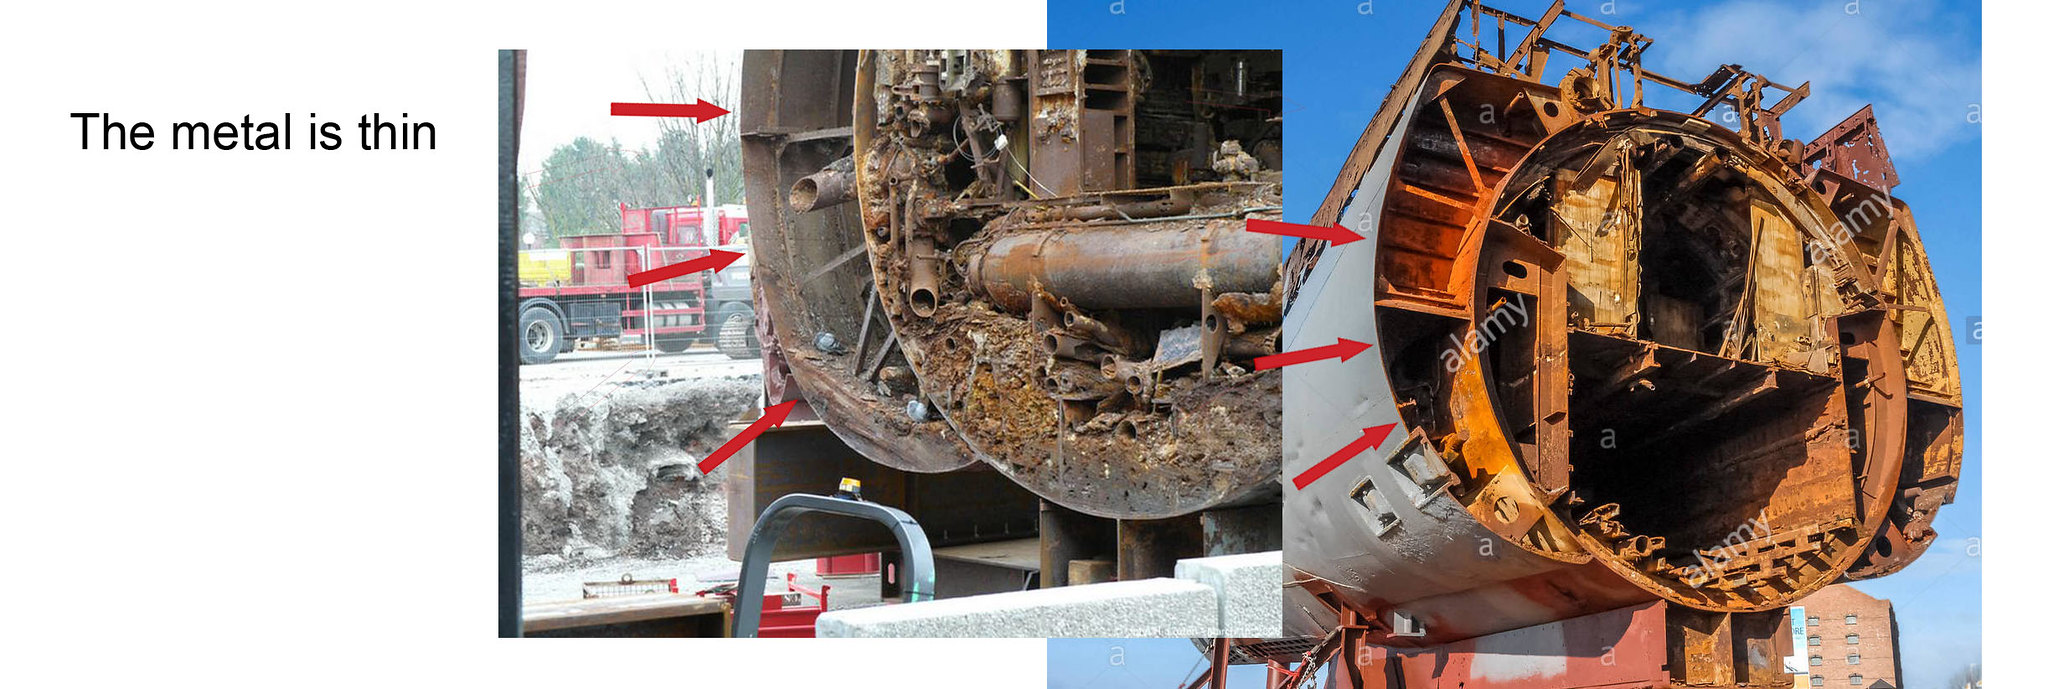
Here I show you the inside of the front and the machines section to give you an idea.
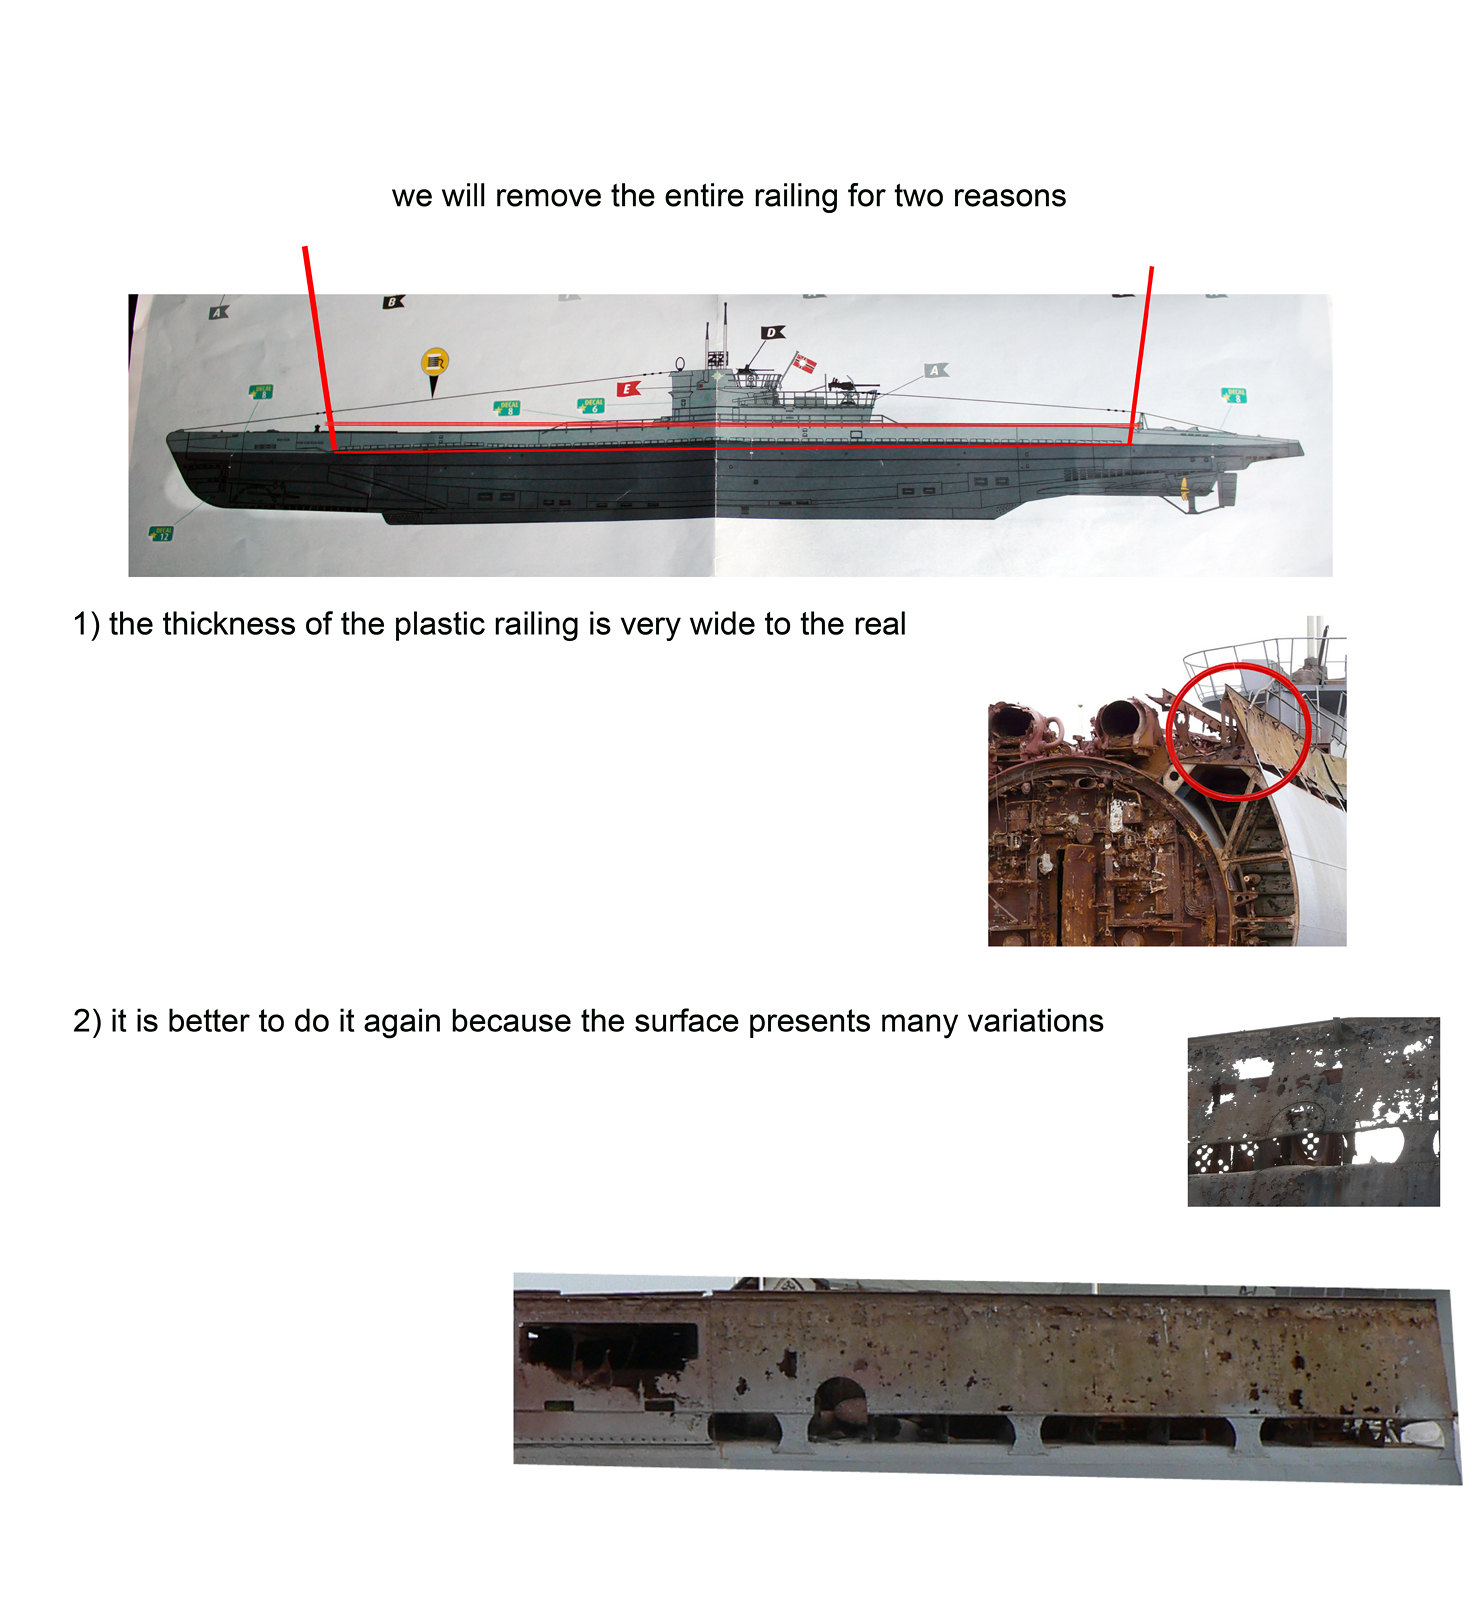
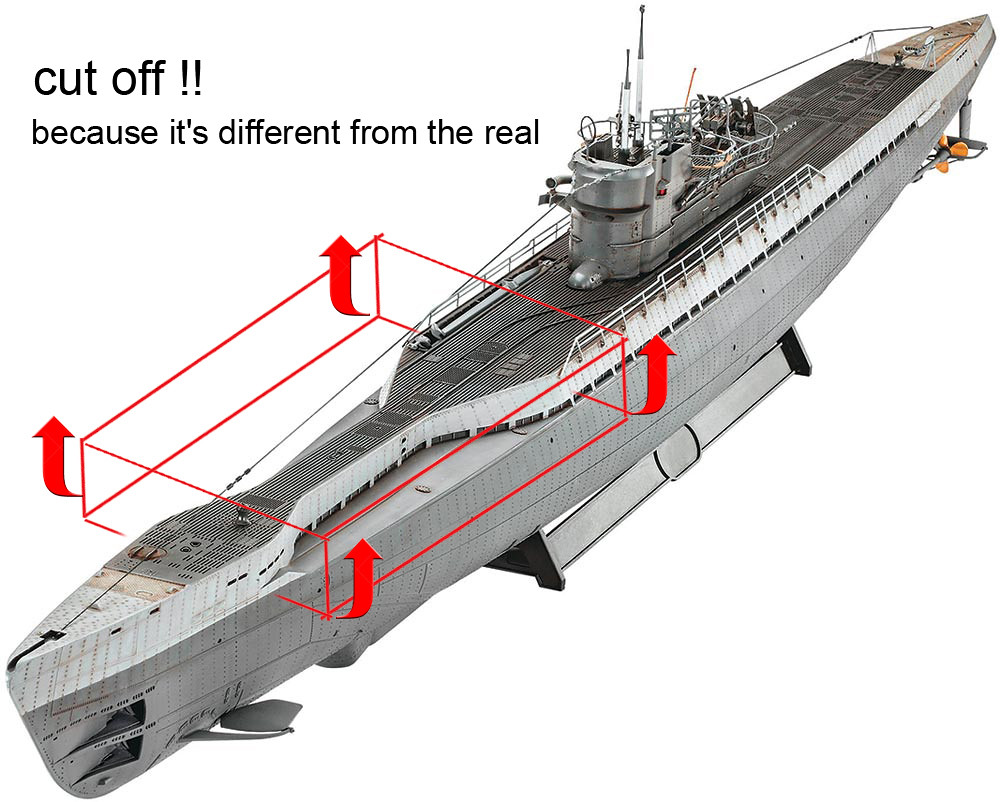
One of the challenges is the challenge of how I will represent all the skin of the submarine (which has many holes and prominences) to make it look real (as real as possible) it is very interesting
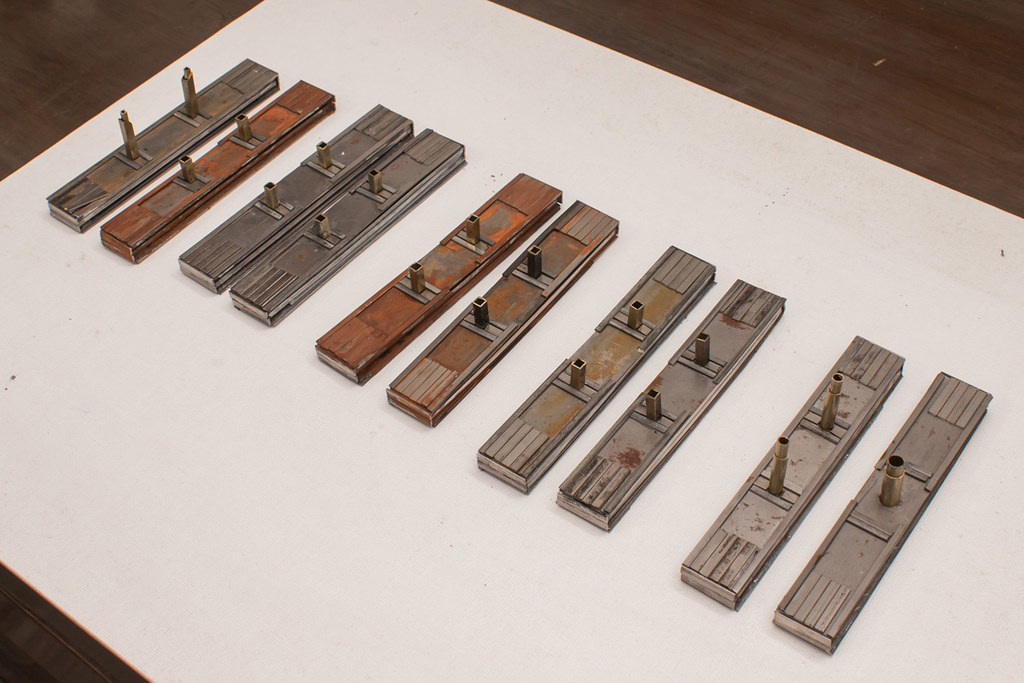
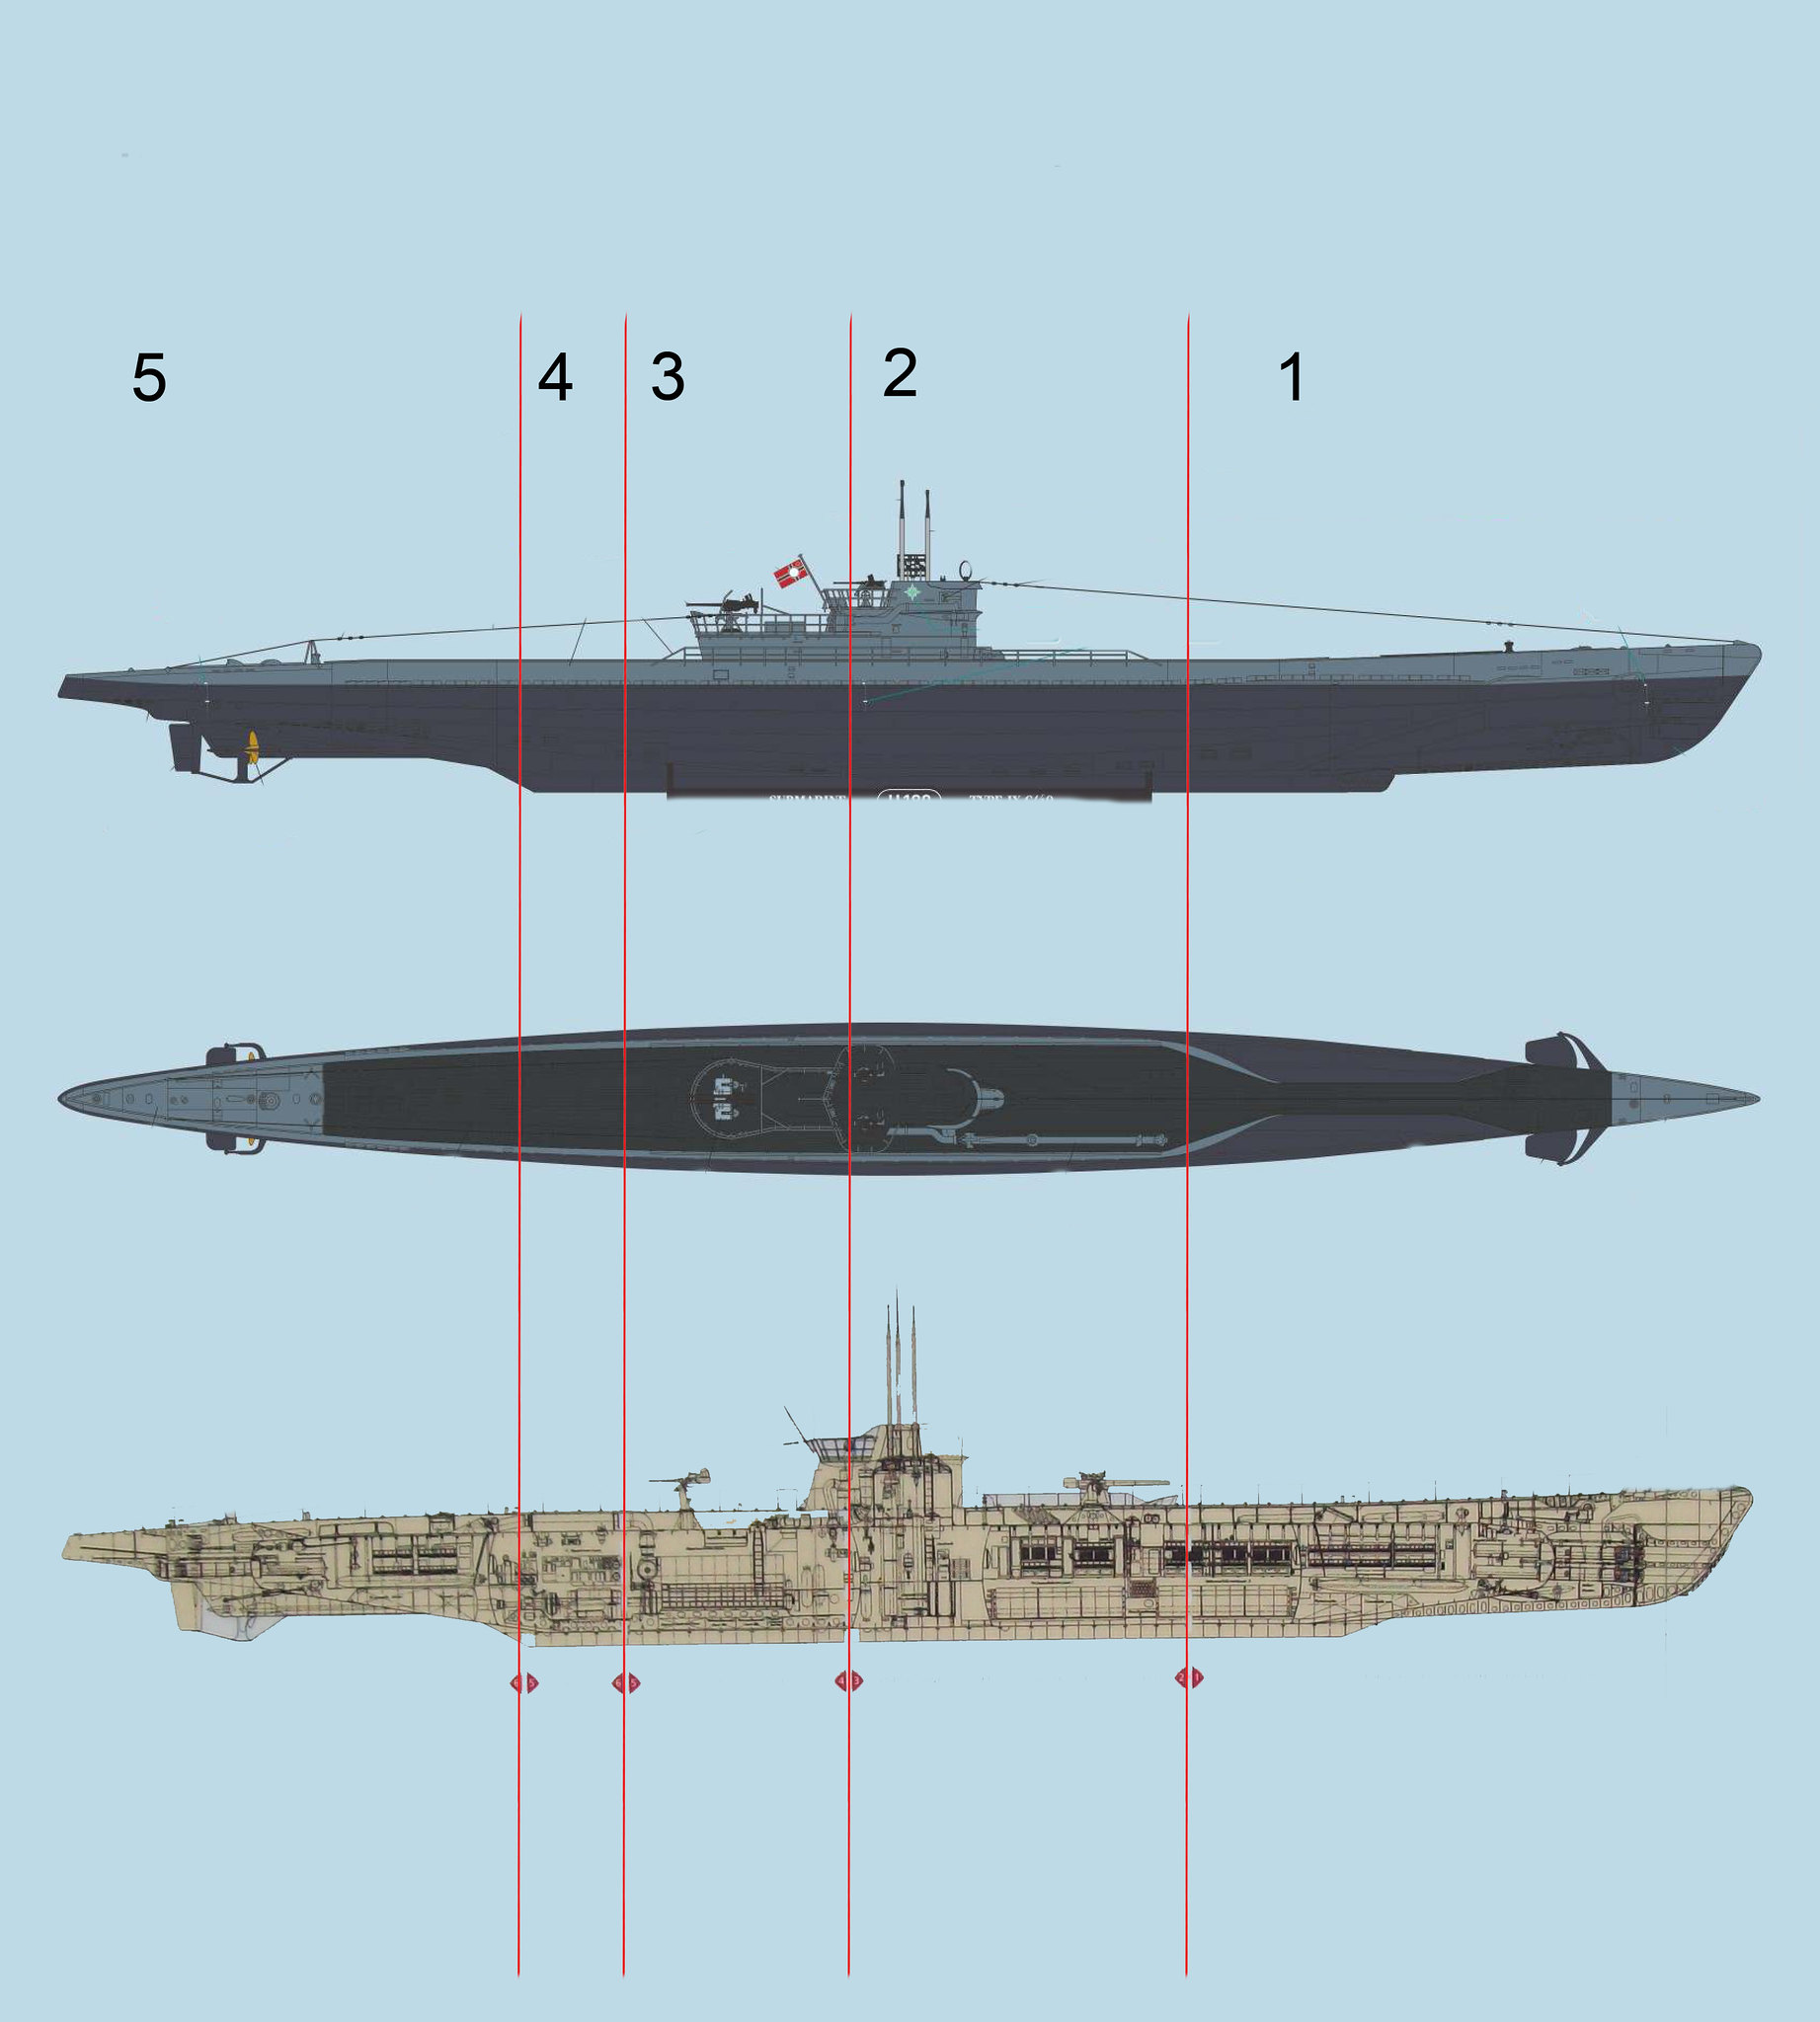
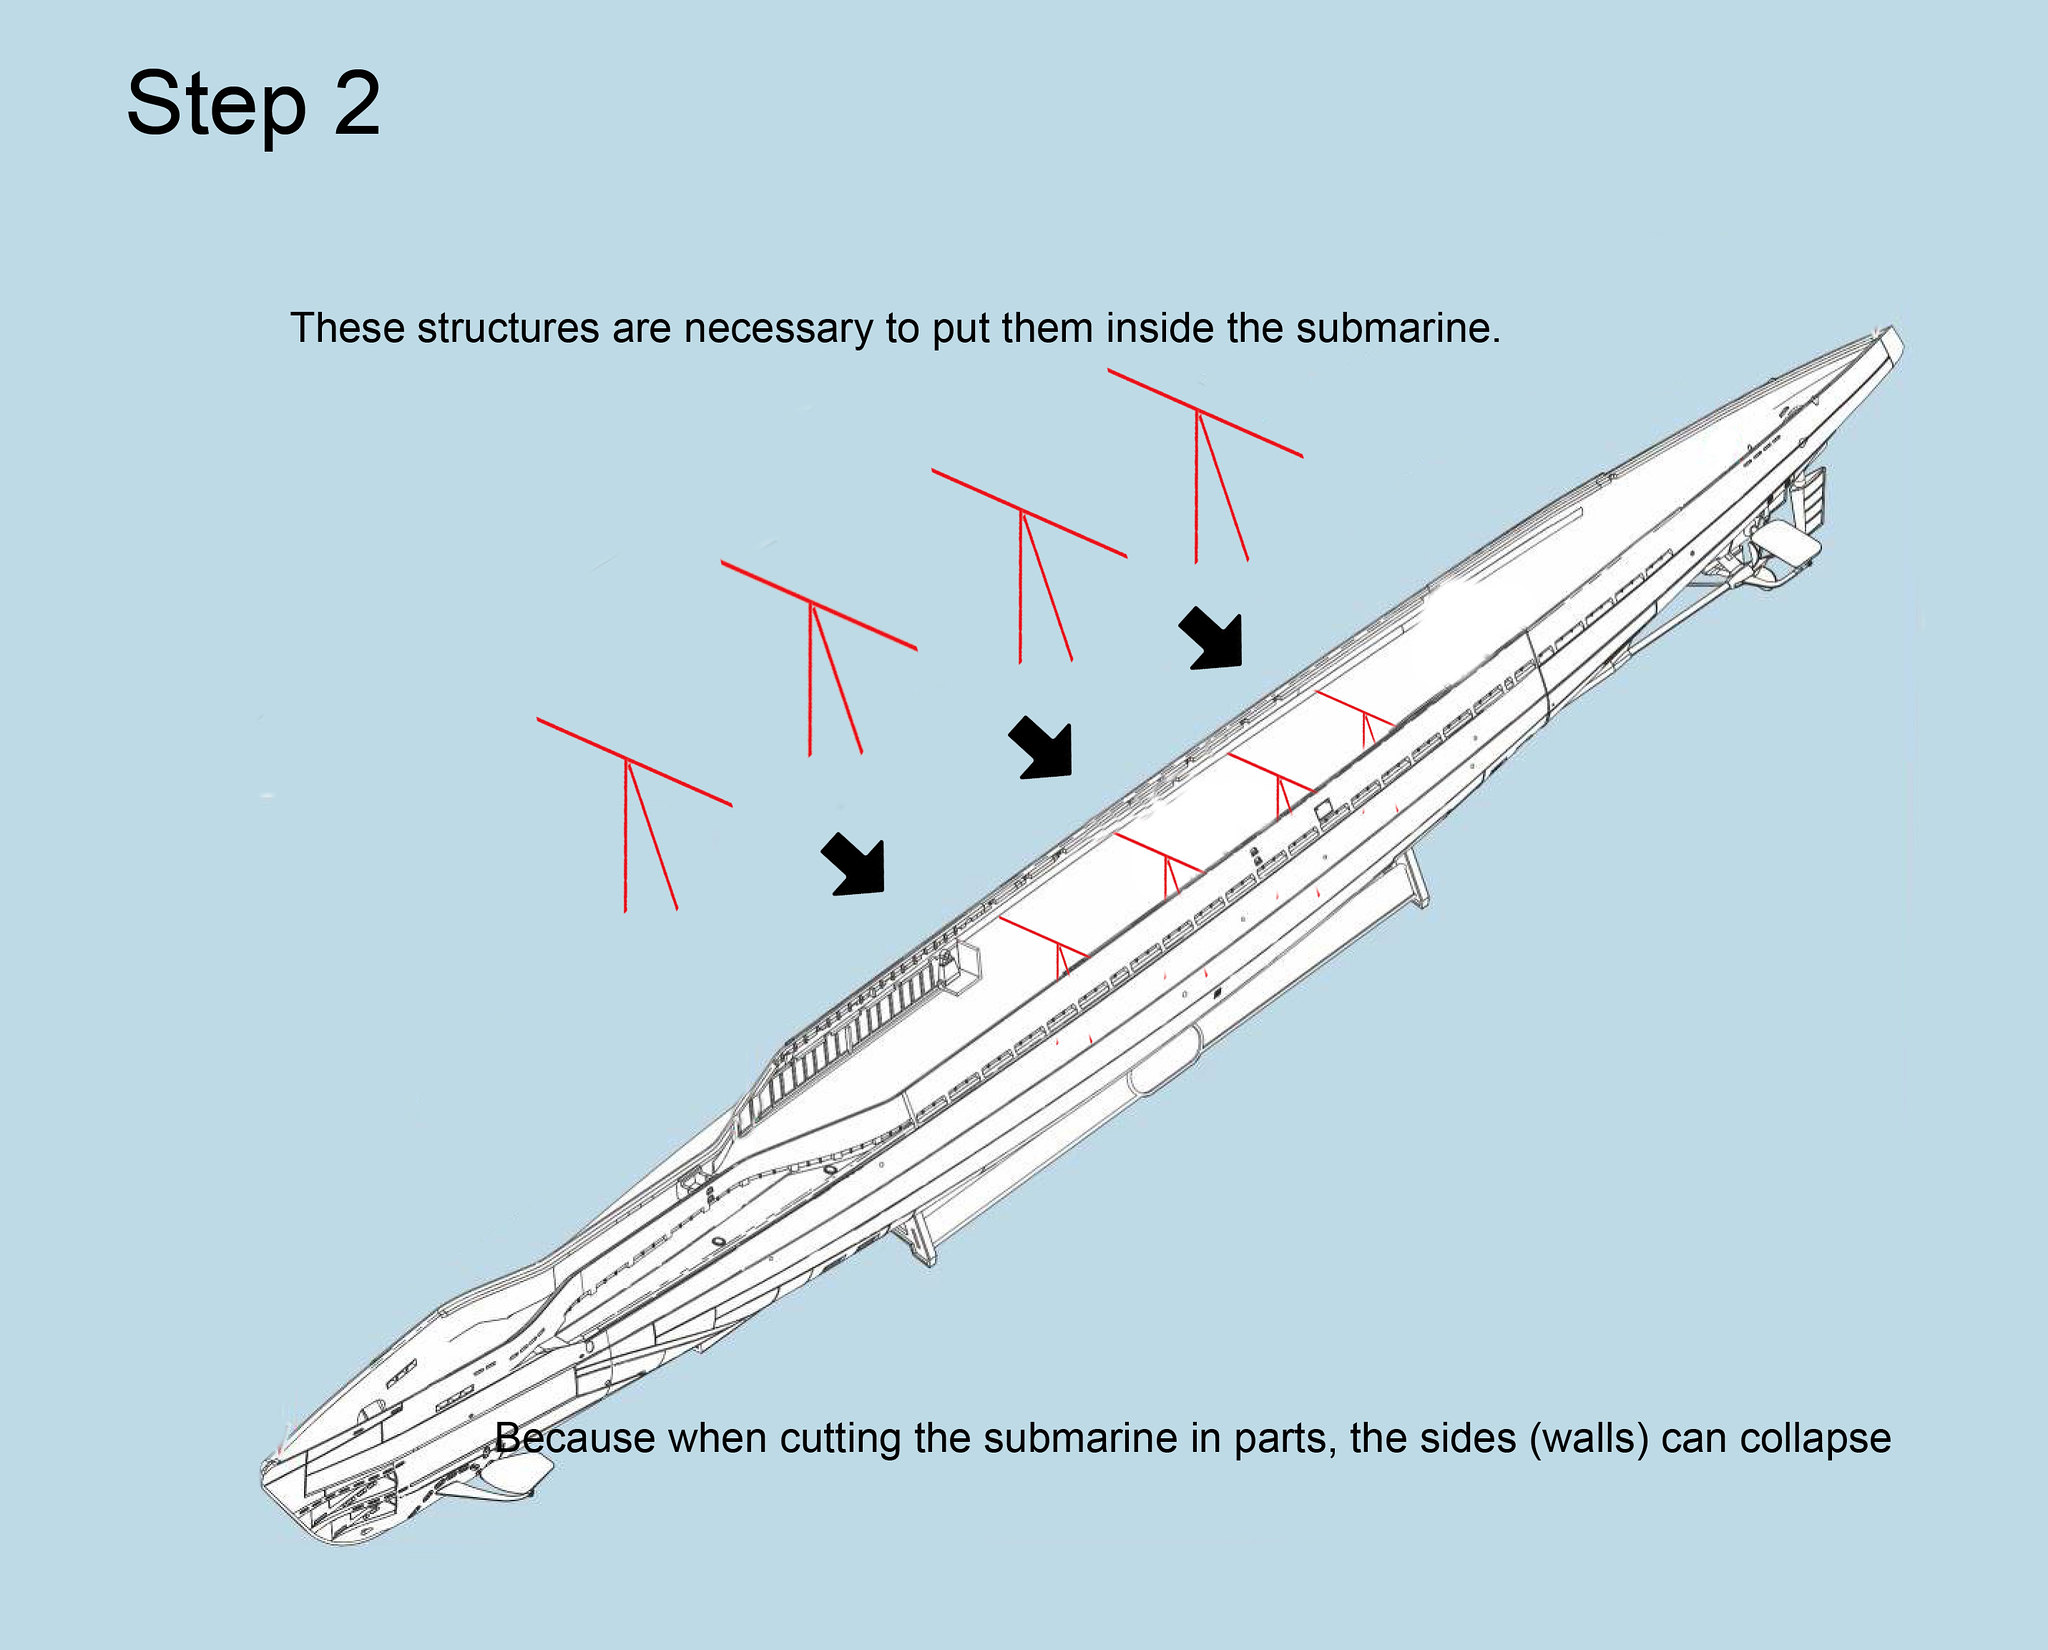
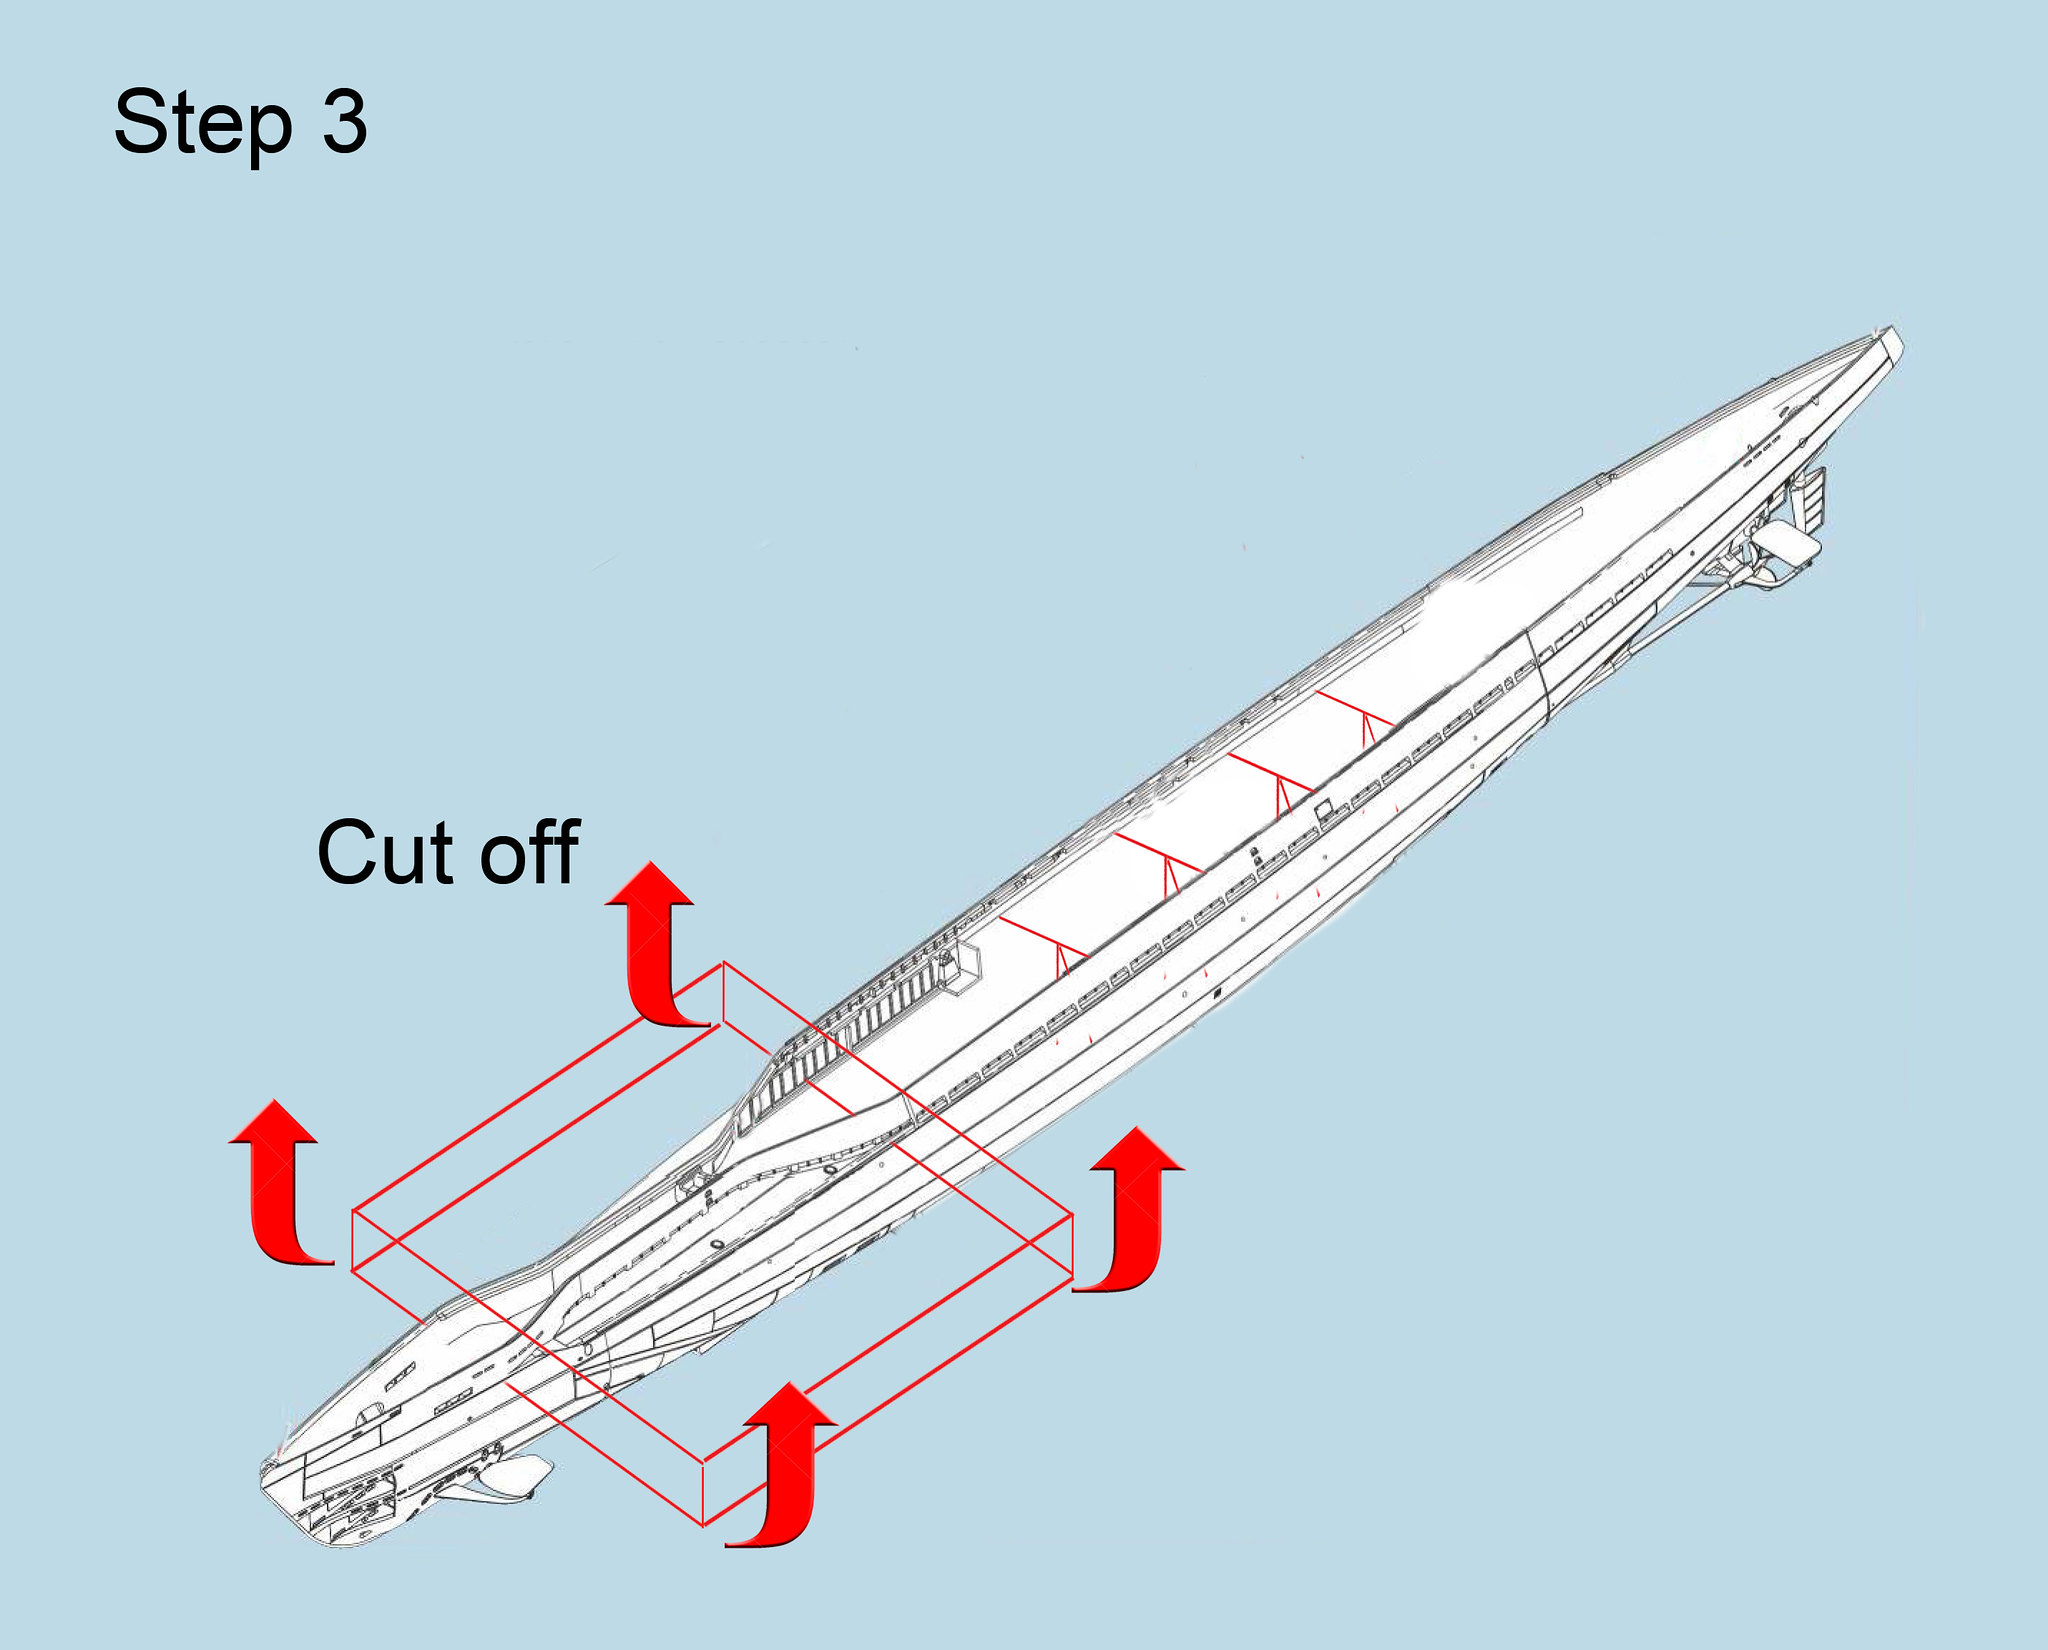
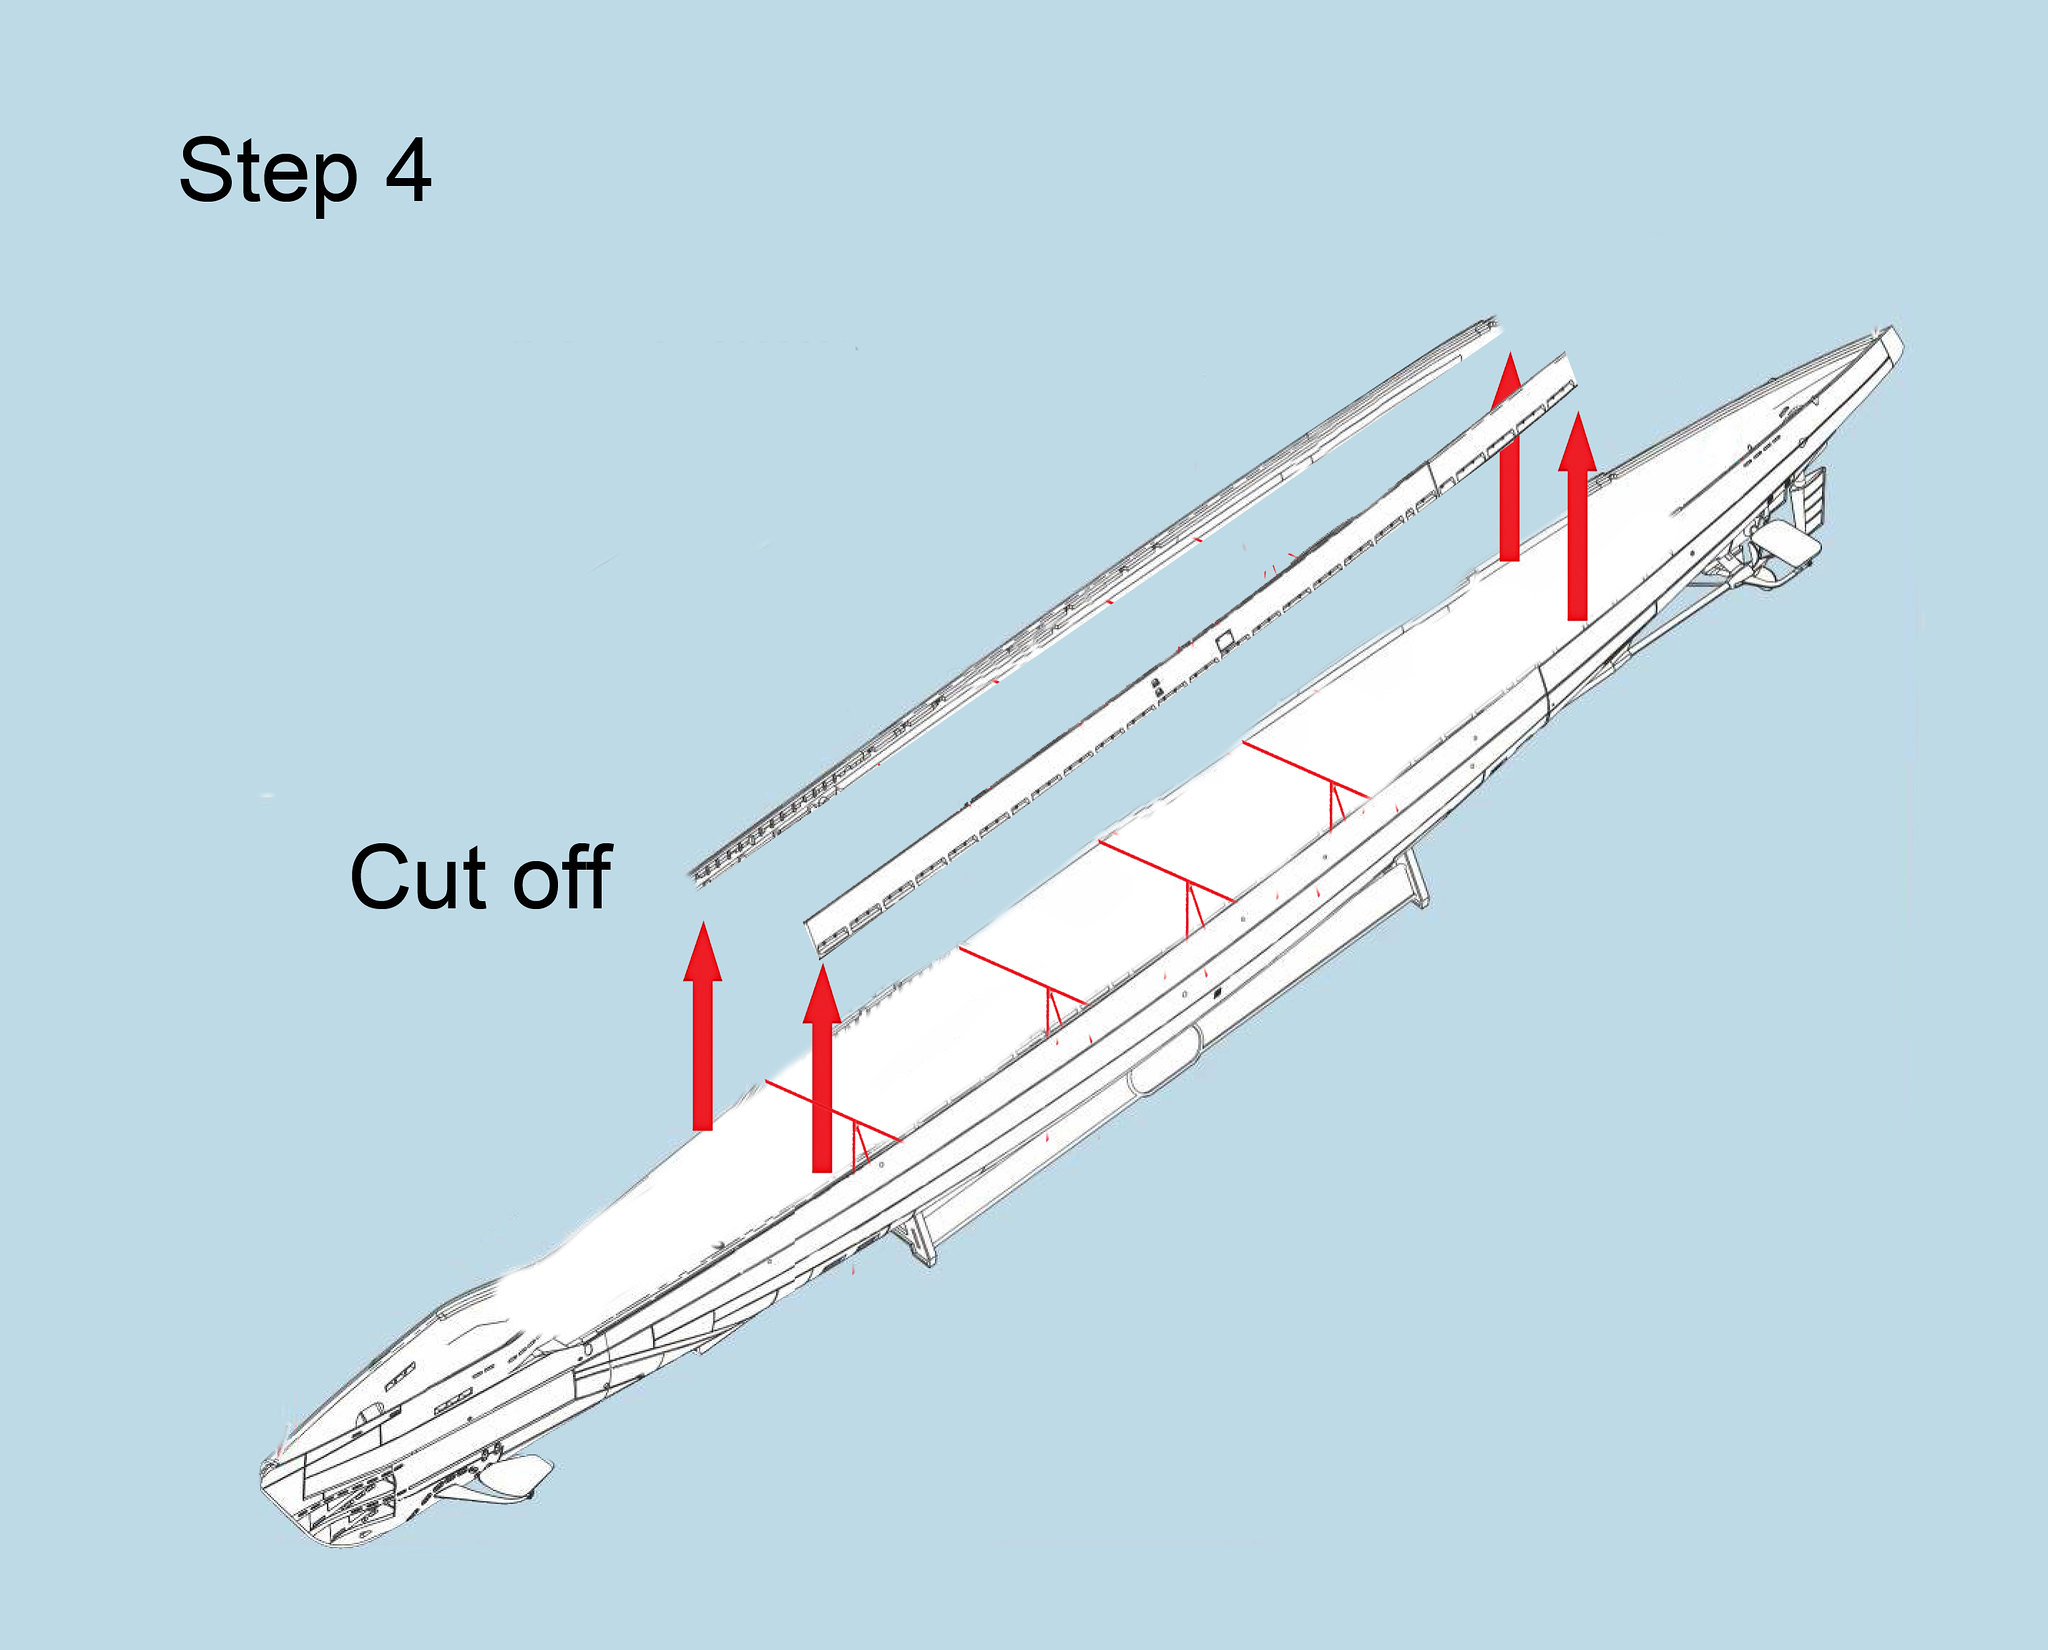
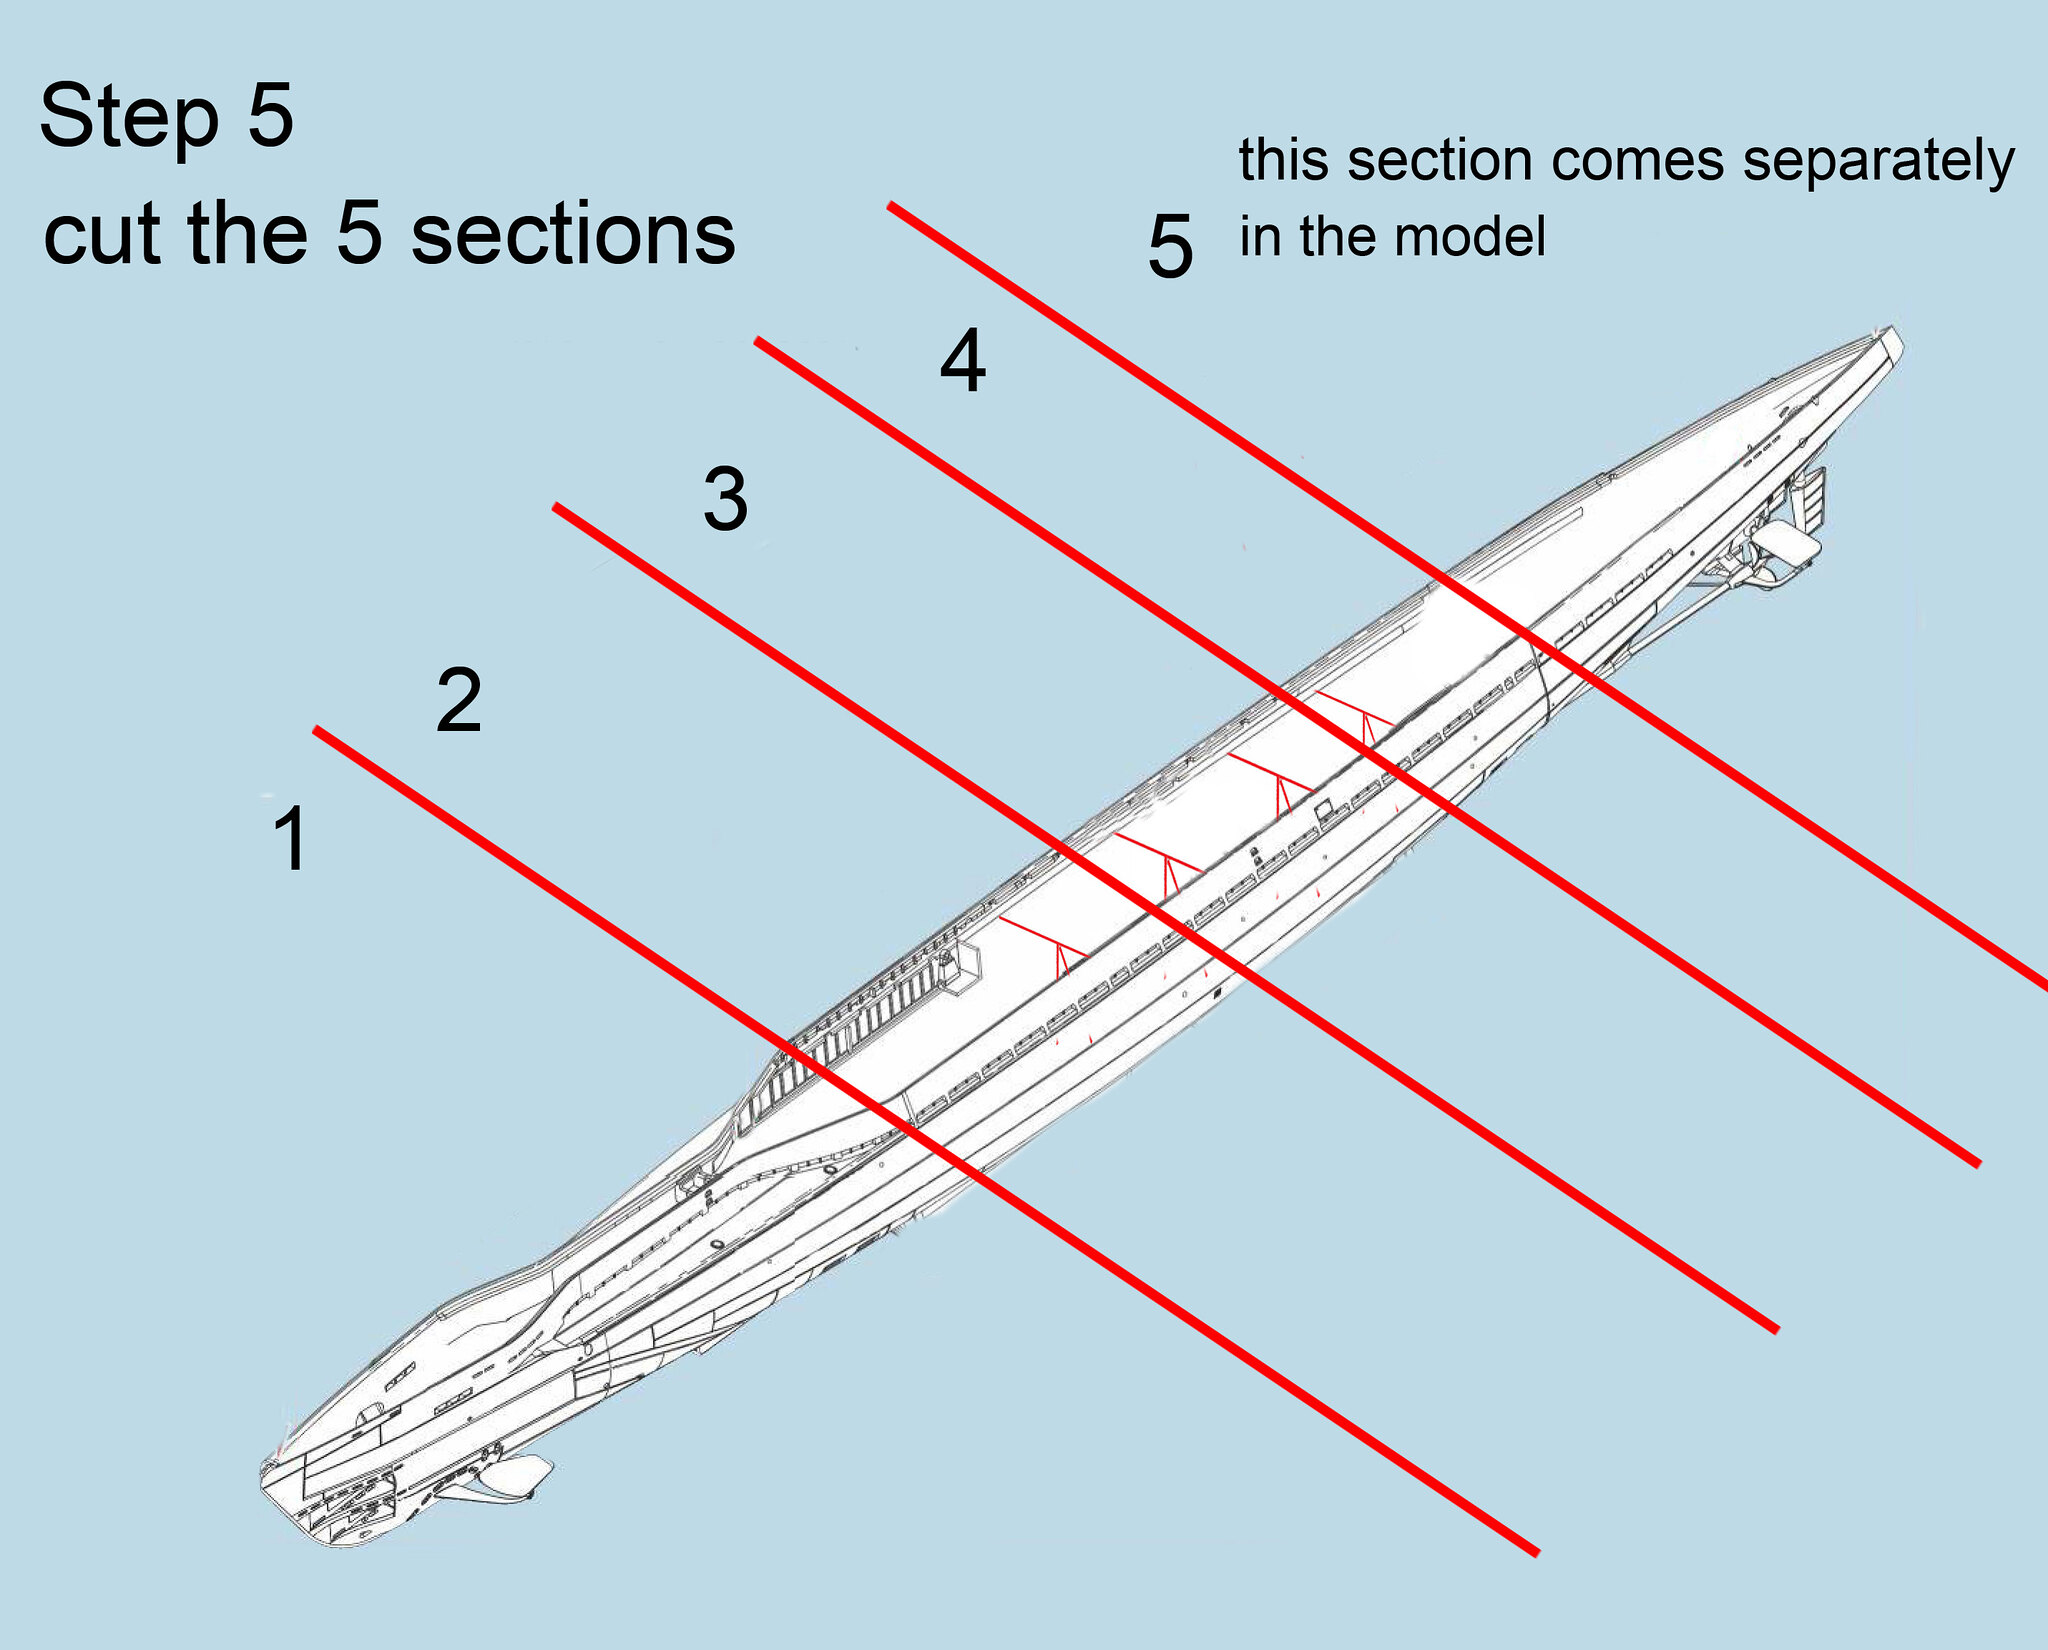
The general idea is that the cut of 5 parts, need to be fine and delicate as posible but, in this case, the cut does not need to be in these way.
The challenge and the risk to be able to make the skin, is to use a printing sheet that will cover the plastic.
In the printing sheet it is more easy to imitate the alterations of the submarine.
It will be done in the final stage of the whole project and it will be another great challenge because it must remain as real as possible.
It is related to the cut because the plastic will be covered with the printing sheet. obviously the surface has many peculiarities to take care.