I feel your pain! I remember having seams pop a couple of times while working on other pieces. That Hasegawa kit is very nicely detailed but can be a bear to work on.
I got my gloss clear on the other night, and am hoping to work on decals today. I’ll post some pics soon!
Excellent pics Steve. This ‘N’ has the standard aerial mast. Am i right in thinking that the Chinese varient had the DF loop though? Congrats on getting your photos published. Big Kudos for you my man. Also the picture of the Packard engined P40 was fantastic. You get an awsome view of the exhaust staining on the far plane. Looks quite different to what is usually modelled.
Congrats on getting your photos published! Even if it doesn’t make you famous, it is still very impressive. Thanks for the inspirational photos, they really do help. [tup]
Crack fixed without “too much” trouble. I made some landing lights that will be visible under the lenses in the wing and wing root. I can’t remember where I saw this method online. I am going to put a “how to” in my tools/tips sections soon. Easy to do. The one just inside the root will line up with the hole in the bottom of the wing. The one in the outer wing area gives you and idea of how it looks. Ailerons have been cutout and animated. The JLC saw is great for this.
I managed to get all of the decals on without too much trouble. I used the Hasegawa kit decals for the stars, the “U.S. ARMY” came from a Superscale sheet, and the yellow tail numbers came from an Eagle Strike sheet.
The kit decals went on pretty well, as did the US Army decals on the belly. The only ones I had were black instead of the dark blue, but at that point I decided to use them anyway. I was a little worried about them as they are so large, but they went on quite well. The Eagle Strike tail numbers were a real bear to work with. Very thick, spotty and opaque in some areas, and looked like someone hand painted them onto the carrier sheet. Overall, my impression of them is on par with my impression of Aeromaster decals- I will avoid them whenever possible! I decided not to apply all of the little stencils, as they would be almost invisible to me in the end.
Marc, great progress so far! The 'pit looks awesome, and I like the way you did the landing light and the additional details in the wheel wells! I really need to pick me up one of those saws too.
Frank, looks good there buddy! [tup] The pre-shading is really nicely done, and the decals look like they went on without a hitch. I can’t believe you’re almost done with this thing! Jeeze, I really need to get my butt in gear! LOL!
Wow Frank, that looks awesome so far. The pre shading works a treat. I used it on mine and liked the finish. Cant wait to see yours all buttoned up. Keep up the good work fella.
Thanks everyone! I am really hoping to have this bird finished soon. She’s been in the works since it first came out (wasn’t that about 4 years ago?), and it wasn’t until I saw Espins1’s finished aircraft that I decided that I HAD to finish it.
looking good Frank.You better get back to work before the boss catches you playing with plastic instead of your gem’s. Look like I have to add this GB to my things to do list.
I shot steve a pm, dont know if he will have a Texas boy in his build or not. I have to get motivated for this one because I just finish two of these birds last year.
Looks good everybody. I’ve been out of town in Turner Falls up in Oklahoma for the last few days, so nothing accomplished since I assembled the cockpit the other night. Should have time to do something tomorrow night.
A little update from me. Last night I started on my P-40B (1/48 Monogram). This kit has Eduard PE set and resin cockpit. I plan to make a “Miss Kay” plane from Wheelers Field. If you guys have any references for this plane I appreciate if you remember me [;)]
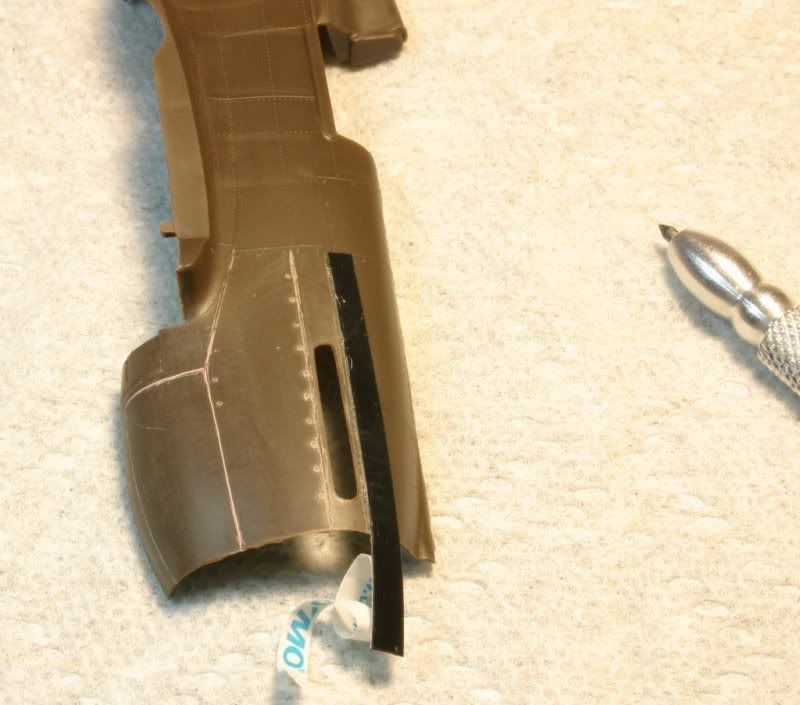
It may take longer than usual kit due to … panel lines.
And here is how I am doing it:
I use this tool to sribe the panel lines
To show fasteners I use a thin needle (from my flu shot [:D]) cut and sharpened flat. I am sanding off all rivets, since those crafts had flat rivets, probobly not visible on 1/48 scale.
Is it the way it should be done ? (its my first panel line scribbing)