Nope, not me. I got offered a new full time job today. No tears on this guy. Nothing’s going to wipe this smile off my face. Football game? What football game…?
Boyd, Congrats on the job!! Are you a teacher? Keep on smiling!!
This Buds for you!!!

Boyd- Congrats! By any chance you got the job at hobby shop so you can offer us good deals? Like I said it was one of best SB games ever…
Sorry, man, but nope, not at a hobby shop. I’ve been offered a full-time teaching position at one of the colleges I’ve been part time at for a couple years. Patience and persistence do pay off…
PS I agree, that was a really fun game to watch.
Just a quick update on the Stug III. Hope to get it into the paint booth for some Panzr Grey this weekend:
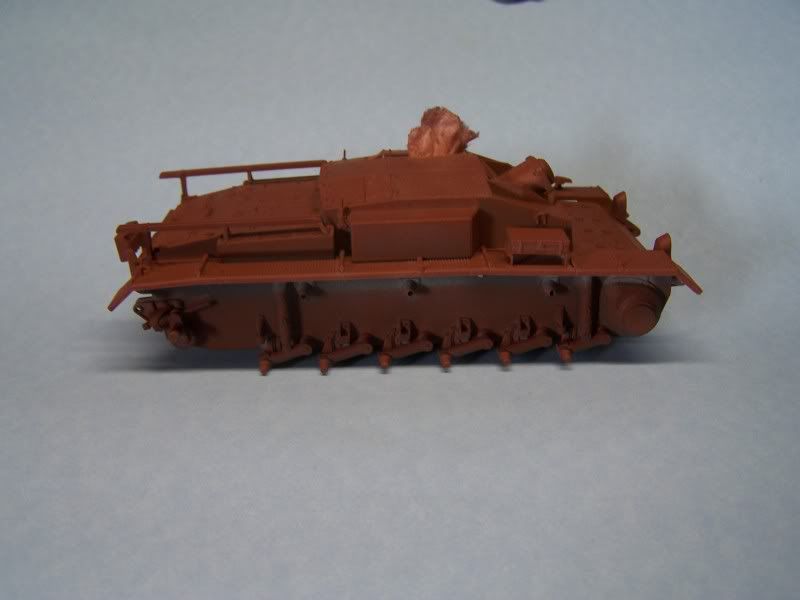
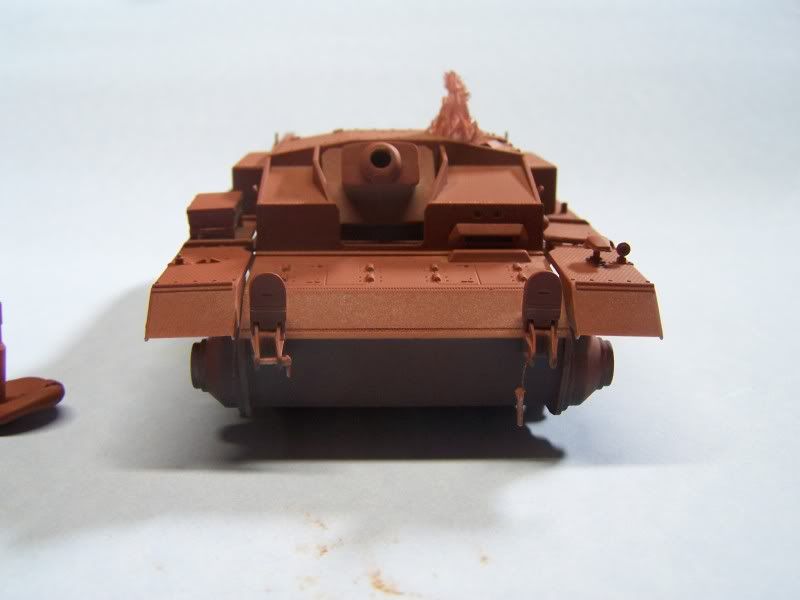
I typically like to have one little detail that is ‘off’ on all my kits. As you can see for this kit, I’ve added a bit of PE chain to one of the tow pintle pins so that I could leave it dangling.
Boyd- Great work having your StuG primed. Nice touch with the dangling chain!!! That’s something we all should do…
Looking forward to your next update!
Boyd, very nice, I like the chain as well nice touch
I’m going to leave both of my tow pintles dangling by chains…does that make it better? [6]
Almost done with construction on the Pz.Beobs.Wg.III Ausf. H. Can’t wait for this build to be done so I can stop typing that. Jeeze.
Will toss up a pic before the paint flies!
Dupes, go ahead and post pictures or I will maky Boyd go up to do it for you. Lol. No hurry I remember your situation with limited Internet access. Is it still the case?
Well, my internet is better, but still very limited. Not stuck with dialup anymore - am able to tether my laptop through my smartphone (think “wi-fi hotspot”). Unfortunately, while the speed is muuuuch better, I have a monthly bandwidth cap after which I start paying through the NOSE per megabyte. Like, 25 cents per MB if I remember correctly. In other words, loading a page (once) that’s heavy with WIP-pics can add 5 bucks to my cell bill.
Ouch. [:#]
Looking at finishing the Pz III Initial J with 2nd Panzer Div. 6th Co. markings (Dragon) found a photo in Armor at War Series which depicts one (601) with a large storage box on the rear engine deck … looking closely at the storage box it looks like its leaning back … may be sitting over the tow cable or some other item, the problem is the tow cables are there now … have a resin wooden box from League comes pretty close to size of the storage box depicted … will need to modified some details… the photo is B/W … not sure if the crew would have left it natural wood or would have painted it gray …
Picked up some Archer transfers (AR35010) Pz III - 2nd Pz Div., 6th Co. markings … the instructions call out field modifications to the vehicle which crews moved the front left fender spare roadwheels over to the right side rear fender and lashed it down using the tow cable. In the photo I can’t see the the spare roadwheel on the right side. … any suggestions … Armor86

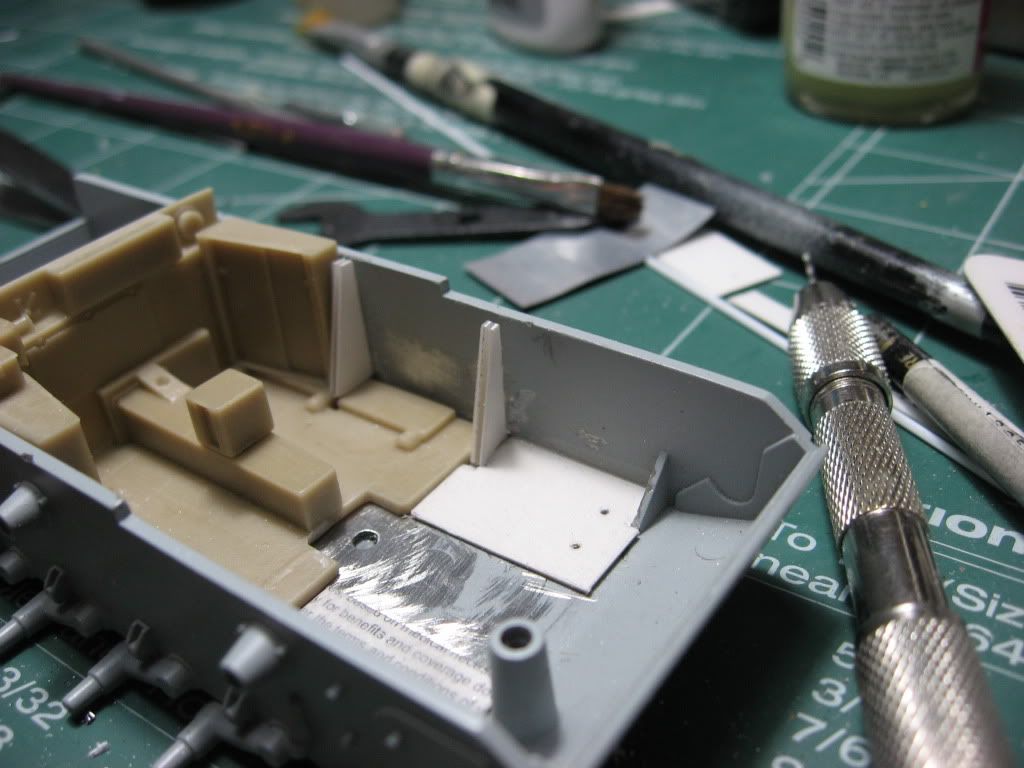
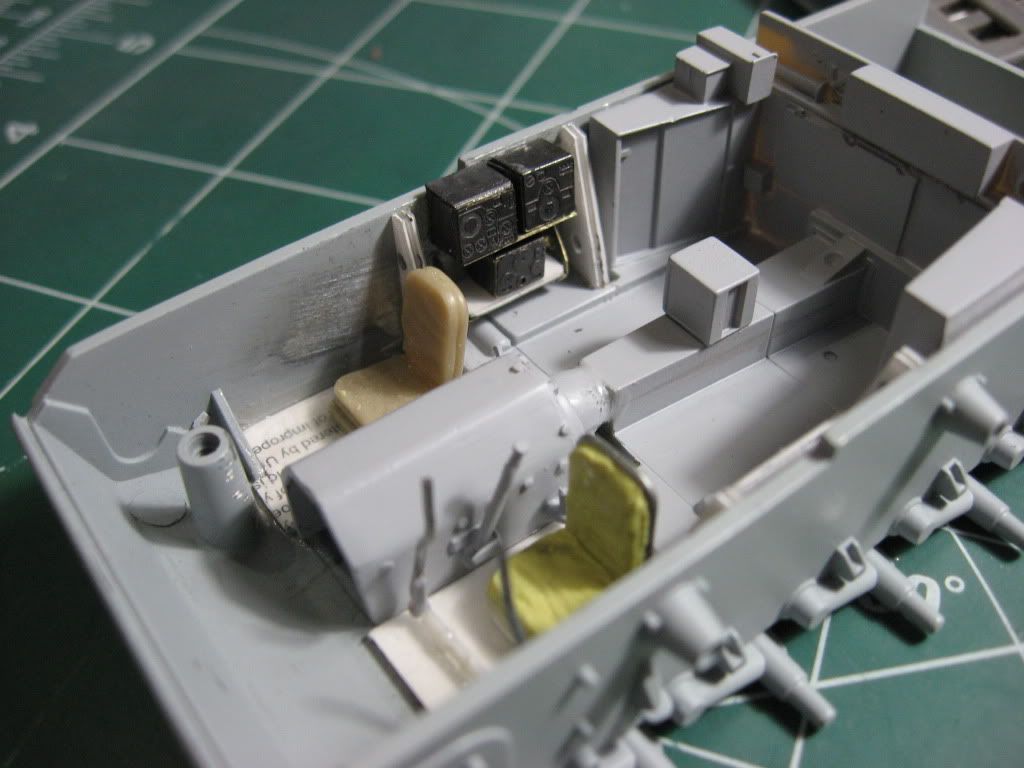
Ok…some advance on my III…just as a reminder,the Verlinden set is missing some nice detail from the front of the drivers compartment…so I scratch built…
since Im adding the transmission housing and seats I had to grind a little metal nub on the floor I also added some plastic to bring the floor level up a bit. I also ground down the stubby angles on the sides which were not even close to accurate or even the right size
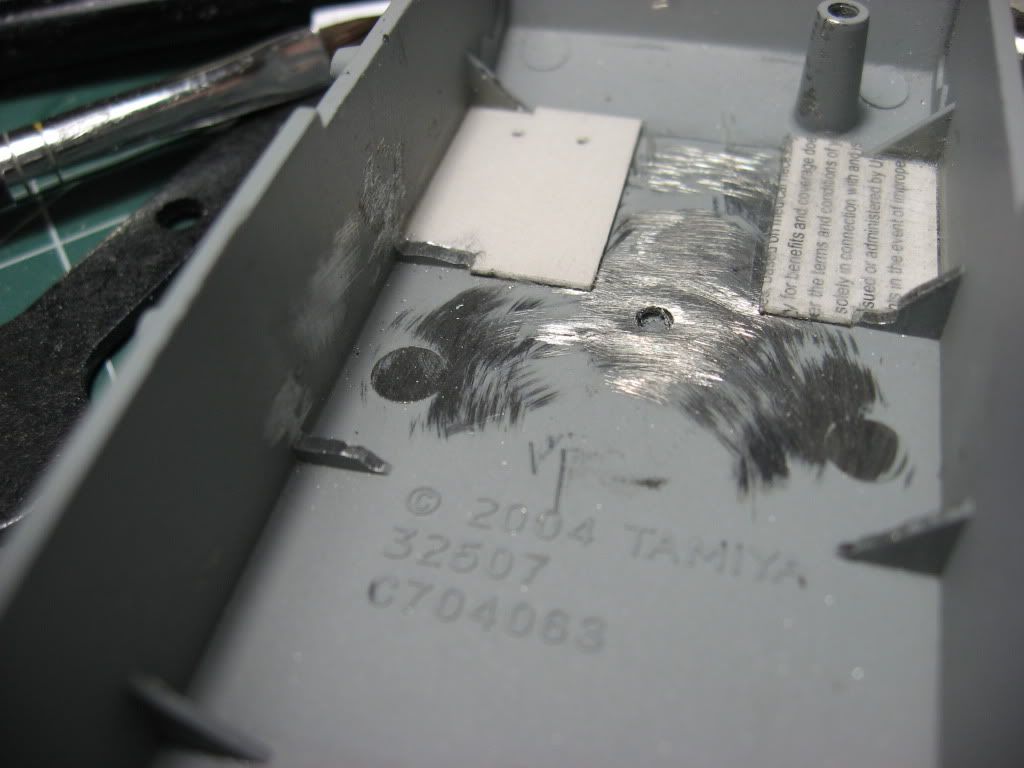
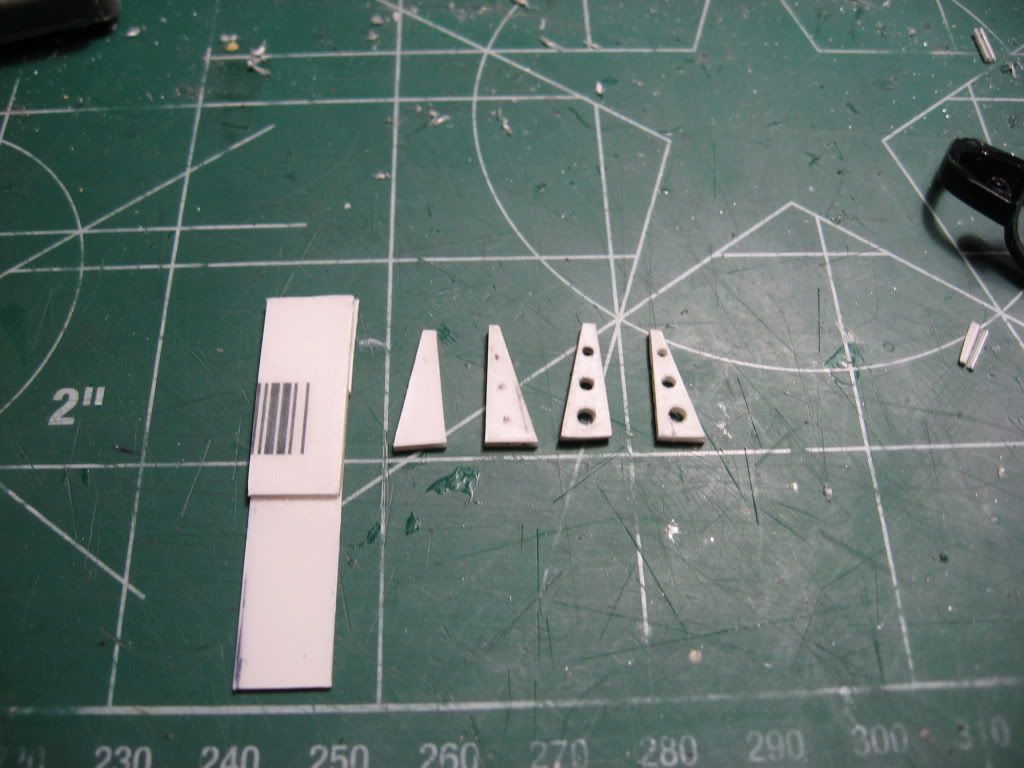
so I sandwiched a some plastic, cut them at an angle and drilled lightening holes
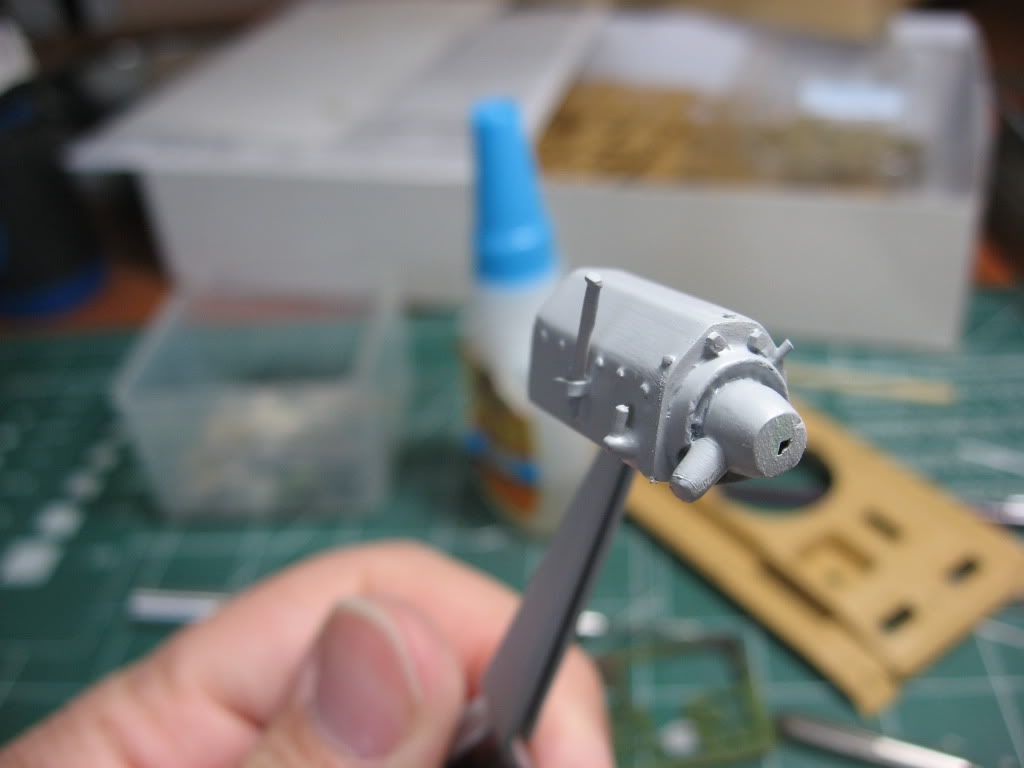
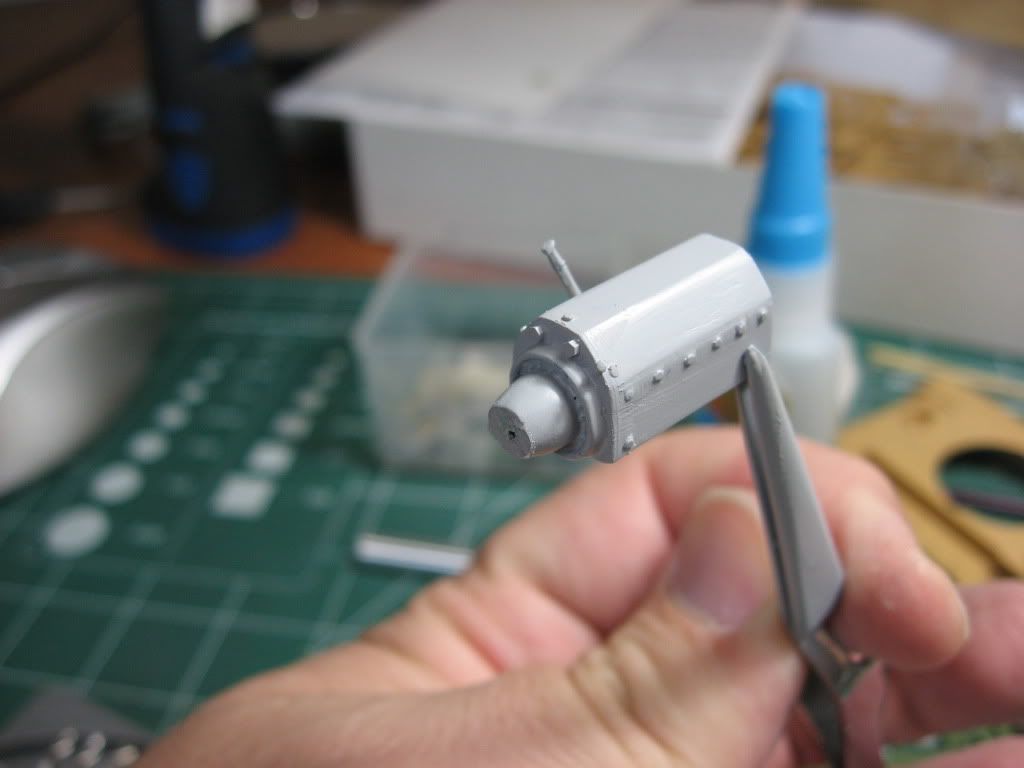
I added some fiddly bits to the transmission housing…bits of stretched sprue for bolts, which I sanded down a bit another bit of sprue for what looks like an oil filter and an old control stick from a Tamiya jack for an “I dont know what for” lever…basically copied some detail from pics…(hey Im an aircraft guy)
added some boxes and shelves on the side walls…again going by reference pics…used some plastic strips and some extra PE from a He-177…
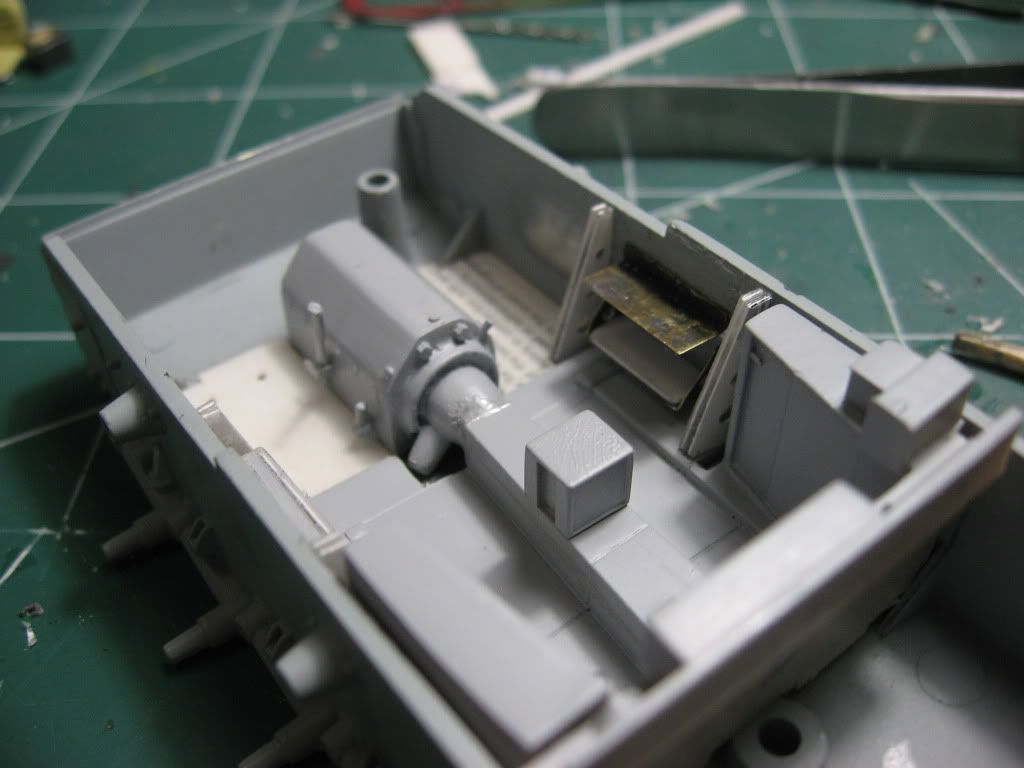

so everything together…I also used from the He-177 PE a couple of what I would assume is radio and communication equip that go on the shelves… I also made driver’s levers out of some wire and parts from a Fujimi Val…

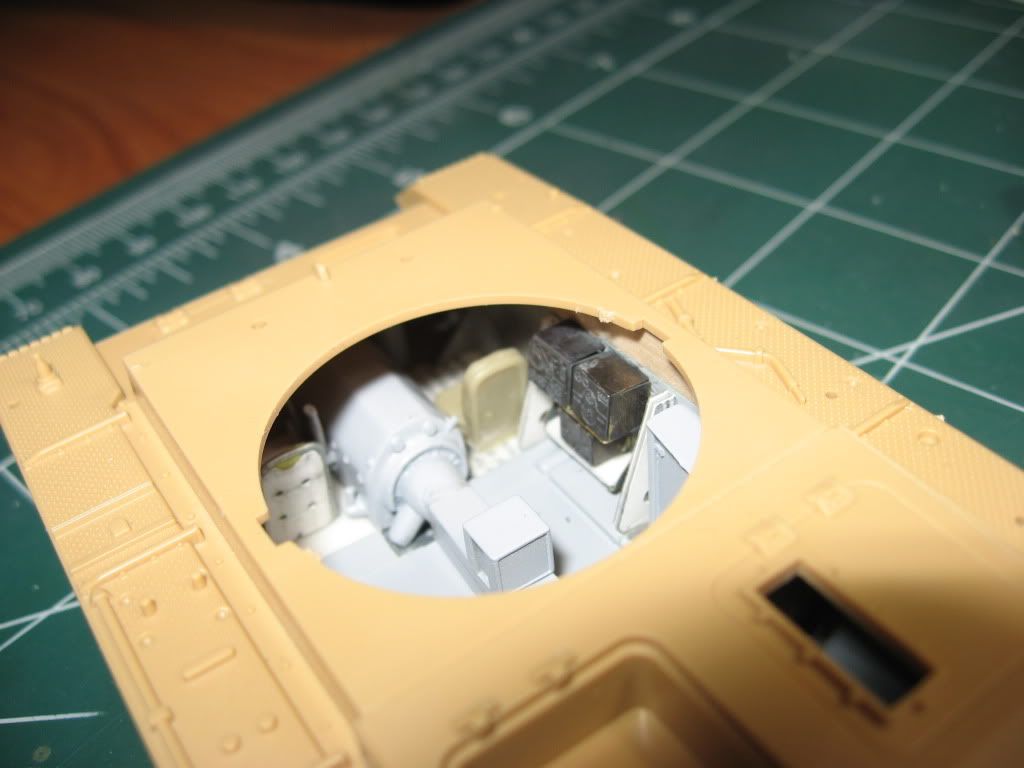
and here is how it looks through the turret opening…and explains why I did it…you can see the front of the compartment…
of course comments are welcomed…just remember this is my second armour kit in 25 years…and the first real extensive scratch building attempt…so go easy on a GRL…[:$]
Carlos
Those seats are great! Looks like you will have one heck of a build when all is said and done!
Armor86- You are going to love those Archer dry transfers. I have been saving $$$ to buy as many as I can at upcoming AMPS National show this spring.
Wish I can answer your question about the spare wheels on the right side. One thing I have noticed… nothing are alike it was up to the crew to place their spare wheels… anywhere wherever space was available.
Carlos- Beautiful work scratch building the interior! [Y] You are doing GREAT especially as your second armor kit in 25 years. Looks like you are being drawn to the dark side…
Which part of south Florida are you located? I go there every year or twice if I can to see my ‘snow birds’ parents in Venice.
thanks DP…I’m having fun with this one…next step is to prime it all with some Tamiya primer which is FINALLY available here again, then Interior Buff…I’ve been building for a couple of weeks now and have only taken 2 parts off the kits sprue…[:O]
I’m on the opposite coast…work in Downtown Miami but live a bit further north in Miramar…your parents picked a nice place…the west coast is so much nicer…
Updated photo of Pz III Ausf J Initial - Used a old Verljnden Production detail set “military supplies” - long wooden box and did some modifications to get closed to earlier posted photo of the storage box on the back … from photos and archer instructions the storage boxes from the unit being modeled (2nd Div 6th Co.) were painted field grey. I have it painted with darker german grey and washed for shadow detail with some natural wood showing some wear … looks like some rope was used to fasten / tie down the storage box … Armor86


Road wheel mounted on the right side, likely start placing decals next
Does your browser have any options to shut off the images?? I know it was an option way-back-when that nobody seems to pay much attention to anymore. It may still be in your preferences somewhere. You could browse that way, and just click on the pics you want to see.
Carlos- Cool! I used to live in Miami for a year… Kendall off SW 88th Street. Great memories especially on South Beach when I was 25 years old and single. [whstl]
Armor86- Nice work on the wooden box! I want to get that too… gonna hunt for it on eBay. Nice job dealing with Panzer Grey… looks like you will bring it across the finish line anytime soon.
Vance - that’s a really good question! I’m using Firefox…does it have that ability?
Tonight is paint night for me - FINALLY! Going to do a bit o’ preshading on the recesses and joints, then dunkelgelb away. Meant to review my AK Interactive “Dunkelgelb Modulation” set last night…will have to check that out while the preshade is drying.