Now we are talking. [Y]
I have always wanted beachfront property in Arizona. If the property has mineral rights too, I might piddle myself.
Now we are talking. [Y]
I have always wanted beachfront property in Arizona. If the property has mineral rights too, I might piddle myself.
And that is where I left off. This update will be convoluted because the process was just that–convoluted.
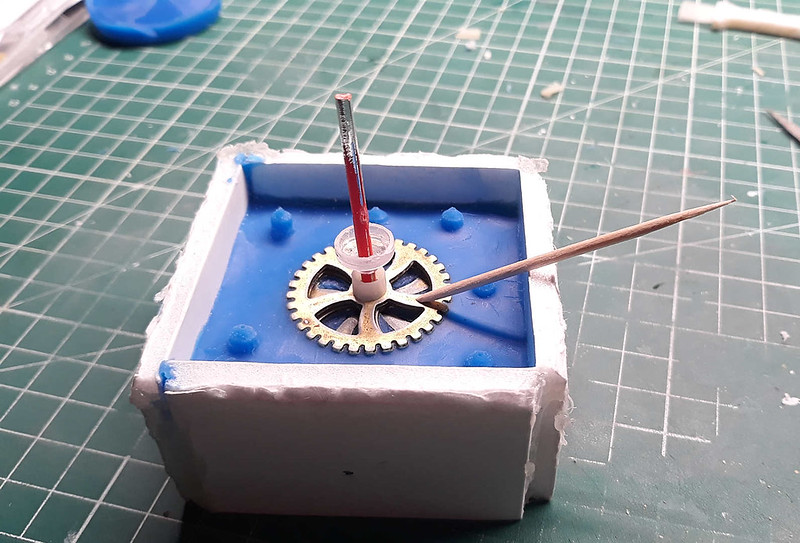
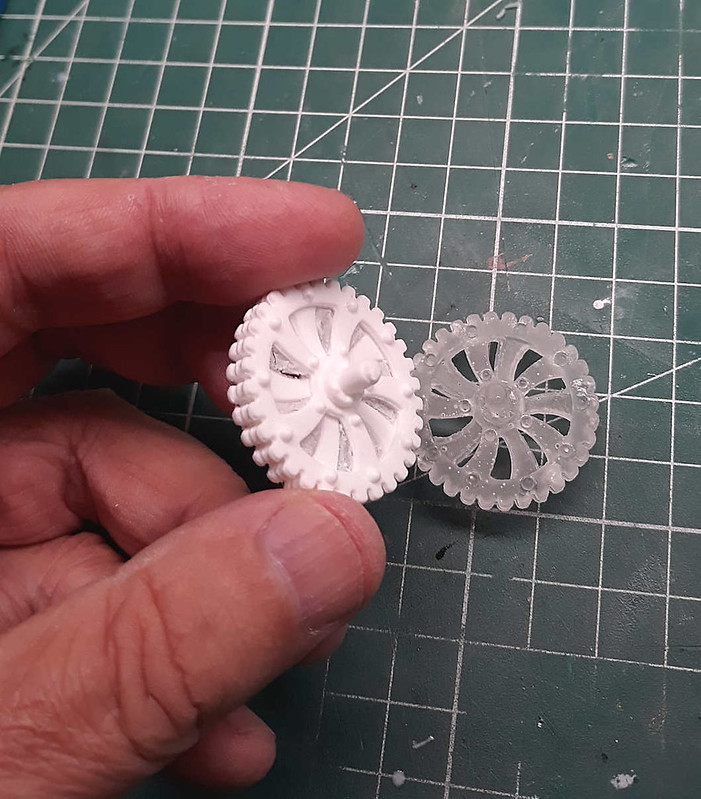
So, I made a new mold. This time, I did things a little different. I made the pour spout on the front of the wheel. I failed to image that before I poured the silicone so, the image below only gives a gist. You need to reconfigure it in your mind that the wheel would be flipped.
The toothpick is a vent for air to escape. I made the center pour spout by cutting the tip off a syringe. You will see why later.

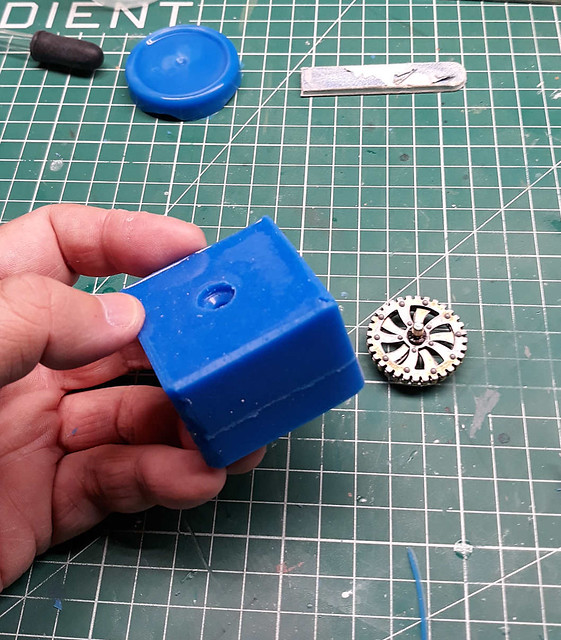
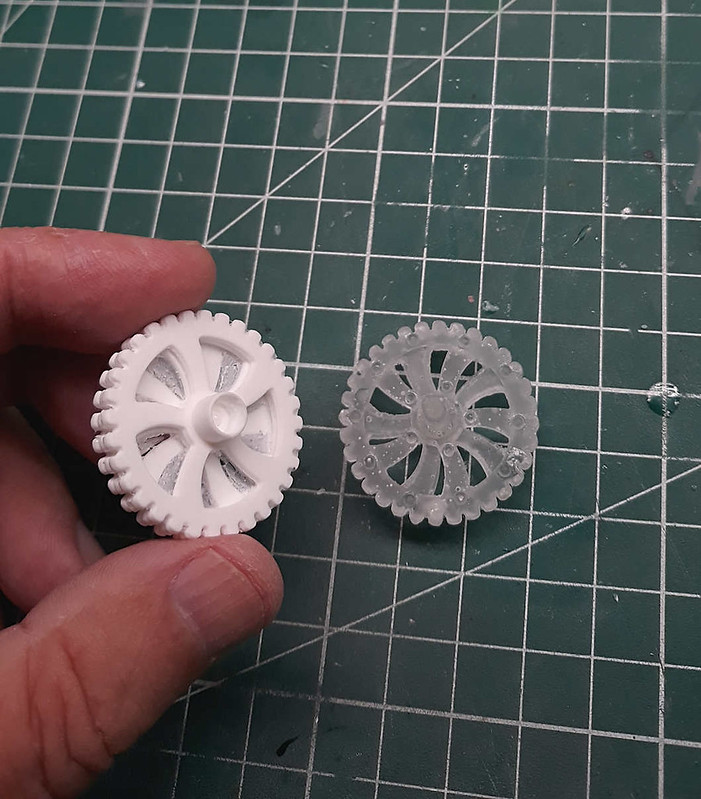
And… success. I applied a thin layer of vaseline before the second silicone pour. They came apart, no problem.

A nice little mold.
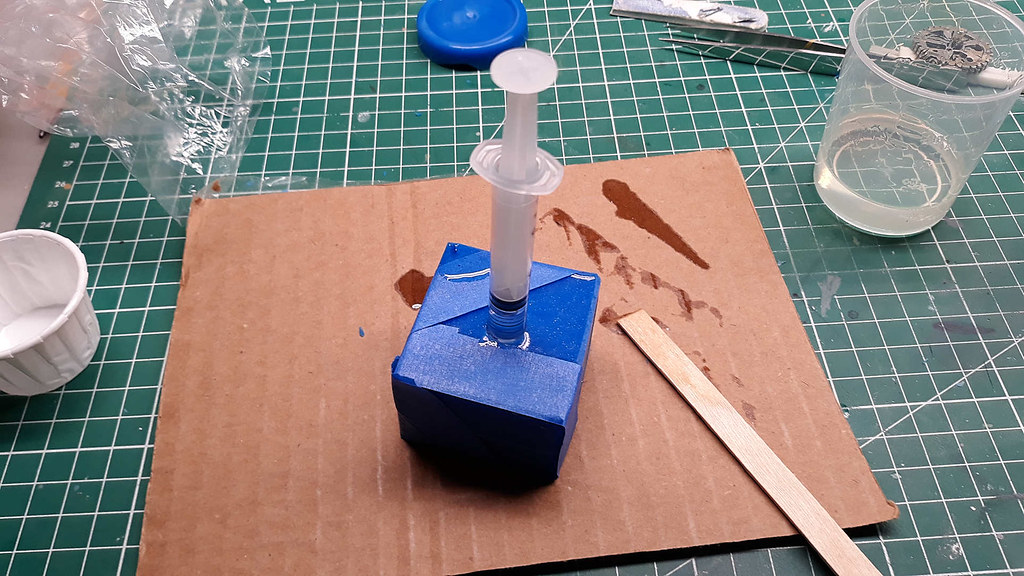
And now you see why I used a syringe to make the opening. Using the same type of syringe, it makes a perfect port to inject the resin. I opted to inject the resin because I had little faith pouring will work well.
And what was the result of the cast? The result was … garbage. The piece had numerous holes, cavitys, and thin spots. Following this I tried another cast but this time I rotated the mold to try and flow the resin. The cast was much improved, but it still had too many defects. I tried other things, but the result was always the same, too many defects. The problem areas being the teeth of the wheel. The resin failed to flow into those small recesses, and this left gaps, and holes.
At some point I gave up on the idea of using the Smooth-On casting resin. I decided to try using Puduo epoxy resin. Puduo is too thick to inject, so the idea was to fill each half of the mold and then slap them together. It was an oozy mess, like an oversaturated PBJ sandwich. But in principle, it worked. I did get an improved piece. The problem? The problem like with most all casting resins–bubbles. I went through great pains to eliminate them, but they seem to appear later out of nowhere. This then causes divots. Once again exemplifying the need for a pressure pot.
Now what do I do? Since the Puduo worked, in principle–can I use the Smooth-On in the same way? I thought yes–but not the same way. Smooth-On is “Ultra” low viscosity and trying to PBJ the mold would not work well.
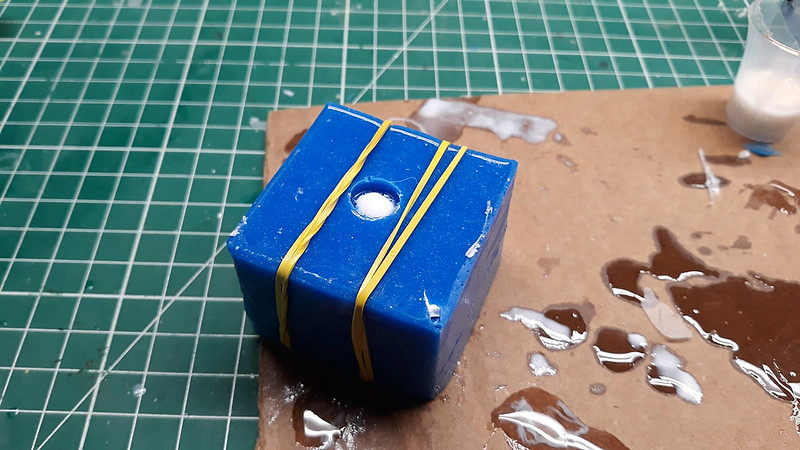
Ultimately, I poured the resin into the half that has most all the issues. I used a hobby brush to work the resin into the recesses and to help dislodge any bubbles. I then poured resin into the hub of the second half and then slapped the two halves together. I banded the mold and then injected more resin with the syringe.
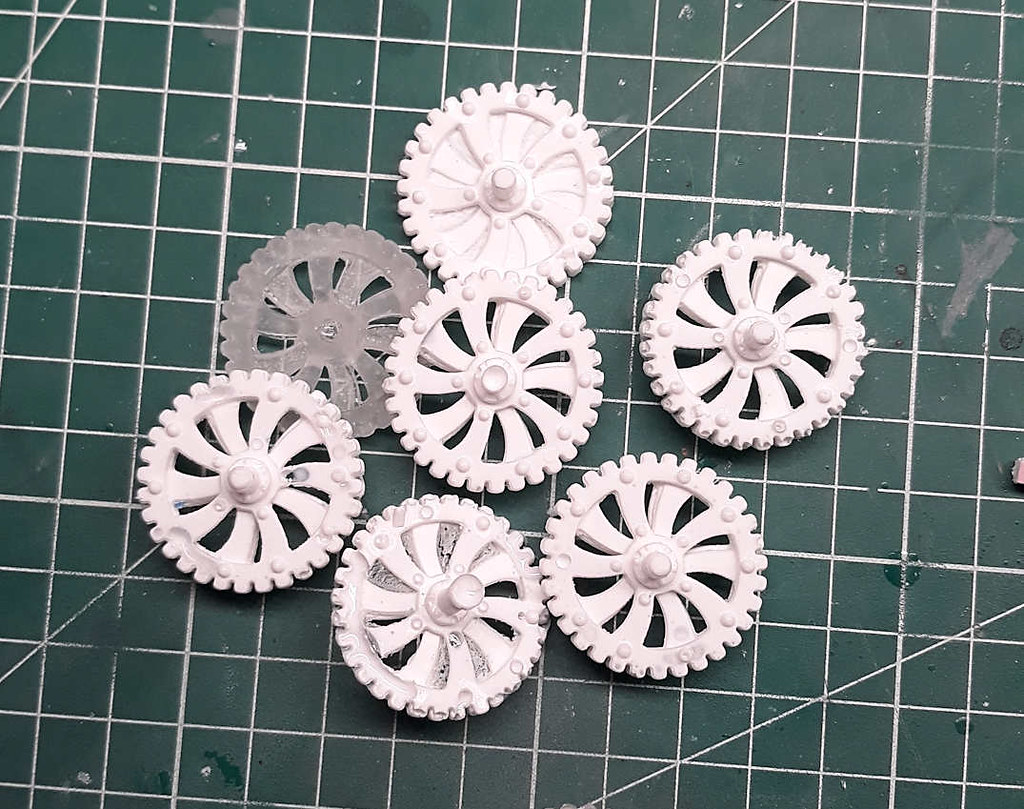
This then resulted into a good cast. There were still some defects here and there, but they should be fixable. And of course, there is more flash to remove, but not a big deal as they flake off easily.
I am holding the Smooth-On piece, the Puduo is below it.
Refuse pile. If you look closely, you can see some of the short-shots and such.
Some things to note:
Two-piece molds are not an easy thing, as I have learned. Particularly, when you have intricate detail. A better mold maker would surely have solved the problem differently, probably, through better venting. Maybe even by using a different acting resin.
Remember how I said I would use wax paper to hot glue the form to? Well, instead, I used aluminum foil and that worked well. The hot glue came off easily.
I really like the Smooth-On resin. It captures detail well, it sands well, and it is extremely lightweight. My model will not even feel the wheels. To that point-- the mission is accomplished.
The resin I purchased is a fast cure. It has a potting time of about 3 minutes. If I were to do this again-- I would purchase one of their slower cure resins. The one I have cures so fast you rush to get things done. This does not help me in my fight against air bubbles and air pockets.
The Smooth-On silicone rubber worked very well too. Btw. If you use their resin with their silicone you don’t have to use a mold release agent when casting. It is recommended you do though, to lengthen the life of the mold.
Smooth-On has a number of helpful videos.
https://www.smooth-on.com/tutorials/
So where does this leave me? I need to cast another wheel. Here is the bad news that struck me one Saturday morning. If I want the spokes of the wheels oriented in the same direction for each side of the model–I will need to make another master that is oriented as such. Then I need to make another mold, and more casts. I guess the good news in this is that I should get my monies worth out of the resin and silicone, before they go bad. Always looking for the silver lining…
Egads man.
Crikey, Bakko, after all that I’m going for a beer… As a would be medical practioner, I recomend the same for you.
Truly excellent and inspiring blow-by-blow tutorial…and, as the pundits would say, “…a glowing testimony to the resilience and tenacity of the human spirit.” [And your last-minute realization that you needed a ‘reverse’ mold had an all-too-familiar ring, for similar-complexity projects I’ve undertaken through the years.]
Genuine thanks for sharing this project with us…and as Red Green would say, “I’m pulling for you; we’re all in this together.” [:D]
[And I’m with Dodgy…liquid refreshment is definitely called-for!!]
Mind you this: There may be rum in this, there might not be. Up to you to decide.
Way ahead of you Dodgy. [:|]

True story. A week or so ago I was in the midst of the storm. The castings were not working out, my best friend was taken to emergency unconscious and near death, and at work parts shortages are popping up faster than I can say, I need a new job. At the end of the business day my field sales rep texted me that he is near jumping off a cliff, and we both vowed to take the evening off with refreshments. I had a gift card to use, so I decided to get a good meal as well. Later, I texted the image to my coworker, and he texted me an image of the beer he was drinking while grilling dinner for the family.
And thus I did. Perhaps God had pity on me because it was a good meal and a good evening. I chatted with a couple of lovely ladies that were sitting at the bar. The topic was of all things, the world economy, and how precarious it is in its current state. They both work in the banking system and they had their own horror stories to share. I think I made some new friends and that is always a good thing.
Regarding my friend. She is doing better and currently in rehab. Her condition is chronic and eventually, it will get the best of her. But for now, still fighting the good fight.
THE END
Wow Greg, I can’t tell you how much that inspires me.
Again, thank you, and thank you for appreciating what I am working on. It means a lot. [Y]
WOW!!!
Things got complicated quick!
Don’t worry about all the “rejects” , paint them rust and give them a black wash. Then you can pile them up behind Nemos shop.
Lol. I love how you think. [:P]
Here is something I learned from the Smooth-On videos. When mixing silicone you will invariably end up with extra that cures in your mixing cup. His idea was to pull that piece and use it for holding pointy tools.
It works great.

This concludes the tip of the day.
Bakko
Just have to read the fine print.
Arizona river washed rock is a valuable mineral export (if a generic term as you can get ‘arizona’ rock in CO, NM, and CA).
Downside is that it’s only getting aout $120-160 per ton, and that’s FOB at the front-end loader for truck delivery. So, you need to be able to dredge and poile the stuff in graded and sorted piles for less than around $100/ton.
Sigh.
On the Minibricks YT page, for payng attention, it’s clear that they have some bucket or lid handy for leftover resin (and likely leftover RTV), and make round paint pallettes out of them.
Sigh. As to resin, Kathy Millett, Luke Towan, et al have had me rowsing the AnyCubic and Eleygoo web sites . . . there’s a “gotcha” there in that you also need a parts washer (and IPA by the gallon) and a UV curing station to factor into the price. I caught myself wit ha spread sheet comparing Resn plus RTV and the like prices and tme requirements . . . Sigh.
OUCH! Hope thing are better now my friend. Good to hear your friend is doing better.
Good luck with the castings and yeah if it’s not going well set it aside and spend a little time with a book, movie, adult beverage, whatever…
And I like Timmy’s idea- rust the suckas and build a junkyard. Nemo must have had a least one with all the stuff he was building.
Resin printers intrigue me too but after watching some videos on the process, I will wait for the technology to improve. It’s a whole to do with these things: Expense, cleanup, washers, fuming, shelf-life, etc. They have already improved much but banding is still part of the equation too. To me, just not worth it. I am sure they will come up with something that will leave the current technology as something from the dark ages.
Thanks Cliff. Yeah, this turned into a bigger muddle than I thought it would be. The resin does not want to flow throughout the mold. I ought be able to either pour or inject the resin without seeing all the issues that I do. Though, I am a lot closer to the endgame, it bugs me that I got there by doing a workaround. I can’t let things be. Lol. For grins, I wrote Smooth On for advice. They offer technical assistance and I am interested to hear what they tell me. It may end up that my mold design is defunct. If I get any usedul info, I will share it.
In my fantasy world there are gold nuggets waiting to be dug up. [:P]
That was quite an adventure to get the one casting. I agree with the gang, A+++ for resilience, Stevie.
As for having to reverse the second one, what comes to mind, and I paraphrase Nicholson in Mars Attacks here, ‘You got one out of two and that aint’ bad".
Nah, you’ll get it.
All I have to say is, WOW! I emailed Smooth-On late last night and here they are, see below. THAT… is great customer service. Too bad some other unmentioned businesses we all know would follow that line. It is a quick and detailed response. [Y] to Smooth-On.
Will I follow all this and try it? I don’t know, my sail is lacking wind.
I thought you might appreciate reading their expert advice.
Okay, after taking a look at your photos there are things you can do to improve your mold design. This is a very difficult part to mold. I understand why you want to lay it on its side and inject it but that gives your part a large flat surface that wants to trap air. You’d have less air entrapment if you stood this part up on end but that would require your making a tiny vents between most of teeth of your gear that would need to be snipped away each and every casting.
So, if you look at the gear straight on with the axel facing you this is what I suggest…
You would want to either glue a short peg or make a cut between all the teeth from about 7-9 and also between 5-3 from 9-12 and 12 to 3 you need a vent that goes up to the top of the mold Then the axel should be vented from it’s outer tip back to the top of the gear wheel as high up as possible at the 12 position. I’d put the injection port at the bottom of your mold from the side of the gear on either the left or right side, not straight into the gear as you now have it and keep the whole thing a two part mold as you have it or make it a cut block mold with the bottom still attached and you’d cut it down from the top to the 9-3 positions respectively. You would then inject the part very slowly until you see resin coming out of all the vents at the top. If possible you’d want to pressure cast this for the best results. If you can’t then just be careful that you do not flex the mold and suck air into it from the vents. You will also either need to leave your syringe in place until it cures or plug that bottom hole with a small stick or clay after injecting it.
The way your mold is not you will always get air entrapment on the wheel face just because the tension is so high that face will want to hold the bubble in place. Plus you will always need to brush resin in and do all those extra steps to try to fill in the detail before filling the mold completely.
Heating your mold a little before casting could help and also injecting about a 1/4 of the resin in then rotating the mold all the way around a couple of times as if it is spinning on the axle of the gear may help push air out to the teeth and help the resin flow into these areas better.
As I said this is not a simple part but I believe you’d be able to get fairly good castings if you design your mold as described above.
Thank you,
WOW! Now that’s some help! Sounds like good advice to me.
“Wow” is right. That’s some customer service. [Y]
Yeah and they followed up with if I send them a sketch of how I see doing it, they will review things for me. Pretty nice. Their good service makes me want to try it. THAT, and the dogged mule in me.
We shall see. My job is taking all my time, losing wind in my sails. Lack of time is killing this project.