Steve - I didn’t sand anything between coats, just on my final detail.
Tim
Steve - I didn’t sand anything between coats, just on my final detail.
Tim
Man, you guys are awesome. I just hope my BMW and GT turn out half a good as the work that’s going on here. WOW!
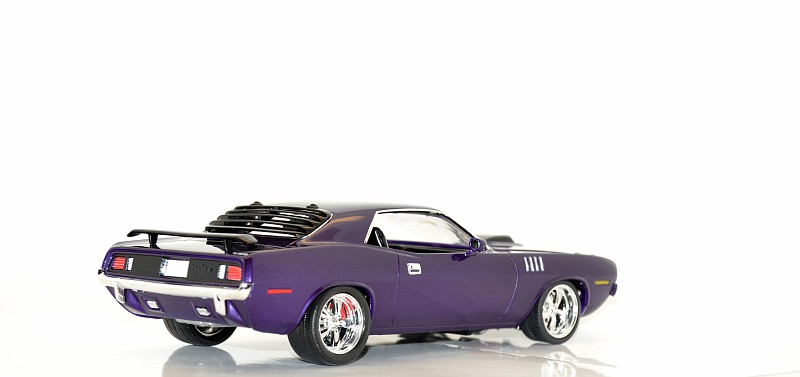
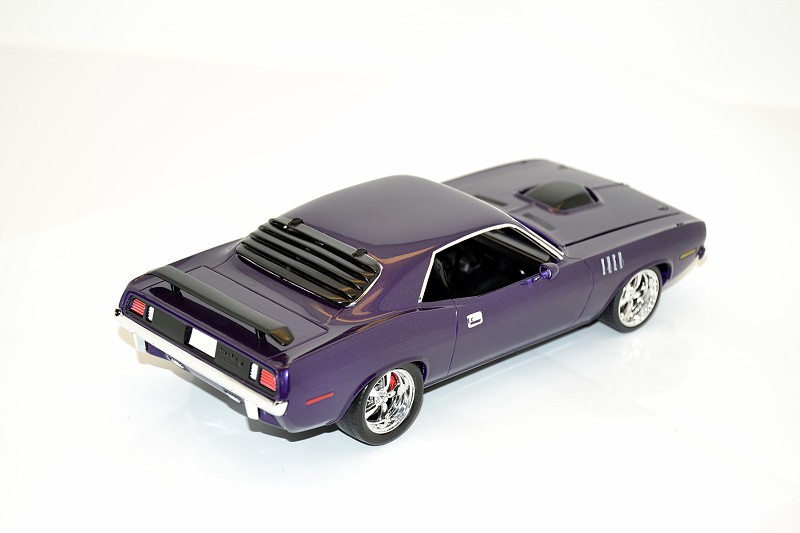
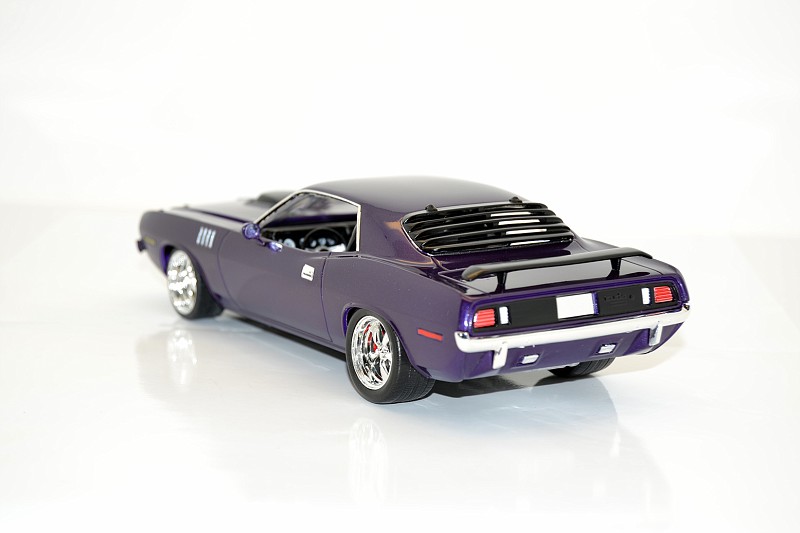
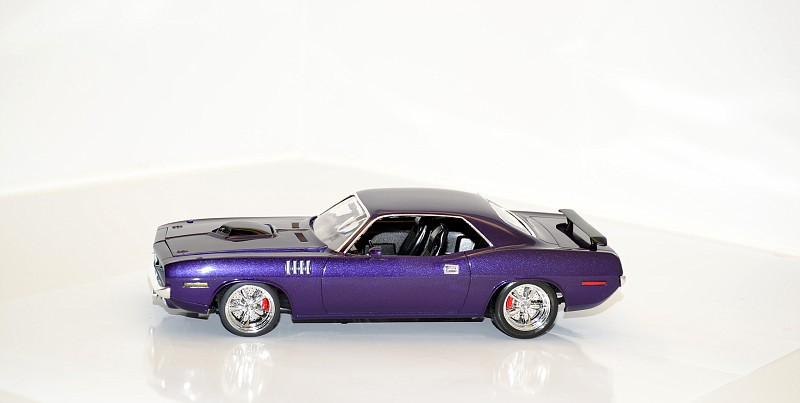
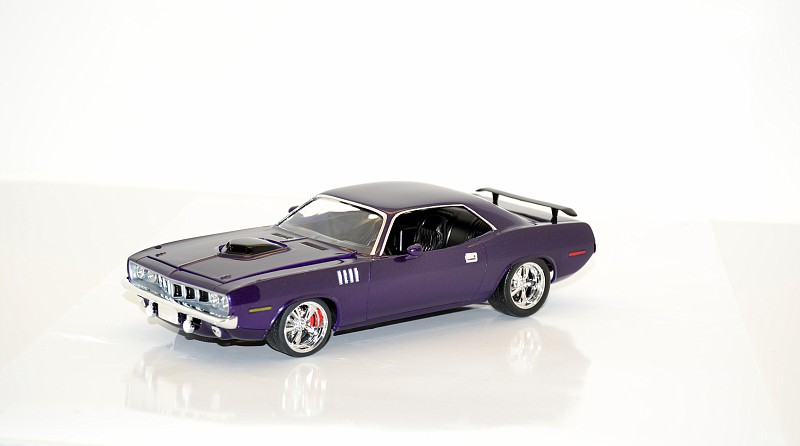
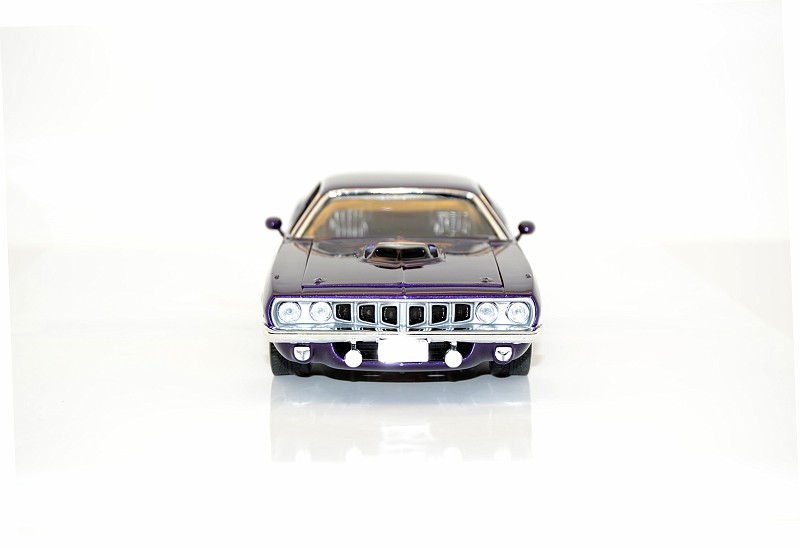
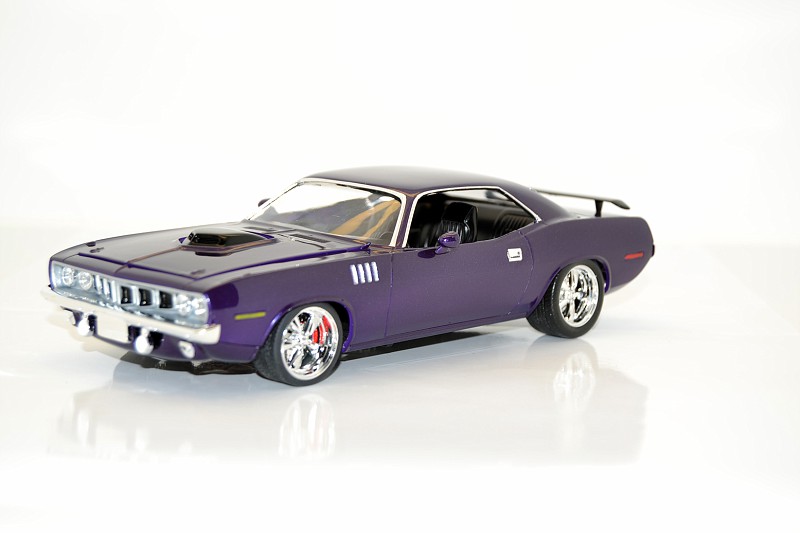
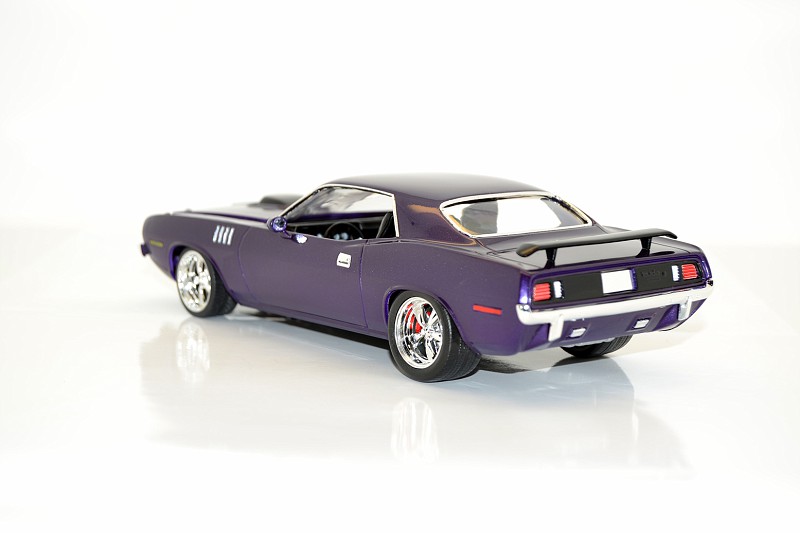
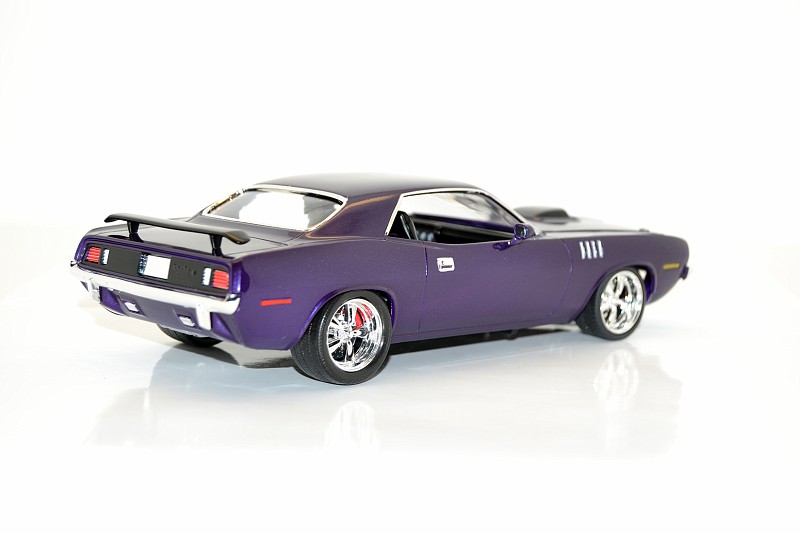
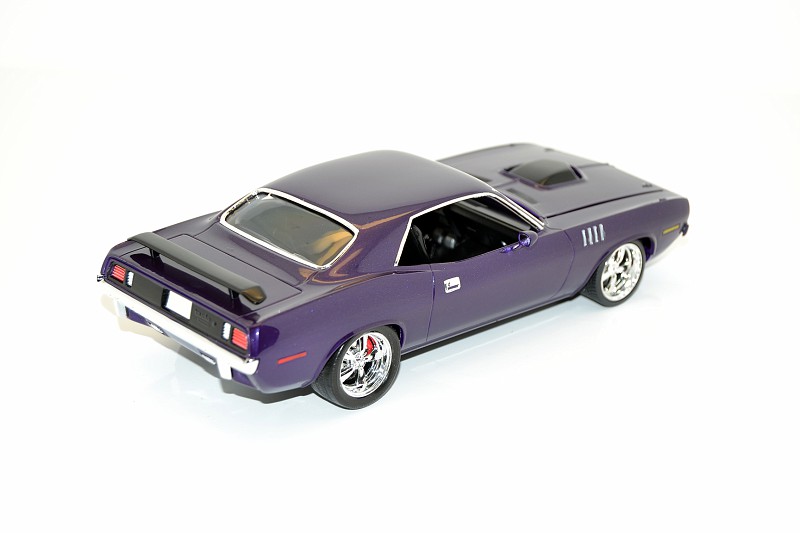
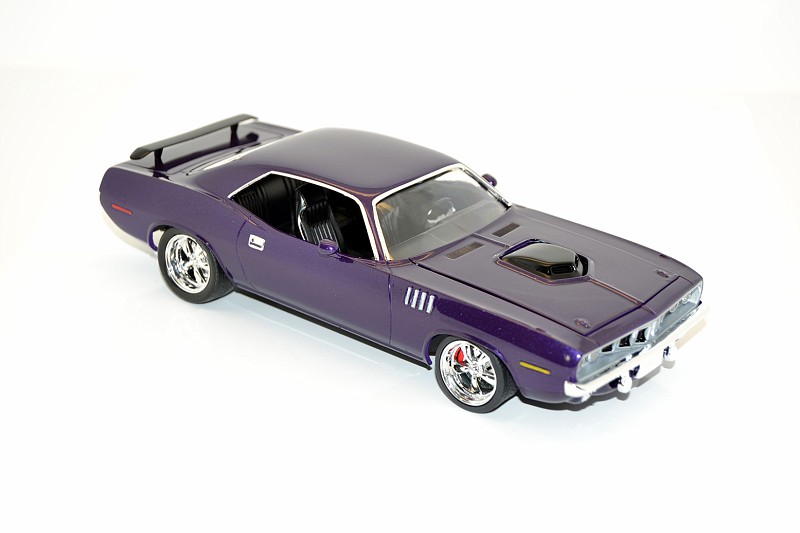
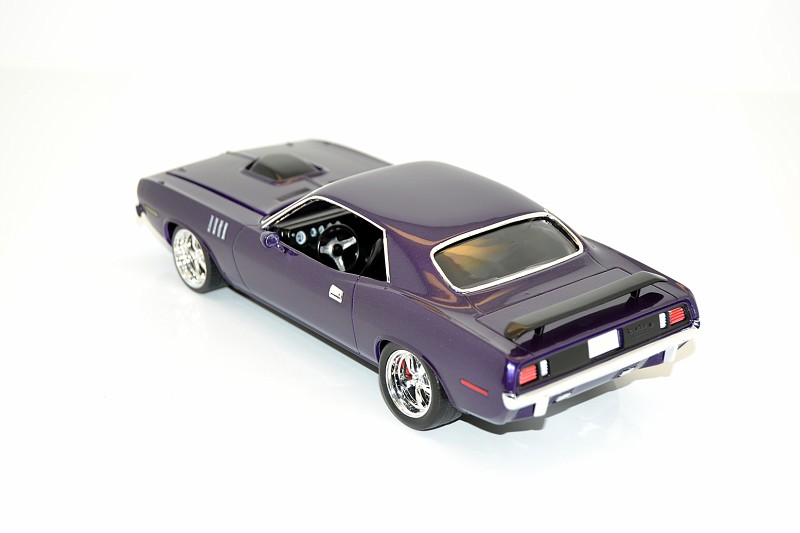
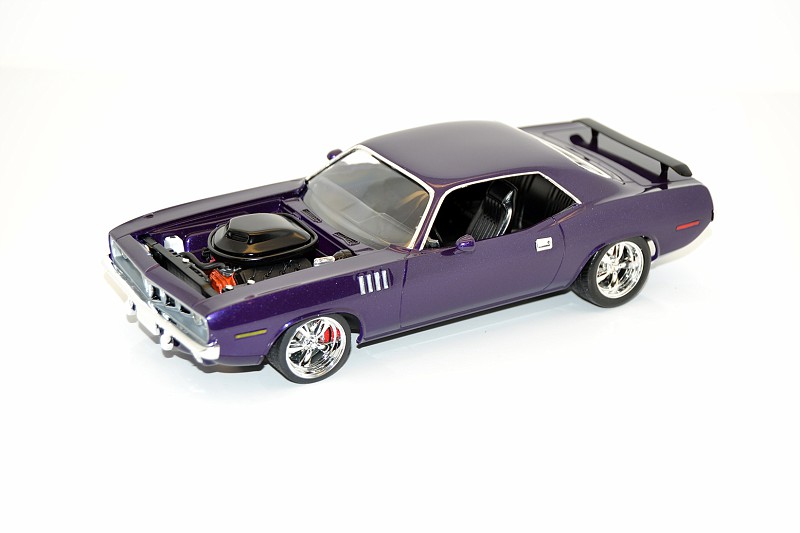
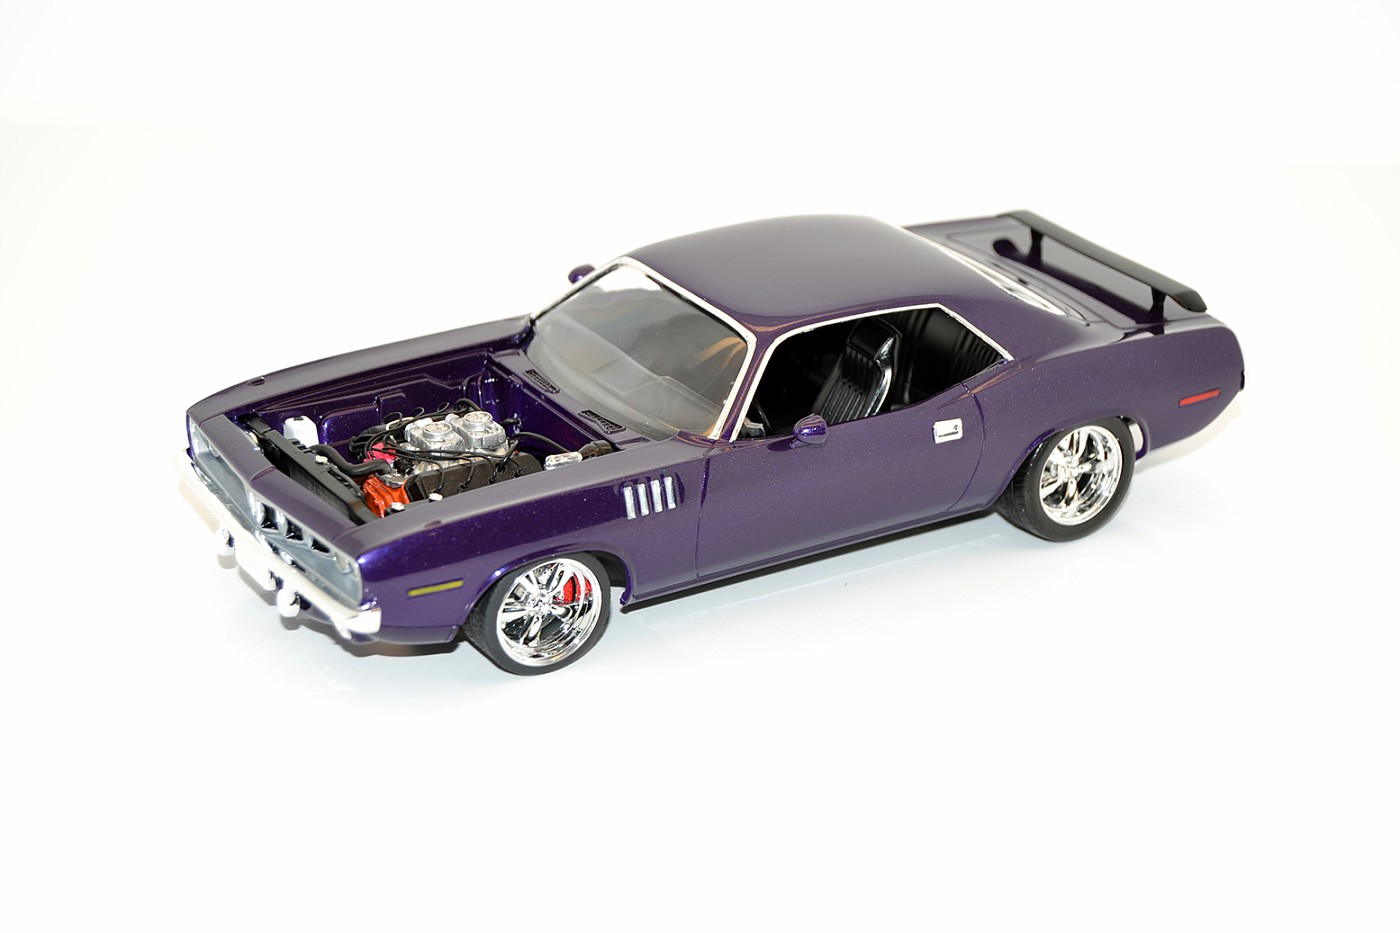
am LOVING that purple beauty!
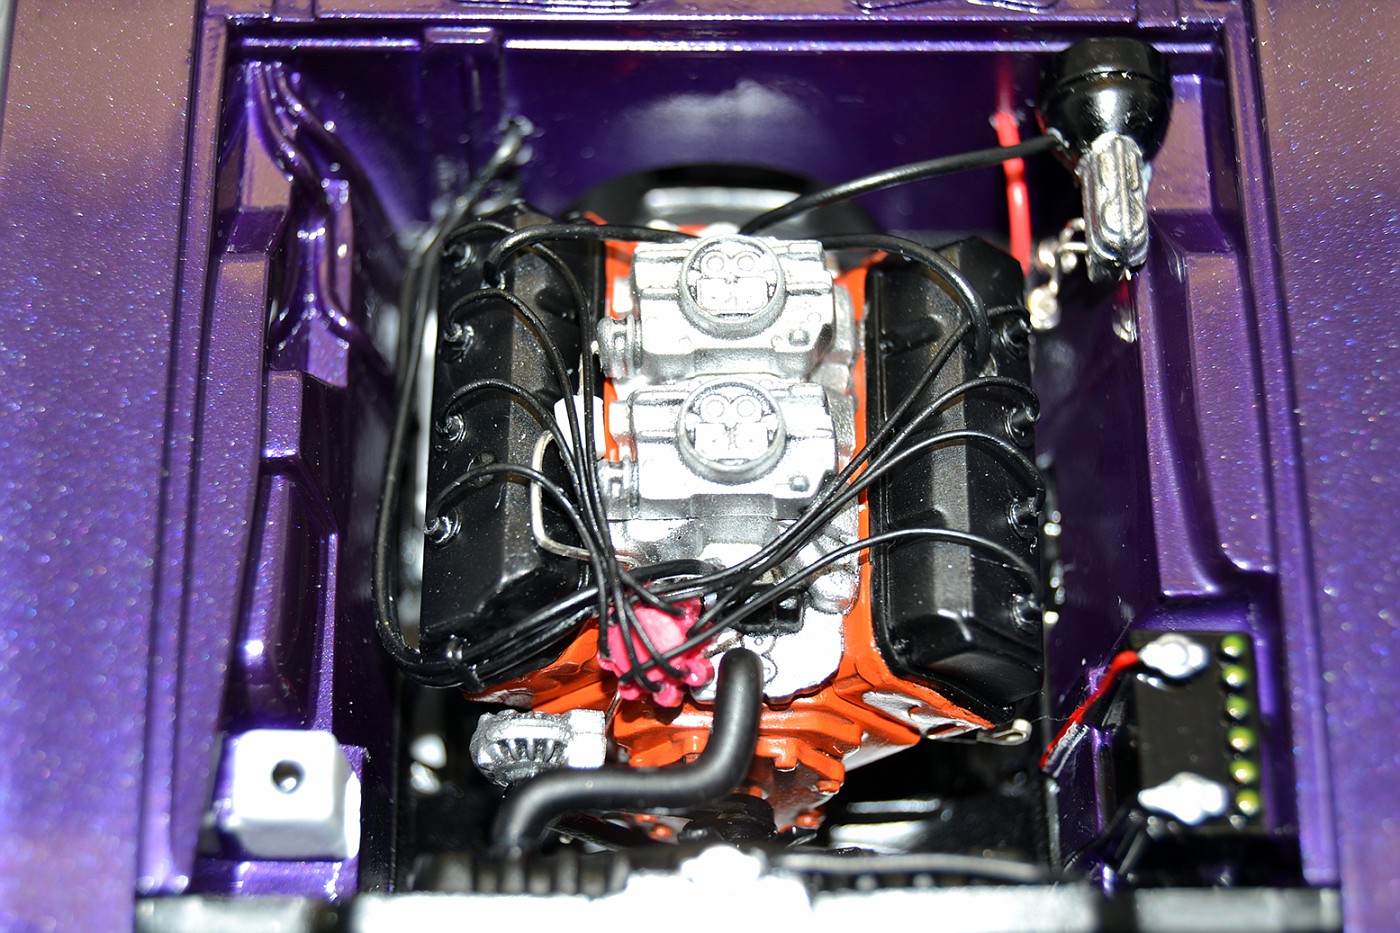
That paint is so good I’d leave it the way it is! As an idea is there another vehicle that has just a Hemi decal that you could use on this build?? Possibly?? It would go with the wheel/tire set up you’ve got I would think.
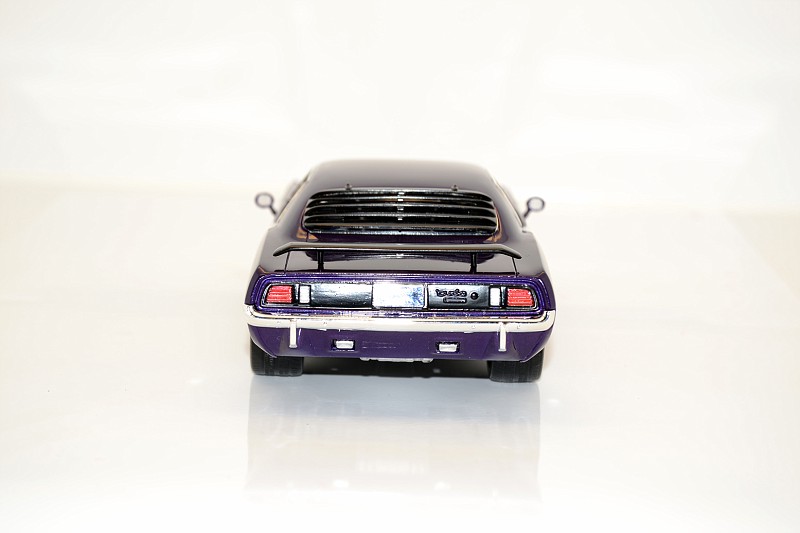
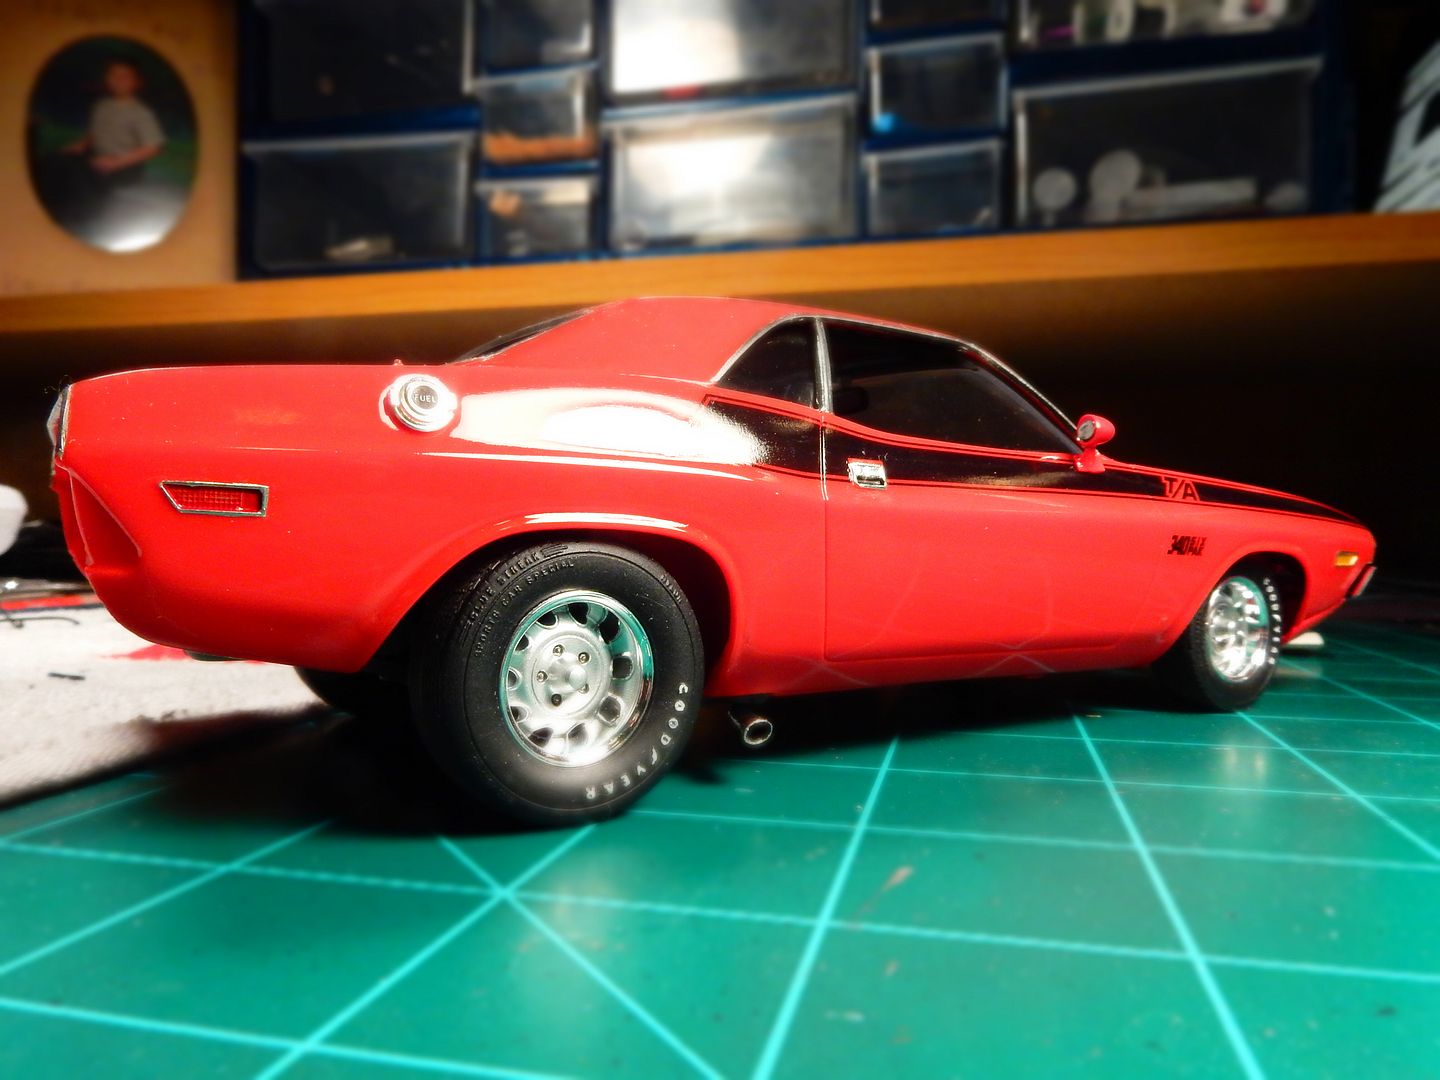
My first Mopar… One of my new favorites! I decided not to put the flat black Hemi logo on the back, if anyone is curios.
Thanks for looking.
Tim
More on next post…


!!! And another thing…!!! I really enjoyed watching this beauty coming together Tim! We’ll get which ever pic you want here in the intro post. Have you got another one in you?
Nice job all around, Tim. I like it a lot. Did a little bit today on the powertrain. Transmission painted Alclad steel, valve covers in Alclad chrome.
Jay
Looking good Jay
I’m really gravitating towards replacing all kit supplied chrome with alclad after seeing this and other examples of its results. Looks really good Jay!!
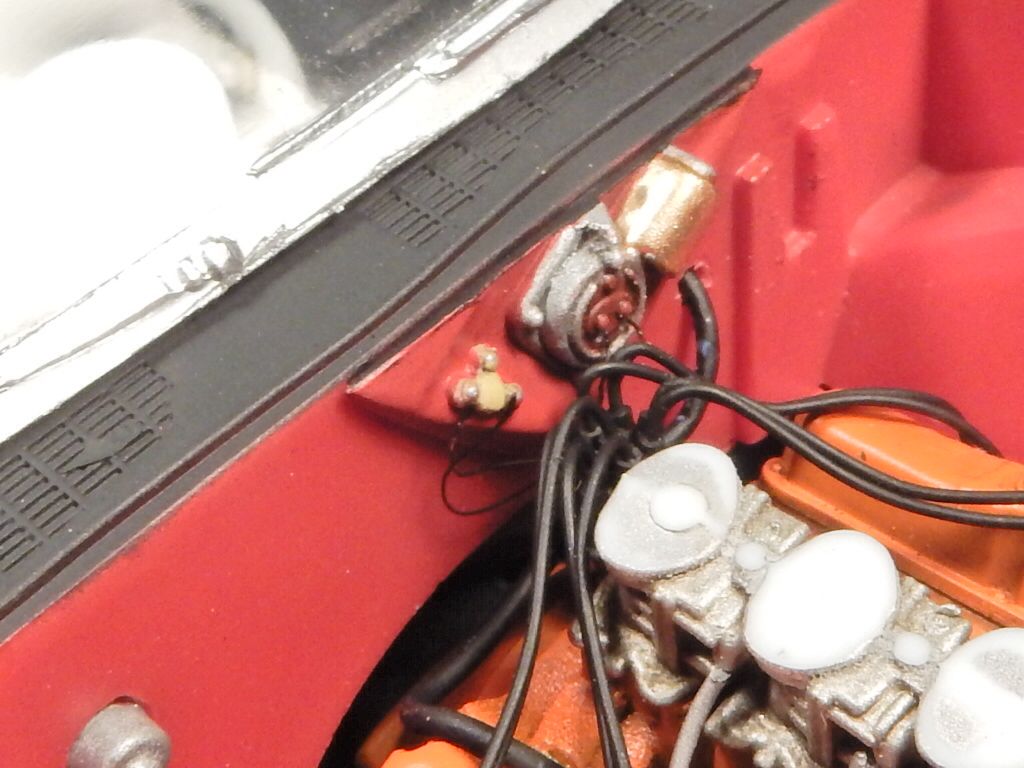
Well I got the windshield wiper motor and ballast resistor wired up and ready to go this morning:
and got the exhaust installed yesterday!
Thanks, Joe and Jay! Looking forward to seeing both of your builds complete.
Tim
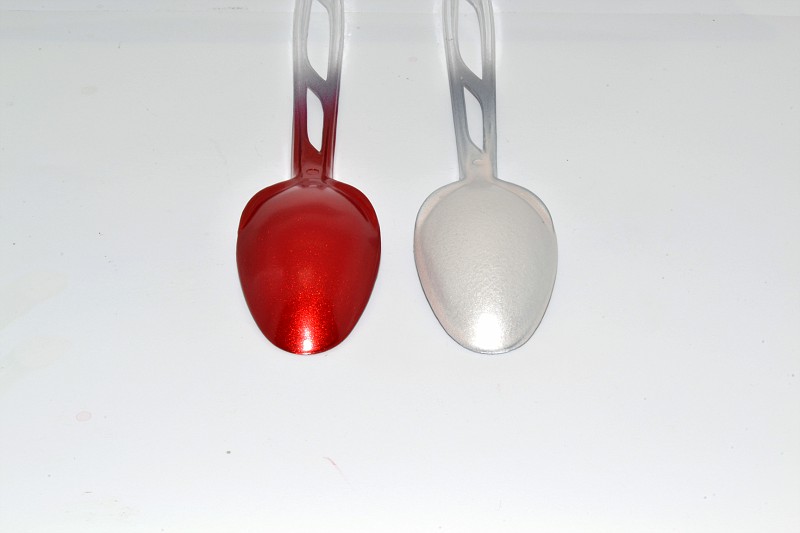
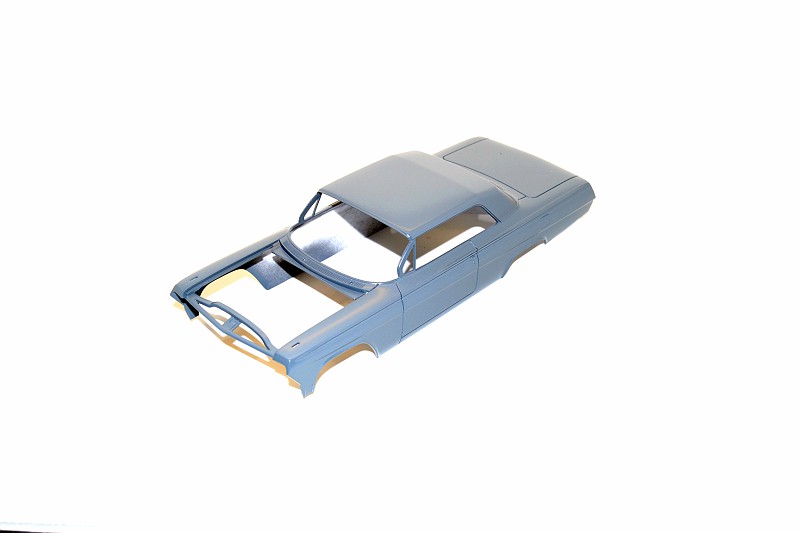
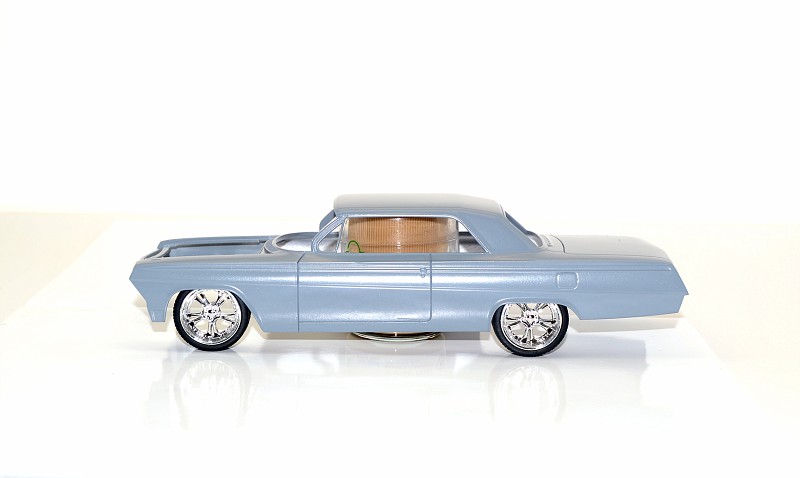
I wanted to try and knock the exterior paint out in the next couple of days since that takes the longest to dry, so I panel scribed and primed the main body parts. I also did the spoon test since I haven’t sprayed with the Testors Aztek series acrylics yet. I chose pearl red for the lower portion of the body, and pearl white for the upper portion. I am not totally sold on the pearl white just yet because it didn’t seem to flow like I wanted it too, but we will see. If I don’t like it, I might go with bright white or titanium… haven’t decided yet. Clear coat will be Tamiya with a light brown/beige interior.
My plan is the split the car right at the top of the molding line that runs the length of the car and divide it in half. Top half pearl white, lower half pearl red. We will see…
Tim
It’s hard to tell that the white is pearl.
I ordered the Master Tools-Line Engraver off of Amazon and it’s a useful little tool. Well worth the $10.00.

The panel/body lines are really defined now, which I really like. One day I will venture into cutting the doors and trunk out. One day… lol
Here is what I envision the stance to be. I know, I know… not many people are a fan of the “big wheels”, but they fit so good in the big wheel wells.
Thanks! Tried to get a little more done tonight. If you keep taking lilltle steps, once in a while you actually end up with a finished model. Stripped and repainted the door trim panels. I think I can work with them now. Assembled and painted the seats which are from Competition Resins. While I had paint in the airbrush I shot the engine compartment to check my work where I removed the battery tray and painted the inside of the body. Not a big fan of the four large ejector pin marks at the corners of the headliner, but would be difficult to remove and probably very hard to see anyway. Dug out a Morgan Automotive Detail distributor which I like a lot. They are prewired and come in 4,6,8 cylinders and choice of wire colors and cap color. Glued a piece of styrene rod to the distributor body to simulate the mechanical tach drive.
Jay


Tim: Man I really can’t wait to see some more of that great paint work that you pull off! I’ve been eyeing a kit that I built as a kid and will apply your techniques that you have shared here (and abroad) on it. Check it out. I’ll have it on the way tomorrow!!

Jay: Those seats you have freekin’ rock man! That interior is gonna look great!
It took a stupid amount of time for such a small return, decaling something the size of a large grain of rice, and then sticking four resin connectors in it. mad but strangely satisfying.

Tim - the red and white will look very sharp
Jay - looking good I use the same pre wired distribors and have had good results with them.
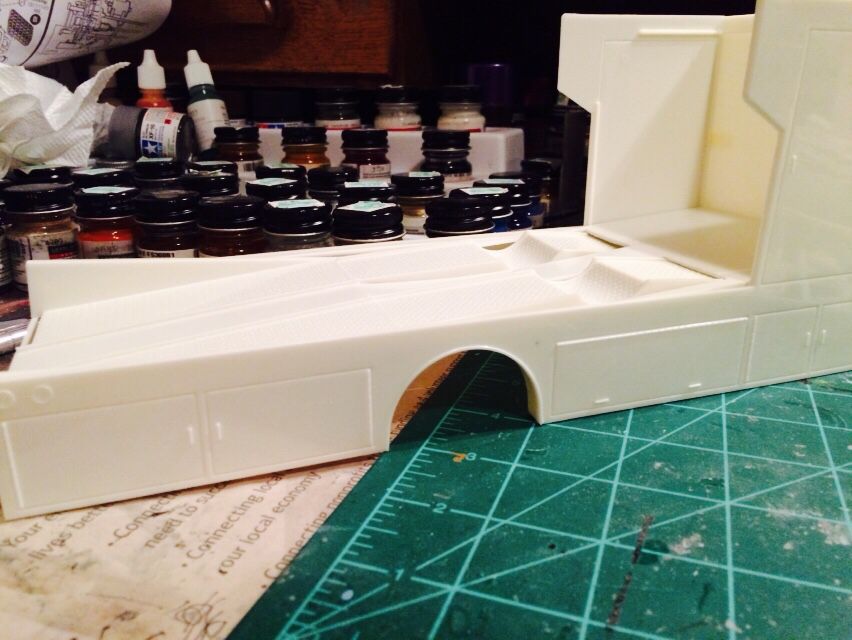
I will be making progress on cleaning the resin cab up and cutting down the Ford interior tub so it will fit into the Dodge. I also got some better pictures of what the 39 Dodge really looked like and may be adding some more details to make it look more like the real ones. I’m also working on cutting down the ramps that stick up. I’m not sure if I’m going to remove the indents that they have for the front wheels. Should I keep them or remove them and make it all flat??
Here’s some pictures of where I’m at.


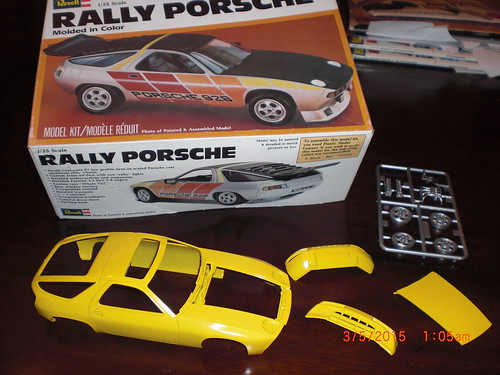
I just started to build my first car model in ages and saw this GB while heading to another GB I was following. I am building a Revell Porsche 928. It’s the same kit I built in the late 70s or early 80s in high school and it was my dream car back then. I found it on eBay and bought it on impulse. I built it out of box as a rally car, but this time I am just building it as a plain jane stock car.
I happened to have a can of gloss yellow spray paint handy and used it to paint the body. I sprayed the wheel sprue chrome silver and sprayed the underside of the chassis flat black so far.
Dan: I would make it flat myself just because it’ll look a little off if a tire that’s not exactly the size of the cut out is in there. I’m really looking forward to this build!
Rob: I’ll get you in the intro post pal. It’s great to have you in here!!
Snow day here so I will try to make some progress. Primed body with Mr. Surfacer 1200. Base coat is HOK Orion Silver and then topped with HOK Kandy Oriental Blue. Having trouble with the hood. Paint does not adhere very well at the base of the scoop. Had this problem with the first one as well.
Jay


