Sean, Aaron, looking good guys. Your putting a lot of work into these kits [tup][tup]
Hmmmm tough crowd tonight. [B)]
While I really like how the PE stuff adds to the look for the smaller forward crane for the aircraft which is not included in the Pola kit. I decided to go the old fashioned route. Spares box yielded and old crane from a kit long ago sunk in the river as a child no doubt. Looking at the drawing provided for the markings and colors ,which is much more accurate than the model itself, It seemed to be the right size. Close enough for me. [tup]
Now to spruce it up just a little with some 1/350 scratching.
I like the PE hook on the big crane so to make my own I took some of my Pe rail cutting scraps and took a single rail cut in 1/2. Then I simply bent it around a dowel made from stretched sprue and made the hook.

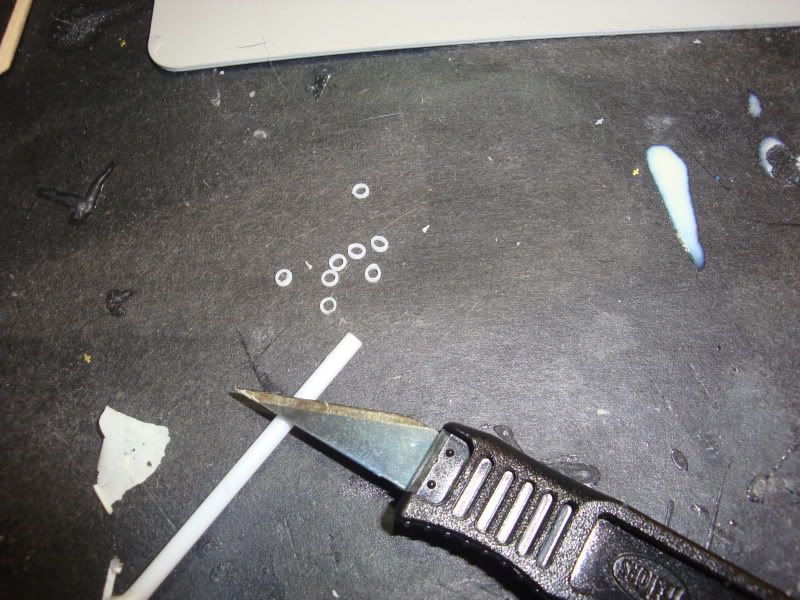
I then took the same sprue dowel and cut two cross sections small as I could to give round plastic pulleys.

Using the shap small tip of the knife to pick up the small cross sections I trapped the hook between them and applied liquid cement to melt the whole thing together. Use only a little or it will disolve the whole pulley!
To really make things thin and interesting I stretched already stretched sprue to get the ultimate in this styrene but used the medium sized stuff as it was easier to work with and sturdy enough to build with.
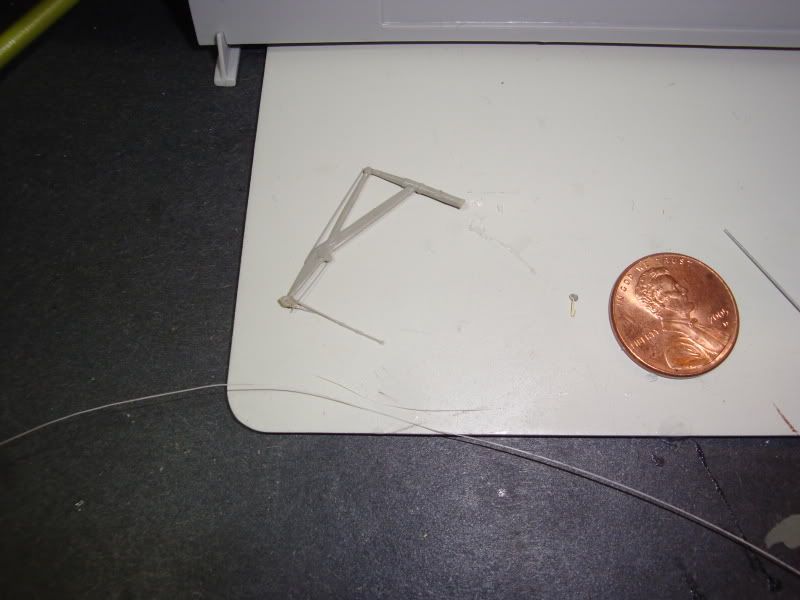
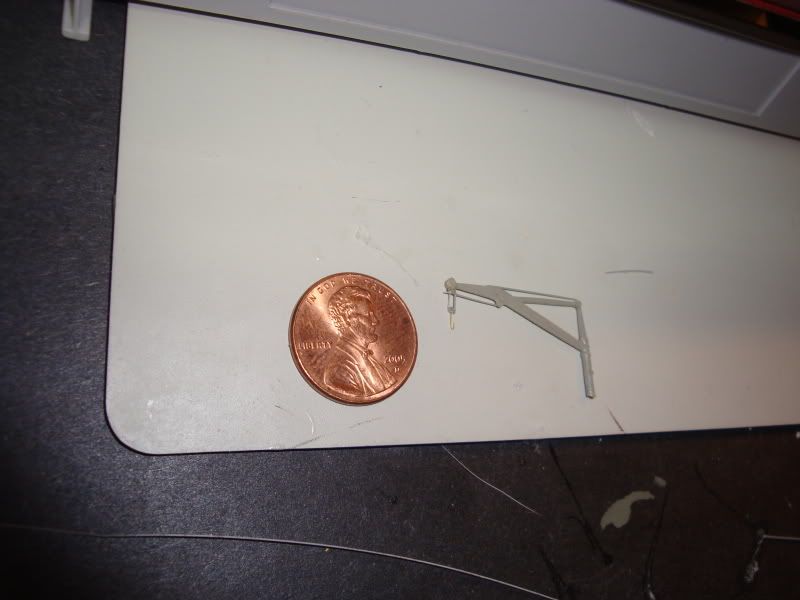
Put it all together and you have a not so bad scratched crane ready for painting and mounting.
Just to make it interesting I did all of this in the dark with my bare hands and standing on my head. ( At least it felt that way! )
Sorry Dave musta posted at the same time! Anyways Thanks and somehow, Yes even in the ship forum this has got to be your fault!!! [(-D] Ever since Ritchie talked me into that 1/72 PE for the Swordfish!!! [;)]
Fantastic Crane Aaron [^] [tup]… My question is how many pulleys did you lose ? On my Lifeboat crane I have lost over half a dozen to places unknown to me in my Hobby Room. They all dissapeared by the sound of a Tweezer snap [XX]
I need to get some more progress posted- eh tomorrow will work for that…[:-^]
Aaron, great work on the crane.
I am overdue for an update here so I shall try to show a bit more progress. Sean and I undertook this project thinking it was going to be an easy quick practice to hone our skills for bigger and better kits. So far we both have worked all month on it finding little ways to improve on this old kit.

I made a very small flag pole that looked in scale with the live photo’s he supports are 1 rail of PE railings cut in 1/2.
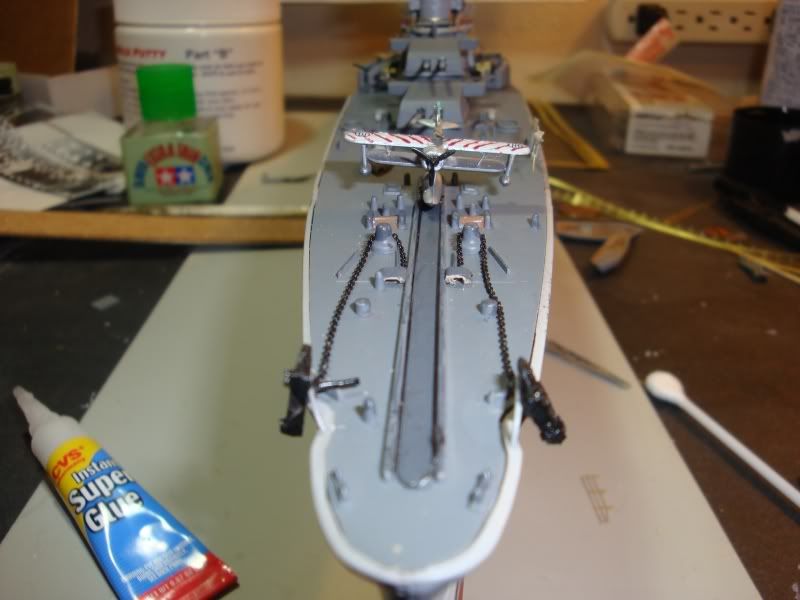
Then I turned my attention to the forward deck. Figured it was time to start nose to tail and get it all together.
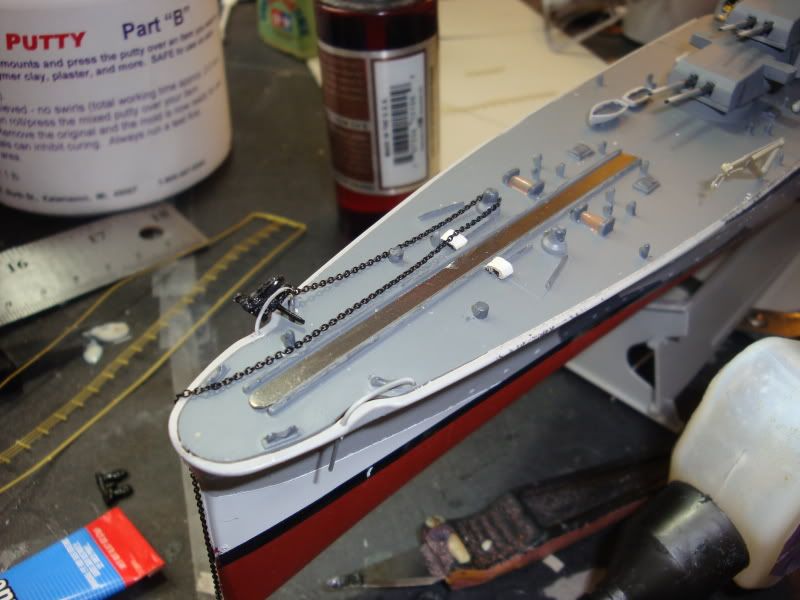
Sean’s anchor chain looks perfect to me! He also suggestested small boxes to mark where the chain originates at the deck! Brilliant!
The anchors are cast copies of the Banner Arizona kit. Modified to look like the photos of the actual ship again. Small stretched sprue placed into drilled holes and forced down into them made a good anchor lock with which the anchors lock onto and hug as in the pics again.
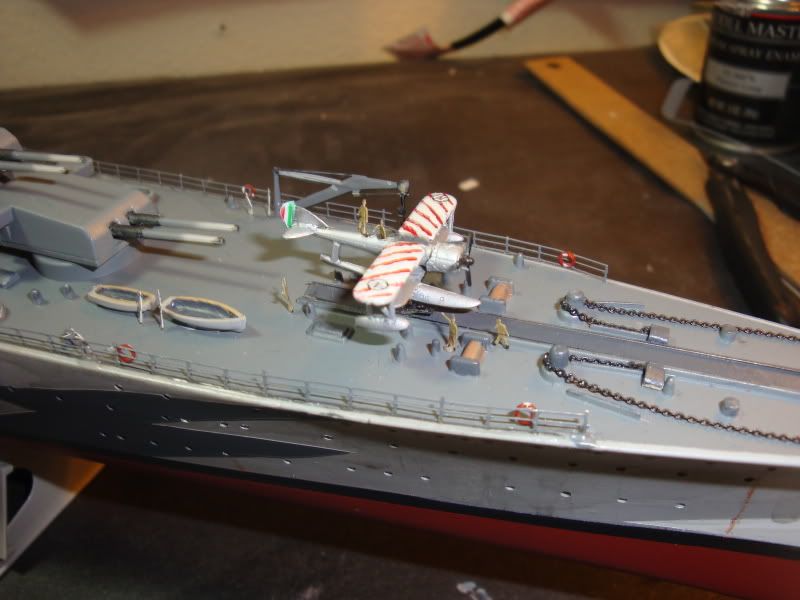
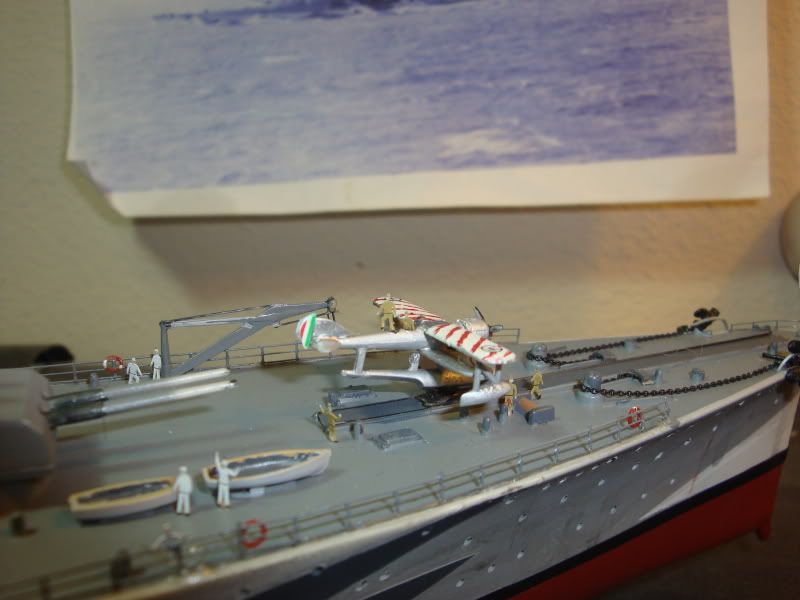
A piece of scrap PE from the Trumpeter Swordfish was cut. (tough stuff ) to shape and used to elevated the catapult platform slightly.
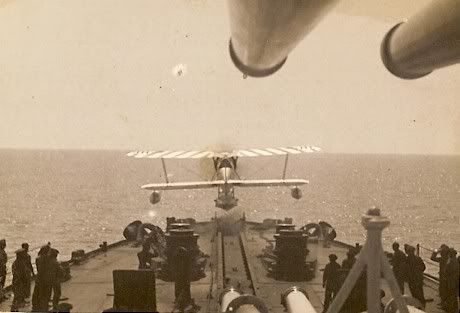
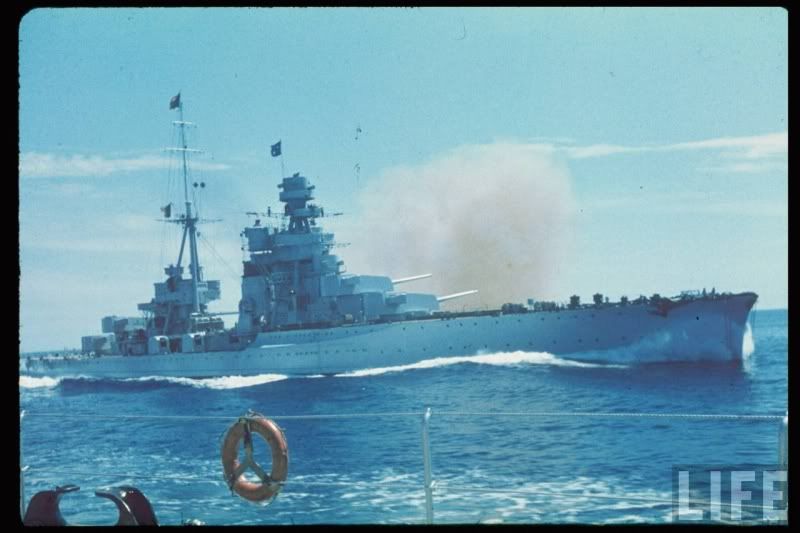
I used this great picture as my reference. Notice the platform which the aircraft sits on to ride the catapult?
Using some scrap railings again I bent and formed the platform into shape and painted it semi gloss black.

The little details are starting to add up and make a good visual difference.
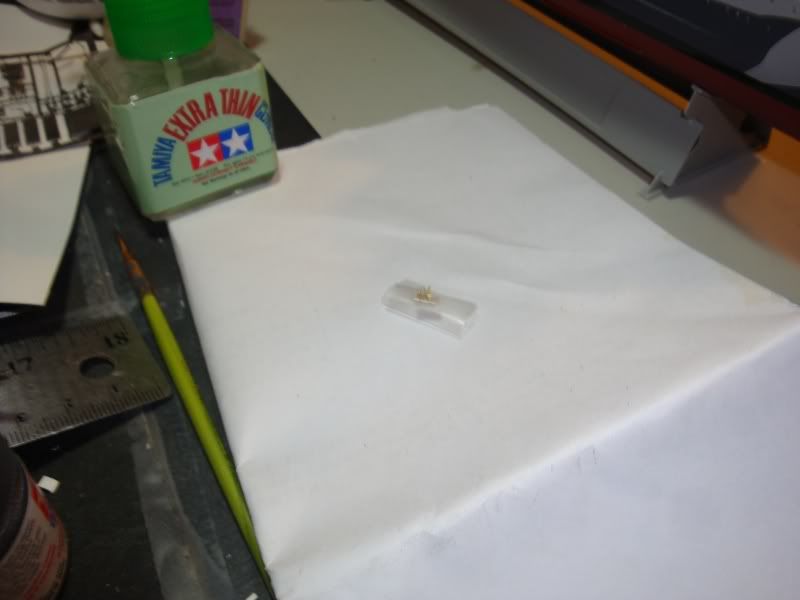
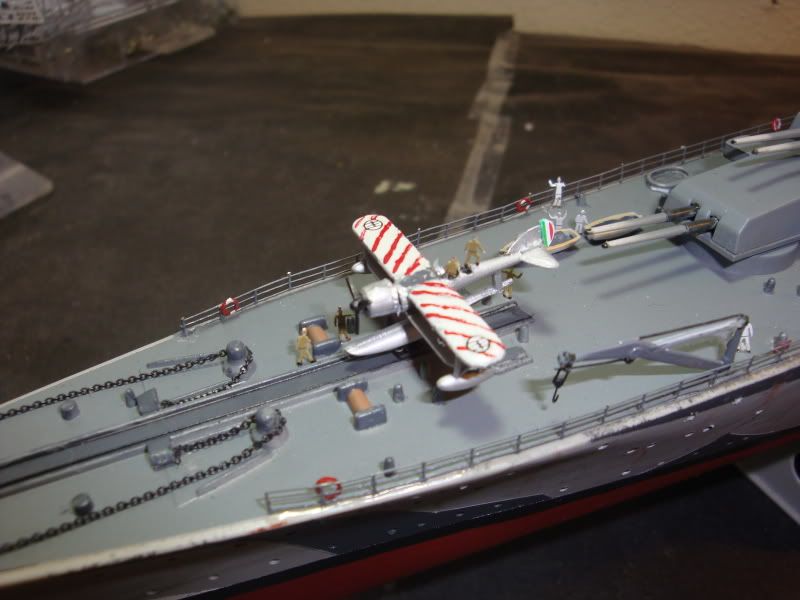
The aircraft was kinda lifeless and bland in my eyes. So going in blind as I had no idea of the type I started detailing it.
The great fellows over at the RA GB helped me to ID this recon plane as the RO-43.

They are a great bunch of fellows over there! Bondo and Guy jumped on this question before I could spell airplane.[bow]
So I kept on detailing the 1/350 recon RO-43 Drilled out crew compartments added floats and some struts with the scrap PE railings again. Good stuff! 1000 uses!
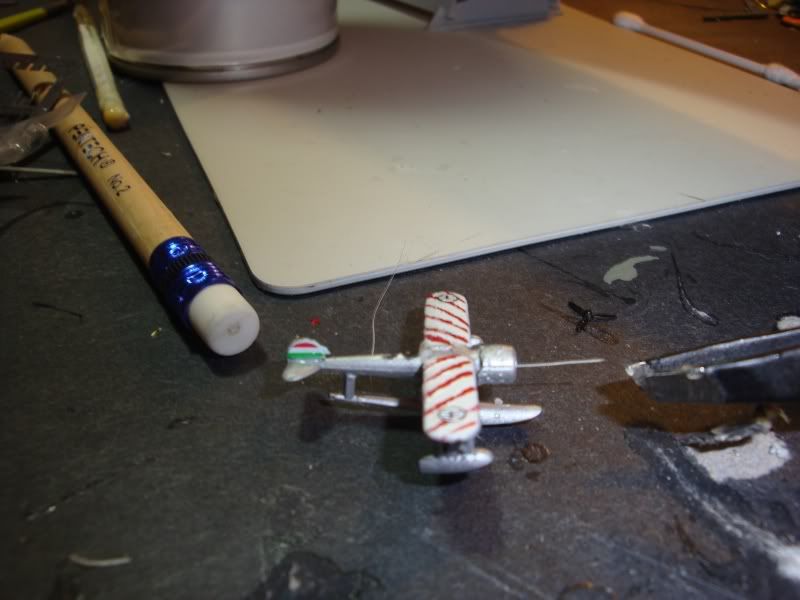
Notice the tail stripes? Wrong way they should be vertical! Did this at 3AM and Sir Bondo didn’t let me get away with it!

Looking much better especially after I fixed the tail.

Getting there bit by bit. Sean’s scratch build life rafts are awesome! None in the kit were given and his match up perfect to the pics. [tup]
This project is a massive team effort and I really appreciate all the help and comments. You all are the best!
Hey Aaron - What happened to this being an OOB Build ? Your Goriza looks very busy with all the scratchbuilt additions… [tup] Yours looks ready to deploy and mine is still dry docked on the bench.
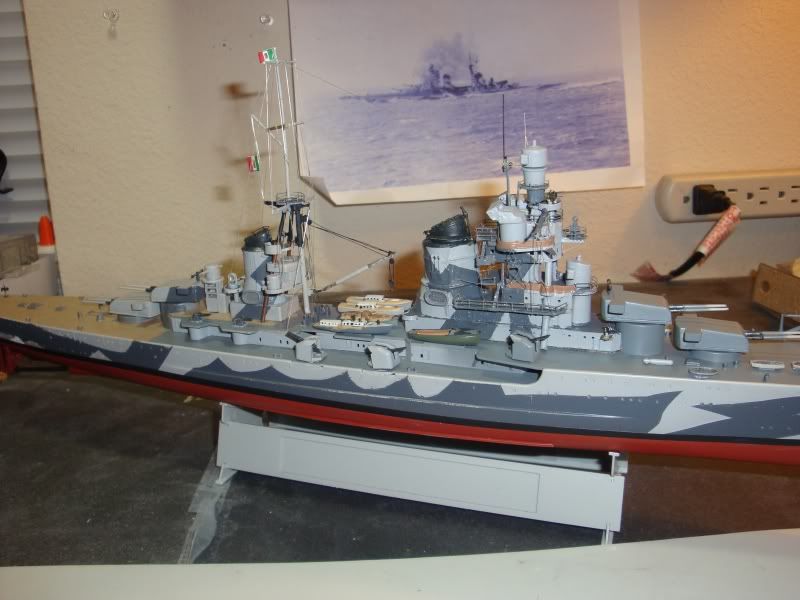
I also rebuilt the life boat crane… The kit’s boom wasnt to my liking so with some wire, aluminum tubing and stretched sprue here is my replacement.

Started adding some railing to the structure, also used a 7 mm length of a “soda straw” to hide the button tab under the forward secondary gun…

And lots of masking and painting as my hand is hardly steady enough for brush painting.


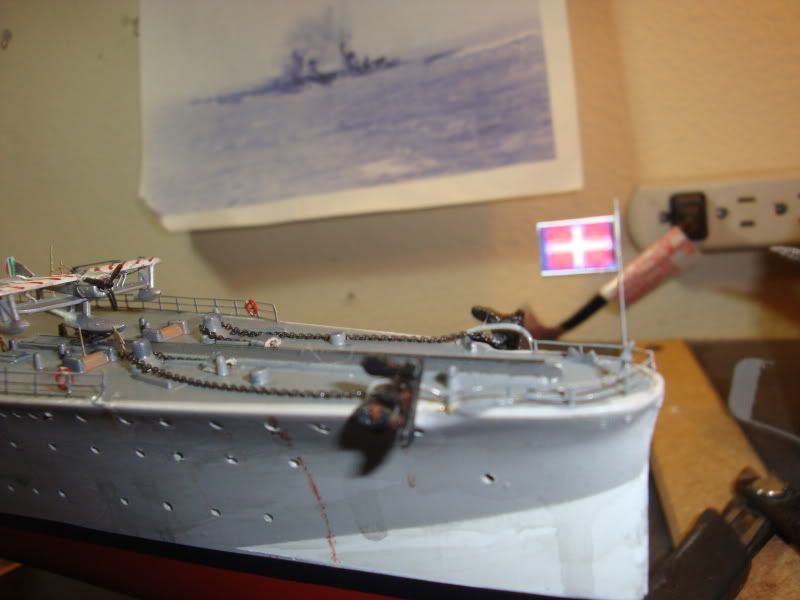
This mornings progress the stripes for the “candy cane” forward deck .

Now to start adding the little details…[tup]
Man, you guys are good! Scratchbuilt details? Custom painted 1/350 aircraft? Real anchor chains? PE parts? [:O]
Love that little plane Aaron. And Sean- that striped fore deck- YOWZA!!!
Seriously, this is good stuff. No, I mean REALLY good stuff. Keep it up fellas, good to know who to come to when I build a ship. [bow]
Hey thanks Frank! Your doing tanks now! Heaven help us if you invade the ship forum!!! [(-D] Jump in the water is fine!
Sean that candy strip marking looks good enough to eat!
I got some good work done today though, the ship is rigged and spot painting mostly done except for some lighter gray. Maybe some railing touch ups. Really going to pre paint the big round the hull jobbers.
Still thinking about where to put the life boats on mine. The location on the ship has no boats in my pics of the Gorizia but maybe farther up with the hoist in a stowed position as far as I can tell.
Hmmm still thinking on it.
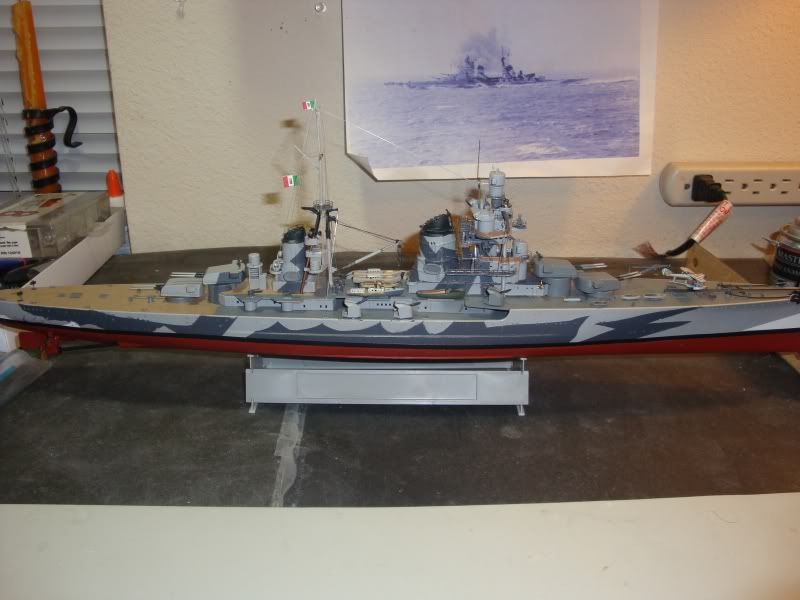


You can start to see how the roughness and little oopsies are being cosmetially covered with details that grab your eye. A bit more and it should almost pass as a ship? LOL!
Got another idea!
I was putting on my rails when I realized I forgot the straw tip you mentioned for the secondary guns! Finding Dee’s left over diet soda I stole her straw! Why do people chew straws? But I found an unchewed area and went for it!
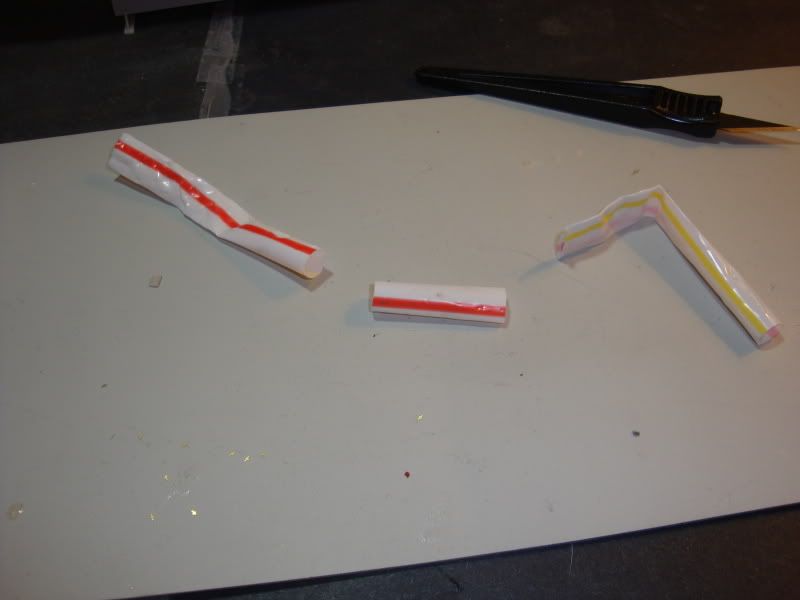
Then It dawned on me I have hollow plastic shafted pointy Q-tips! So I did the same thing!
Why would he do that tou ask? Well paint then red. Add some white. and presto!

Life savers! A little big. Not much I think they will pass on the rails if not overdone!
Whatcha think?
Sean,
I think you’re falling a bit behind, get crackin sir!
Mac,
Looking good. Would’ve never thought about using the qtips as life preservers.
Good Heavens!
I wondered where you chaps had got to! I am most impressed with your sterling efforts gentlemen, well done indeed! [tup]
Now, back to the mayhem…!!![:-,][:D]
Cutting sections of Q-tips for life preservers? Now THAT is absolutely brilliant! What next? Officers on the deck with little cups of coffee in their hand?
Great stuff guys, keep it coming!
Darren - Thanks for looking in. Yeah we jumped ship over in the FAA for a small break… I will have more updates on the Sea Gladiator after I finish messing with this Regi RO-43…

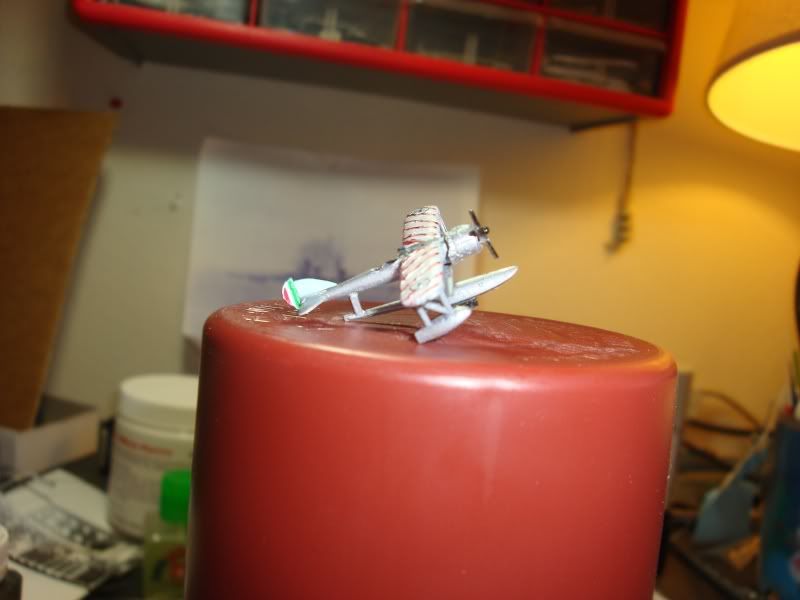
I added some fine wire forwing struts and sawed the pontooons off the lower wings and re ~ attached with wire also… [X-)]
No area for the pilots so I drilled out two “offices”

Sheesch my prop does not look as nice as Aarons P/E prop… [sigh]
Oh well time to mask and paint the candy stripes on the upper wing [tup]
Frank - I have no clue what may be next [;)] Great idea though…
WOW!
Sean sent me this link to show me what he was up to, and I have to say that you guys are kicking BUTT on these builds!
You should SERIOUSLY consider writing this up as an article for FSM! It’s got an “angle” that is really compelling and unique–the “team effort” thing.
Looks incredible, guys!
Wow! Thanks a bunch fellows! [bow] Sean that Aircraft is looking good! It should be sputtering off into the sky at any moment!
Have done a coupe things I’d like to share here.
Sorry Frank! I messed up on the coffee cups but Ol Bondo sez they drink eppresso anyways in Italy. [#toast] Small cups and mine look more like Modern art tumblers.
As far as the crew though I am trying these little PE fellows for the first time.
They gave me fits positioning and falling over until I came up with a system that worked.
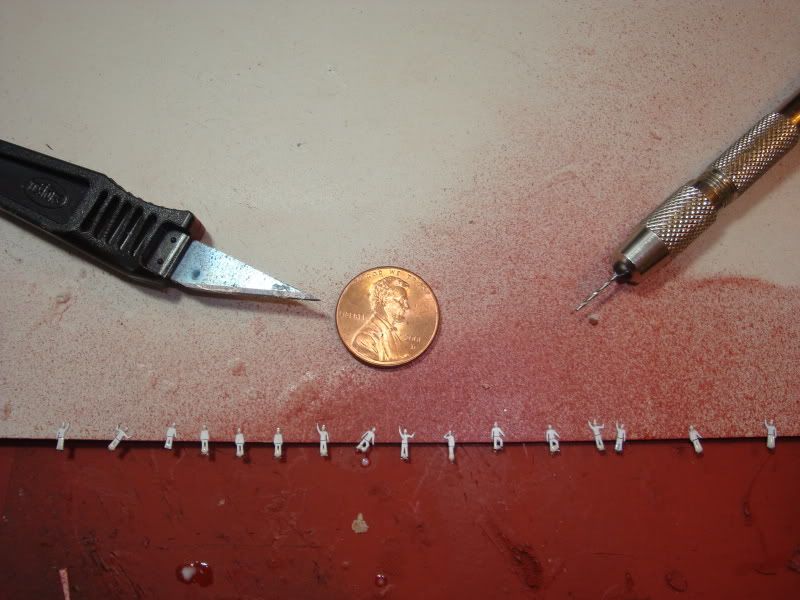
I put little beads of white glue on the bottoms of their legs and let it dry. I have read it can also be used to give the flat PE fellows some 3d form but my eyes were going crossed.[D)]
After it dryed I grabbed them by the head with tweezers and dipped their feet into som CA and they stuck the 1st time everytime. Gave enough lee way to get them good and straight then when fully dry they are on there really sturdy.
Now I am sure this probably has been explained 1000 times by the expert shipmakers here but I learned a few things this 1st time using them.
You should put them in place as you build to allow some to be positioned in hard to reach areas that can’t be accessed after built.
They look more convincing in numbers. 2 or 3 fellows on a spot rather than single figures spread across the ship.
The scare crow poses can actually be bent and modified to have a more natural look.
Probably coulda learnt more but I got tired. My Brain hurt 2 or 3 things a day is my limit.
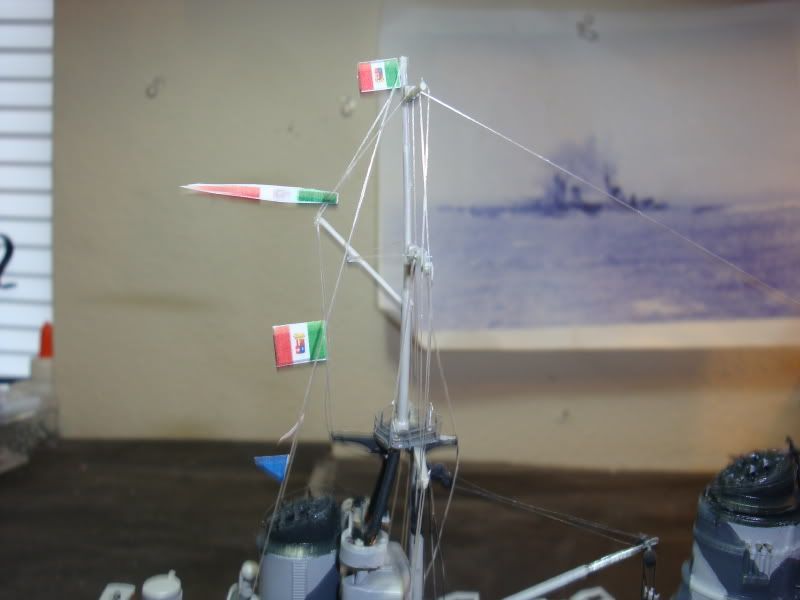
Not wanting to get too fancy buying extras I used the internet, My printer and Power point to create some scale flags that were accurate in look. Decals on lead foil may give a better wavy appearance but these are more like the old Revell stamp flags as that what I was used to as a kid.
The National flag, The Italian Naval Battle Banner, and the Italian Naval Ensign shown above with a couple of signal pennants.
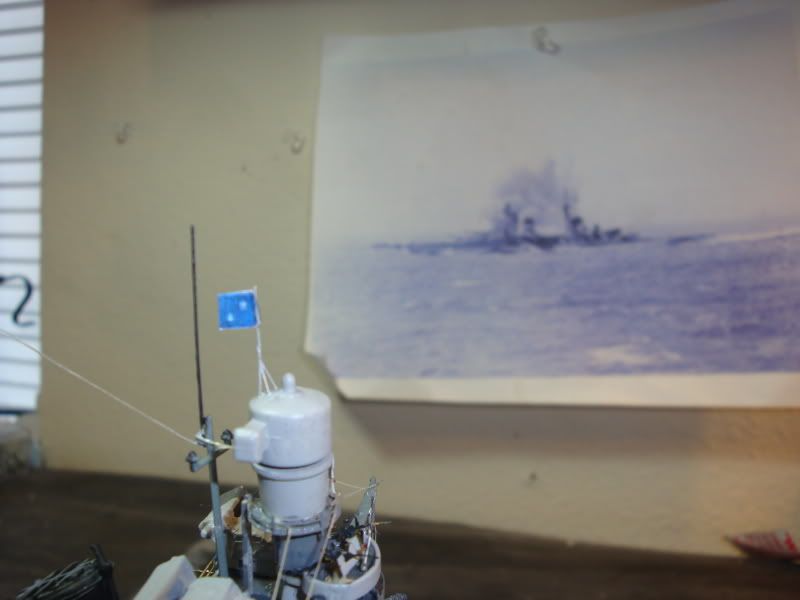
An Admiral’s flag forward.
Italian Naval service flag on the bow and the stern is empty as she is on a high priority convoy defense mission to North Africa.
Here are a couple shots of the crew forward. Servicing the RO-40 and such.
You can see my life perservers on the railings as well. I think they make a nice touch to the plain railings.
Thanks for bearing with me fellows your the best!
Boy, those people are REALLY small! Aaron- Are you wearing an optivisor yet? If you’re not, you better get one before your brain explodes! [:O]
Again, love those life preservers- brilliant idea. [bow]
Sean- Cutting off floats? Wires for struts, in 1/350? Are you guys BOTH nutz? [8-]
Frank - It still amazes me that Aaron does not use an Optivisor… I use one combined with a set of reading glasses and I still have a battle with the bits…
Back to the Pola, I started adding the scratched liferafts. The supplied kit picture has them a Very Yellow color with red stripes. (makes for a good target)

I had brought to my attention the centers were to “yellow” so digging in the spares box I found some leftover mesh from a “King Tiger” grill . I made a pattern and went from there.
 Almost looks just like the reference pic…
Man I Am loving those rafts! they look better than the ref pic! A great effect well worth your efforts! Do I smell popcorn? An Optivisor would make me simply irresistable to all the girls! As it is I have to be cautious leaving the house!
That ref pic is so much more detailed than what the kit gives you and your making it even better than that! Great stuff!
Ah ha, Ive found you both. Dont you know its way past your bedtimes? How did you manage to get in over here? they must have very low standards thats all im saying LOL.
As for the builds. Stellar lads, absolutely Stellar. Youve made a committed aircraft man, crave a ship to build. Dont think id have the patience or talent to do half the scratchin you 2 have though.
Now ive found you both, im here for the long run. So keep the updates a coming. Is there a prize for who finishes 1st? LOL.
…Guy
Guy - You know what a machine Aaron is. He is still working away at the bench at 3:am while eating Burrito’s and drinking Dunkin Donuts Coffee… Not sure which one it is he gets the energy from…[:O]
Updates - I am getting down to assembling the sub assemblys I have spread all over the bench. The kit supplied mast and yard arms was not to impressive at all…
 It does have potential but I did not want to give the effort.
It was much easier to fab a new one that would be sturdier. Using bits of tubing and wire the madness began.

The results

And in place, yes it is leaning aft but it is only temporally sitting on the locator pin.


Thanks for looking in.