Otto looks great and could star in a dio of his own. Looking forward to seeing this one completed
What Hercmech said.
Darn. If I were doing this WIP, there’d be a lot of glue smears and missing parts involved.
Like the figure Richard. Very nice.
Great build so far Richard,
Here’s a link to a small walk-around from the G13 Hetzer in Overloon:
http://public.fotki.com/DRAGONWAGON/walkarounds/jagdpanzer-38-hetze/
I still don’t know how to post a live-link on this Forum…
Grtz, John.
Great job Rich!
I’m glad you chose to slice them - I wish I’d done that now or used some brass replacements.
As soon as I’m finished with my StuG I’ll get the whitewash on mine to cover that darkened paintjob up!
If you aren’t happy with that front skirt with the broken arm you could show it as missing or hanging off through damage?
Keep it up - the figure is superb btw!
All the best,
Ben [t$t]
Hey guys,
Been busy getting the basic paint on during the weekend. Hope you guys like it:


After three attempts with my airbrush i gave in and chose a brush painted camo job and yes it shows…[:$] But i still like how it looks and am eager to attempt some weathering with washes, drybrushes and filters… More soon to follow gents![;)]
Richard
Camo looks great Richard. Once you weather it, the brush marks will be more muted.
Thanks Tigerman,
I know i could do a german camo with AB if i would just have the right tool for it… The brushmarks arent that bad, maybe so on the dunkelgelb as it was the most unforgiving paint i used.
Right now i am trying a wash and some drybrushing and if i dont like the outcome i can always attempt a whitewash i think… At least that’s the line of thought i have.
Richard
Richard great job on Otto man [Y][Y] Hey I have 3 figures I need painted [:D]
I think the brush painted camo on your Hetzer looks spot on. I would think ( not being an armor guy) that a lot of the camo was field applied with brushes or even rags. The washes and dry brushing should tame it a bit and make it look even better.
Hi Richard,
What a great job!
The brushwork is great and I imagine it makes painting a hard edged scheme a hell of a lot easier and removed the need for masking if airbrushing.
The figure looks very good too - I really need to work on my figure skills!
Keep us posted,
Ben [t$t]
Hinksy, Vetteman,
Thanks alot guys! Maybe not contest winning material but i am having a blast with this one. A true “shake 'n bake” kit.
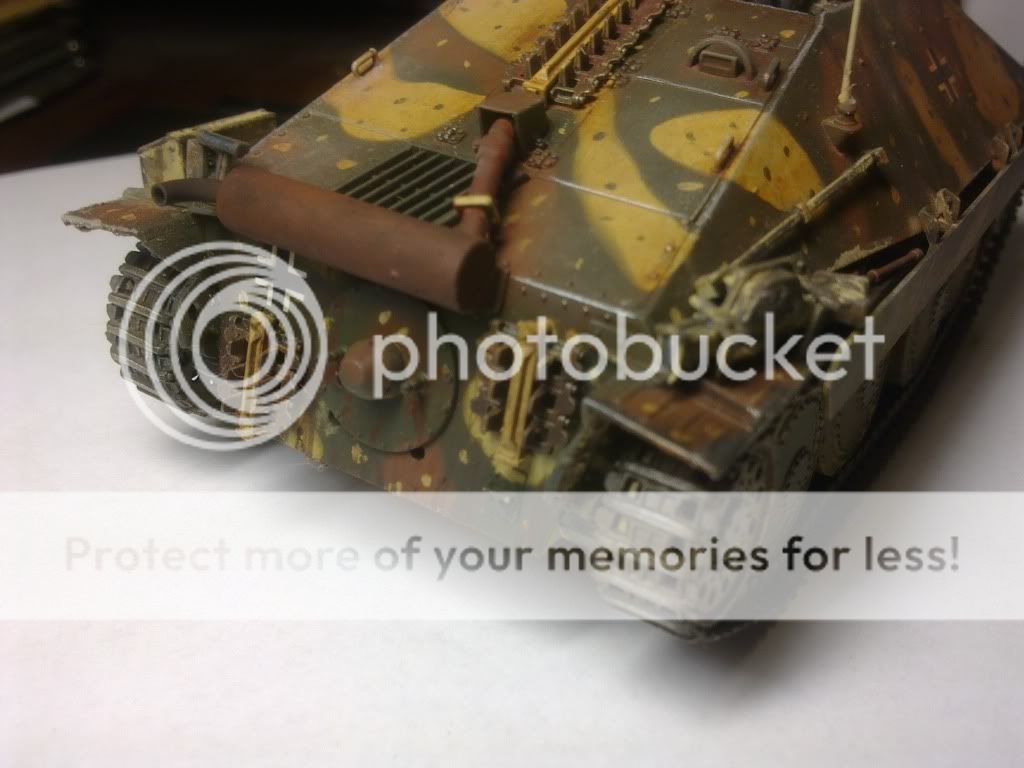
Well, i am calling this light tank destroyer finished. I went ahead with drybrushing, washes and pastels and also tried the dot filter technique for the second time. As per a tutorial on the subject i chose not to coat my model with future or the likes prior to decals and weathering and i must say that both times that gave me some issues with silvering…[:#]. I do love the way this technique looks on a model but for a next time i think i will adapt the steps a bit:


Funny how pastels fade away on photographs… But i assure you it’s pretty dusty[:D]
As i kinda like the way the model and figure turned out i decided to have a go at putting my work on a base. So scavenging my stash and dio supplies i came up with some stuff i can use:

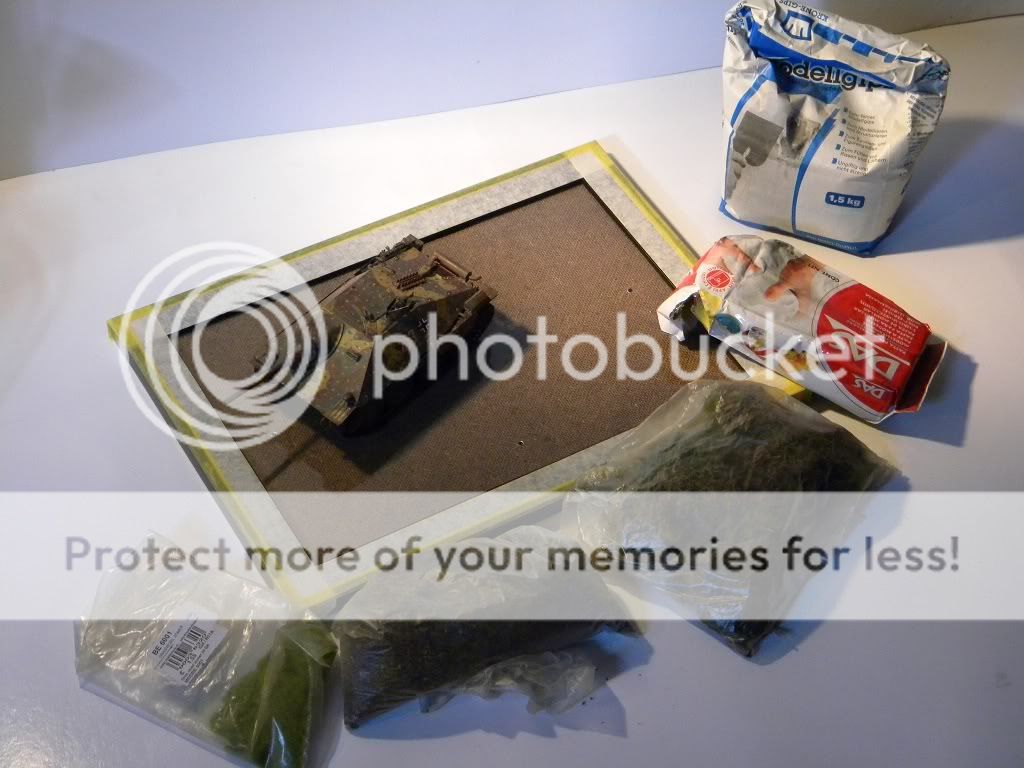
Only my second attempt at ground work so i should be having fun fiddling around and learn some stuff[;)]
See you soon gents,
Richard
Richard the Hetzer looks great buddy. I like the places where you get the hint of brush painting and the way you make the surface detail pop out like the rivets and such. Cant wait to see the base looks like you have a good start on it going.
I have to ask whats this trick of applying decals over flat paint ? I cant see any silvering of the decals at all.
Good looking Hetzer Richard. I really like the camo. Probably the flash and or lighting that’s affecting the finish. I’m no camera expert either. I wish I had photoshop installed on my Mac.
Hi Richard,
Great work buddy! Really great work [*]
A great Ambush scheme, the washes have really toned it down and took the edge off the brush marks and overall it’s loking superb [Y]
The only tiny little nit-picking things that I can really see and this is really scraping the barrel is:
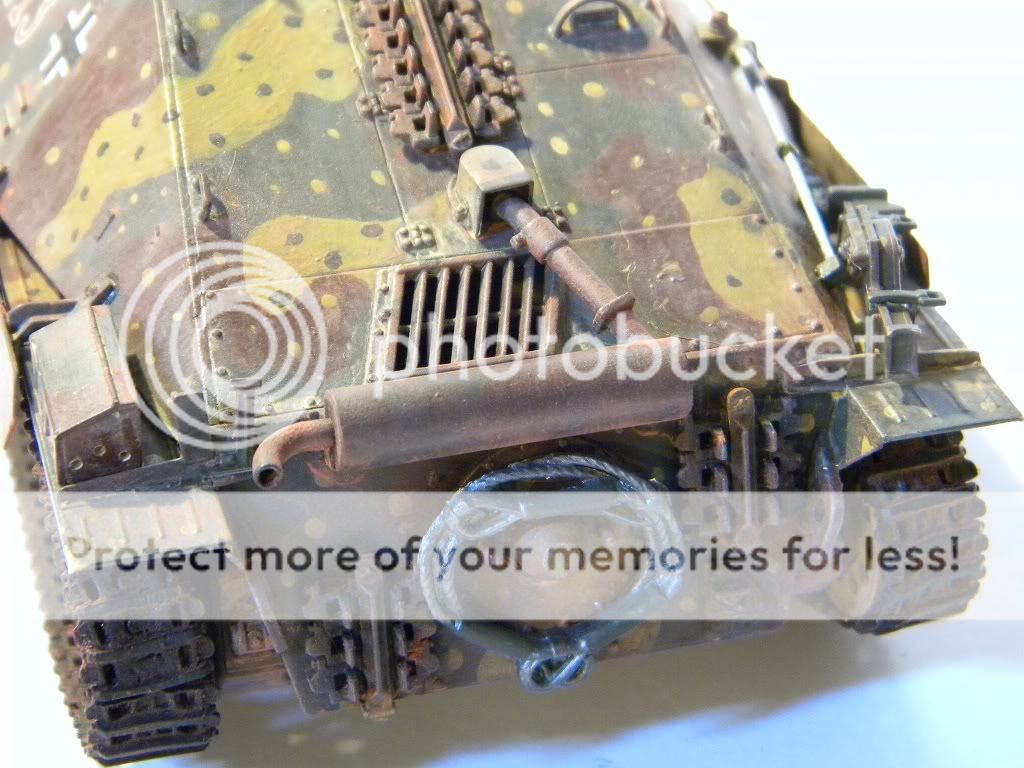
- I’d have a go on that rear mounted tow cable again. Sorry if you still mean to work on that but it’s a uniform colour all over so I’d perhaps get a small brush and paint the clamps and the bit that holds the cable ends together where the cable comes back around & wraps together to make the loop Paint that Dunky to and add a bit of colour to it and perhaps a bit of VERY light rust to the main cable. Remember the cables would have been well looked after so you wouldn’t have seen much rust on them. Either way it’s a bit too ‘silver’ for a battlefield tank tow-cable so at least an Umber wash should help.
- Where’s the blue convoy light that should be at the top of the stem behind the muffler pipe on the rear on the left? You really need to get that back on there - if you’ve lost it just scratch one from something.
- Erm, is that left hand track joint at the rear going to hold? [;)] I’m really struggling now!
Straight up, that’s a great job. The silvering is nothing to worry about and can’t be seen from the usual photographs and is barely noticeable in the bigger photo so don’t spend any time worrying about that!
I’d definately look at that tow cable and the convoy light but apart from that it’s a very much faultless build!
Convoy light below - paint it in a light/bright blue:
Anyway, I’m about to start a base for my StuG III B. Check out my WIP for a base update. I’ll start it next week so I’m at exactly the same point as you re this build - my build is complete and I’m about to start the base (it’s only my second ever base too). I’ve got the base and a good selection of scenics and I’ll be really interested to see what you do with that huge base of yours!
I’m limited to a small Walnut base and a figure as I haven’t got room for anything bigger in the cabinet or anywhere else as I hate getting dust on a matt surfaced model as it’s a real PITA to shift!
What have you got planned Kermit?
All the best matey,
Ben [t$t]
I like the subtle weathering. Some folks with great modeling skills sometimes, IMAO, over do the mud, rust and weathering. Great step-by-step WIP thread. [t$t][snWow]
kermit - great looking Hetzer!! Fine job with the camo and weathering, and I love that figure…hmmm, where have I seen that before??[whstl]
Question: Does the Tamiya kit come with a photoetched mesh screen for the rear deck air intake?
Great looking Hetzer Richard. Will keep an eye for the finished dio.
Hinksy,
Thank you for pointing out three, might i add obvious, flaws in my build. Each and everyone is a very valid point and i will act accordingly![;)]
Kinda forgot to weather the tow cable… Painted it with humbrol gunmetal, the “clamps” in olive green and that was pretty much it. I will weather it a bit because it does look rather shiny now that you are mentioning it.
The blue light is something that doesn’t show up on the colored painting suggestions or the instructions. I just checked. So ignorant about german armor as i am i wasn’t aware of this. Easily solved though[:)]
And the tracks… I was kind of stupid in gluing the entire suspension on so i can’t roll the yucky spots on the tracks to a less visible place. But i will take it off and reattach it more carefully this time. I guess behind the sideskirts would be a more obvious place to have the joints end up.
The base does look quite big but i occupy an entire attic as mancave so i have ample space to put my models[:D]. I have some scenery stuff, modeling snow and extra figures as well as sandbags to fiddle around with. Just poured some plaster of paris into the frame this morning and will let that harden out for a day or two/ three before i really start some ground work.
Maj, Mike, Bufflehead, Bish,
Thank you guys for your comments![y] This kit certainly wasn’t hard to build. Fit was excellent without any putty needed and the camo was a nice challenge for me as a first timer. Sadly the kit doesn’t come with any PE. Just the option of vinyl tracks or link and length ones i believe theyre called.
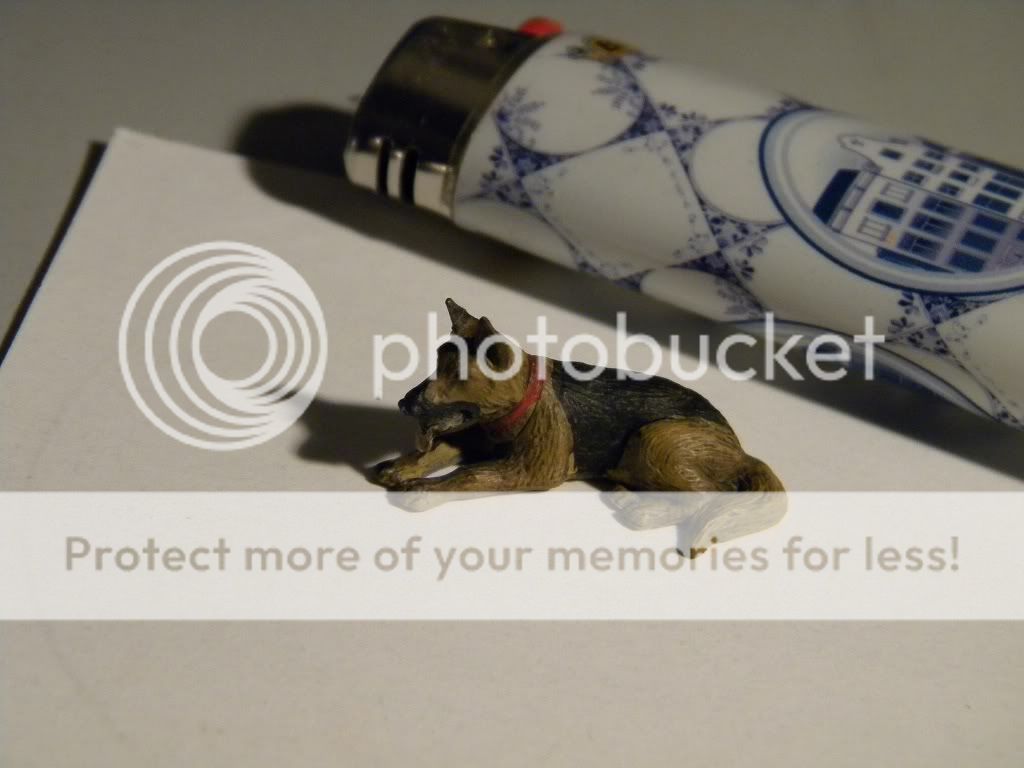
In the mean time i can show you something for Otto to look at, his head turned like that suggests he is looking at something of interest. I give you…Sascha the german sheperd:
More to follow!
Richard
To be honest i don’t think i have ever had to use filler for any armour kit i ahve built, not that i can think of. And deffinatly not on a tamiya one.
On the PMMS review for this it shows a pic of the camo scheme. For the vehicle you did, it just has the 3 colour scheme without the spots. Were they an option or did you just decide to add them. I only ask because when i get this kit, i will be building the same vehicle as you due to its unit.
Umm… Artistic freedom…?[:#]
I just thought it would look cool so i added the spots. [:p]. I am not that much of a sucker for 100% historic accuracy you know…
Richard