Since I have a lifetime supply, happy to mail you a chunk?
1 Like
I think so too Chris. I used the aluminum tape on my P-51B and really liked it.
As I mentioned to Sam, at least to my eye, it looks a tad thicker than Tamiya’s tape so I am not sure how the photo etched buckles/latches would work out?
I hate the the micro setting so much.. blah
Thank you so much for the kind words!
Happy Modeling,
Mike
4 Likes
The metal tape long term was what was in my thoughts . I use aluminum tape for a few other hobbies , some work great and some just won’t stick around ……….
3 Likes
Hey hey Sam,
Oh man, if you don’t mind? That would be very cool and in turn, if you need something, let me know!
I’ll mesage you shortly!
Happy Modeling,
Mike
2 Likes
For sure, when I bought it, I realized it was enough for about 1000 shoulder straps so I’m happy to share the wealth.
Will sent it out tomorrow.
1 Like
Haha noice! Sweet, and you know, I don’t care what they say about you.. You are AOK haha
Thank you so much once again!
Happy Modeling,
Mike
1 Like
Update 2
This is just a quick update to where I am at at the moment with this build.
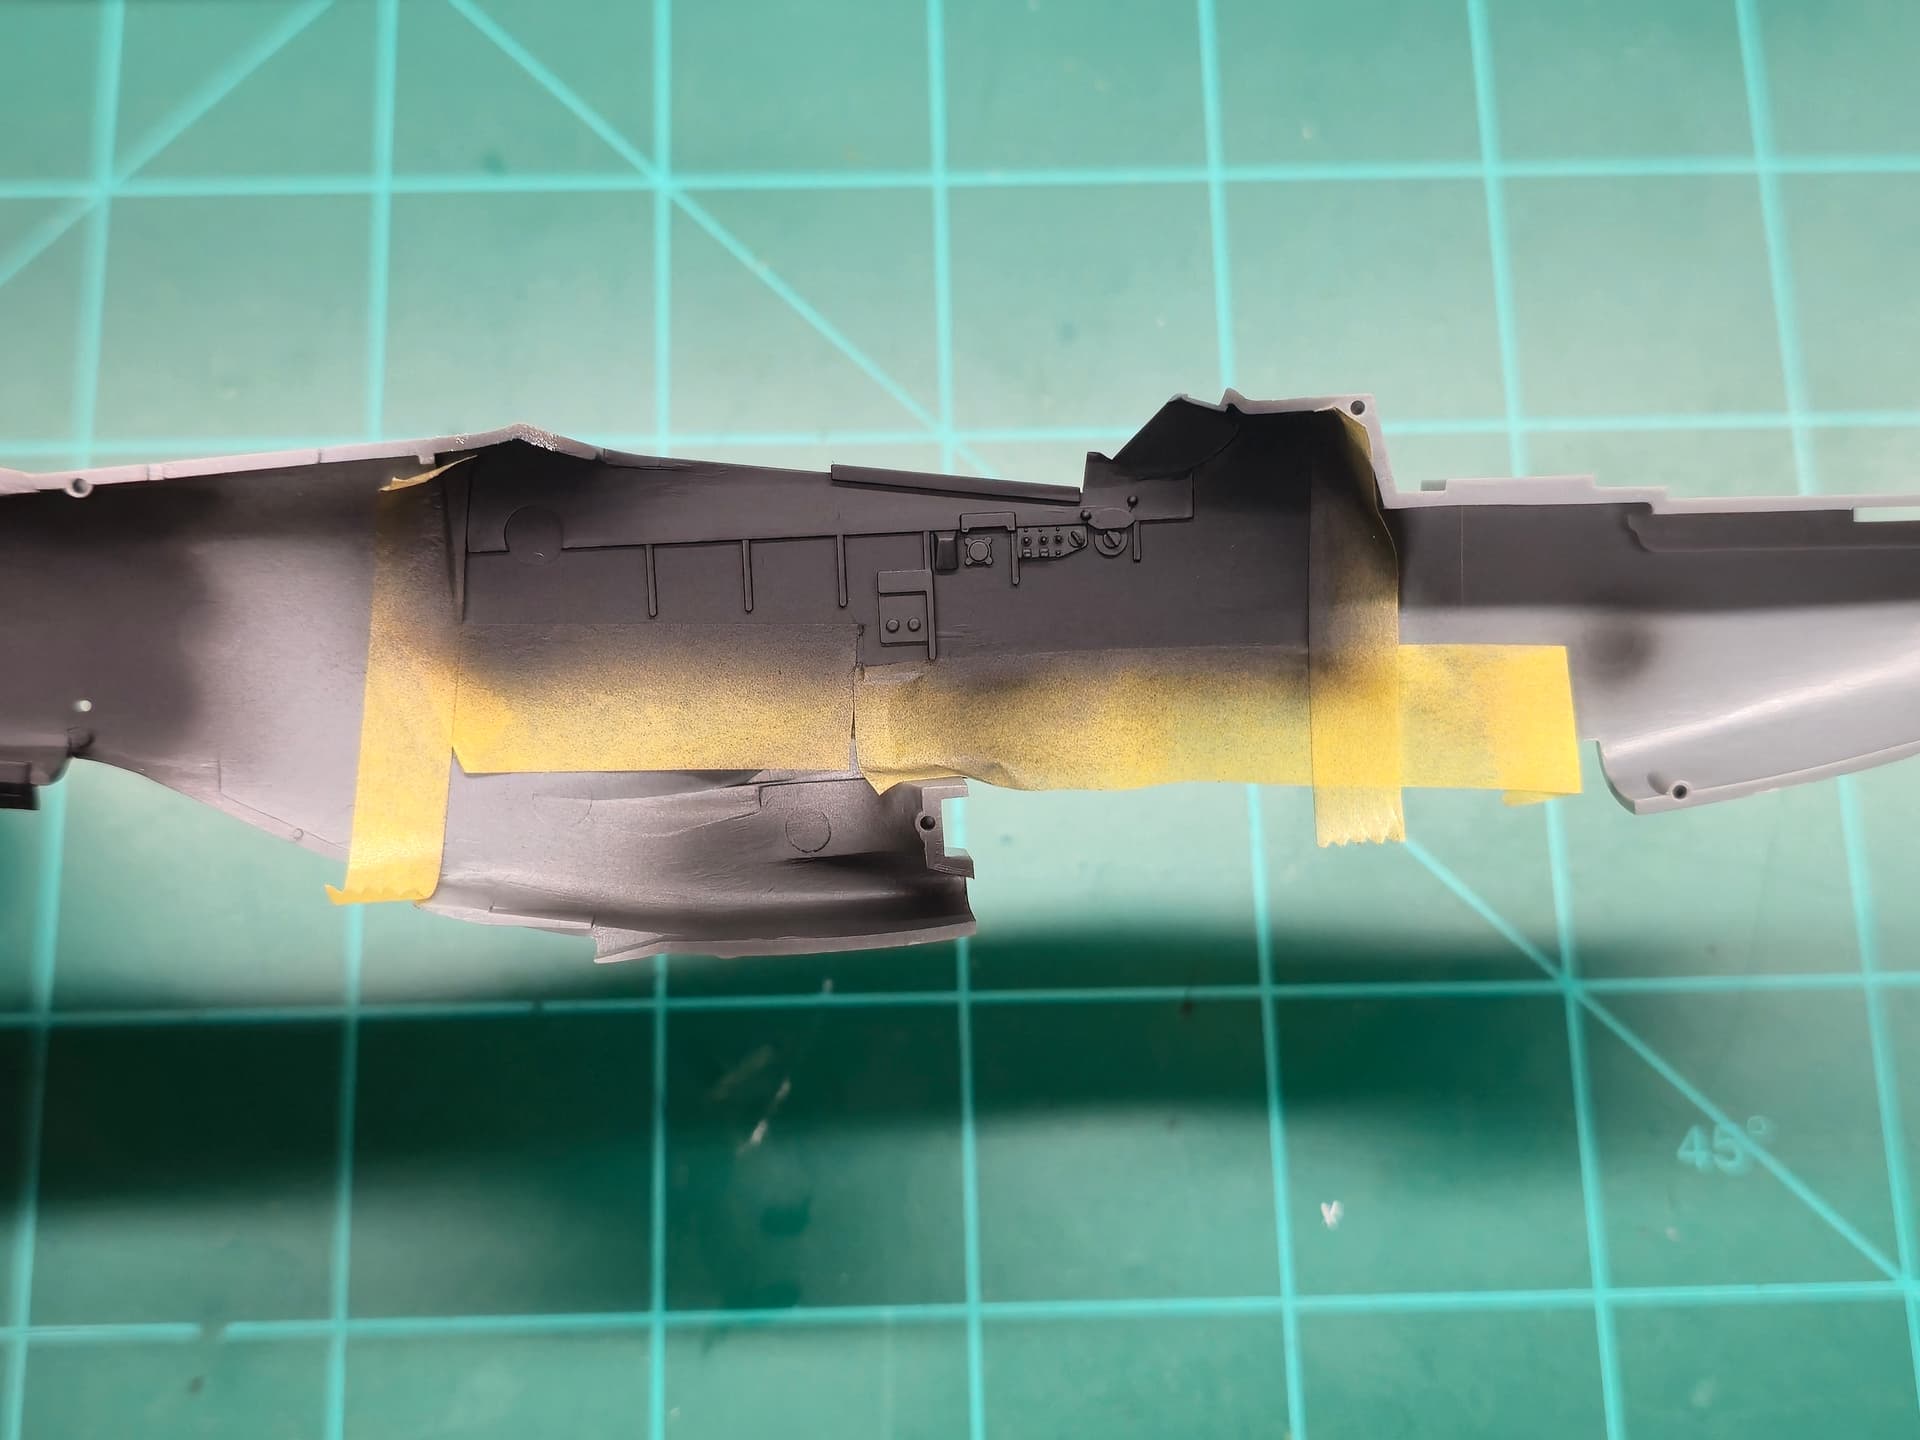
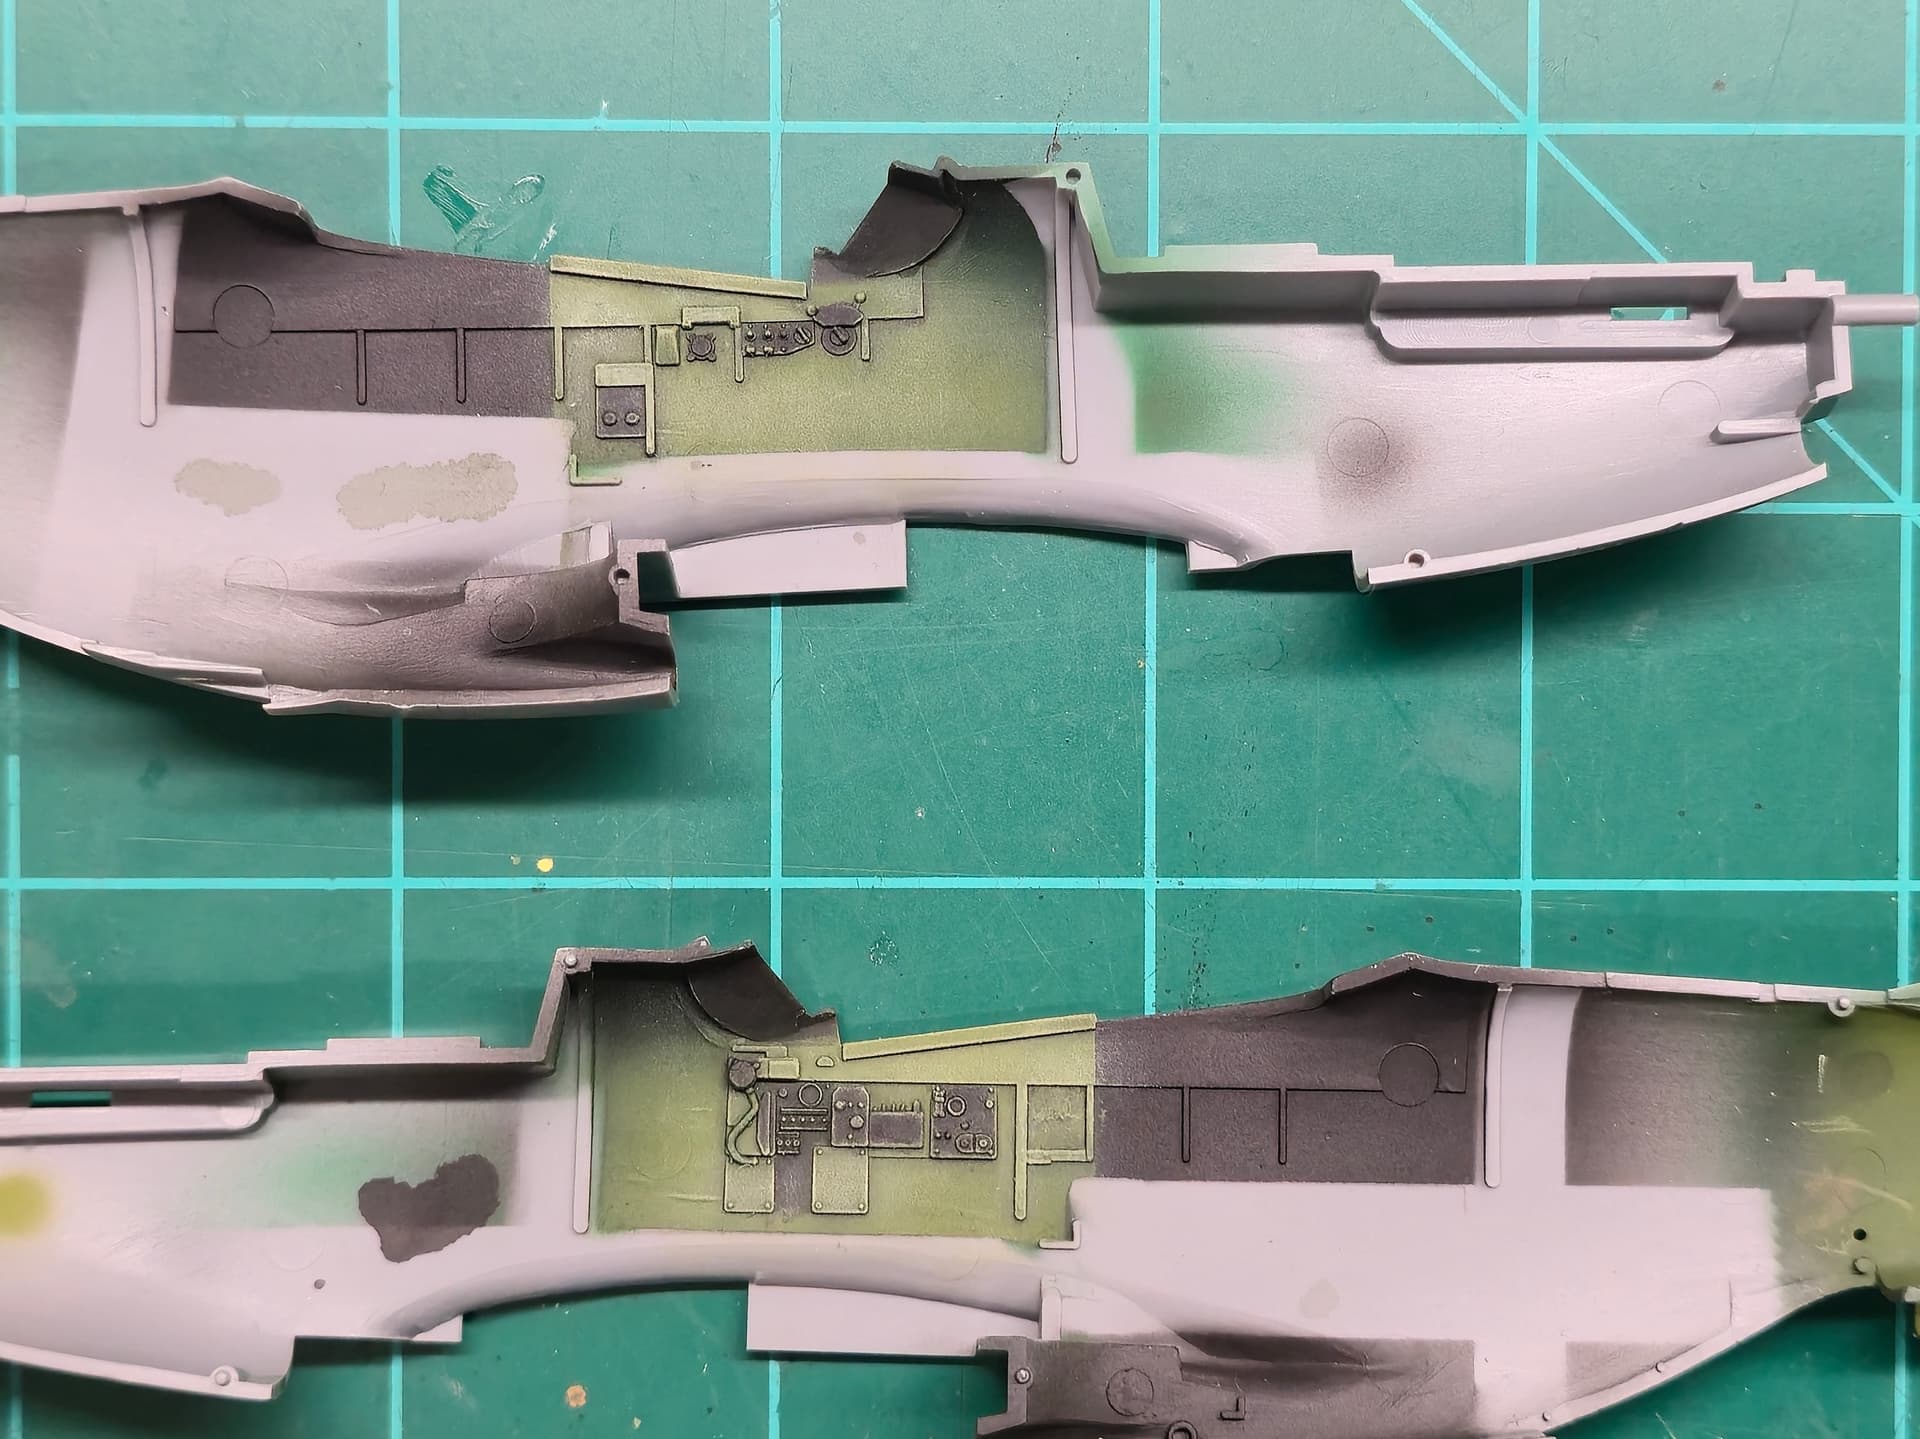
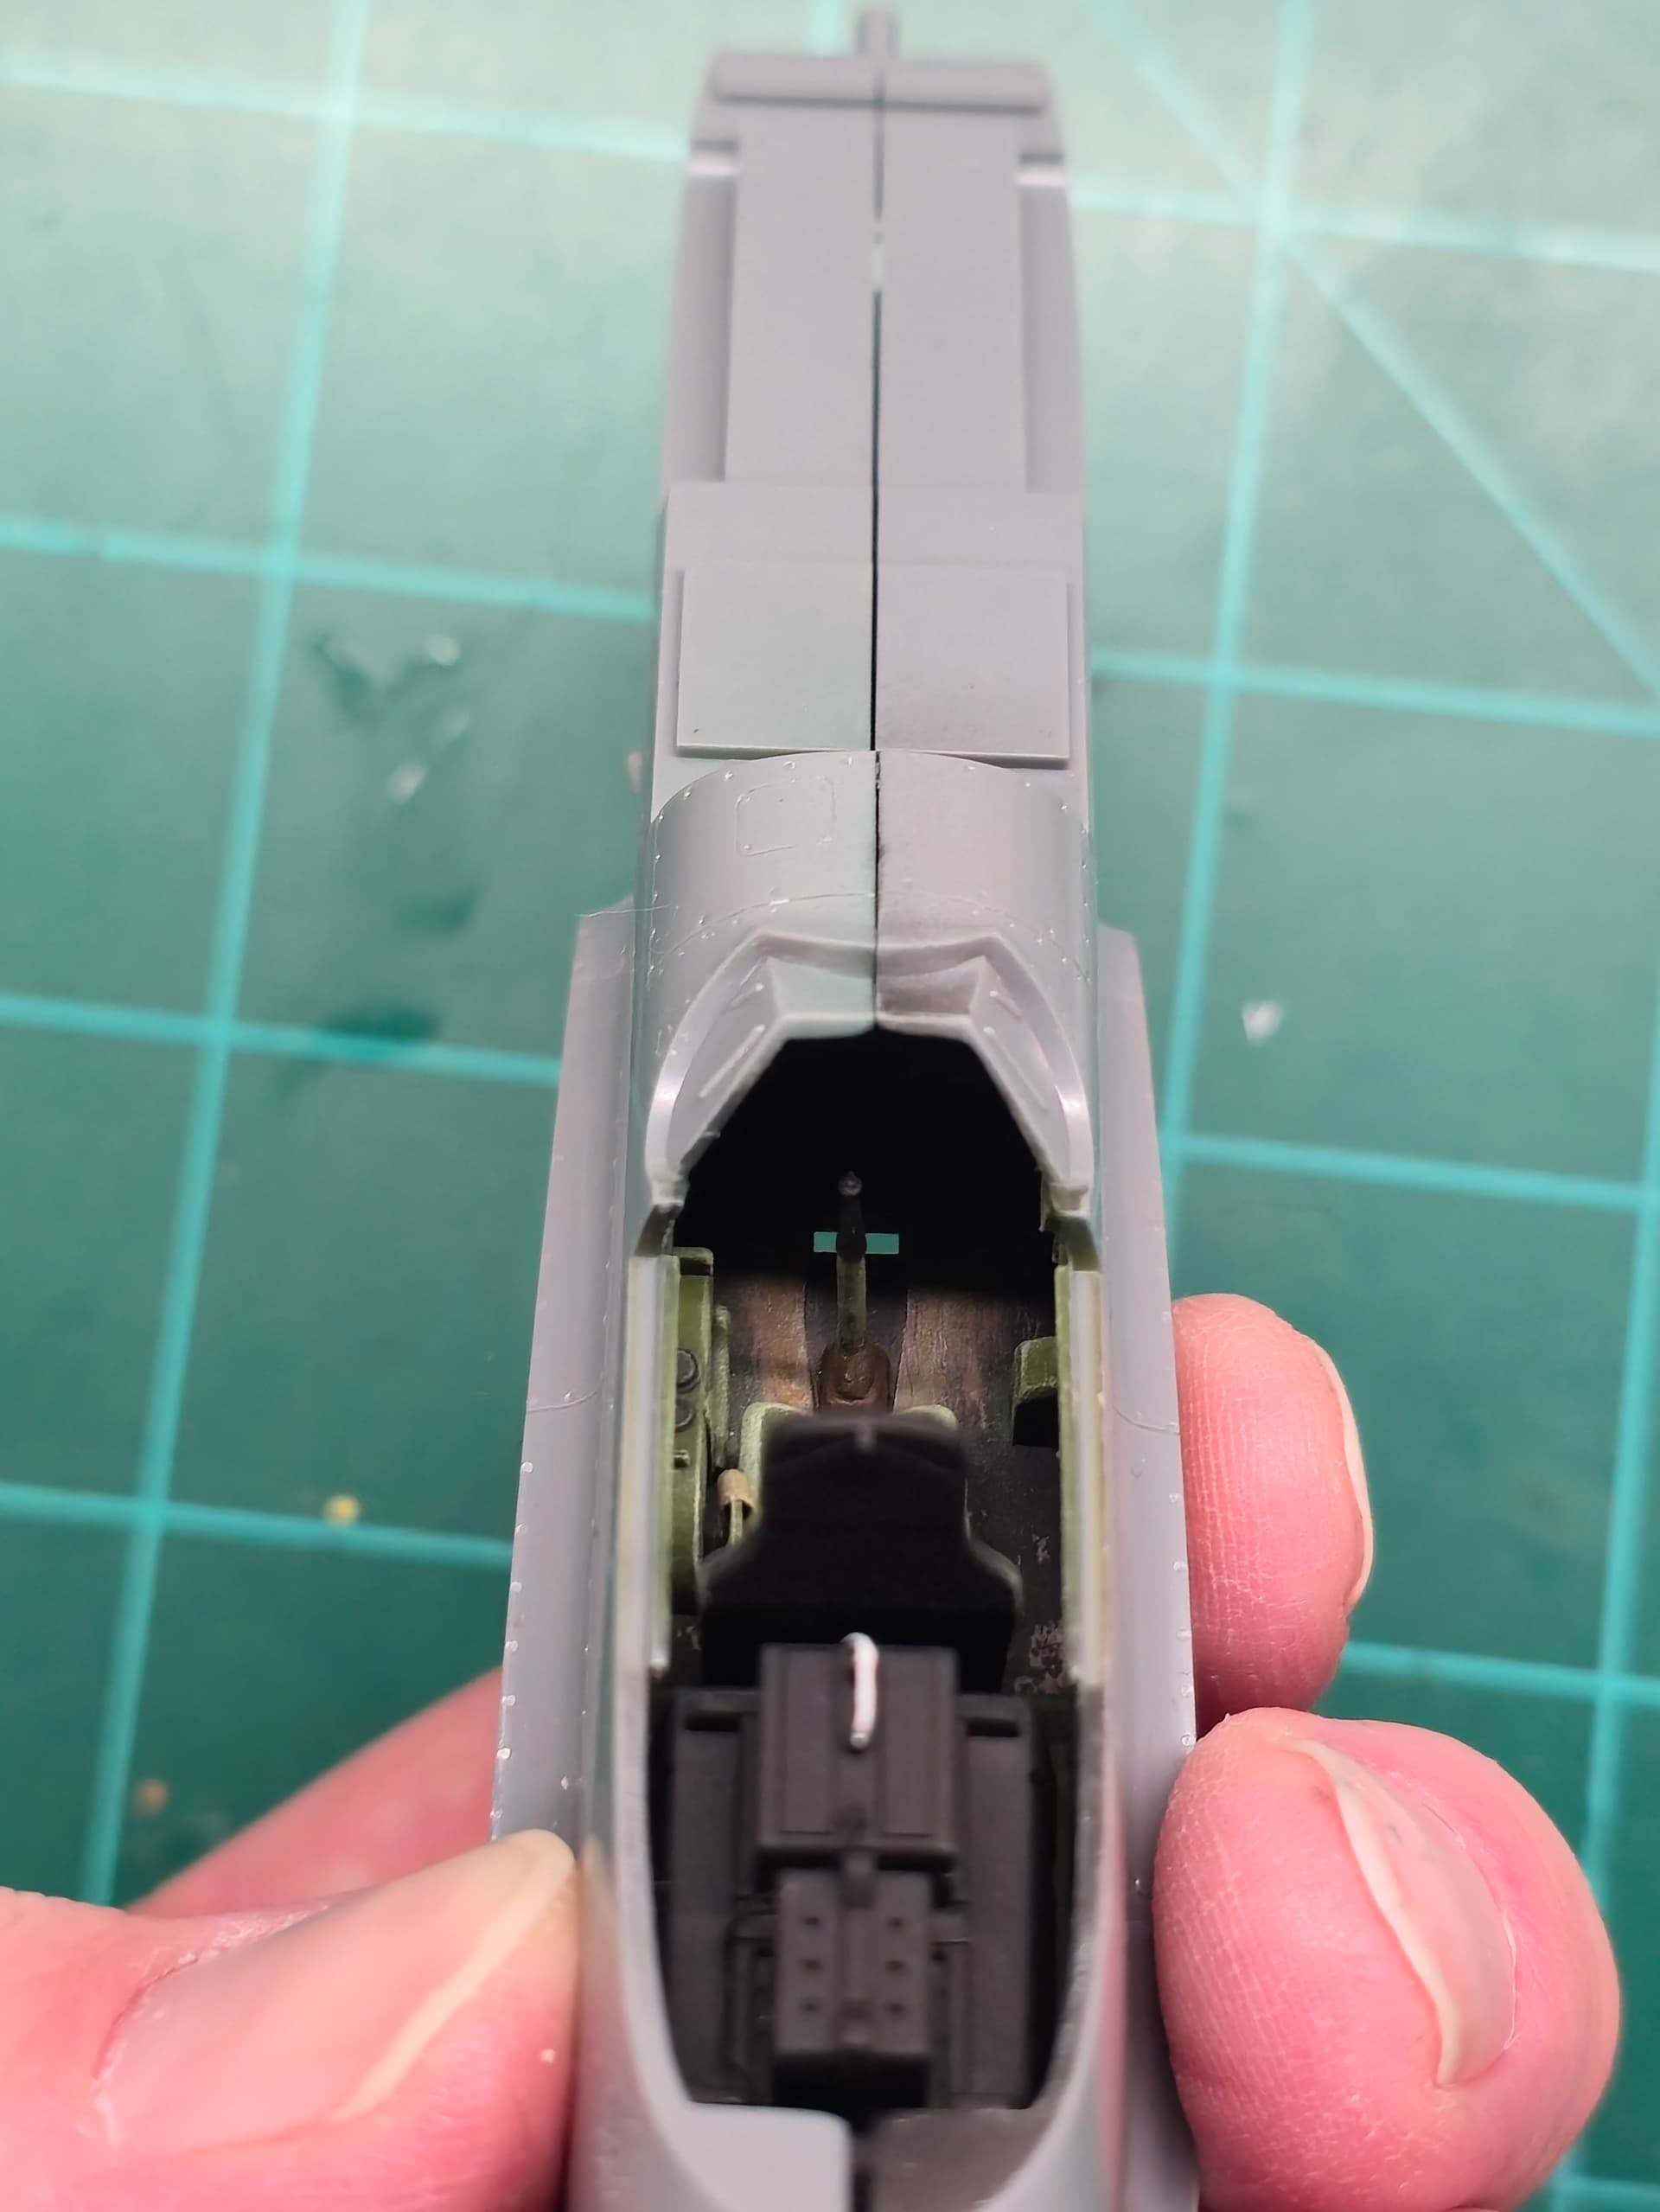
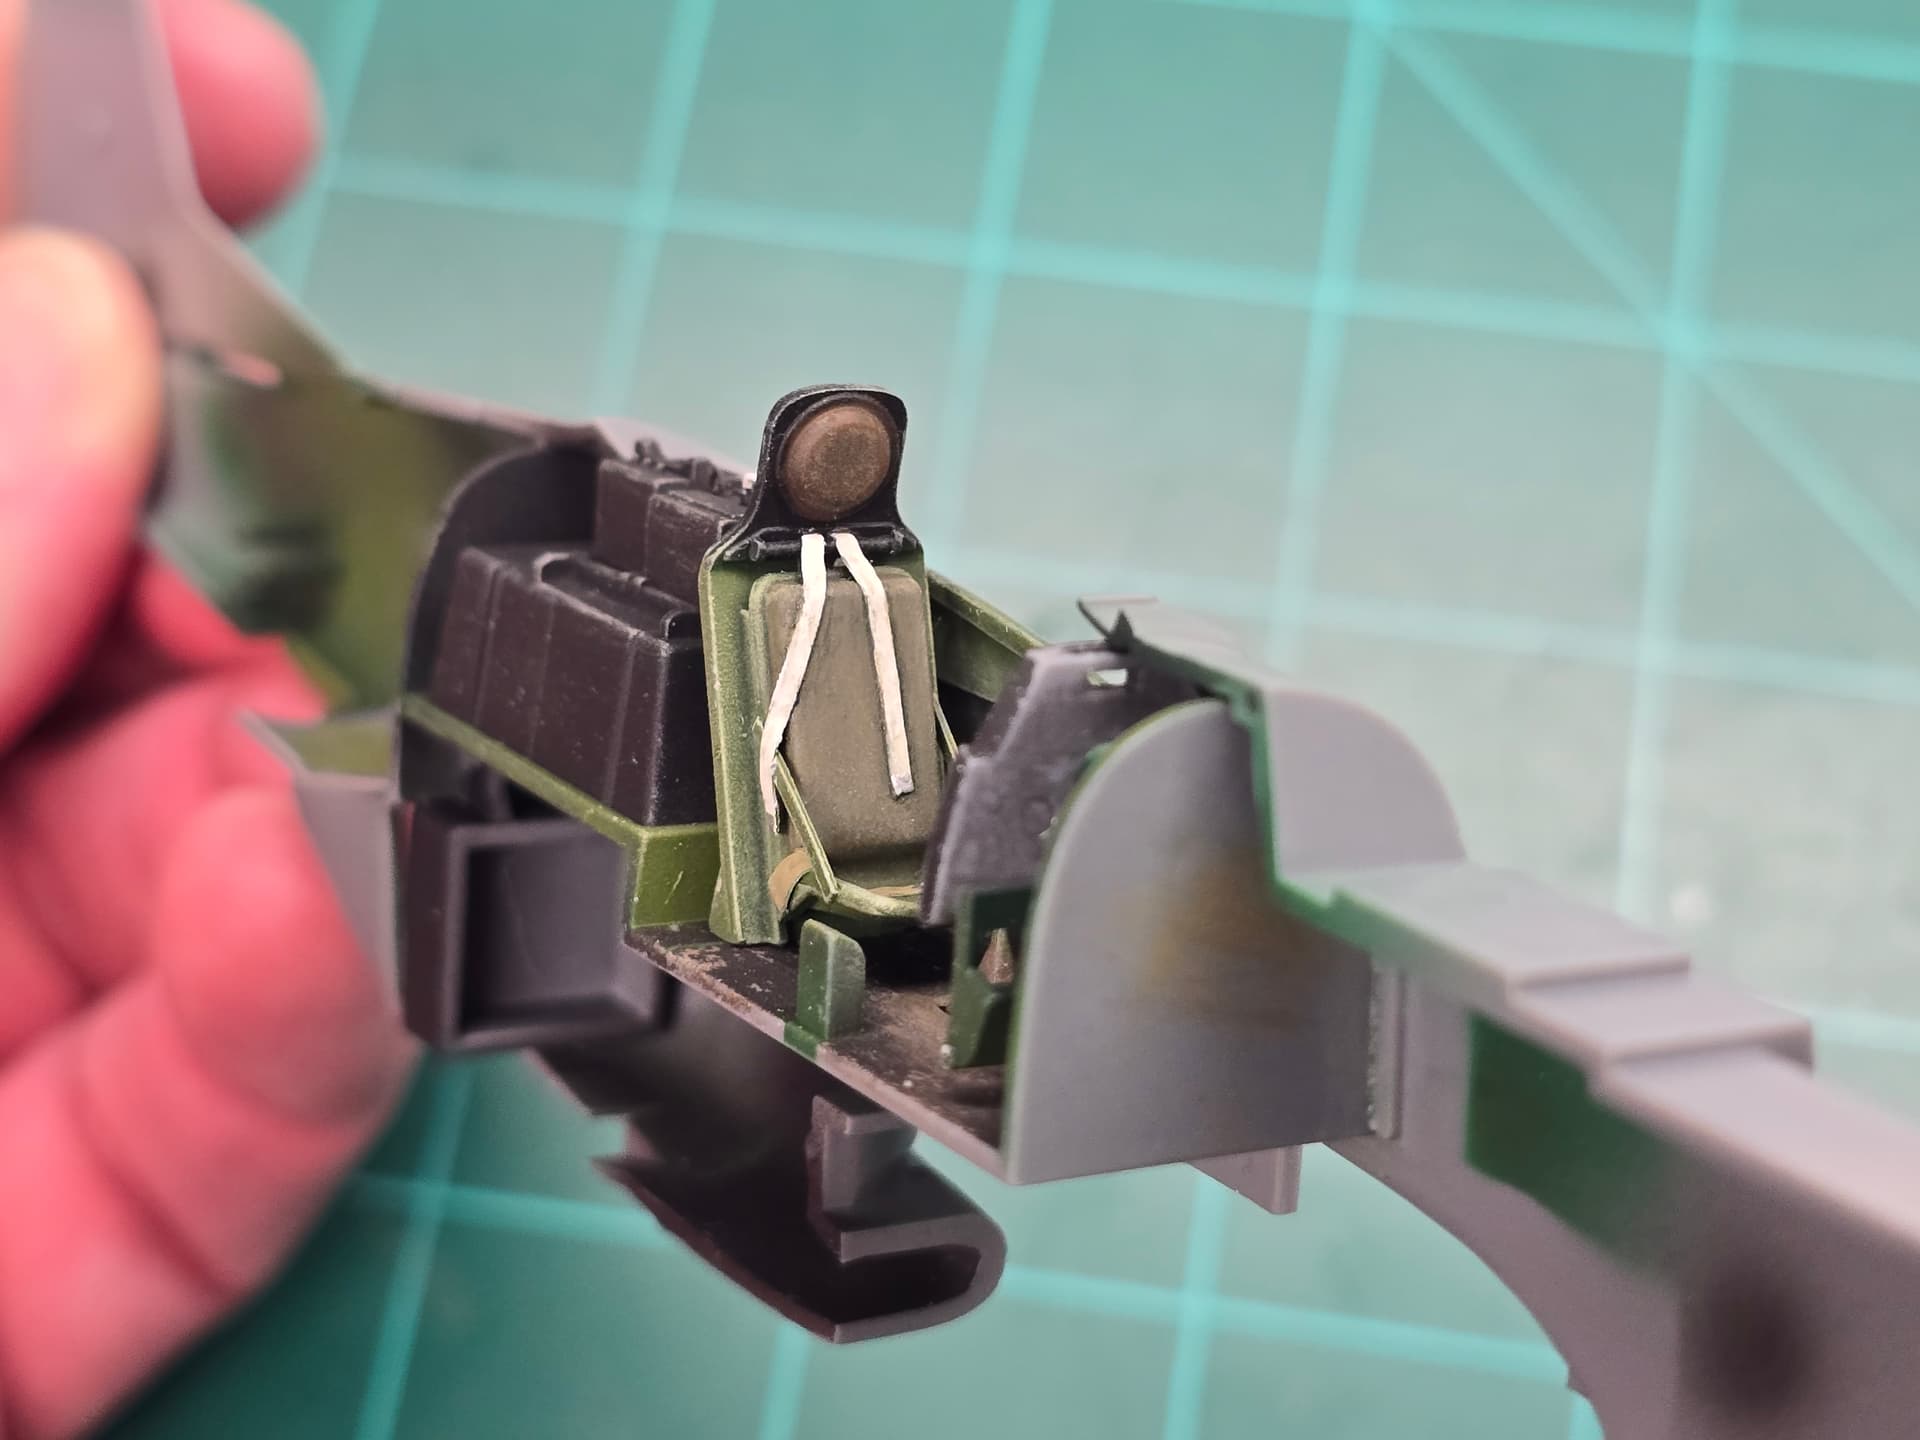
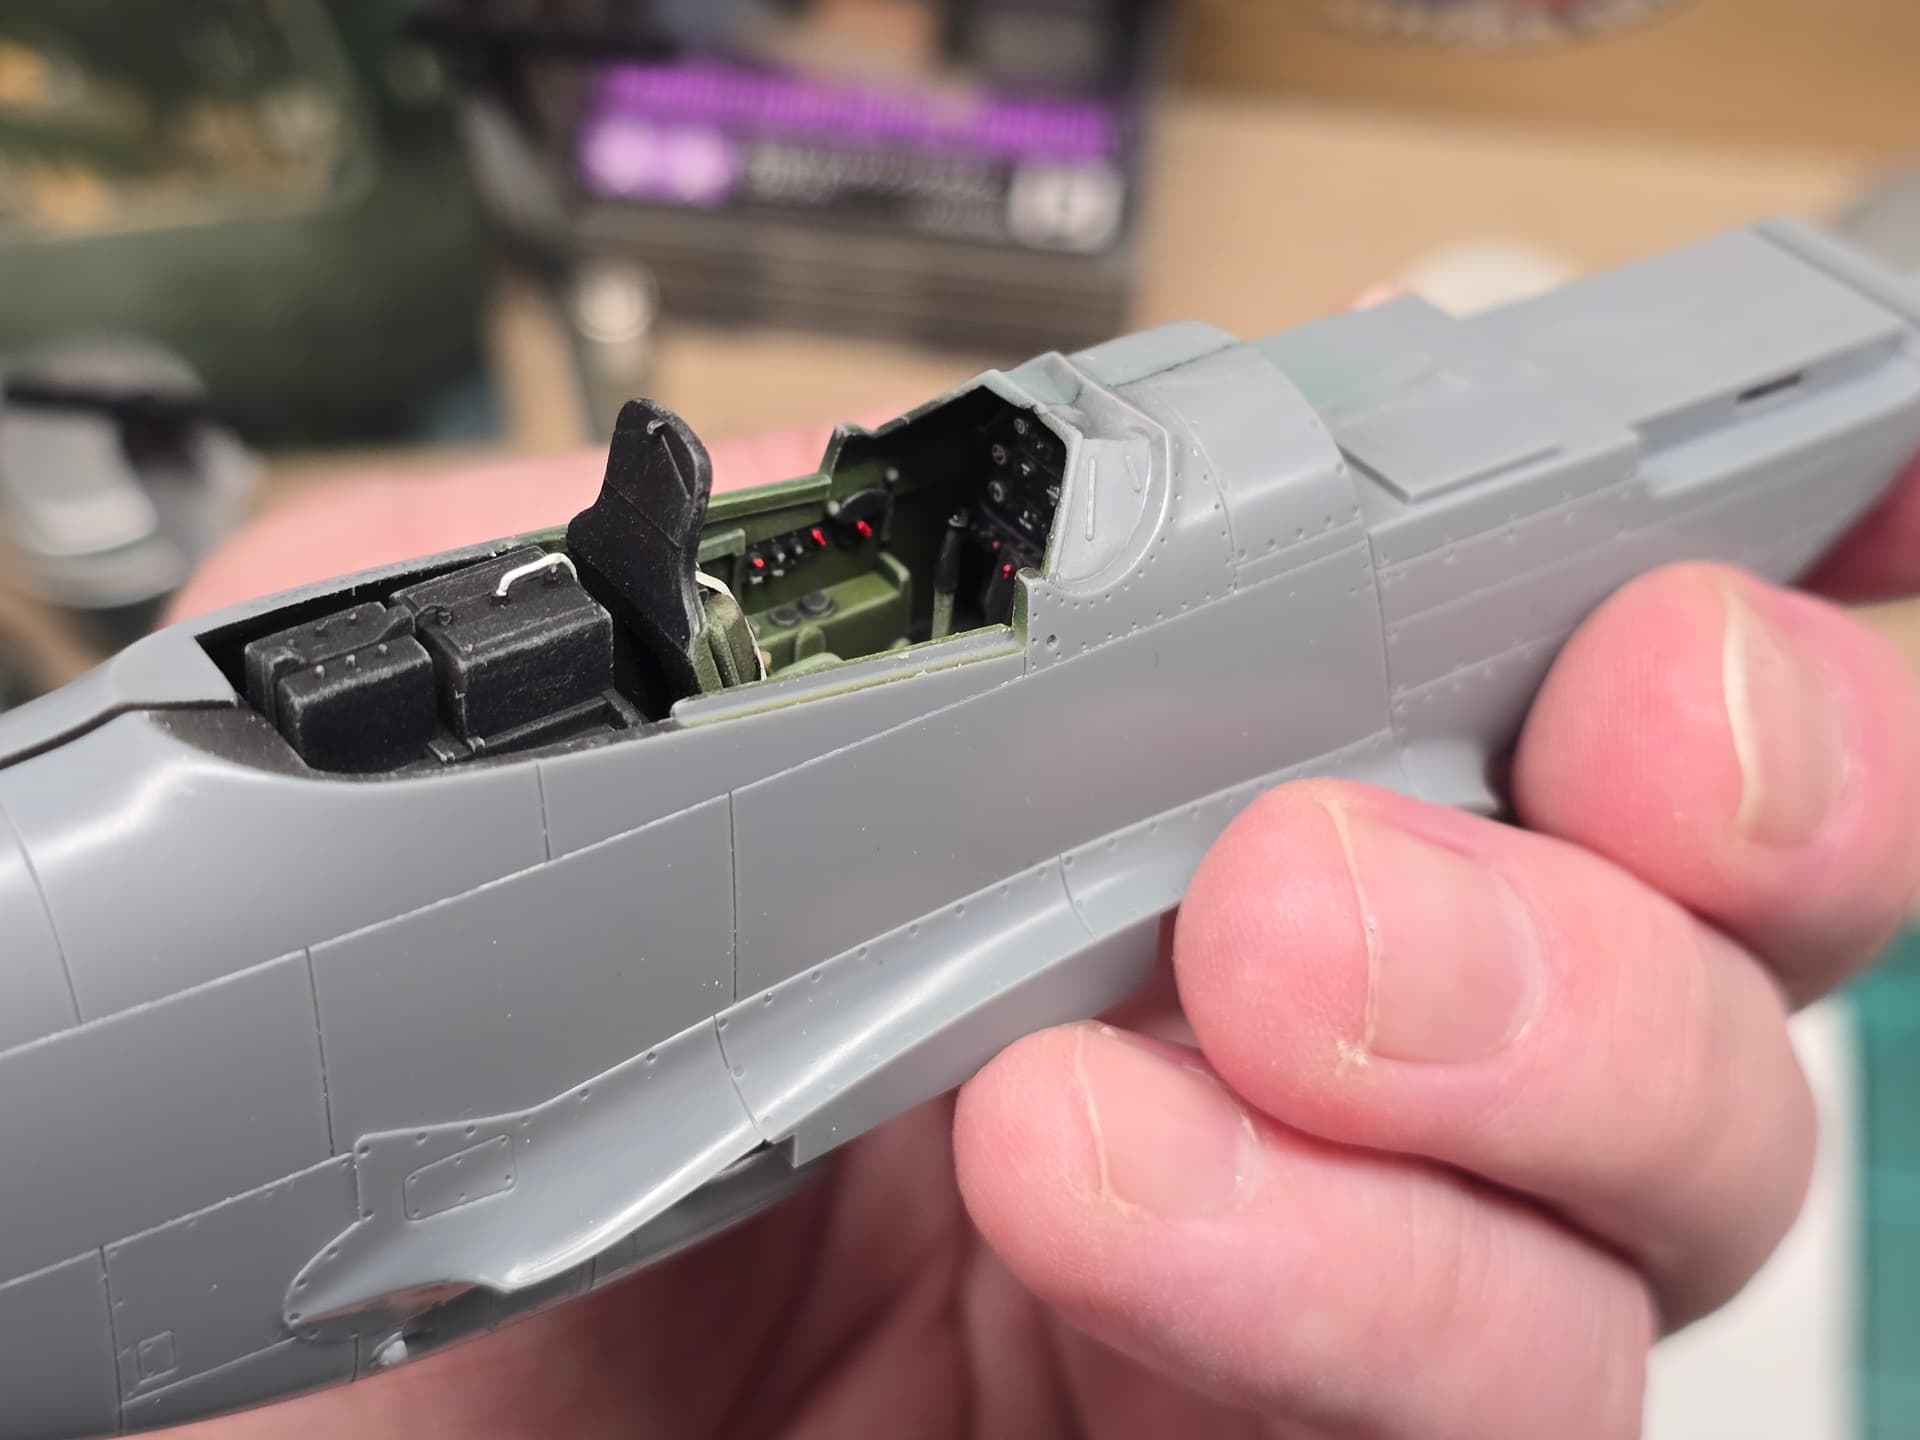
I used Vallejos flat black as my basecoat for the interior parts.
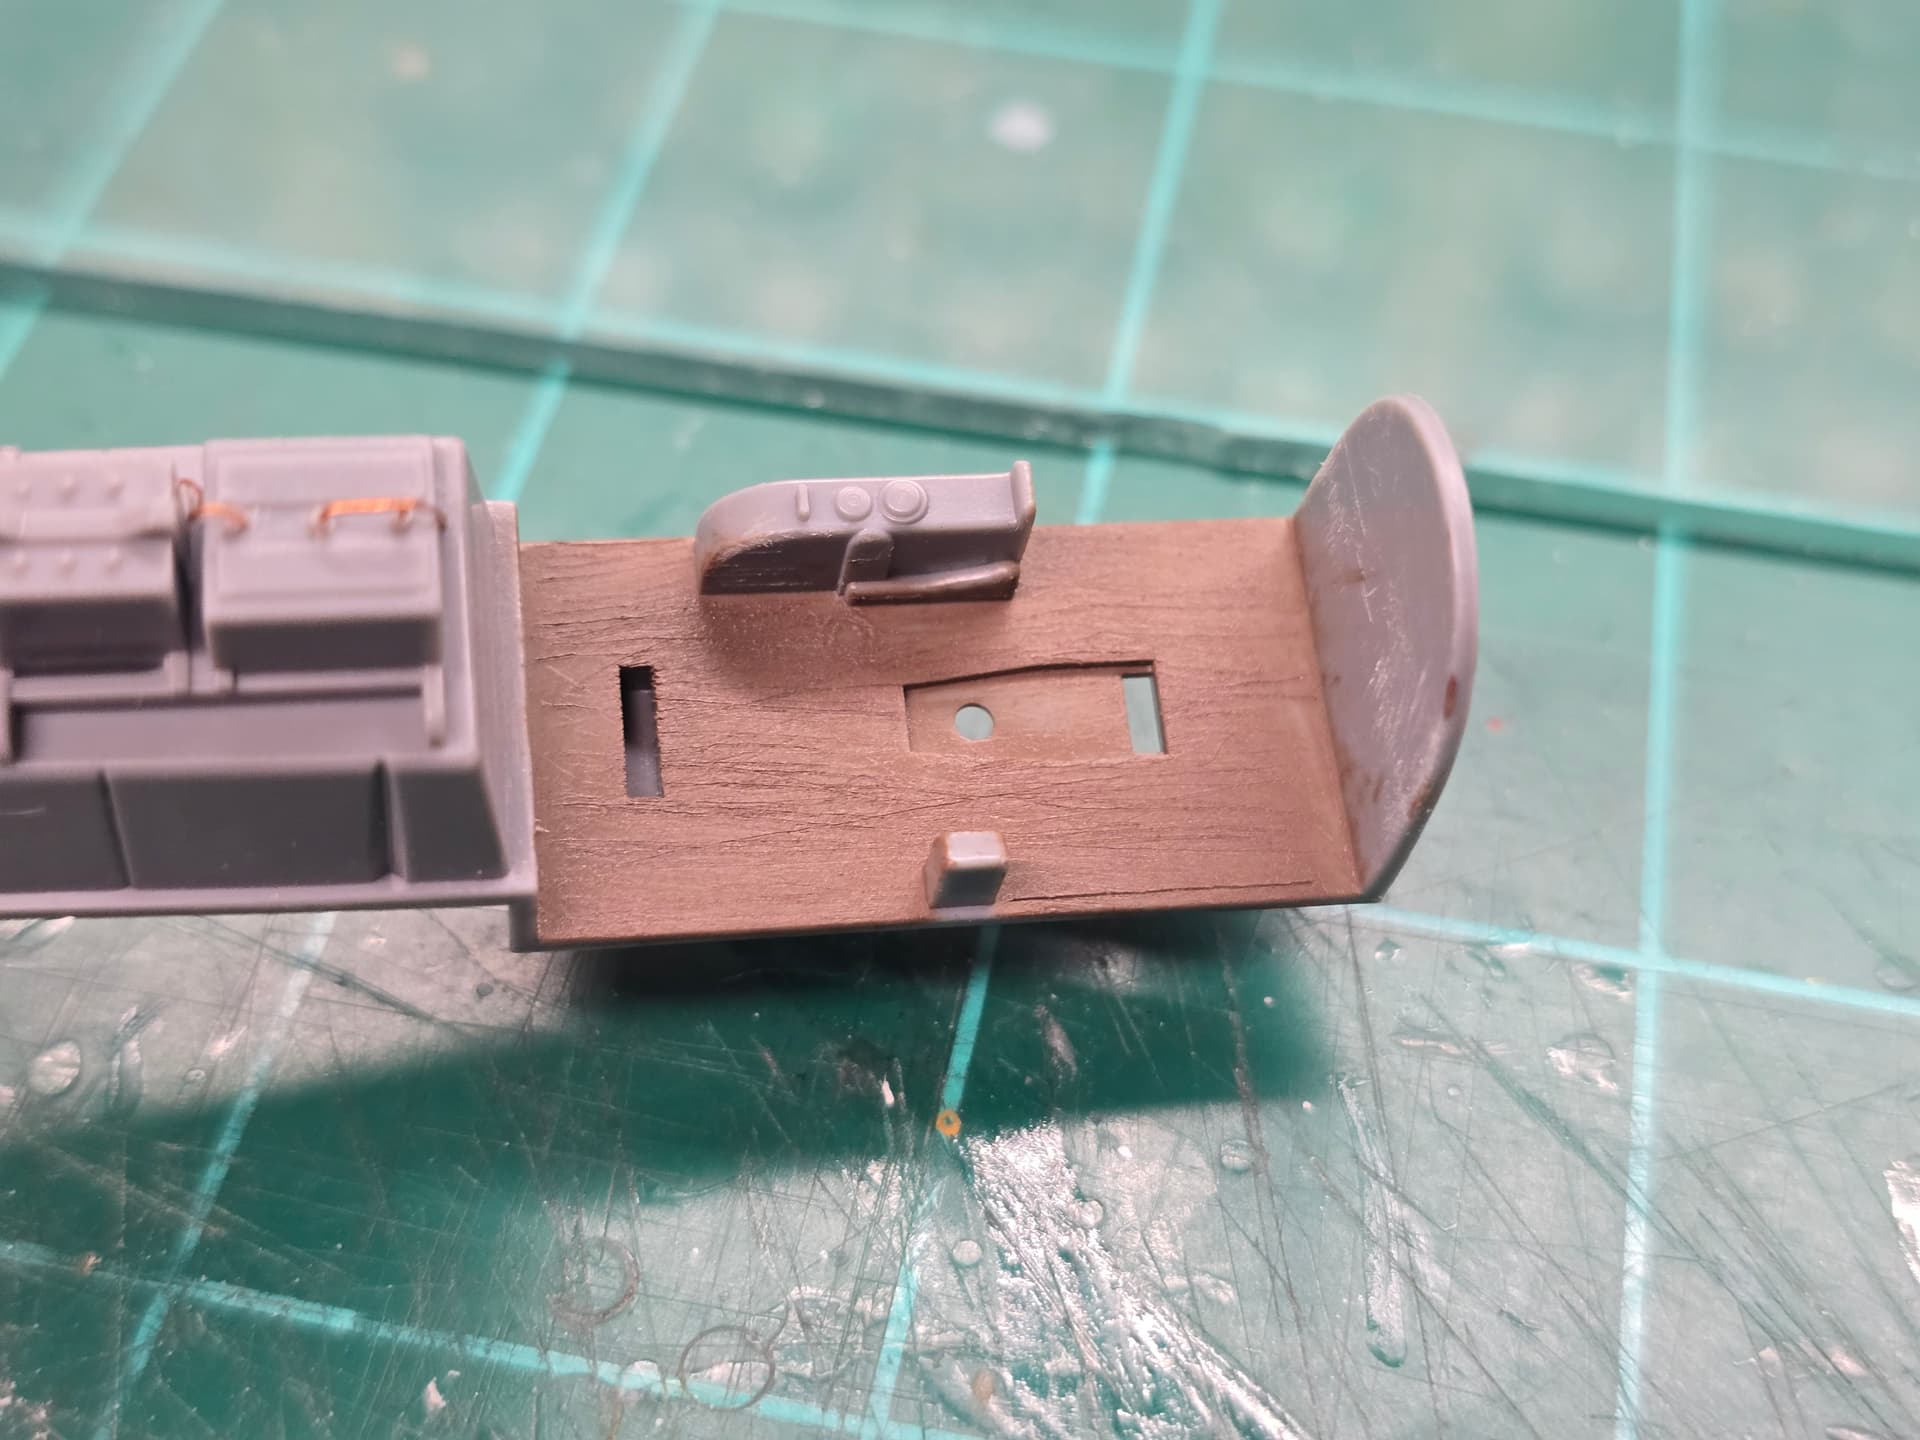
Used a razor saw to replicate the wood grain on the floor. From three feet, it looks good ![]()
Lets see what I can get myself into…
Happy Modeling,
Mike
2 Likes
Update 3
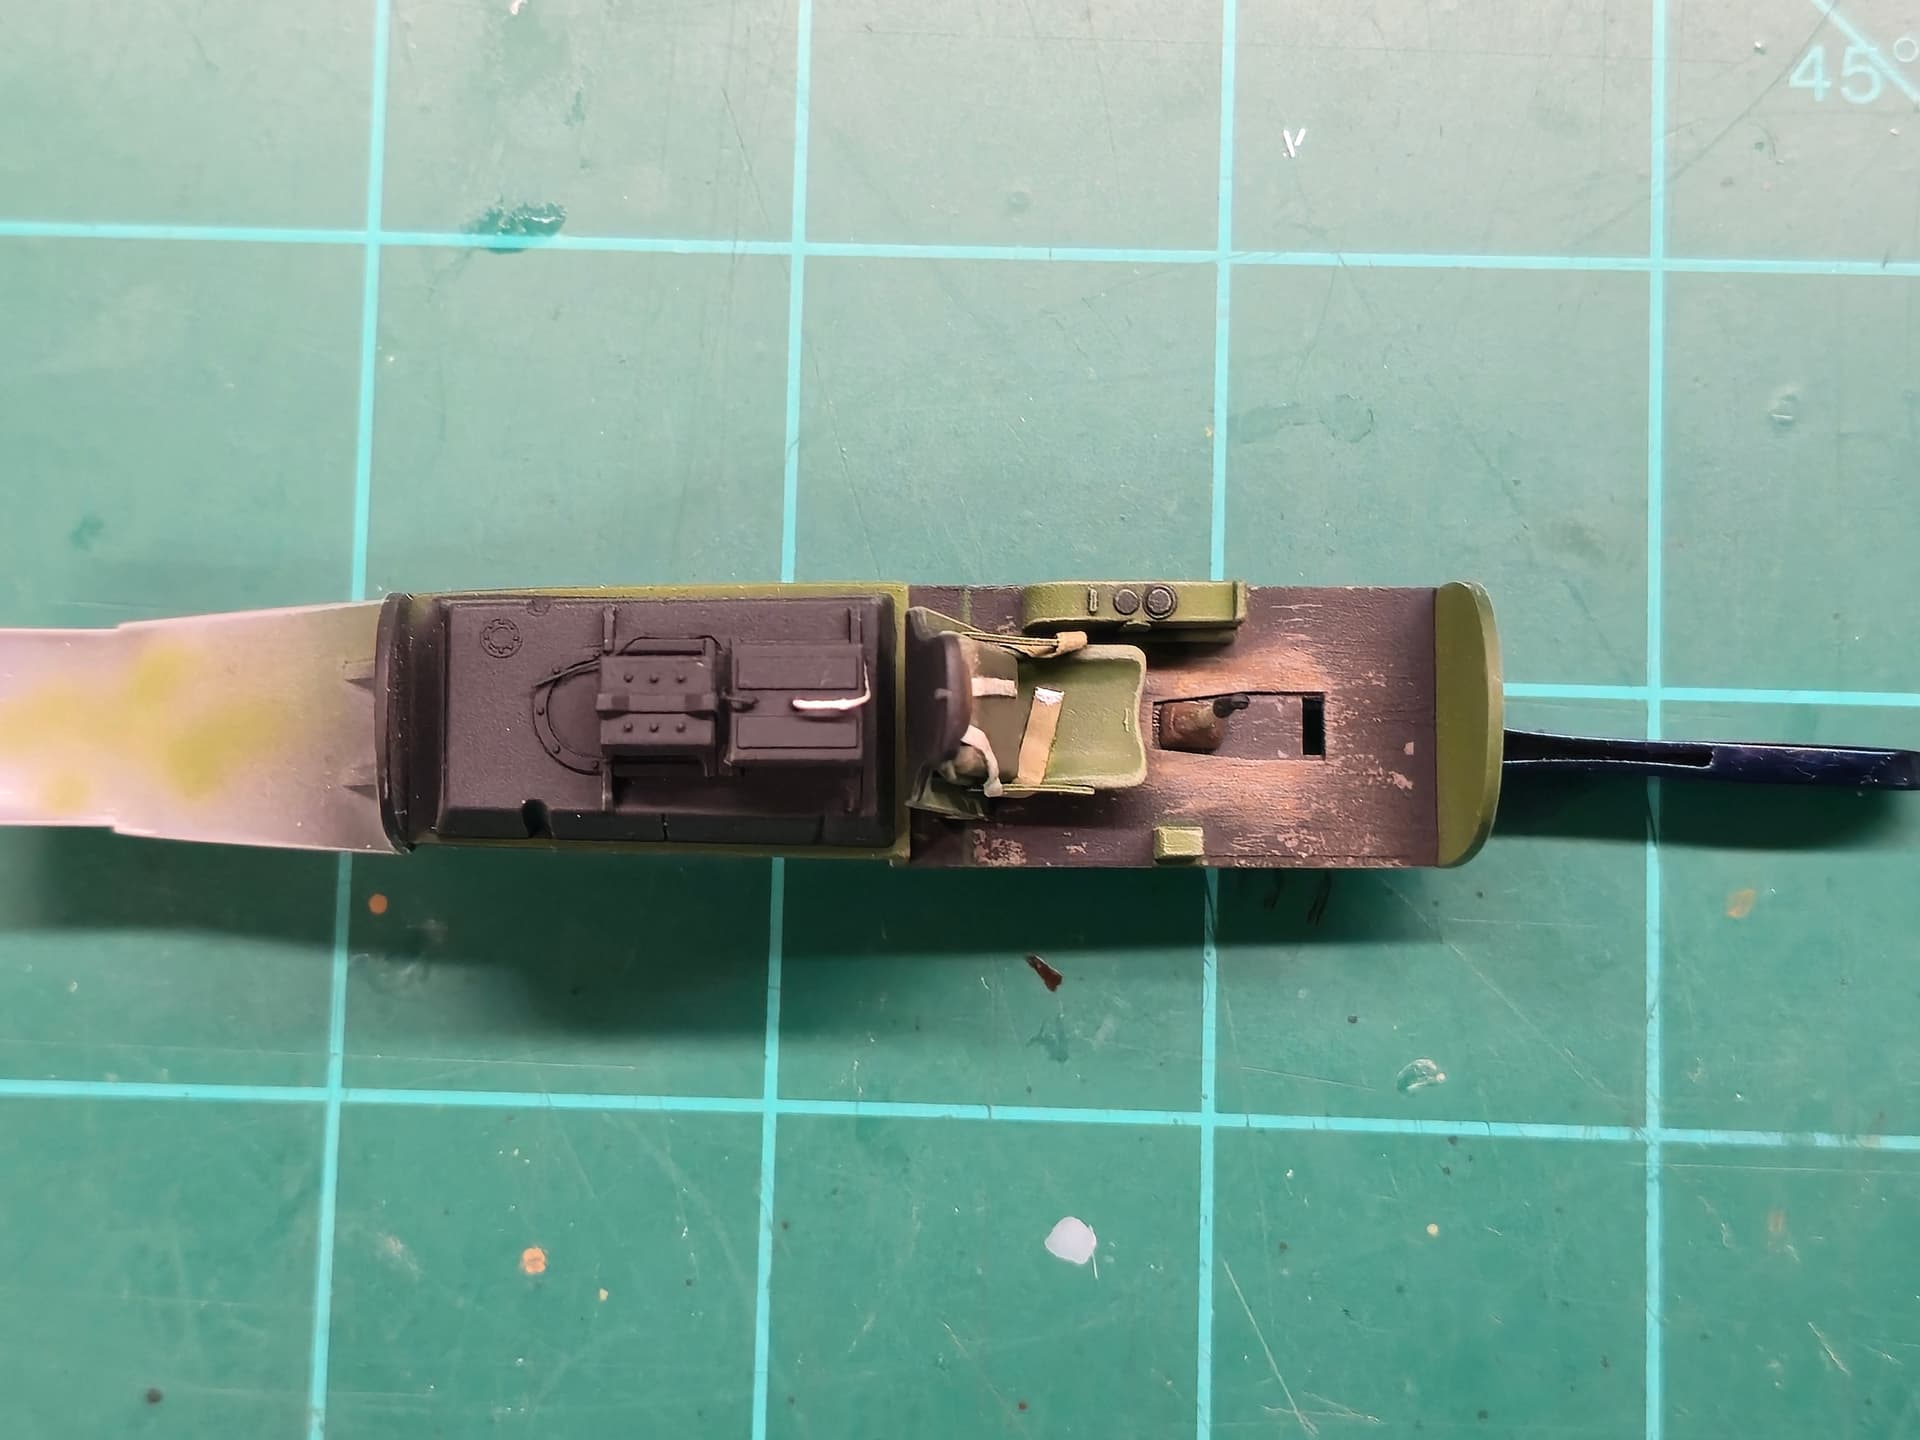
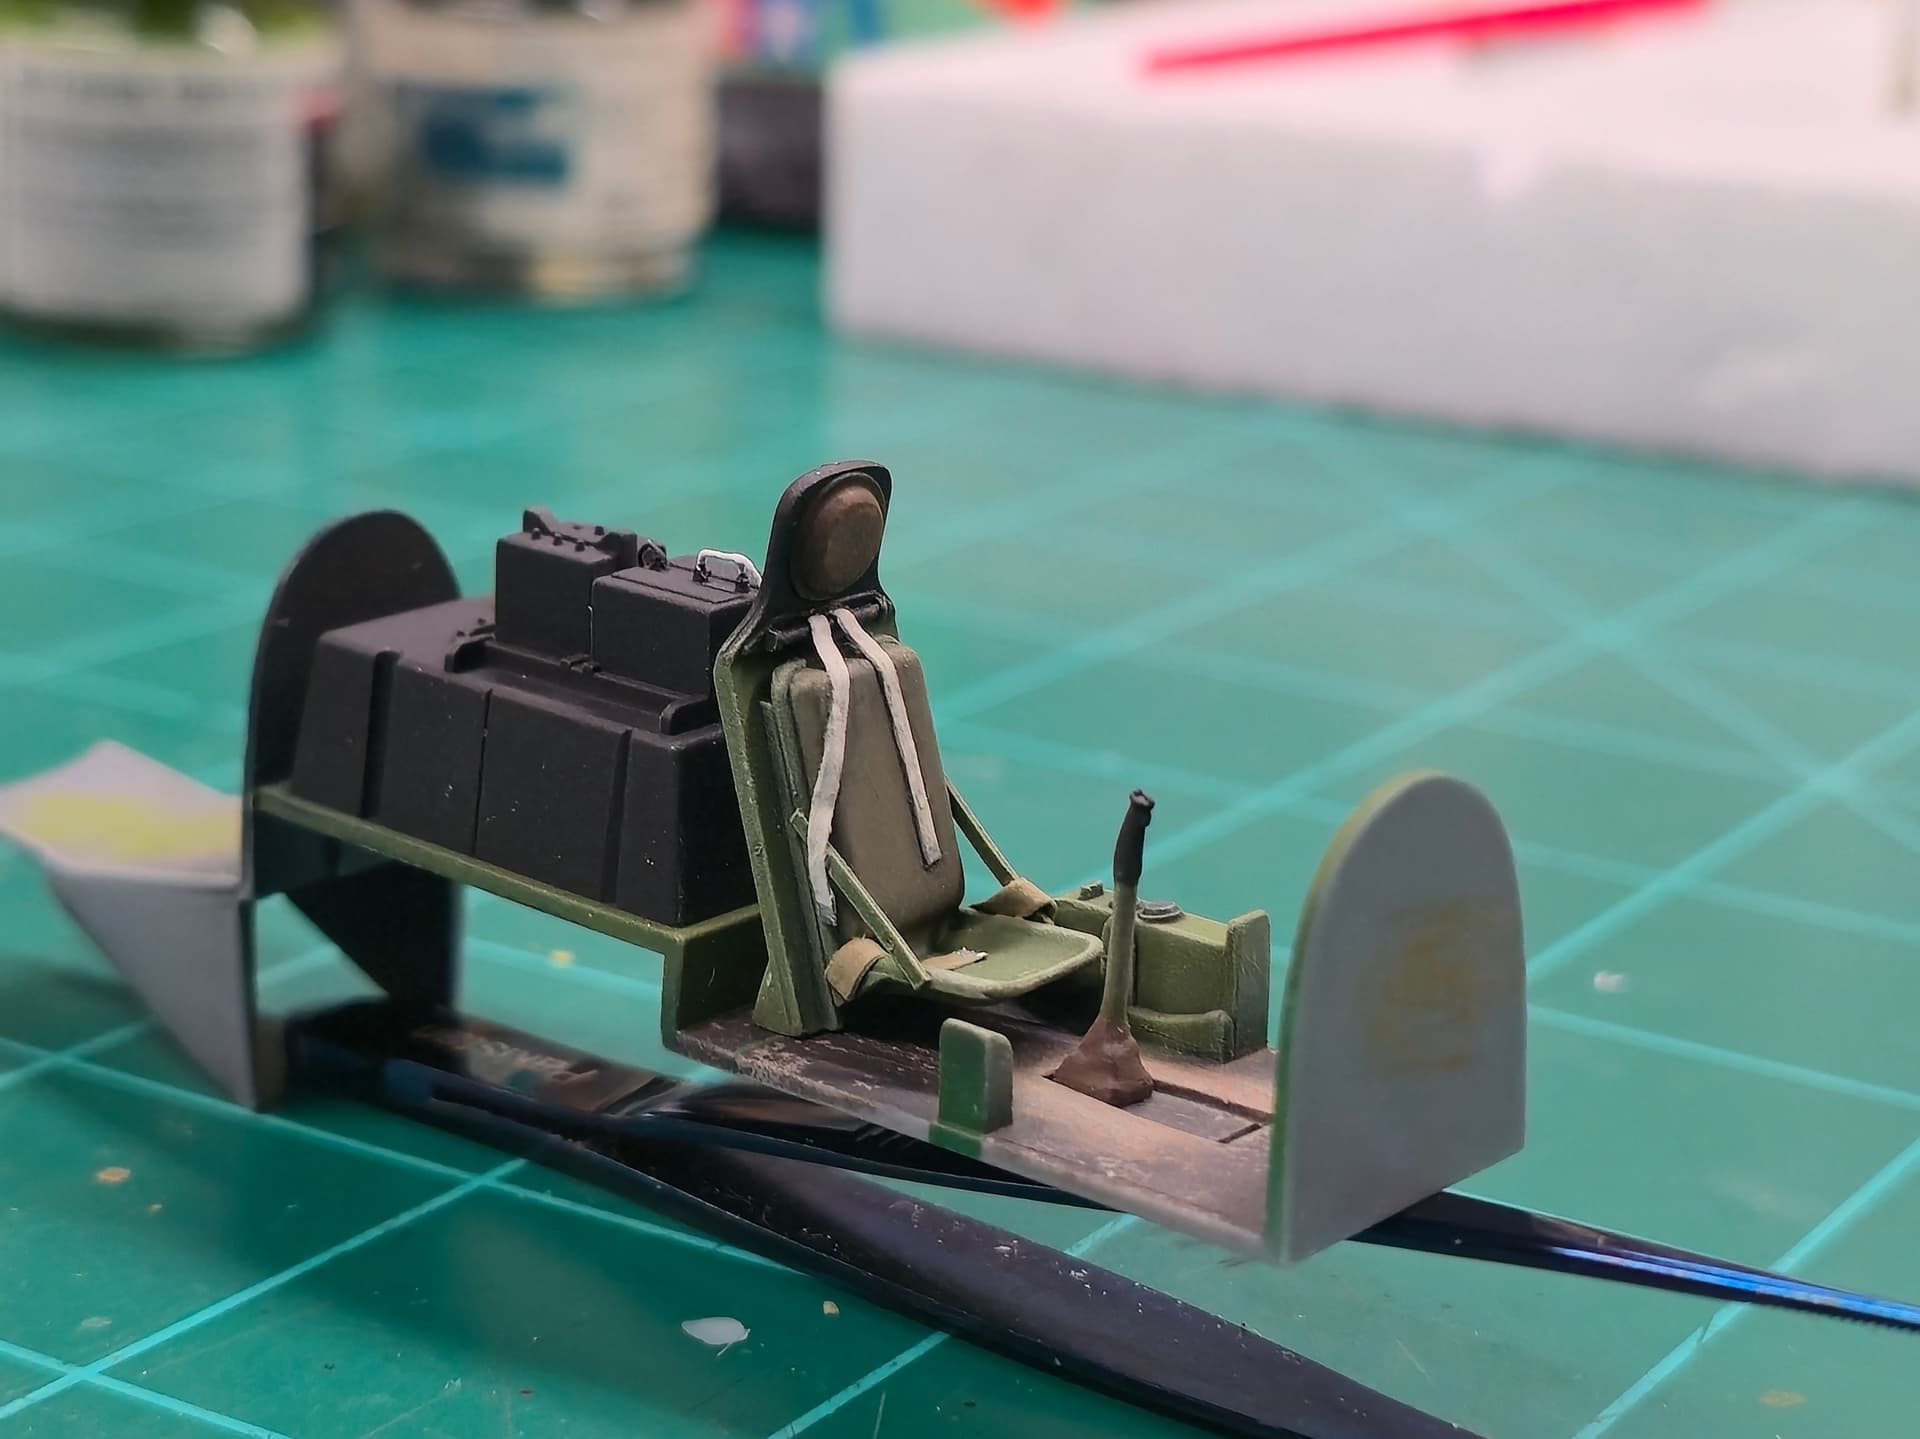
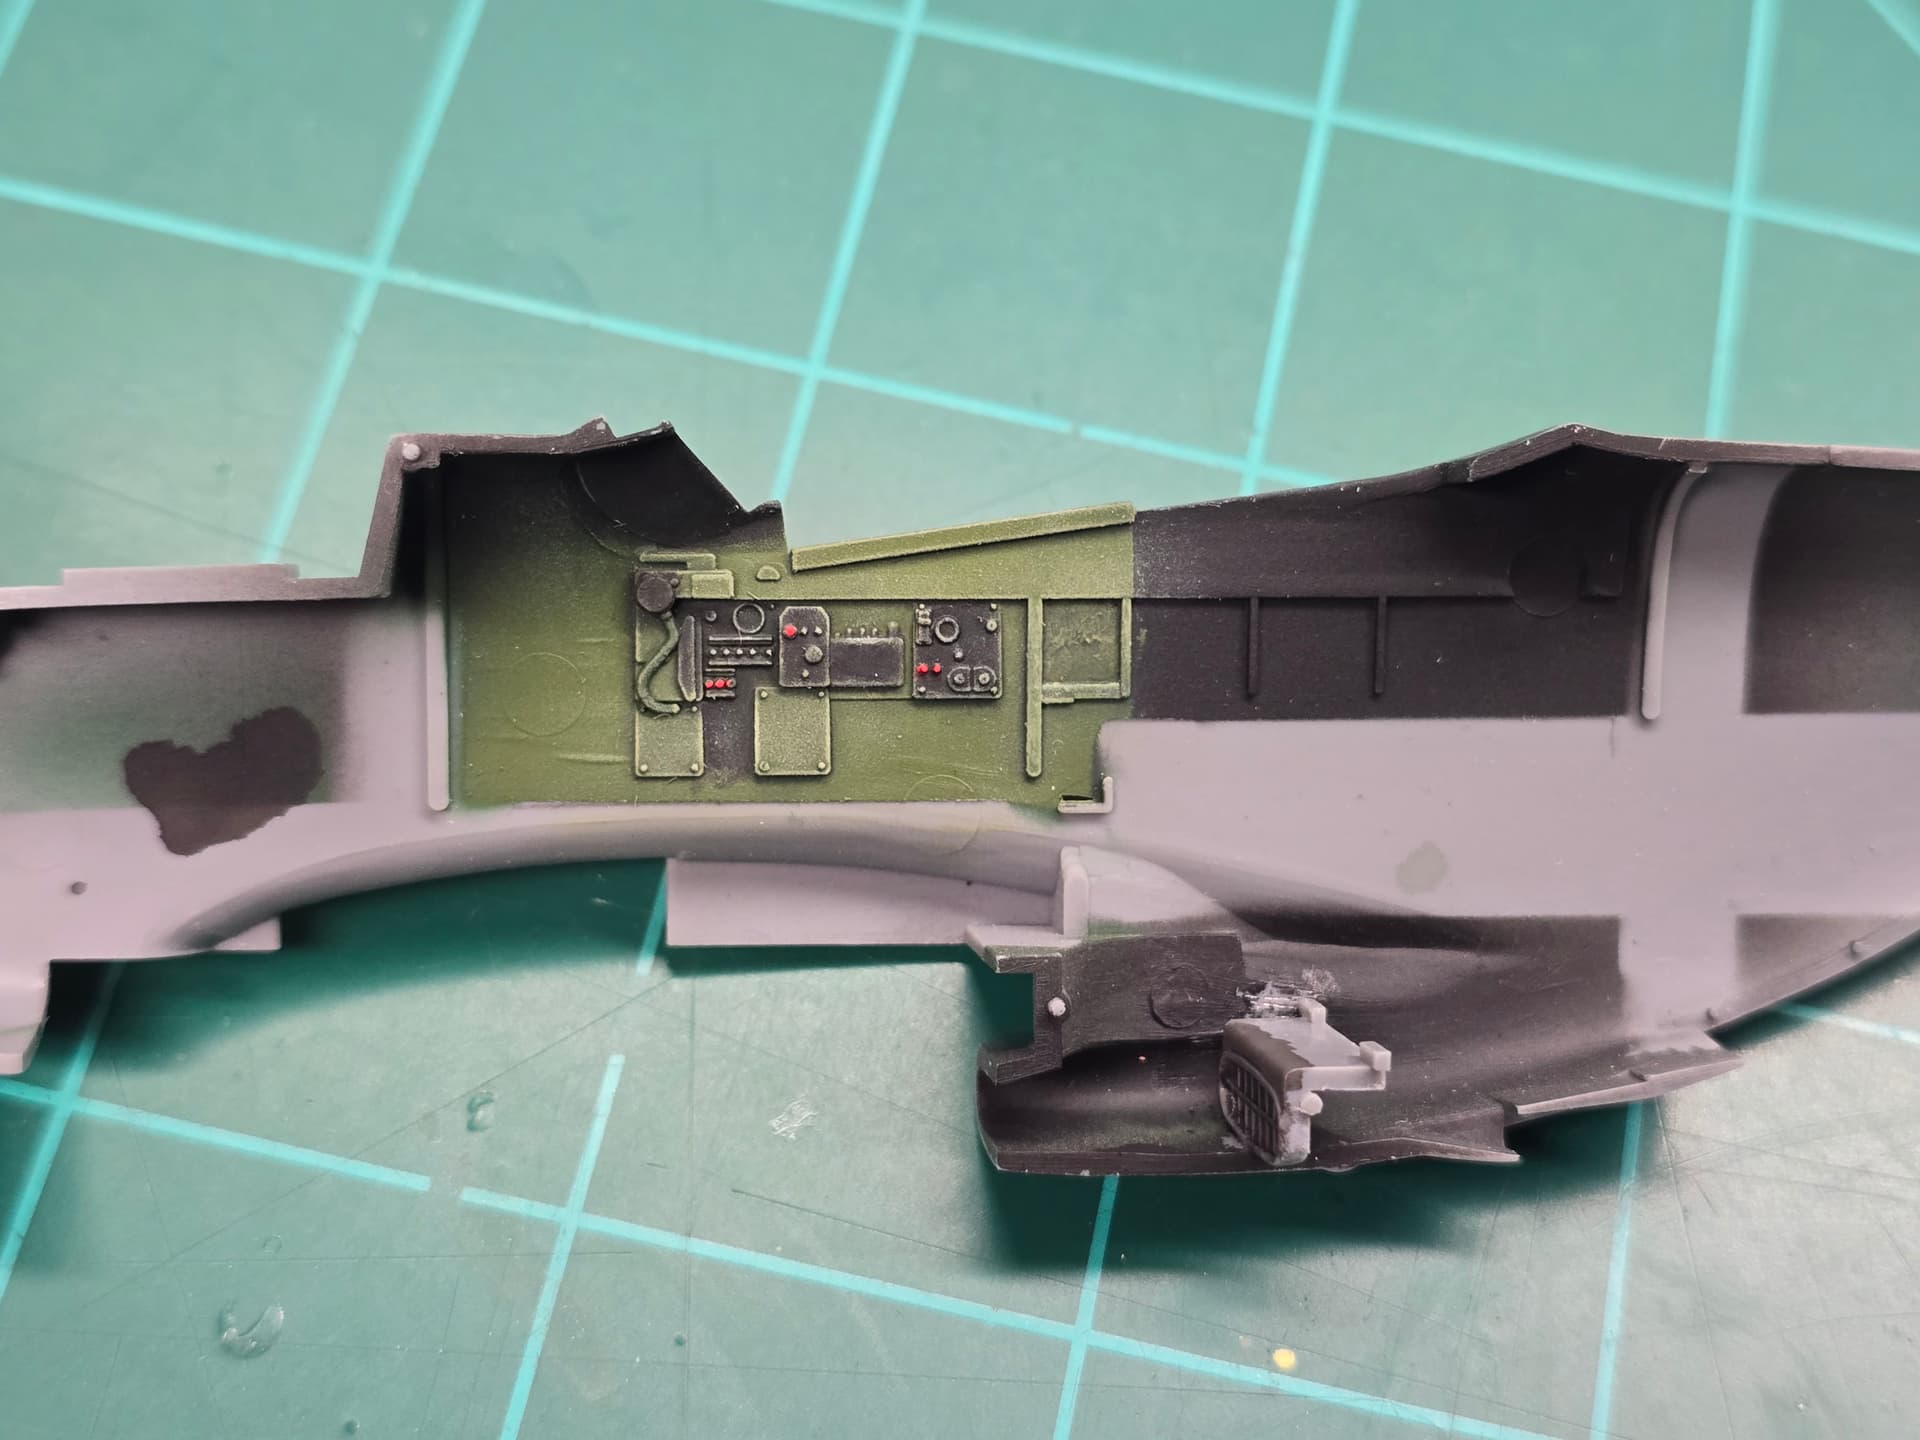
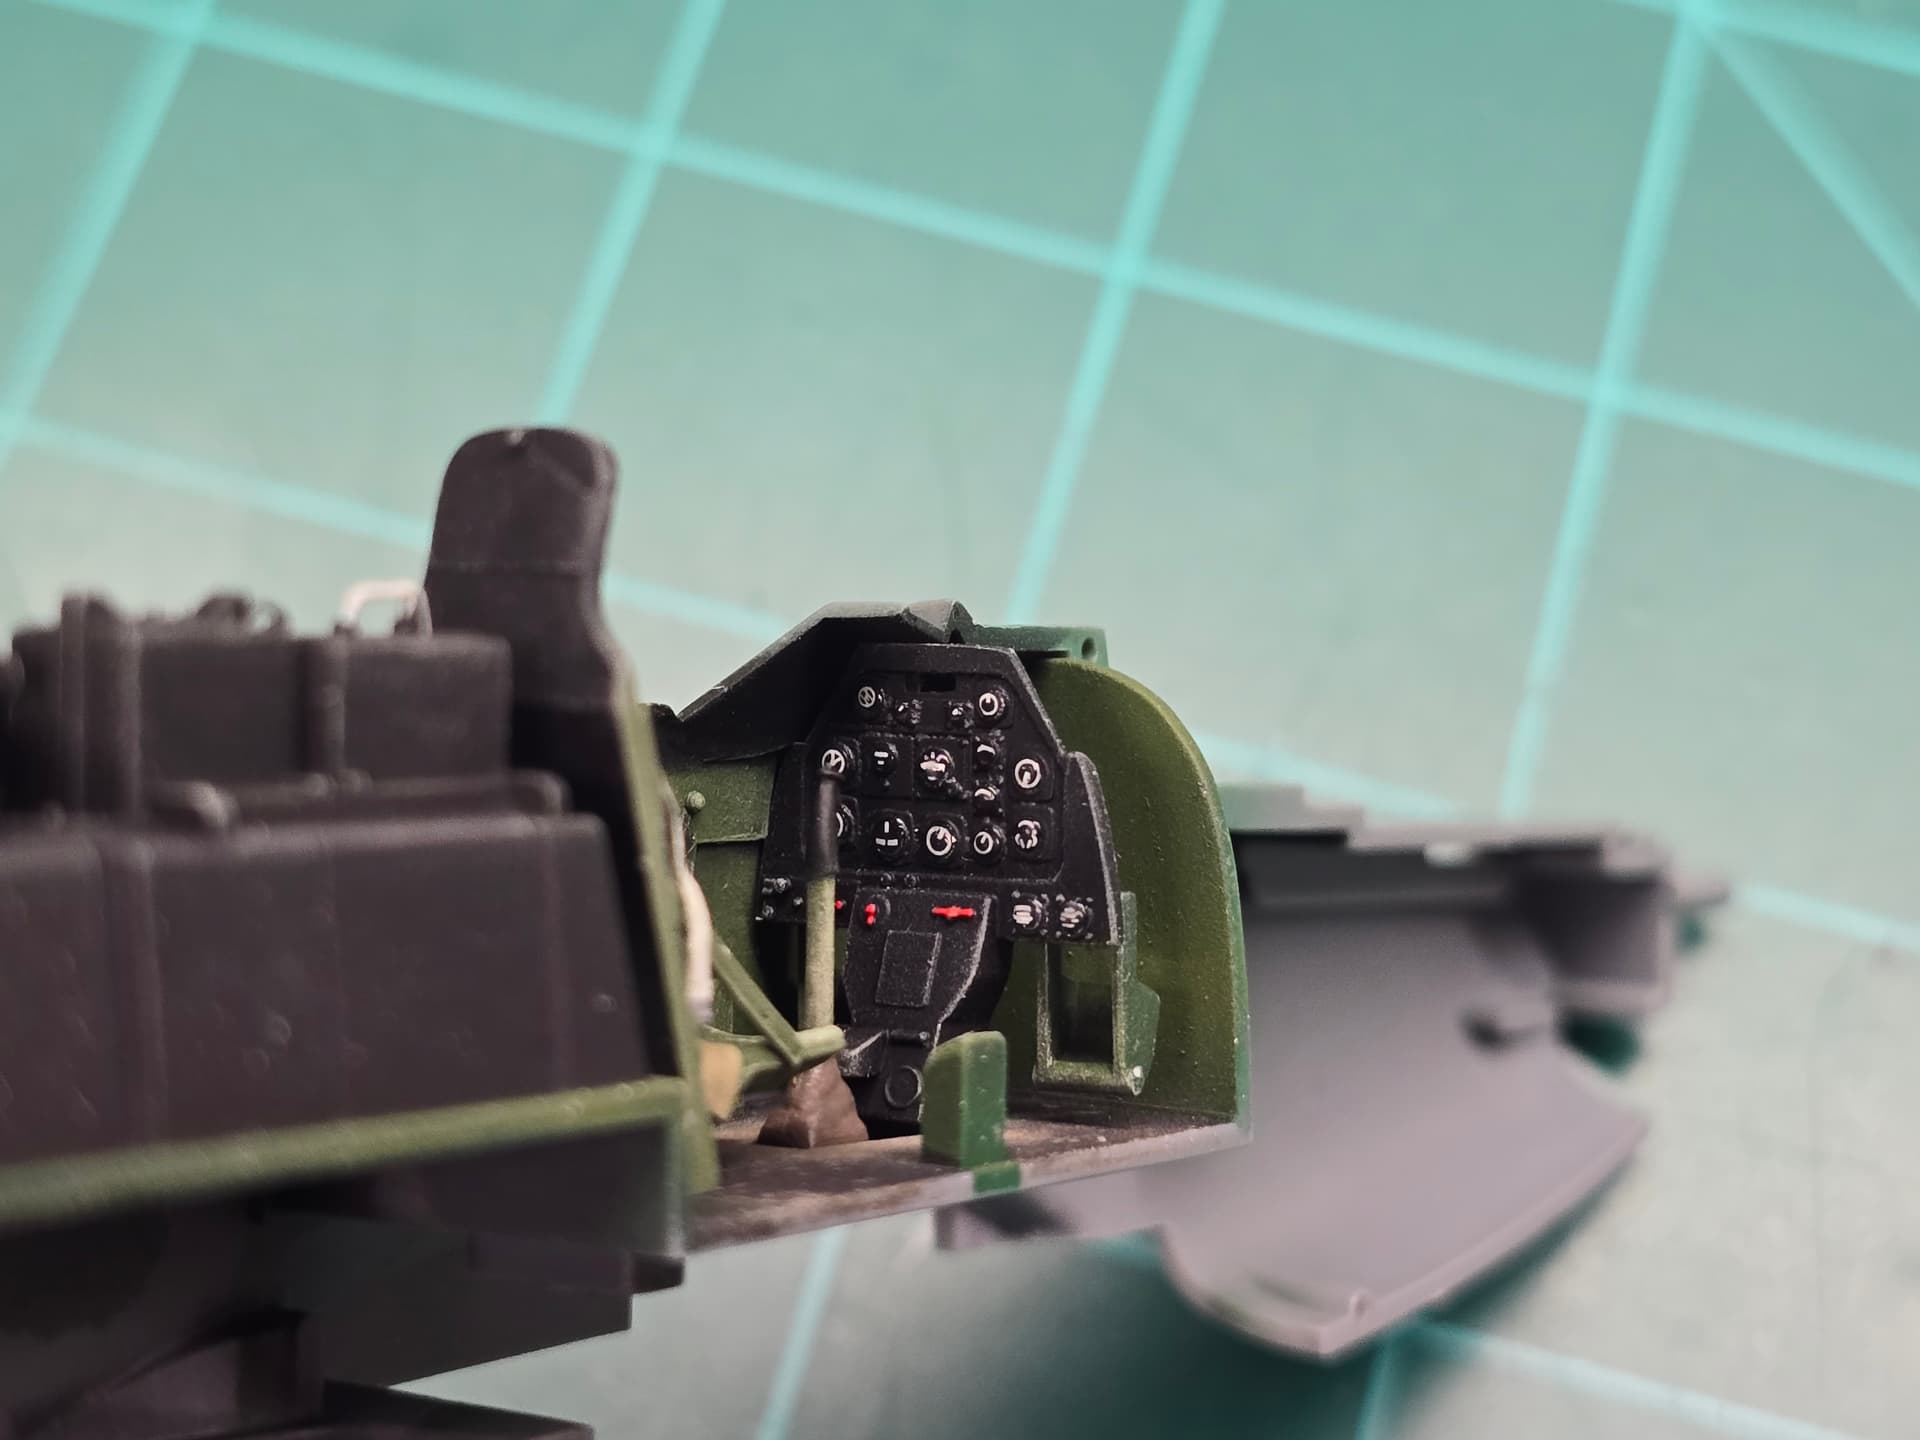
Got a little more done on the interior with some subtle washes and some dry brushing. Now the fun really begins, the detail painting.
As for the floor, I lightly sprayed it a dark brown then dry brushed a lighter shade of tan.
Then sprayed the basecoat using flat black. Once everything was painted, I sanded the floor area lightly removing the black and revealing the "wooden"floor.
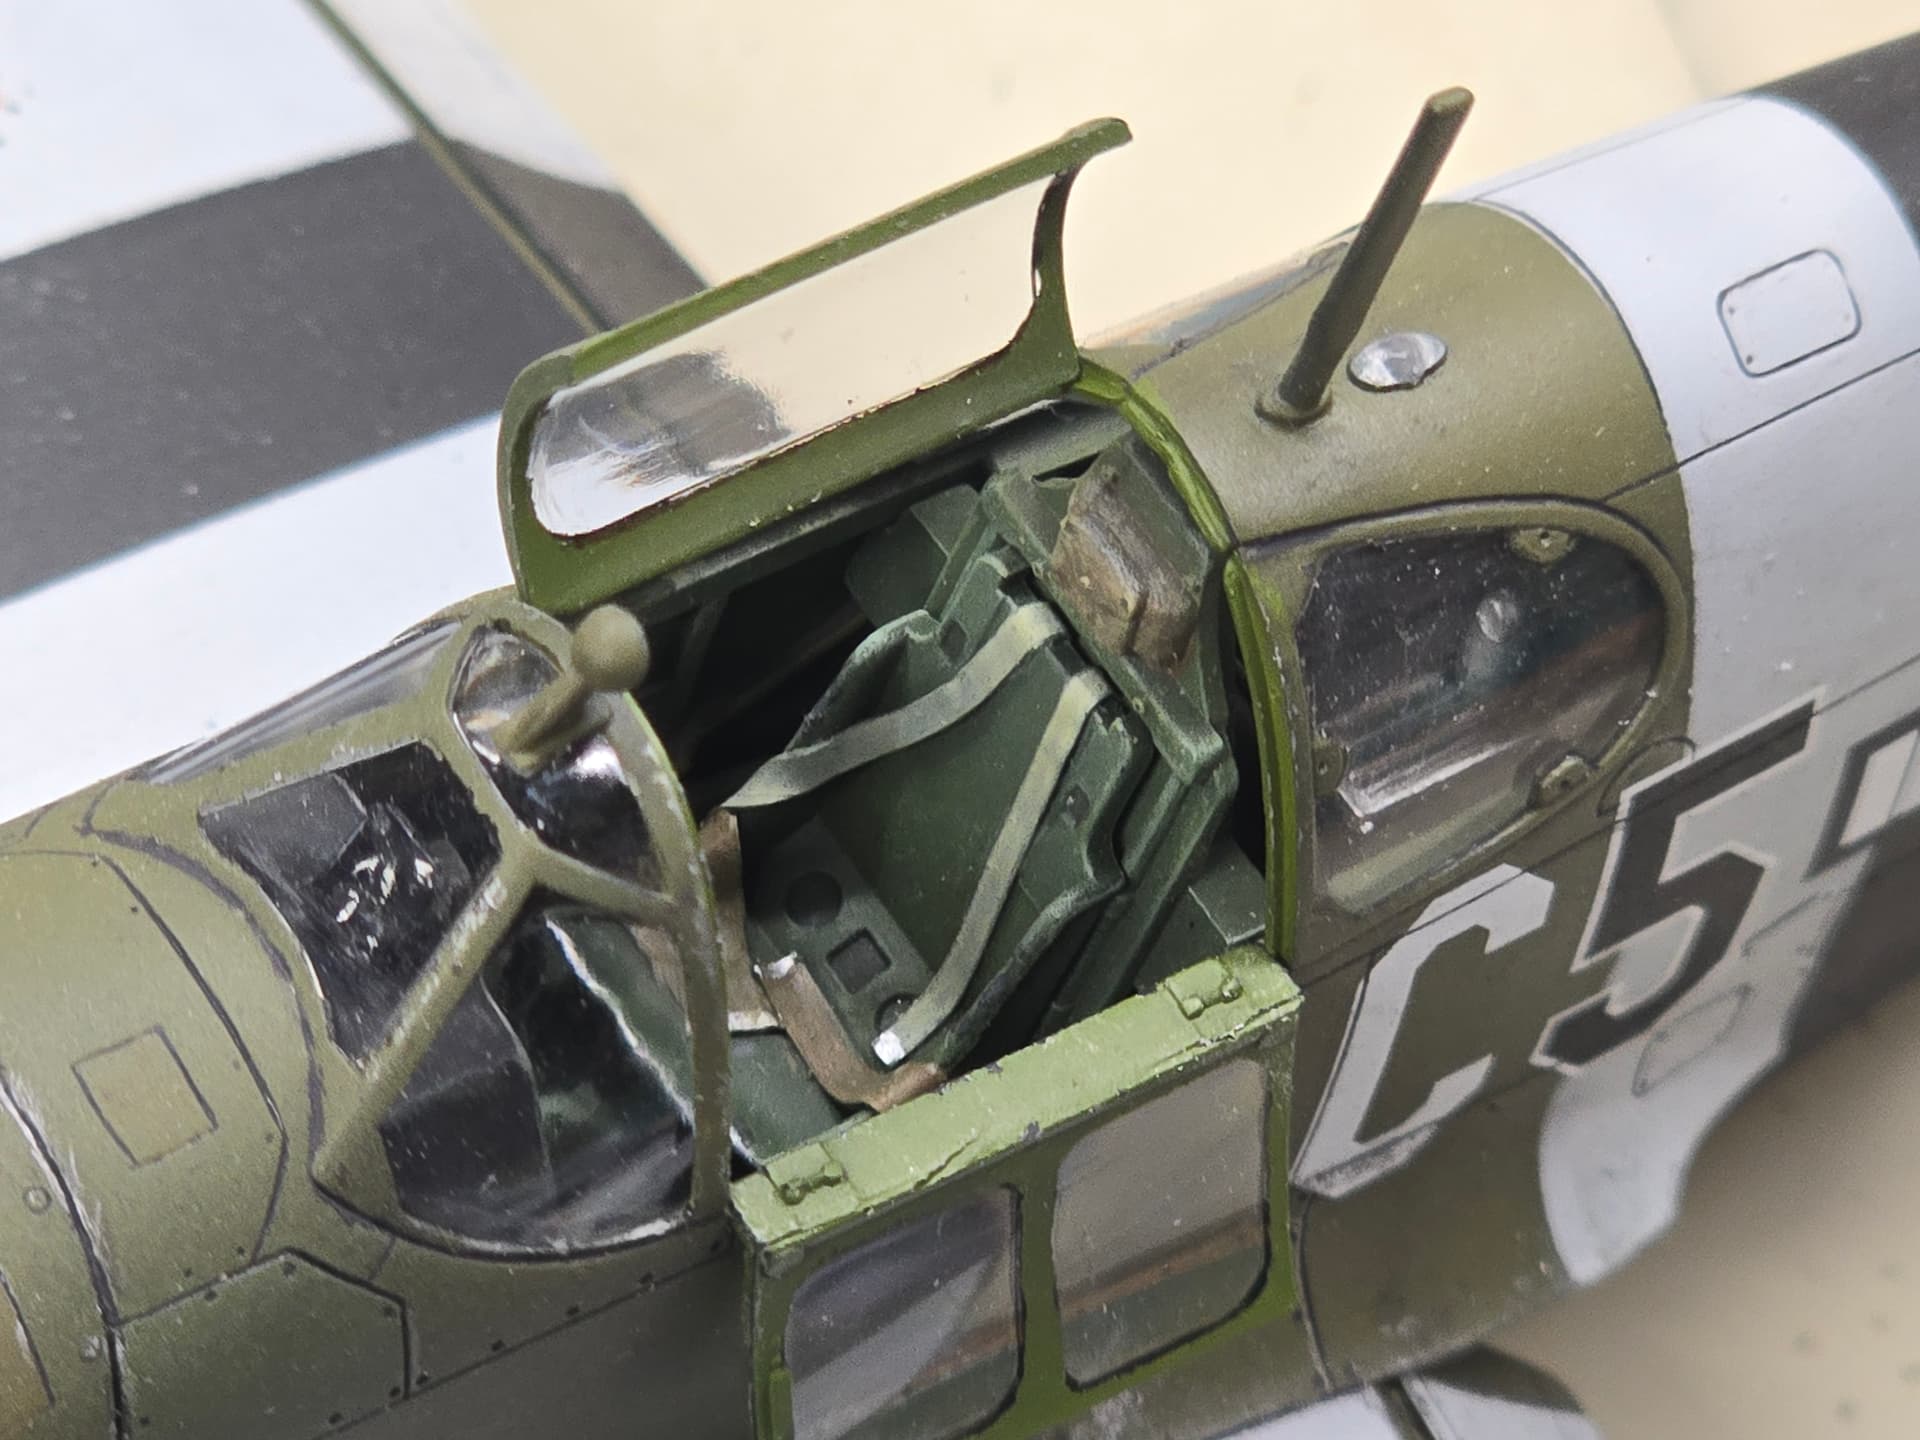
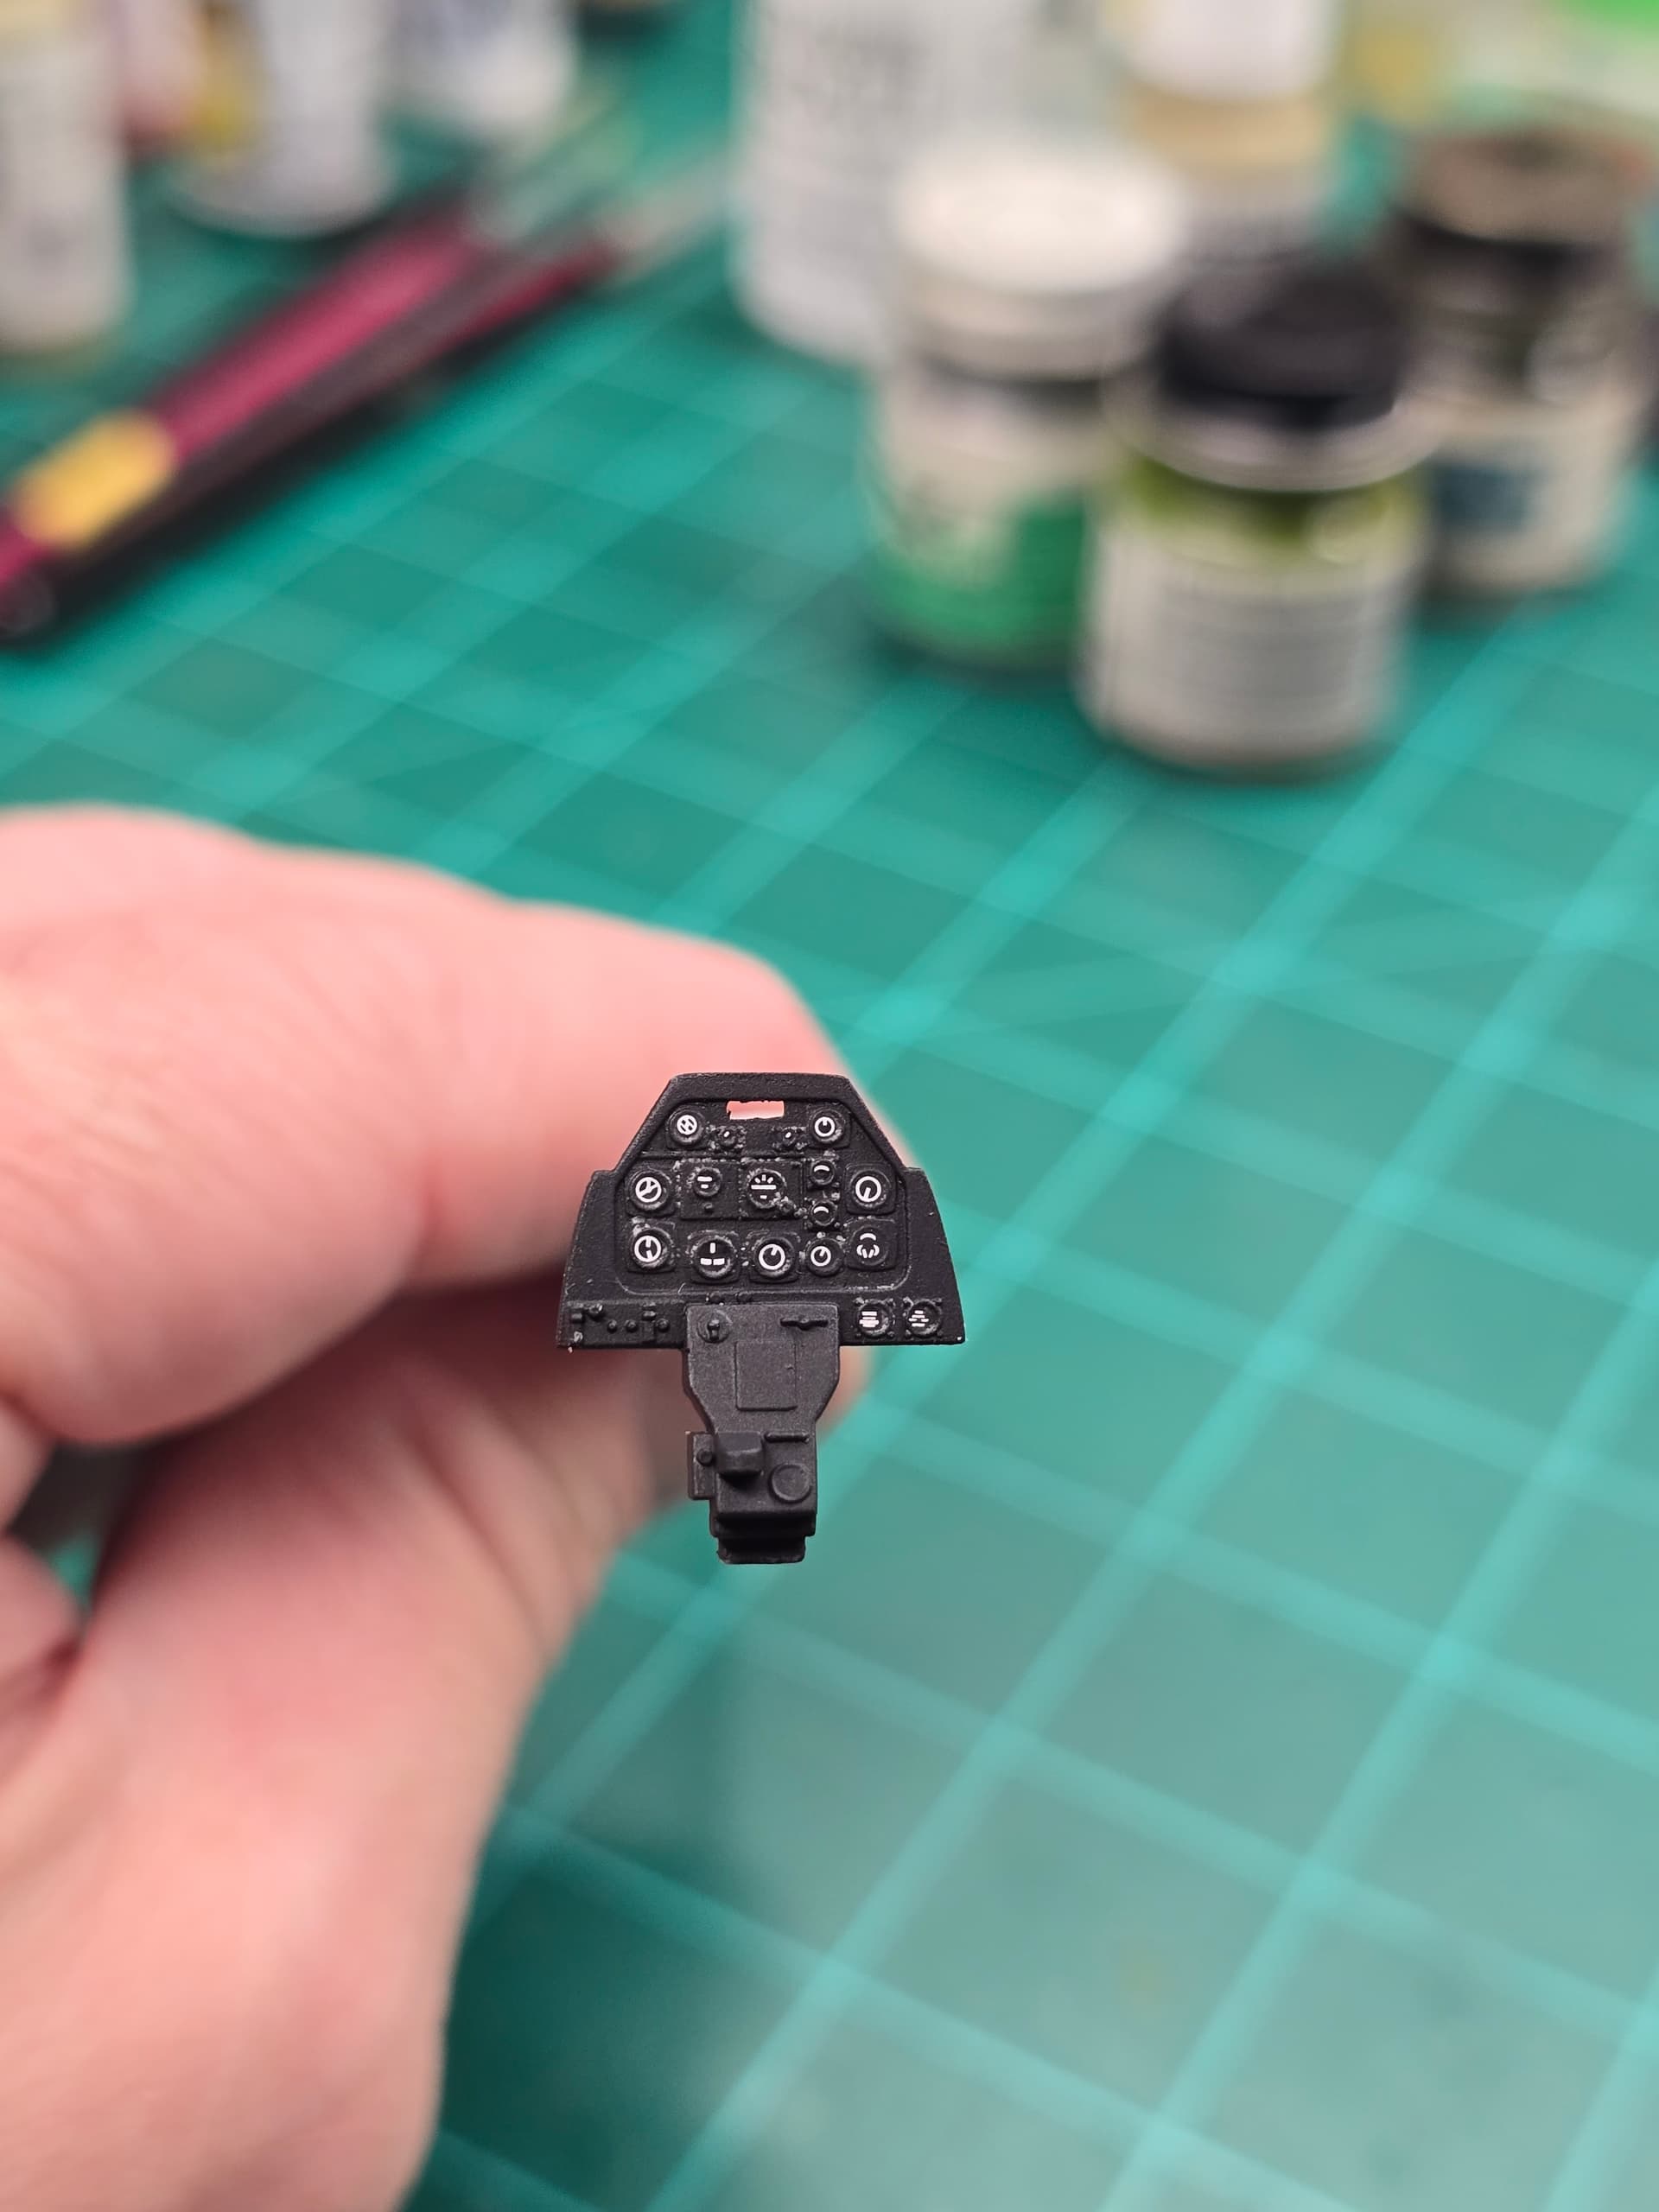
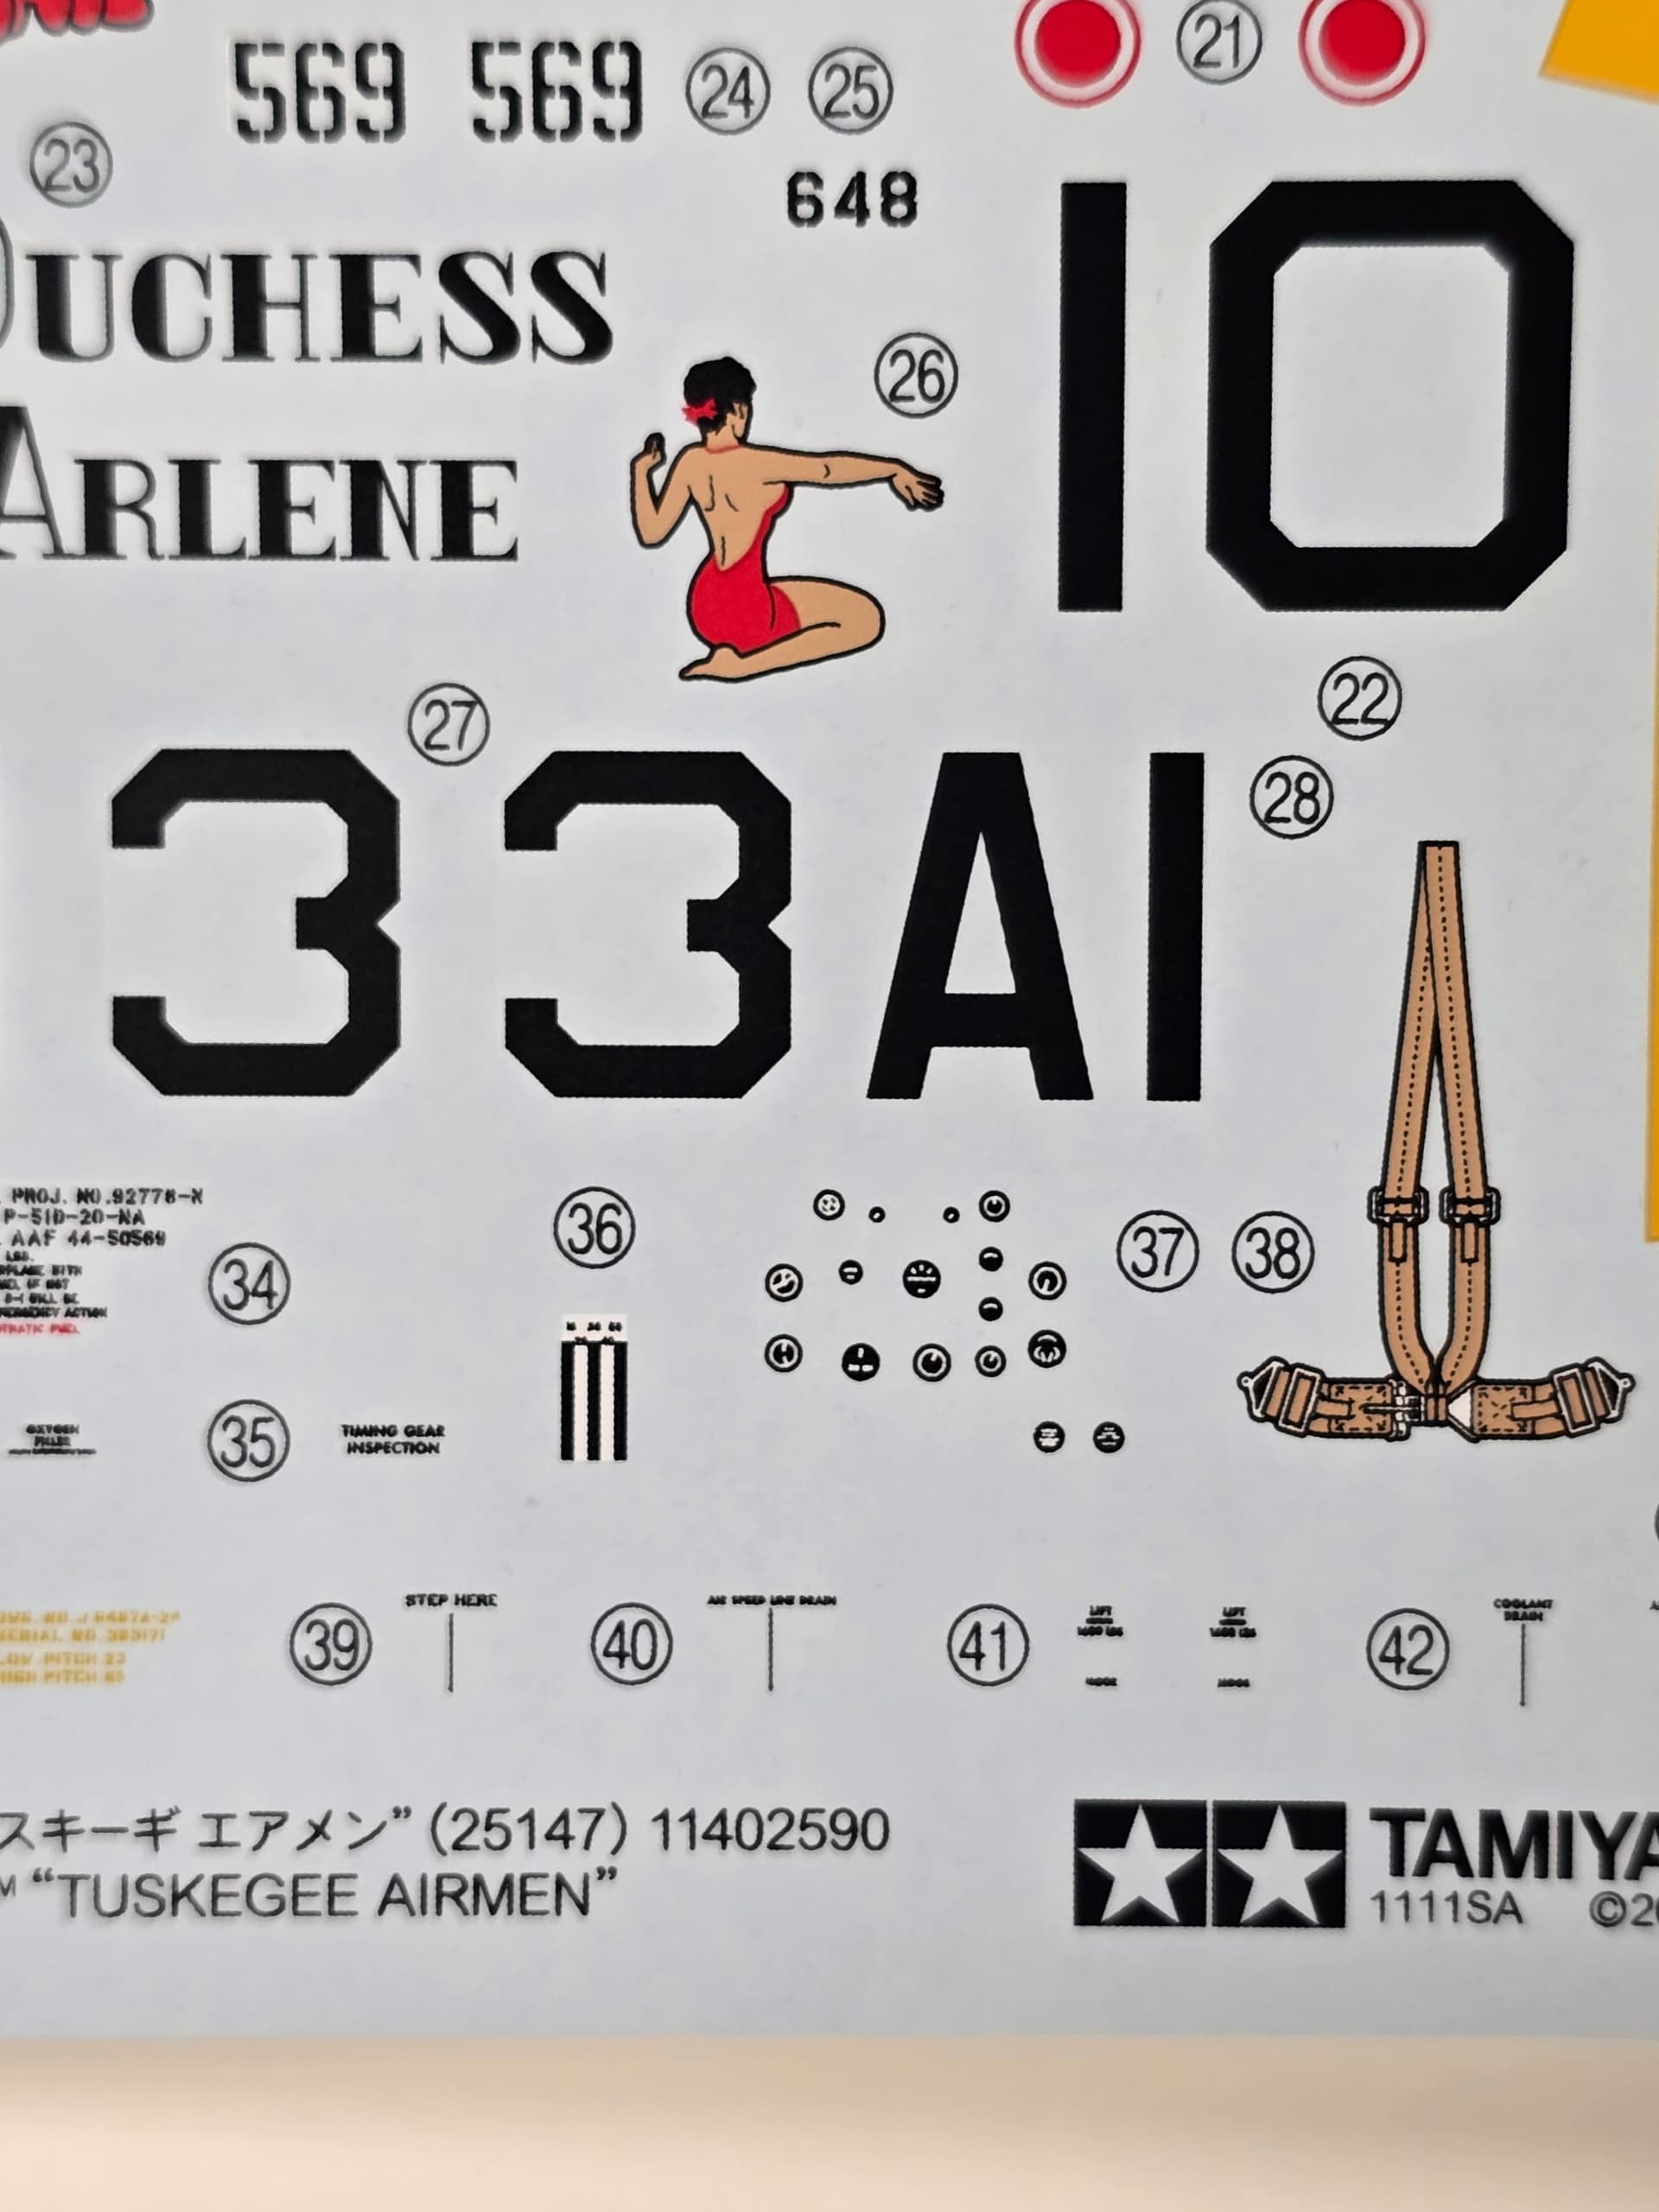
One thing that I am blown away by is the instrument panels decal. It is very plain Jane with simple detail. I checked the Tuskegee Airmens P-51 by Tamiya and the IP decal is more elaborate.
Both of these offerings are the revised kits where they changed the attachment points on the clear parts. Instead of being on the glass itself marring the glasses surface, Tamiya relocated the points to the bottom section of the glass. With that being said, they also added a decal for the instrument panel and who would have thought, that they would do two different styles? ![]()
The weekends here and hopefully I’ll be able to get more bench time!
Happy Modeling,
Mike
3 Likes
Update 4
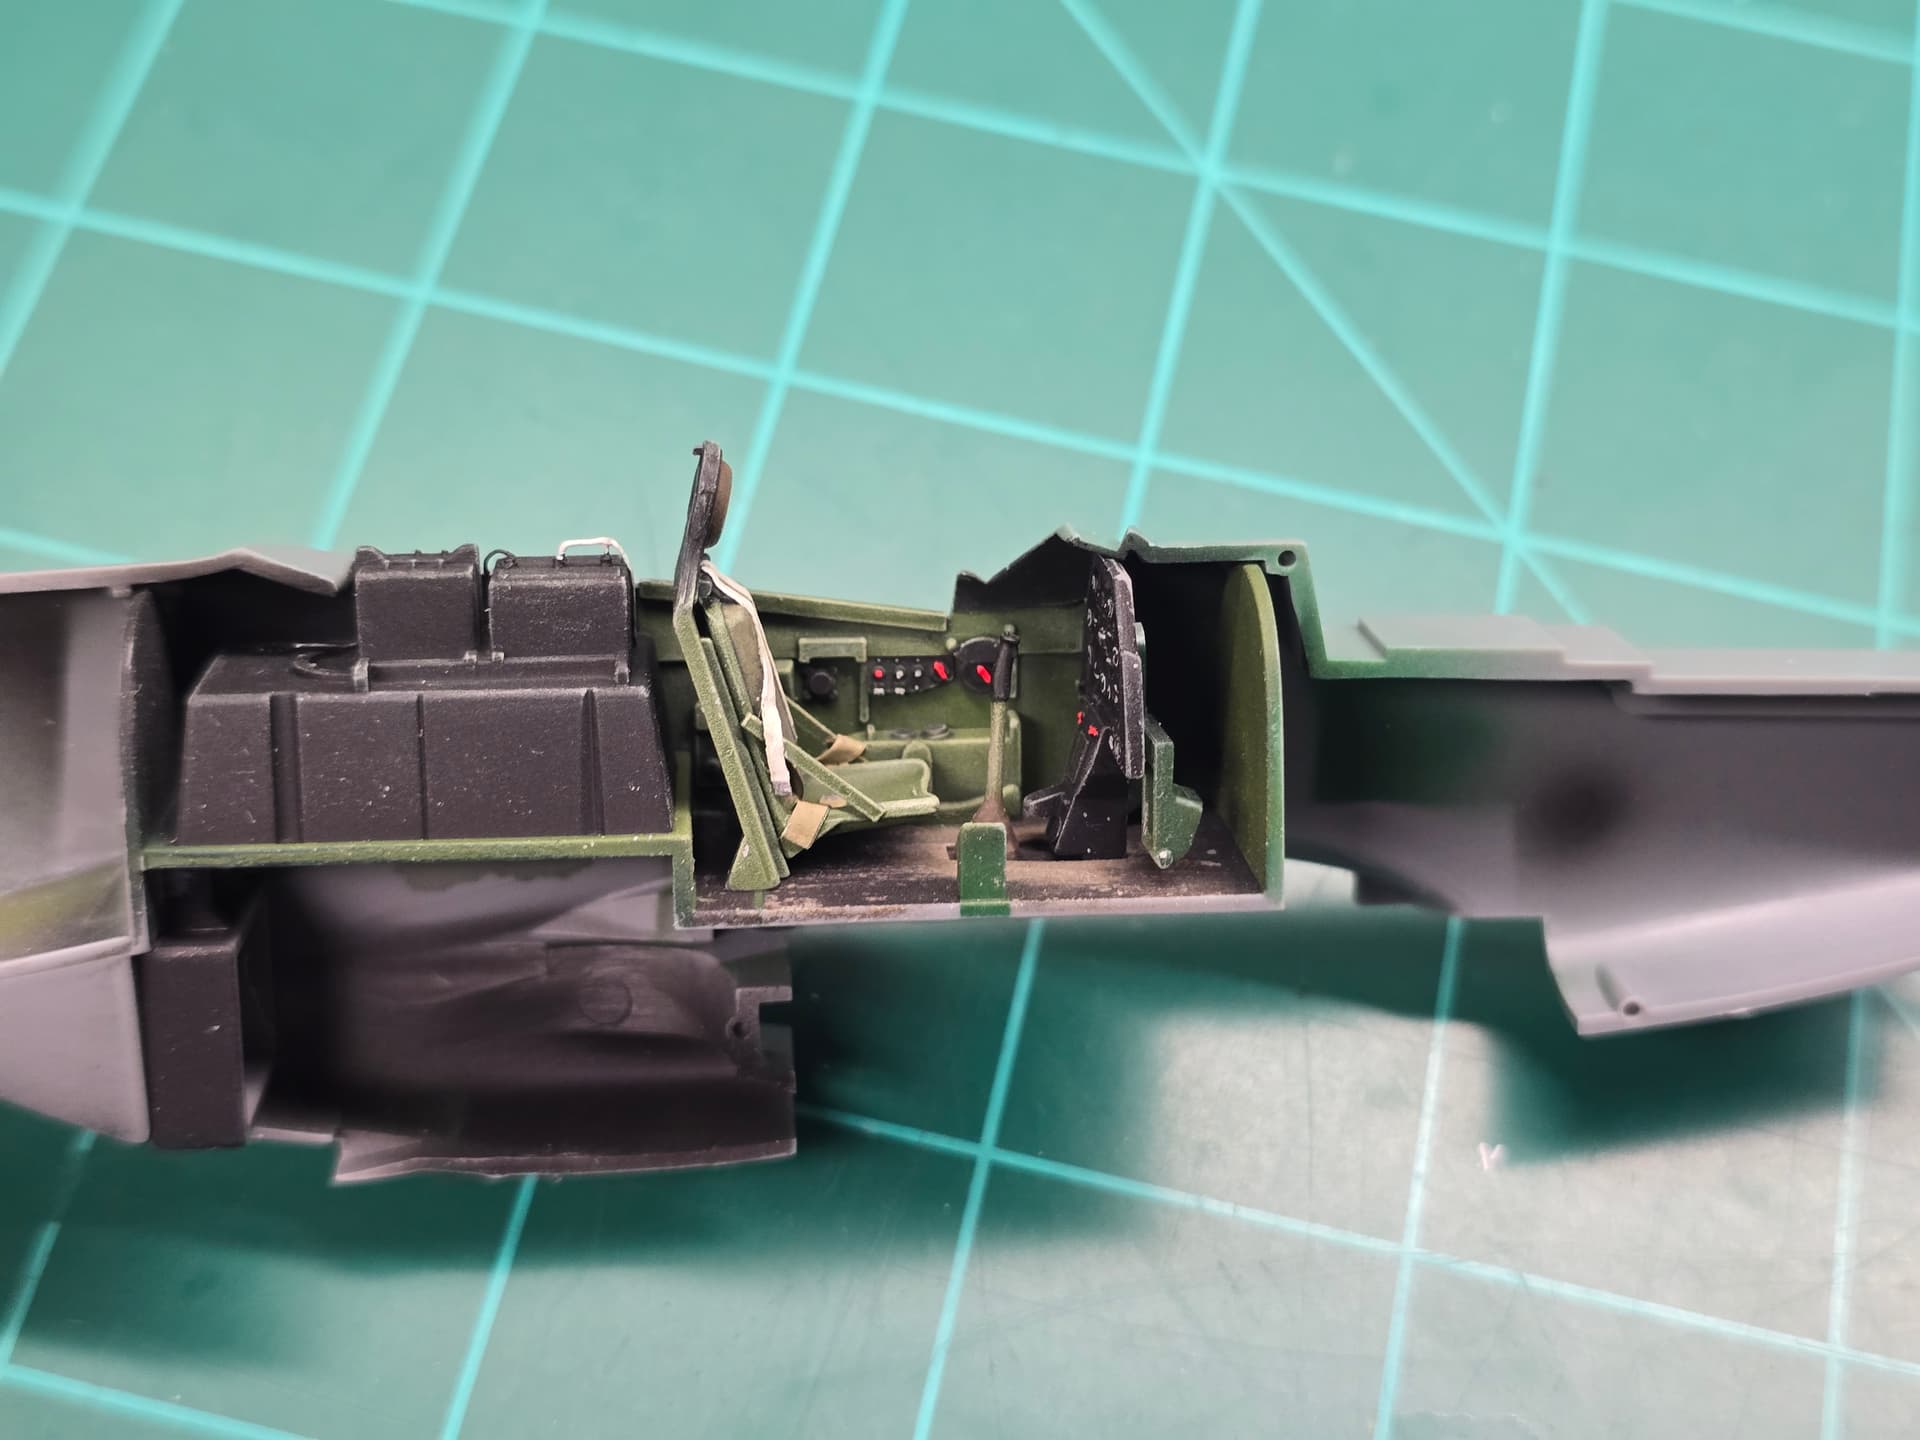
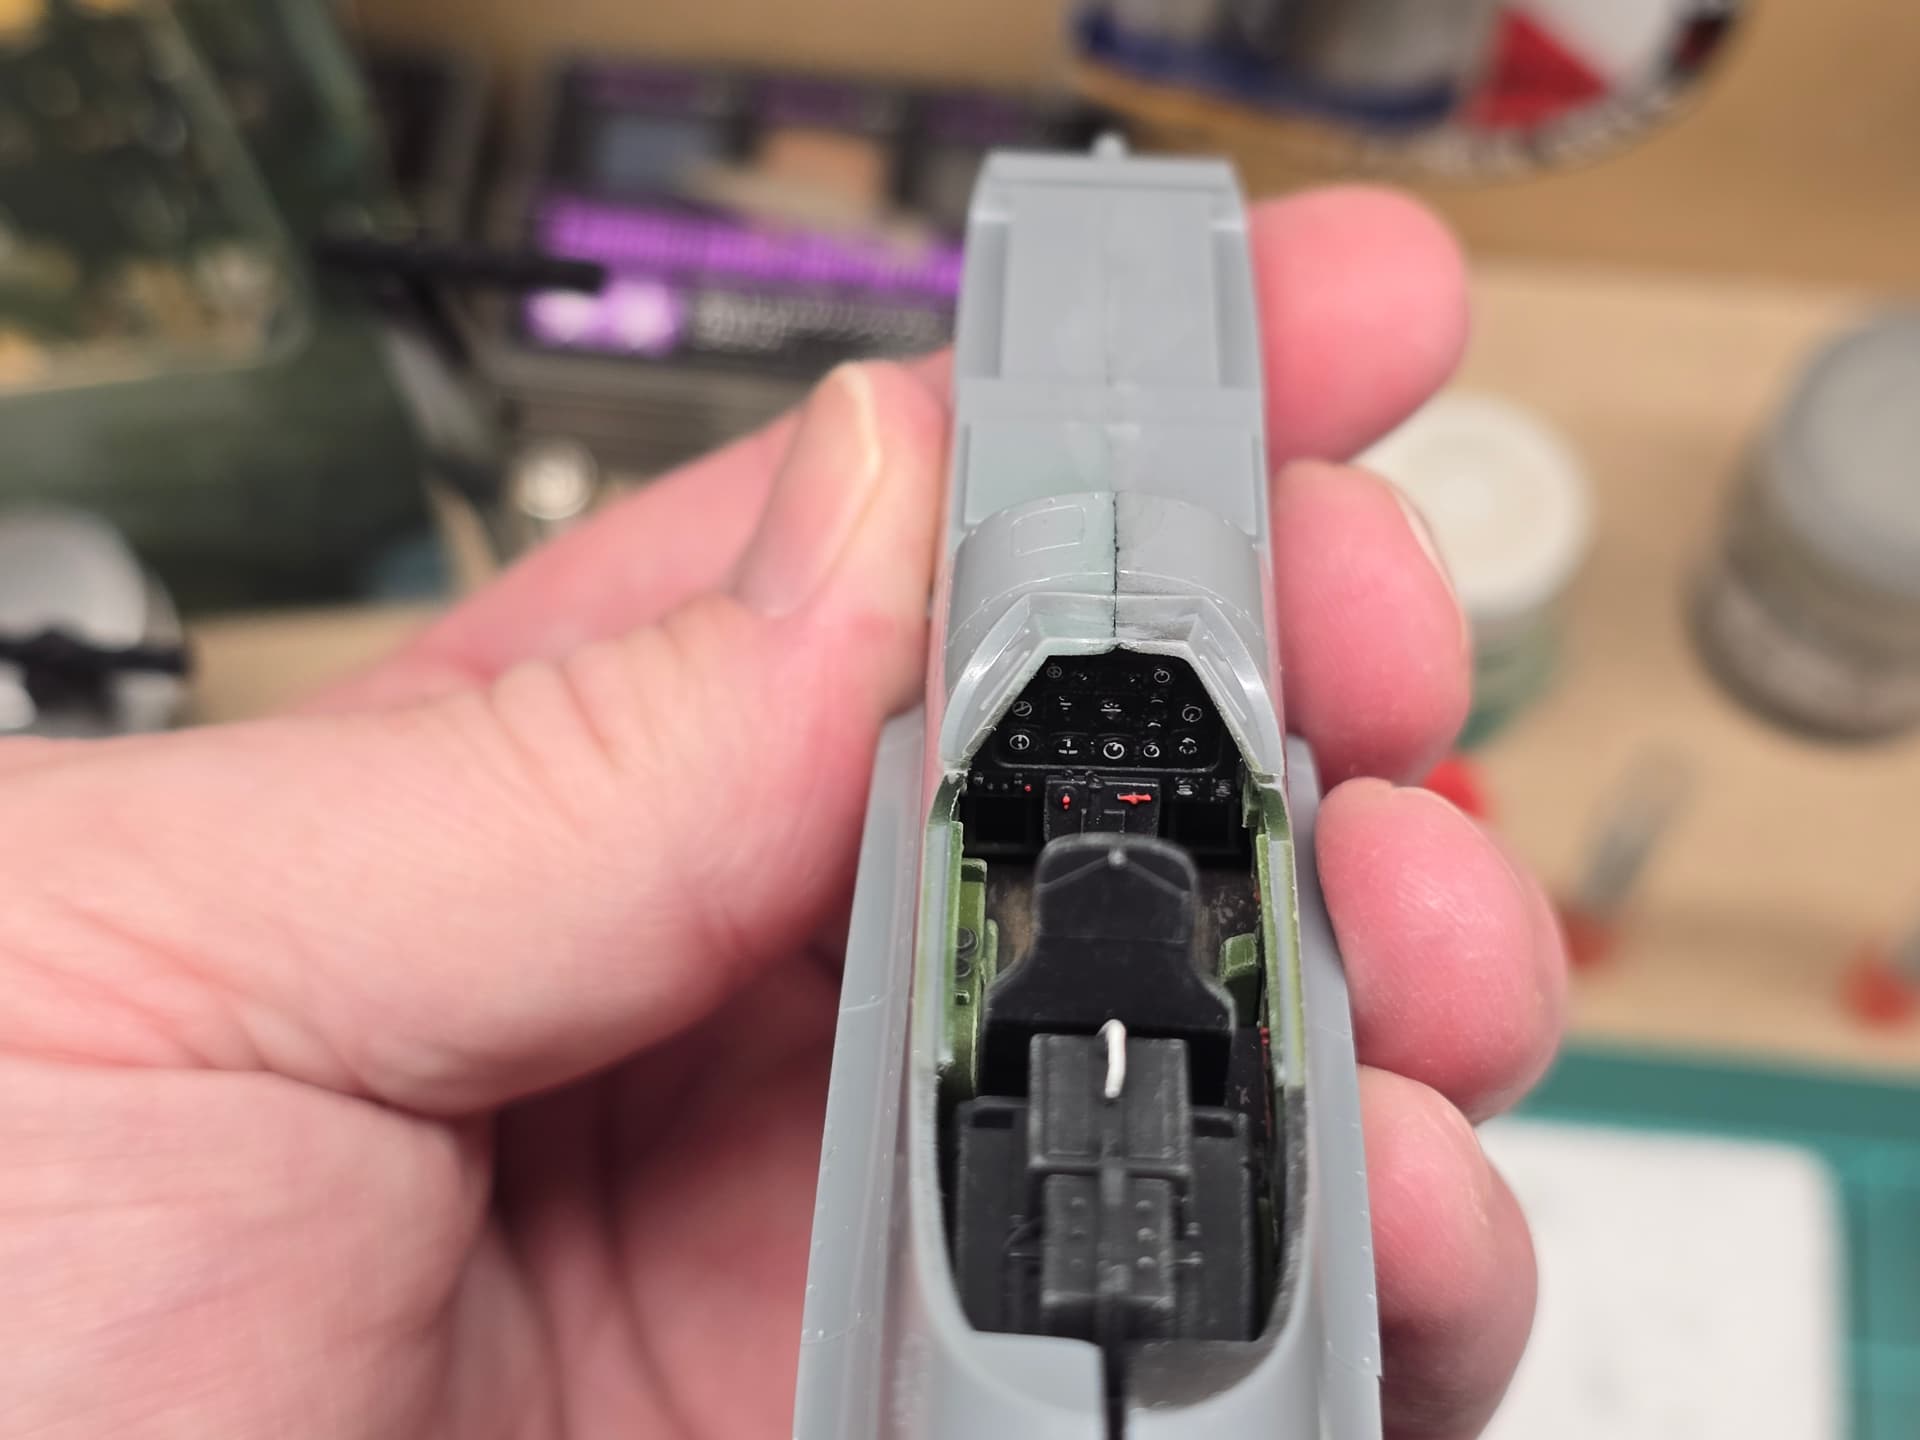
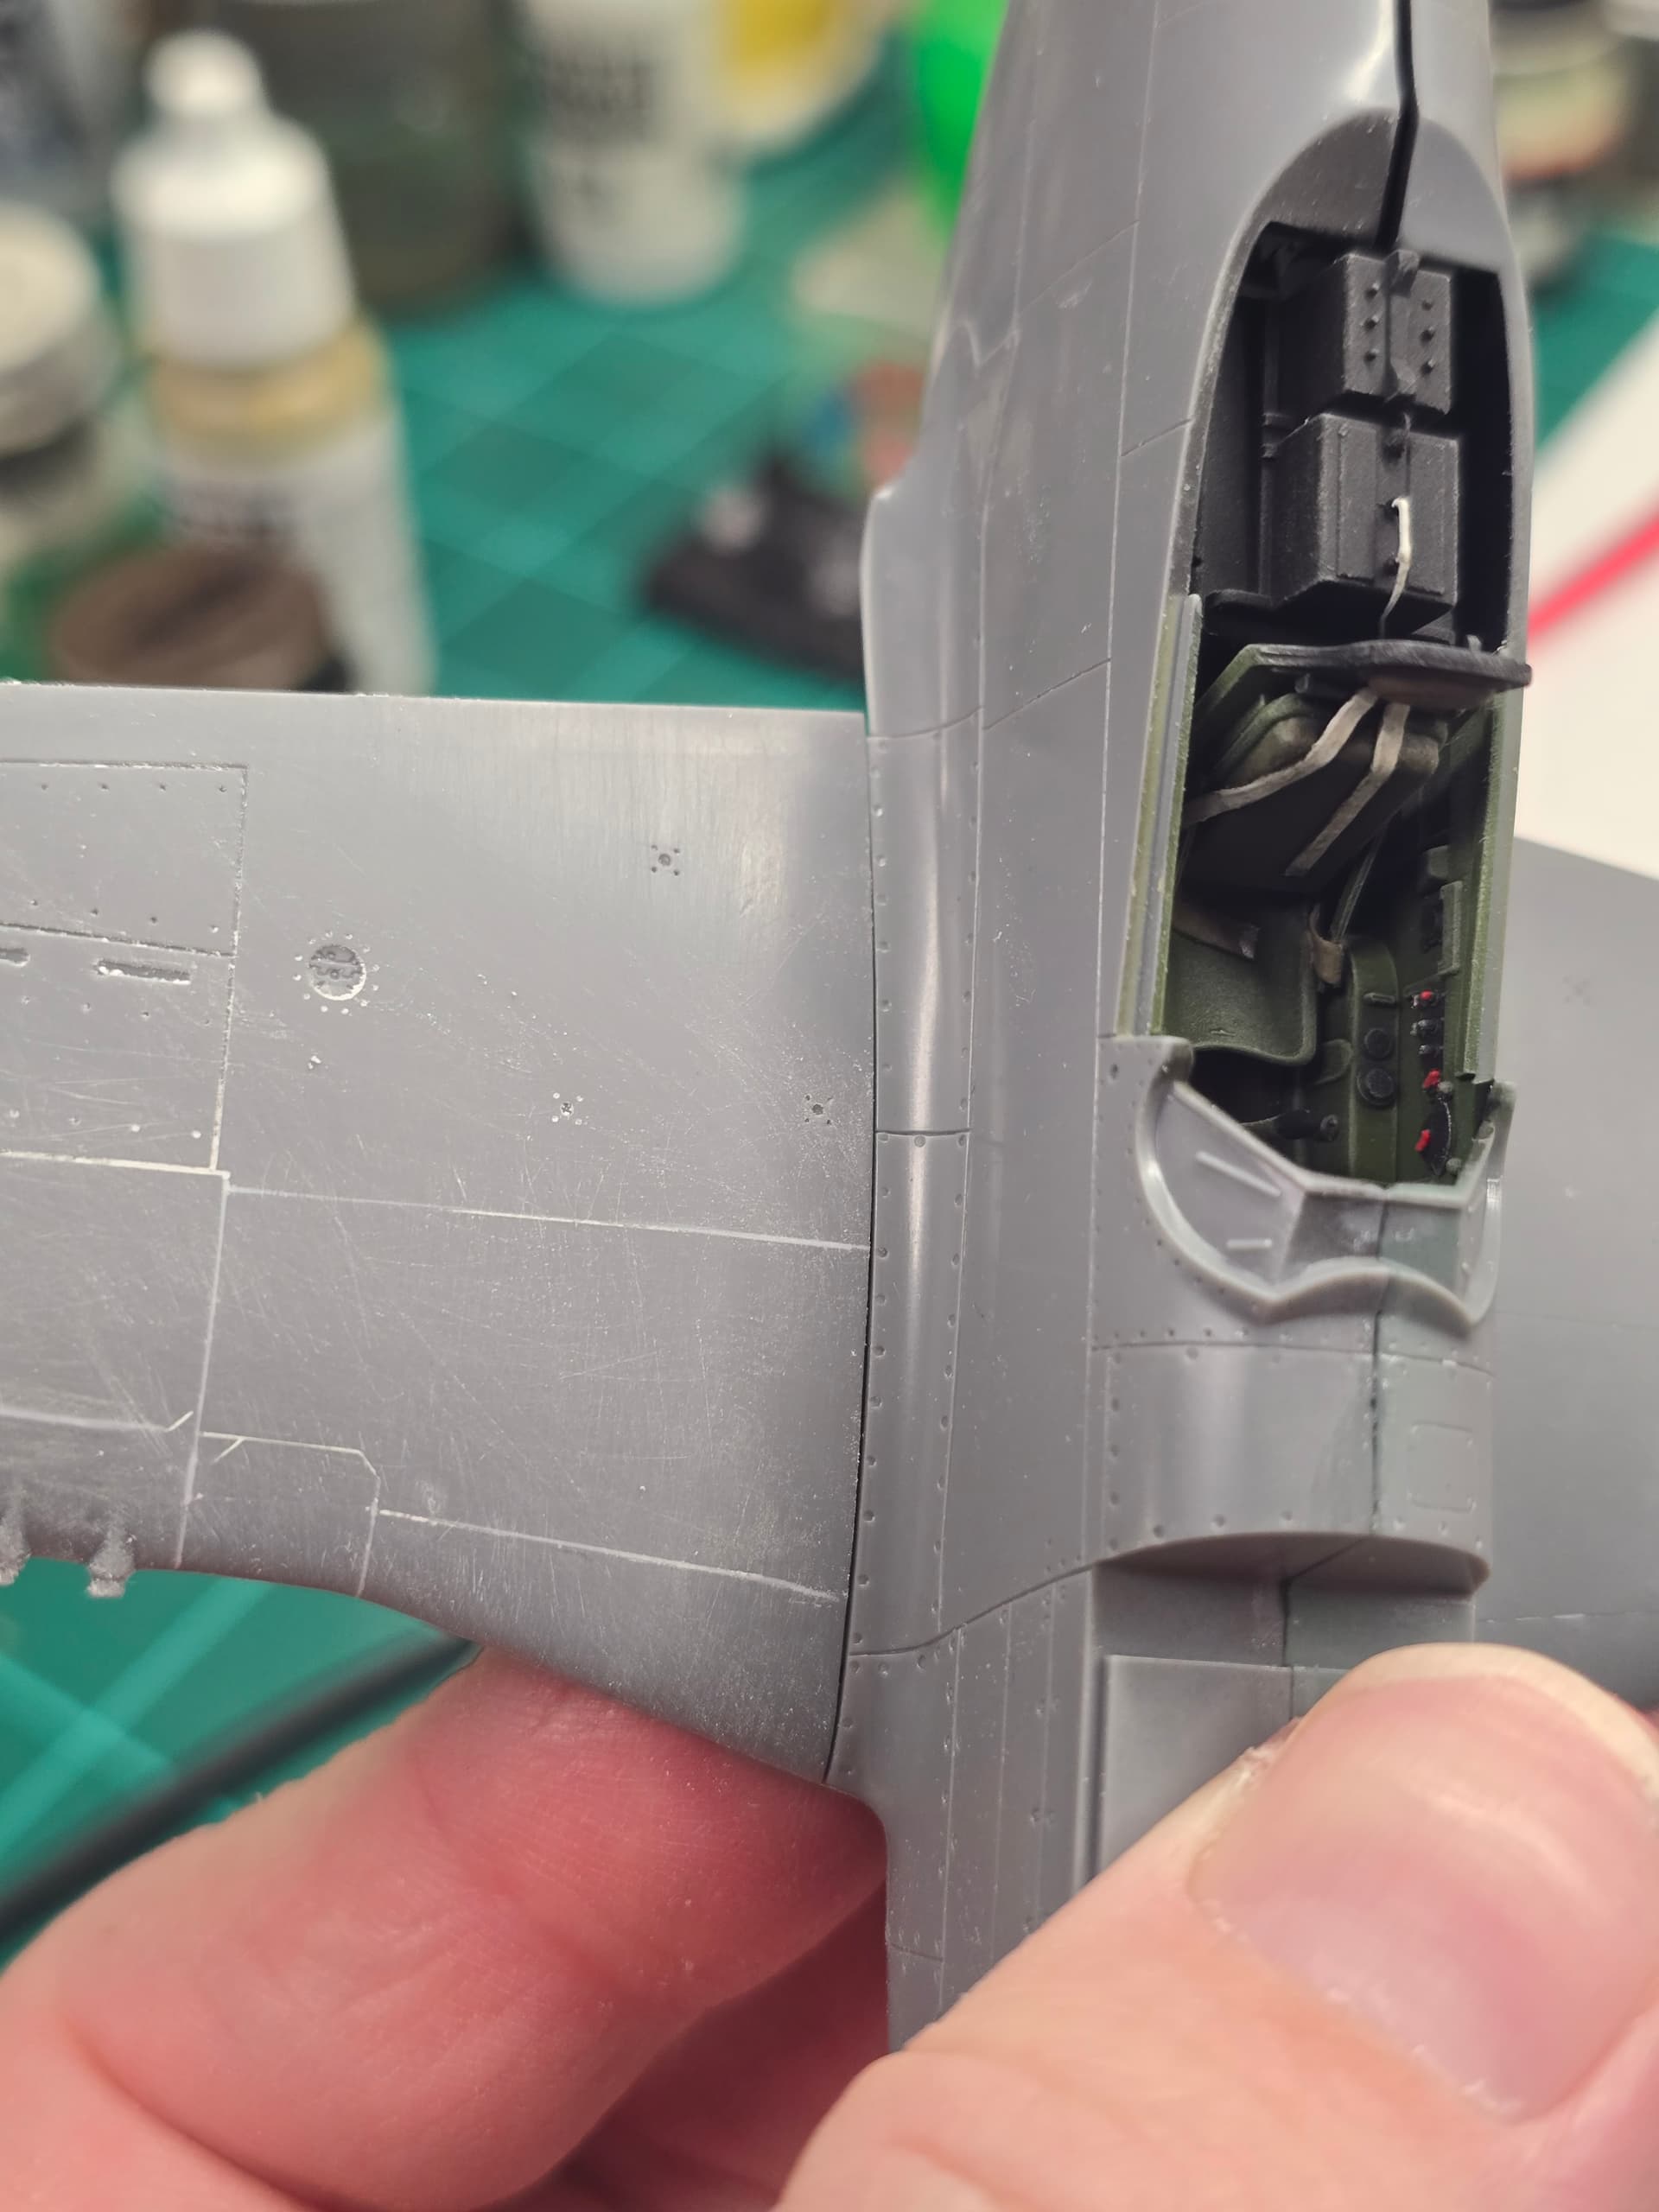
I made a little more headway with the Stang. Interior all done and fuselage has been buttoned up along with the interior.
Overall pleased minus the IP decal. Still baffles me but this will be essentially done out of the box minus the final markings.
Happy Modeling,
Mike
3 Likes
Nothing more satisfying than closing up the fuselage. Lookin forward to the next update.
1 Like
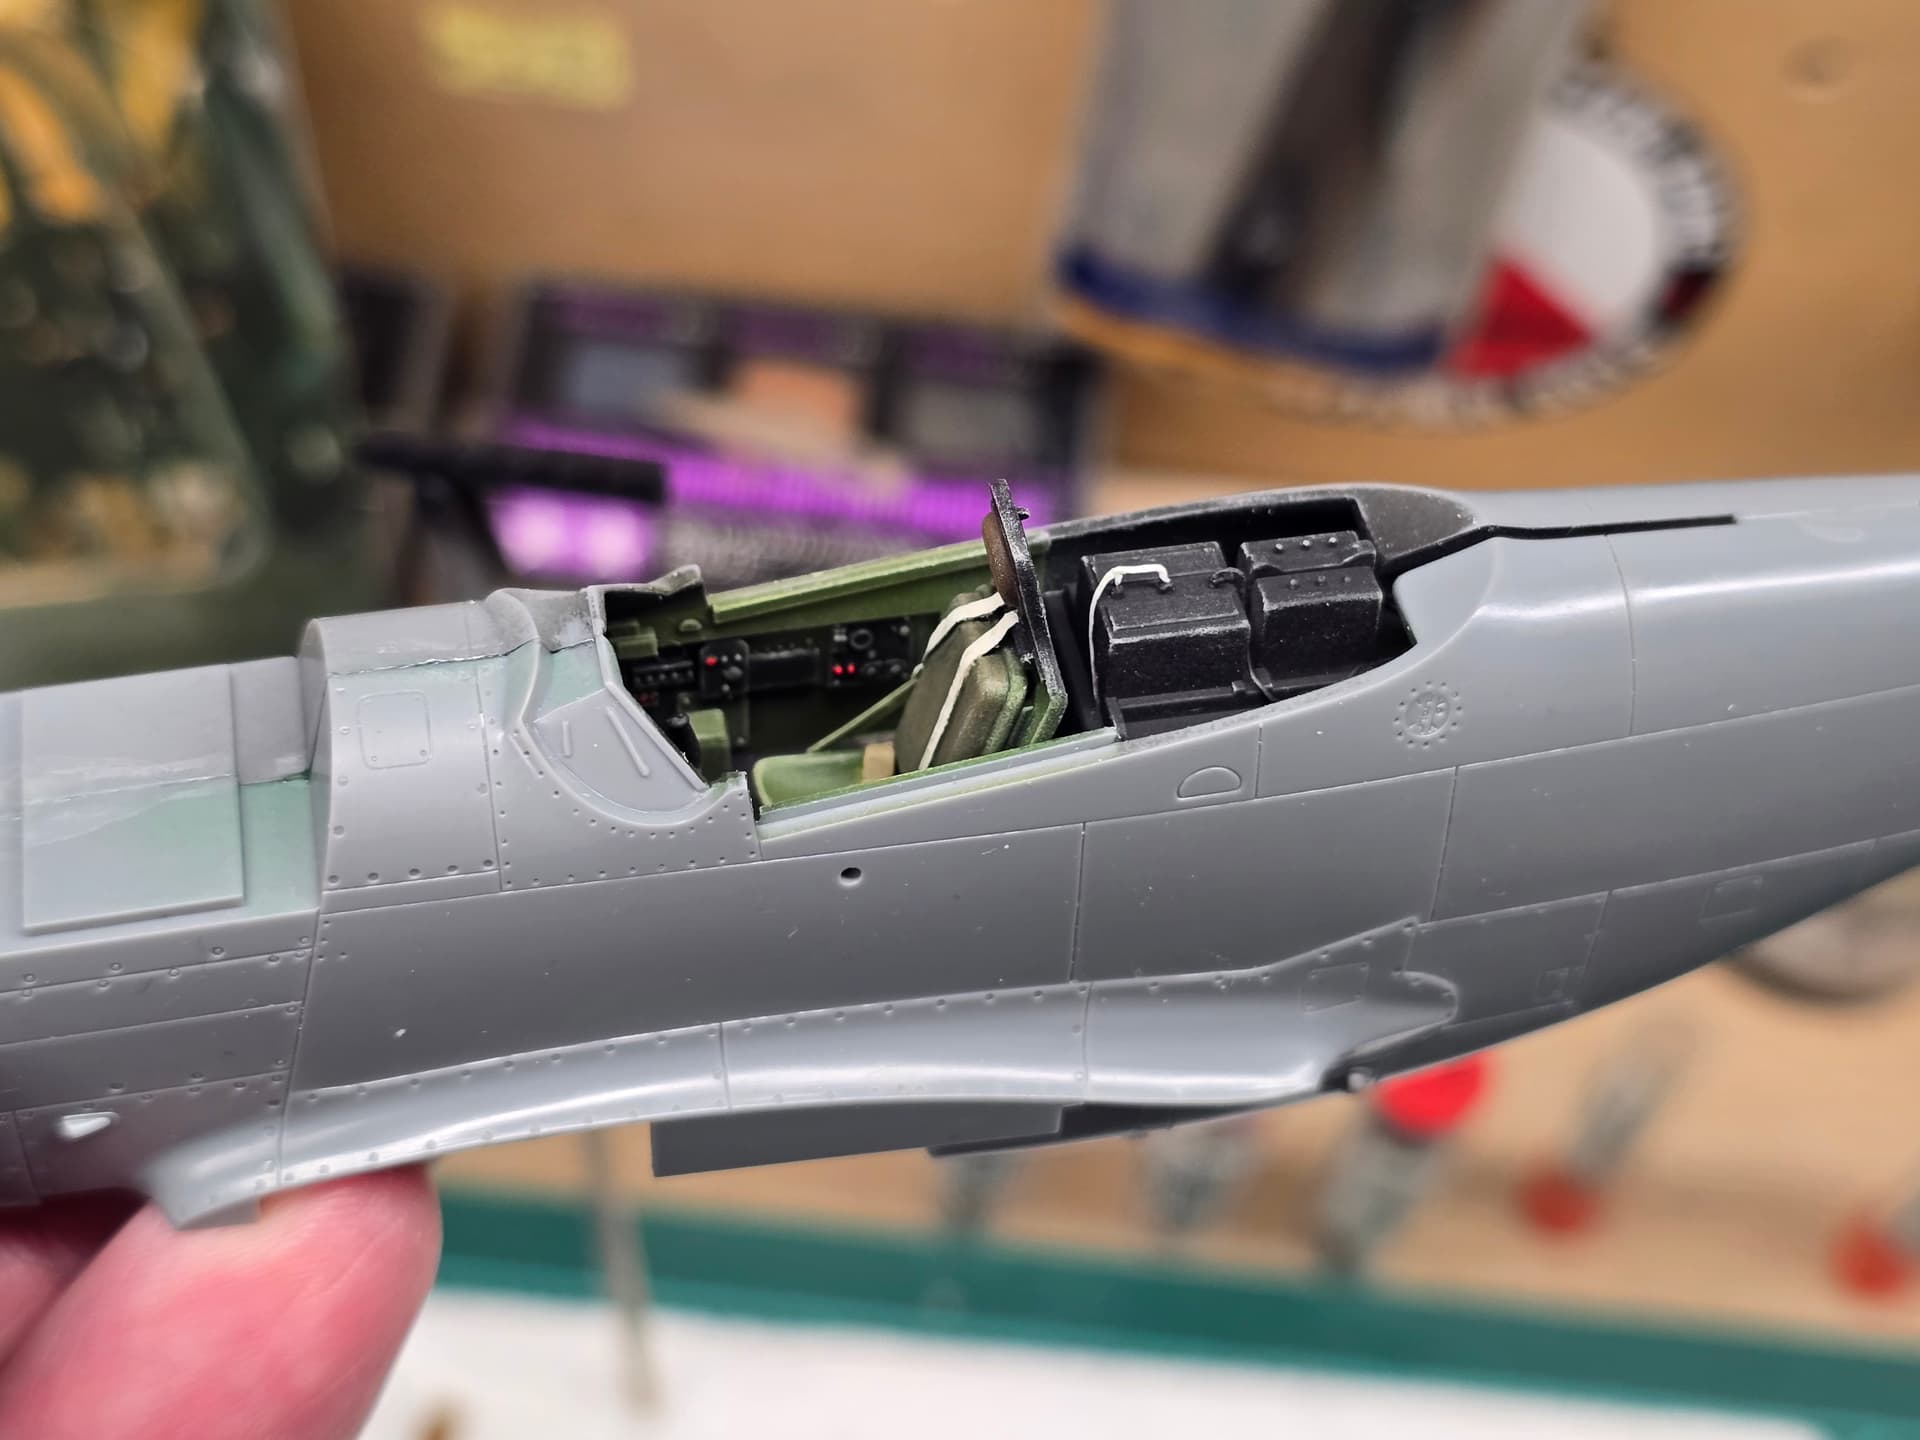
Lookin’ good Mike. Sorry to hear about the IP decal but looks like putting the fuselage halves together helped you out with that. ![]()
1 Like
You ain’t kidding Chris, once I closed up the fuselage, I kid you not, the Angels sang haha.
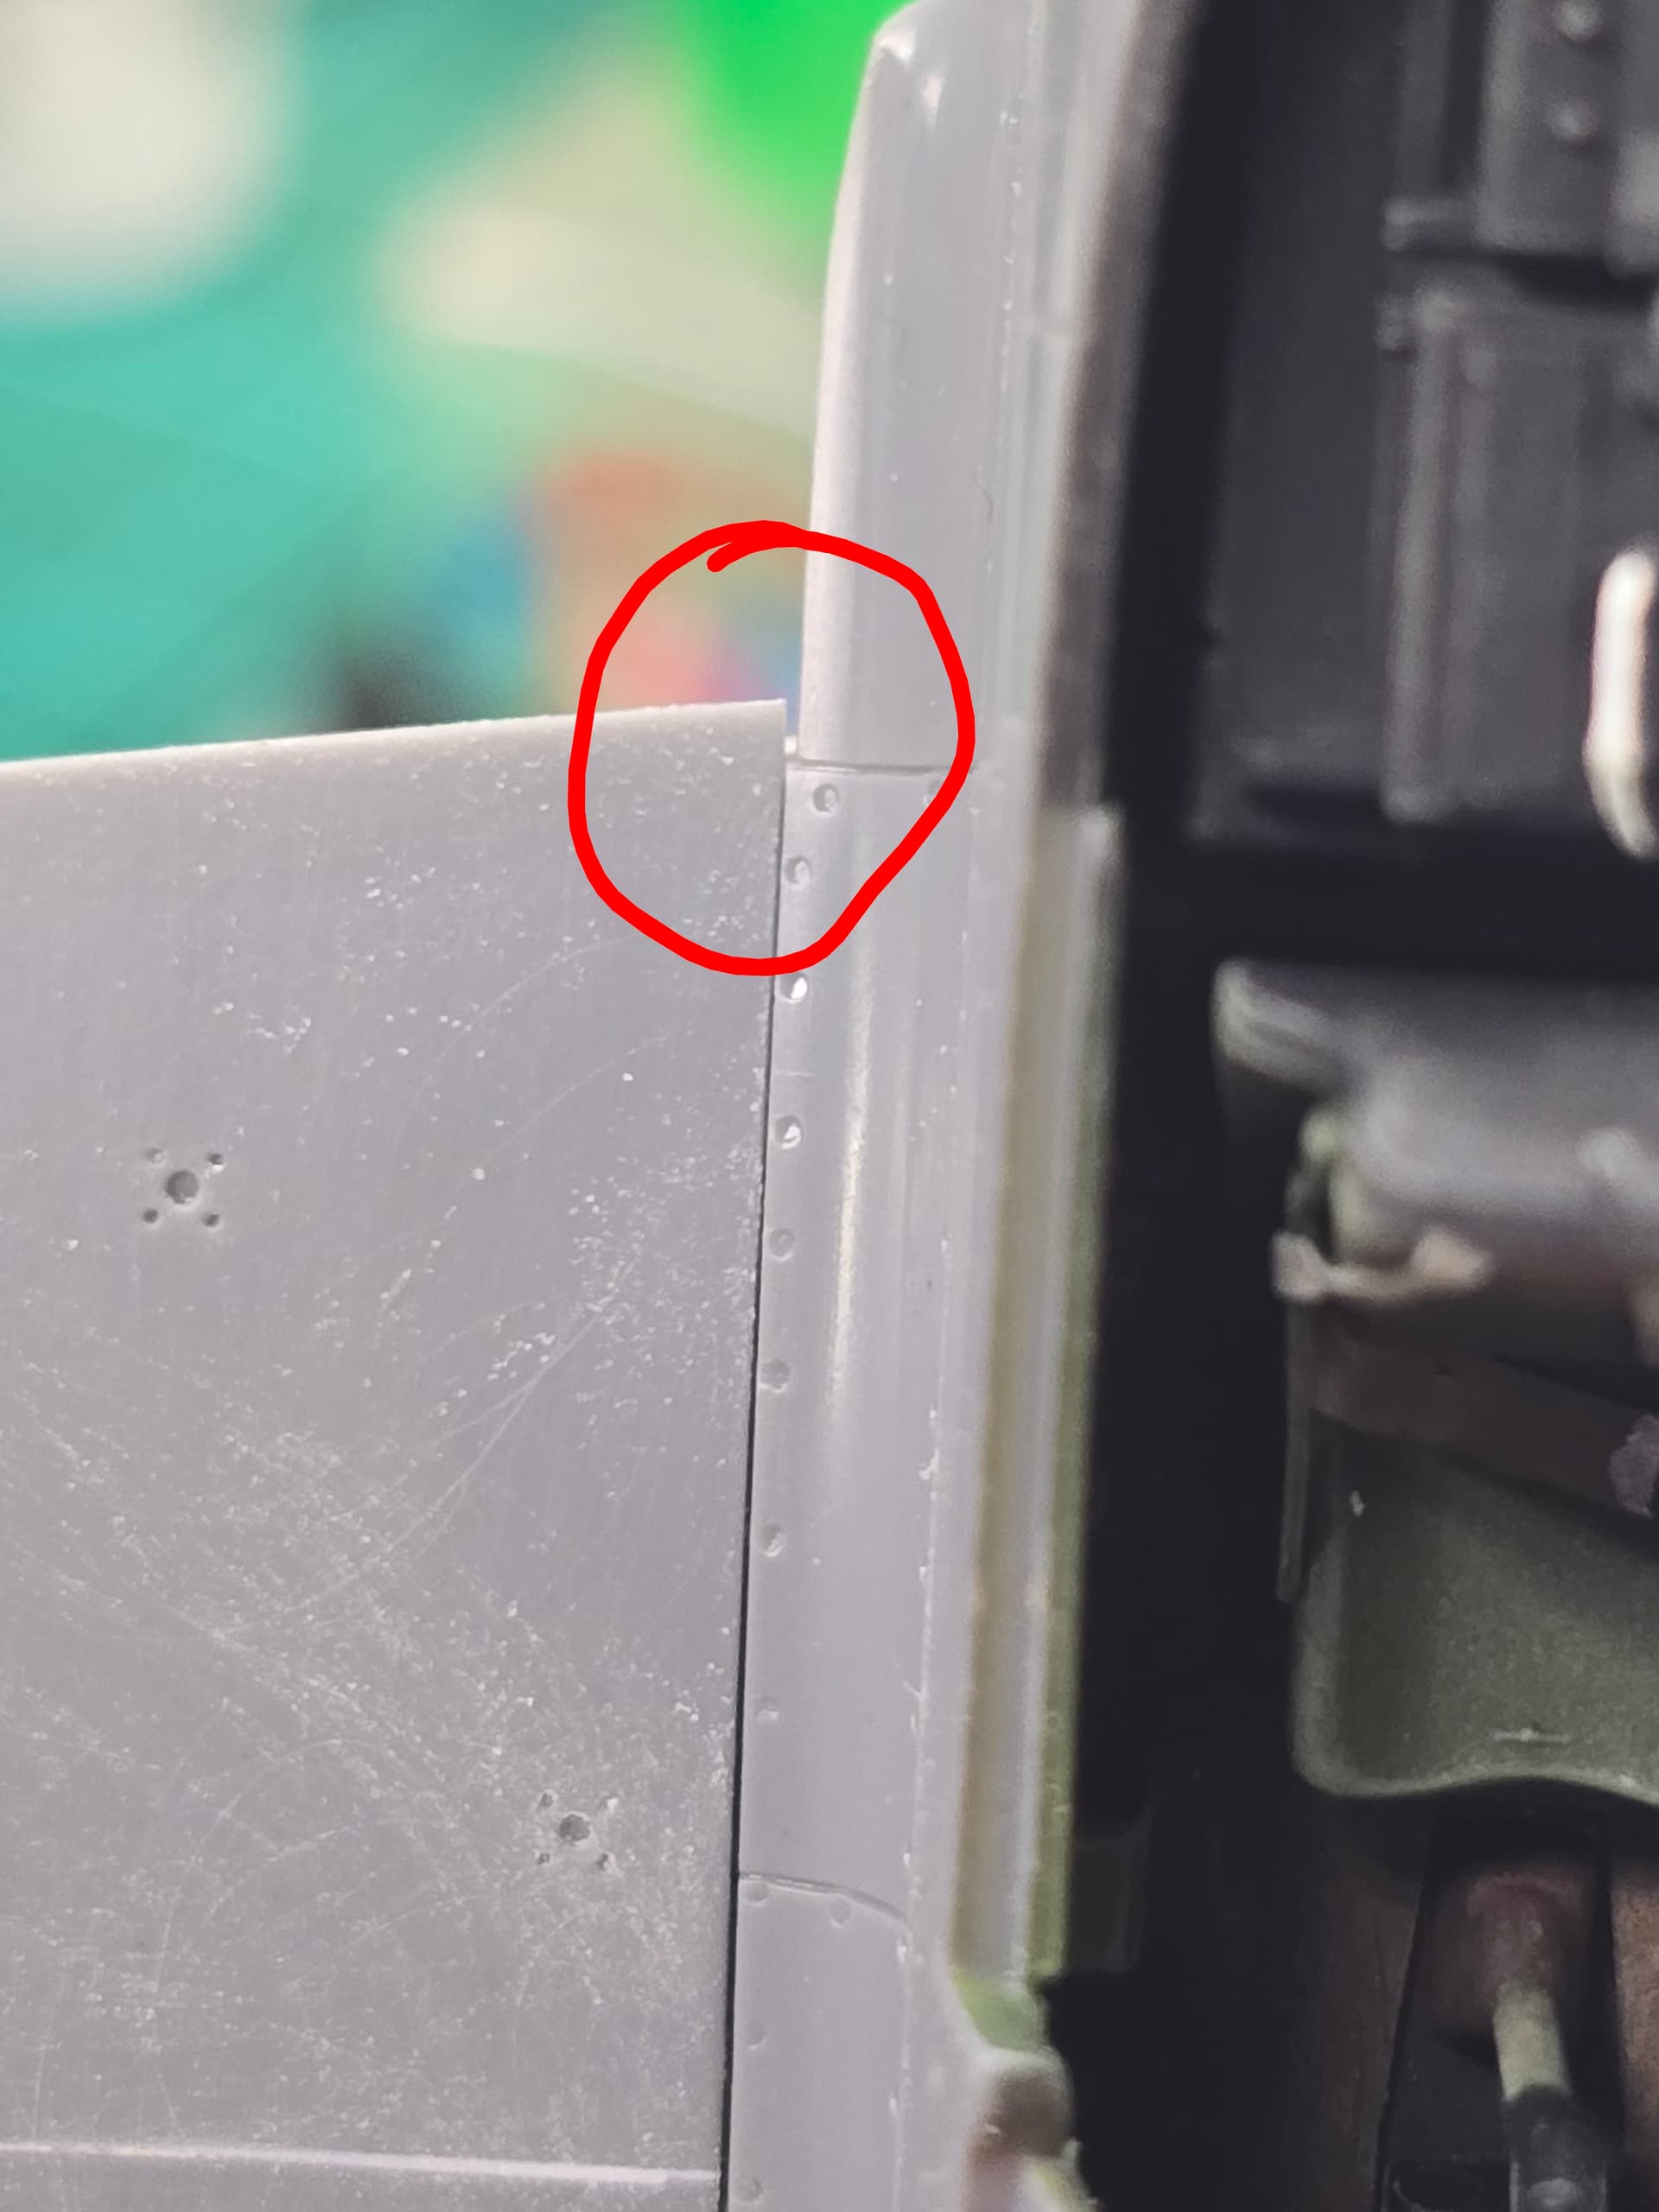
Last night I dry fitted the wings to the fuselage and everything lined up nicely except one area.
Its on the fuselages wing root towards the rear and creates a weird step.
It’s subtle but creates a gap between the fuselage and the wing.
I’ll post a pic of that area shortly.
Happy Modeling,
Mike
Thank you thank you Joe! Yes, it definitely takes away by buttoning up the fuselage but at least to me, the IP looks decent in place.
I’ll dig out the other IP decal.and post it in a bit.
Happy Modeling,
Mike
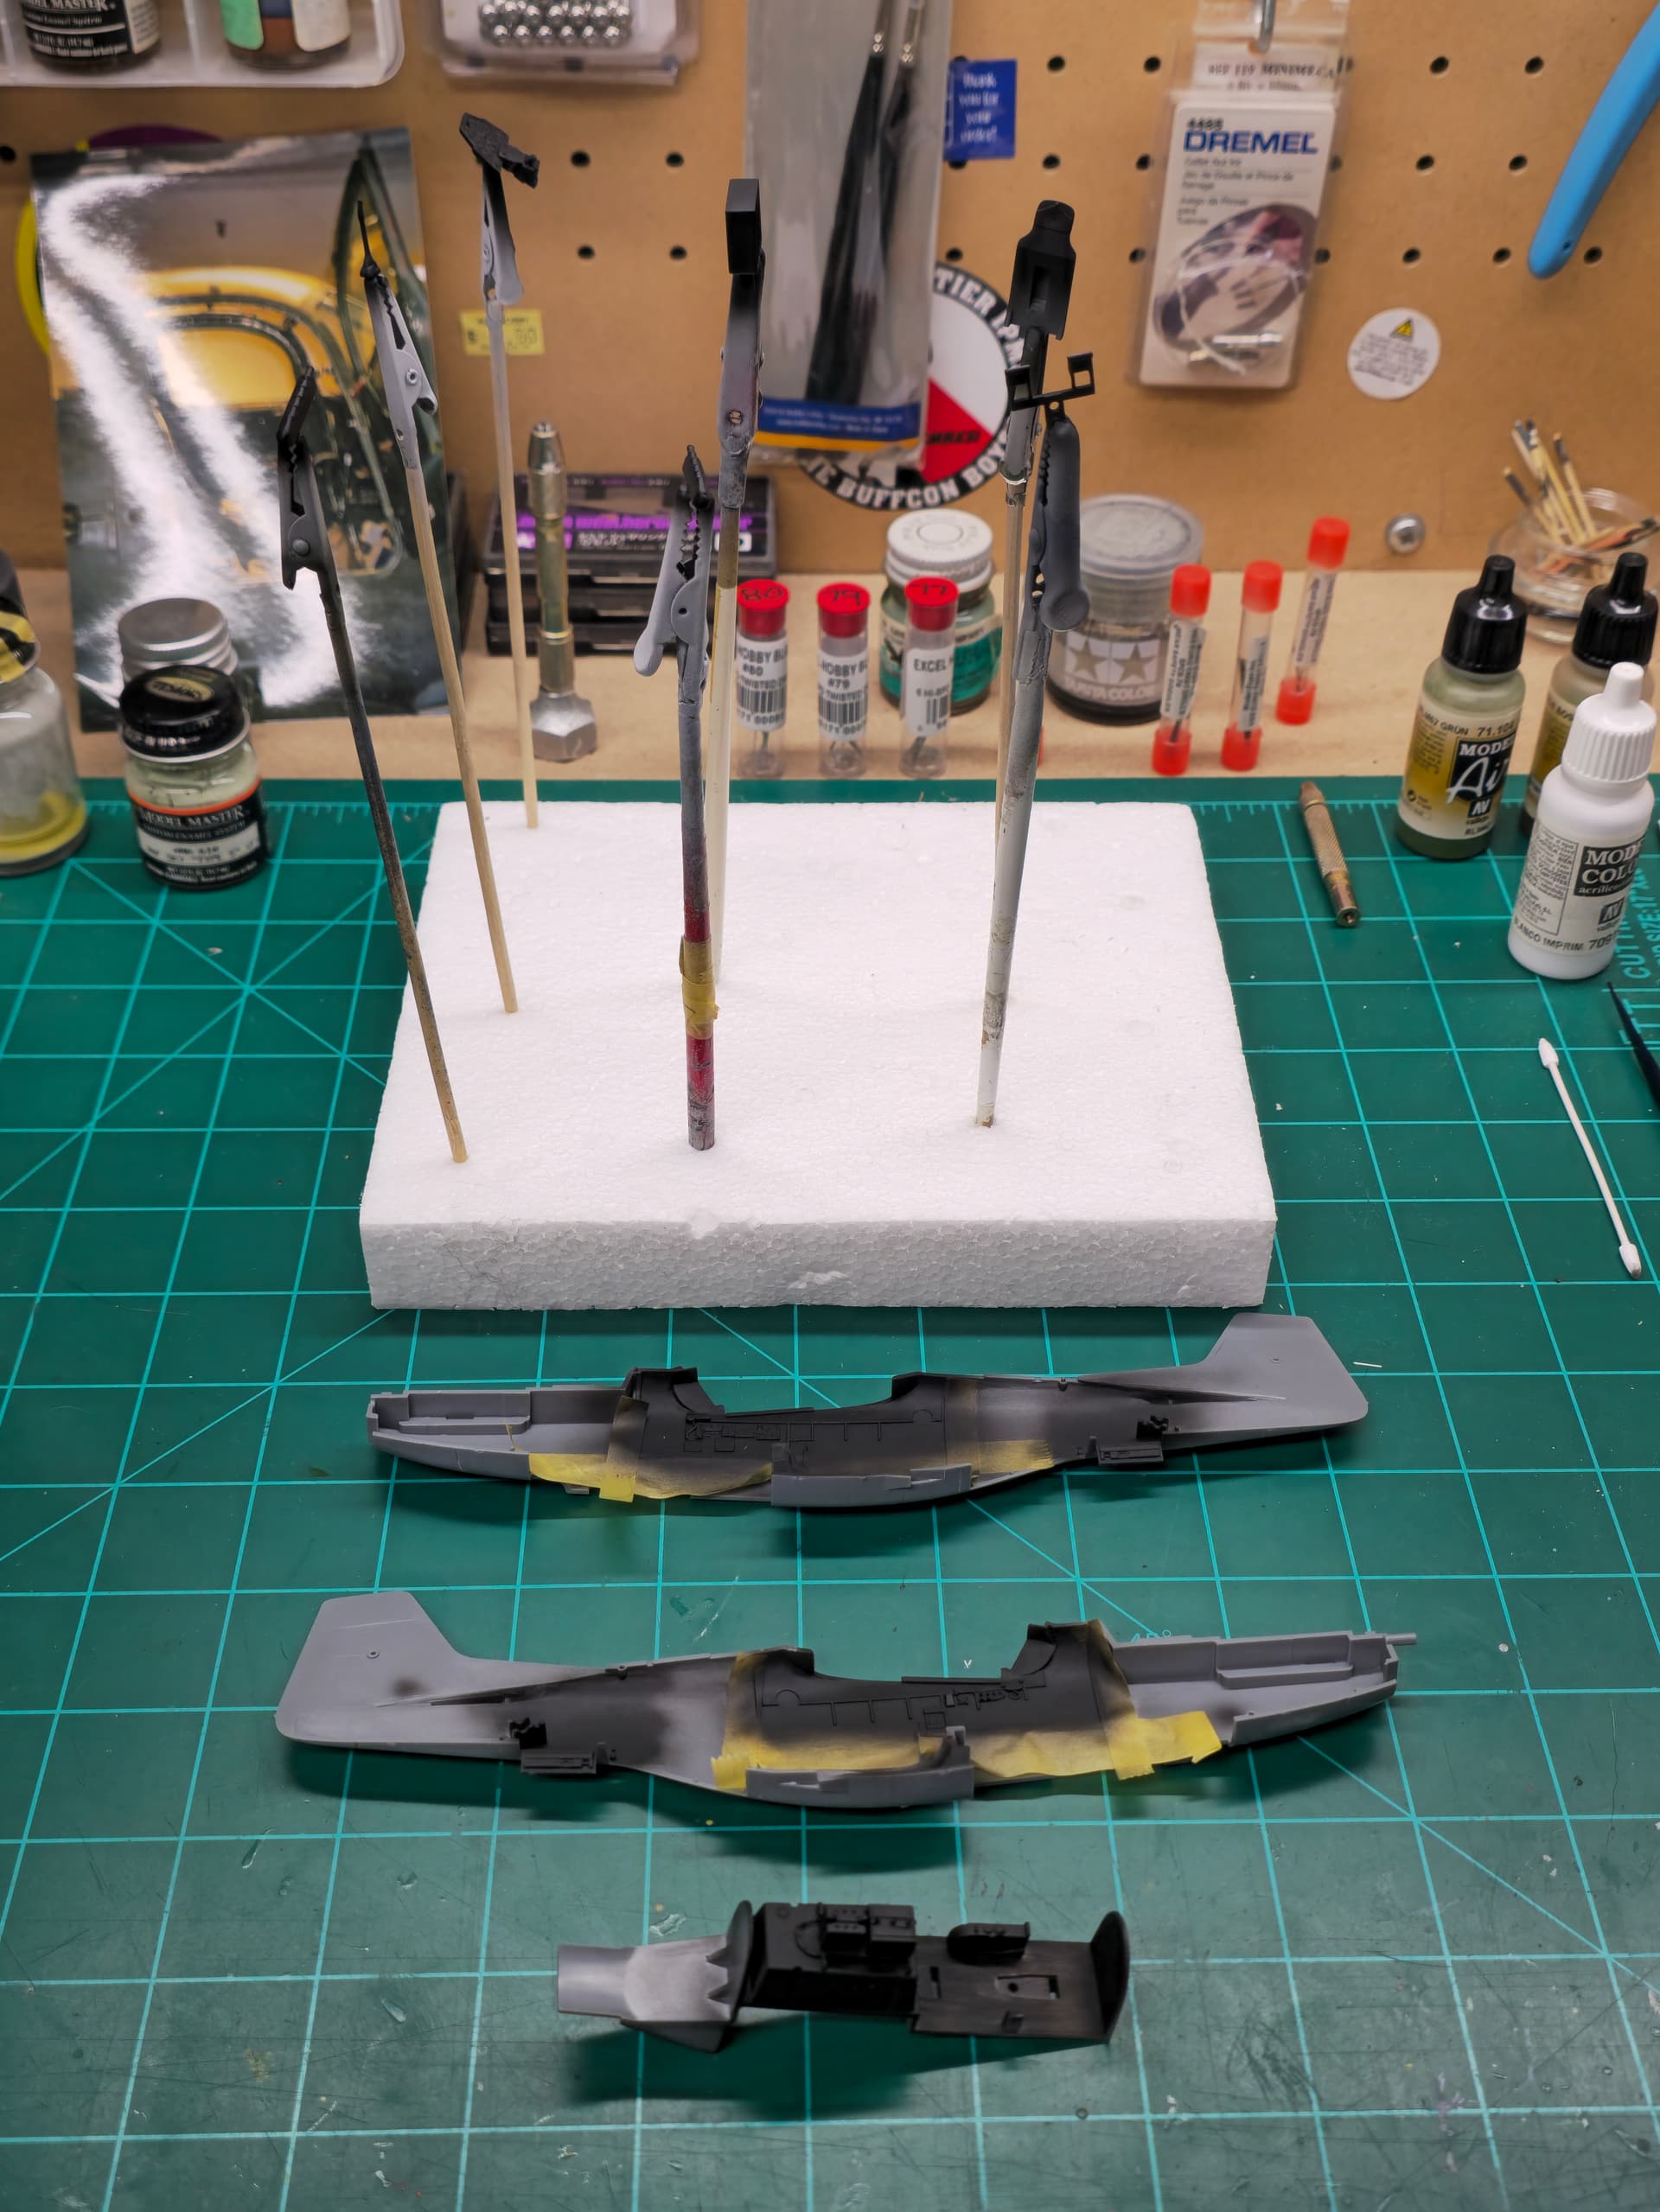
Quick update 5 - Dry fitting of the wing to the fuselage.
Looking at Tamiya’s “Tuskegee Airmens” Mustang, that IP decal is more refined where the one I used, the detail(s) are a bit thicker.
Here is where I did a quick dry fit of the wings to the fuselage and so far things fit.
I still need to make some minor adjustments but there shouldn’t be a lot to get a good fit along the wing roots.

I mentioned Joe initially but the area circled was short shot during the mold process.
The edge of the fuselages panel that meets the wing is a bit rough and irregular.
I built three other Tamiya Ds and never had this issue till now. Then again, this is modeling aint it
Happy Modeling,
Mike