Thank you Mr. Bish!
Thank you Mr. Bill!
I just had a look at your Pzkpfw I Ausf. F.
I enjoyed every part of your Build Log. Is that what they call a Blog?
And know I will have a lot of fun following in this one ![]()
Happy Modeling
Zack
Thank you Mr. Bish!
Thank you Mr. Bill!
I just had a look at your Pzkpfw I Ausf. F.
I enjoyed every part of your Build Log. Is that what they call a Blog?
And know I will have a lot of fun following in this one ![]()
Happy Modeling
Zack
No clue why the spacing looks so awkward…but I will figure it out ![]()
Edited: Got it ![]()
Chris
Thanks for the comments and glad to have you along! As for your question on the return rollers and wheels vs. the tracks, this is one of the advantages of using workable tracks although you could do the same with static tracks as well depending. In my case, the workables will be painted and detailed off the vehicle and installed later on. If I were using statics, I would still install the wheels and rollers and use them along with the sprockets and idlers (but leaving them removable) to ‘form’ the track runs (usually in two sections per side, one for the upper part, one for the lower) with the necessary sag and let them set up…then remove them, detail/paint, and reinstall along with the sprockets and idlers when the time came.[Y] HTH!
Zack Yep, a Build Log = Blog [;)]
Cheers Bill - thanks for the tip!
I’m in the process of building my first set of indy-link tracks, but not workable. I used the method you talk of regarding forming them around the wheels and return rollers, but removing the wheels later.
I had assume workable indy links required the same technique - glad i asked first! About to embark on buying my first set of a/m working tracks, so will be sure to use the method you demonstrate here.
Again, thanks for sharing your techniques with here.
My pleasure Chris! Workable tracks offer a lot of different advantages (and some challenges too!) vs. static tracks but I’ve found them to be the preferred route when it comes to tanks with ‘dead’ tracks that sag. Glad to be of help! [Y]
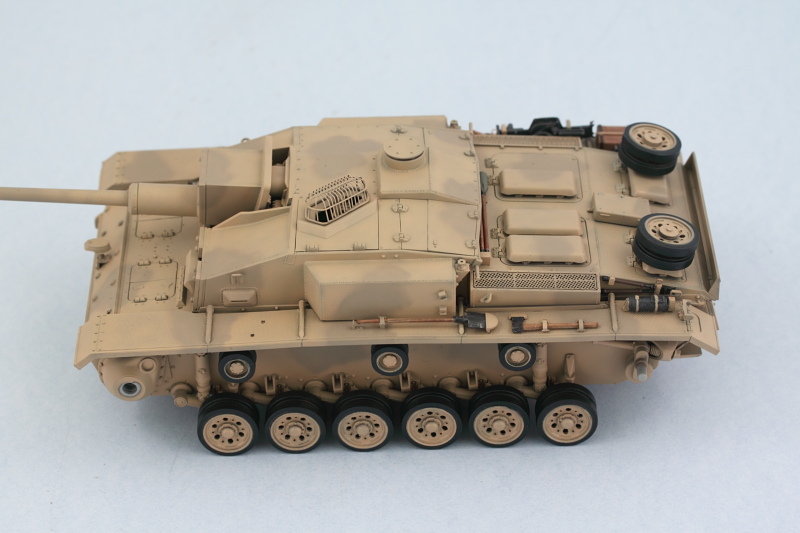
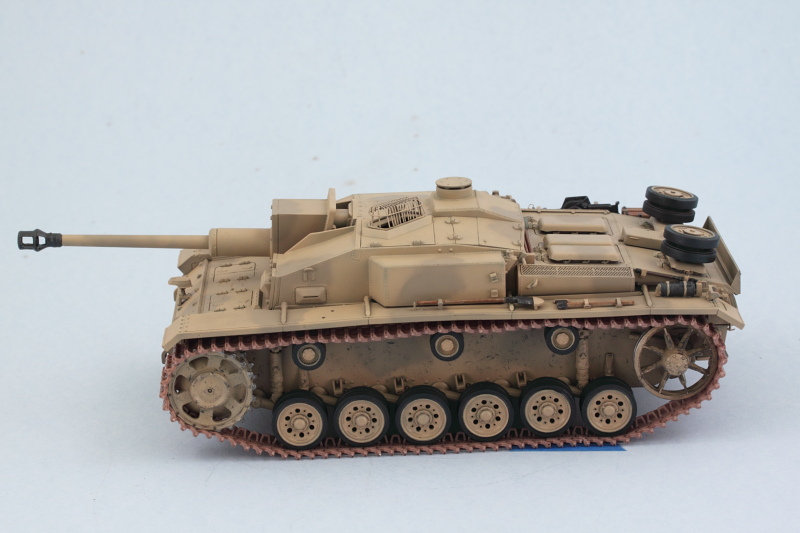
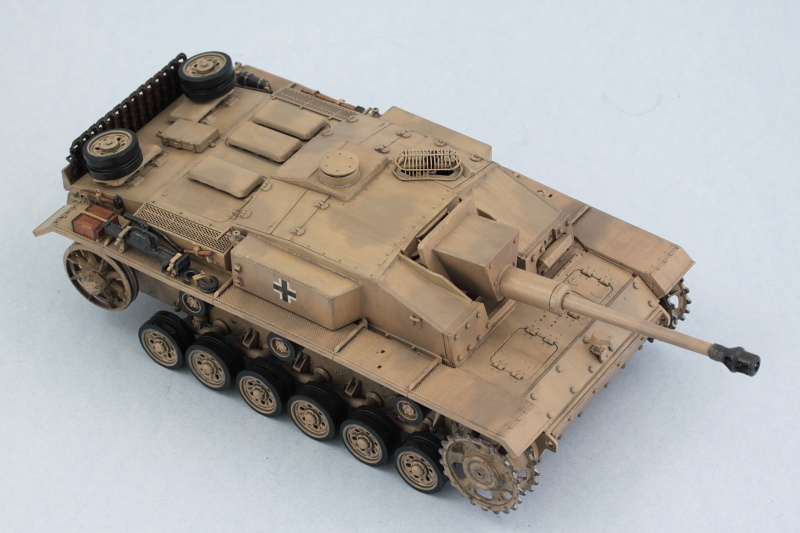
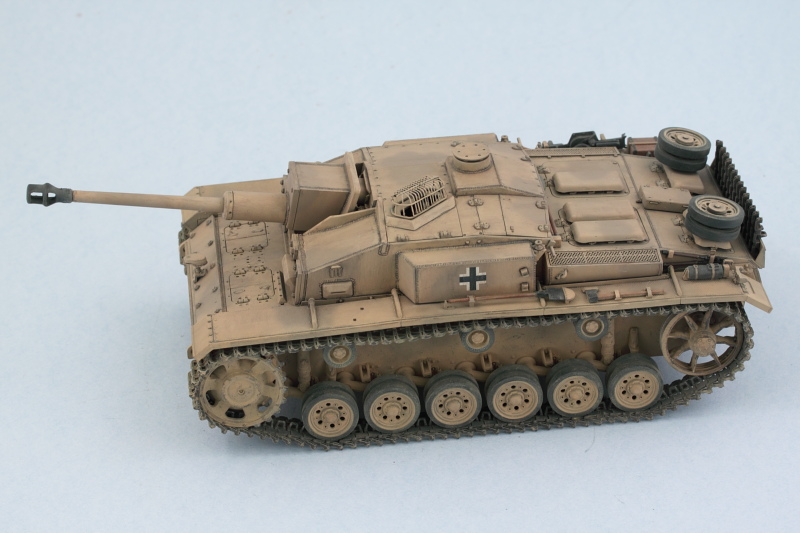
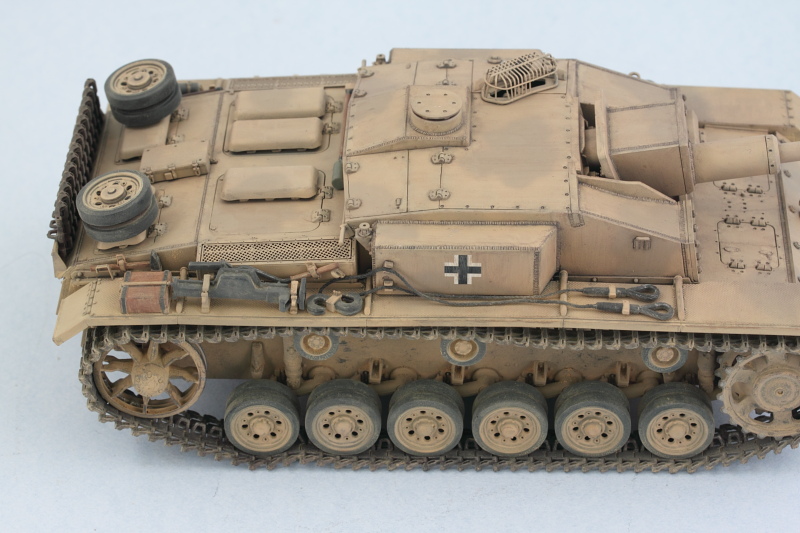
Managed to get all the on-board equipment squared away over a couple of sessions of hand detailing for the various parts. For metal portions, I used a combination of MM non-buffing Metalizer Gunmetal and a light dry-brushing of MM enamel Steel. For the wood portions, I used a base of 50/50 Dunkelgelb/Light Gray followed by a thin wash of MM enamel Leather and some burnt umber artist pastels to provide some variation. I also opted to detail the fire extinguisher and jack in panzer gray to add a little color in those areas on the fenders as well. All the tool clamps were detailed with their necessary colors to match the camo scheme depending on where they installed on the vehicle.
Then it was time to fit it all in place along with the spare road wheels on the engine deck. The tool arrangement on the right fender is very tight and it’s critically important that the jack be positioned just right in relation to the block and S-hooks in particular, so the careful work done earlier in test fitting paid off.
Next up will be paying some attention to the lower hull and suspension as a ‘pre weathering’ step and getting the tracks ready for paint.
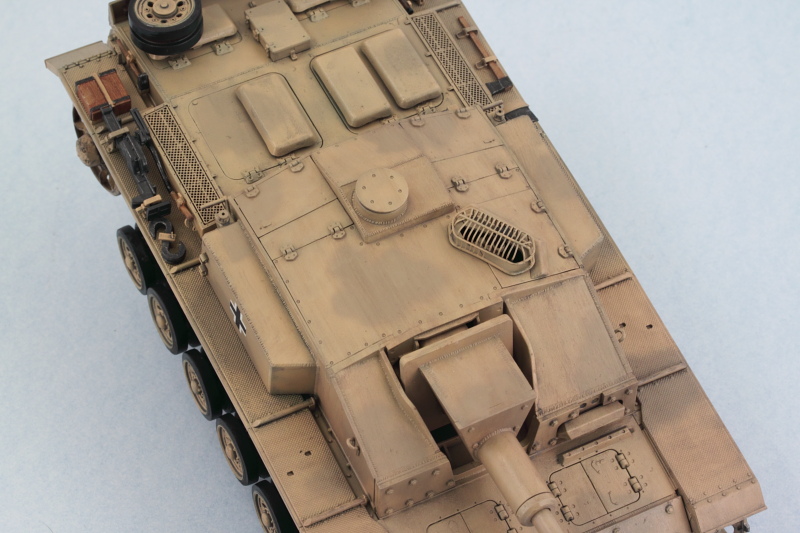
Looking good. I have only just noticed the grill over the opening, I’ve not seen that before, its a rather nice addition. Is that a part of the kit or your own.
Thanks Bish! It’s a unique feature to the F/8 (the ‘birdcage’ over the gunner’s sight). The kit supplied it as a pre-formed PE cage plus a styrene base to create it (it also has an all-styrene part option that is much thicker). I thought it was a nice touch for them to include it myself. [B]
Ye, it is. makes sense having that, last thing you want is a grenade dropping in there, that would spoil your day.
OMG,
I’m not even done yet with that 88, and you are almost finishing up another one Bill!
Really nice so far my friend, I always liked the style of the F/8 with that ugly square mantlet.
I really enjoy your WIPs, I’m learning quite a few neat things in them.
[Y]
Thanks J-M! Still a bit more work to do on this one, so don’t worry there! [;)] The StuGs build up a little faster due to their nature. Have to agree with you on the look…this was the last of the ‘fast-back’ superstructure designs with that big gun and block mantlet plopped on and spoiling its lines! Glad to hear the WIPs are helpful. [Y]
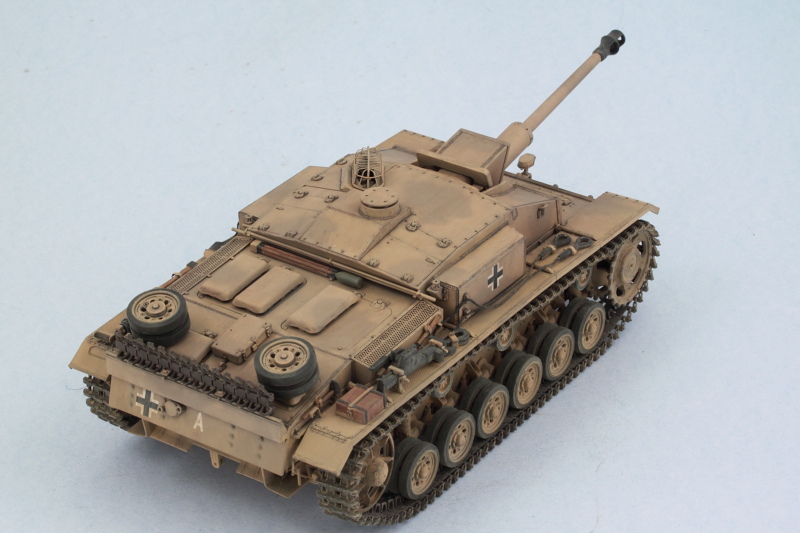
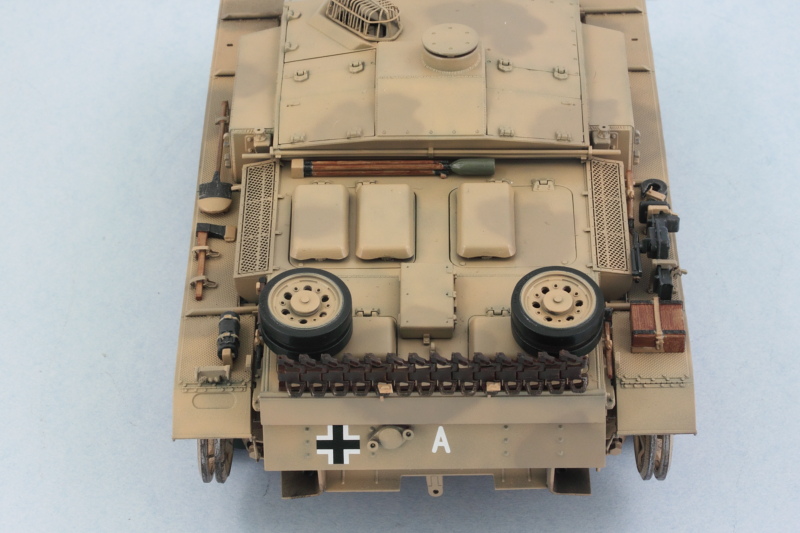
Worked on the tracks and suspension a bit in preparation for the weathering stages later on. I created some scuffing/chipping by stippling some Panzer Schwarzgrau on the hull and sprocket and idler. The contact surfaces on the idler and the sprocket teeth were treated to some non-buffing Metalizer Steel followed by some dry-brushed Burnt Umber to create their look. A test fit with the MK runs showed that 93 links per side on both side did the trick just right for sag.
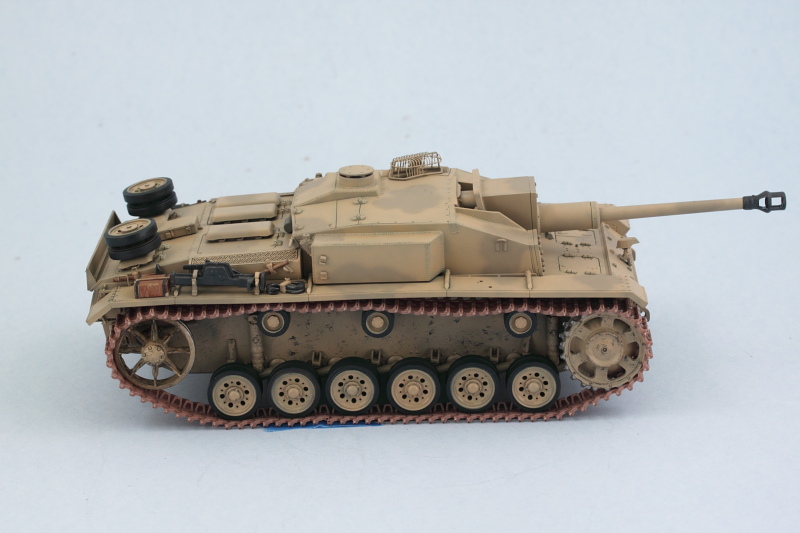
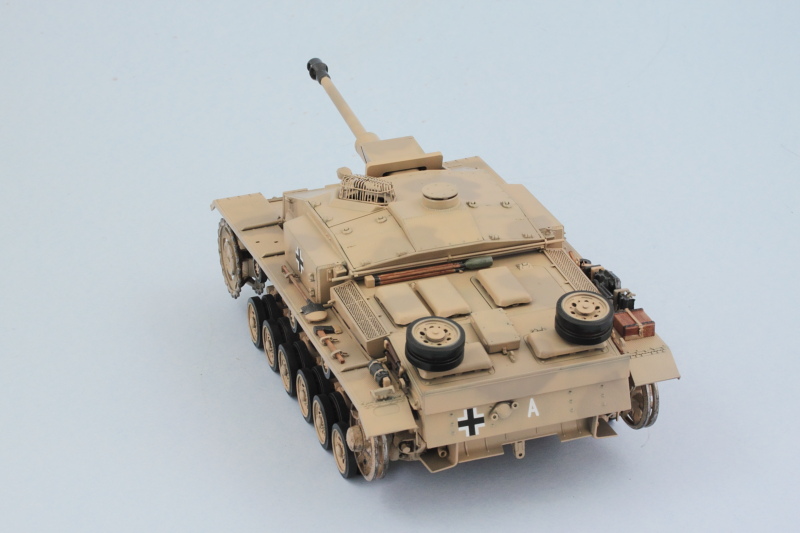
I also used a 10/0 pointed brush to paint the gunner’s sight with some MM non-buffing metalizer Gunmetal through the birdcage, then touched up the exterior of the cage so it once more matched the hull. Laid down a sealing coat of acrylic Future floor polish, let that air dry for about an hour, then added the simple vehicle markings. The reference photo showed an ‘A’ on the rear hull plate, so I added that by cutting one off the kit-supplied ‘name’ decals as an added touch.
Applied a 2nd coat of Future over the decals after they had thoroughly set to seal them in, will let that cure for a good 24 hours before starting in on the filters and weathering.
Today’s efforts took a little bit of a detour…I had planned to start on the filters and weathering but when I started in on the front left fender, the paint started to lift…so that means I either a) the Future didn’t fully cure since we’ve had some high humidity due to some rain storms or b) I didn’t get it on solid enough around the raised pattern or some combination of the two! So after a momentary panic, the colors were re-sprayed over the affected area and it will get some time to fully cure for sure before work continues.
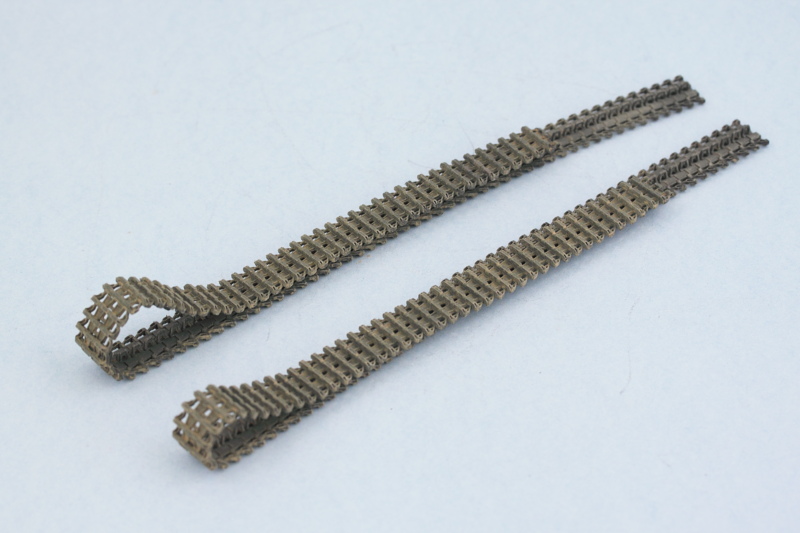
So the detour instead led me to work on the tracks. These were airbrushed with MM Burnt Umber for their base coat, then heavily dry-brushed with MM Steel. Last but not least they got a wash of Raw Umber to prep them for later pigment weathering.
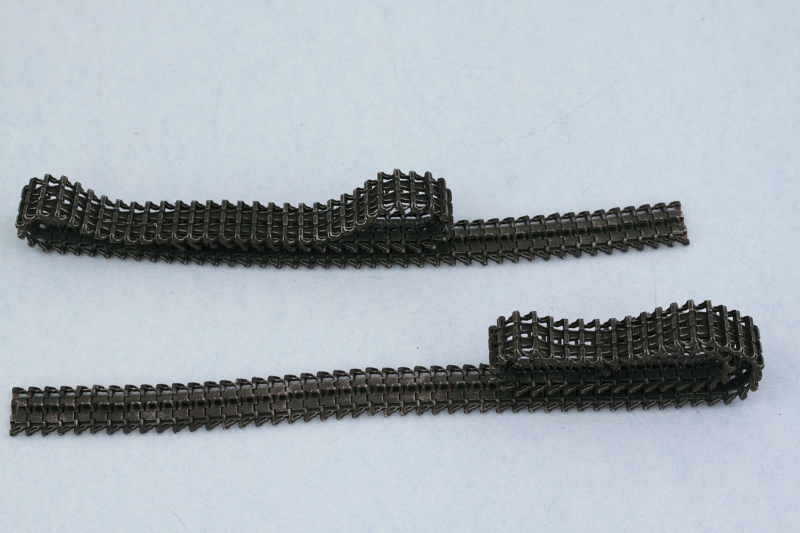
The spare track run for the rear tailgate was given the same treatment but also got some extra attention in the form of an MM Rust wash followed by various rust-colored artist pastels. The tailgate has a lip that runs around the top edge that was designed to match up with retaining pins that held the run in place. Dragon didn’t include those in the kit, so I scratched up a pair using some thin sheet styrene and some 0.5mm diameter solder.
Fingers crossed that round 2 with the Future/weathering goes according to plan. ![]()
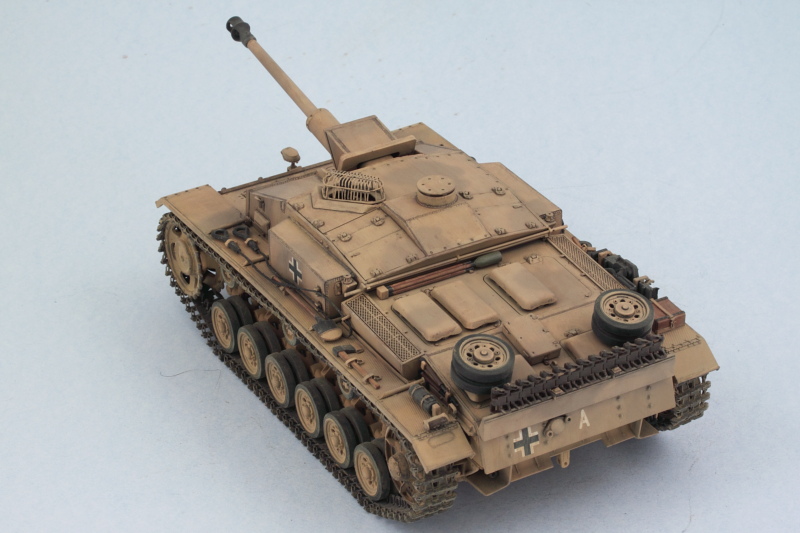
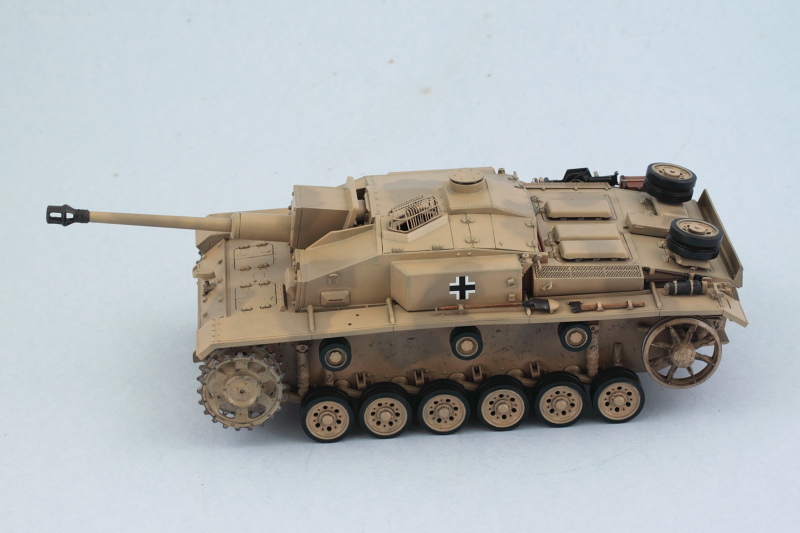
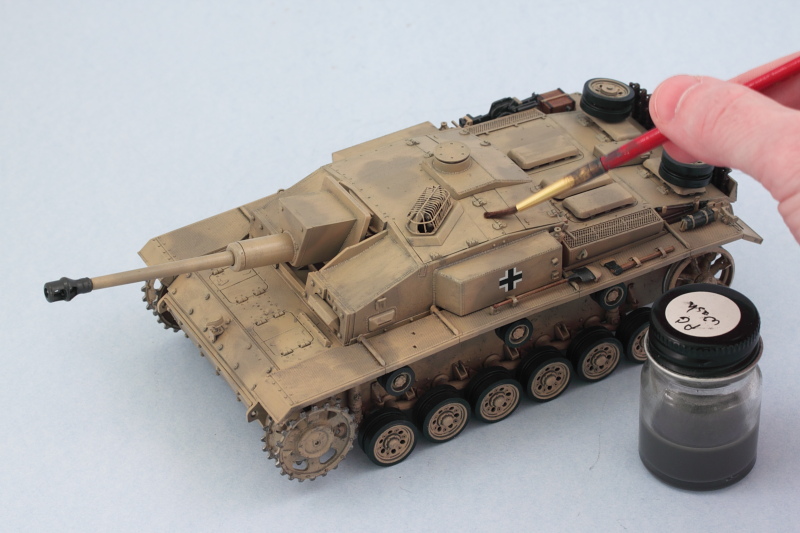
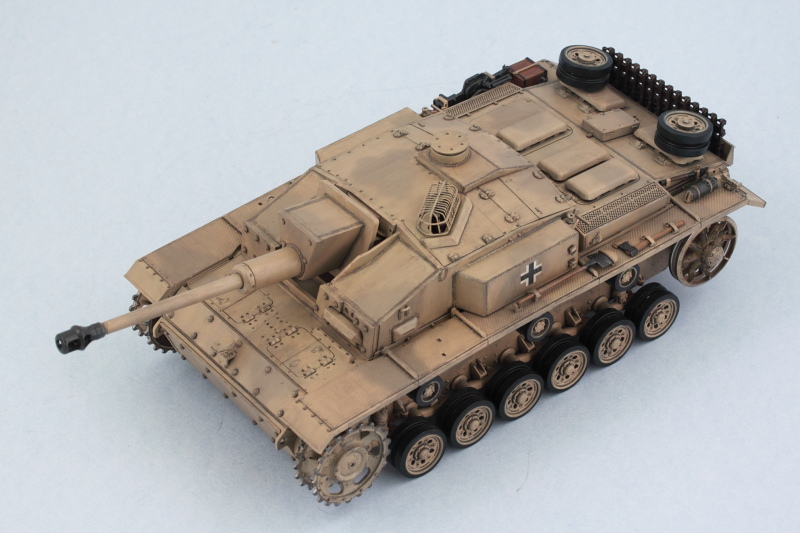
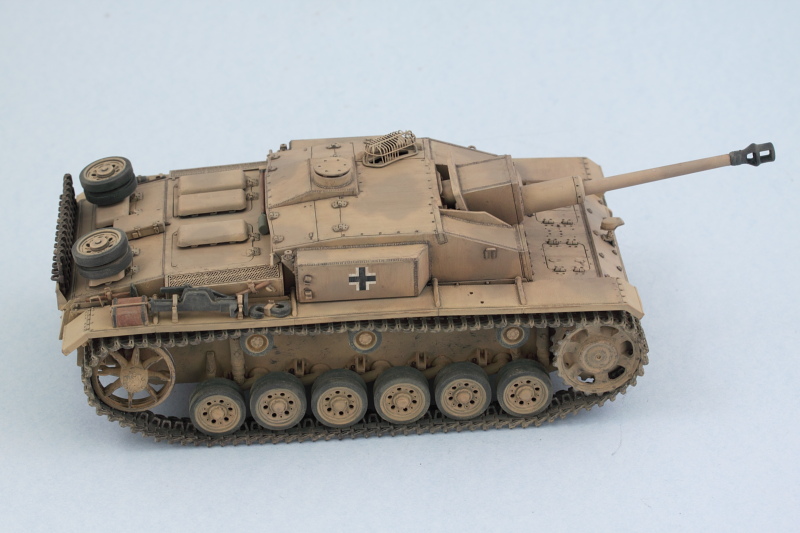
All the stars aligned today so I was able to start in on the weathering. First step was an overall wash of thinned MM enamel Panzer Schwarzgrau. Normally I would use Raw Umber in this step but since the colors are so light to begin with, I used the gray instead to avoid overpowering the scheme.
Next came the dot filters. I used Raw Sienna and Flat White and blended the dots using a square tip shader/blender brush lightly dampened with thinner. Since the enamel dots will dry quicker than oils, I worked in small sections at a time progressing from the front of the vehicle to the rear in stages.
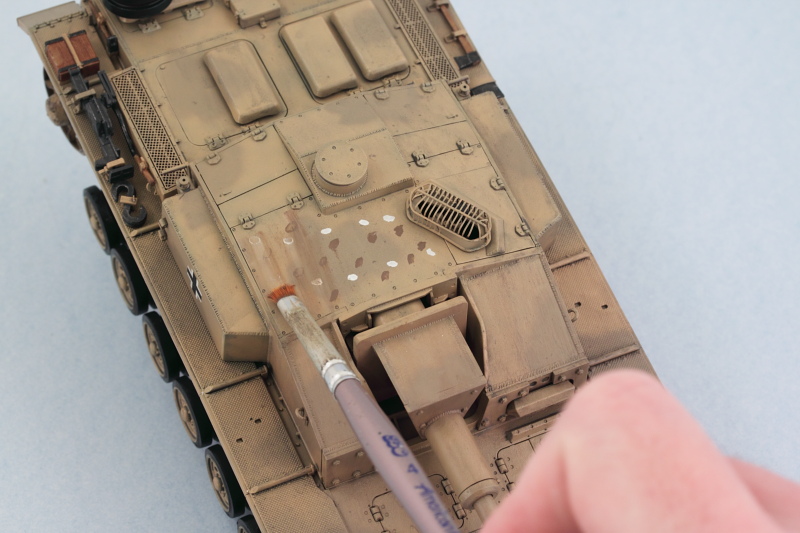
After a few hours, the whole vehicle from the fenders upward got the filter treatment. The lower hull and suspension received only the Panzer Schwarzgrau wash since the pigment weathering will deal with those areas later.

Pin wash will come next to help pop out the details a bit more.
Bill, fine stellar work here. That choice of Panzer Schwarzgrau wash is interesting from another point, because blue grey is pretty close to the complimentary colour of the sand tones.
regards,
Jack
Looking really good there Bill.
A Pz Grey wash, would not have thought of that one.
Thanks Jack! The panzer grey did just the trick for the reasons you mention. Light/sand colors are harder to weather convincingly and when you look at the available ‘weathering sets’ for desert colors, the filters they recommend are almost always a dark or medium gray depending. It also helped, ever so slightly, to emphasize the contrast between the two tones of the camo scheme. [Y]
Bish Thanks as well my friend! [;)] It’s not something I can claim as an original idea but it does work!
Next step in the weathering process is the pin wash to bring out the details. I used a highly thinned mix of MM enamel Burnt Umber and a fine point 10/0 brush to apply it. Then used the same brush and some clean thinner and cleaned up the excess, fine tuned it here and there, etc. Takes some time to pull it off but worth it.
Will let that sit overnight and check it with ‘fresh eyes’ to see if there’s any additional points/adjustments that need attention before moving on to the pigment weathering.
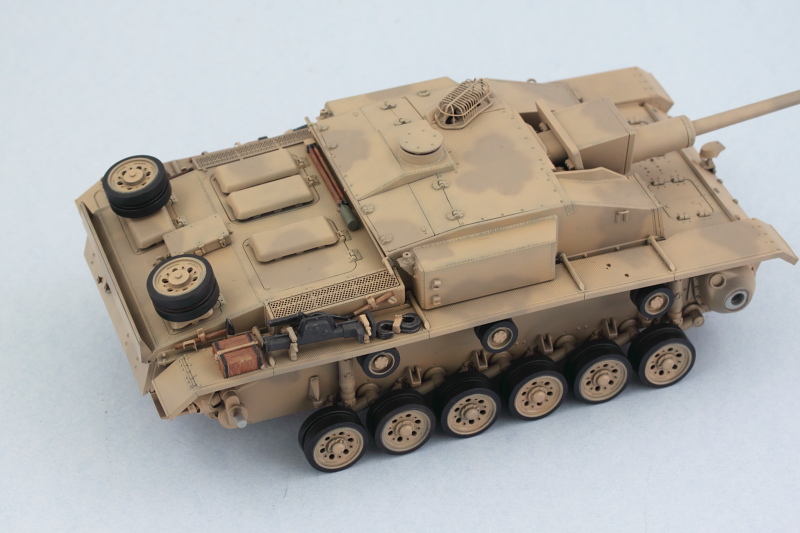
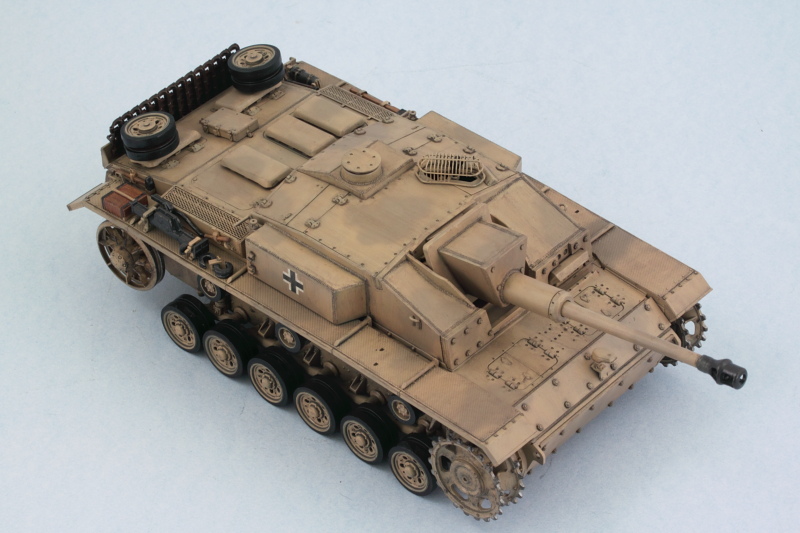
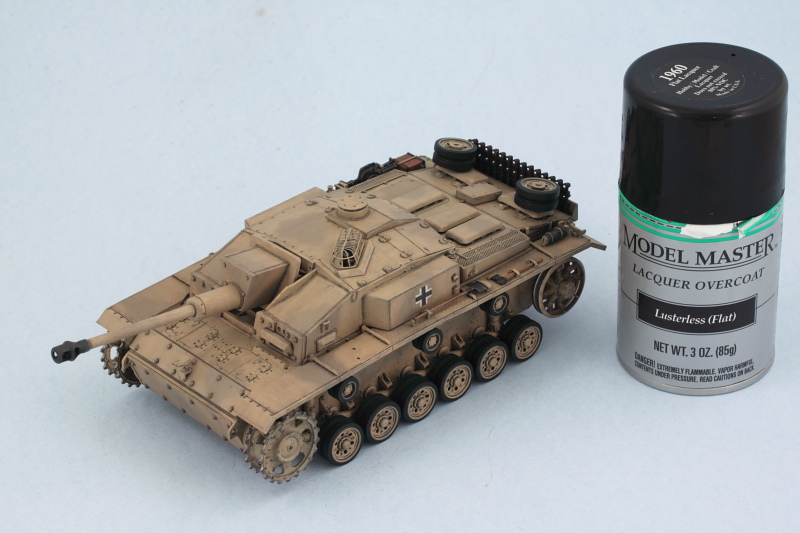
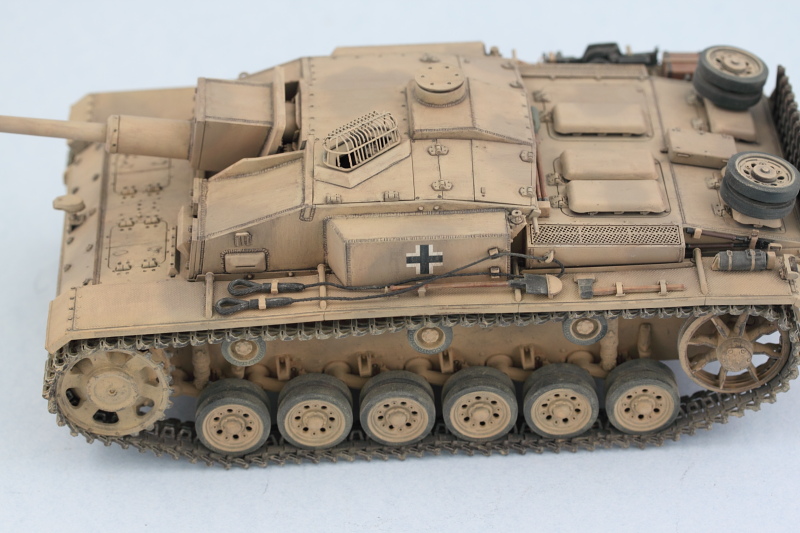
Got all the pigment weathering done today. The first step was to seal in all the previous weathering work with some Testors MM Lusterles Flat in the spray can.
I used Mig Productions Gulf War Sand and applied it as a wet mixture first to the lower hull and suspension. Adding a drop of liquid dish washing soap to ordinary tap water breaks the surface tension and allows it to flow easily. Left to air dry, it looks like a mess at first but this is just a foundation.
Using stiff bristled brushes to remove the excess, further adjustments were done with some dry q-tips as well to get the look I was after.
The tracks received the same wet pigment treatment followed by stiff brushes. One of the advantages of workable tracks is the flexibility in weathering prior to installation.
Tracks were then installed to both sides and the sprockets and idlers permanently glued in place to create the necessary sag/tension on both sides.
Just a few small details remain before this one is all done!
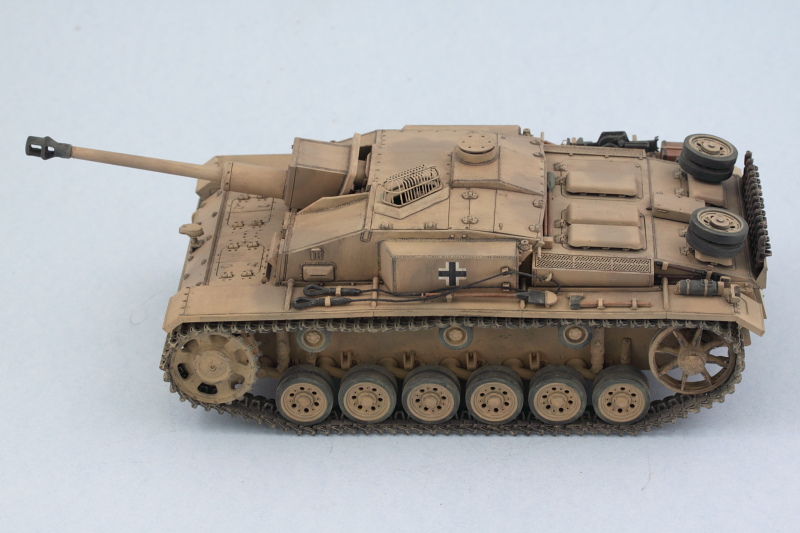
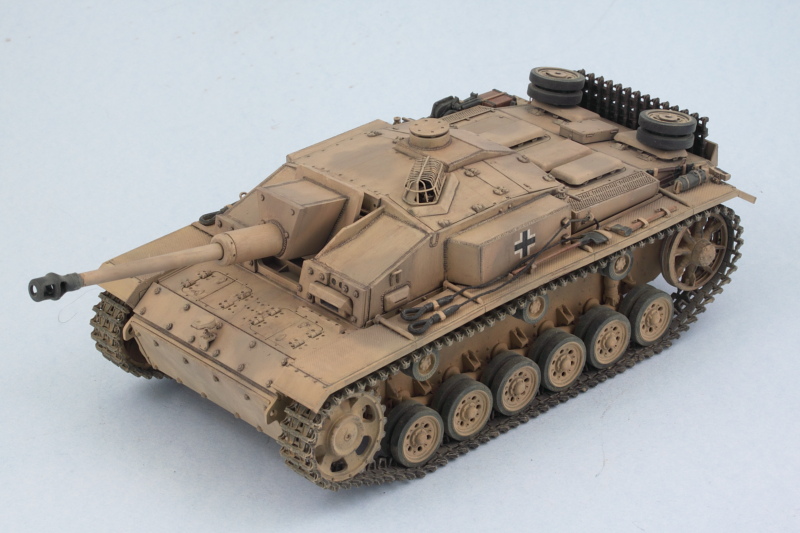
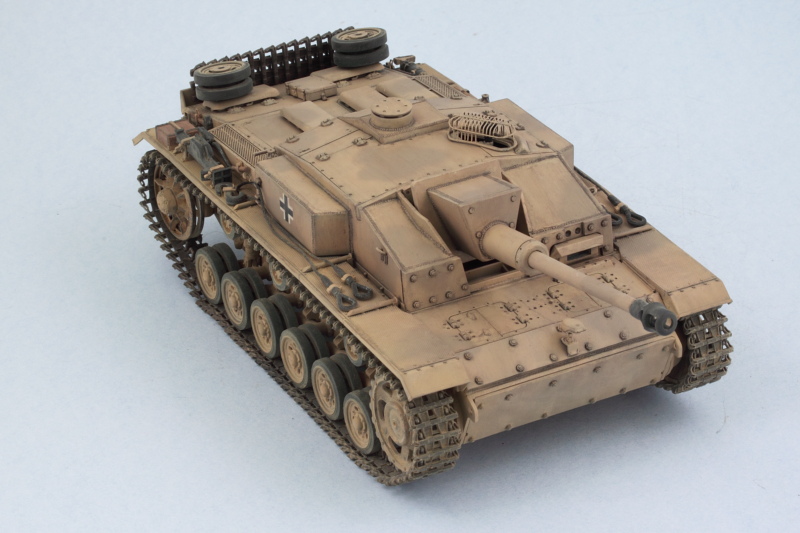
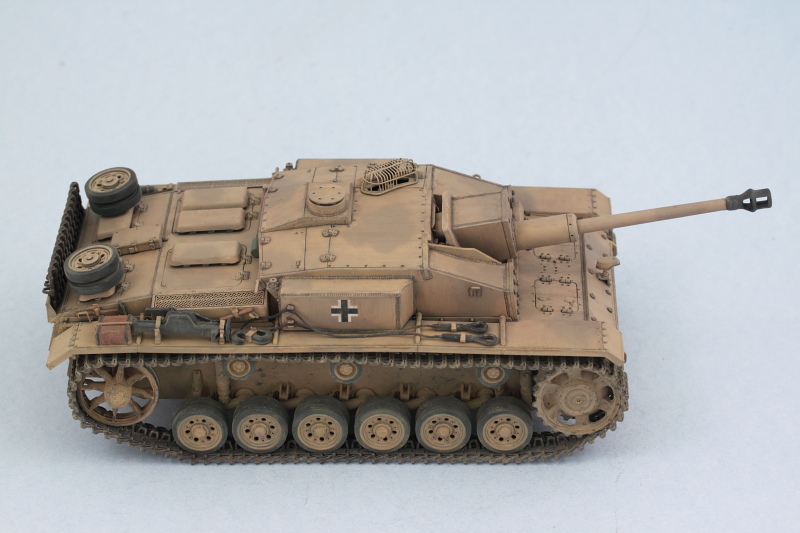
One of the last remaining details that I deliberately left to the very end was the tow cables. The Dragon kit supplies some braided steel wire for this but it’s extremely stiff/stubborn to work with. I replaced it with my go-to substitute, crochet rope/thread.
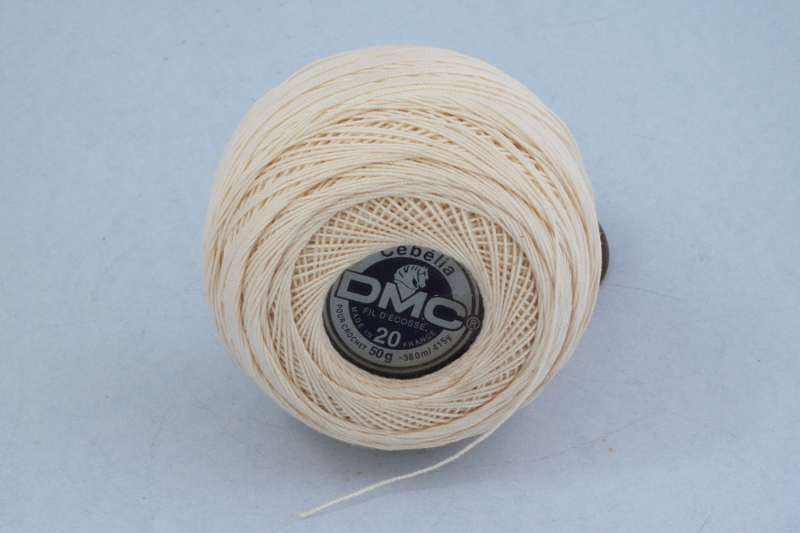
This stuff is very cheap at any Michael’s/Hobby Lobby and a single roll will last a very, very long time. It’s also handy for tie-down ropes for stowage. For tow cables, I cut a long length from the spool and then dip it into some Future so it will stiffen and take paint better. It also prevents any ‘fuzzing’ of the line as well. Once it dries, simply cut to the length needed, in this case 110mm per cable, and attach with CA glue to the cable ends.
Since the cables don’t have any real clamps at the loop end, only the ‘guides’ on the sponson sides, the cables always appear sloppy in the reference photos of these vehicles, so I used the thread’s flexibility to my advantage and draped the cables accordingly before carefully gluing them down in the sponson guides. That’s why these were saved to the very end, so they could interact properly with all the other stuff on the fenders.
Once in place, the cables were lightly dusted with pigments to blend them in with the rest of the vehicle. The final little detail was the install of the rear Notek convoy light, this was provided in the kit as a clear cylinder that I painted with Tamiya Clear Smoke and installed into its holder on the rear fender. Then it was time for the walk-arounds to make sure I hadn’t missed anything or make any last minute adjustments.