I was originally planning to build the Revell 1/72 kit of the Kaydet like the artwork on the box, then I got sidetracked into changing it over to a cropduster. The little notes that come with the Kaydet mention that after WWII, many Kaydets were sold and quite a few ended up as crop dusters.
At the same time I was reading a biography of Australia’s most famous pioneer aviator Sir Charles Kingsford Smith, who was the first to fly cross the Pacific Ocean, and also the holder of numerous other records. The biography mentioned that “Smithy” had no business skills. It was his partner, Charles Ulm, who organised the money and did all the deals that got Smithy the planes and funding he needed.
It was just one line in the biography which said that had Smithy not met Ulm, he might never have become famous and probably he would have ended up as yet another excellent but unknown bush pilot doing things like cropdusting.
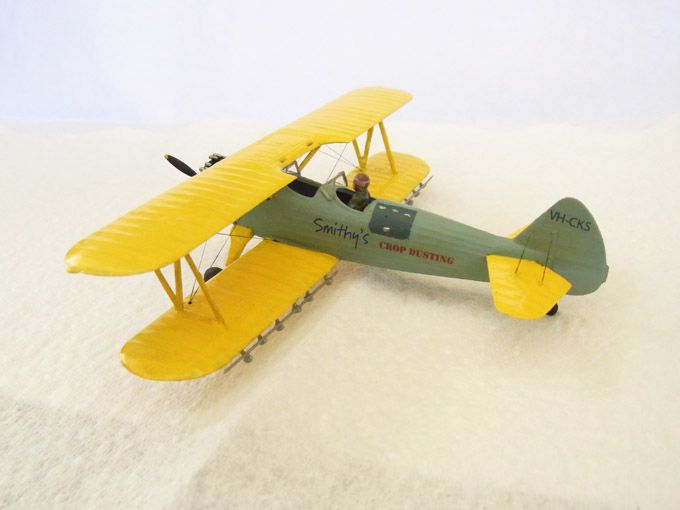
And so “Smithy’s crop dusting” service, flying in a Kaydet, was born in my mind.
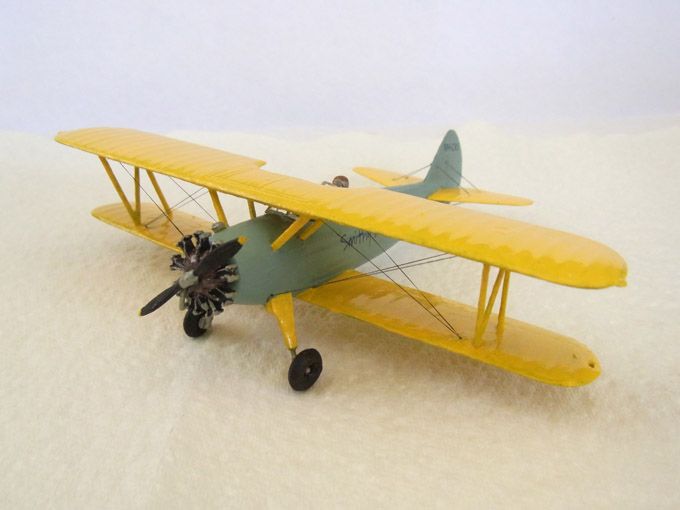
The Kaydet kit is the 1/72 by Revell. I made up my own cropdusting sprayers to mount under the lower wing, and also the decals for Smithy’s Crop Dusting Service, etc.
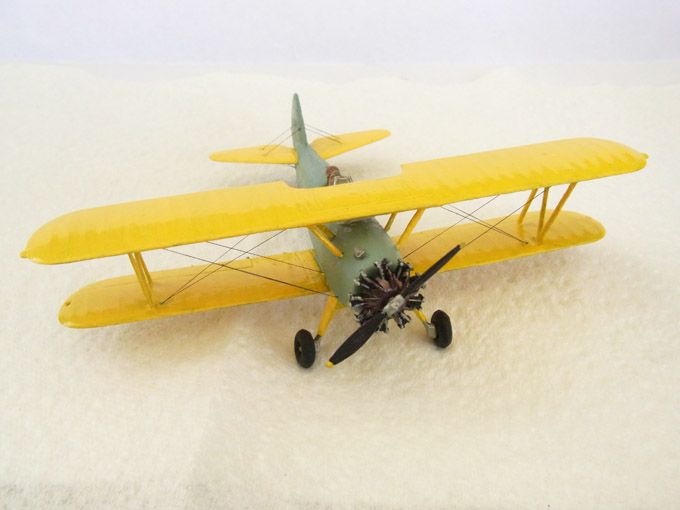
This is my first attempt at doing biplane bracing wires using EZ-Line, and thanks to some excellent “how to” tutorials here I discovered it was a lot easier than it looks.
The Kaydet actually has paired sets of two wires, rather than single strands, but as a newbie I decided that’s something to attempt a bit later on down the track.
If you like Stearmans, be sure to build the new Revell 1:48 version. It is a beautiful kit! And- they have just produced a new version of the kit with a cowl and PW 450 Wasp engine!
Your construction of the Stearman is very, very nice. How ever, you left out one critical item in your work. When the Stearman was converted to a sprayer, it became a single seat aircraft, with the hopper (or tank) was installed, it was placed where the front cockpit was. The top of the hopper became the top of the fuselage in that area and eliminating the front windshield and the opening for the front cockpit.
Hi, thanks for that. Yes, I was aware of that particular Stearman cropduster, as it’s the one that comes up most often if you do a Google Inages Search for a Stearman cropduster.
As well as being beyond my skills to scratch-build the thing, it is also one thoroughly ugly looking device, and so I would never want to build it. As my model was a gentle fantasy based on somebody else’s cropduster, I decided to leave the plane looking like the original as much as possible.
Very nice job…I bought two of these kits several months ago and started putting one together, in the old USAAF version - even bought 2 sets of Star Fighter (?) decals for them, but ended up throwing them away because I couldn’t figure out the rigging. The instructions were a joke, and I tried using different gauges of wires, even dental floss and guitar strings lol, but none of those help an idiot like me determine how the wiring should go, which holes to start in, etc. I don’t have enough patience for this yet, so I went back to armor kits, lol.
To me, the fun should be in building kits, accuracy be damned…that’s all that matters in the end - is whether or not you had fun building it. It’s apparent from your photos you indeed had fun. Great job, looks great.
Ever since I bought some EZLine my efforts at doing rigging for planes have gone from terrible to OK. I find it really easy to use. Apparently some more expert builders say the EZLine rigging can look too fine on some models (depending on the scale) but I find the results with it always look nice and neat, which is 90% of the challenge.
And you’re right about the “fun” issue. I just build models for fun, and all those accuracy issues that some builders see as very important don’t bother me much at all, I’m afraid.
I’ll order some EZLine and give it a try again…I was frustrated with the instructions and lack of direction in some tutorials I had looked up - they all seemed more pre-occupied with what material to use for the rigging, whereas I needed direction in which hole to go thru first, second, third,etc…I’ll dig out my Stearmans when I receive the EZLine and give it another go. I did like the way the yellow and blue paint came out on the model, it was actually very attractive looking, vibrant even.
The magic stuff to use in tandem with the EZLine is the super glue accelerator (Zip Kicker is what I used). Once you have some tension on the line, the kicker holds it in place perfectly. This made the whole thing come up very neatly.
If it will help I can scan the rigging instructions from the Revell 1/48 Stearman kit. It’s not perfect but might help, especially if you also look at some pics online of the real aircraft – it should start to make sense then.
I appreciate the offer, but I believe the 2 kits I purchased were the Revell 1/48 Stearman kit (I always buy 2 of each kit). I will look when I get home, but I’m thinking that’s the kit and instructions I have - the instructions were one page, towards the back of the booklet, and it really only showed how the rigging should look when it was complete. I will look again, thanks for the very kind offer.
Ah, OK. Just a word of caution: Revell’s instructions provide dimensions for each length of wire, but they’re incorrect (at least, that was my experience). I’ve built the kit and rigged it with stainless steel wire. Here’s the link to the finished build, hopefully the pics might clarify where some of the wires go:-
great pics - your Stearman is beautiful, very very nice.
I think I know my problem now after seeing your pictures…I think what you did for your rigging was to use individual pieces of wire among the various rigging places? I was trying to use one continuous length of wire for all the rigging, and not using pieces…that is what I couldn’t understand was, like using a long shoelace for a boot, which hole to go through next…what you and others I guess have done is cut pieces of wire to length and glued them in place? This makes a little more sense, although I wouldn’t mind still being able to rig with just a single piece of wire for the whole rigging.