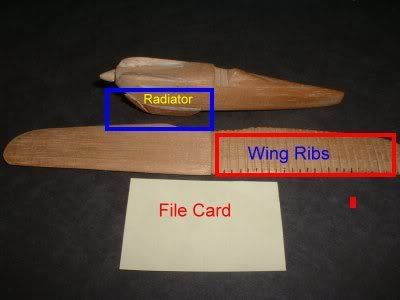
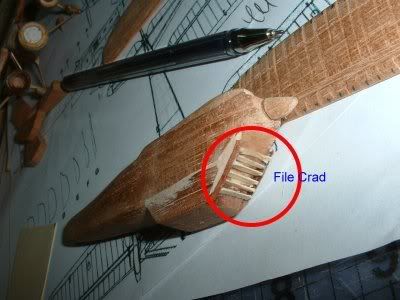
At this stage, I start some details that will be easier now than later in the project. It is easier now to do the ribbing in the wings and add louvres to the radiator now than later, besides doing details is where the fun is. What did I do?..I finished the air intake-radiator and also added the radiator panels or louvres, also filed at marked intervals in the wings the " ribs". On a larger model 1:48 and up I would have marked the ribs with thin strips of card or heavy paper, but in this 1:72 it looks fine only by slightly filing them at the right locations. Remember since you are “making” everything you could leave the wings without the ribs marked, its up to you. This is the beauty of scratchbuilding, you go on details to whatever level you deside!!!. In order to obtain the " cloth" look of the wings I will later cover them with white glue and “tissue” that will really make them look real, besides I will be “spraying” the whole plane with “clear finish” spray several times[:D][:D][:P]…having real fun now!!!
Next we will put things together, like a kit, and get into the intricate details of the landing gear, and how about some “plaster of Paris” parts??? at least the wheels ok?[;)]
The end of the construction phase is near. I went ahead and “filed” the tail, elevators, wings and wheel “pants” to almost final shape by sanding with 250 sandpaper. Now I will sand some more with 1500/2000 sandpaper and then “glue” them in position. I still have some “detail filing” and final, final sanding and the parts will be done.
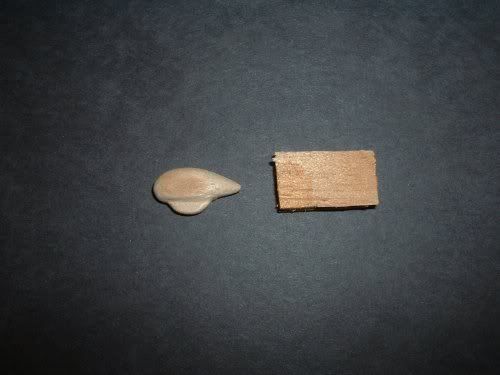
The wheels pants are made from scratch pieces.
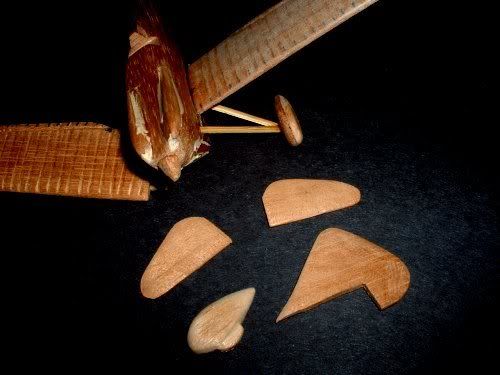
Some of the pieces almost ready.
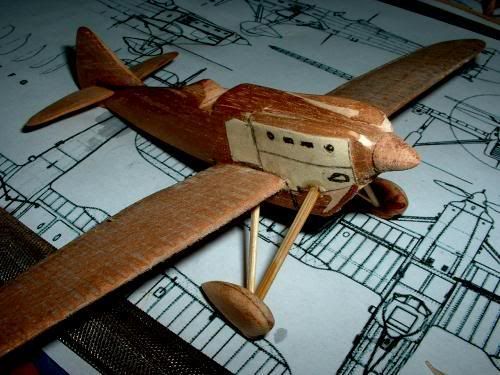
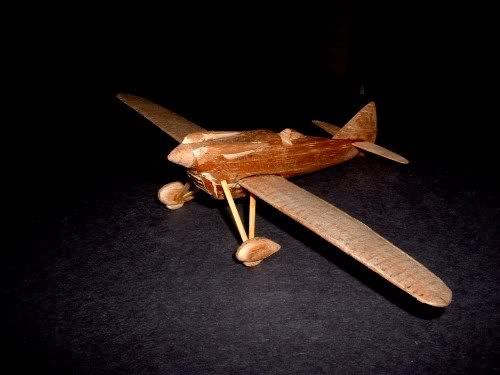
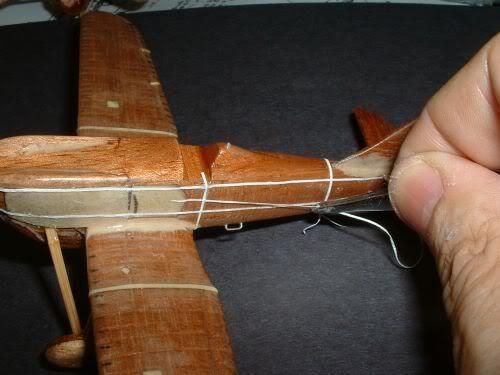
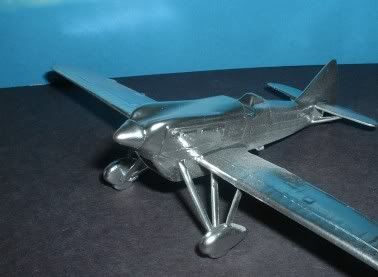
All the main pieces ready to be assembled. Notice that I went ahead “temporarily” placed the left wing and undercarriage…just to check alignment , proportions etc…I also added “bamboo holders” for the wings and made holes for them in the fuselage, this will make the wings/fuselage assembly very strong. Please note, that I have already pasted the " tissue-skin" to the left wing, will do it later on the right also, top and bottom.You can drop this model from 6 feet and nothing will happen to it. I have some solids that are 40 years old, they easily last a lifetime and more…If my grandchildren don’t mess them up they will probably give them to theirs!!![:)]
Do you think the “shapes” of the parts were hard to do??..No!!!, if you shape parts with a " Large Sharp File" its very easy to control, once you have the right basic shape, then it’s just a question of filing some more with small files and finish with sandpaper…easy as pie!!! or cake!!! or wine!!!
Tonight I will try to finish assembly of the model and then go to the “finishing” phase.
I will then: Make all tiny details on the surfaces, make the windshield, wiring , with very thin “bamboo hairs” etc and then cover the whole contraption with “clear finish” spray. I will place many coats of it until everything is shinny and ready for painting.
For the Spanish Civil war, decals are not done, since this plane was flown by the Republican Forces with just red wingtips and a red band around the fuselage. BUT!!!, to show you all that might tbe interested, I will make two models…this present one I will paint it with French squadron Markings and do them on PAPER, as they were done 60 years ago. Technology will help us a lot, Your PC is just the machine for it…so this step, drying of the finish, and getting the “decals” done will take a week or so…[8D]
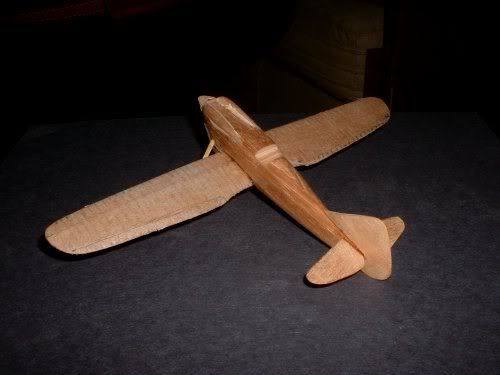
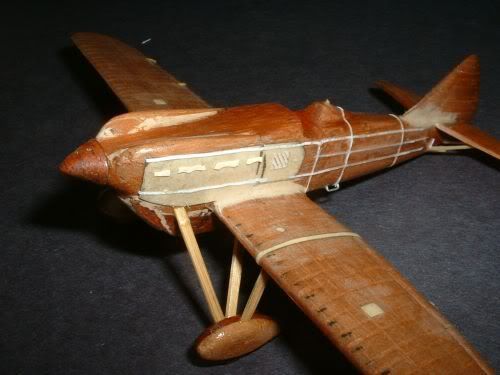
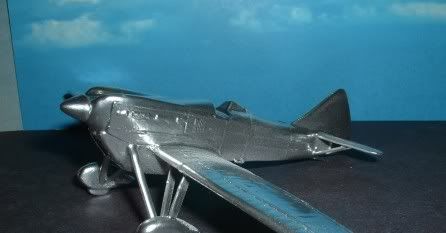
With al parts 90% done, I went ahead and put it all together. I now have the “basic” model done. That spinner will challenge my patience but eventually will get done right. I now have to do some extra sanding and “paste” de “panels” which are just file card cut outs. I will " burnish" them to the fuselage so they will look real. This I will get by sanding very slowly with 500 grade sandpaper.
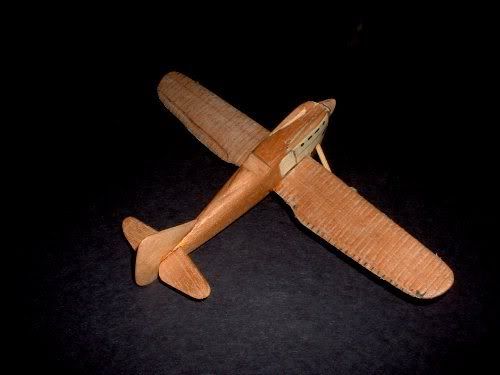
I still have to make the smooth transition between the wings and fuselage, fillets, and also those of the tail feathers. This is easily done with putty, just put it on and with with your index finger go over it…whala!!! a fillet!!!..then the varnishing…
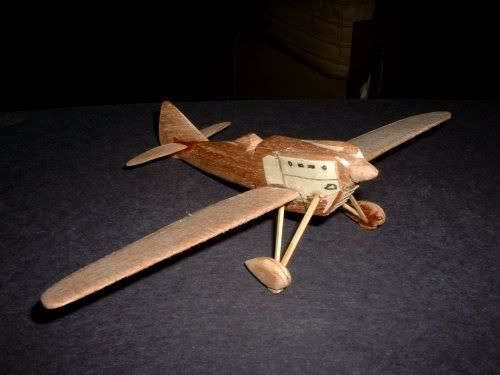
Here I pasted what will be the front panels, card cut outs…I also will be working on the cockpit, my mototool will help me there.
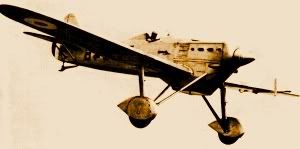
As you can see things are winding up…see you all, till next time…Oh here is a photo of what we are striving for.
OK…Details: Fine, BUT not too much!!!..paint, light and shadows will cover what’s needed. Besides in real planes, from 8 feet away you Don’t see too much details!!!, when looking at a 1:72 model from 3 feet away, you should not see too much detail…[:P]
Cut very thin strips of regular typing paper, if they curl when you cut, they are fine. Glue these to the fuselage to give the impression of stringers…the work here took about an hour, one side. Notice that I have already added transparent spray…once the “stringers” are cut, glued them with white glue, very very slowly, I will add about two or three more spray coats, so they will be seen… but just enough…
Notice I also added pieces of card for the exhausts, I did not make them too detailed for paint, light and shadows will show them sufficiently so no need for super detail here.
Since I finished detailing the model ( this is as far as wanted to go on this one) I went ahead and applied the first " spray"…I used a “chrome” house spray to get the metal look. Oviously I will have to tone it down. I will do this by rubbing it down once its really dry, about three or four days. This first step of paint will also show some defects which are easily fixed. If necessary I’ll " spray again". Notice how the paper strips and card pieces have “faded”, just leaving “looks like” areas.
Once I feel it’s ok to go on, I will start adding more detail with color paints and pastels until I obtain the “worn” effect I desire.
Hi Bud…The way things are looking, I should finish this weekend. and then???..Got to do a SM-81 for a Contest in Milan Italy in Dicember and a long time waiting guy!!! The B-18 Bolo…[(-D]
Solid, This is a very interesting build. Looks real good too!![tup][tup] I might even try this sometime. I have plans/ blueprints of the RA-5C Vigilante & You’ve given me something to consider[:-,][swg]
Keep up the good work[:D]
When I work with wood I ussualy used 2K urethane filler for the surface covering. Best result!! Then overlay with 2K gloss varnish and this give nice surface.
Solid: Nothing like a good bit of scratch-building. I’m presently scratch-building a balsa and plastic model of my 1:1 scale Grumman AA1A in 1:32 scale. It is very challenging to have to not only cut material accurately but to design the model for the proper construction sequence…I’m going to do a full electronics interior thanks to Dynamicscalemodeling.com.
If anyone else would like to see the “old school” type of modelling, please visit my website at http://www.barneysairforce.com and click on the moving “header”
Hi Everyone:
So happy to see you guys interested in “scratchbuilding”. You know, most everyone thinks its “really hard” but it is NOT!!!..basically just to take your time, do one or two models, even if they don´t look “super” and keep on going.
With three view plans, some thought and patience you start. Be sure to get good wood!!!, no balsa for solids guys, its too soft and details don´t come out right. In the States it´s easy to get good “white pine” which is fine, oviously Mahogany is great!!!. Give it a try…
Thanks on the tips you have given me, I will try them.
Will start the B-18 Bolo tonight, while waiting for a “good paint dry” on the D-510. I also have to have ready for a Dicember Contest a SM-81.
I don´t do much Military Vehicles, BUT!!! I have been wanting to do a " WWII, Russian armored
motorized Sled!!!"…don´t tell anyone but I started it last night…[:O]
The plans of the B-18 Bolo, a long forgotten bomber, many of these were destroyed at Pearl Harbour are ready so I will start cutting the fuselage tonight.
And the DH Dragon Rapide is also one I have been wanting to make for a long time …Like I said before guys, one of the beauties of scratchbuilding is that there is no limit to the aircraft you can build. You just need a good three view plan, wood and a will to make it…[:D]…and Time (Eternal Enemy)
I usually have about three or four projects going at the same time, if one bores me for a while I go and work on another…I have a Tupelov R-6 that only needs some details and paint but somehow it has been sitting in its hangar for over a year…waiting[:(]
I will be finishing, by the end of the year, a little “manual” ------- " How to “Make” your Own Scale Model Airplanes" . As you have seen in this thread, it will be a more detailed Step-by-Step. If you are interested in getting a copy just send me an e-mail and I will gladly send you one.
I hope with it that more modelers will be encouraged to " Make their own". This part of the hobby should not be lost, with XXI century materials plus good old wood it is a lot of fun, besides, modelers making their own will be a proud bunch!!![8D]
If you guys would like to see the B-18 as a step-by-step let me know also. I can gladly do so. On this one I will be doing the “glass” front using a " transparent plastic and candle" modelling technique, similiar to Vacuforming but much easier.
Enjoy your modelling as much as I do.
Gera
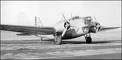
By the way, here is a pic of the SM-81, “Pipistrello”, a 1935 Italian Three engine bomber, widely
used in Ethiopia and later in the Spanish Civil War. I will be making this for a contest in Milan, Italy in early Dicember.


 are ready so I will start cutting the fuselage tonight.
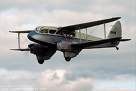 …Like I said before guys, one of the beauties of scratchbuilding is that there is no limit to the aircraft you can build. You just need a good three view plan, wood and a will to make it…[:D]…and Time (Eternal Enemy)