The challenge building a all chrome plated Mustang is that, how do you glue things together. I had to use a #7 blade and carefully scrape off the chrome in every area that was supposed to be fused. As for 1/32 Tamiya kits, you can see below a Tamiya 1/32 Zero. I also built the Spitfire, Corsair, and Mosquito.
Quote: “If your house is like mine I actually don’t look forward to holidays when I have to clean the table of my stuff so we can entertain! Lol!”
Cheers!
George
[/quote]
That is too funny…that is exactly how I am…everytime we have guests or family come for dinner, too…I have to clear all my stuff away into storage, clean and polish the dining table, reset it, then when everyone has left…take everything back out of storage and set my space up again! [:P]
Do you have a YouTube channel, and if so, do you upload any modeling videos?
Drop me a link if you do and I’ll reciprocate the honor and subscribe to you.
That is too funny…that is exactly how I am…everytime we have guests or family come for dinner, too…I have to clear all my stuff away into storage, clean and polish the dining table, reset it, then when everyone has left…take everything back out of storage and set my space up again!
Do you have a YouTube channel, and if so, do you upload any modeling videos?
Drop me a link if you do and I’ll reciprocate the honor and subscribe to you.
Cheers,
[/quote]
LOL! I am glad I am not alone in this world of kitchen table comendearing! Is it bad to wish I had a bigger kitchen table? I digress. You are way ahead of me with YouTube at this stage. Maybe someday. In the meantime I will continue to learn from you I suppose.
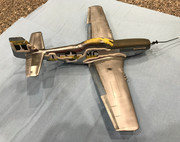
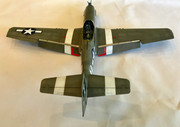
Well, I managed to get home for a few days and made some progress. I did not coat the NMF with clear before I applied the OD paint and stripes. I used Mission Models acrylic paint for the OD. It dries to a low sheen, rather than a dead flat so I made an attempt at decaling without a gloss coat. I got most of the large decals on with no silvering but did have some appear on the small placards at the wing fuel filler caps. I got through it ok with some light scuffing and micro sol applied a few times. I think before I finish with the rest of the small placards I will be gloss coating just to be safe then weather it down from there. I am one of those builders that just plows ahead sometimes in the excitement of seeing it come together. I had to get back on the road for my job so it will be back to a slow pace for a while. Just thought I would share…
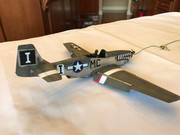
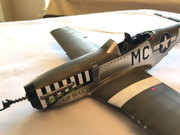
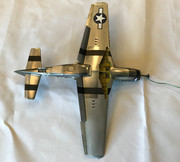
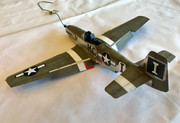
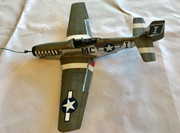
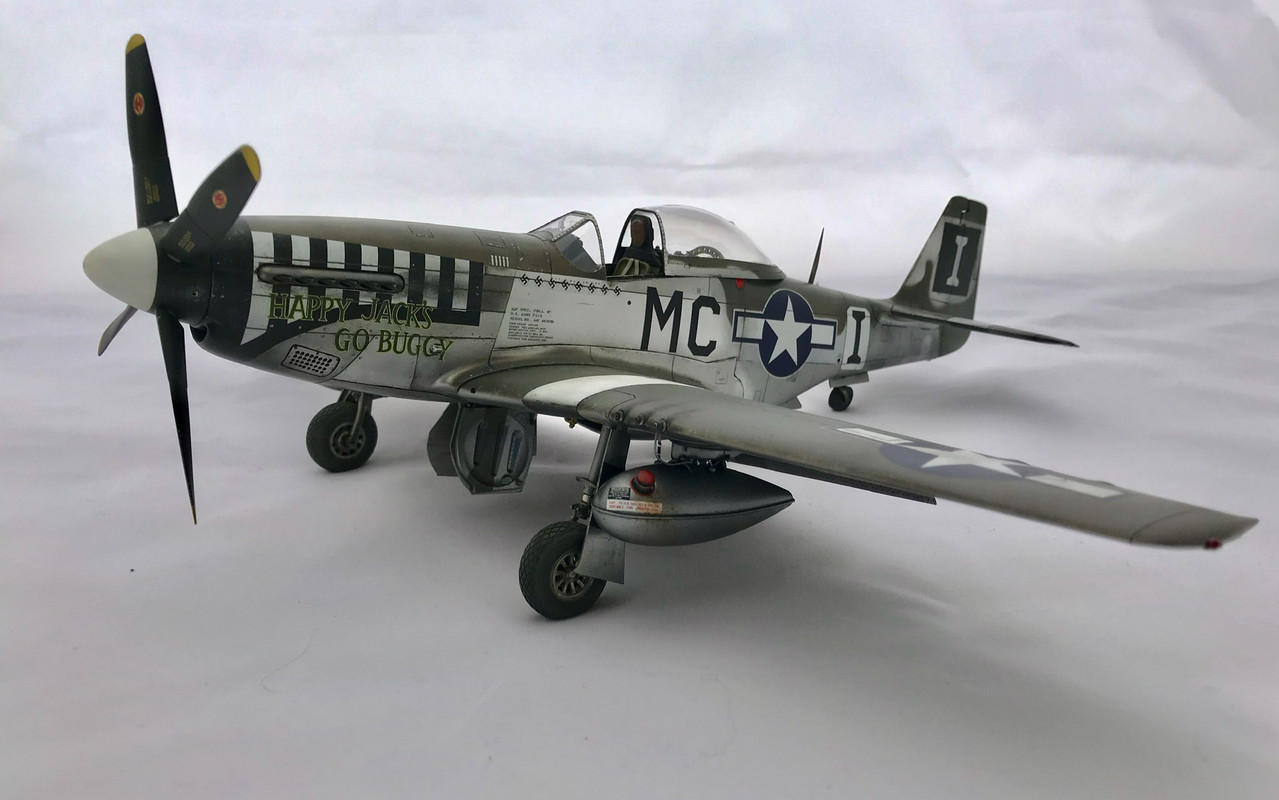
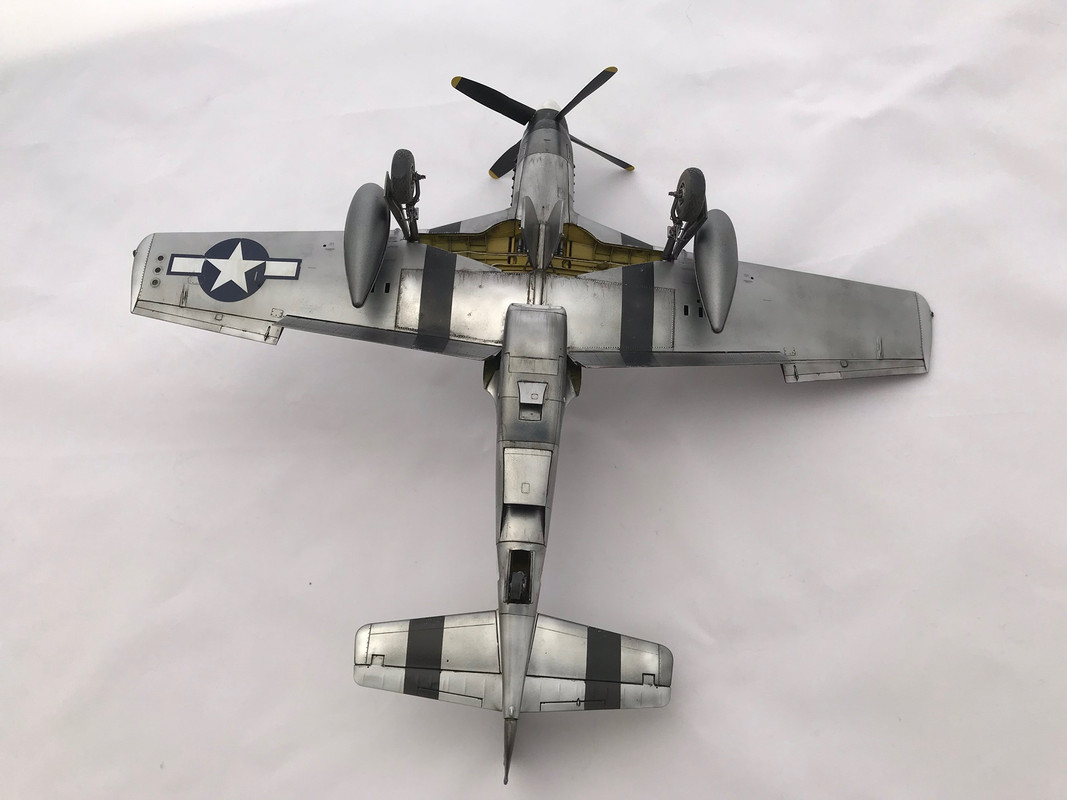
Hi Folks, sorry for not getting any updates over the last few months. My job has been keeping me from being home and now have finally been able to finish. I hope you enjoy. I am actually quite pleased but welcome any and all constructive criticism you can offer. Thanks! George
All the builds I do and the pics I post are Imgur ones.
I wash through photoshop and resave as a JPEG and then upload to my Imgur account, having a new album for each build.
My camera is a big professional one with a full frame shutter/sensor and so when I upload I use the ability on the website to change the size to one for 19 inch monitors as I figure that’s what most of forum members will have.
I moved when Photoshop stated dmanding money with menaces!
To me, this is no different than regular paint. I never trust a glue joint if I do not scrape the paint away, so the use of a metalizer for me entails no extra work. BTW, this thread convinced me to order the kit. Got the kit the other day, still waiting for some of the third party detail.
I found this kit to be more enjoyable than the Tamiya kit. I hope you will also. I will say that I don’t think it is cheaper if you add all the detail. I will say that once it is done with those details I would not go back to the Tamiya kit unless I wanted to display the engine and gun bays. I put together the following as a description of what it all included in this build:
Revell P-51D-5NA 1/32 scale
Depicting Happy Jack’s Go Buggy flown by Major Jack M. Ilfrey. 79th Fighter Squadron, 20th Fighter Group. December 1944.
I’ve really gotta hand it to you for making such a great build out of this kit. Very nicely put together and fantastic job on the paint, decaling and weathering.
Thanks so much for the kind words! I appreciate it! I did really enjoy the kit. The aftermarket stuff not only presented an additional challenge, but a very nice reward in appearance in my opinion. Best Regards, George


 Hi Folks, sorry for not getting any updates over the last few months. My job has been keeping me from being home and now have finally been able to finish. I hope you enjoy. I am actually quite pleased but welcome any and all constructive criticism you can offer. Thanks! George