This has helped a bunch! 'Preciate 'cha!! =]
Does anybody out there happen to know what color the interior cowl area of the these AVG P-40s were?
Here’s a quick update. Nothing really special here, but I thought I would show how I’ve mated the cowling panel to the separate kit piece. I’ve also got the gun fairing attached to both parts as well.
You’ll note the cut away part for the .50 cal gun barrel to fit through. I’ve dug through everything I could to find a photo of this and came up with nothing. This is the solution I came up with mostly out of functionality and little to do with anything I referenced. But it seems to make the most sense also.
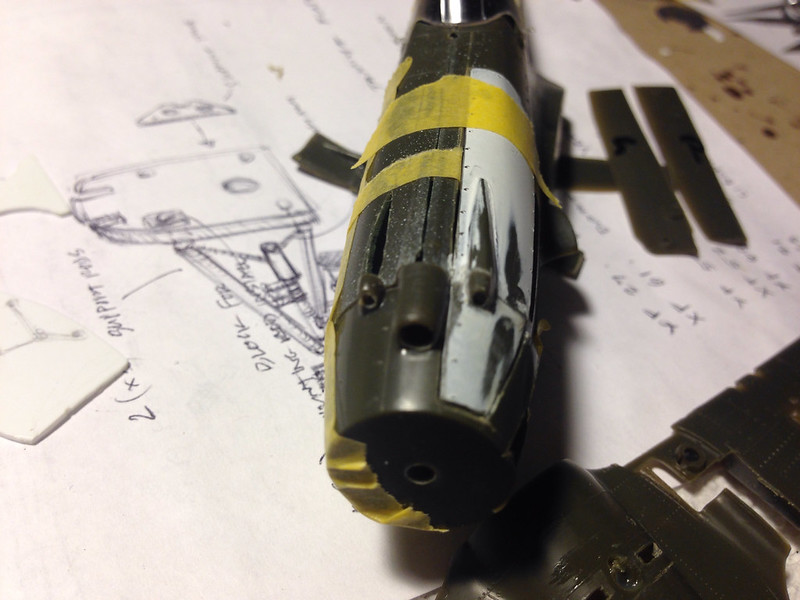
The fairing has been sealed up with CA and sanded smooth to fit flush over the two kit parts. Same with the cowling.
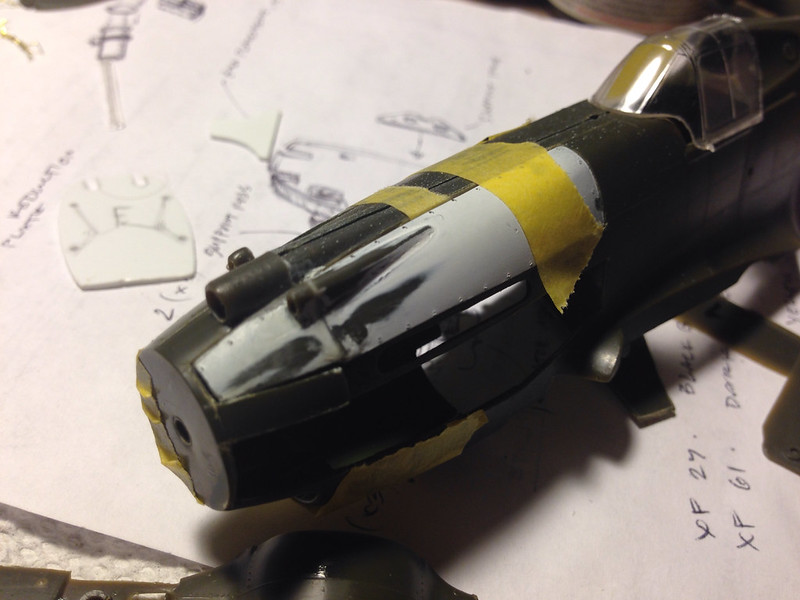
It’s a little difficult to see in the photo since this is just taped to test fit, but so far all the parts are matching up without any unsightly gaps. *fingers crossed. =]
Great work Bv! Looks really nice!
Steve
Here’s a quick reposting from the P-40 GB. =D
Just made some major progress on this V-1710-33 Allison. It hasn’t received a clear or flat coat yet. I’ve got a few more things to add still before I can finish weathering everything here. One thing I had to settle on was attaching the rod for the motor mount onto the engine first. It was just too touchy trying to match it to the engine while a part of the rest of the mounting support arms. There’s also some touch up painting to do still, but I really needed to get to this part so that I could move on with it.
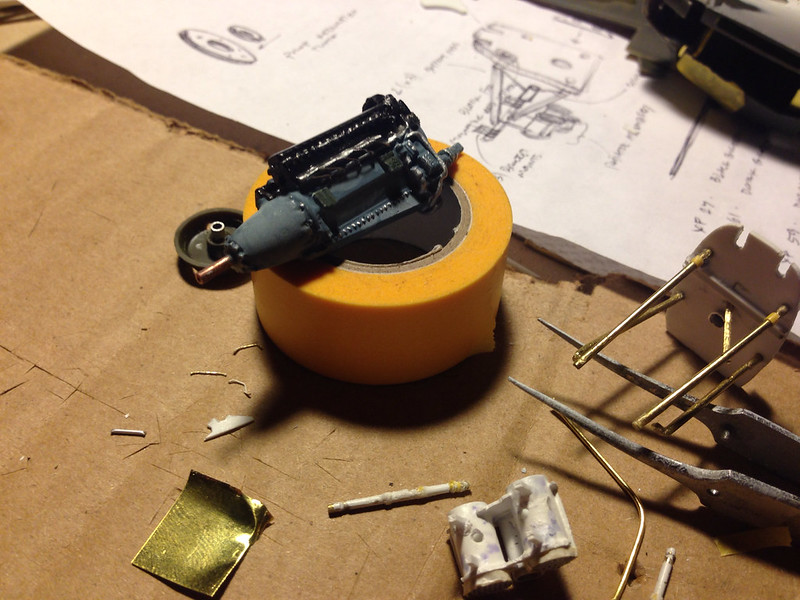 image by brittvallot, on Flickr
 image by brittvallot, on Flickr
You can see here where a few of the ignition cables have fallen off while handling. They’ll get put back on later.
 image by brittvallot, on Flickr
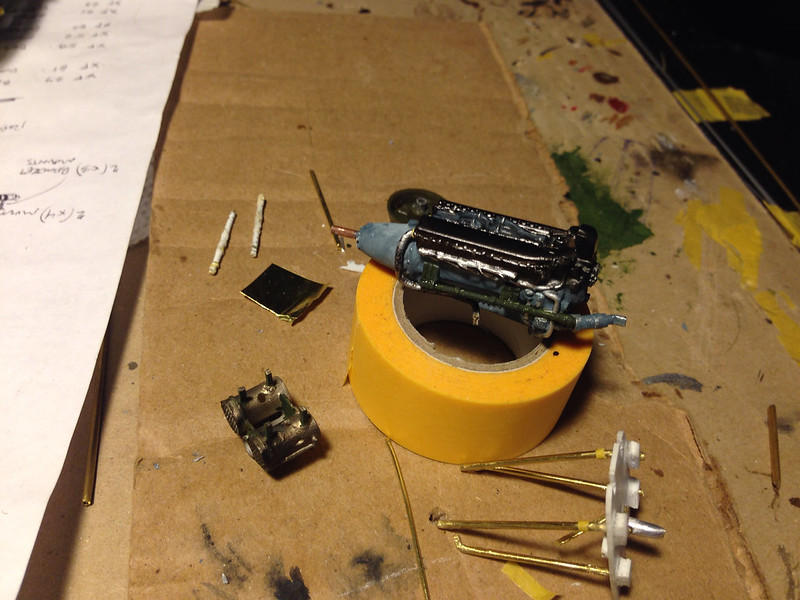 image by brittvallot, on Flickr
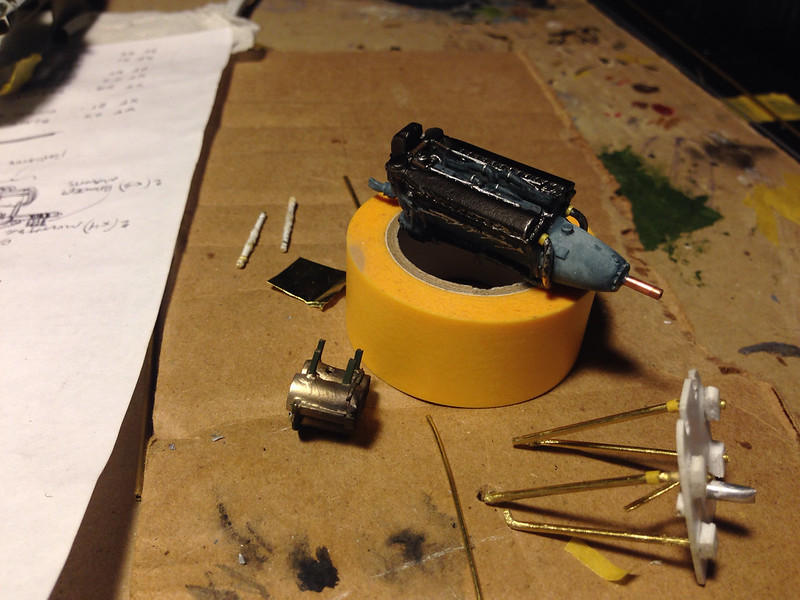 image by brittvallot, on Flickr
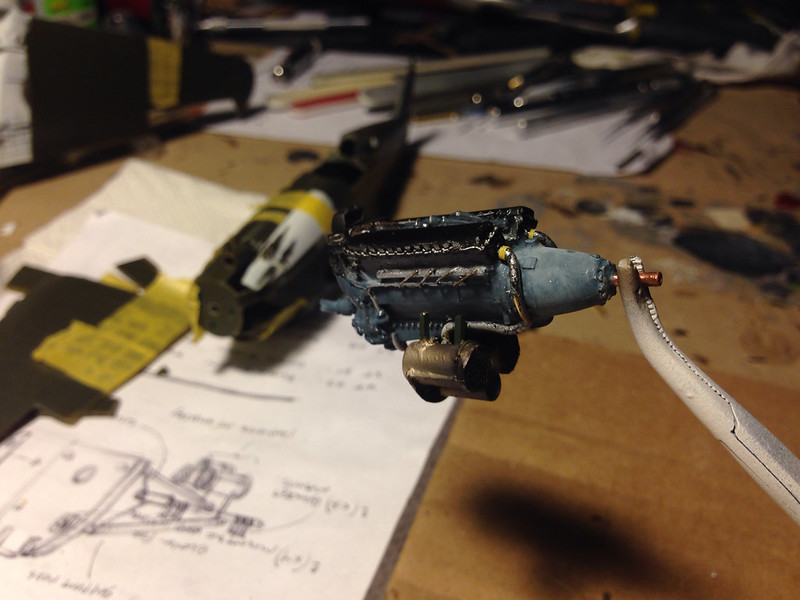 image by brittvallot, on Flickr
Here the radiator is loosely attached to test fit. Quite pleased with it so far. =]
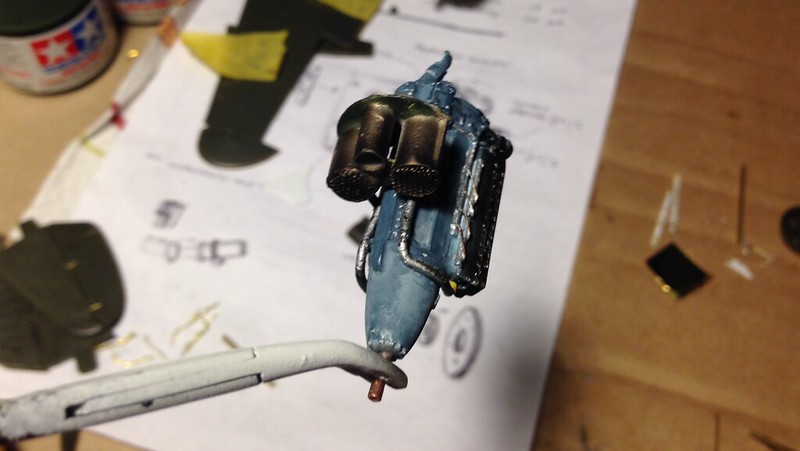 image by brittvallot, on Flickr
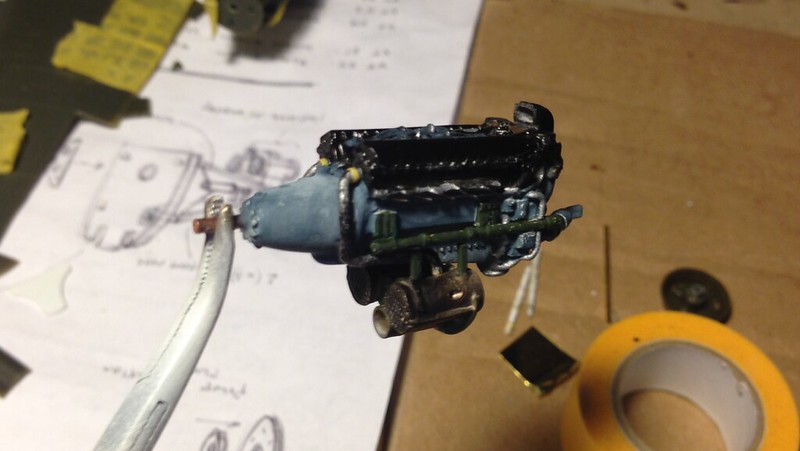 image by brittvallot, on Flickr
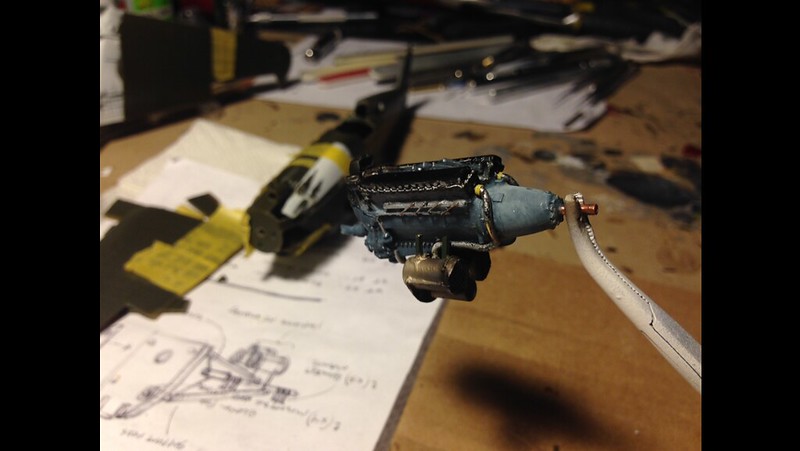 image by brittvallot, on Flickr
The blue is a Tamiya’s Medium Blue. I made a quick coat with the AB and followed up with some Med Blue lightened up with Flat White with a fine brush to fix up weathering the paint in places. I mixed and thinned the color to lay down somewhat what randomly.
The top over the crankcase is painted in Alclad’s Jet Exhaust. It puts down a nice dark color that isn’t quite black but has enough character to look to reflect some of what is going on with the rest of the engine being hot. The oil and coolant piping is made of brass rod and primed and painted in Tamiya’s Flat Black and then Flat Aluminum. The radiator is painted in Alclad’s Pale Burnt Metal first and then touched up with Exhaust Manifold. All of the green parts are just painted in Tamiya’s Olive Green for now so that I have something up there. I will later paint these with a color that will go down on the rest of the cowl parts of the engine area.
This is a really fantastic resin engine from Engine & Things and with just a little bit of love and some scratchbuilding, you can make something quite special to add some life to your build. =] I’m glad I got one!
Finally decided to install the cockpit. Here it is now.
I had to fix up the bulk head here to make the TD cockpit fit:
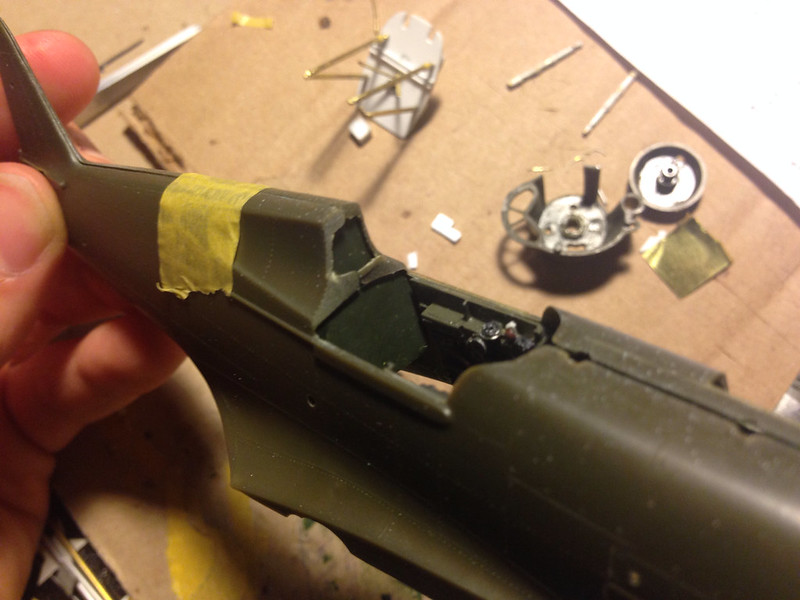 image by brittvallot, on Flickr
IP installed:
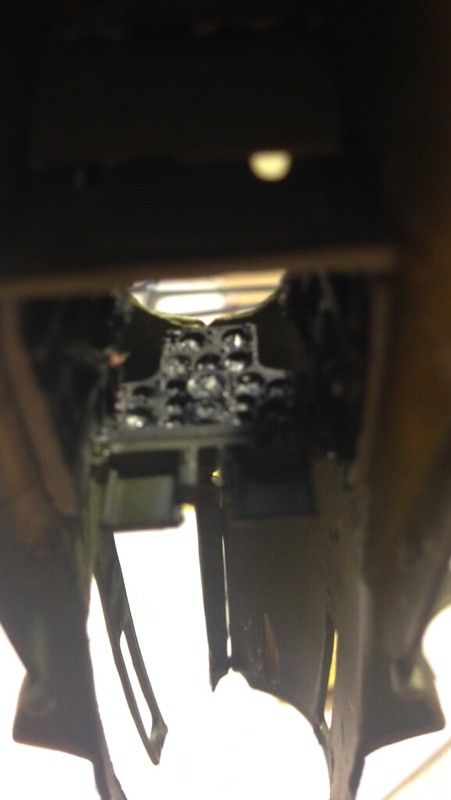 image by brittvallot, on Flickr
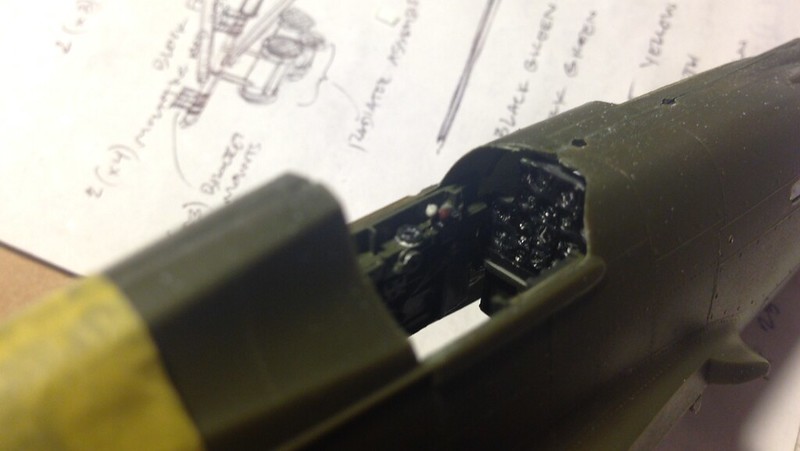 image by brittvallot, on Flickr
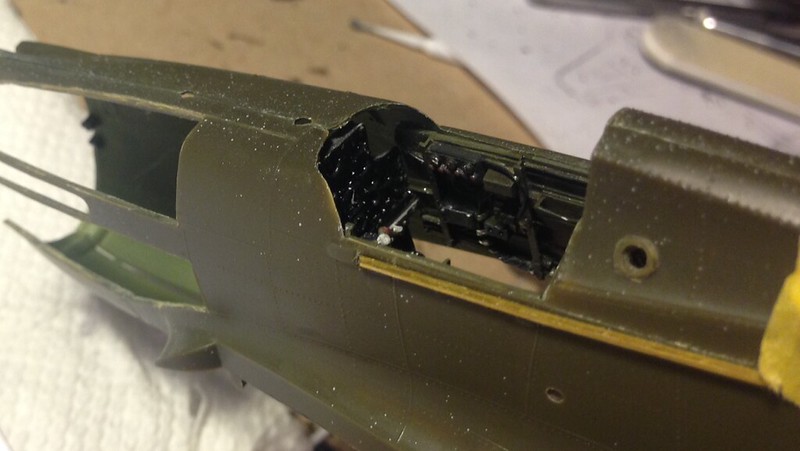 image by brittvallot, on Flickr
Bulkhead behind the seat:
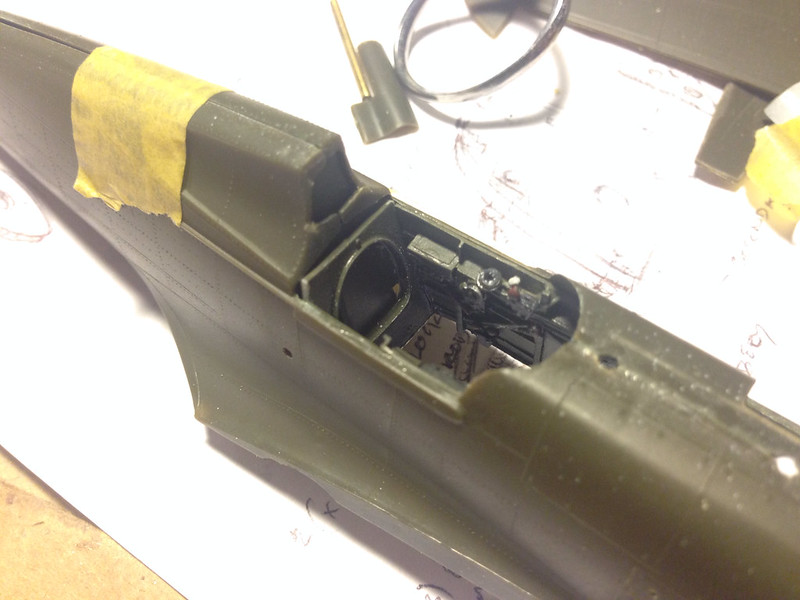 image by brittvallot, on Flickr
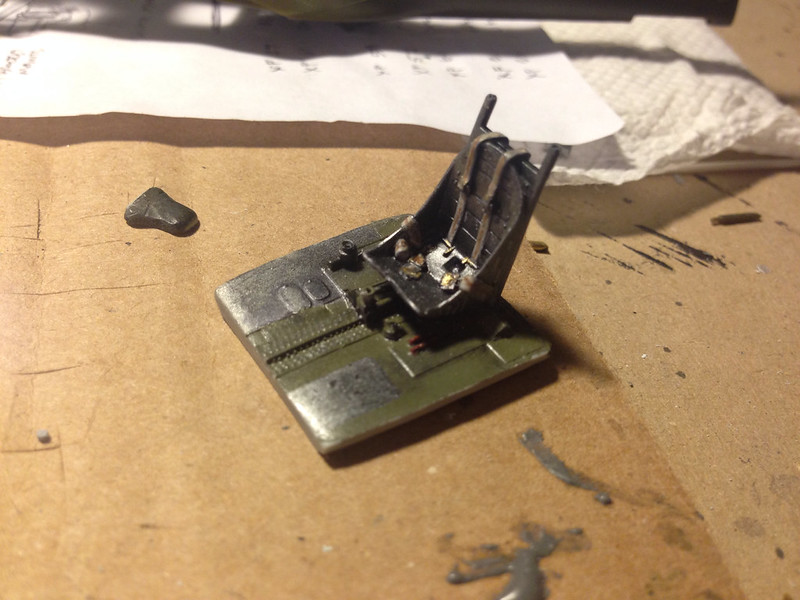 image by brittvallot, on Flickr
Everything in place:
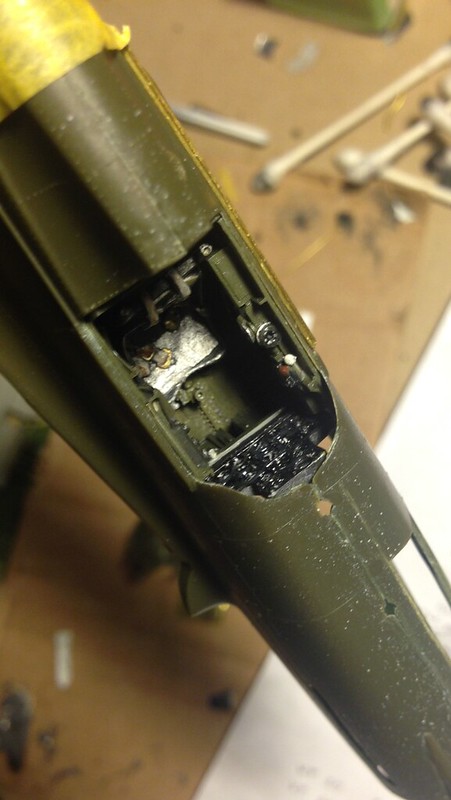 image by brittvallot, on Flickr
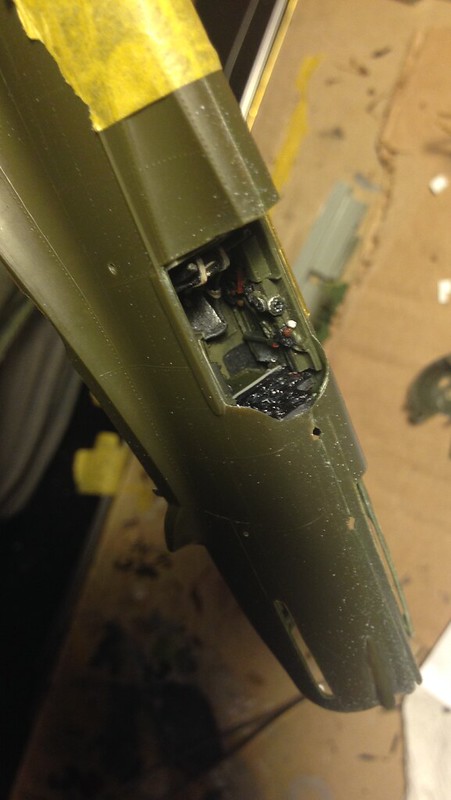 image by brittvallot, on Flickr
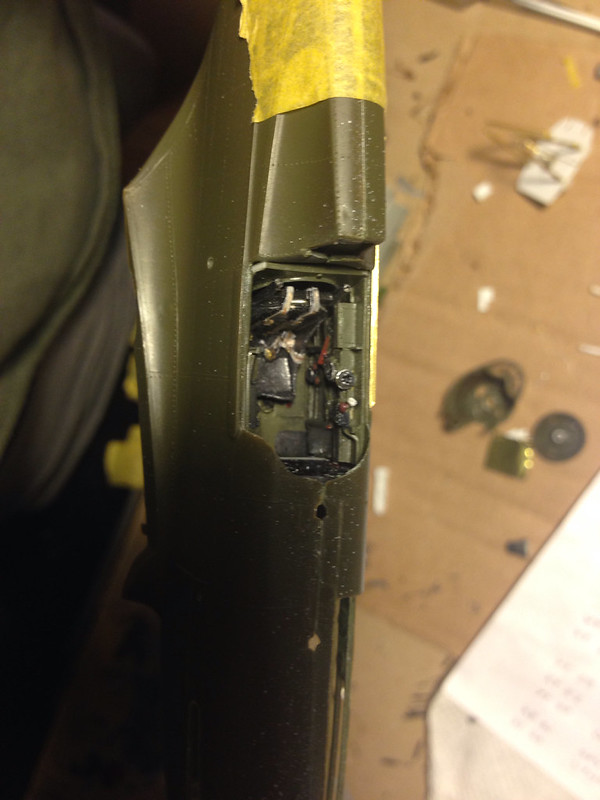 image by brittvallot, on Flickr
I did have to mess with the fit a bit more. Usually the case when you actually go to put it in. So, keep your eyes open Ray. The floor needed a bit of narrowing to get it to seat better. Nothing a sanding tool can’t take care of…And you might want to consider doing something similar behind the seat as well. Just double check your fit before you glue anything in.
I asked about it on the GB, but I wanted to expand it to the Aircraft section as well…any thoughts on wiring the IP here? I’d like to for the practice, but I’m starting to think none of this is remotely visible.
Great work on giving this classic kit a new life, BV!! Keep up the awesome work; I’ve been following for awhile and will use your posts as an additional resource for my builds. (Although I don’t think I’ll be able to go as “crazy” with all that close, detailed work!
Thanks Dave! That’s refreshing to hear. For the better part of two years, I dug through pages of forums looking for examples and tips on how to produce these scale aircraft nicely. So, I’m happy to pay it forward as well as continue to gather advice. =]
So here’s what I have scratched out so far with the .50 cal set up and the bulkhead behind the motor mounts.
On account of the time left for this build, I decided not to engineer another bulkhead where the .50 barrels rest. Instead, I just fashioned a shelf that also reinforces the fuselage. It’s basically just an L bracket.
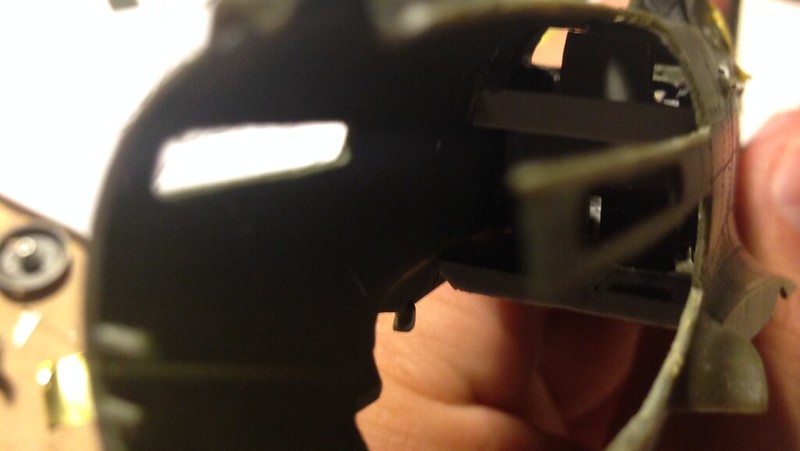 image by brittvallot, on Flickr
Next, I’ve built up the coolant expansion tank with the straps to hold it down and some other goodies…primed it for paint.
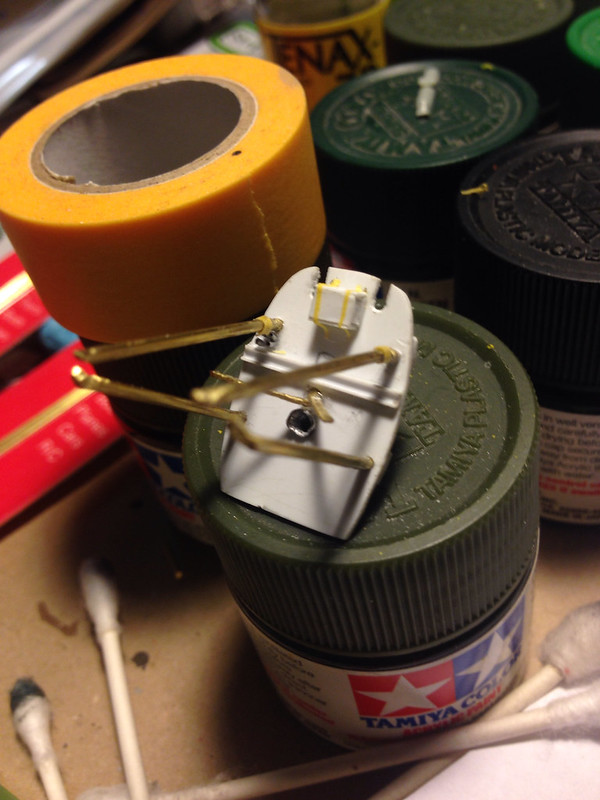 image by brittvallot, on Flickr
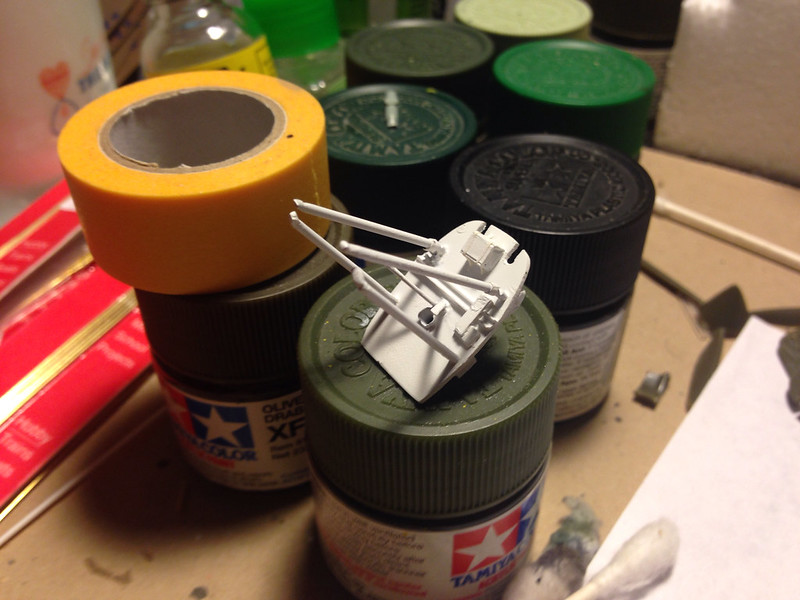 image by brittvallot, on Flickr
So far…everything seems to still be right on the money. No ill-fitting parts yet. I had to be careful with that strut for the .50s. It was a tight fit and I didn’t want it to spread the fuselage to the point where my engine mount would be loose.
Critiques and comments are always welcome. =]
Coming along nicely. The detail work on that TD pit looks great. You cited issues with the fit. Isn’t it designed for this kit?
Joe
It’s actually for the Academy/Hobby Boss kit. So it did take a bit of tweaking. More so on the later end of fitting it somehow… ![]() But I never doubted! I was going to see that thing fit in there one way or another!! The only part that really needs modifying is the floor. I have just learned as of last night that the IP will need a little “more” help in securing to the fuselage side walls. Soooo… I’ll be back with more from that.
But I never doubted! I was going to see that thing fit in there one way or another!! The only part that really needs modifying is the floor. I have just learned as of last night that the IP will need a little “more” help in securing to the fuselage side walls. Soooo… I’ll be back with more from that.
Keep your eyes open Ray. =]
Wow, what a great build! I love the engine and the detailing you’re adding under the hood, Britt! You’ve got great skills for scratchbuilding. This kit is one of my all-time favorites, and the additions you’re making make it a real jewel.
You mentioned about using Milliput. I recommend it, especially if you haven’t worked with 2-part putties. It is relatively simple to work with, and is good for filling seams or for sculpting. It comes in two logs, one of putty and the other of the catalyst, and you just mix equal parts by kneading, then use it for whatever application. It can be smoothed with water while you work it–water applied with your fingertip, or with a brush-and when it sets, it takes sanding very well. A box will also keep for a long time, though over time, the logs can start to dry out, forming a skin. I’ve had a batch for over 20 years, and I can still use it, but I have to shave away the outer skin, to get to the good part. I have that batch so long, because I moved to epoxy putties, settling on Aves Apoxie Sculp.
There are also different grades of Milliput, based on the fineness of the grain. Anyway, you should get yourself some and see what you think. From the rest of the work in this build, I suspect you’ll pick up working with putty and become a master in no time.
Best regards,
Brad
Oh, I remembered one more thing about this kit, but I don’t think it will be an issue for you, because you’re adding the engine. I noticed that the front edge of the fuselage is sometimes a little pinched, compared to the back side of the nose piece. It can cause a visible step where the three kit pieces meet. I’ve made spacers to push the sides of the fuselage out enough, to try to correct it, or at least, make it as invisible as I can.
Brad, thank you so much for everything packed into that post! I long for helpful tips and methods of treating some of the trickier parts of scale model making. I may stay in the dark about dealing with some particular snafu for quite a while until I stop being lazy and look for a better way to tackle it. So it’s posts like these that I’m only too happy to see.
I checked out the milliput site and was very happy about what I saw. This is exactly what I’ve been looking for. Too many times I’ve thought how I wasn’t happy with the shape something made and my only solution was to sand it down since I couldn’t build it up proper. So this will come in quite handy in the future. I just needed to know where to look. =]
And thanks again for the encouragement. I’m afraid I might have bit off more than I can chew this time. That ticking clock might get me! =P
They’ll be more to come soon.
You’re very welcome! If anything I can add is helpful, I’m glad. I’m looking forward to your next installment.
Last quick update here for a little while. Honest! ![]()
Started looking more at the wheel bay just so I don’t have any surprises later on when I’m ready to get the wings together. I realize the wheels will cover mostly everything, but since I’m going the distance already I figured I’d do a little something for all visible areas. Didn’t want to over do it and find issues with the fit so i settled for this:
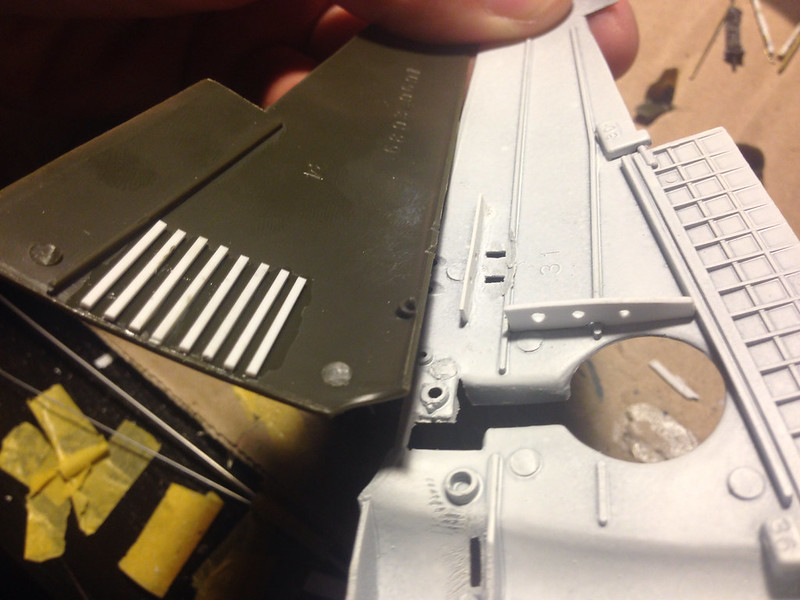 image by brittvallot, on Flickr
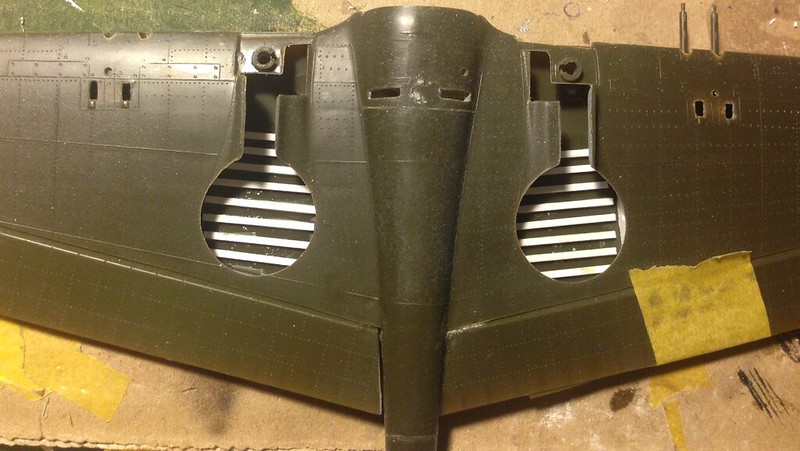 image by brittvallot, on Flickr
 image by brittvallot, on Flickr
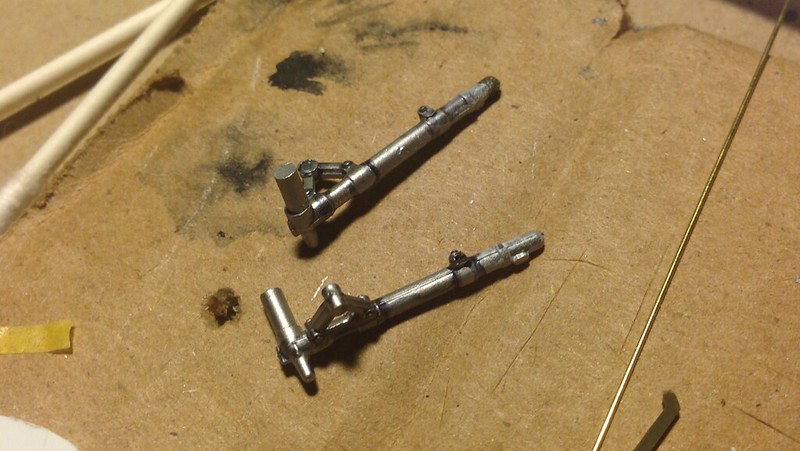 image by brittvallot, on Flickr
Still going to fix up the landing gear here. This is a stopping point for now. Anybody else out there who’s tackled the Warhawk have any input…hit me.
Okay. I’m back with a quick update before the weekend starts. Made a little progress towards getting the engine wired, hosed, and probed so she can be installed onto the engine mounts ASAP. Hope to get her finished by Tuesday. I am very wary of where I will locate the magnets in order to pop the panel on and off for viewing. If anybody out there has had experience with this sort of thing…I’m all ears. =]
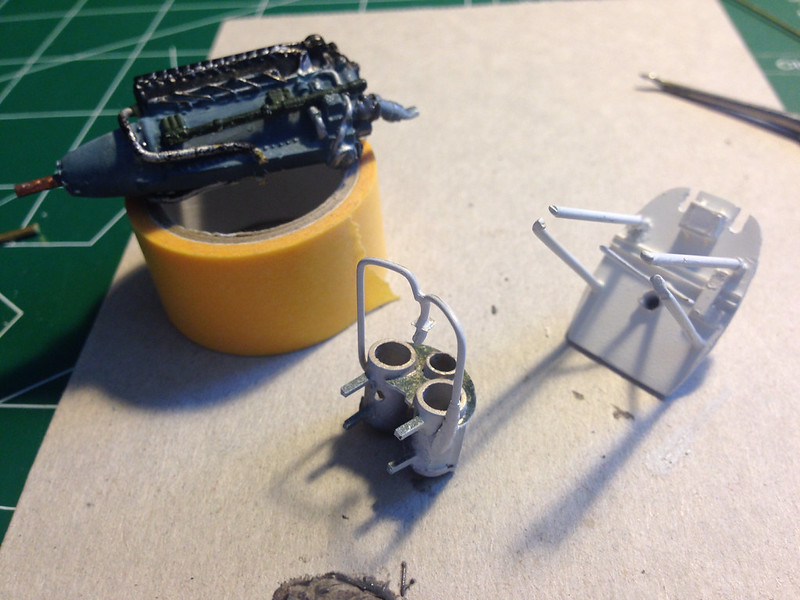 image by brittvallot, on Flickr
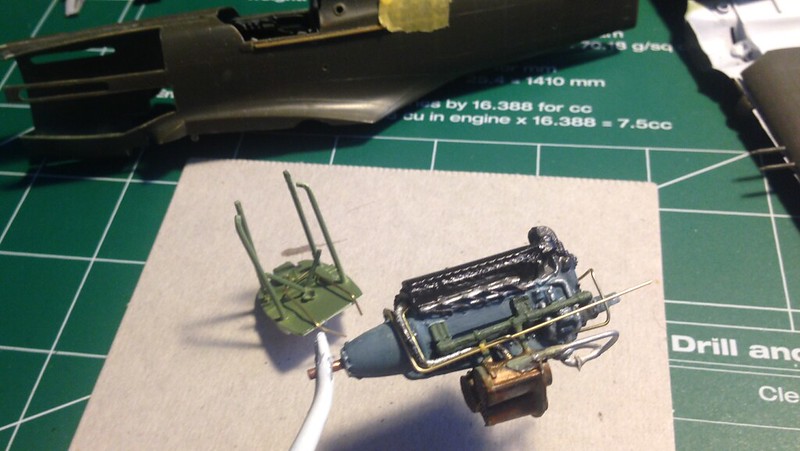 image by brittvallot, on Flickr
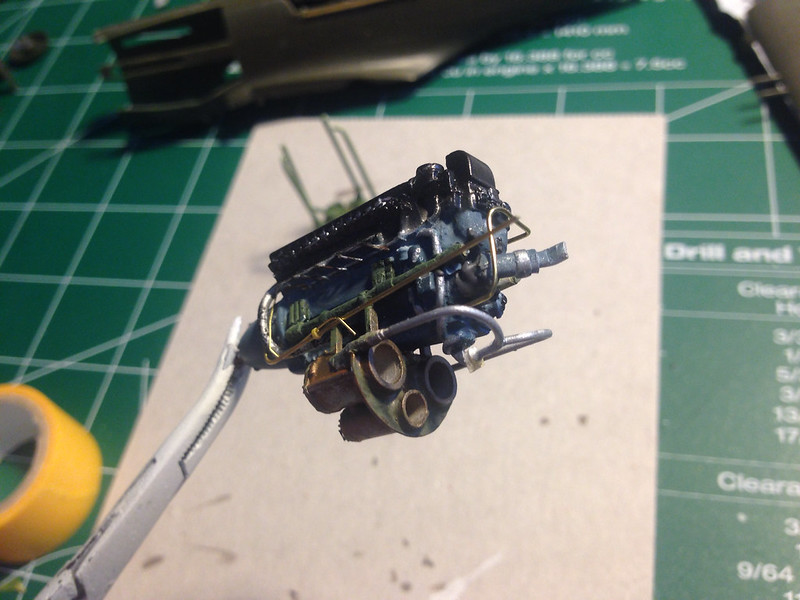 image by brittvallot, on Flickr
Happy 4th everyone. =]
Wow, that looks fantasic.
Now I hafta learn how an aircraft engine works to become a better modeler…LOL
Thanks Jay Jay. I’d also recommend grabbing some extra patience at the store and perhaps some kind of means of holding/securing what you’re working on so that once you complete a job and move on…you don’t break five other things off while working on something next to it. =[
I exercised every four letter word I know and made up some new ones too. I’ve had to redo everything you see above. The tricky part after this is all completed will be to get it installed without breaking anything else.
I usually seem to avoid breaking off the fiddly parts. My biggest downfall is having glue blobs appear at the joining of the parts which ruins the whole look. I haven’t been able to resolve that problem yet, any advice ?
Of course! What you need to get to fix that is one of those extender tips that stretches out real long. There’s a couple of different styles of tips. Most come around one to three inches long. You can cut them to whatever size you prefer but the trick is that the opening is maybe only 1mm wide. That will allow you much greater control over how much CA glue you deliver at one time. =]
I used to have similar issues when I first picked up modeling scale aircraft in college. Actually, I was 8 when my dad did most of the work on a 1:72 F-15C. I always thought to myself…“one day…” and then it was one day at the end of a long semester I had plenty of time off to try one. It would be three more years before I walked into an actual hobby shop that was stocked with all the goodies one would need to go to work. I was amazed on what I had been missing out on. =D So if you haven’t yet…I would recommend you taking a stroll through your local hobby shop and peek at what they’ve got. You’ll no doubt find a few more goodies to make life easier for you.