Jim, while the kit itself is nice, personally i think the PE take it to anotehr level. I did the same kit you have last years and used the Griffon Premium set. I had a couple of issues, but nothing a little head scratching couldn’t over come.
Hey Steve, I just came across this build. It is great to see you building and to see what you have done thus far. It looks great. Nice PE too.
My FSM email notification is still broken, going on over a year. Unfortunately, when you guys update I won’t know about it. I will try to check from time to time.
Keep up the good work, sir.
Al, Steve, Francisco, Bakster
It’s great to hear from you! How is the Icarus going? Last time I looked it was looking fantastic bud. Thanks for checking in.
It’s been tough to get to the workbench but I’m trying to get there even to do just a little bit.
Steve
Alright, here’s a small update as usual.
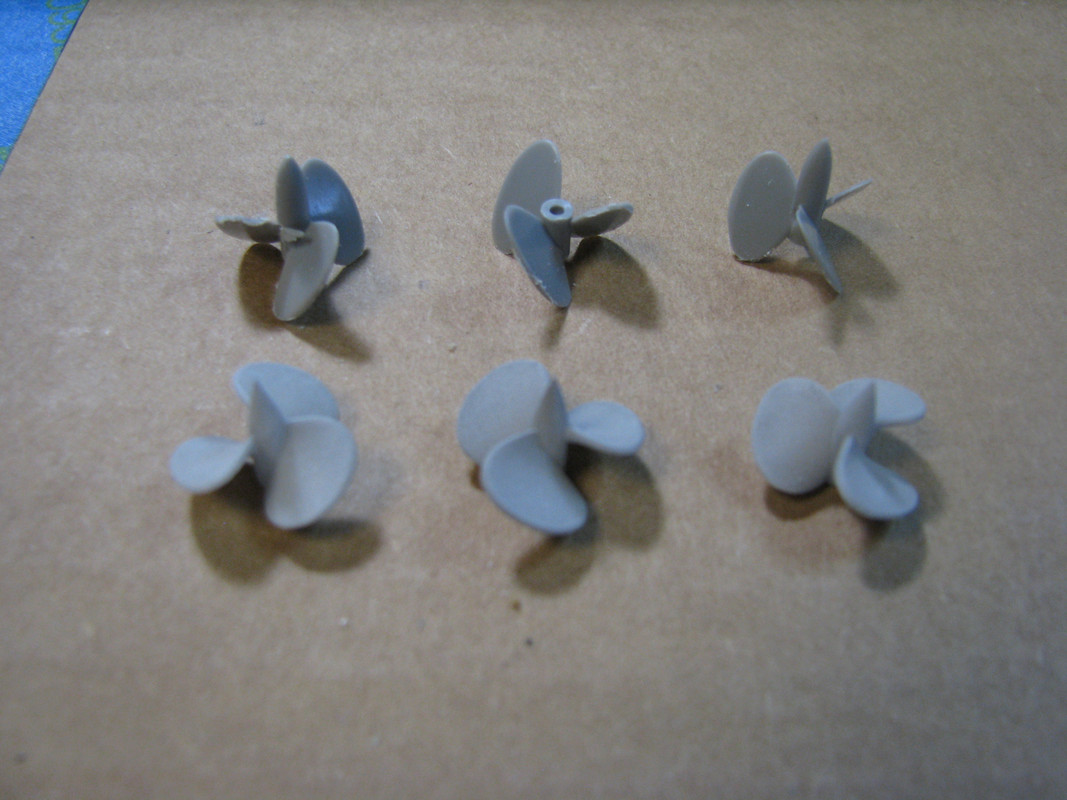
I finally got up the nerve to get the center prop installed. The replacement props are 3D printed and they look great. But know that for the center prop you’re going to have to do some surgery and brother, they ain’t cheap! The main thing to remember is measure, measure and then measure again before surgery. The old addage about measuring twice, cut once is great advice. I only ended up cussing about 40 times or so, so not bad.
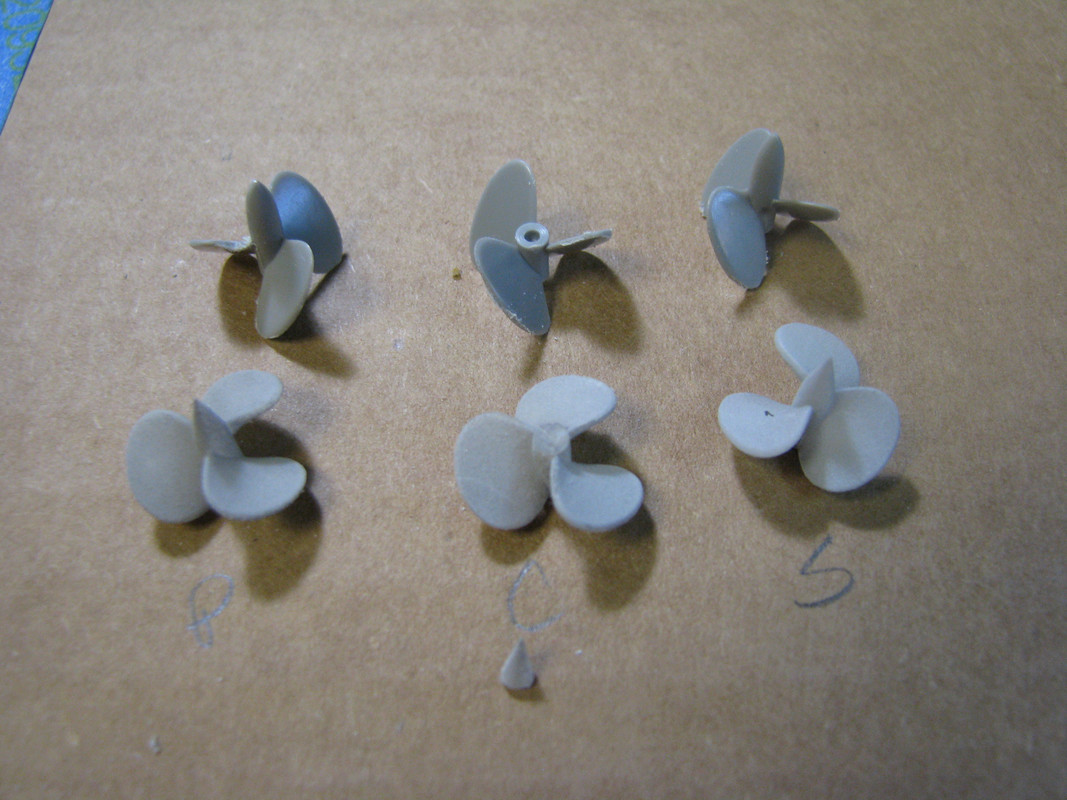
The first picture shows the difference between the kit supplied props and the 3D props. The kit props on the top, are of the wrong shape big time.
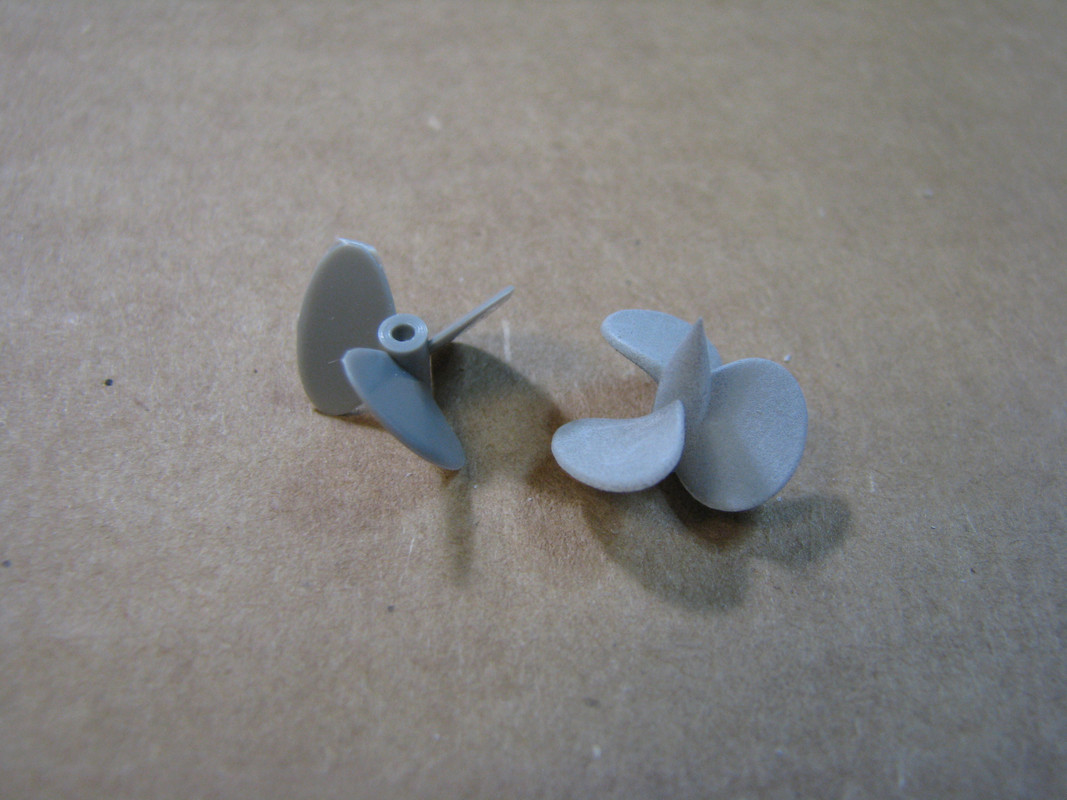
And here’s a side by side view with the kit props on the left.
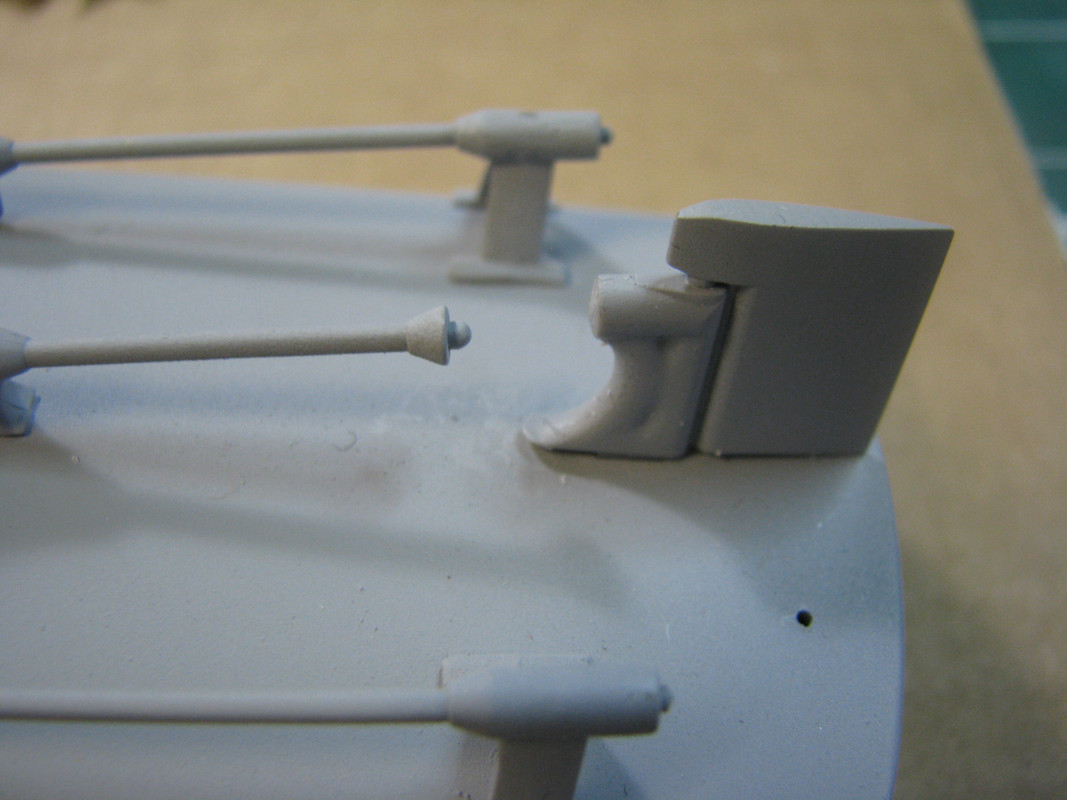
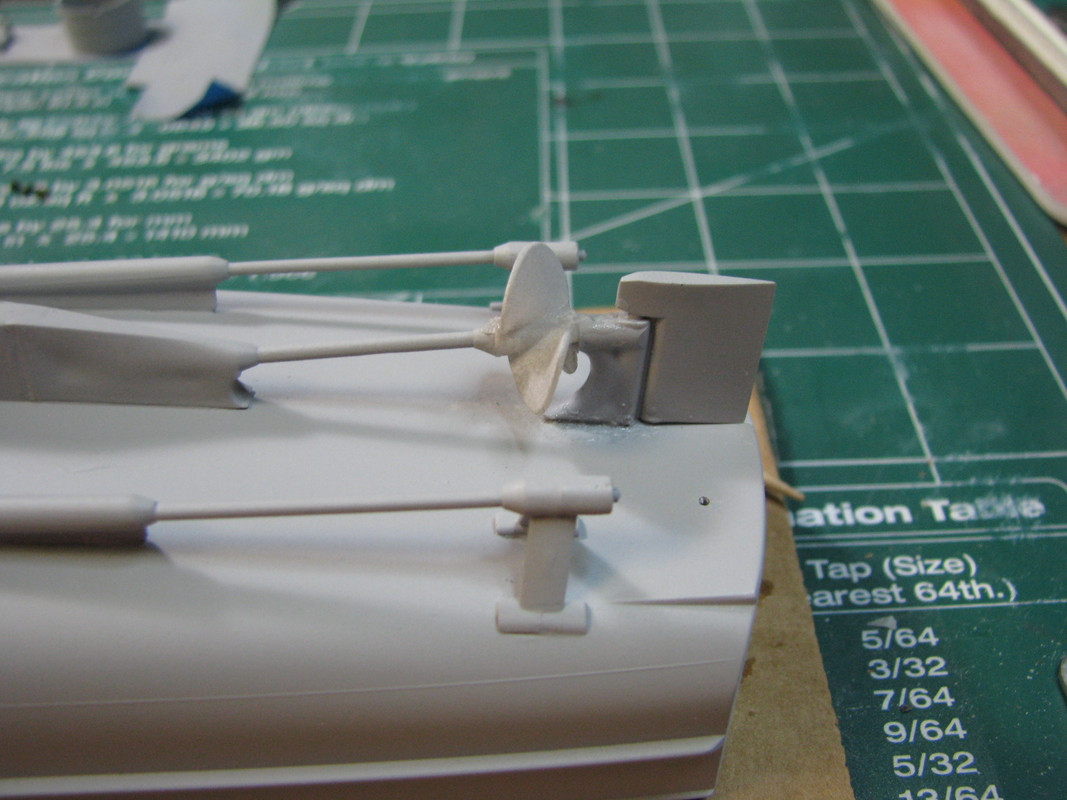
The center prop needs to connect to the center rudder as shone here.
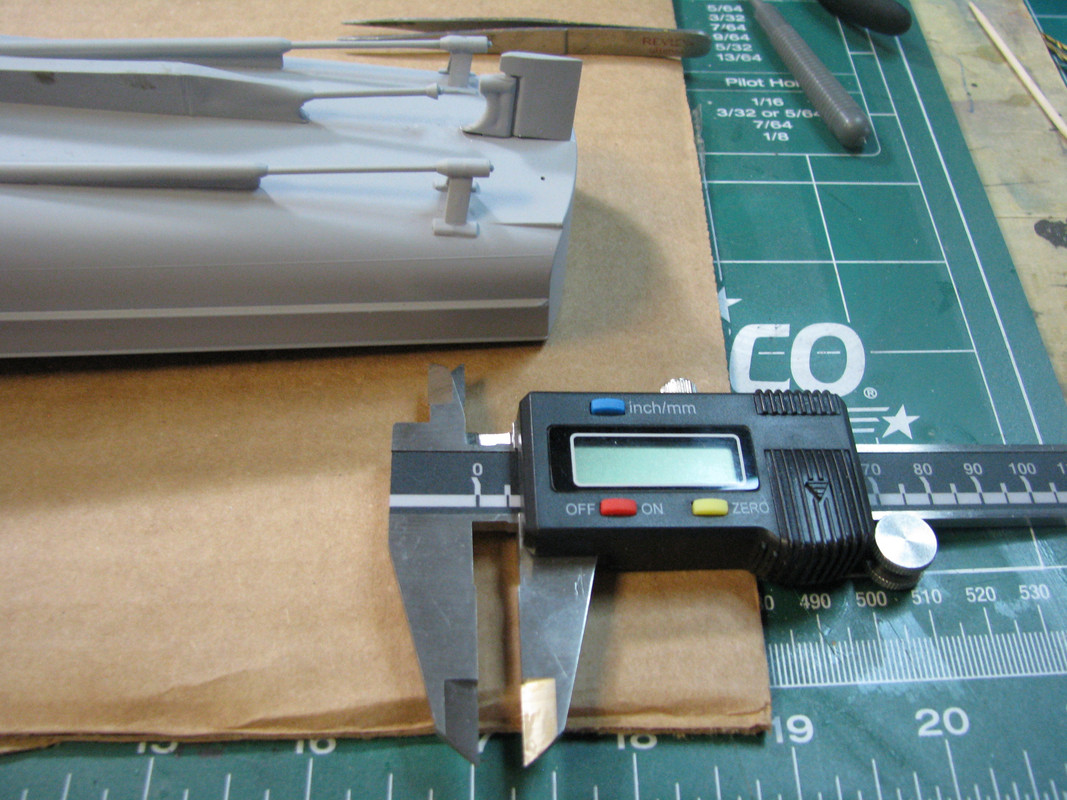
So it’s time to break out the calipers. This is the measure twice and cuss multiple times. Because the 3D printed props are all have the tail. Also, it’s important to note that one of the props is the reverse of the other two. This is the way it supposed to be, you just have to remember that the center and port prop are the same while the starboard prop is the different one. This picture also shows the suregery on the tail.
I cut the tail off a bit short so that I could file the difference as needed. It’s always easier to remove than to add. In this case impossible except to buy a new set.
After numerous dry fittings and filing I got to here. As you can see, there is still clean up to do, but I think that it came out successfully.
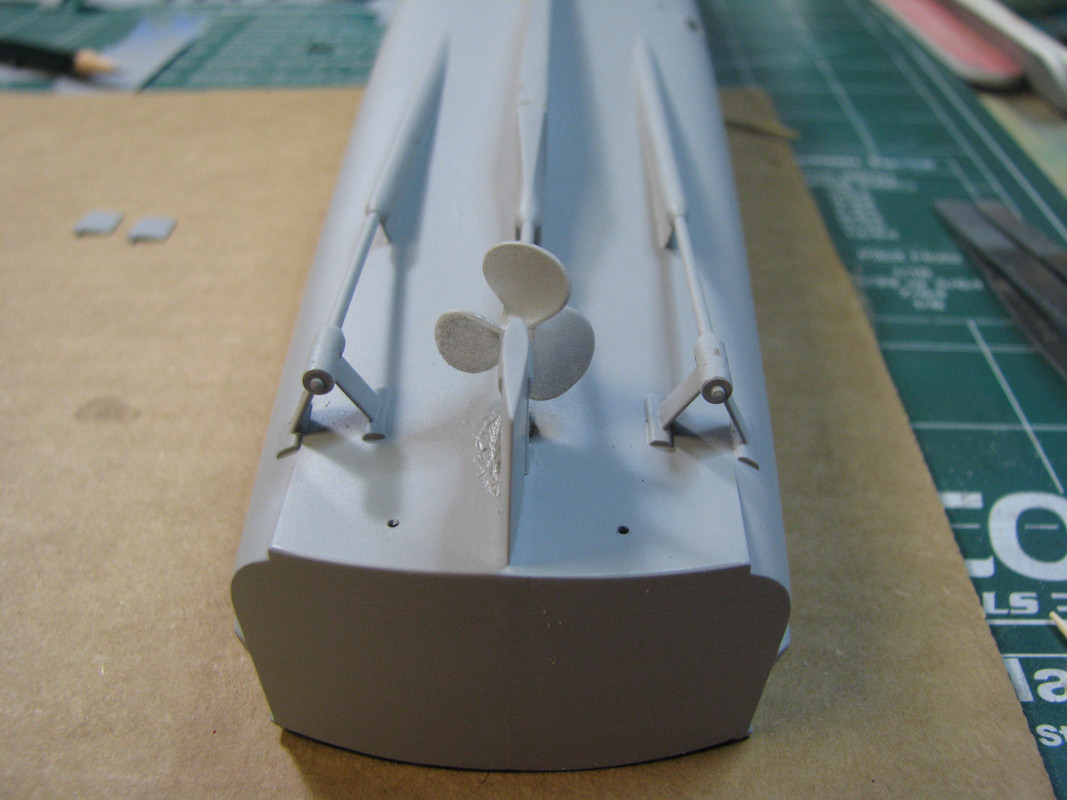
After cleaning up the mess, I’ll install the two outer rudders and maybe get some paint on the hull. Now it’s back to the fore and aft decks and bridge.
Steve
Looking good Steve!!!
Jim [cptn]
Stay Safe.
Hey Steve, Icarus is done. Just building the base now.
As always Steve, I love your work. Watching.
Thanks for checking in Jim and Steve!
Just a really small update. Haven’t been at the bench lately, my hands are giving me fits again.
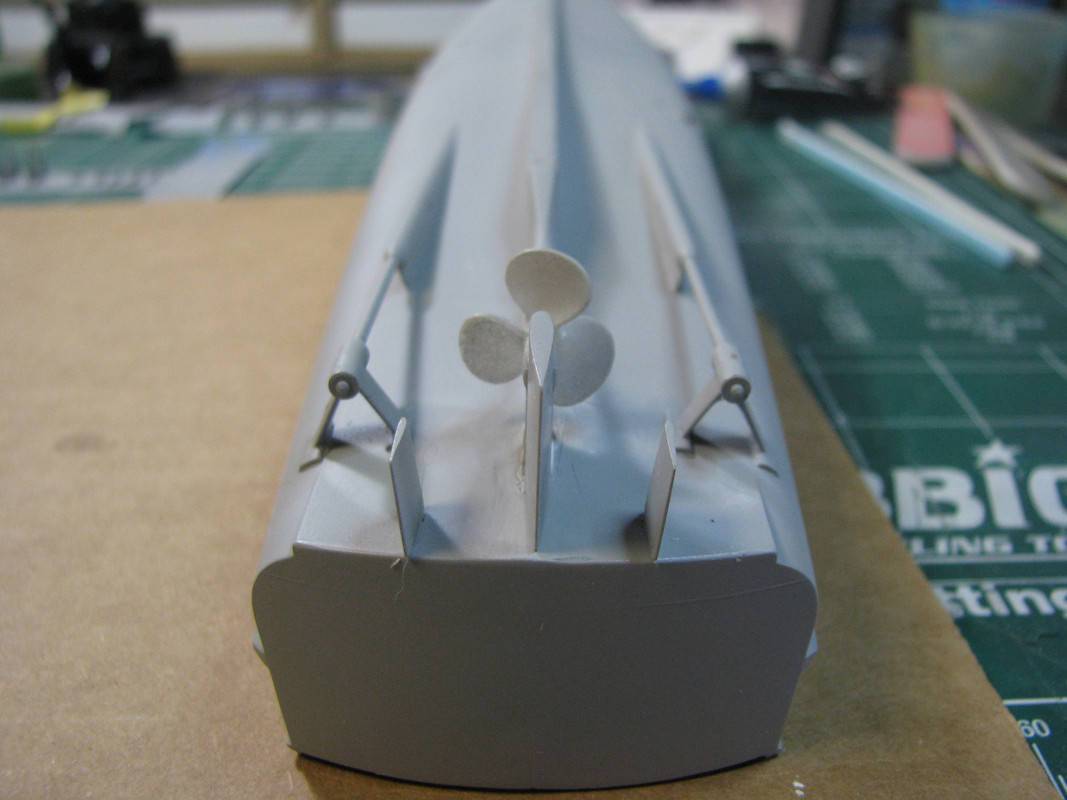
This just shows the clean up, putting and repriming on the center prop housing.
Enjoy,
Steve

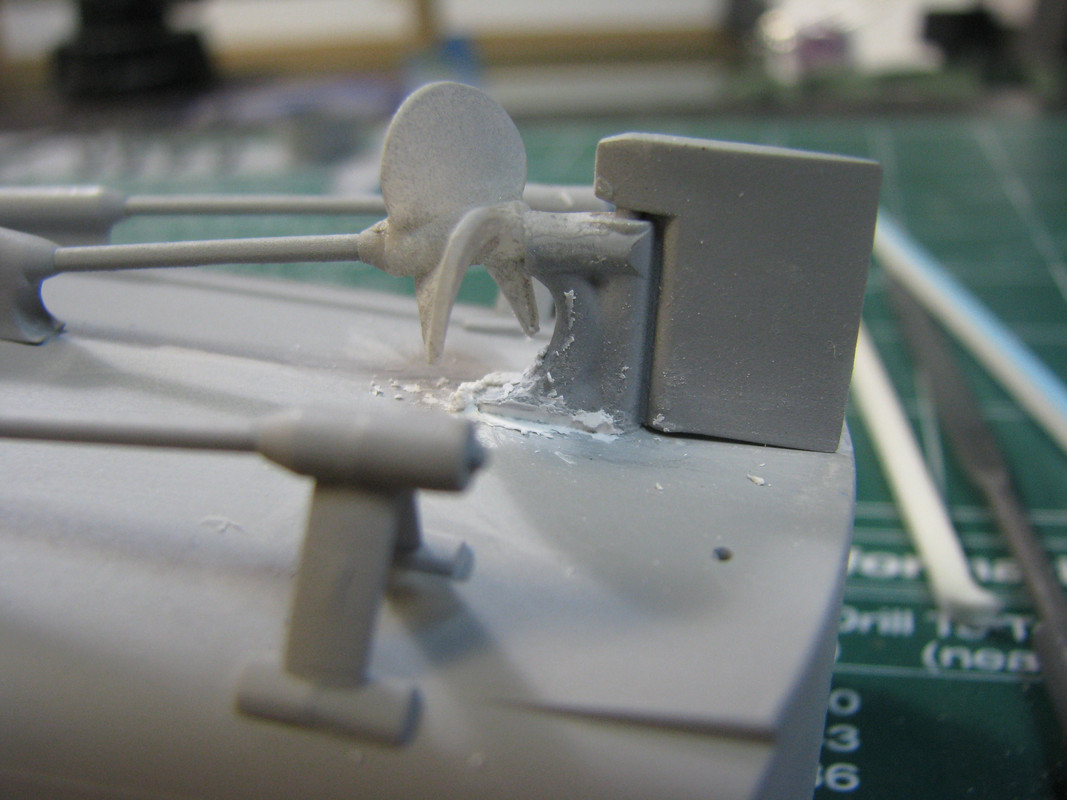
Sorry, this one is a bit out of focus


Wait a Minute!
Is that an Alien in the window from " War of The Worlds"? Sure looks like one to me. Except maybe he’s Sick, The lobes are not the different colors that indicates a healthy Alien.
Nah! Just kidding.That is some great P.E. work. Now, I would have used Heavy Sprue Glue as a filler on that center rudder bracing fitting.
TB,
These are not the aliens you’re looking for…[aln]
Looks like I forgot to add the cleaned up and primed pictures.
I’ll add some this week. Haven’t been able to do much at the workbench, my hands are giving me fits.
Steve
Hi, there-ic
Just ran into your thread, and I am wondering about finishing. I am in the process of scratchbuilding a 1/35 S-Boot, and we are having an argument about the wooden deck sections. I have not been able to find any colored pictures of the decks on boats in service, and there seem to be some arguments about this. There are several threads out there regarding Pine Tar on the wood, which would provide anti-slip and preservative properties. Are there any KM directives for this? As an old Navy man, and a Bootsmann, if it is on the deck, and in the weather, it gets painted the same color as the deck. If you want non-skid on it, get some sand into the paint. If it is not on the same plane, the first step is yellow. Does anyone have any historical references?