Thnaks for that comment Nathan. I just hope i can carry it on with my future builds.
Tony, those Fujimi box arts are very nice. I have quite a few of their Ju 87 kits, and they all have similar boxe’s. I rather like unusal aircraft and variants. For the Me 262 RD GB i built the C-1a. And last night i won an MPM A-1a/U3 recon variant, anotehr kit i didn’t realise anyone had ever done in this scale. Keep an eye out on E-Bay for the bomber version. There was one on there from the US a couple of months ago but i didn’t win that, but they seem to be coming up every to often, and they don’t go for that high a price. It will be a few months before i start on mine though.
I have the Itaerli 129B-2, so will be looking forward to your build.
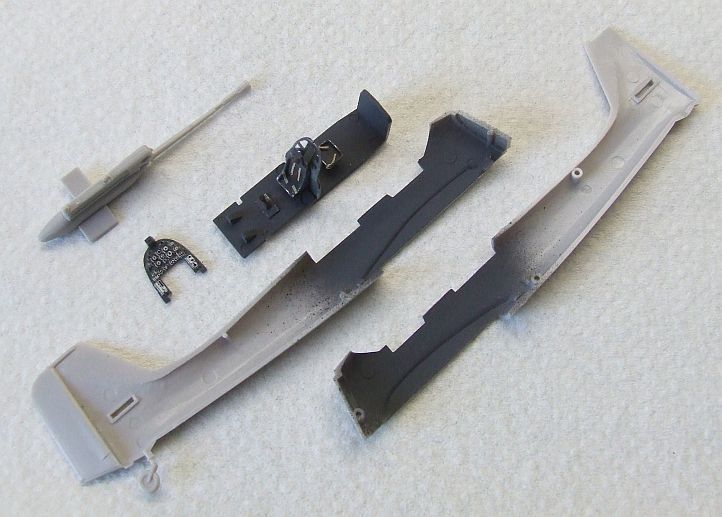
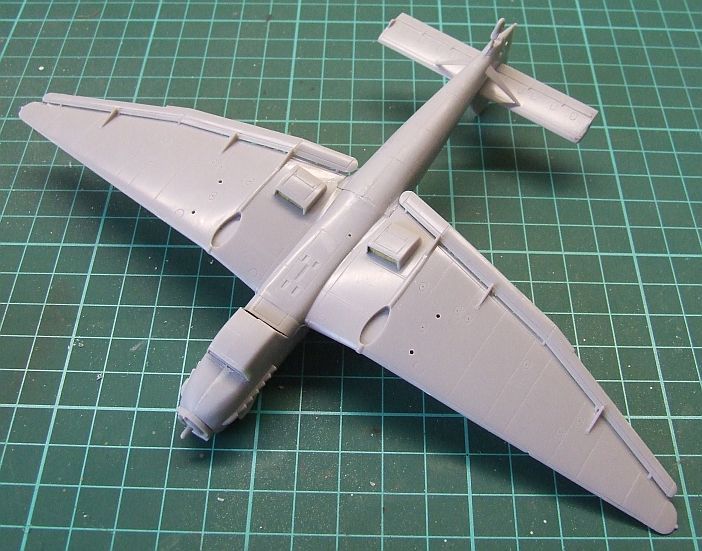
Hi all, here’s something to whet your appetite, a parts layout shot of Rudel’s bird:
I’m thinking of getting the dark gray into the cockpit today, then I can go through a large part of the assembly. i have an order in for both a mask set and some paints at this time.
Bish – yes, I’m thinking about painting them, I have 04 on my order list. Fujimi supply them as decals but the paint option seems preferable if practical.
Yep, January 31st next year – I’ll say that clearly at the next update of p1.
Oh, got the 66 onto the interior parts, and am doing a bit of detail work now…
Good point, it’s inviting a strikethrough situation. I’ve painted the 04 on previous projects, such as a Fw 190 F-8, and I have a Bf 109 F in Werner Molders’ markings, with five yellow areas, in progress. I would have finished it long ago except I had a situation with bluetac used for soft masking and have not yet been able to clean away the goop on one side…
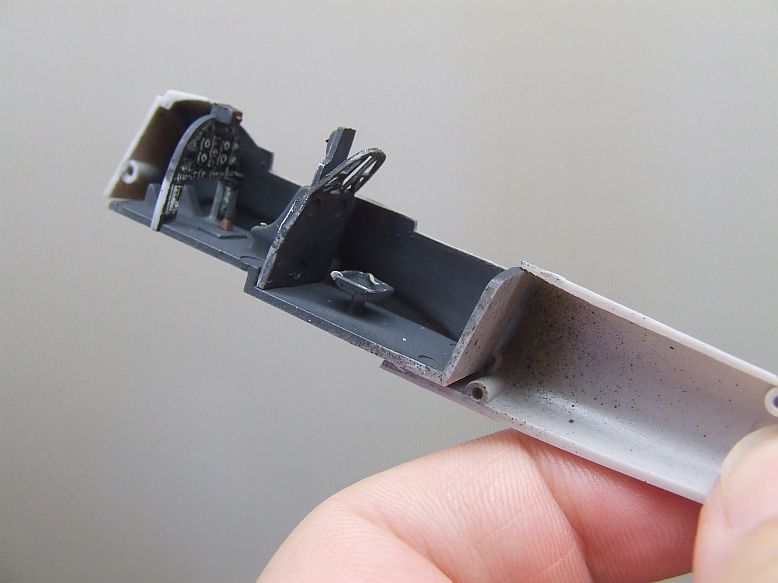
Hi guys, here’s a small progress report. The Fujimi kit has very little cockpit detail, so I started with dark grey (all Tamiya Acrylics), drybrushed with silver, used redbrown for the leather areas, and applied the instrument decal over the panel. The instruments are in raised relief but too low to drybrush without a bit of luck. I used satincoat on the panel first and it took about five rounds of MicroSol to get the decal to pull into the surface. Future was applied to create lenses.
The only detail I have added is harness from slivers of tape, painted Deck Tan.
I’ll paint the sight pad as leather and get some grey on the back of the panel as it’s exposed in the coambing, then I can bring the fuselage together.
I assembled one of the canons and while the fit is okay the sprue gates are so heavy that cutting the parts free snapped the barrel of each half. I had a look for metal replacements but have not found them in this scale yet. The repair is straight but far from invisible…
Nice start Mike. As far as i know there are no 72nd barrels for this, i couldn’t gind any. I think you have two options. You could get the Aires resin guns. They are meant for the Academy kit, but would also work on this. Or i can send you the guns off my Academy kit as i didn’t use them. The sprue attachments are pretty fine and should cut ok.
Hi Bish – most generous! If Academy have fined down the sprue gates, perhaps by using higher pressure moulding, they might have avoided the problem. Will PM you!
I assembled the fuselage, wing and engine cowling yesterday, and am hoping to have main structure done today…
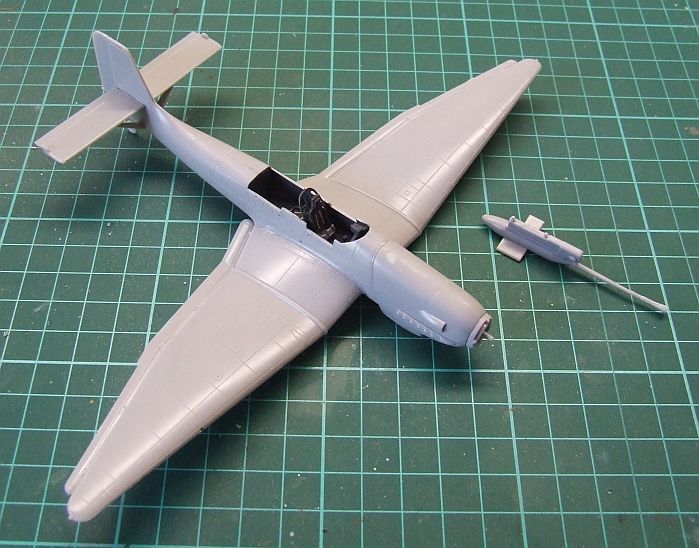
Progress today, the Stuka is pretty much along to her punctuation point. The subassemblies have been brought together – first, the cockpit mated into the fuselage (note the tape belts):
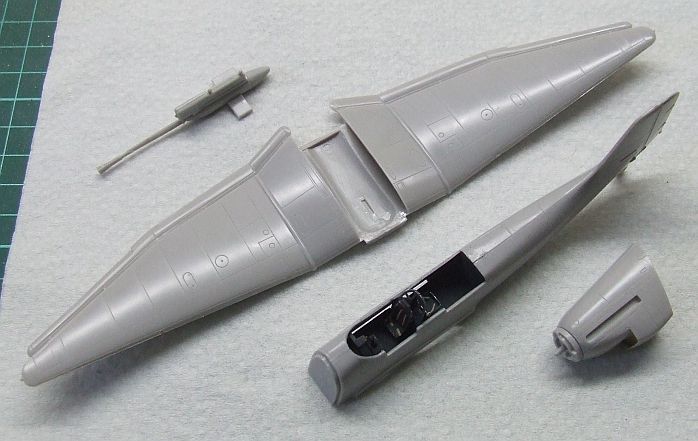
Then the subassemblies: engine cowling, fuselage and wing ready to come together:
The seams on each subassembly were dressed before they were brought together:
At this point all that remains are a couple of spots where the wing to fuselage joint could do with attention, these being at the fore and aft corners – the fit of the rest of the parts I can only call superb, other than the tailplanes which could have done with a positive locator for the lower end of the struts to lock the angle. The three radiators were prepainted and masked, and the base of the spinner has been added, as required, but the rest left off as yet, to possibly facilitate a separate application of the spiralschnauz decal.
I’m now waiting on the Eduard mask set and RLM paints to arrive at my LHS, which could be any time in the next couple of weeks, at which time I can resume this bird. The cockpit is very sparse but this kit builds sweetly, and a closed canopy should be forgiving.
Looking nice Mike. Just a note on the cannon mounts. The Academy kit has three on the front mount and two on the back. With mine, i painted the aircraft and then added the guns at the end. If you doing this, it might be worth filling the holes for the cannon. I can’t be sure the mounts on the Academy kit with line up with the mounting holes on the Fujimi.
On the piece behind the pilots seat, is there anything to go on there. If not, i’ll send you the radio’s that should go on there. Other than those, the Fujimi pit looks about the same as the Academy, but having the radio’s will certainly help fill that out. It should fit in there with the fuselage closed up.
Hi Bish – radio boxes! Great, yes please! The Fujimi has nothing in the rear section but the seat, it’s a grey pit indeed… No worries re the guns, that’s a good approach. I notice the real aircraft seems to have the gondolas standing clear of the wings on shackles of some sort, but at this scale that might be asking a lot, so superglue will probably be doing be honours…
No worries. From the looks of it, the Fujimi guns just have two pins, one at each end, to fit the gun.s The Academy kit has the proper mounts and it very well detailed. In fact its just as good as the resin guns i replaced it with. The only differnace is that the resin ones come with the body inside the covers and these covers can be posed open which was ideal for my dio. If it hadn’t been for this, i wouldn’t have bothered replaceing them.
Seems I’m a little behind on getting started, but on the plus side I have my kit on the way in the mail, along with the photo etch. I should imagine I will starting into it some time march or may (as every other month I have to pack up and go to work).
Hey Mike, I’m one of those who can’t start for a few months, but I’m pretty sure you can put me down for Italeri’s 1/48 D-5 Stuka…we’ll see about resin and pe later on…just masks and resin exhausts for now.