OK, with all that detail work he does, I’m starting to think bsyamato is actually working in 1/48 and has abnormally large fingers!!! [;)] Looking good again buddy. I made some progress over the weekend, mixed & sprayed my first coat of overall gray on the Harrier. (I had some RLM grau-violett already mixed, I started with that as a base. If I don’t like the final look of the colour I’ll have to do a tint-wash afterwards to dirty it up some.) Pics later,
Ops!! you uncovered my secret [proplr] my height is about 2,50 mt
I knew it!!! [;)]
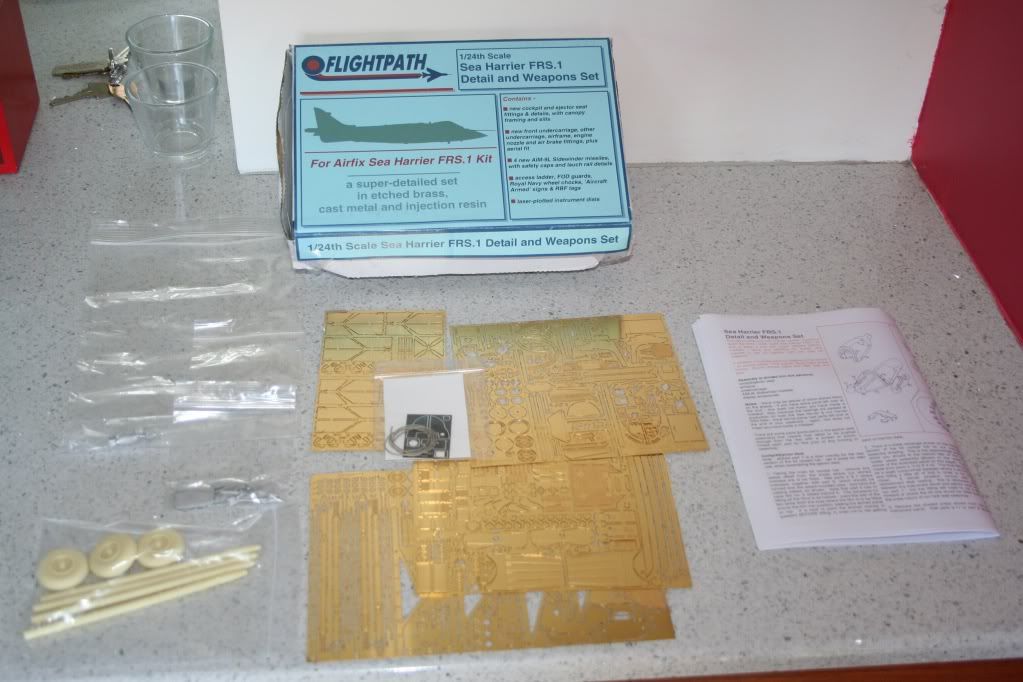
I got my Flightpath Sea Harrier FRS1 upgrade set in the post today. Very nice!
5 sheets of beautifully detailed brass PE, some lovely resin wheels and AIM Sidewinder missiles, film for the IP and 3 bags of cast white metal. A lot of the ejector seat and landing gear is to replaced with this.
This drool-worthy stuff! [Y]
Cheers
WOW! Your going at this one full force. lol[:P]
That is indeed a nice pile of goodies. That should look spectacular in 1/24!! [Y]
Casper that is going to be a serious build for sure, ca’nt wait to see it start coming together!
Ahhhh - this is where my brain cramps up from lack of modern jets. (That’s my excuse anyway!!) I’m using Tamiya acrylics in the airbrush, wanted to have some parts in place before spraying to avoid tricky touchups. I mounted the outboard weapons pylons & then sprayed… then last night realized that the pylons sit over top of the underside roundels!! [bnghead] I guess I’ll have to do some decal slicing!
… and after use the chainsaw to cut some wood for the winter [whstl]
That’s never a bad idea around here! [Y]
Casper I just realized I forgot to add you to the front page, but your add now.
LOL [:D]
effectively an 1/24 harrier is so hard to see [t$t]
NOOOOOOOOOOOOOOOO!!!
In the home stretch on the Sea Harrier. Landing gear getting painted up, decided to add some of the blade antennas last night. Added glue to one of the ones behind the cockpit, started to move it into place & dropped it on the painted surface. No problem, I grab it quickly with fingers, put it back into the tweezers, pick up the plane & carry on.
Then I realize that…
- I had a little smudge of glue on my thumb
- my thumb happened to fall exactly where the RN decided the roundel should be placed
- perhaps my flat coat wasn’t thick enough
- Airfix decals MELT when touched by Tamiya liquid cement
- my red + blue smudgy thumbprint looks nothing like a RN roundel
With no spare roundels that match up (small, red+blue only), I’m thinking of gently sanding out the worst of the smudge, then just overpainting the base-colour gray. Thoughts?
[:)] at least you’re at good point to finish, i am again on the cockpit, just the ejection seat was primed in black [Y]
Thats probably what I would do. For the roundel you could mask and paint the colors for it.
Just an idea.[I]
Mine was more of a “rushing to do something before I had to leave the house” accident, but it still means a mess to clean up!
Pics!
Port side before the glue issue, it looks so happy!! Also before the “mist coat” I applied to dull down the decals which looked too bright for the Falklands planes.


The underside decals, after I sliced & applied the roundels in halves…

The rest are “after the mist coat” . I think I like the effect, maybe took it a little far in places. Note the brass rod replacing the kit pitot tube.


Blade antennas in place…
And the screwed-up port-side roundel - what a mess! [:XX]

BUT, I think I found the solution sitting in the same box, combining roundel decals from the two other options seems to measure out at the right sizes. I’ll try it on a blank piece of styrene first just to make sure, but this is the plan:

Alright, my replacement “decal sandwich” seems to have worked. I applied the white + blue roundel two nights ago, let it sit & applied the smaller blue & red roundel over it last night. I’m sure you could see it close-up, but after I give it a quick spray of the gray filter, only I will ever know. (Well, and you guys too I suppose!) Pics with next update.
Hi everyone ;
I’ve been watching from the side lines all the great work you guy’s are doing with your Harrier builds ,
Awesome stuff…[t$t]
I dropped out of a lot of Group Builds earlier in the year because of time and family issues , however it’s really tempting to want to join in with everyone else .
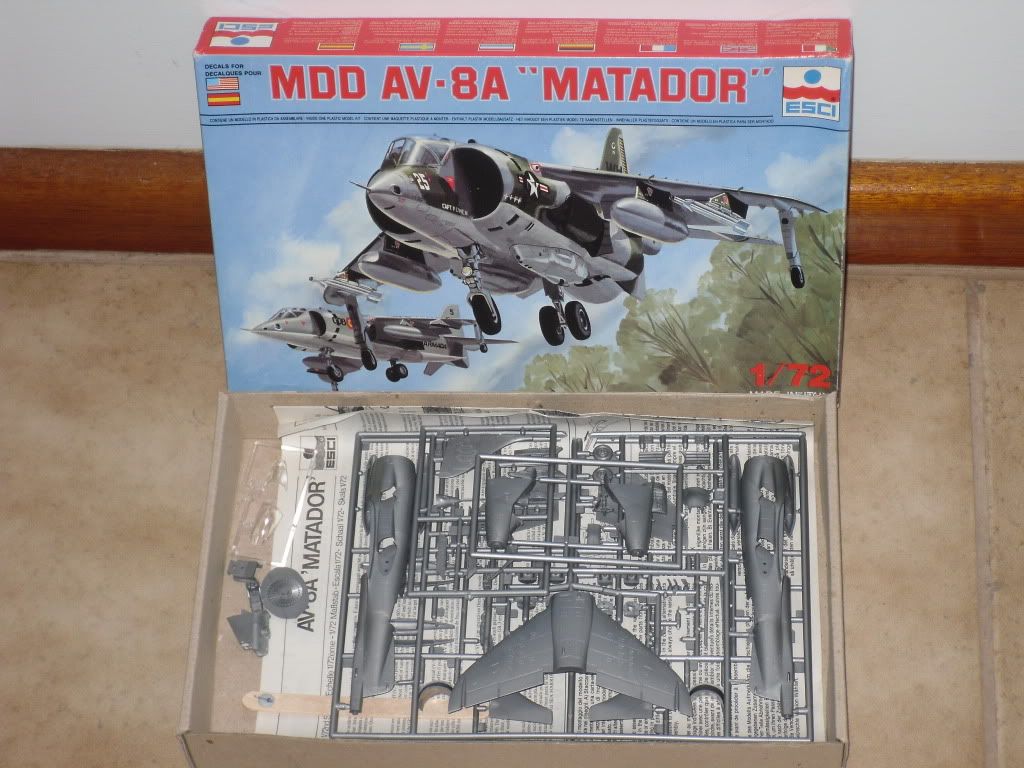
I have a few 1/72 Harrier’s in the stash and I’ve built two about three years ago , so perhaps it’s time for another . Here’s a pic of the stash ;

The easiest way would be to build one straight out of the box , however I alway’s seem to want to do things the hard way and after looking through Squadrons Harrier in action book , I saw this pic of an YAV-8C …

According to the caption it appears to be a AV-8A Harrier with what looks to be some additional strakes under the gun pods ?
So I was thinking of using one of my Esci AV-8A kits as they have the correct shaped horizontal stabilizers ;
Anyway , I kindly ask if I may join in with everyone else , if my first idea doesn’t work out , I can always just build one OOB .
John .
Vance I hope the fix works out that is a great looking build. Pitot tube looks great as well
John Wow now thats a stash!!!
HAH - the pitot tube! That was a "necessity is the mother of invention: moments. The shape on the kit-suuplied part looked fine, but I snapped the bloody thing as I was trying to sand off a pour-stub attachment point. A scrap of plastic, brass rod & CA to the rescue!
Took off the mangled decal by sanding and “flaking” it off with a sharp exacto blade. The portions that made their way inside the intakes were left alone, I just figured I was asking for trouble if I played with thhat area too much. Added a brush-coat of Future & left to dry a few days.
!(http://i1012.photobucket.com/albums/af250/VanceCrozier/Falkland Islands 2012 Group Build/IMG_1431sm.jpg)
A Harrier with blue+white roundel… interesting look!
!(http://i1012.photobucket.com/albums/af250/VanceCrozier/Falkland Islands 2012 Group Build/IMG_1577sm.jpg)
And the smaller red+blue roundel fit inside the white area perfectly, just a little touch of overlap.
!(http://i1012.photobucket.com/albums/af250/VanceCrozier/Falkland Islands 2012 Group Build/IMG_1578sm.jpg)
A little MicroSol and slicing helped it settle into place, again. I’ll give it a light overspray this weekend. The exhaust nozzles have since been painted a burnt-metal.