New quad fifties!

Very nice. The Vietnam version parts look great. Great job at listening to modelers and adjusting as needed. One of these will look great in the back of a guntruck.

By chance, can you ask Sylvain if it would be possible to buy just the engine and electrical box 3D parts to update the older AFV Club or Dragon M55s to Vietnam standards? Maybe he could do an update set for them with some of his newer parts, or of all the 3D parts?

Hello!

That’s good news!

A look at the gunner reminds me about the Dragon offering… I know it’s a bit of nitpicking, but you actually need different gunners for the WWII and Vietnam versions, because of different uniforms. I even have a picture to go with it:

Dragon M55 gunner modified for Vietnam by Pawel

Now there are some more minor things: You don’t need the loader’s platform, parts P26, P27, P30 unless the quad is riding on an M16 half track, which is most of the time. On the Vietnam version you don’t install the sight, part E6 - in Vietnam they aimed the guns by tracers, the sight was way too easily broken.

That said I’d be glad to buy one or more of the kits even as they are now. Will they be also sold in Poland?

I told Joe Bellardo, my Vietnam veteran friand about this quad, he was very excited about it.

Thanks for keeping us updated, have a nice day

Paweł

Got an email from Dynamo and they claim they may have a USA distributor for this in mid May

I ordered them striaght from Dynamo on Apr 15. 1 kit and 1 set of 3D parts to update the AFV Club parts, plus shipping was only about $75. They just hit US customs Fri, and should be here by the end of the week. Not too bad in my book.

I wrote them about a week and a half ago, but I still haven’t heard from them…

And I could really use an update set or two…

Only place I saw them was some French site and shipping was about 40 bucks to USA

I contacted Dynamo from the contact email on their web page: support@dynamo-models.com

Sylvain got back to me promptly and was very easy to deal with.

Website:

https://www.dynamo-models.com/en/kits/

OK tHanks. That’s the guy that I got the email from today so I’ll see what’s what mid summer and if not I’ll go through them directly.

Just got a P.O. tracking notice. I should have it tomorrow. I’ll let you know how they look upon arrival.

Please, that update kit would be especially interesting to me…

I missed the postman on Thurs and the package had to be signed for. I was able to get to the P.O. today and got the box. It was packaged in a large box w/lots of peanuts. The kit box is heavy cardboard with a plastic box inside for the 3D parts. Everything came through w/out any breakage. The plastic is the Dragon kit. They parts are crisp and clean w/no flash. The 3D parts are exquisite; they look awesome. You get a few extra pieces too; six total ammo cans w/ammo belts and five ammo can holders. I won’t post more pics as it looks just like the ones above.

The decals are awesome; very crisply printed and with lots of extras. There are white and yellow can markings for the WWII tombstone cans; a total of 24 of each color, you only need 4. The same for the Vietnam ammo can decals, there are 36 and you only need 4. Overall it looks like a great kit, I highly recommend it.

Sylvain just got back to me with some interesting options… He even wrote me they read about my Quad 50 build before they started tackling their kit… Cool, eh?

Have a nice day

Paweł

Hello everybody!

So I’ve been playing with the new Dynamo Quad 50 for some time now. People who know me won’t be surprised, that I’m going for the Vietnam version. Probably the “Blood Sweat and Tears” in ground mount configuration. But first I had to do something about the gunner. The kit supplied gunner wears a WWII uniform. So for Vietnam he needs different pants and tropical boots - which would probably be left as they are, given how little there 's to be seen and how little space there is under the front armor - and also a different jacket/blouse and helmet with a camo cover. I started to file up the arms, which have the correct position. I also modified the torso with filing away some minor detaillike the shoulder patches, and adding roled up sleeves and torso pockets out of Milliput. I used a helmet from a Vietnam set by Dragon. Here’s what the gunner now looks like - dry fitted. Still some sanding, especially of the milliput parts needed, but we’re getting there:

1:35 Dynamo Models M55 Quad .50 by Pawel

1:35 Dynamo Models M55 Quad .50 by Pawell

1:35 Dynamo Models M55 Quad .50 by Pawel

Thanks for looking and have a nice day

Paweł

Hello everybody!

I have assembled the quad chassis and painted the insides black - for now. Later I’ll spray them OD, but the layer of black will prevent lighter places and provide natural shading. I have also applied the only PE part supplied in the kit - the strip around the main bearing. Now you have to carefully cut it aout and shape it before glueing with CA, but if you take care that should be no problem. One thing to note is that the PE part is about 1 mm taller than the plastic ring it’s bing glued to. You might want to do something about it before tackling the PE part.

I have also finished painting the gunner - here’s what he looks like now:

1:35 Dynamo Models M55 Quad .50 by Pawel

1:35 Dynamo Models M55 Quad .50 by Pawel

I hope you like how this is turning out - thanks for looking and have a nice day

Paweł

Looks great Pawel, sharp work! [Y]

Hello Cliff!

Thanks a lot for your kind words!

I’ve been working on the trailer. Although all parts are very carefully packed (every sprue in an individual plastic bag) i got one part slightly damaged:

1:35 Dynamo Models M55 Quad .50 by Pawel

Rather than repairing it, I decided to cut the bent part and replace it with a section of a syringe needle. This way I also didn’t have to drill the ends out. after assemblying the trailet it looks like this:

1:35 Dynamo Models M55 Quad .50 by Pawel

1:35 Dynamo Models M55 Quad .50 by Pawel

It’s about time to add some paint now… Thanks for looking and have a nice day

Paweł

Good call on replacing the bent part. Good to see her all ready for paint!

Hello Cliff!

Thanks a lot for your comment! I’m going to put on some paint really soon, but first I wanted to tackle the guns!

They are made up from 3D printed parts, so today I would like to write about working with the such parts that come with the Dynamo kit.

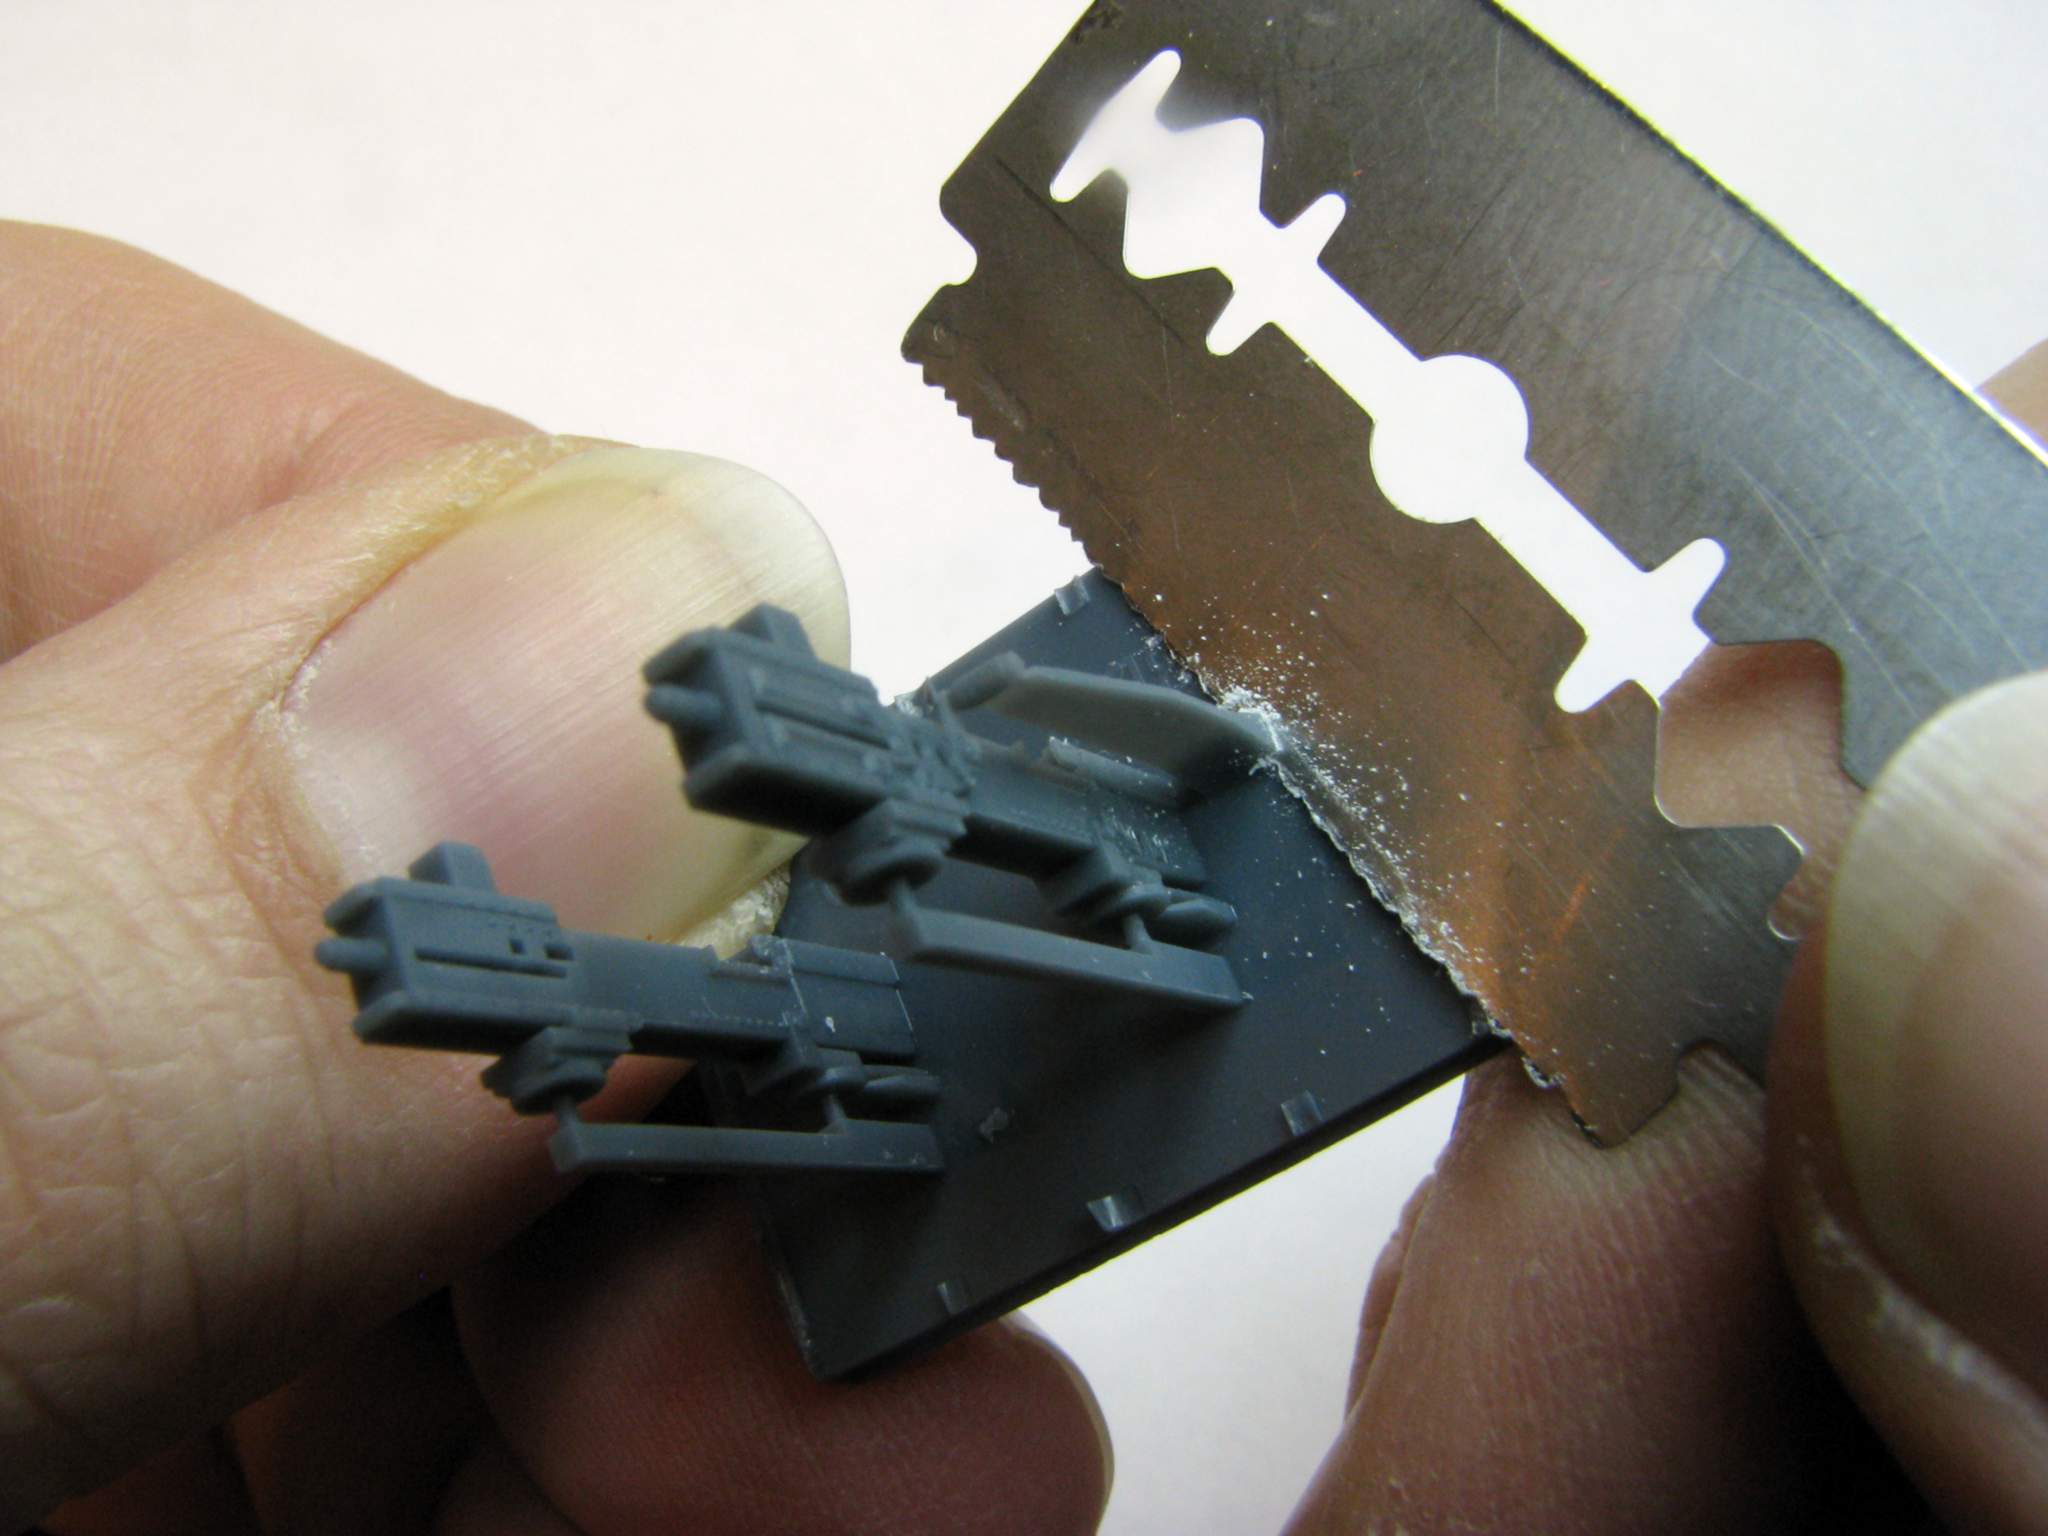
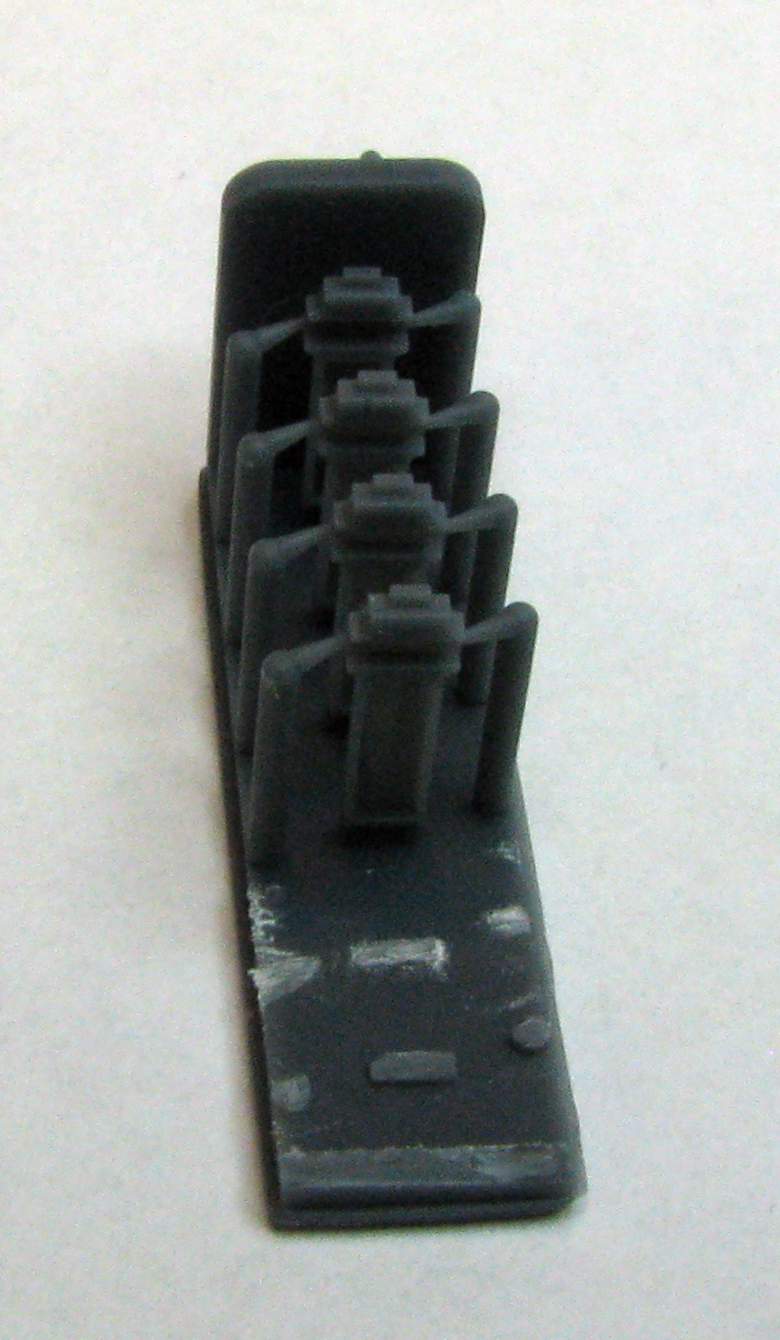
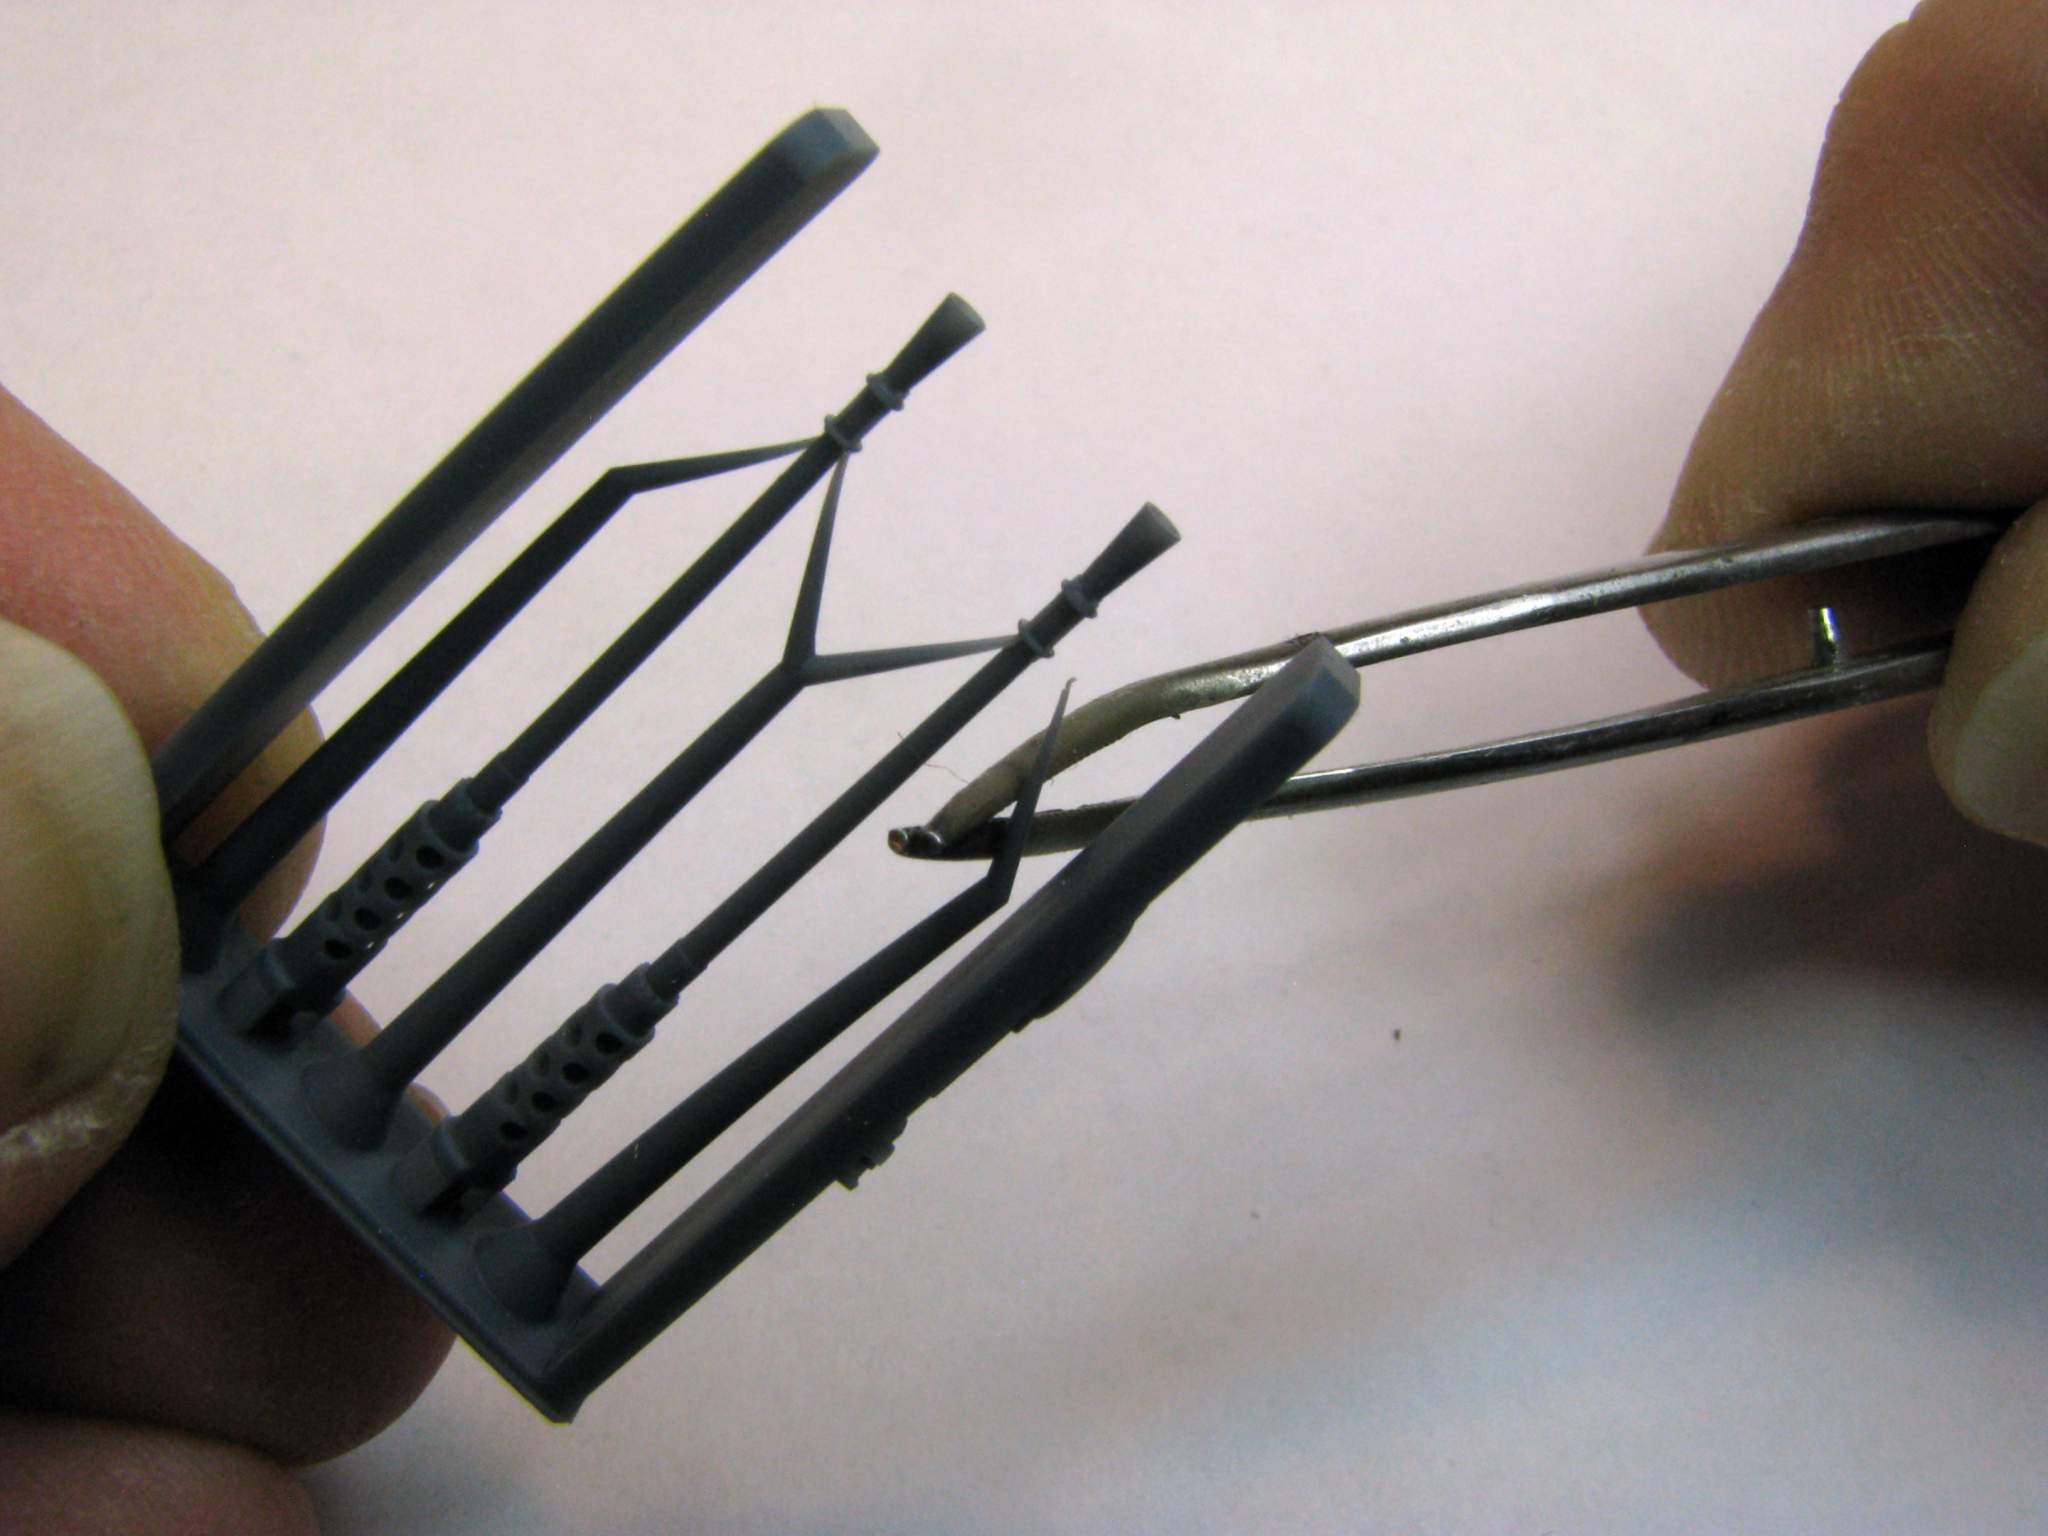
The kit comes with two 3D printed parts that hold two receivers each - one left and one right, differing in the setup of the charging handles. Those handles and their levers are very fragile, and care has to be taken at all times so as not to break them off. Here’s how the 3D printed parts look like:

1:35 Dynamo Models M55 Quad .50 by Pawel

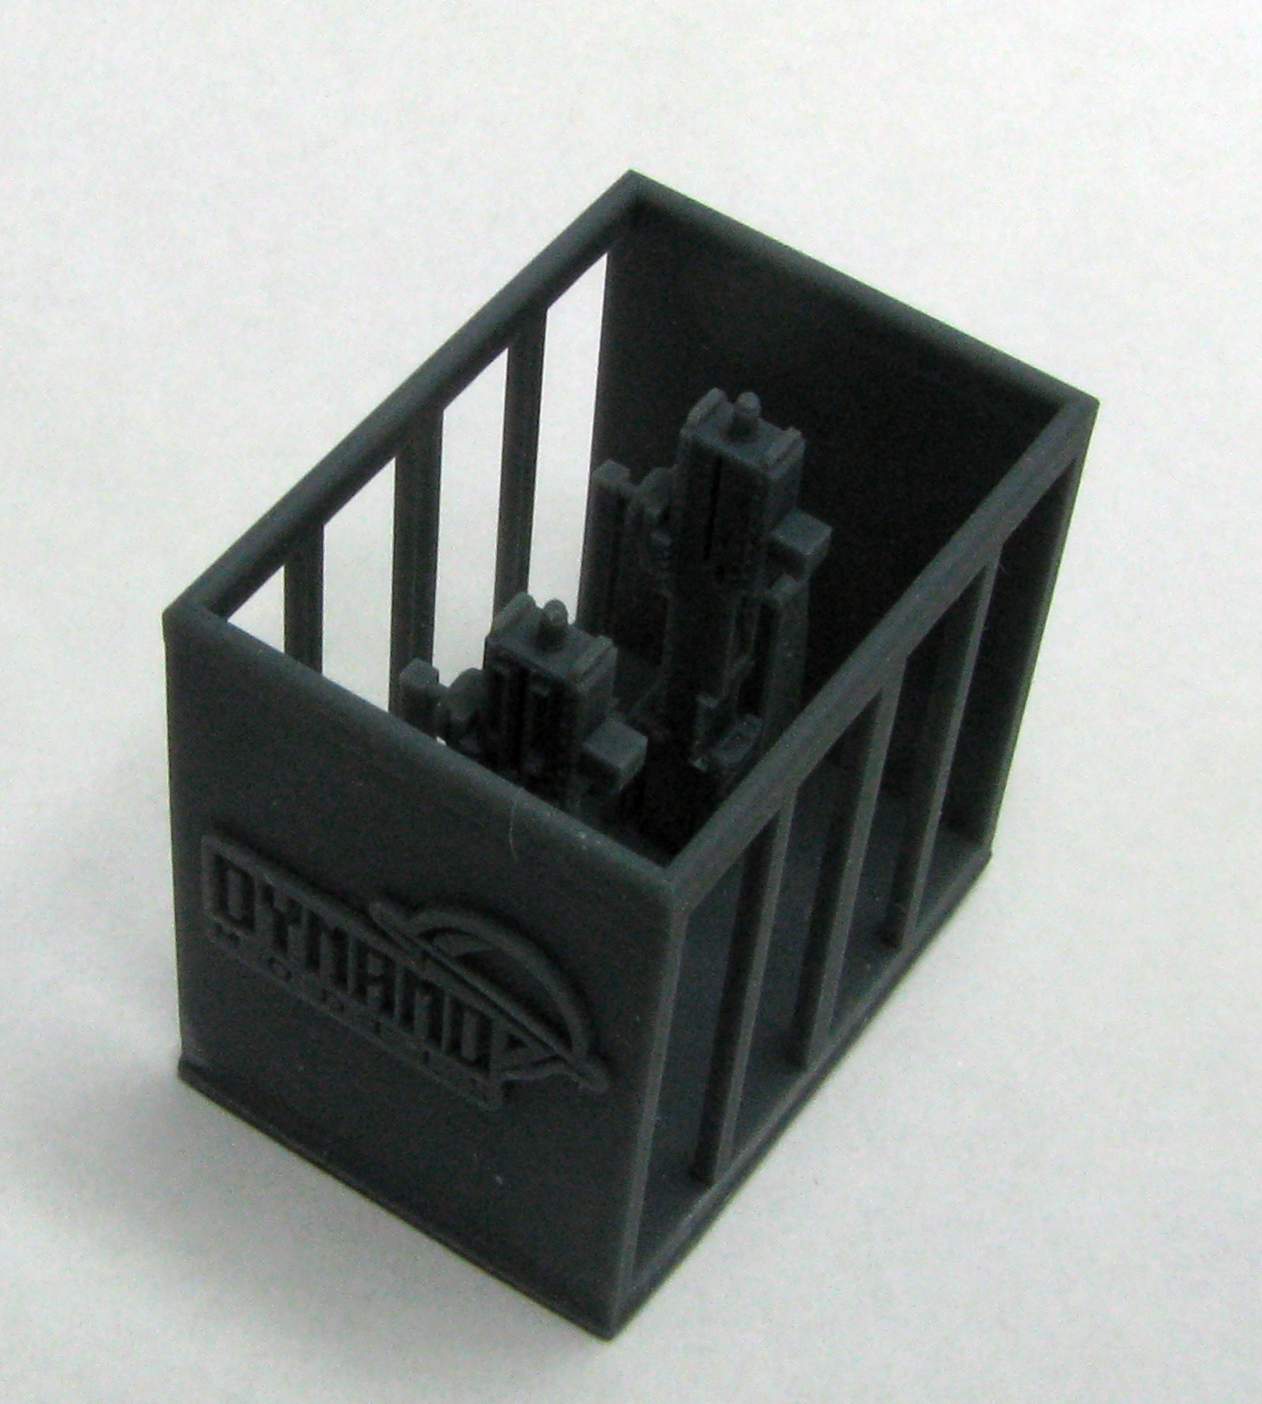
As you can see the large portion of the part is a protective cage that has to be carefully removed.

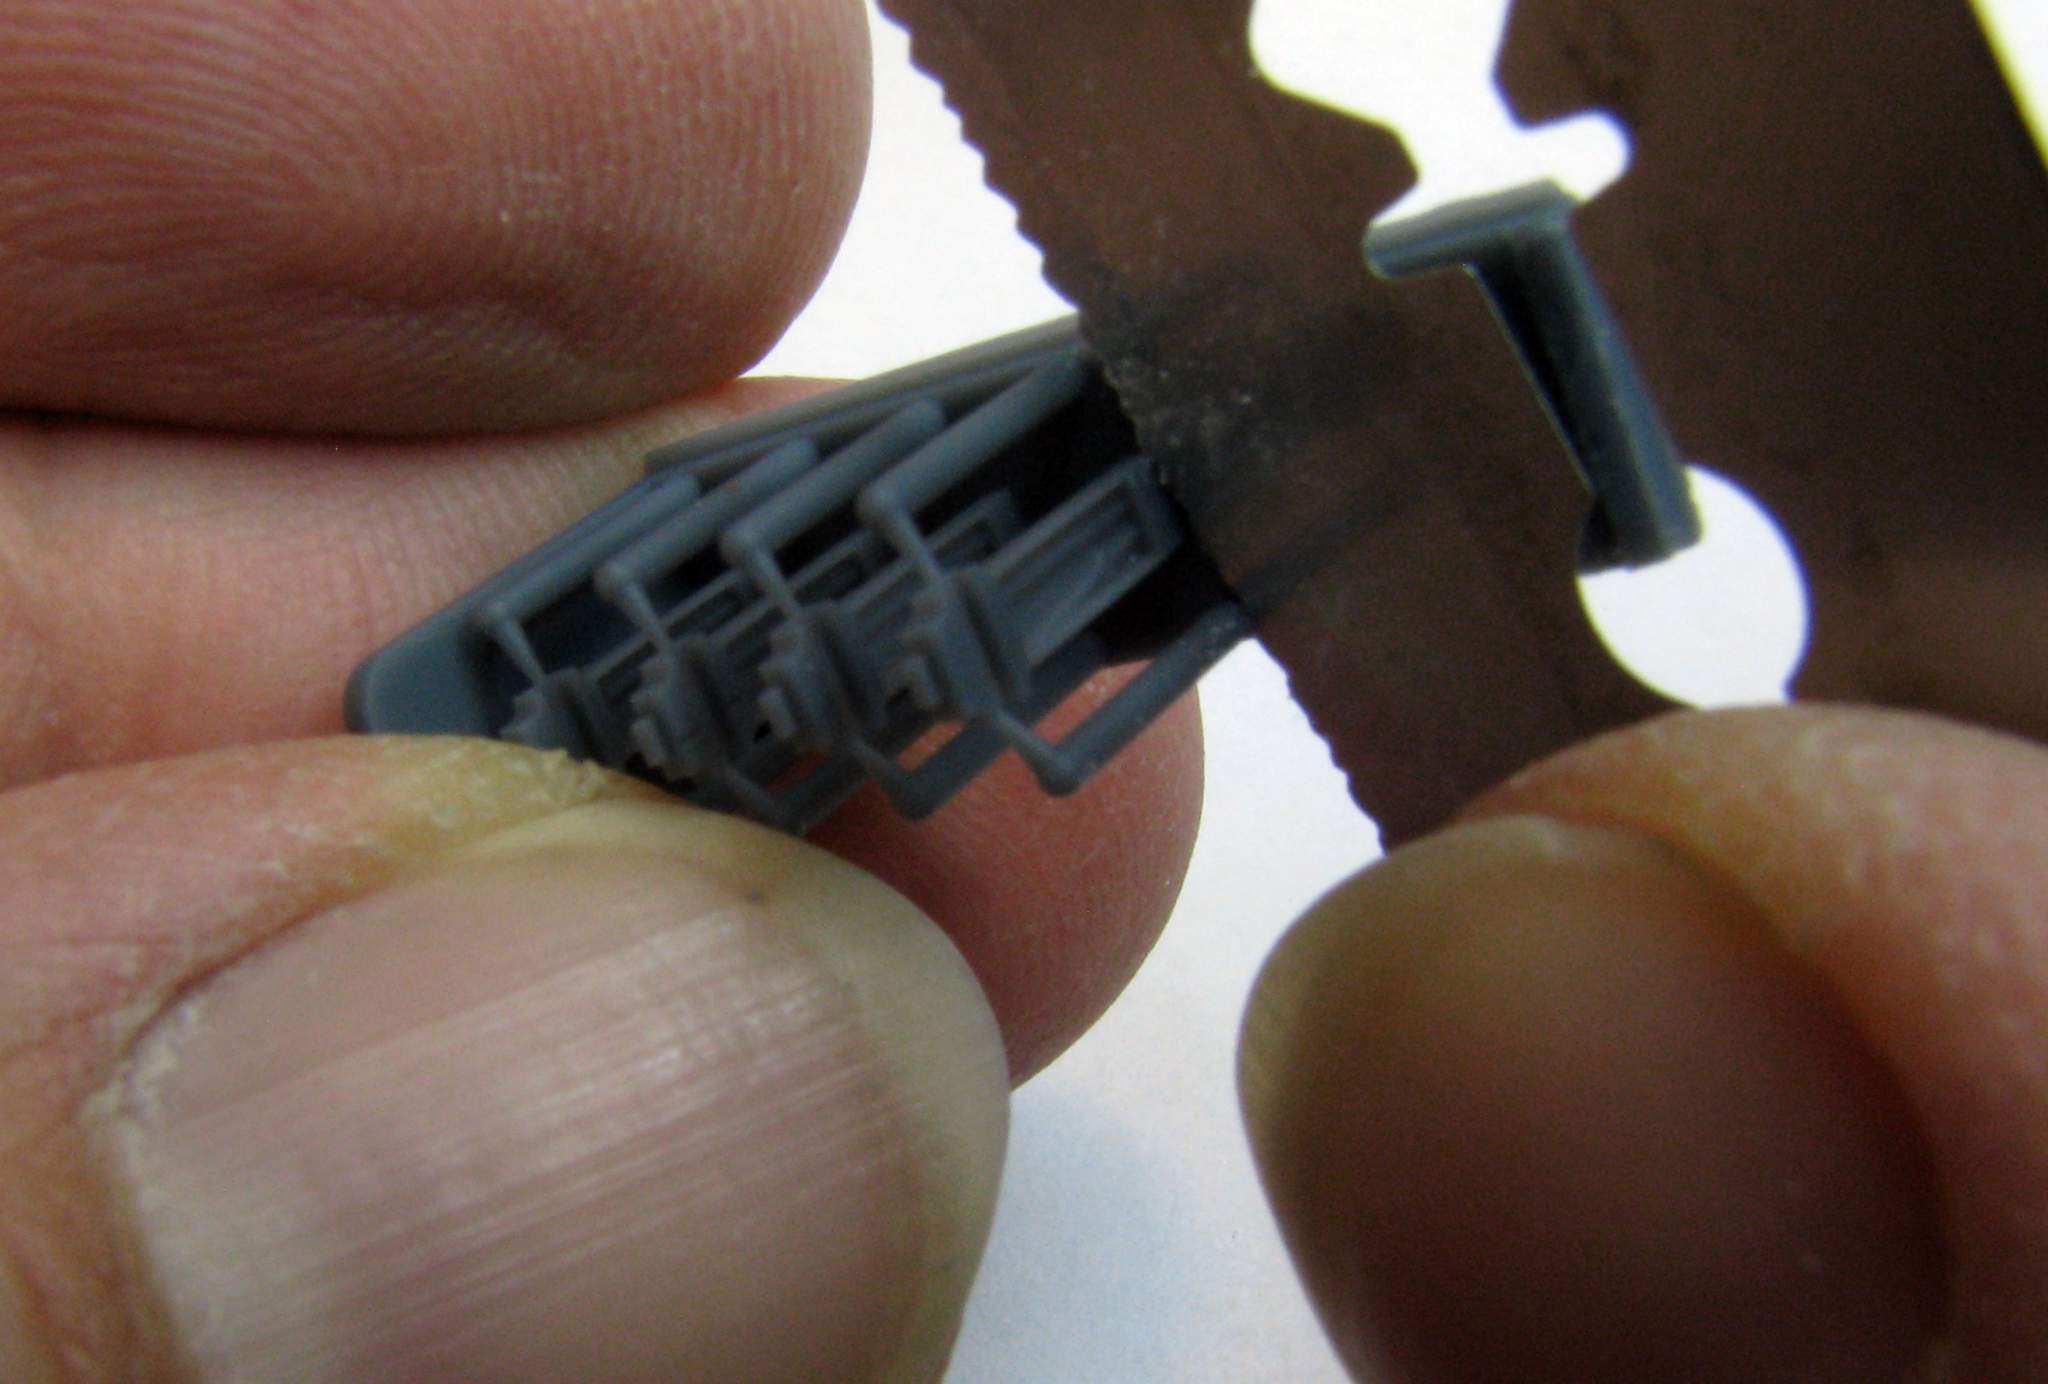
I started with cutting through the wide walls with my plastic cutter:

1:35 Dynamo Models M55 Quad .50 by Pawel

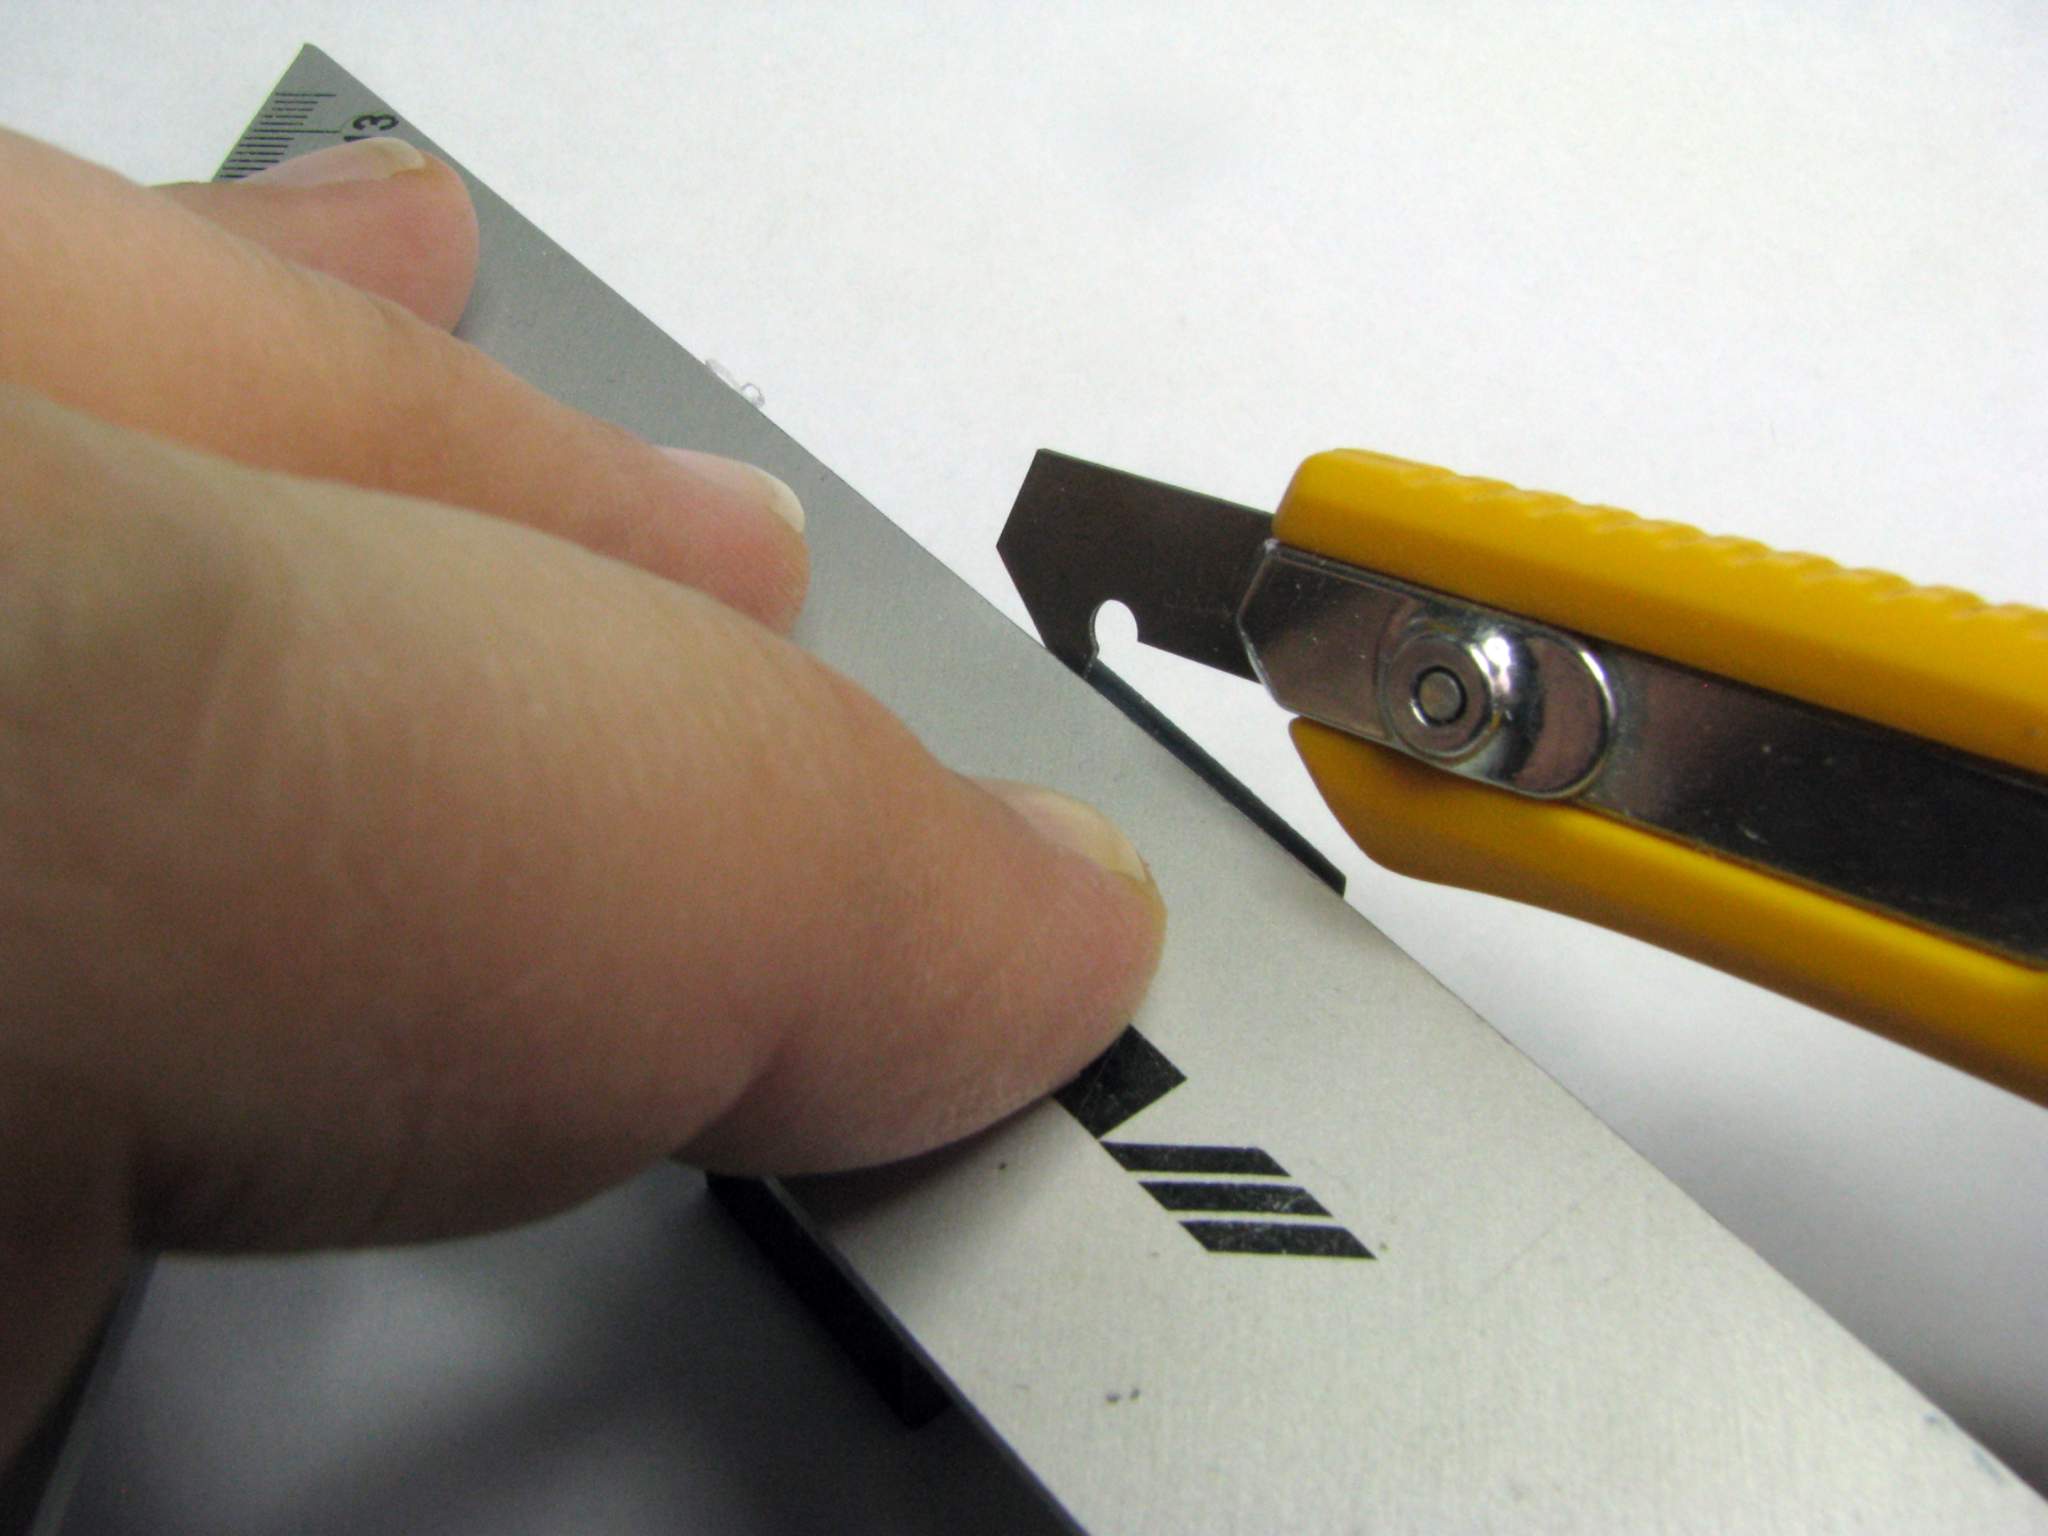
If you don’t have such cutter yet, I would heartly recommend you get one. It is made for example by the OLFA company and it can be used for model building for at least three things: apart from its intended use for cutting plastic plates it can also be used for scribing panel lines, but also for cutting off resin pour blocks. This has the advantage that instead of creating resin dust it tends to cut off quite large swarfs, which helps to minimize the problems with resin dust.

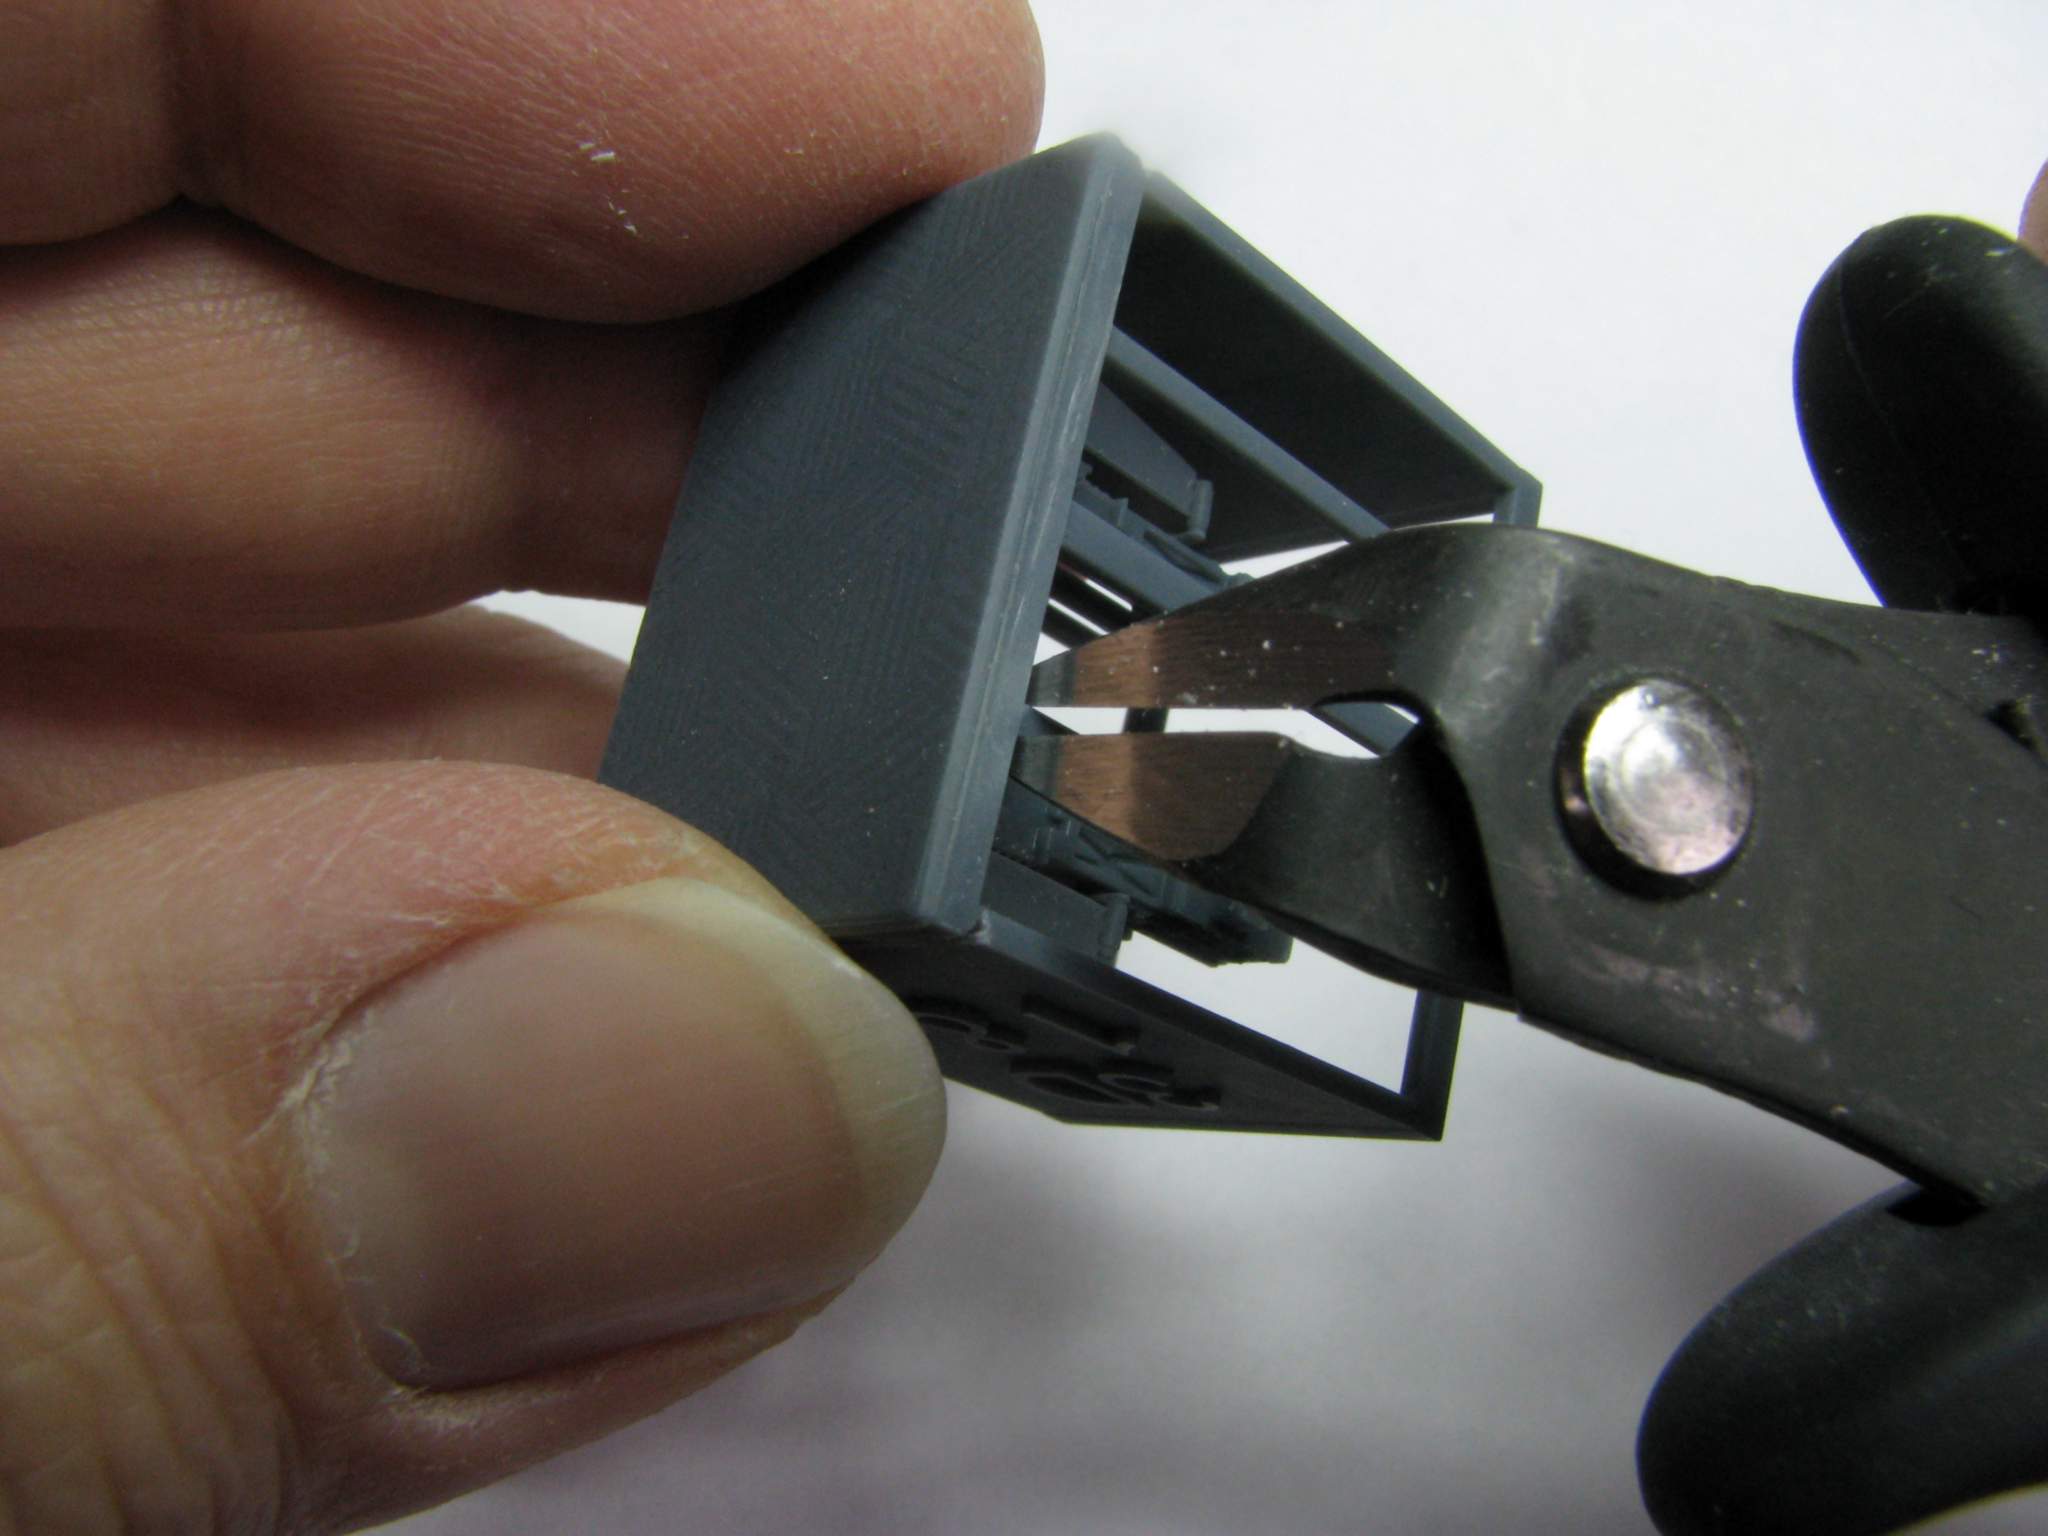
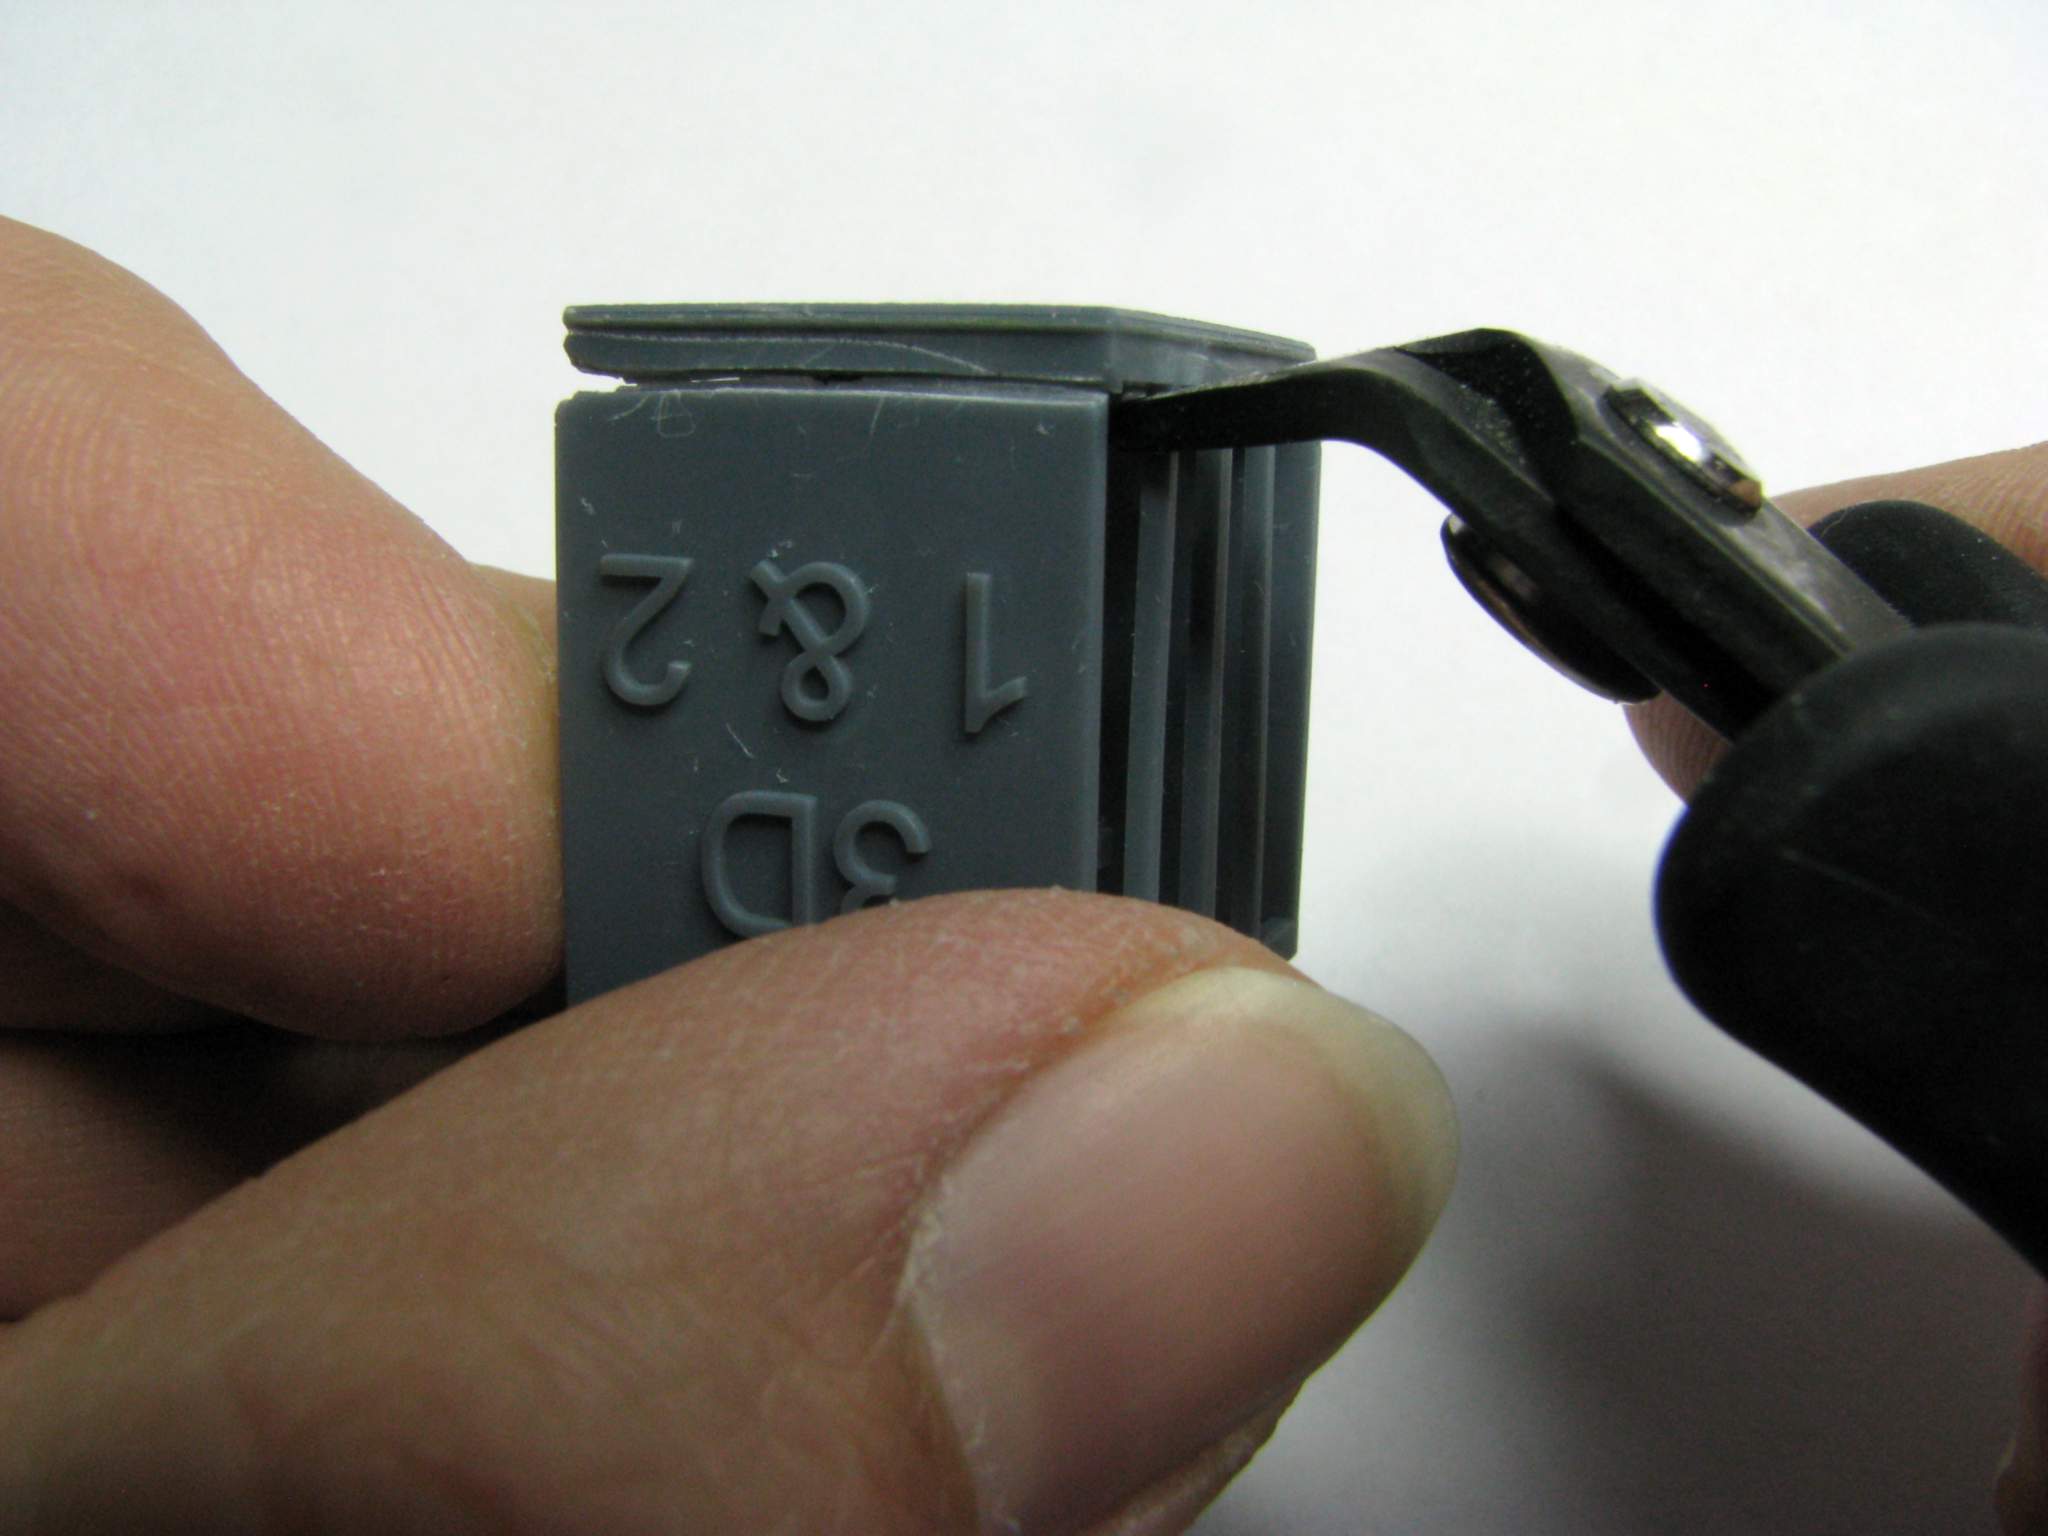
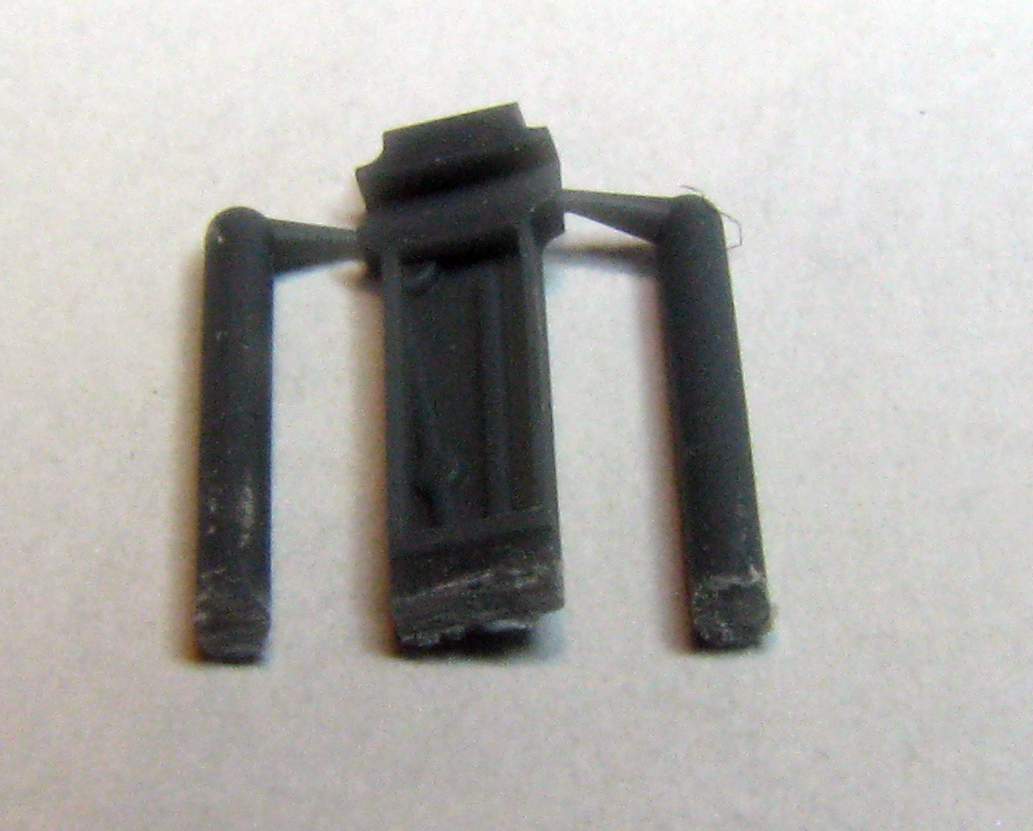
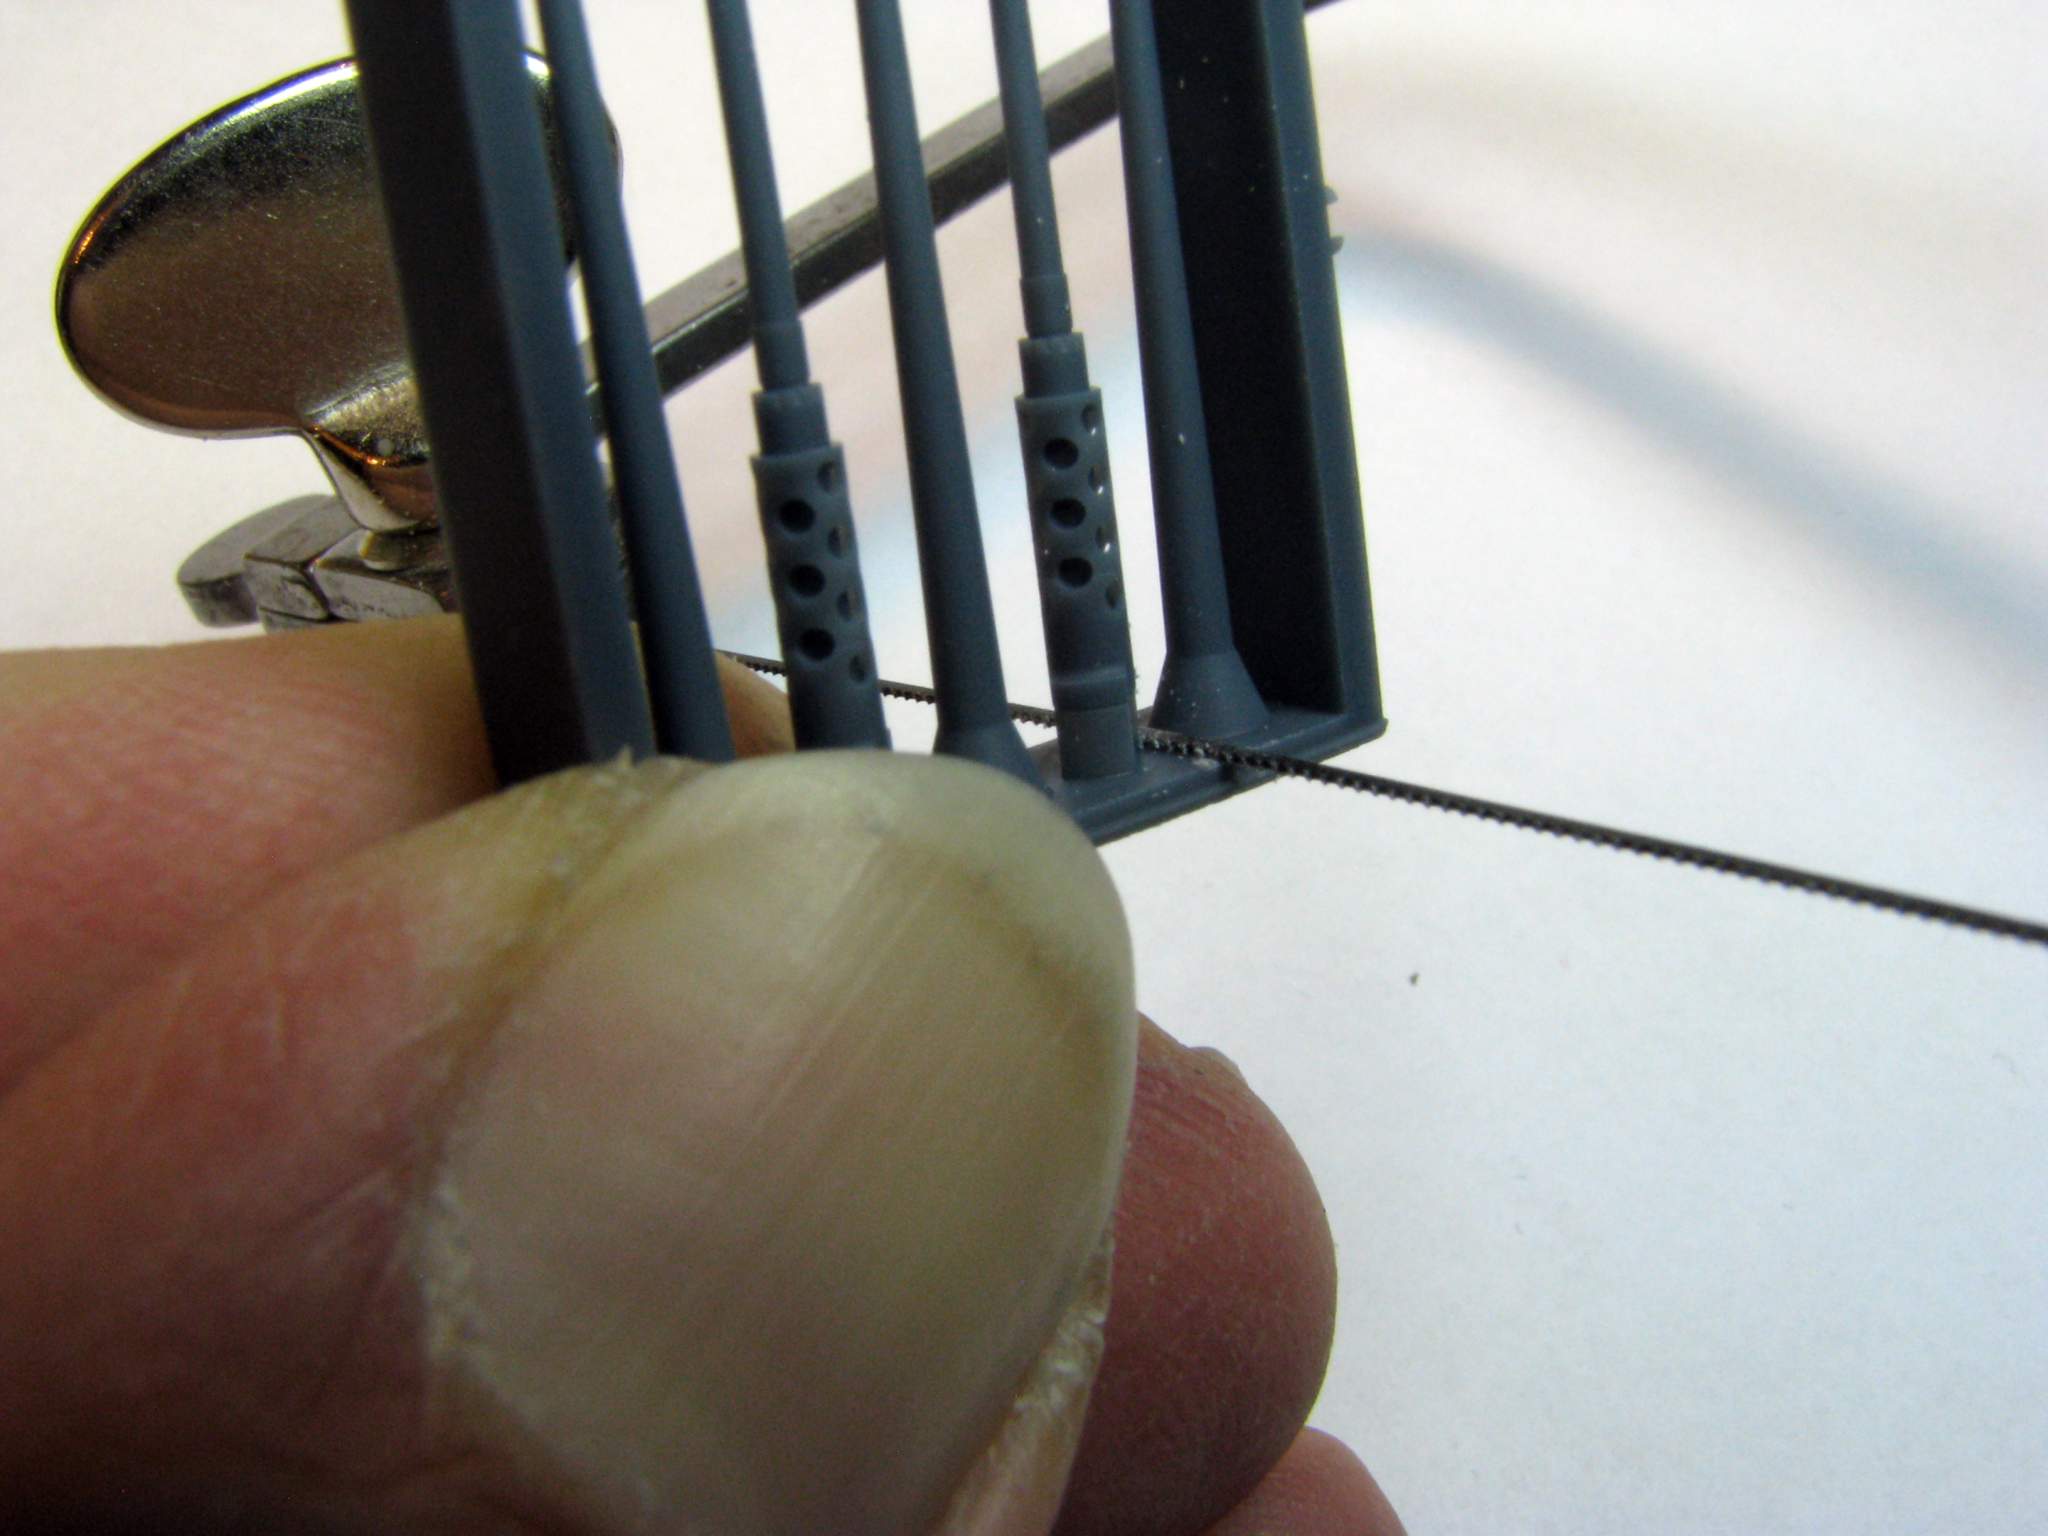
After cutting the wide walls the narrow “bars” were cut with sprue cutter:

1:35 Dynamo Models M55 Quad .50 by Pawel

1:35 Dynamo Models M55 Quad .50 by Pawel

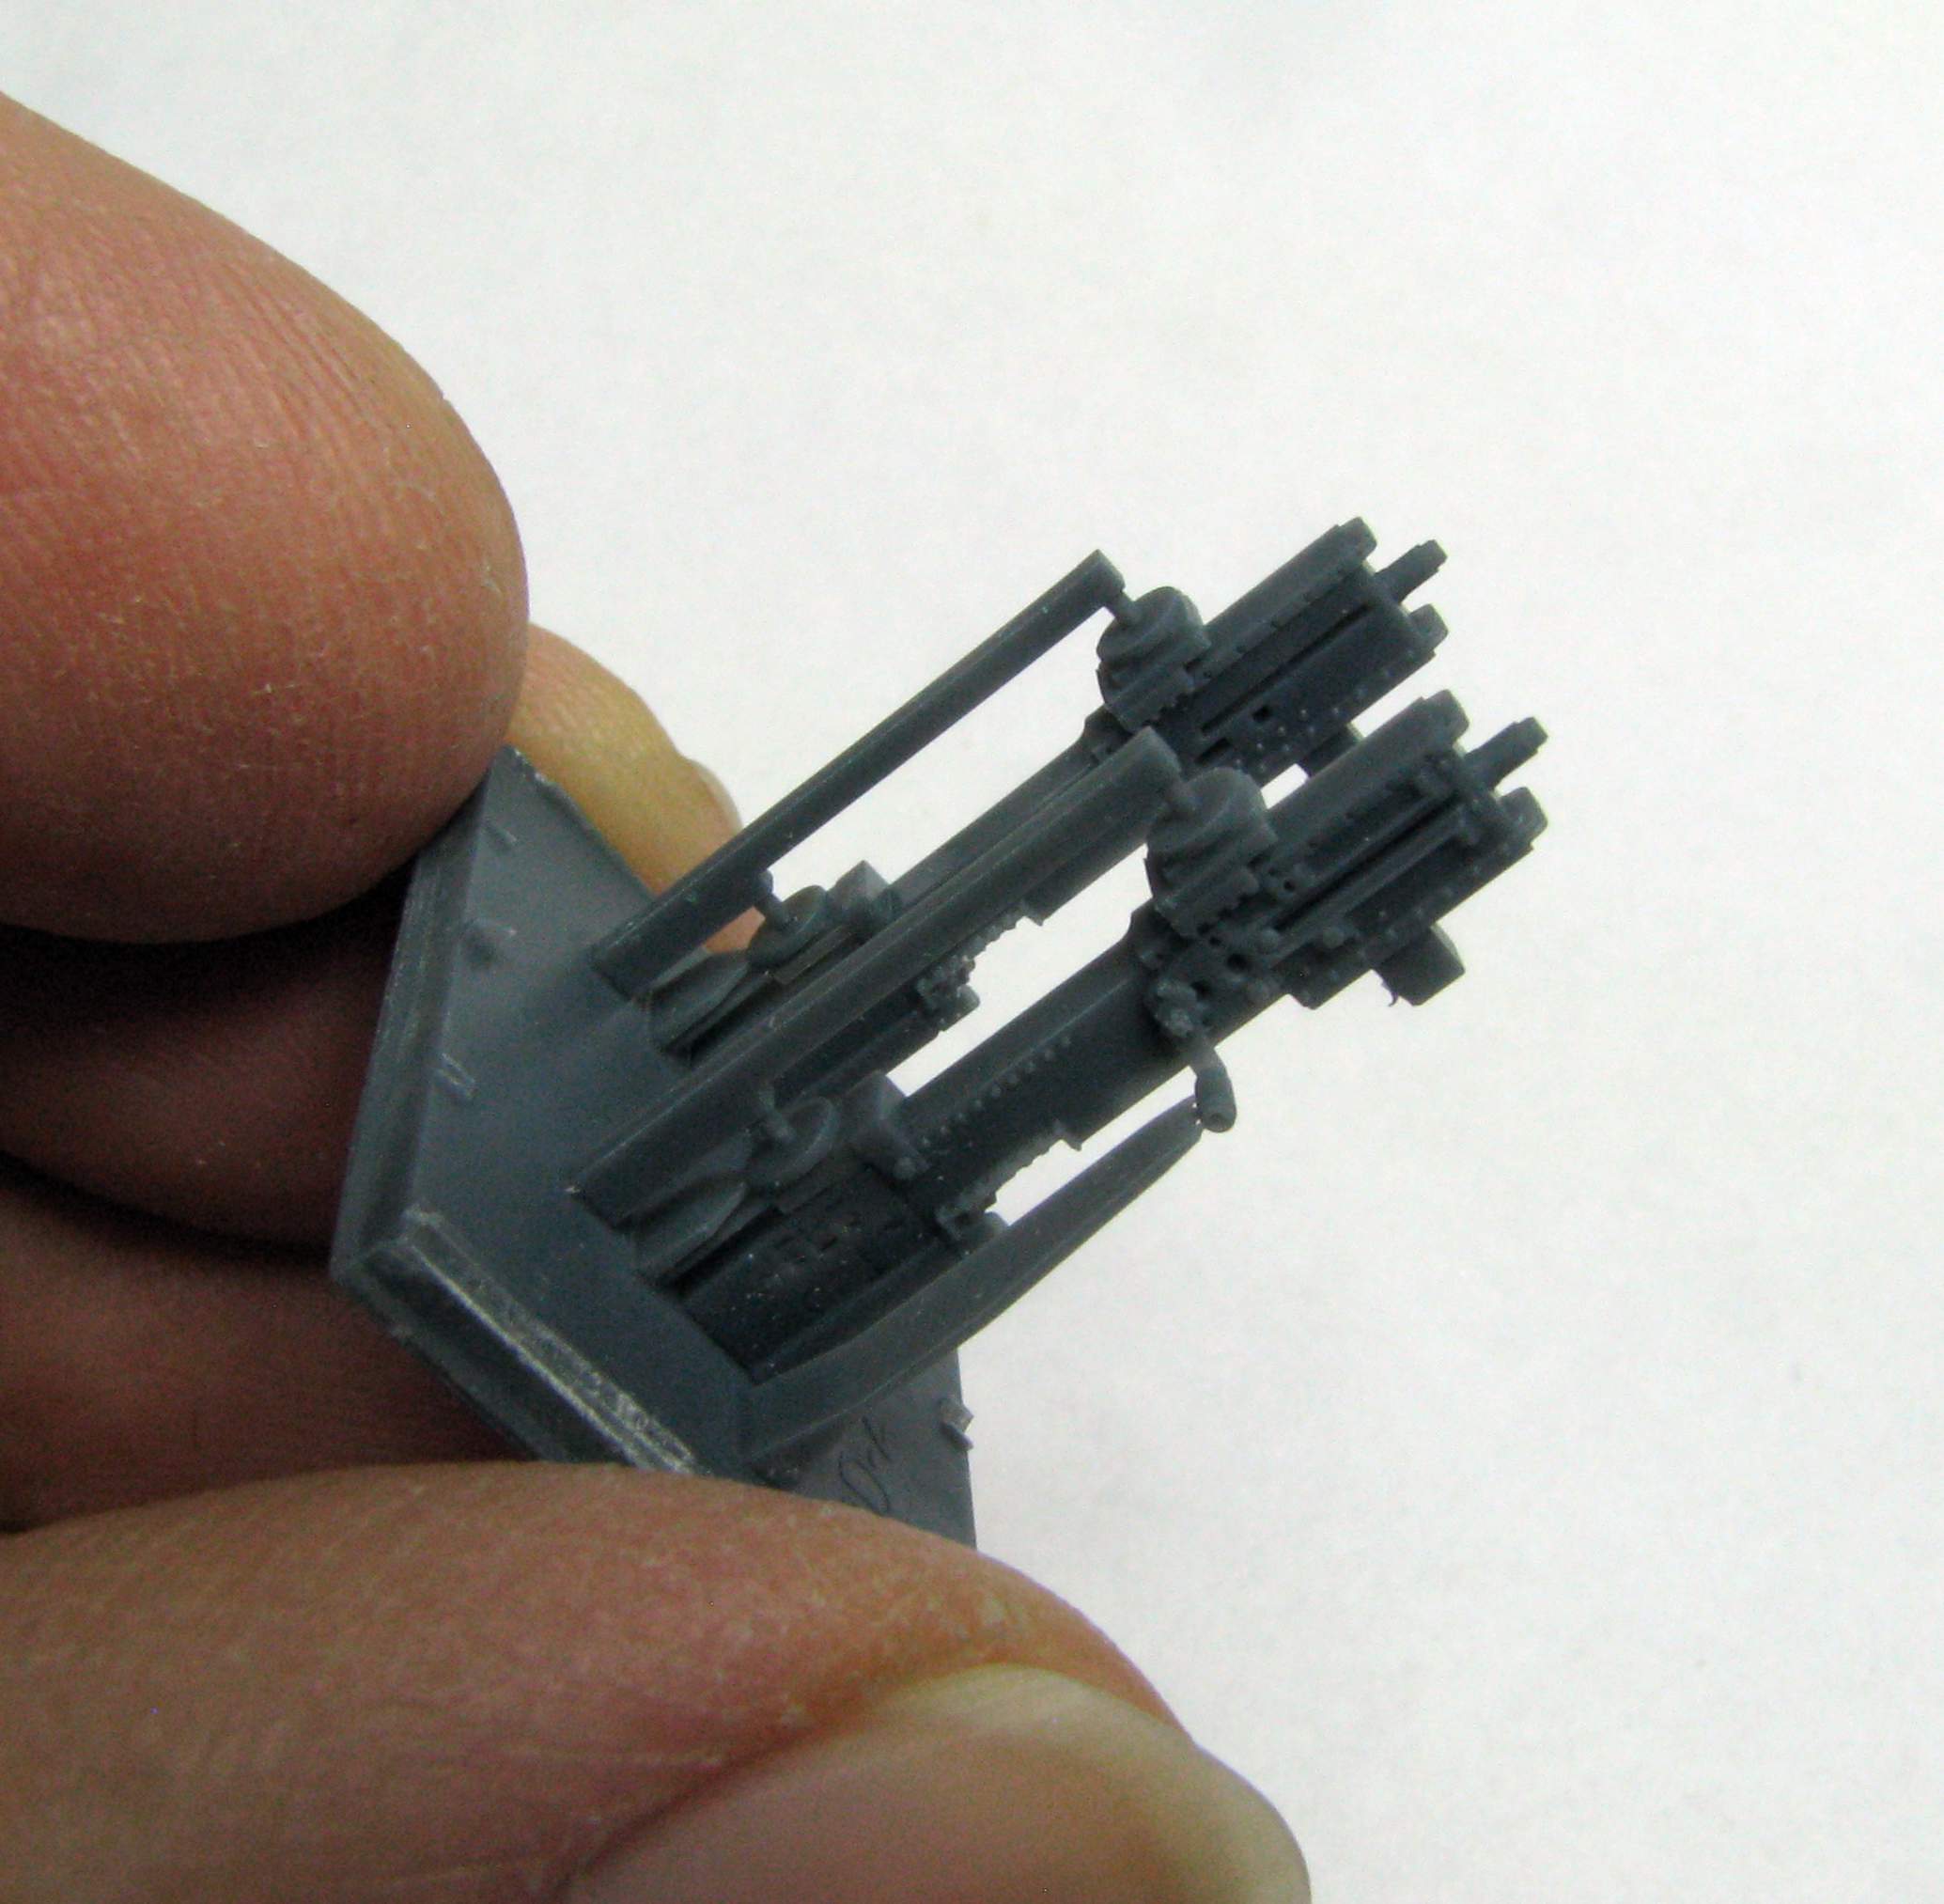
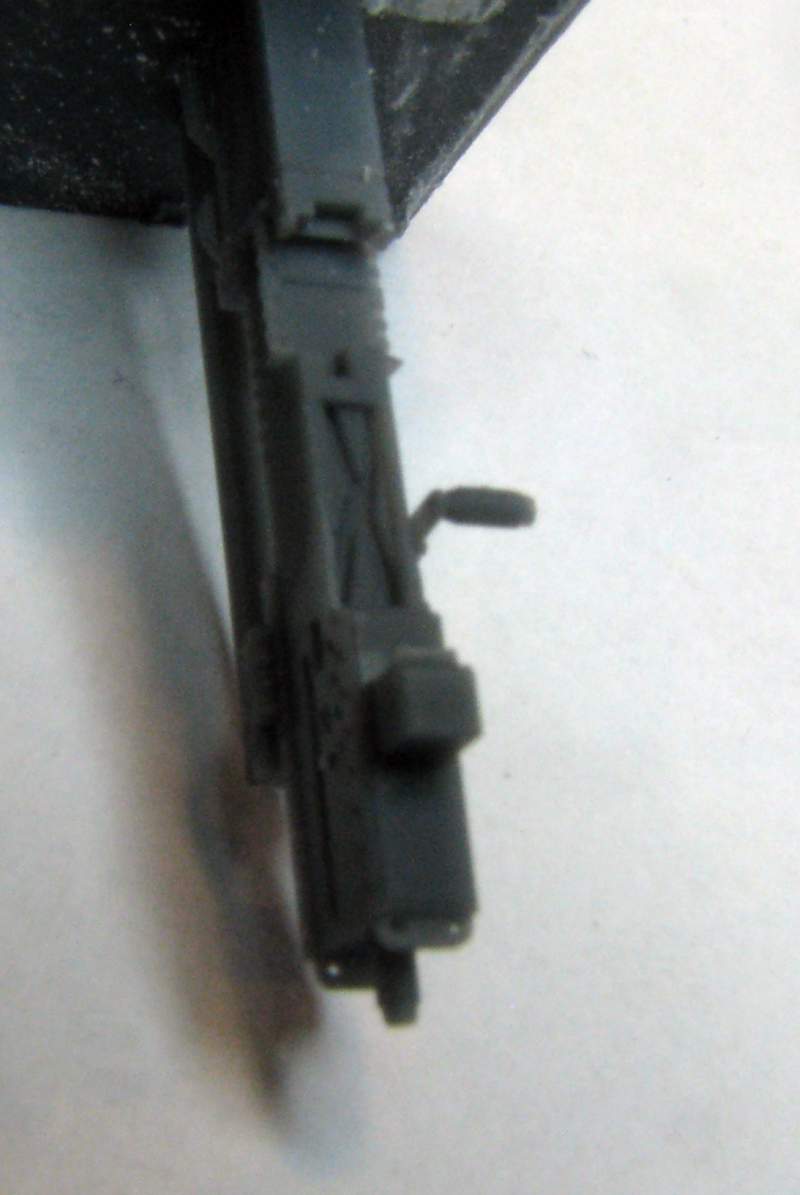
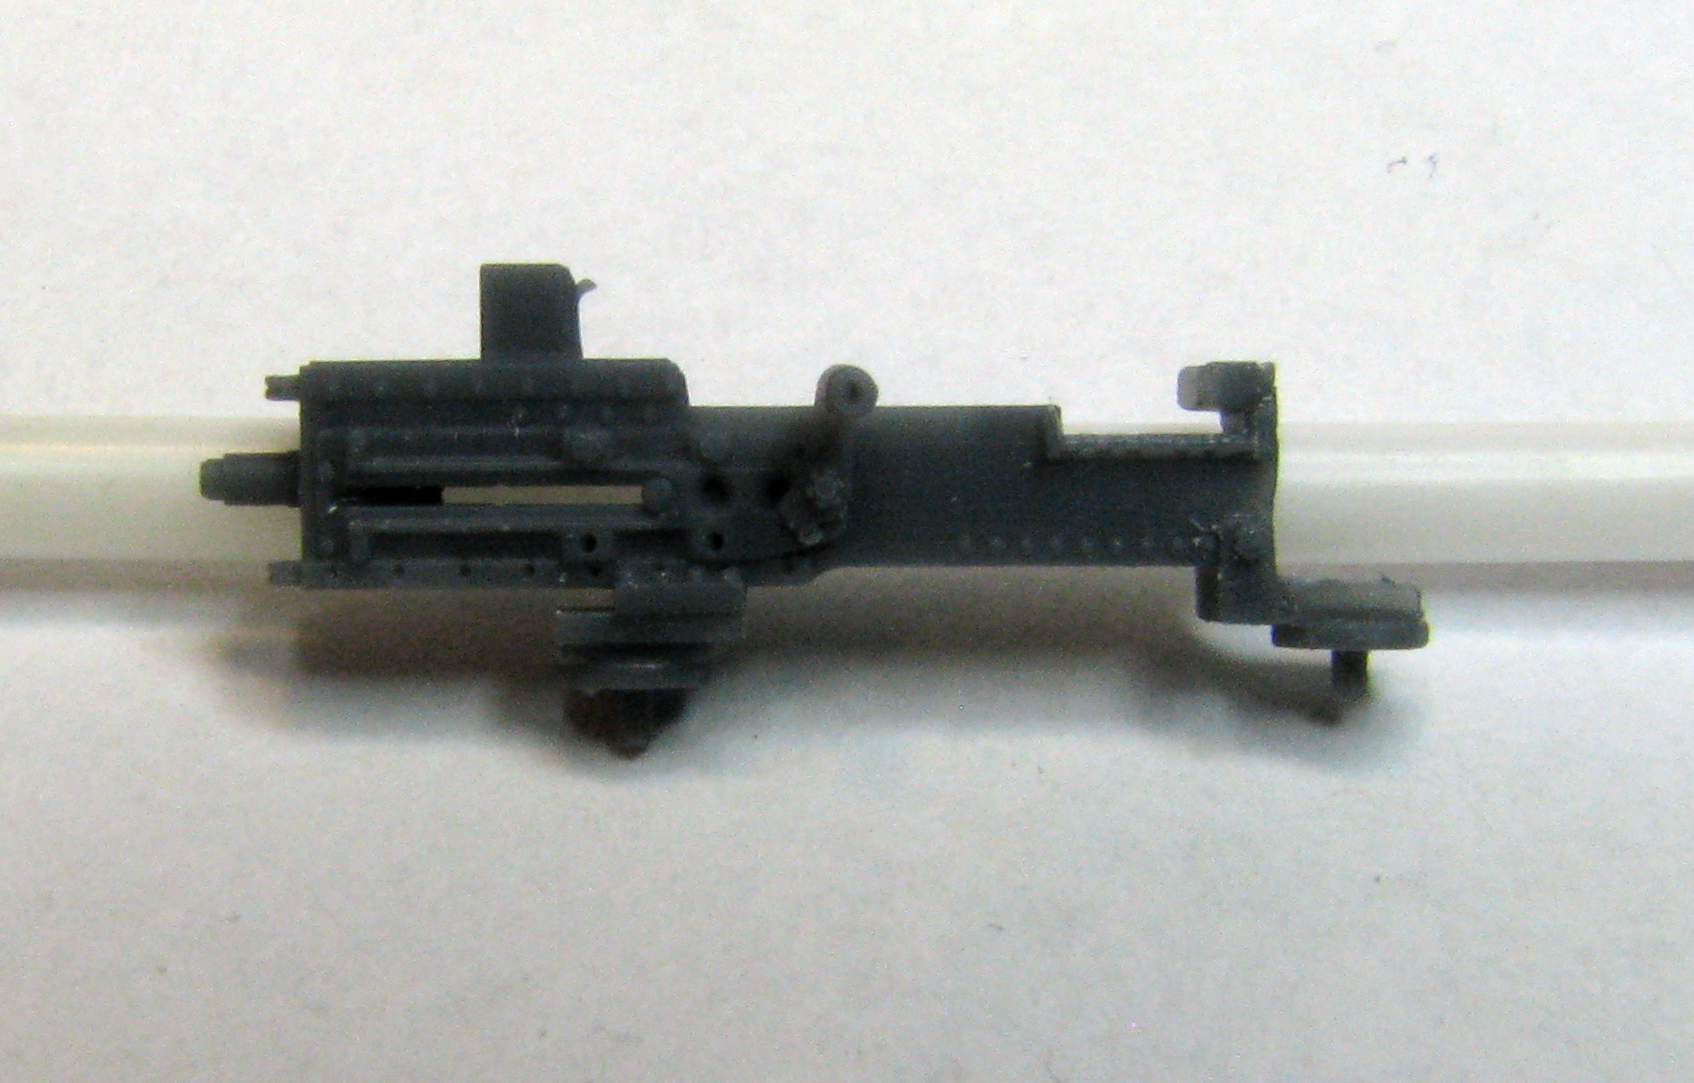
Now the receivers can be fully appreciated, the detail is very good, maybe even exceptional:

1:35 Dynamo Models M55 Quad .50 by Pawel

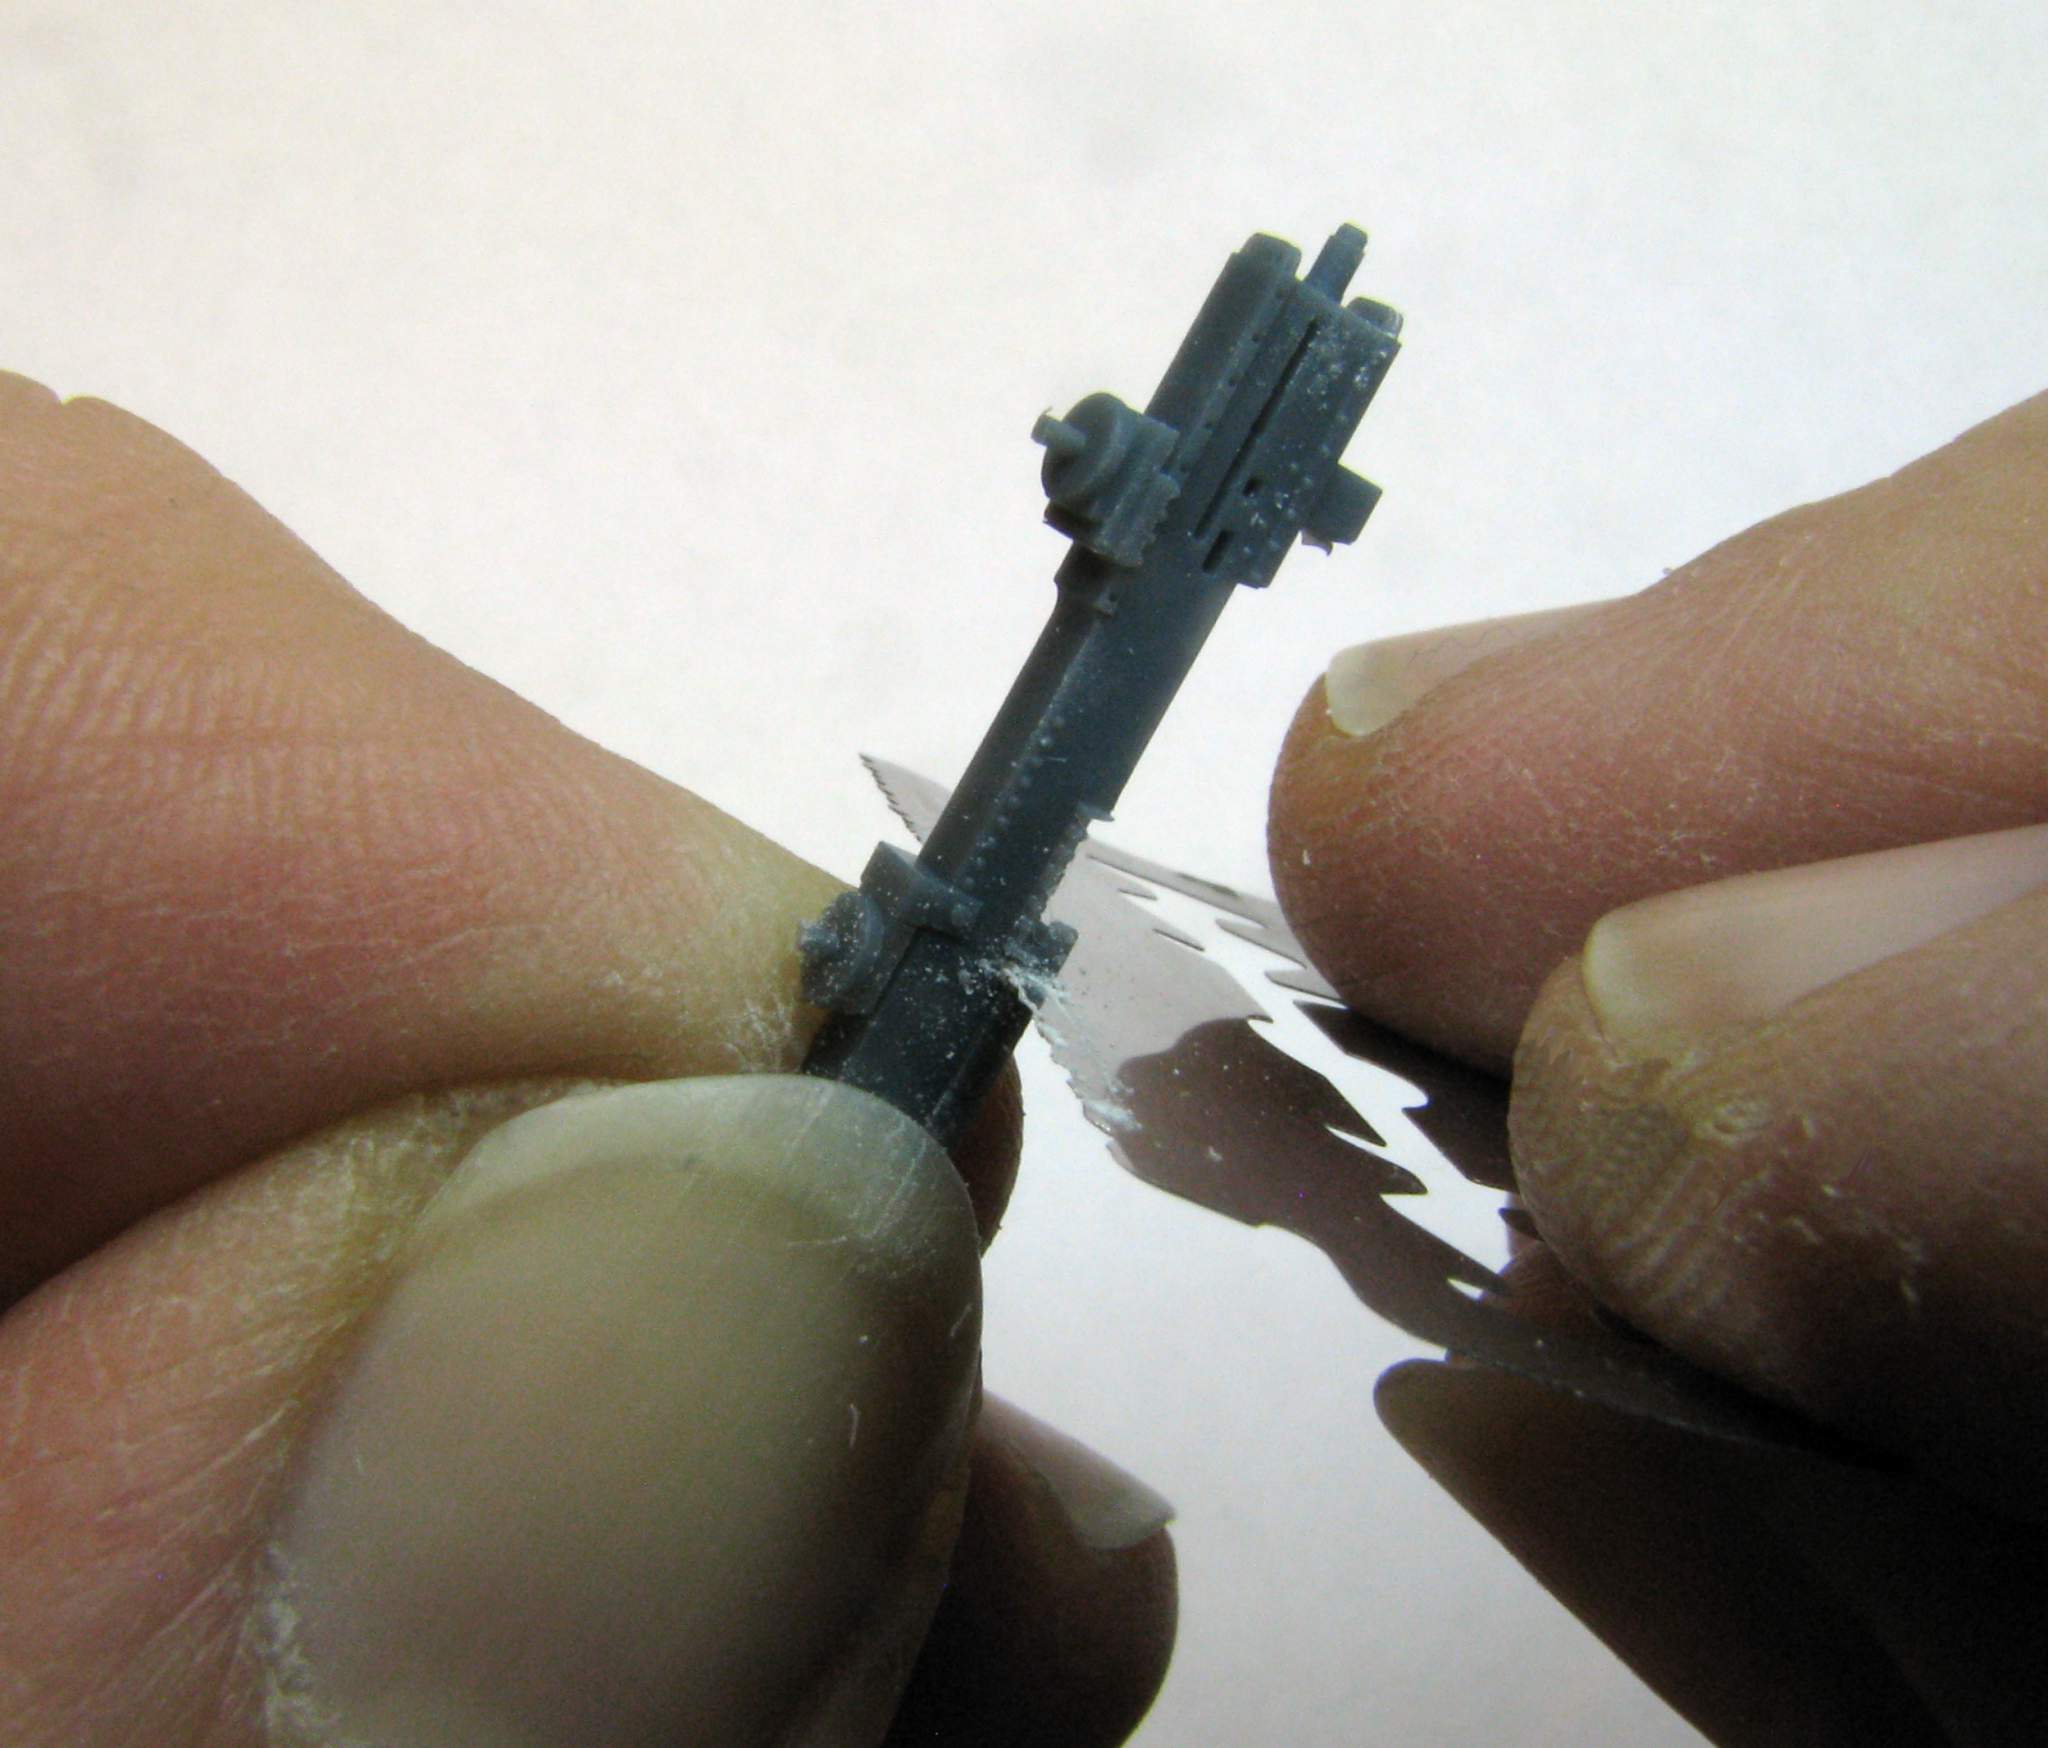
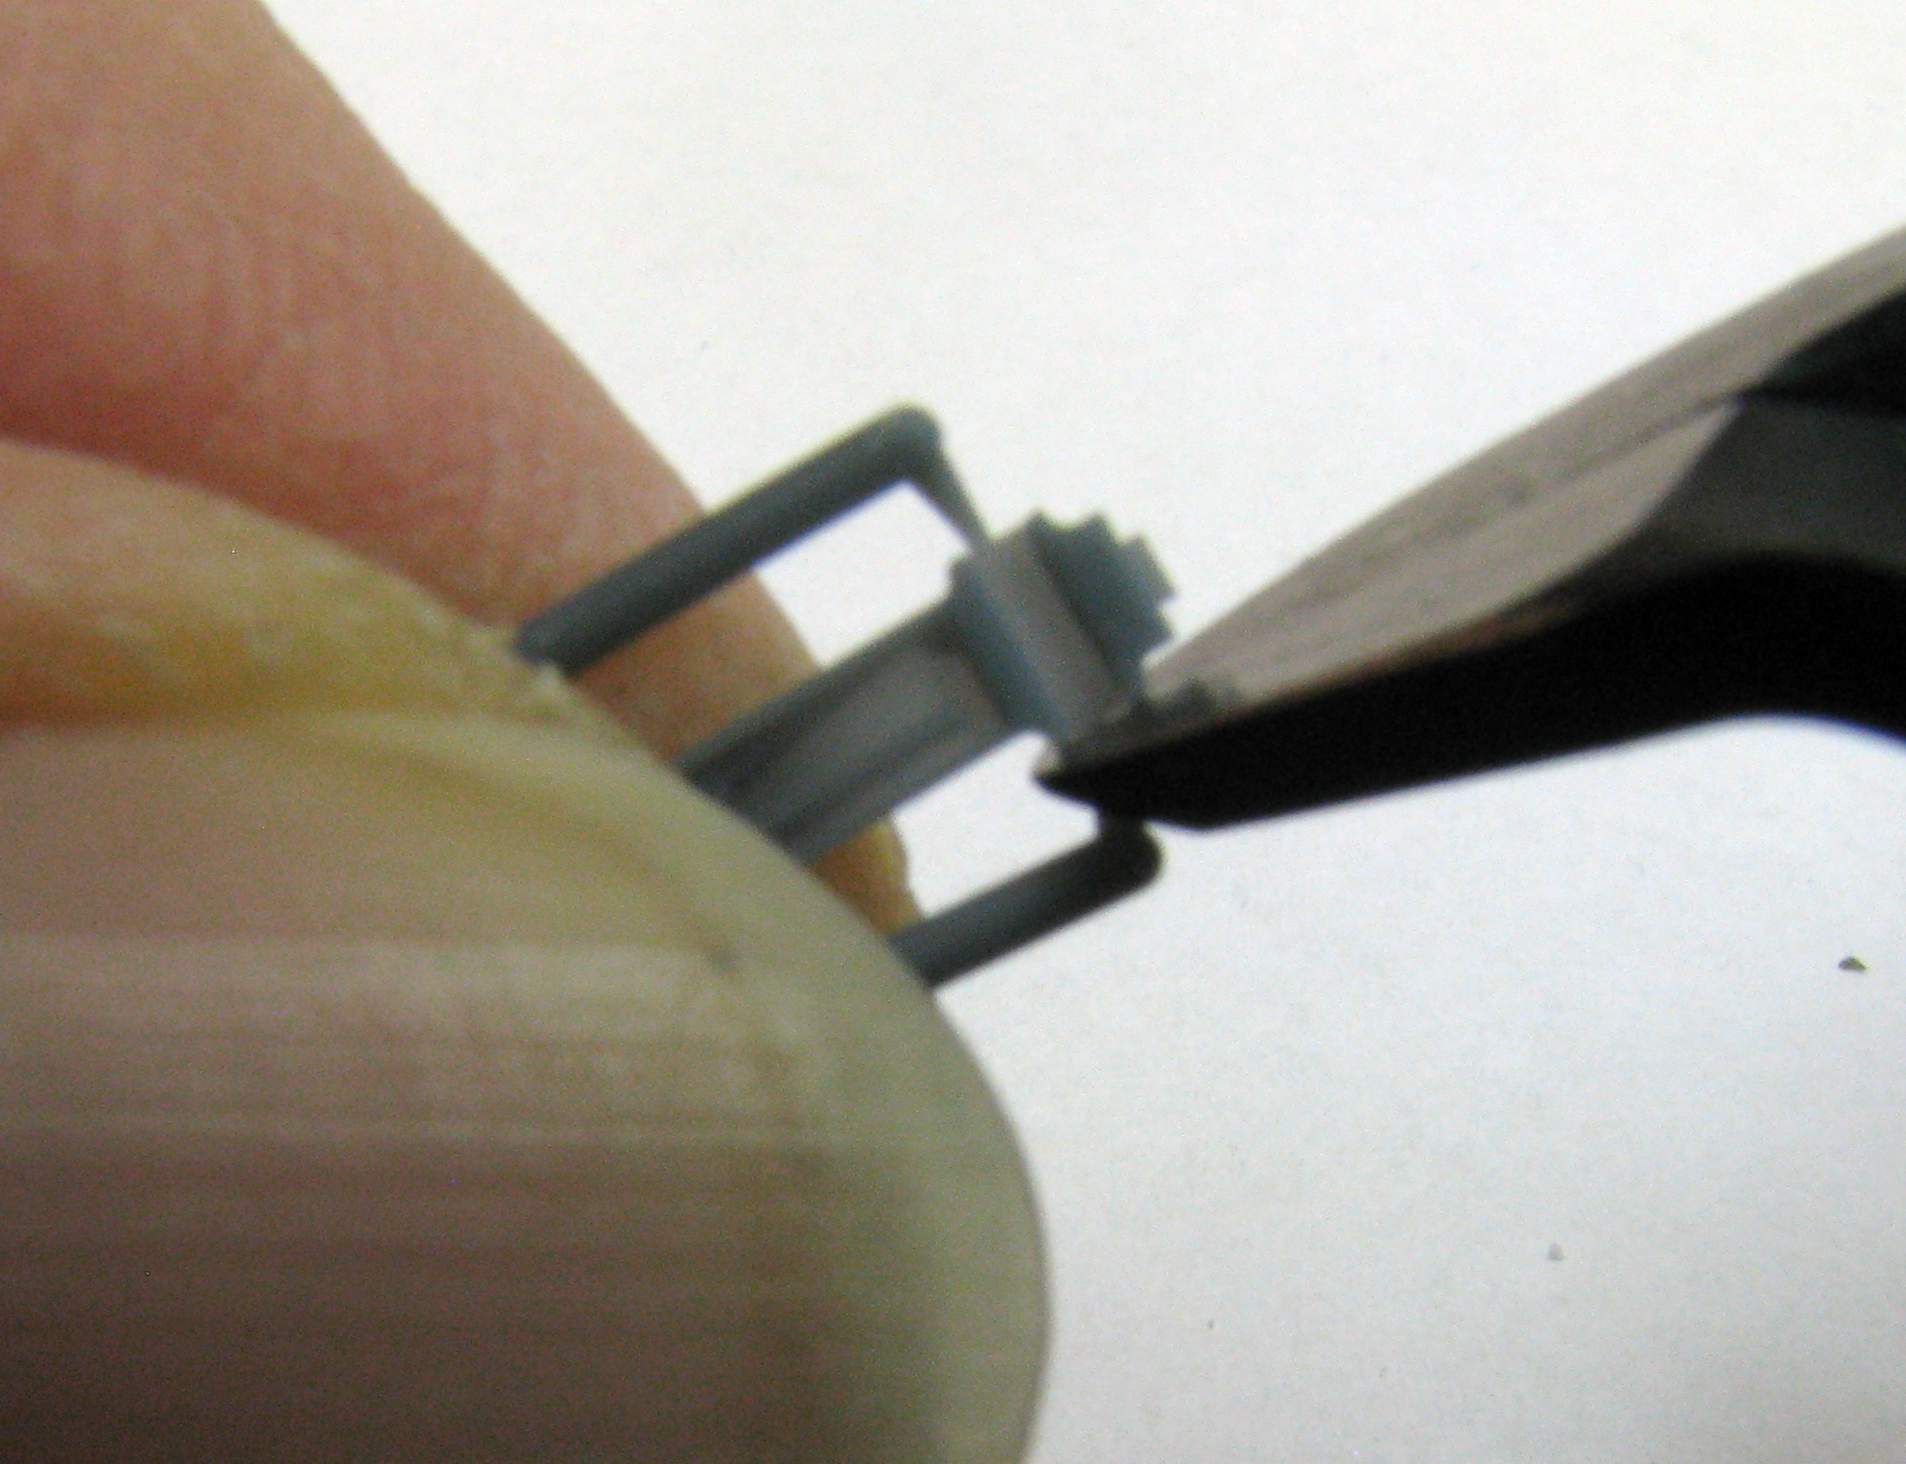
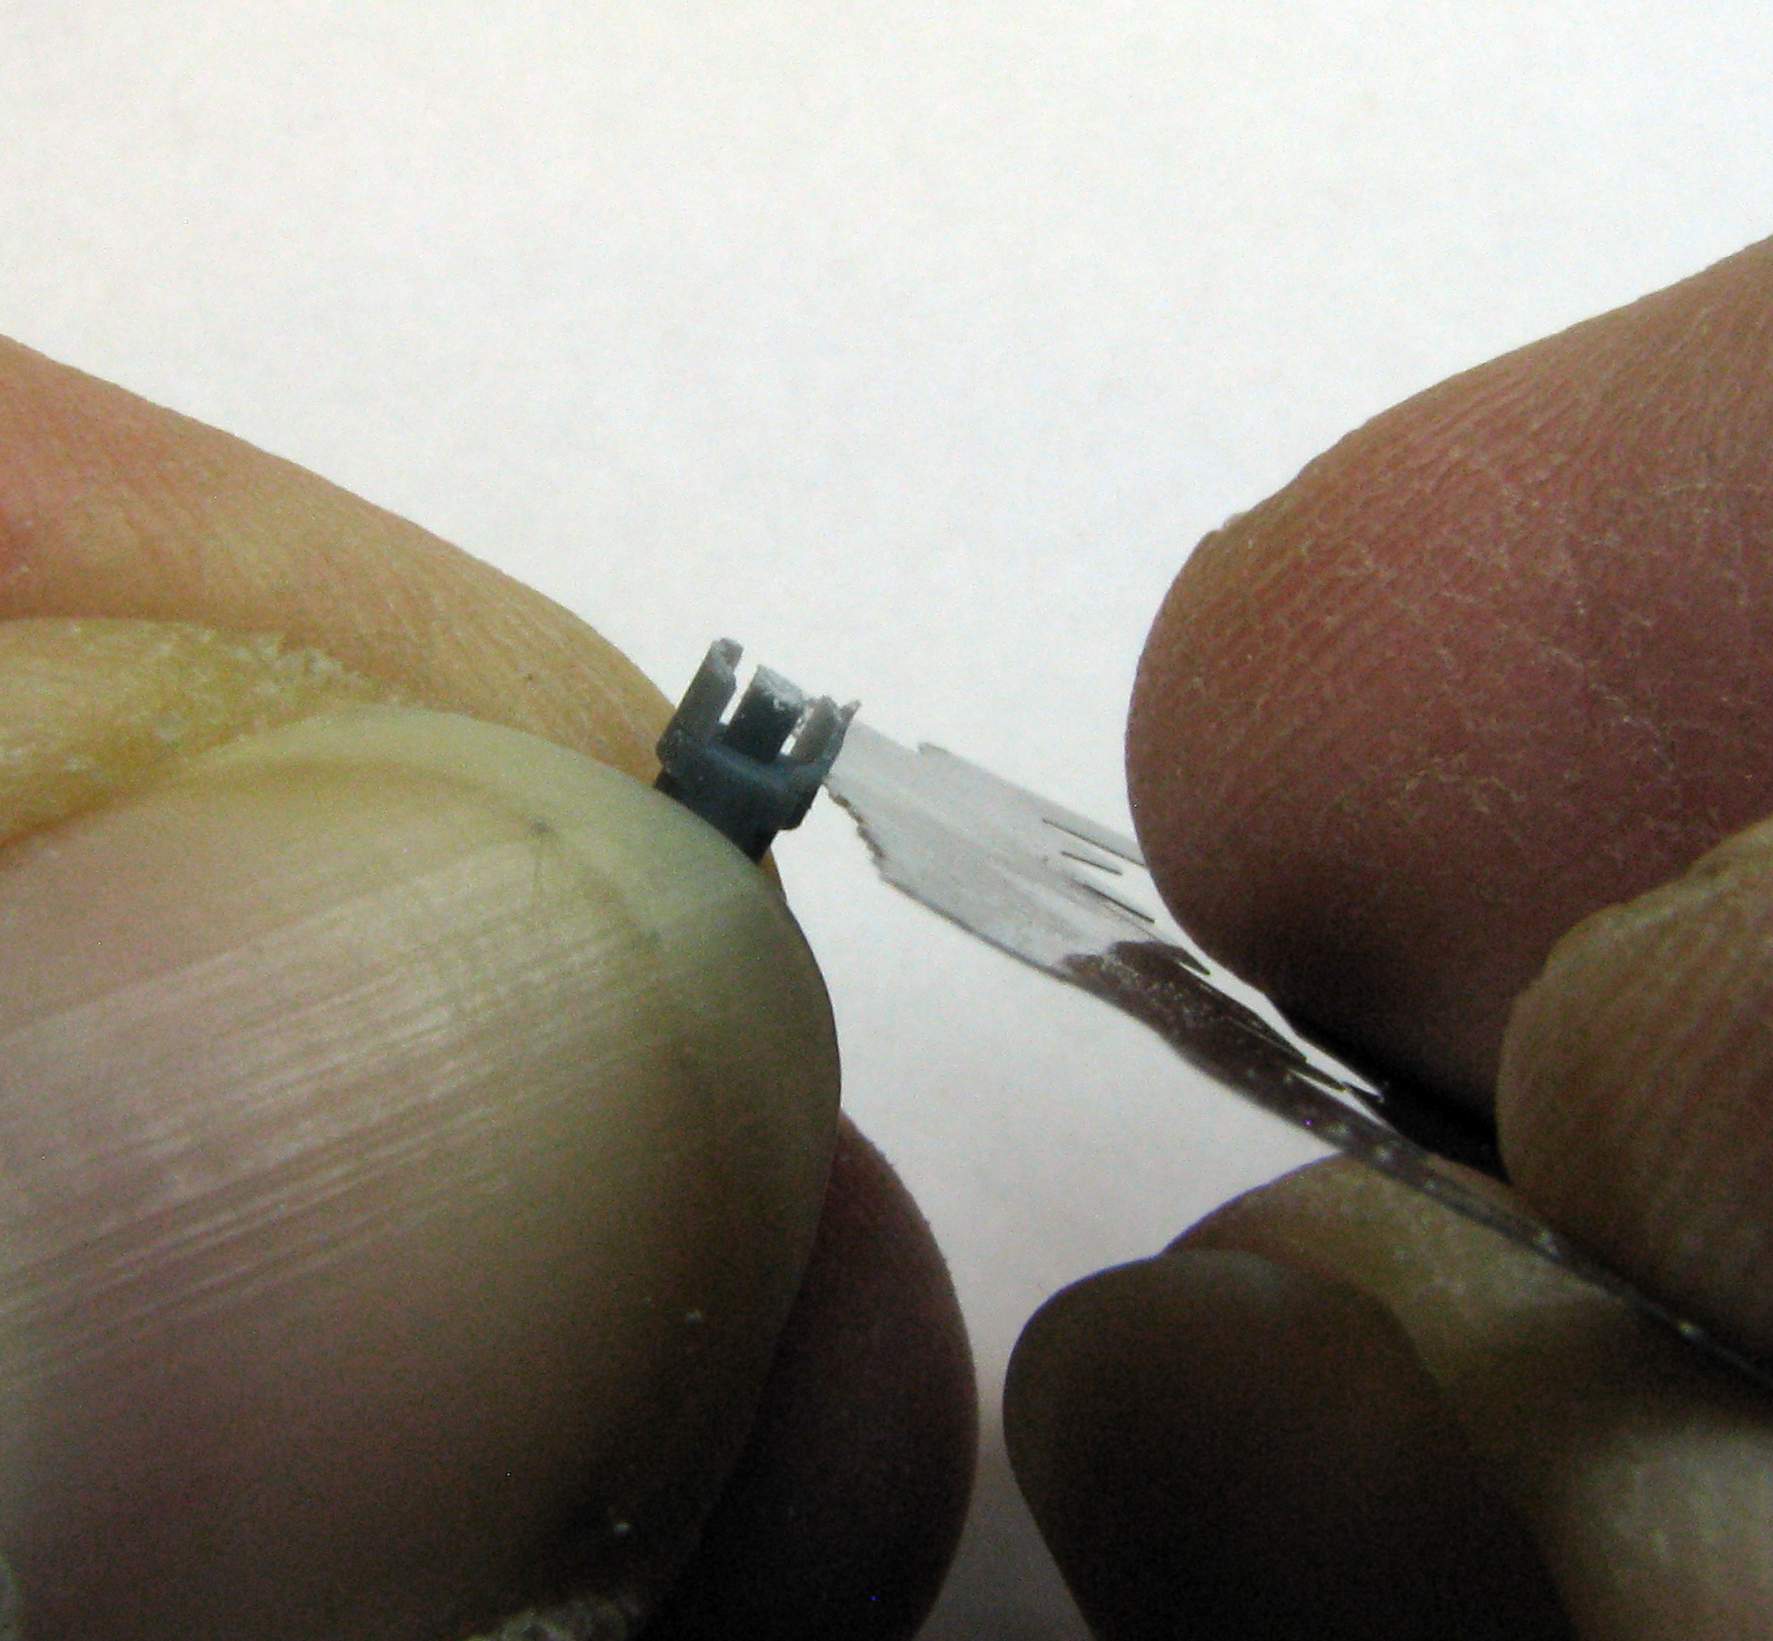
After CAREFUL cutting of the attachment points at the charging handle (they are very thin) the support can be cut at the bottom using a razor saw (the one you can see in the photo I made myself many years ago):

1:35 Dynamo Models M55 Quad .50 by Pawel

1:35 Dynamo Models M55 Quad .50 by Pawel

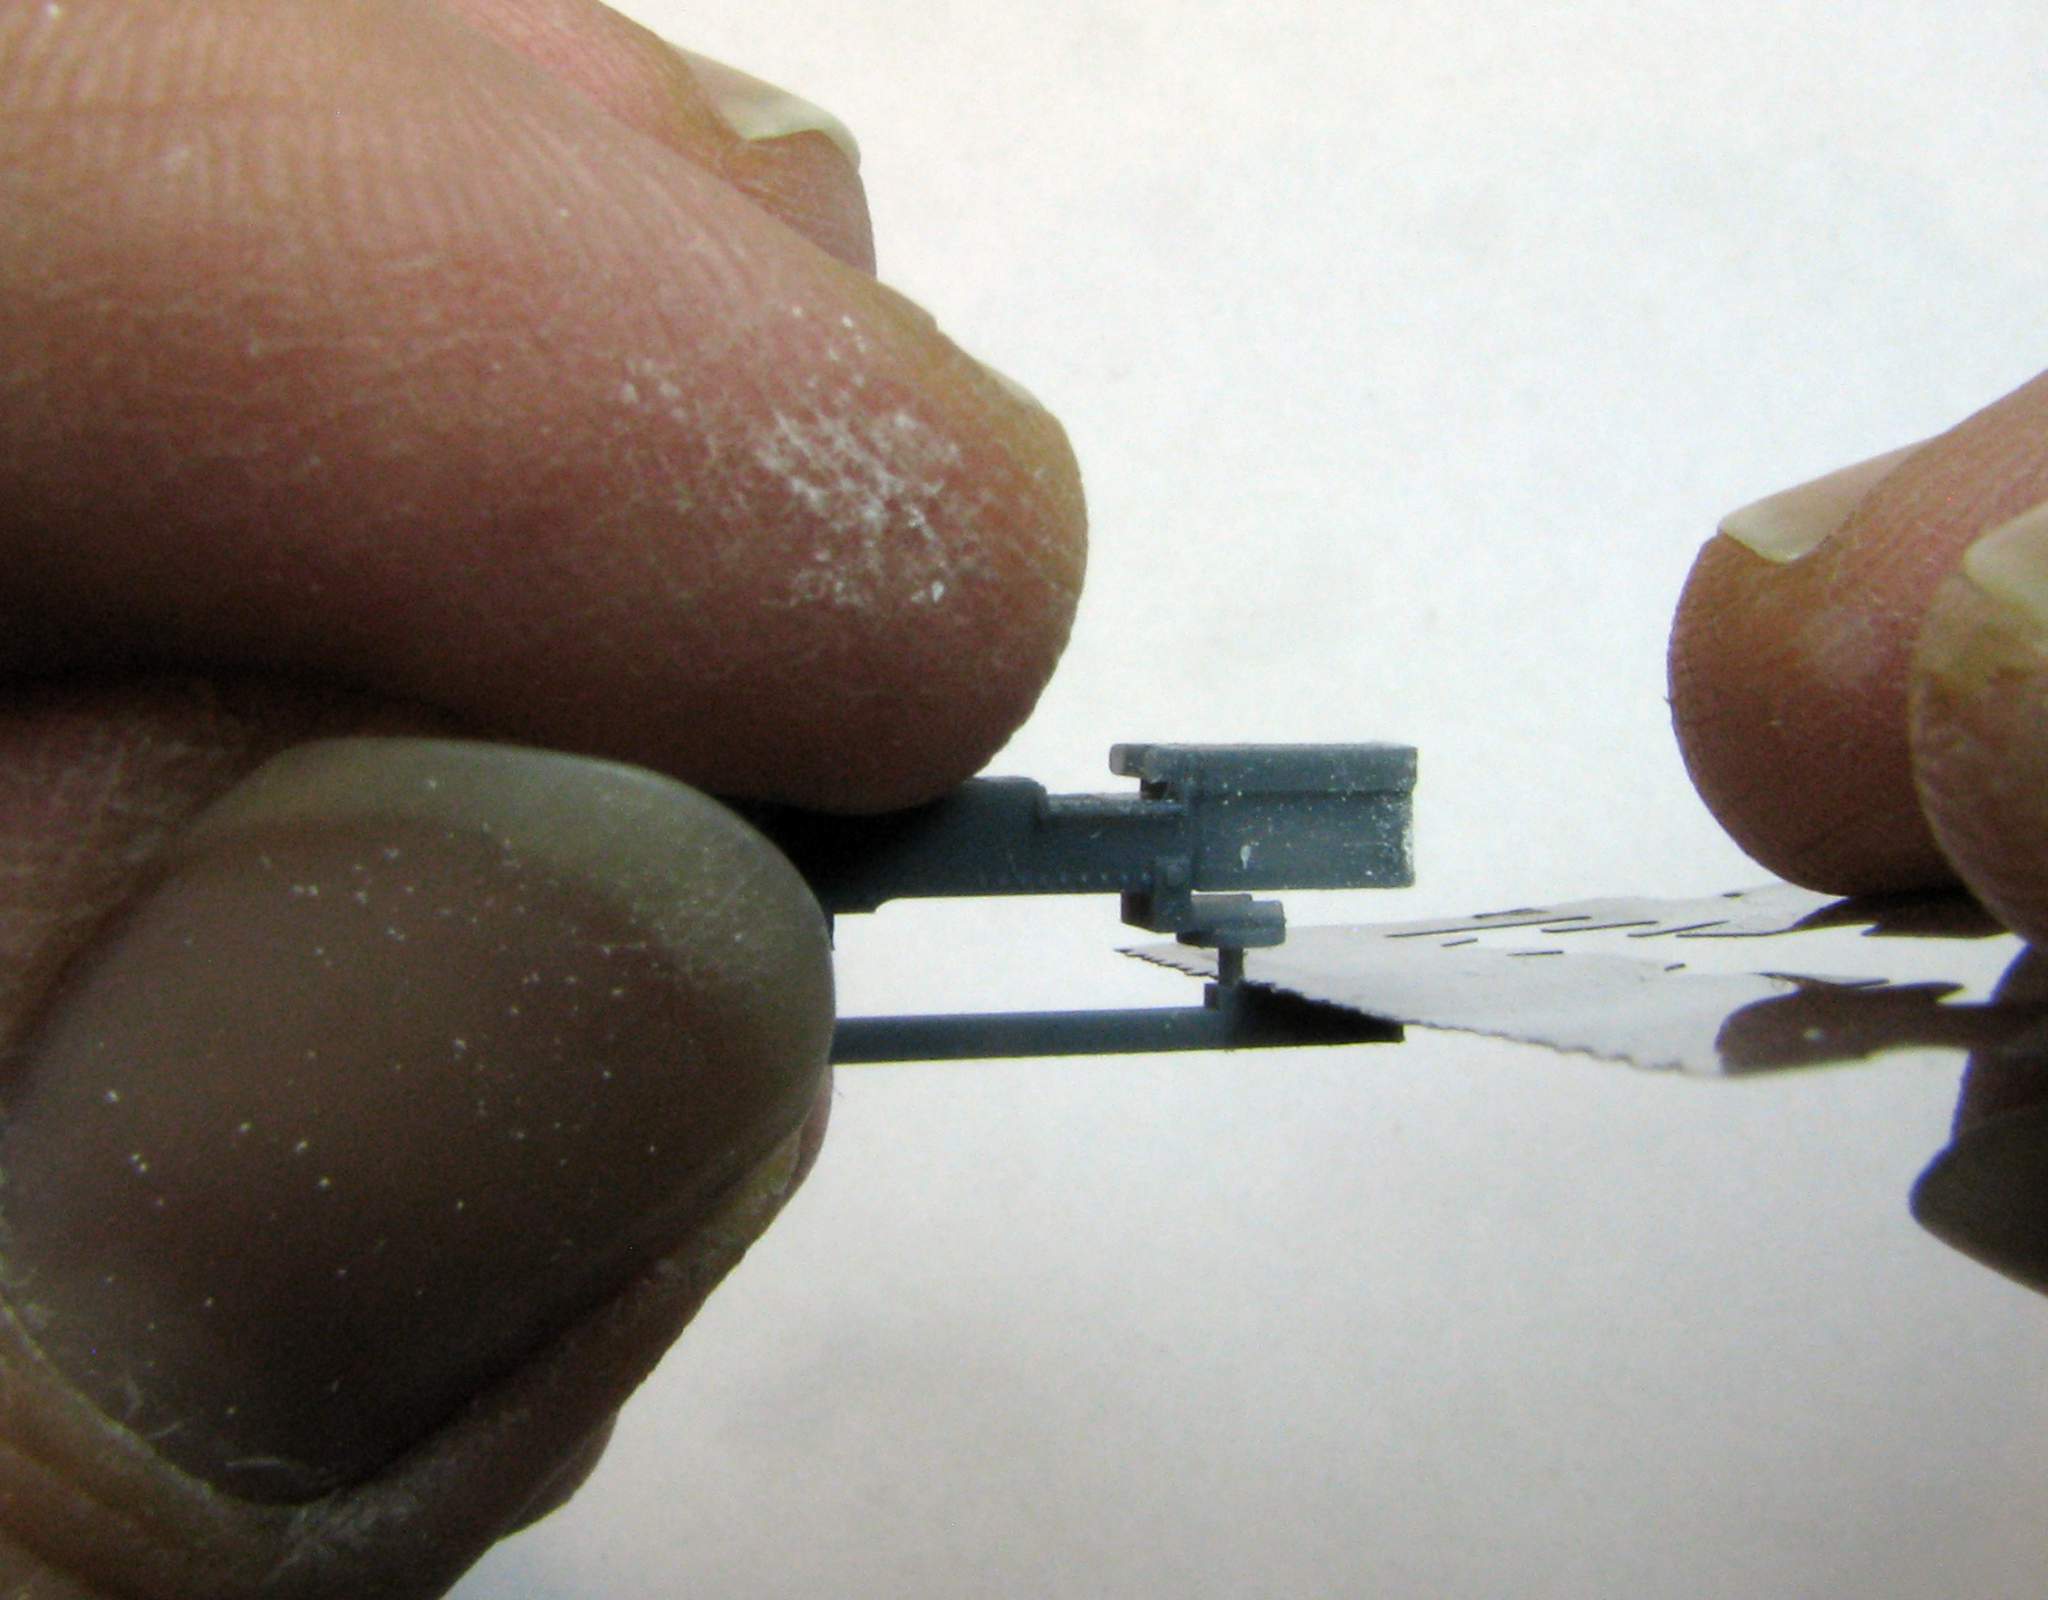
One of the parts can now be separated with a cut shown on the photo below:

1:35 Dynamo Models M55 Quad .50 by Pawel

Next cut starts separating another support:

1:35 Dynamo Models M55 Quad .50 by Pawel

That can be finished with a sprue cutter:

1:35 Dynamo Models M55 Quad .50 by Pawel

One more cut that hes to be relatively precise, separates the final support. All the time you have to watch for those charging handles (ask me how I know!):

1:35 Dynamo Models M55 Quad .50 by Pawel

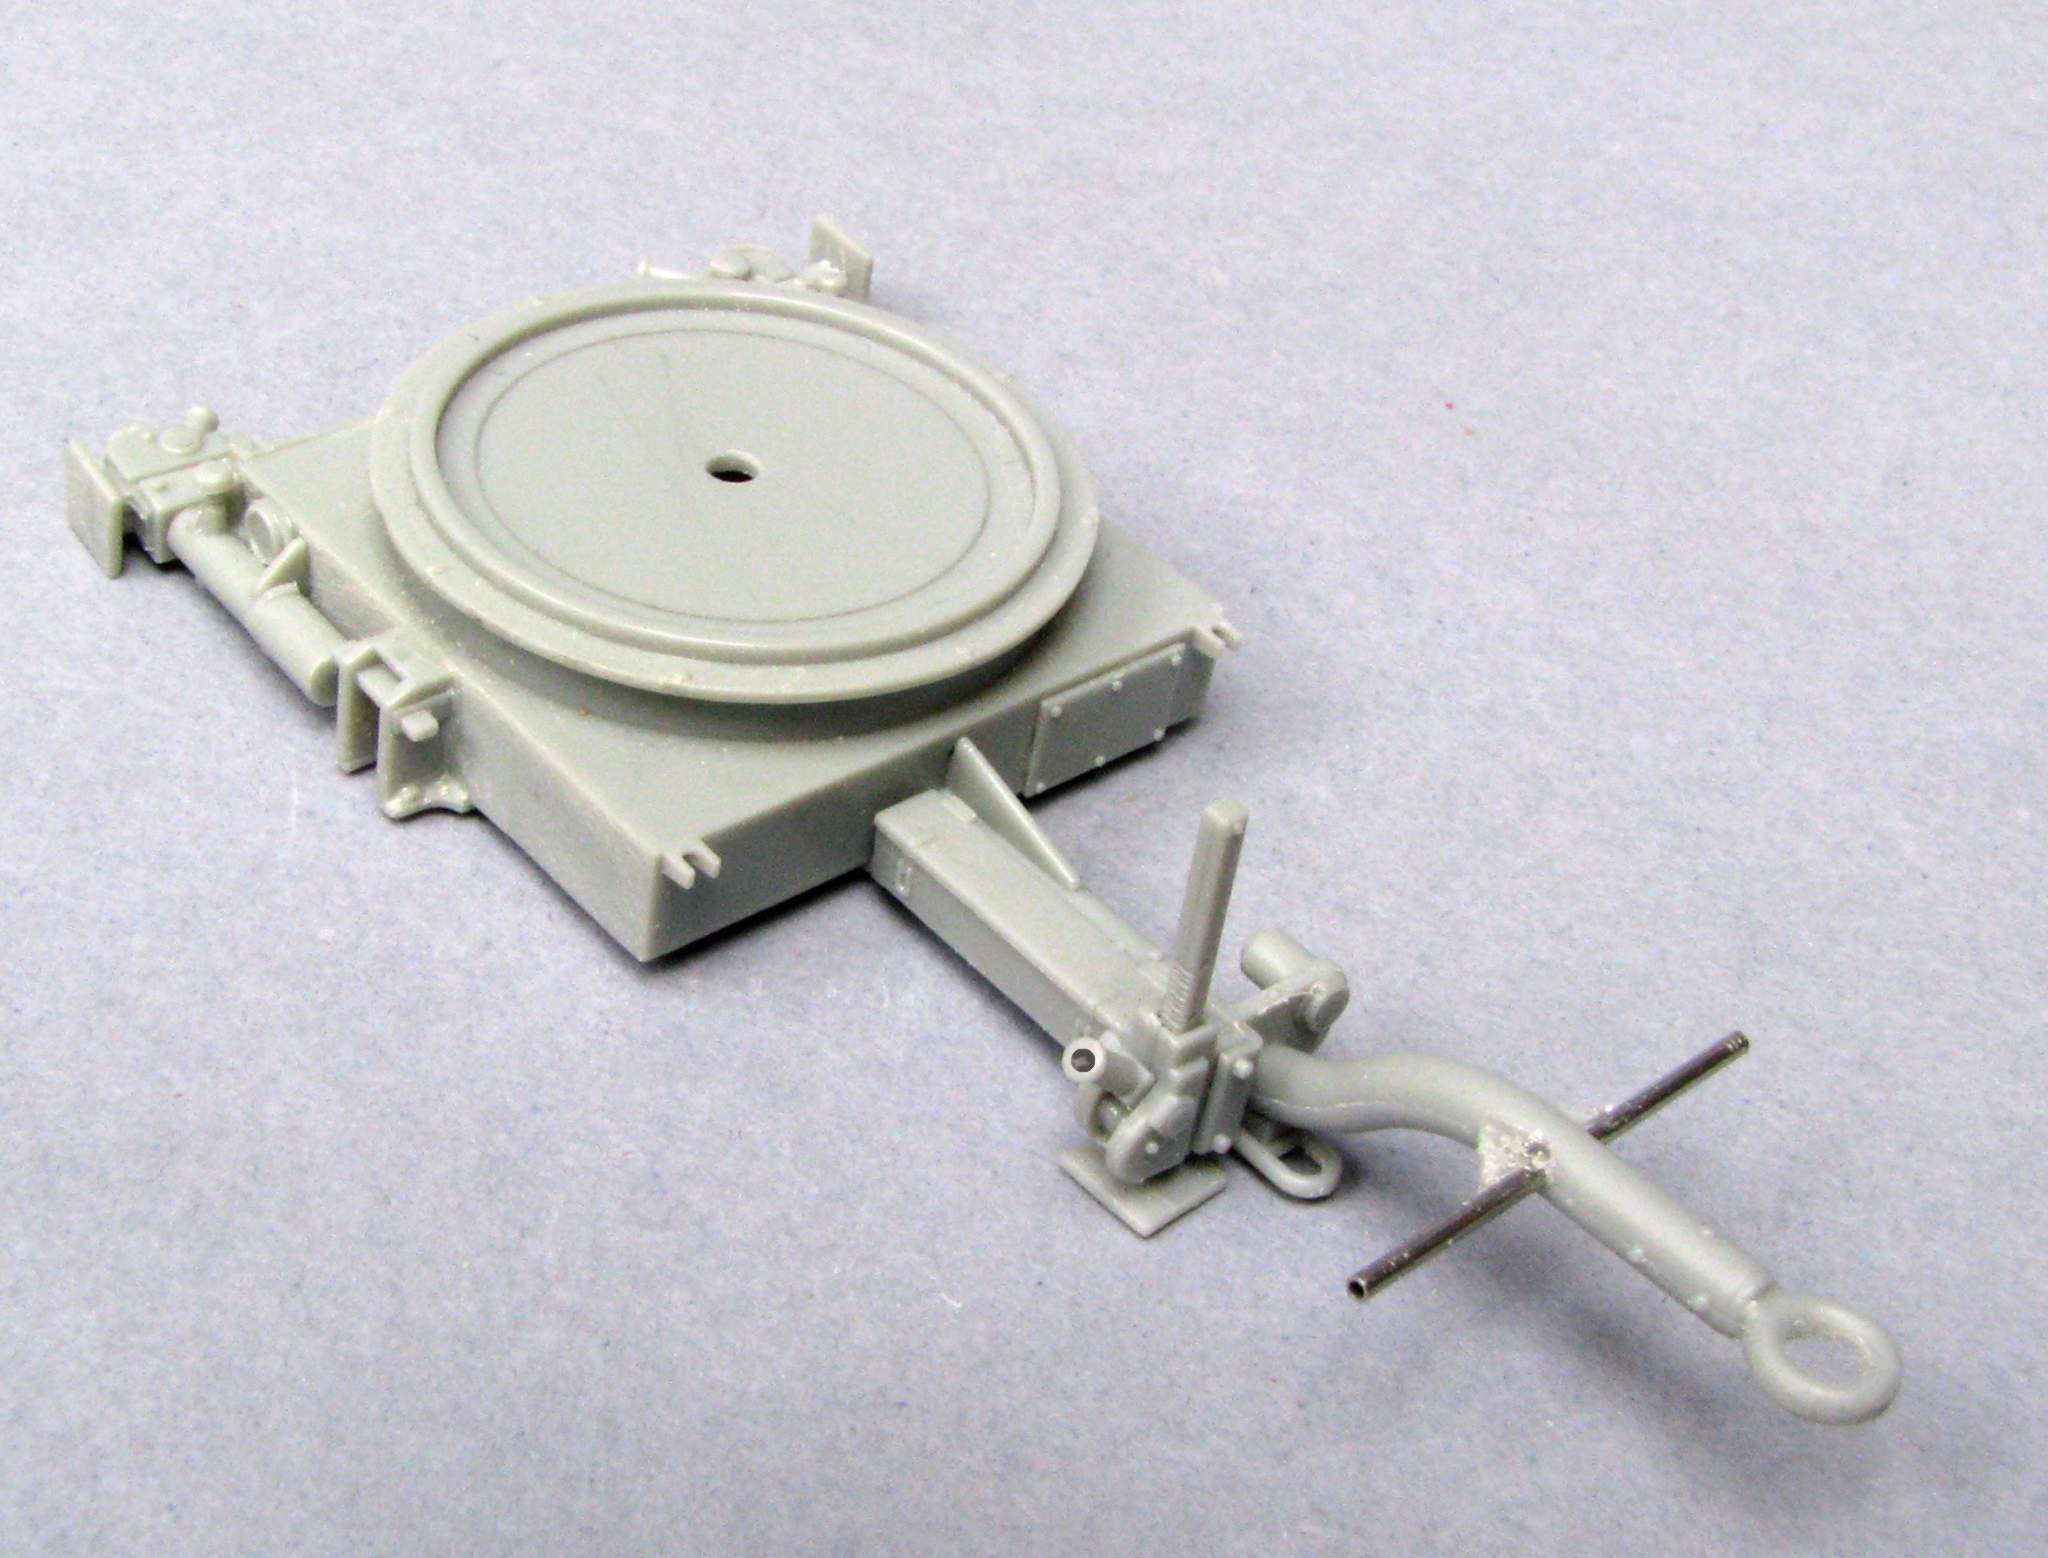
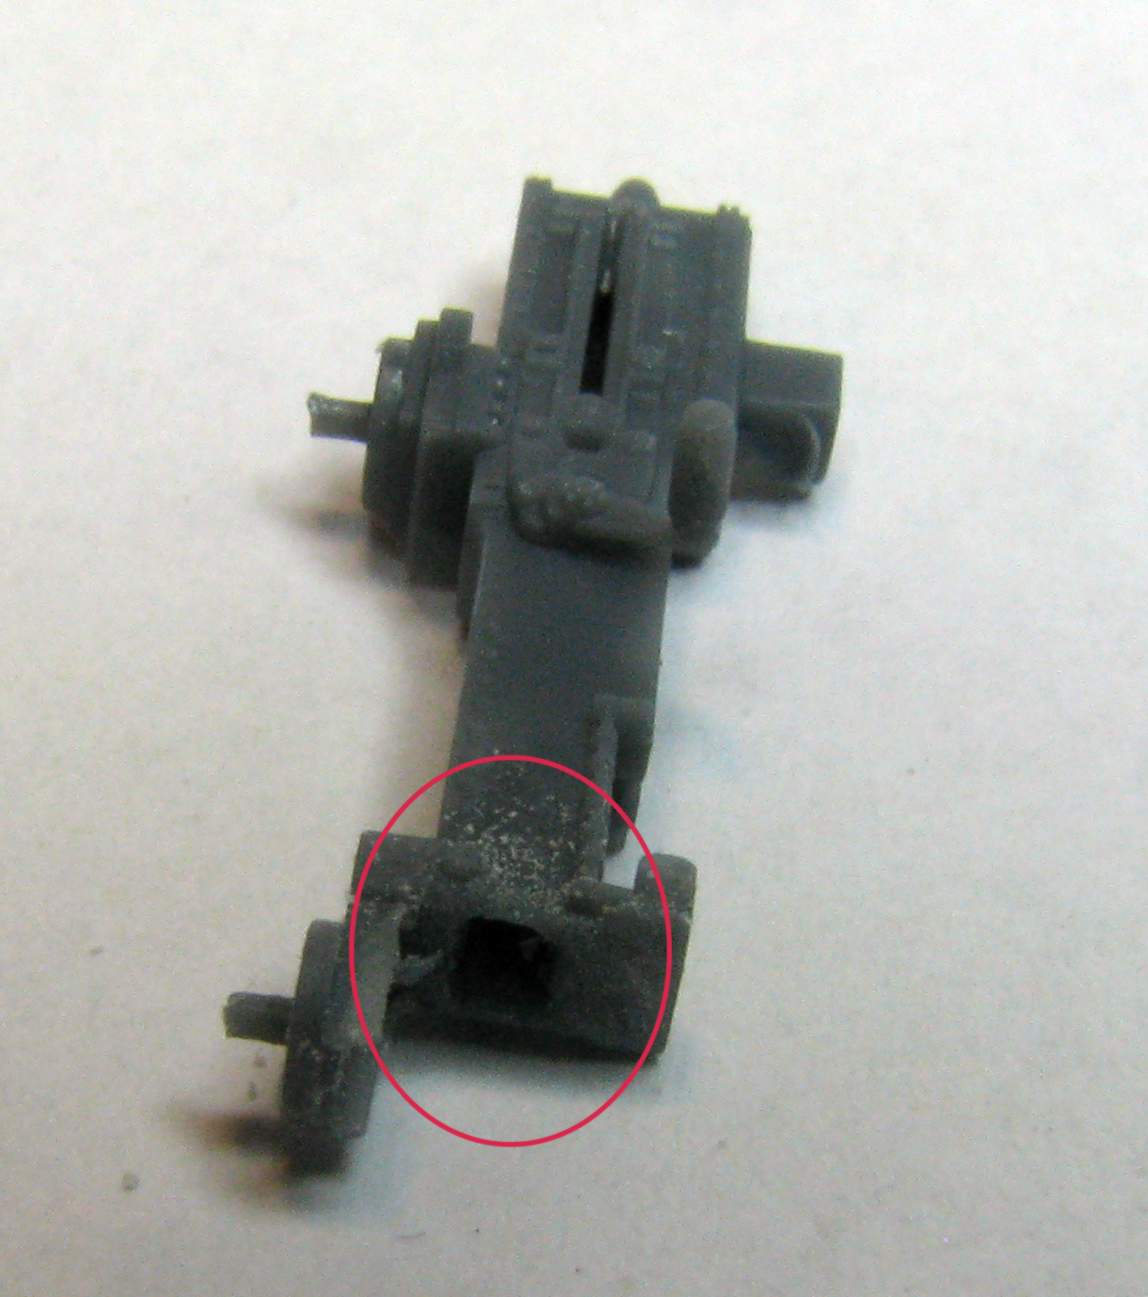
After separating the last support the hole for mounting the barrel is revealed:

1:35 Dynamo Models M55 Quad .50 by Pawel

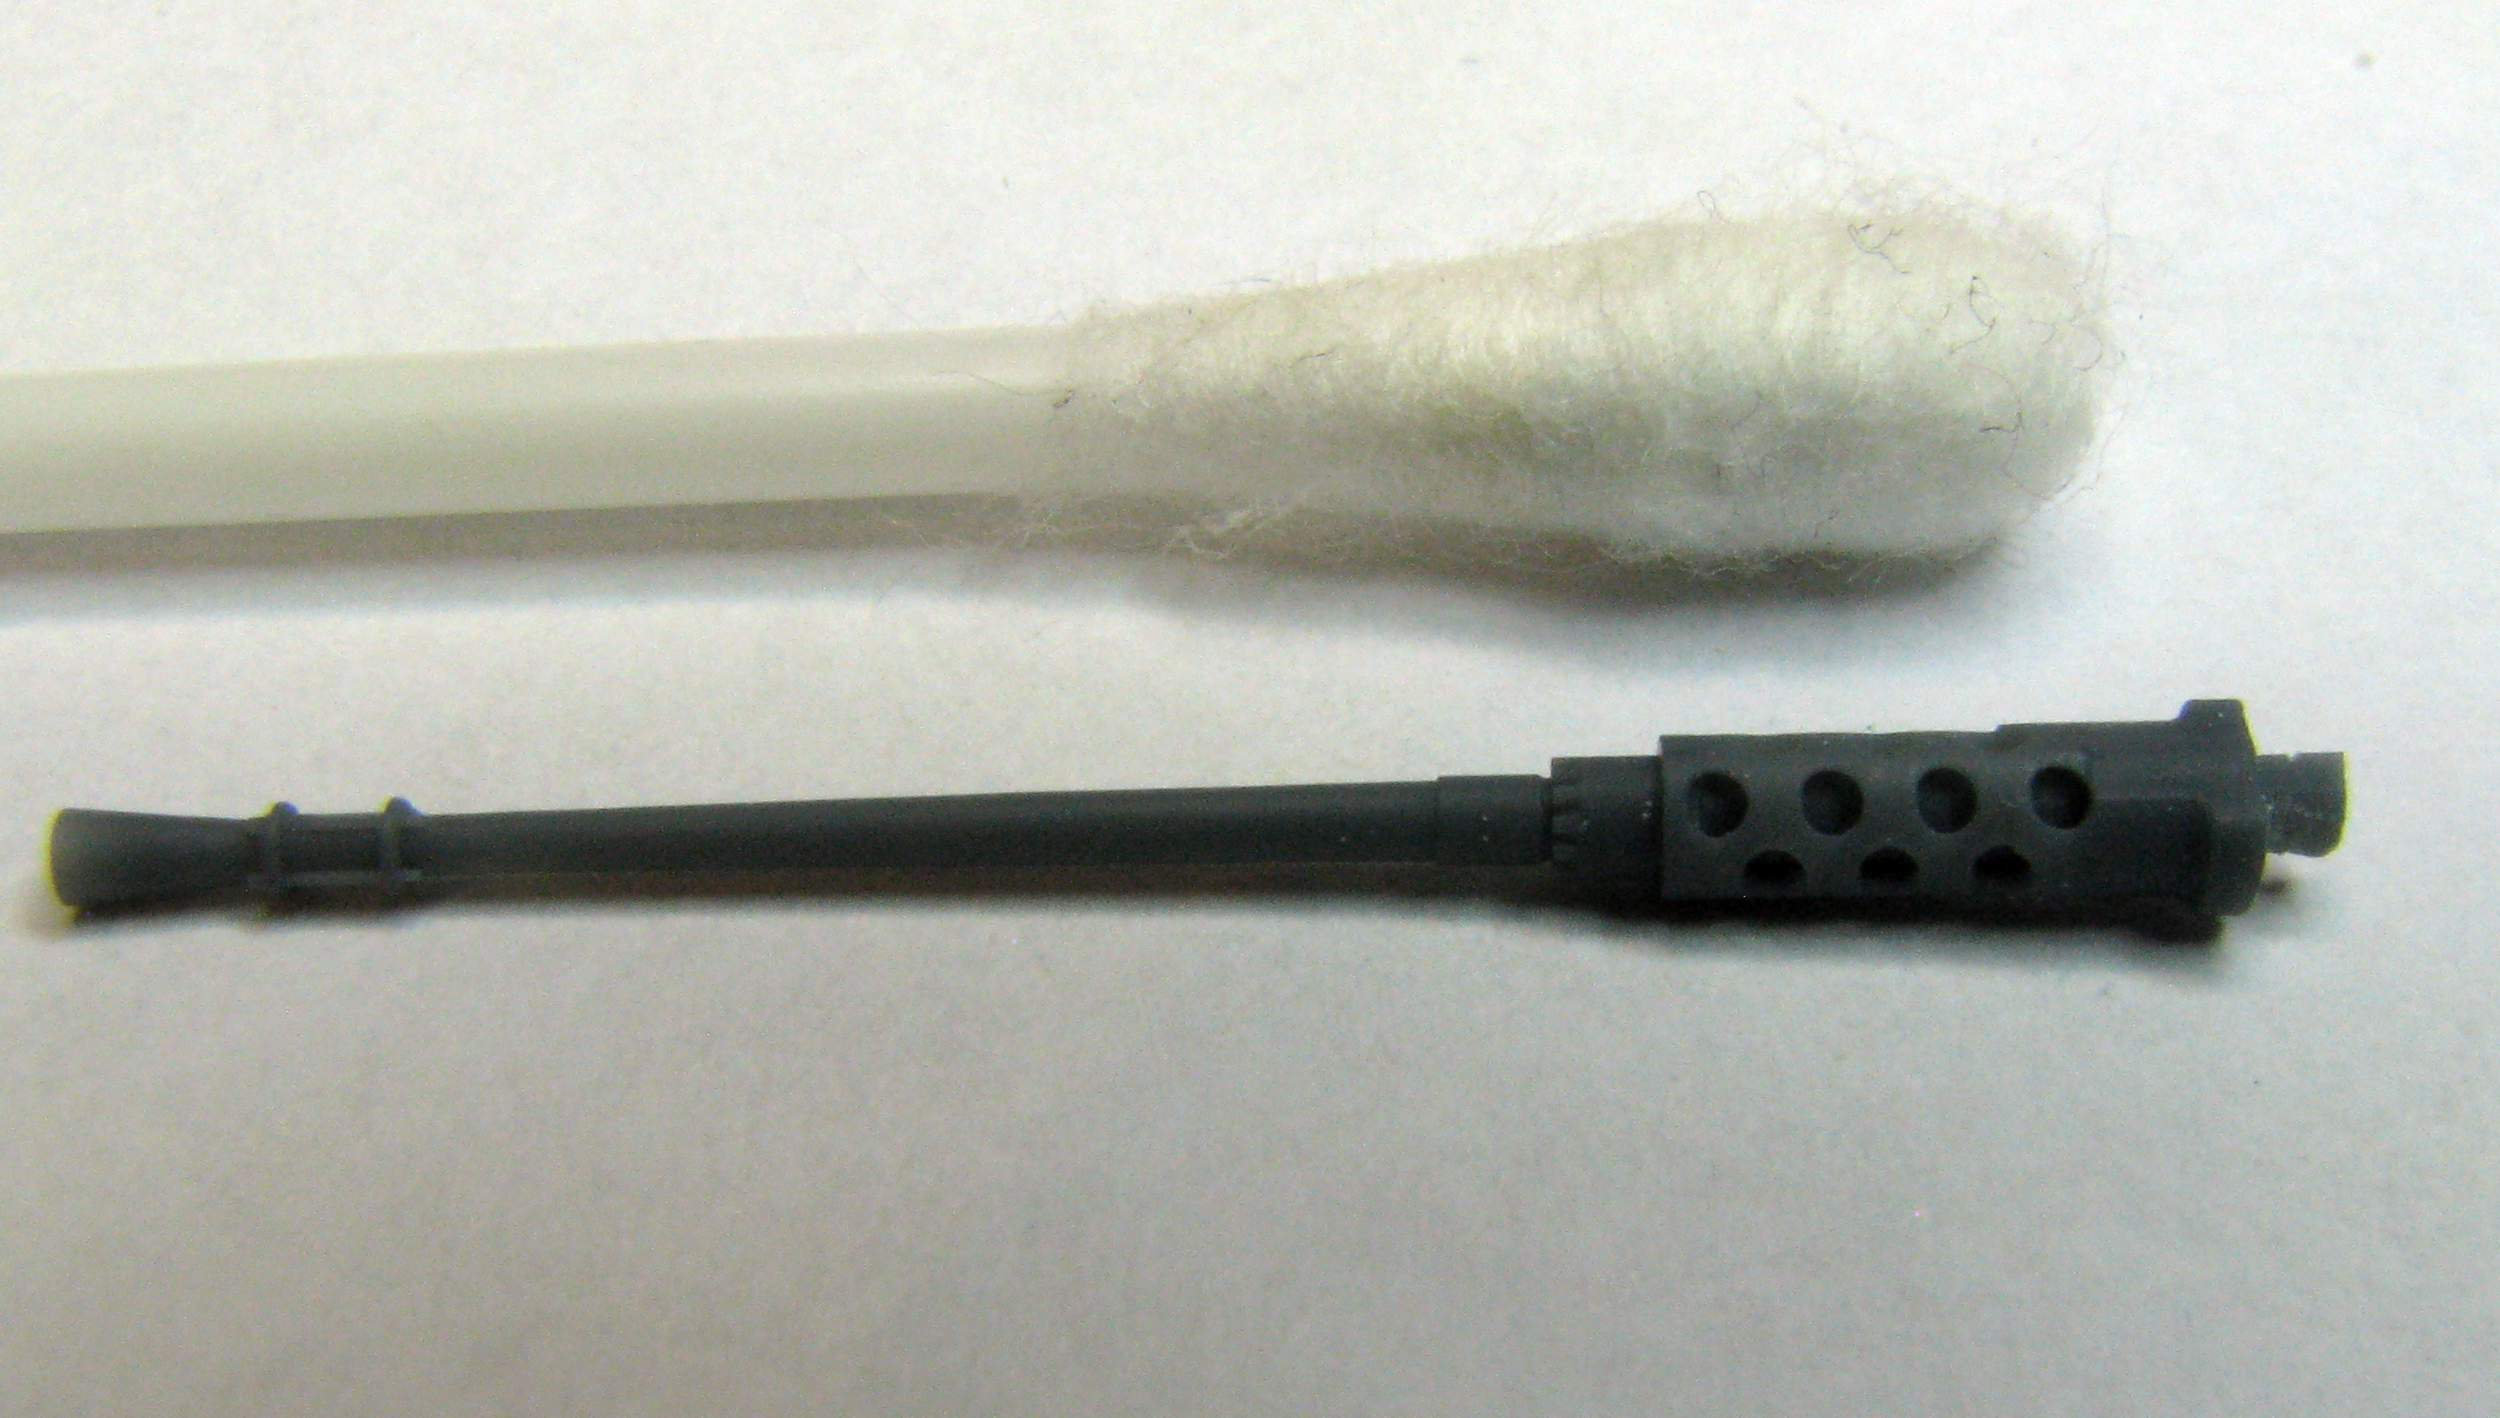
A few more shots of the finished part, with a Q-tip for scale comparison:

1:35 Dynamo Models M55 Quad .50 by Pawel

1:35 Dynamo Models M55 Quad .50 by Pawel

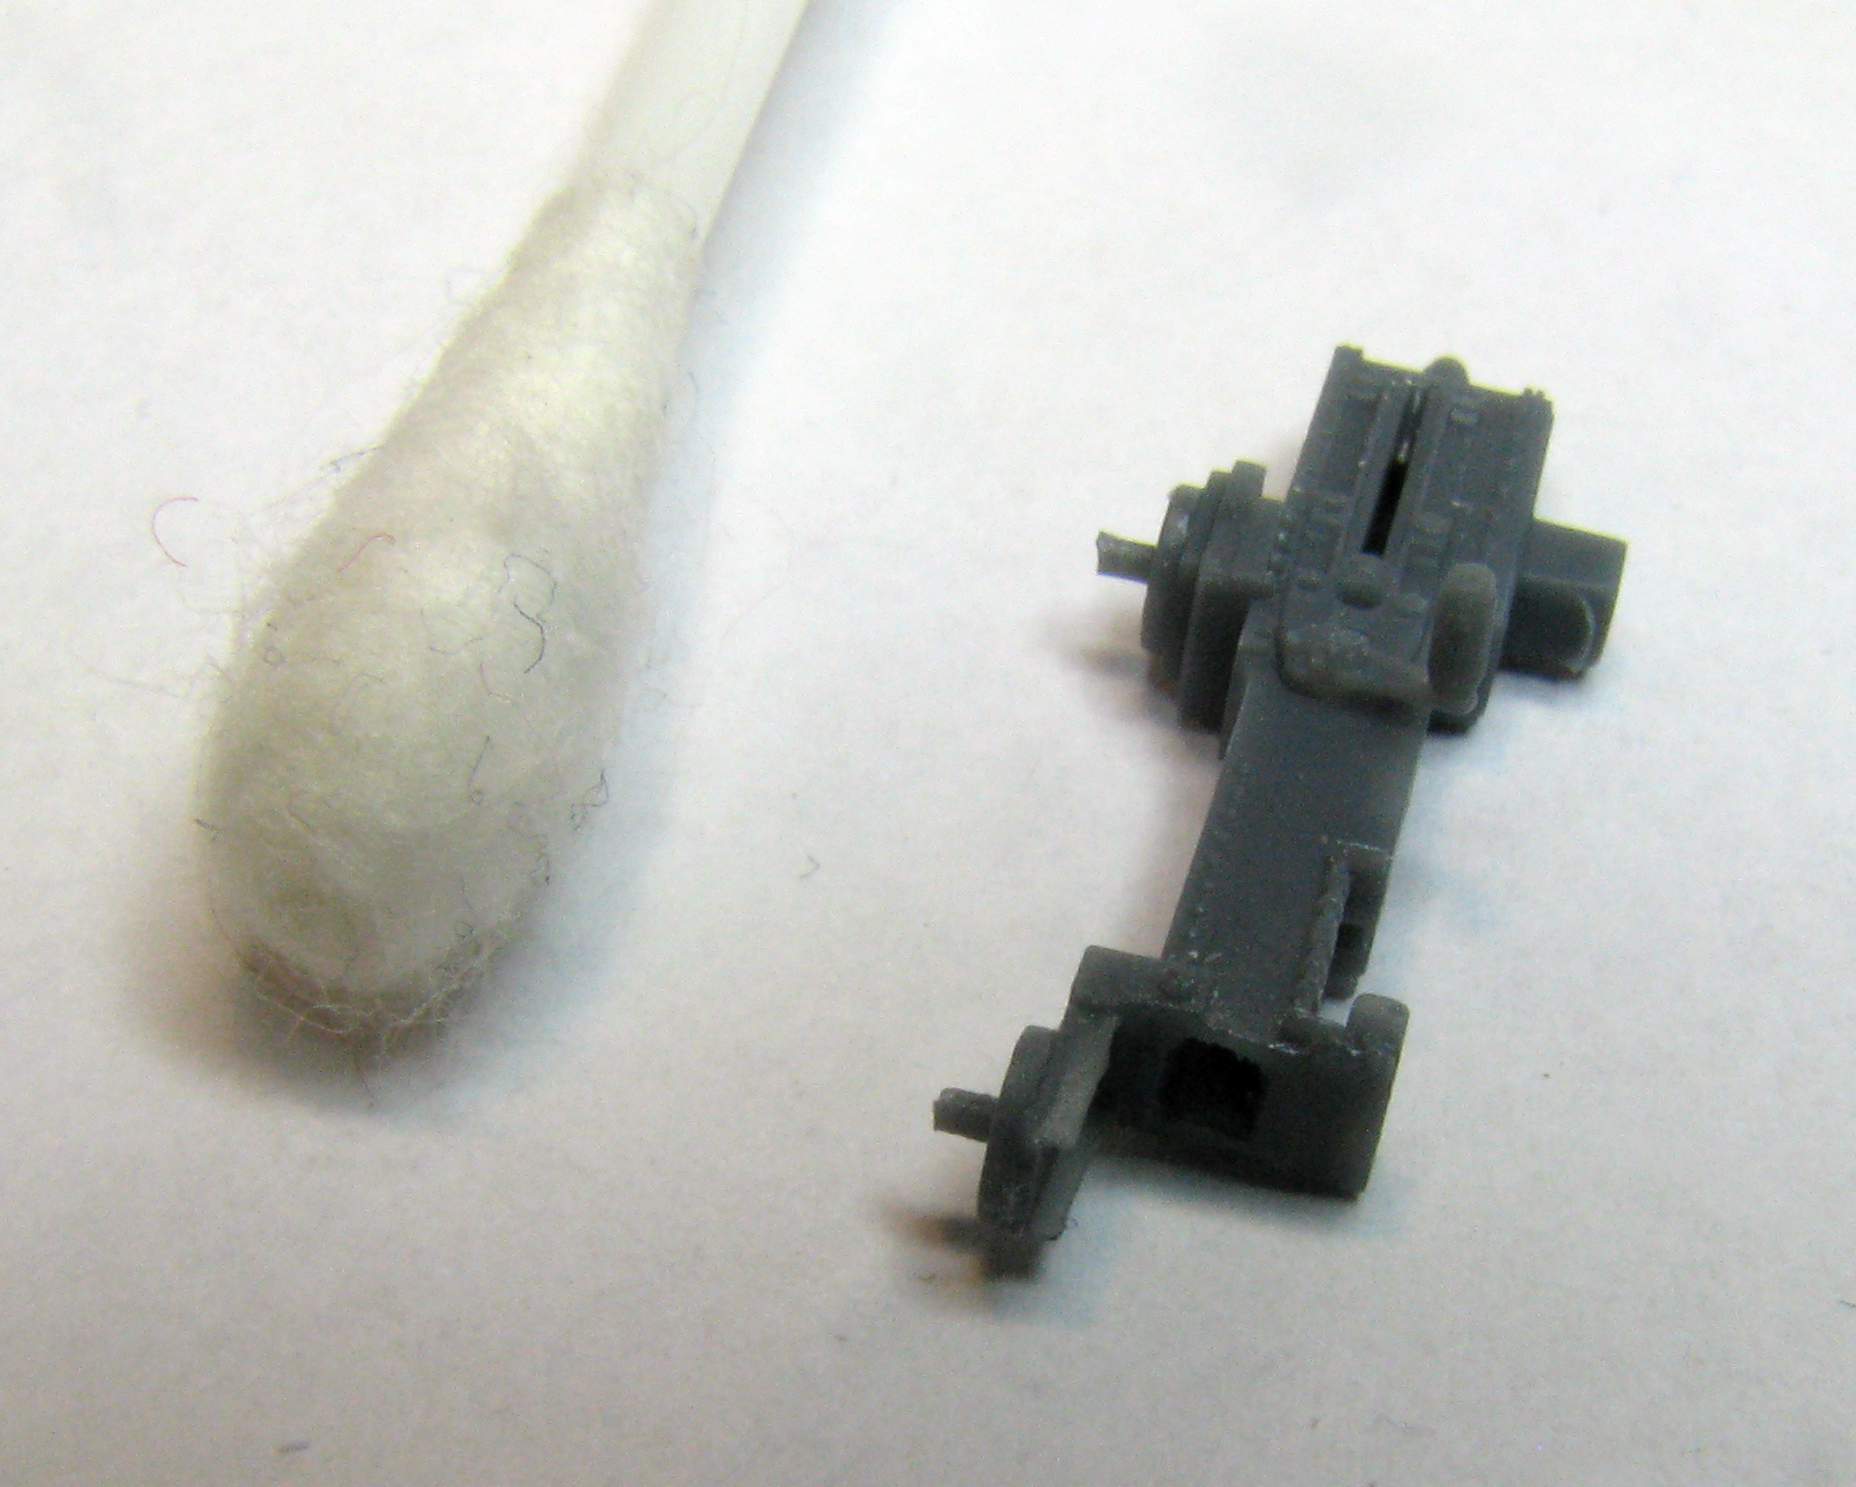
As you can see the insides of the receivers are also detailed so you can show them open, for example for reloading or inspection:

1:35 Dynamo Models M55 Quad .50 by Pawel

Next are the receiver covers. The kit gives you six such covers (two spares):

1:35 Dynamo Models M55 Quad .50 by Pawel

The covers are printed with a relatively small supports, so you have to make a narrow cut as close to the base as possible, so as not to take material away from the part itself:

1:35 Dynamo Models M55 Quad .50 by Pawel

The insides of the covers are also detailed, letting you pose them open:

1:35 Dynamo Models M55 Quad .50 by Pawel

The other supports can be removed with sprue cutters:

1:35 Dynamo Models M55 Quad .50 by Pawel

The support attachment points have to be filed smooth. The one shown on the photo below has to be filed to fit the receiver:

1:35 Dynamo Models M55 Quad .50 by Pawel

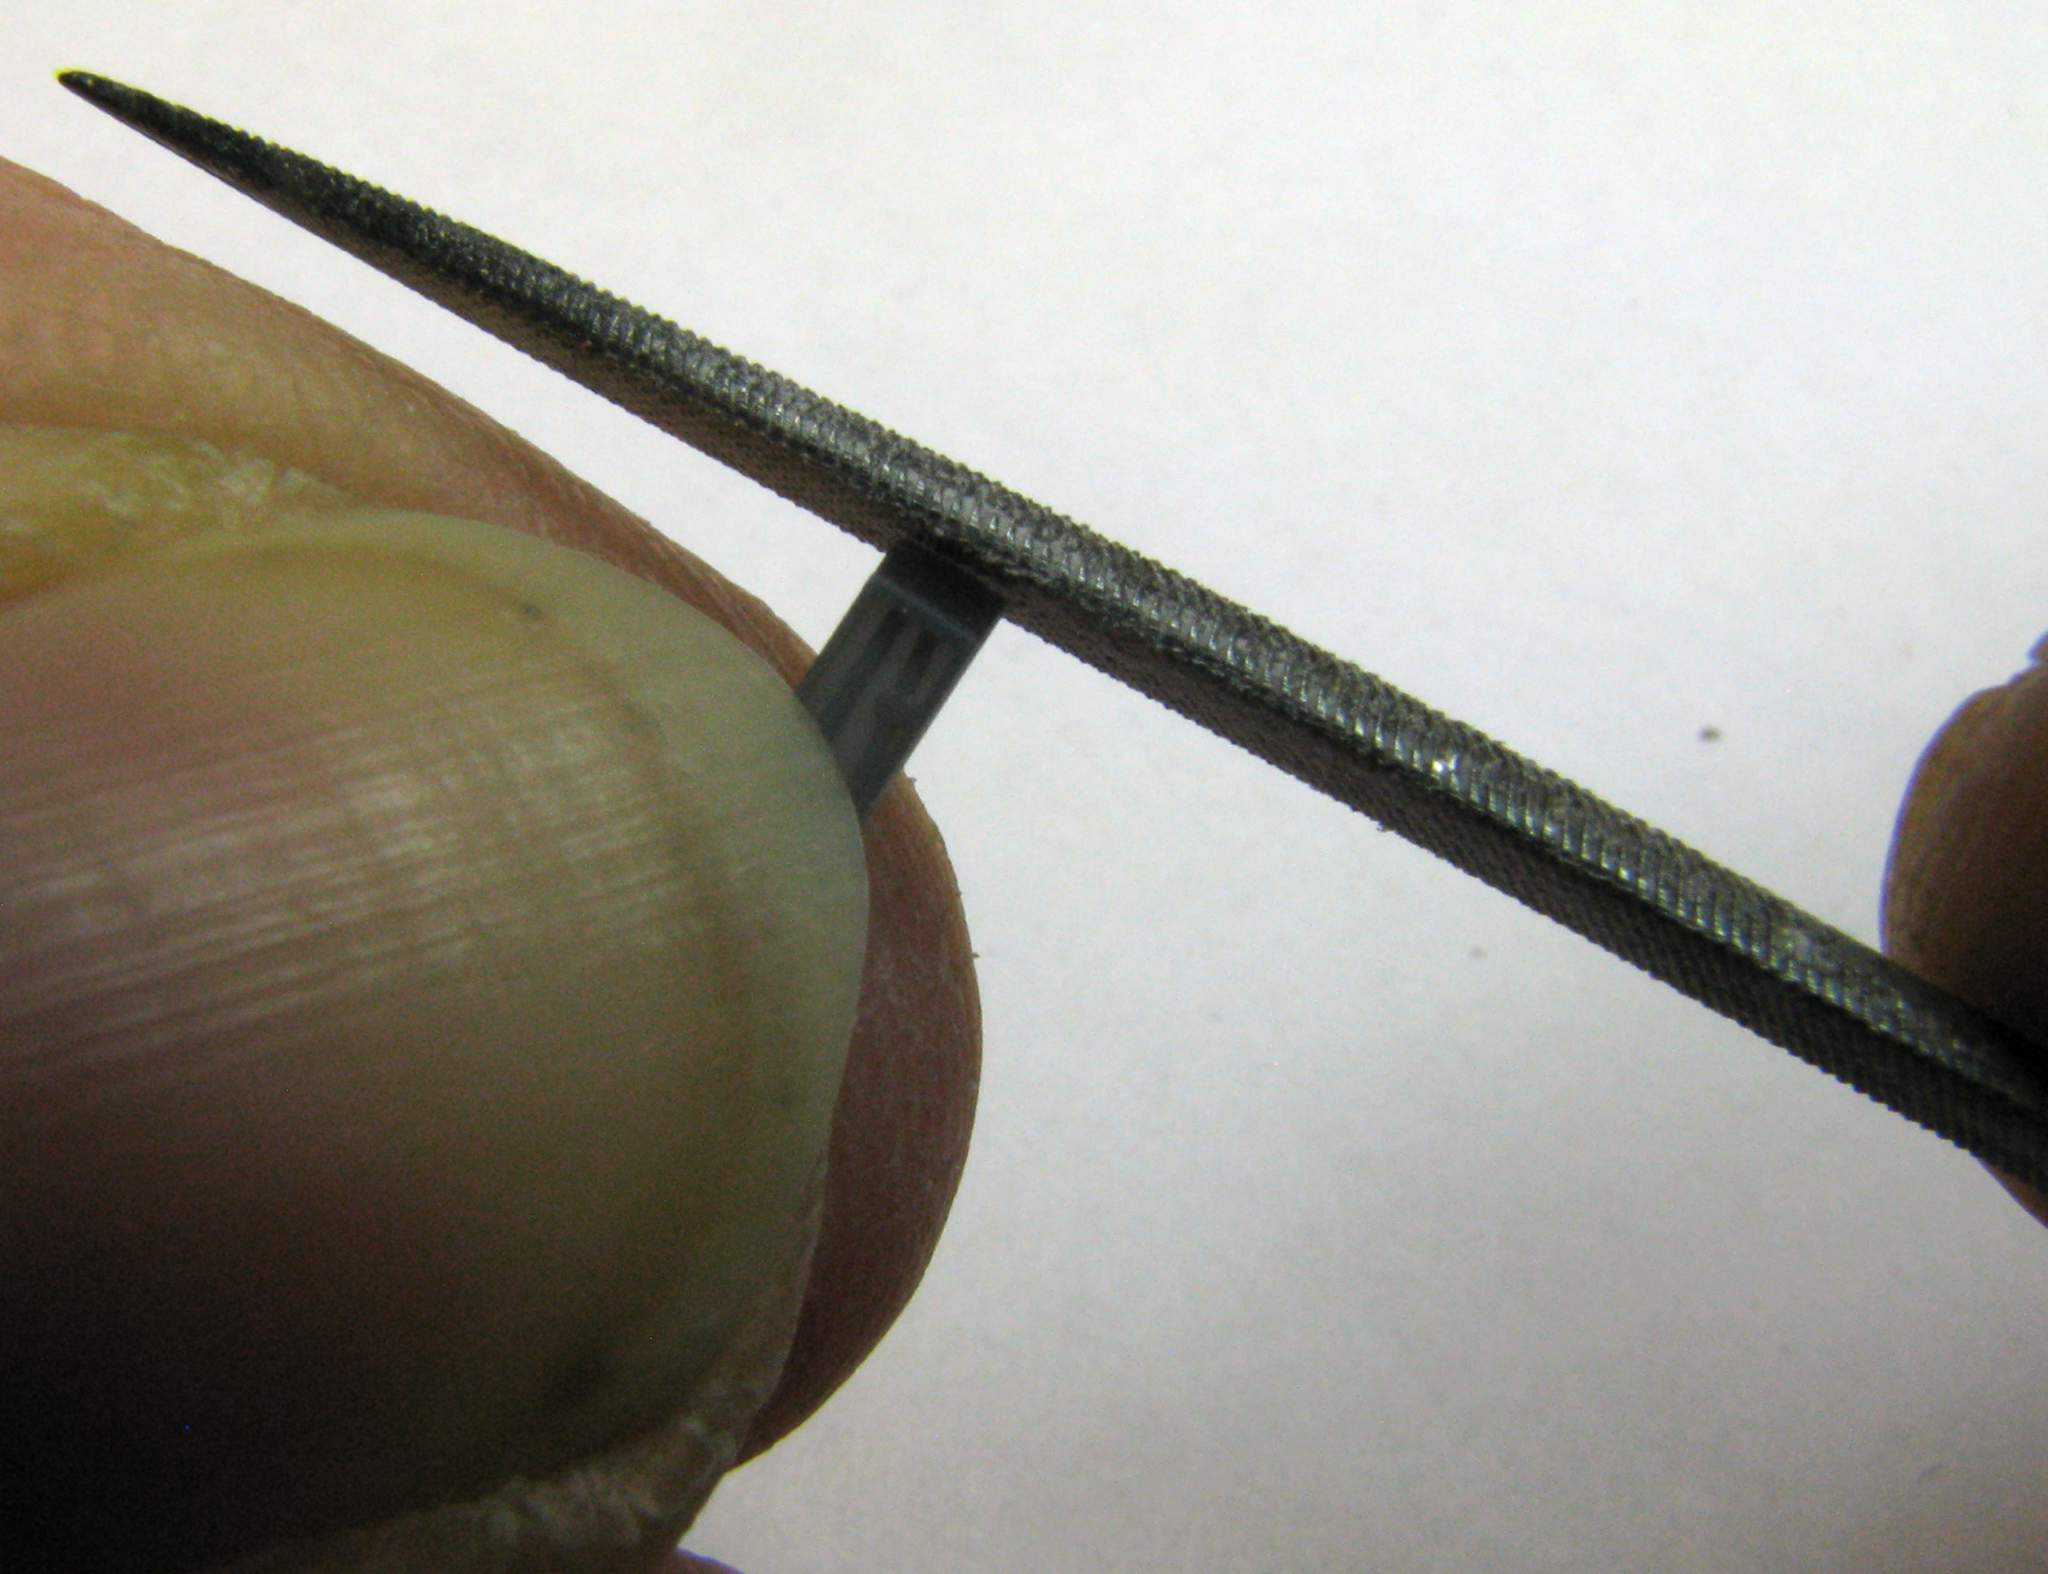
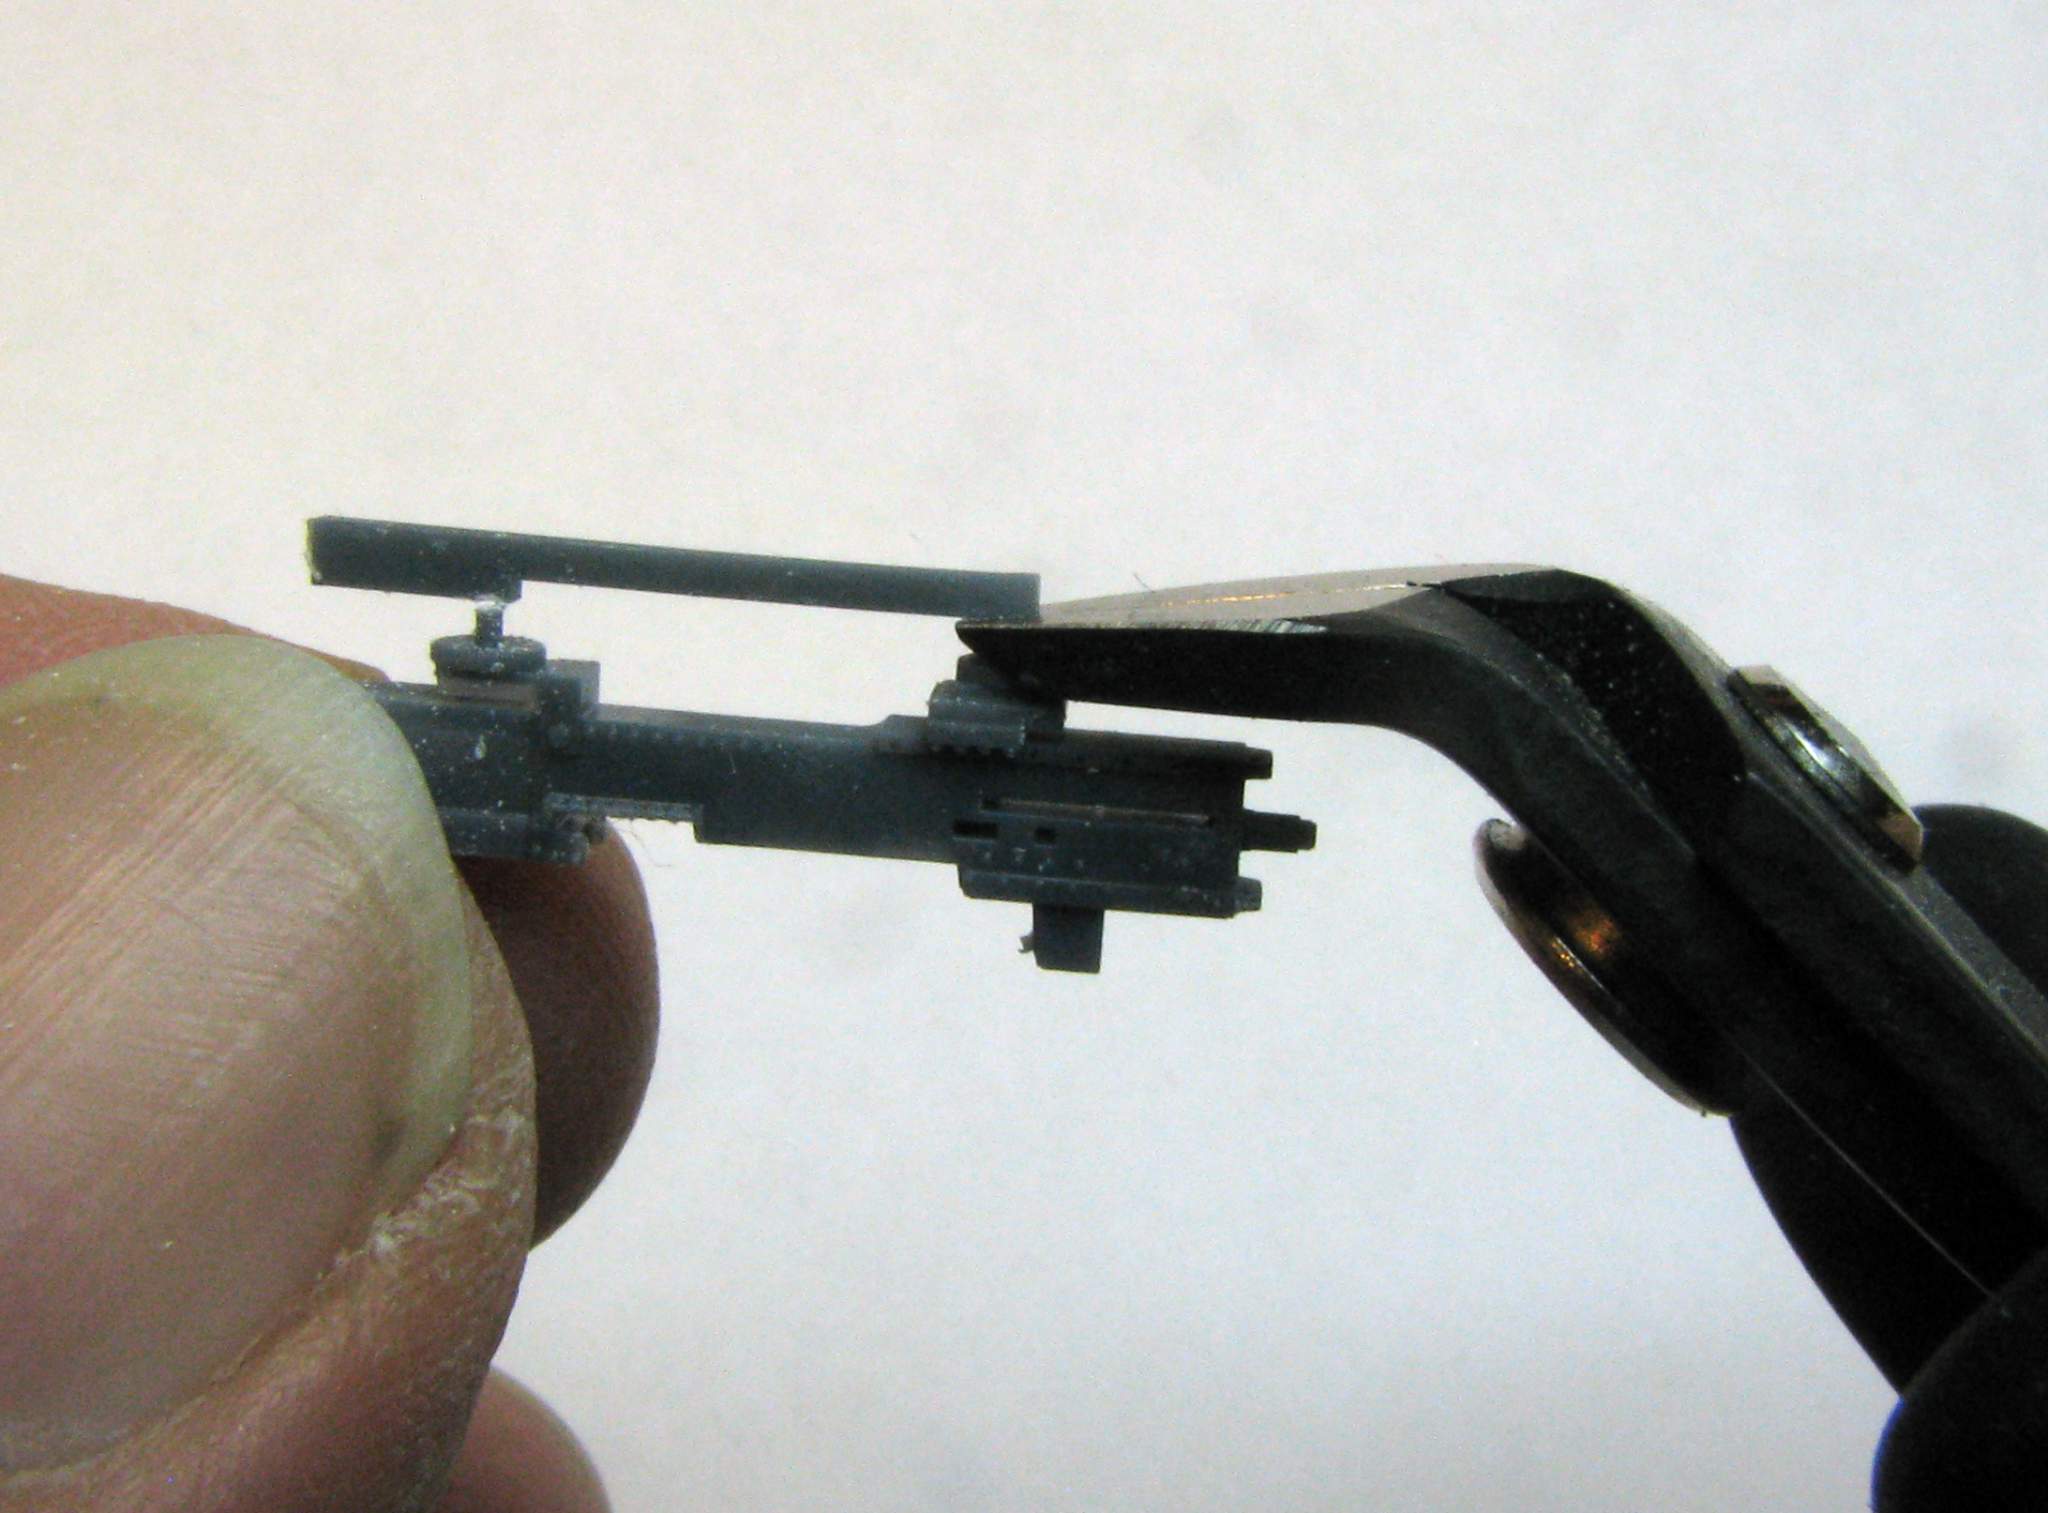
Now it’s time for the barrels. The upper support attachments are delicate enough just to be gently pulled away:

1:35 Dynamo Models M55 Quad .50 by Pawel

Then the barrel can be cut away using a jigsaw:

1:35 Dynamo Models M55 Quad .50 by Pawel

Now the remainder of the supports have to be separated:

1:35 Dynamo Models M55 Quad .50 by Pawel

And filed flat, otherwise the barrel will not fit right or have a tendency to be crooked:

1:35 Dynamo Models M55 Quad .50 by Pawel

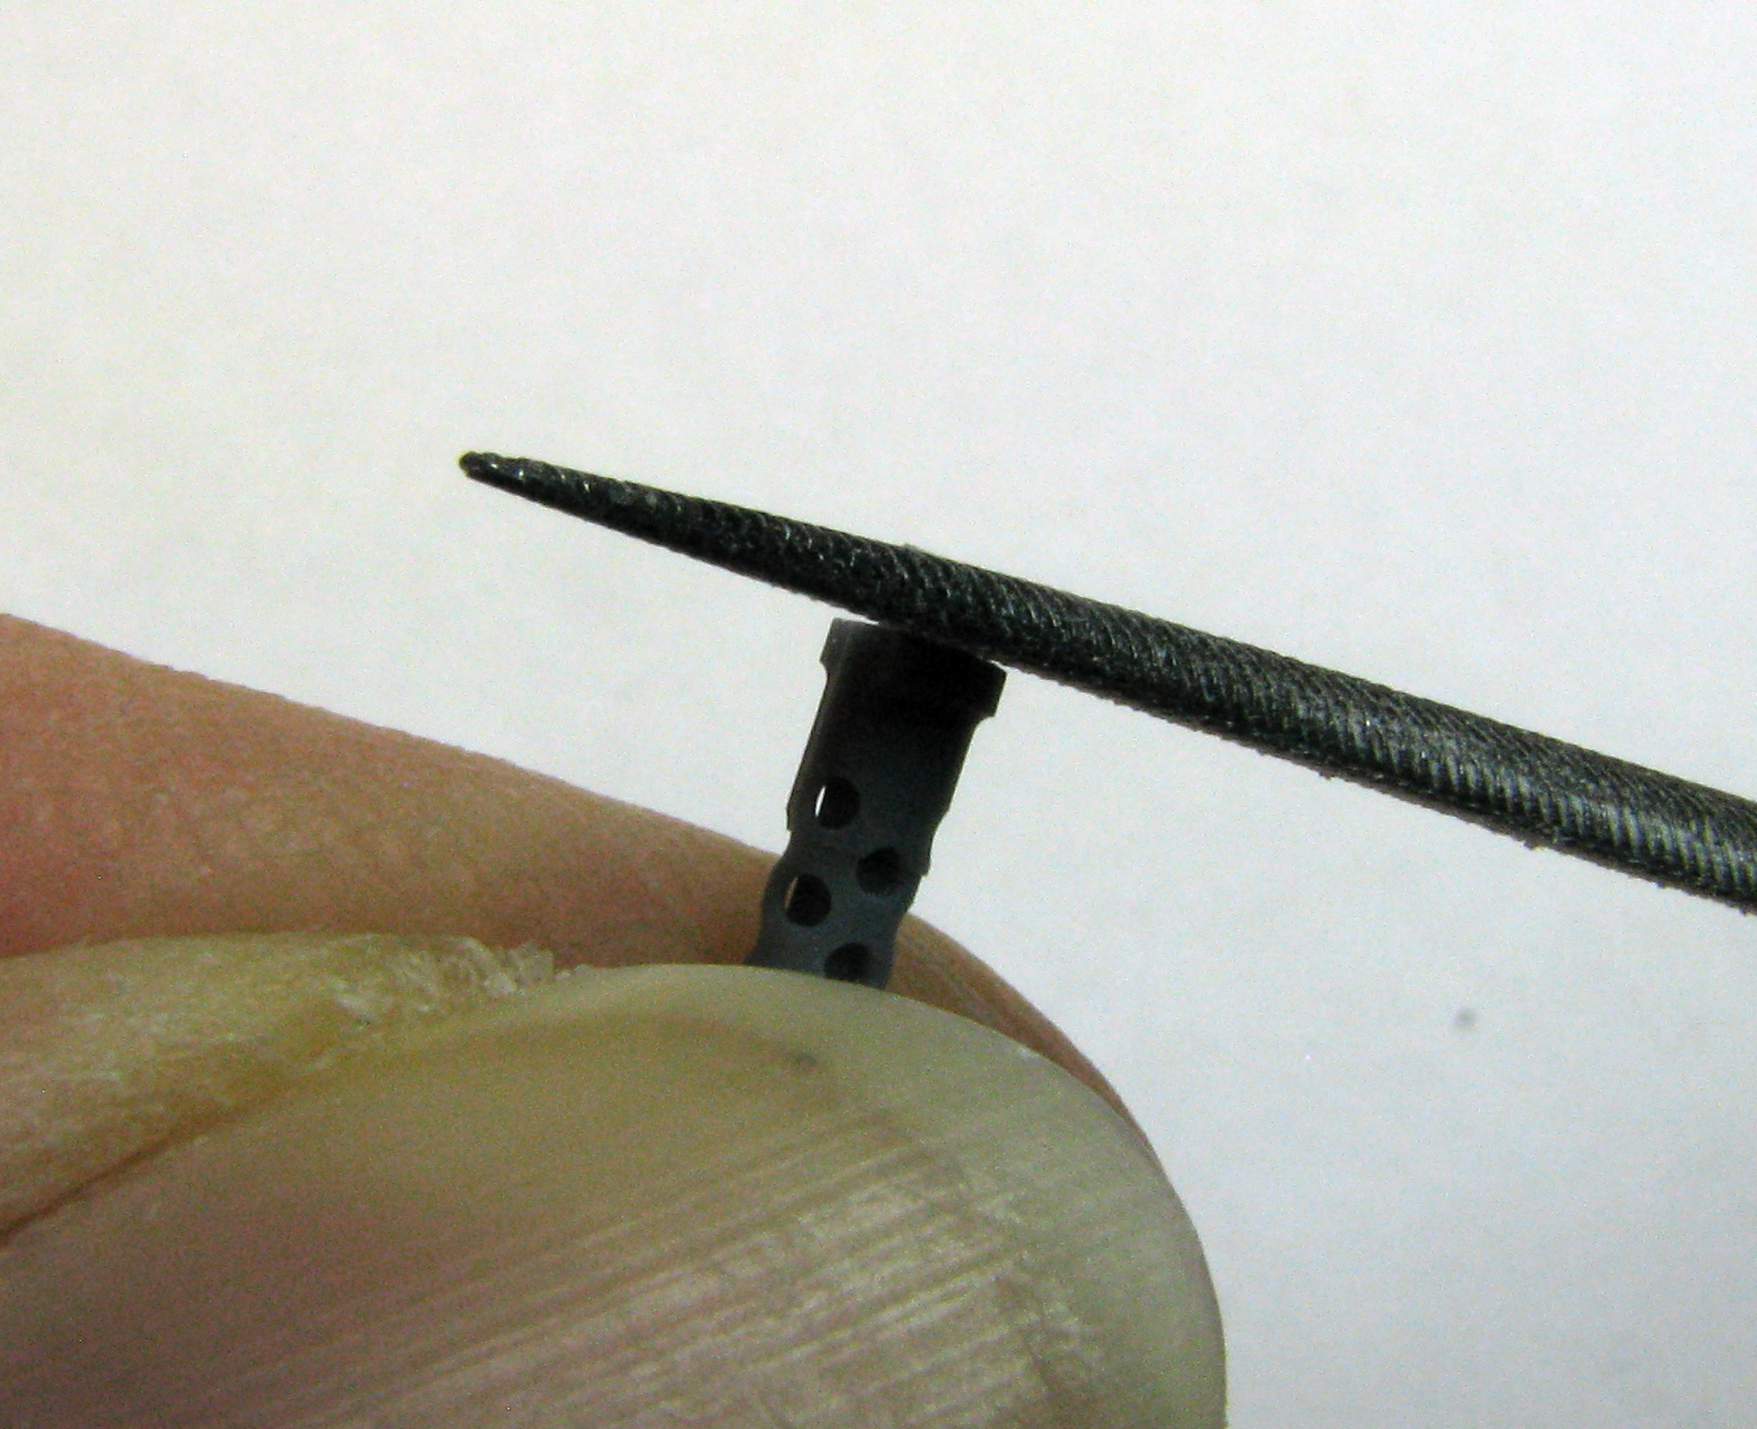
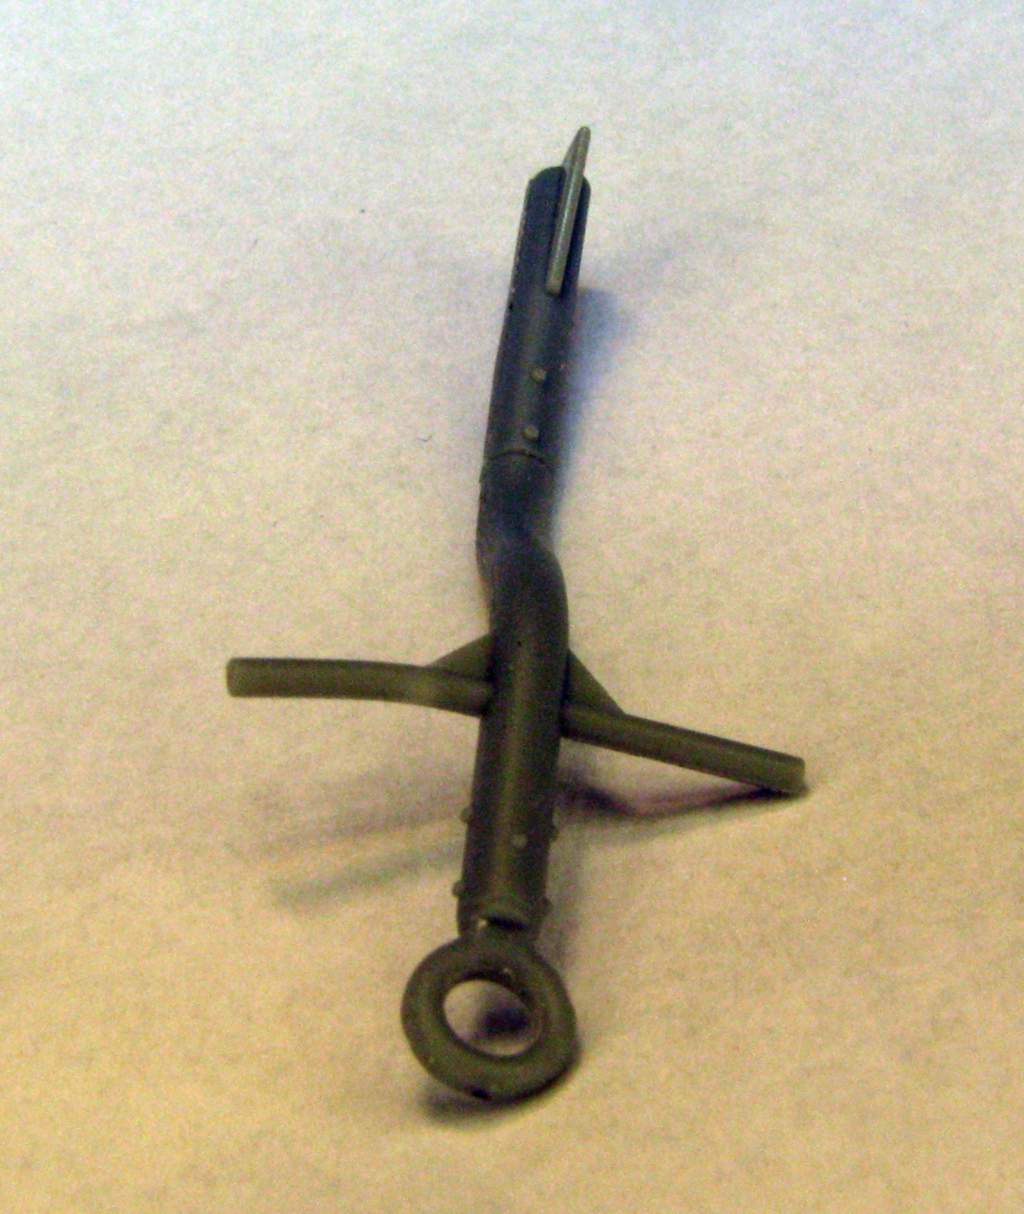
The barrel is also very nicely detailed:

1:35 Dynamo Models M55 Quad .50 by Pawel

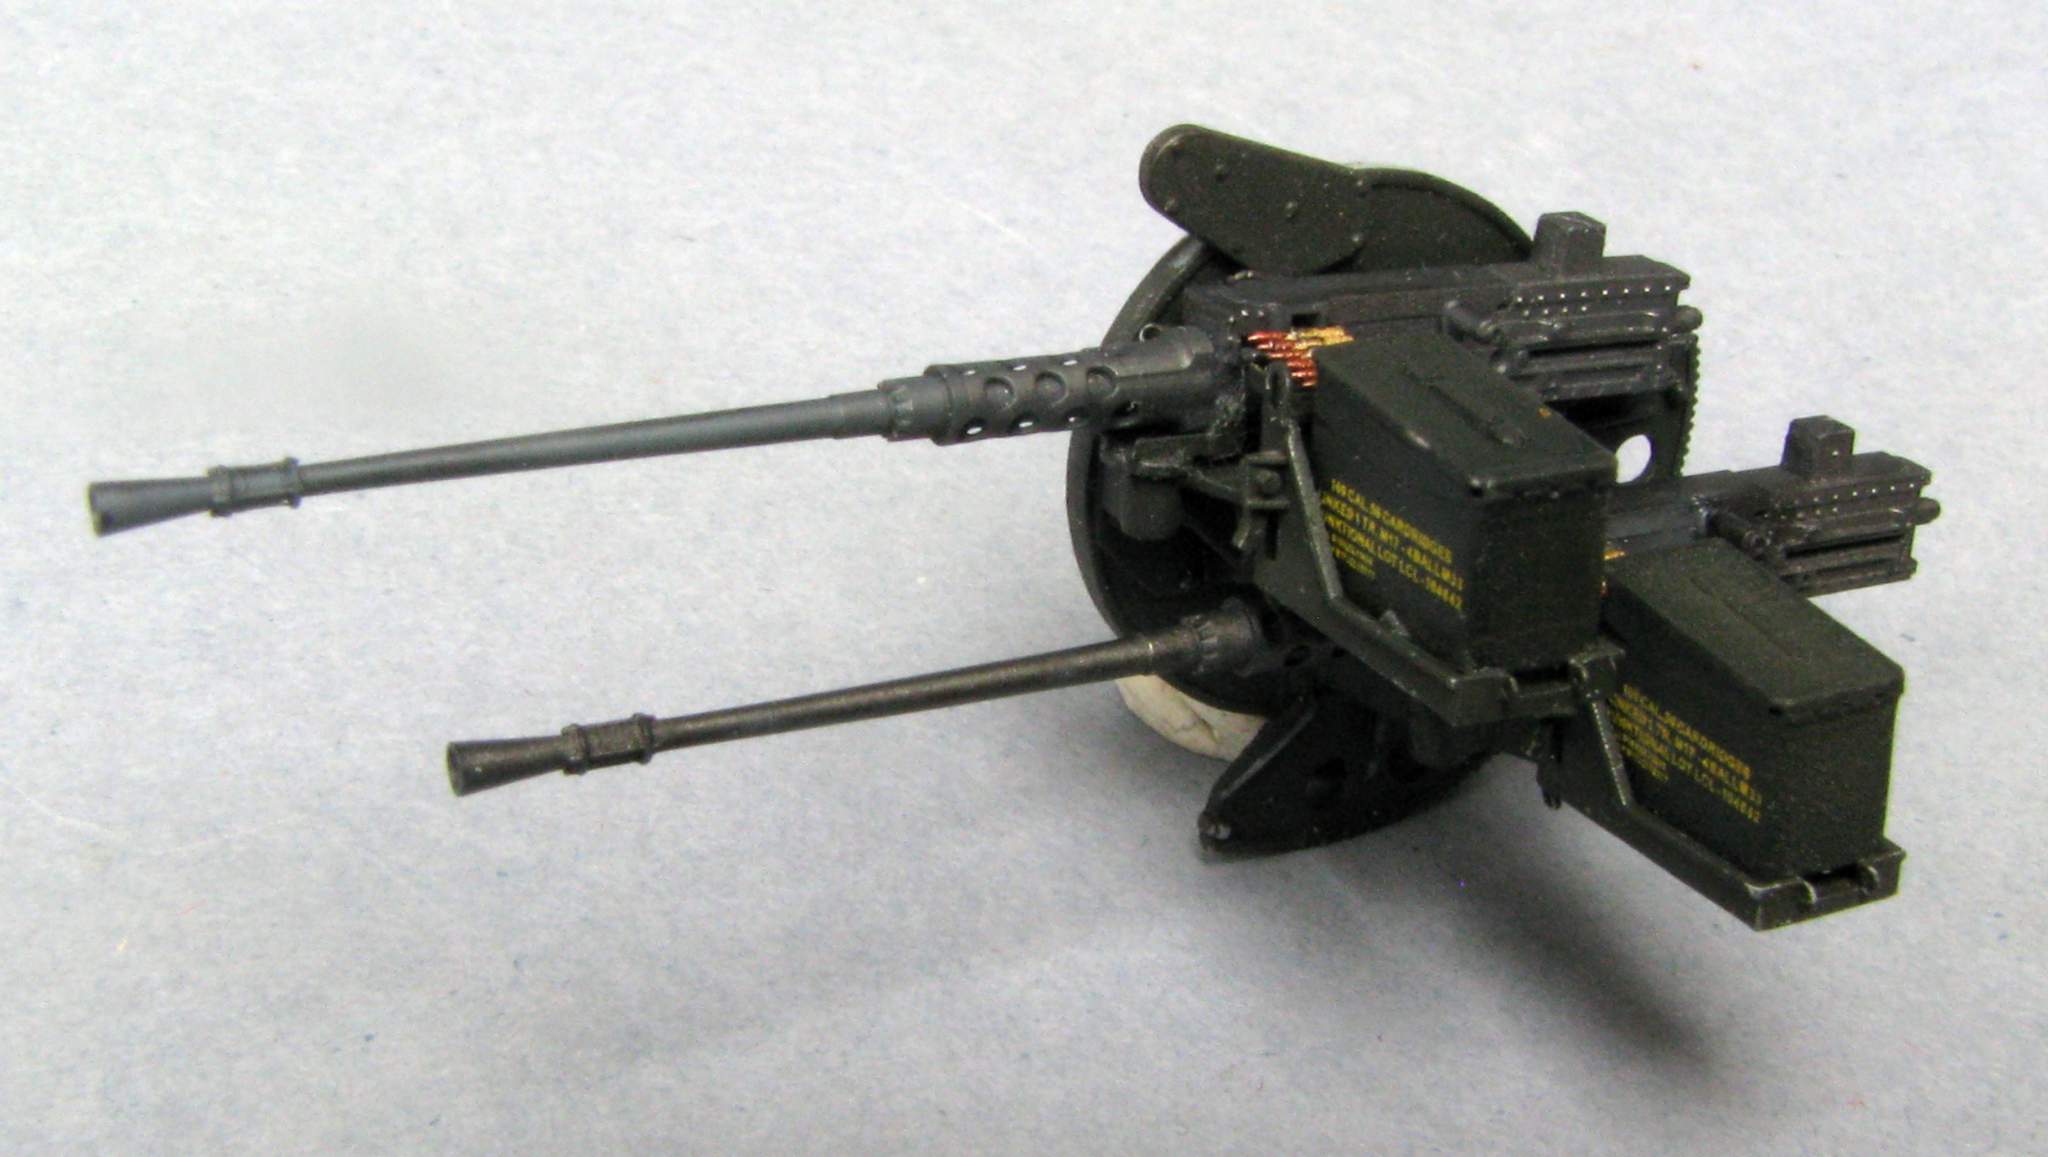
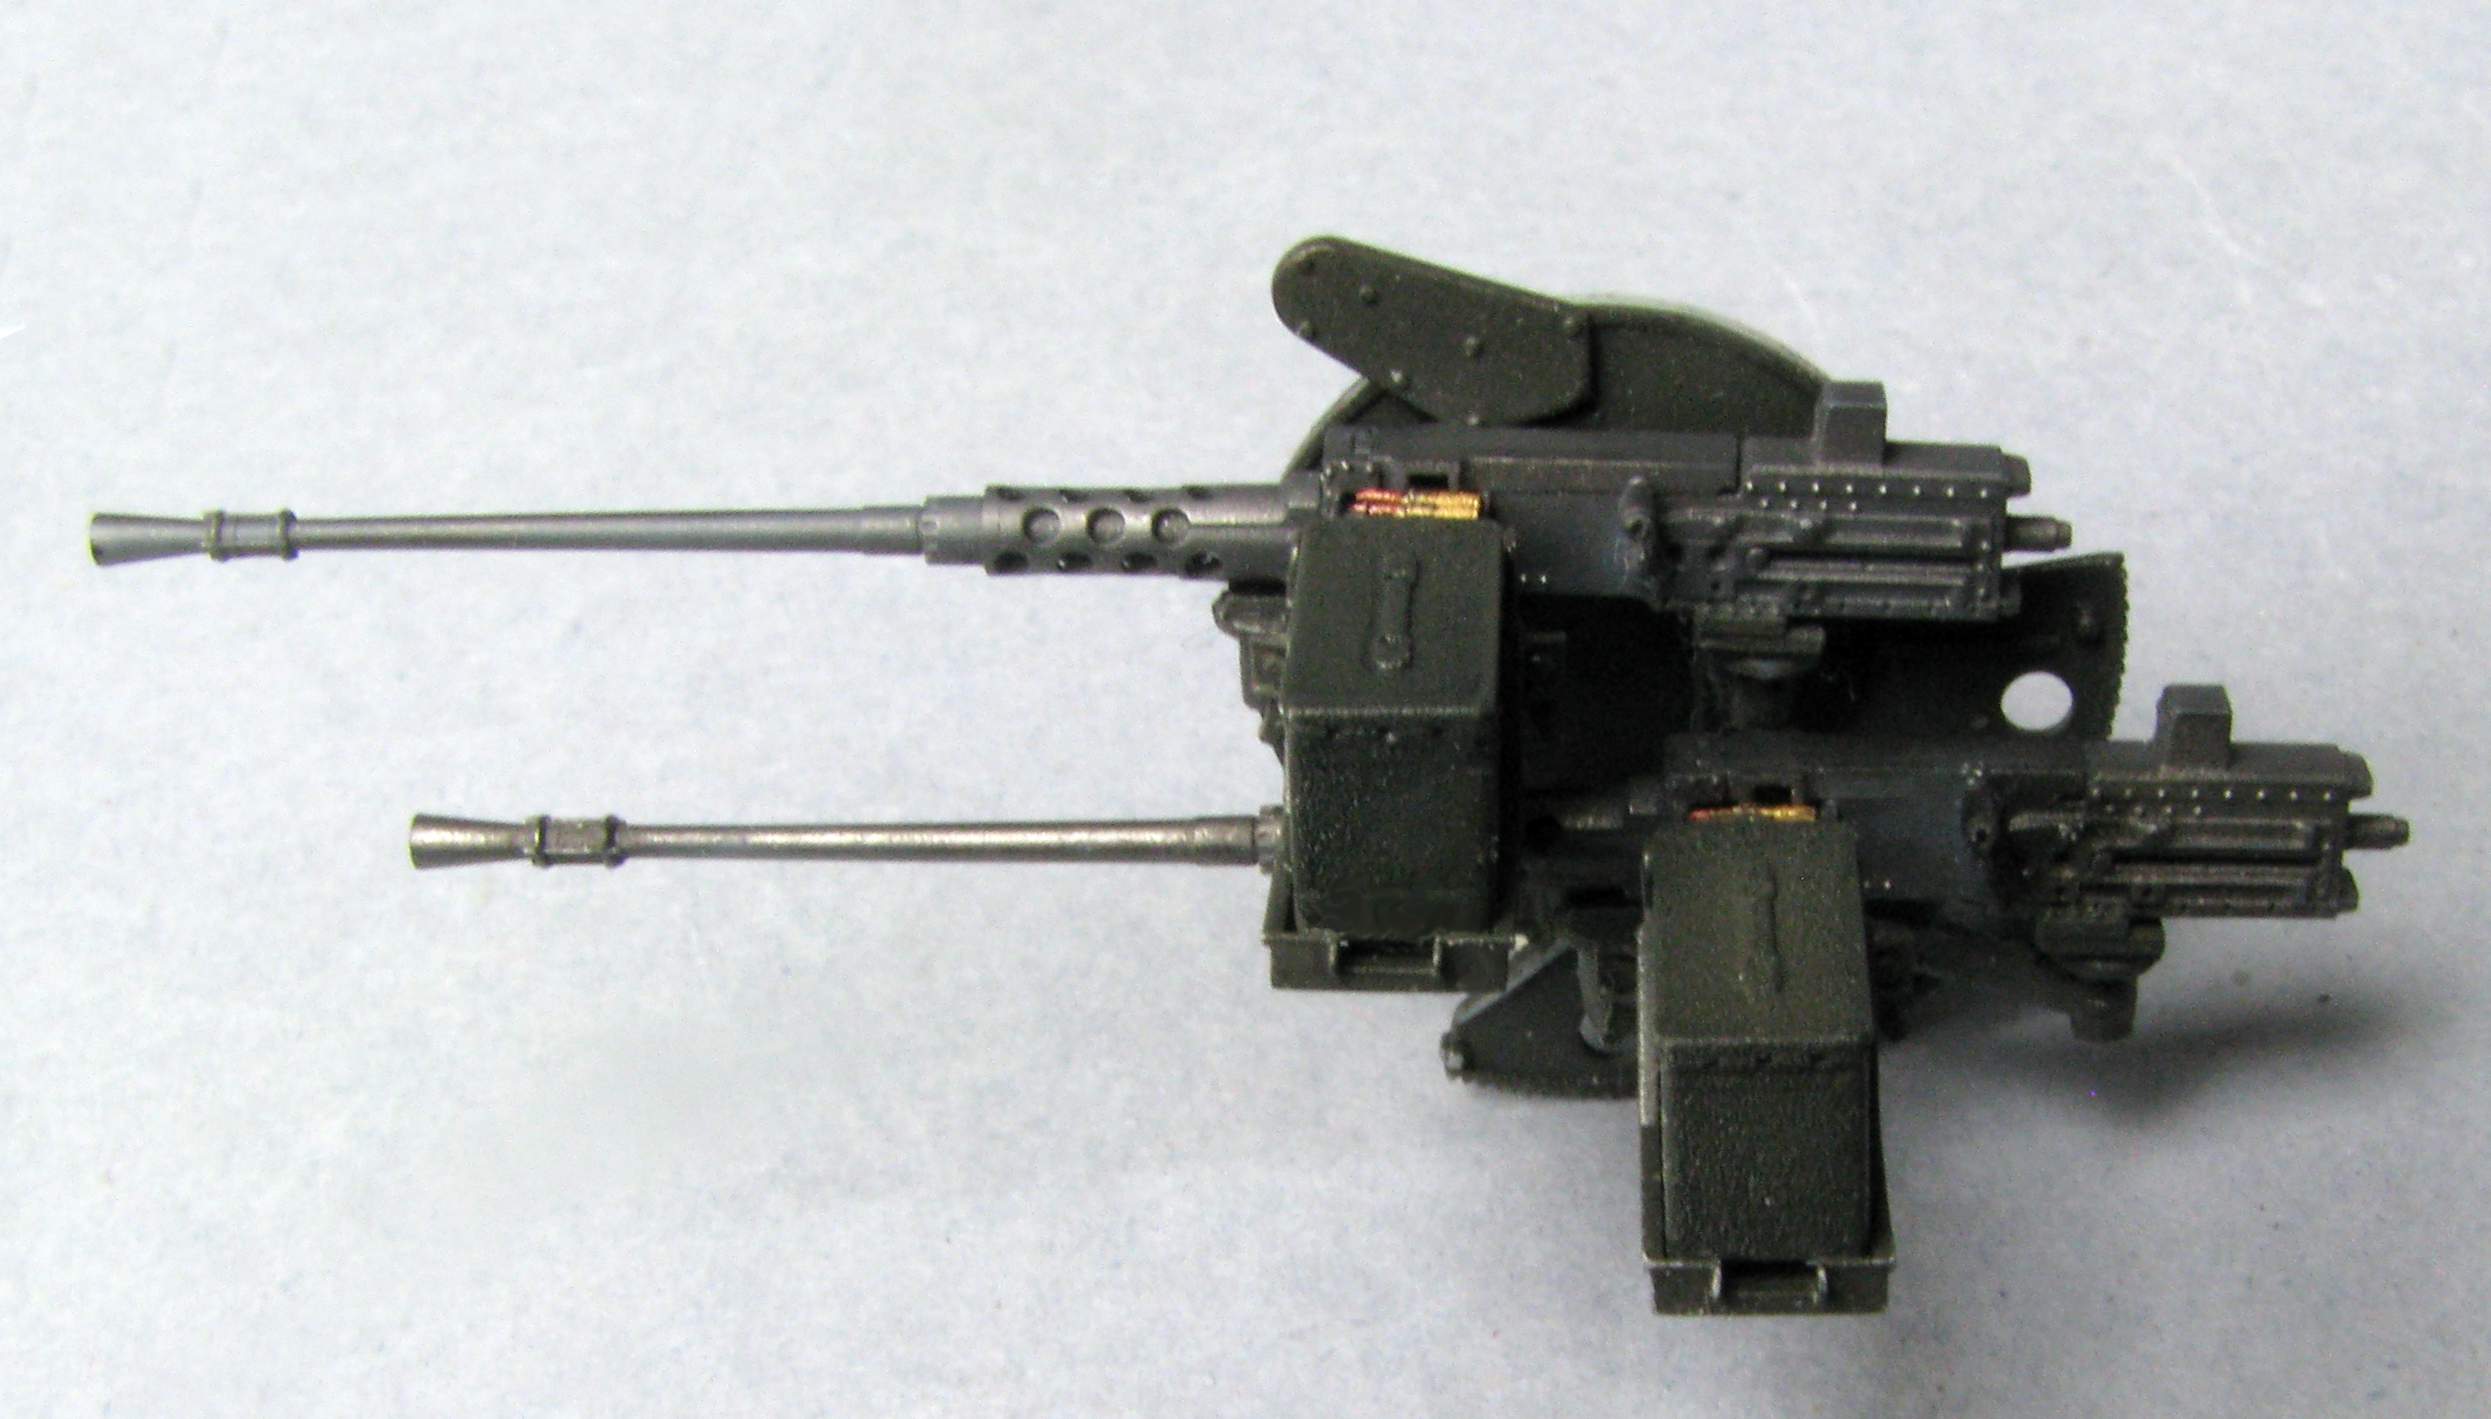
After assembly and painting with some Gunze Dark Iron the gun looks like this:

1:35 Dynamo Models M55 Quad .50 by Pawel

1:35 Dynamo Models M55 Quad .50 by Pawel

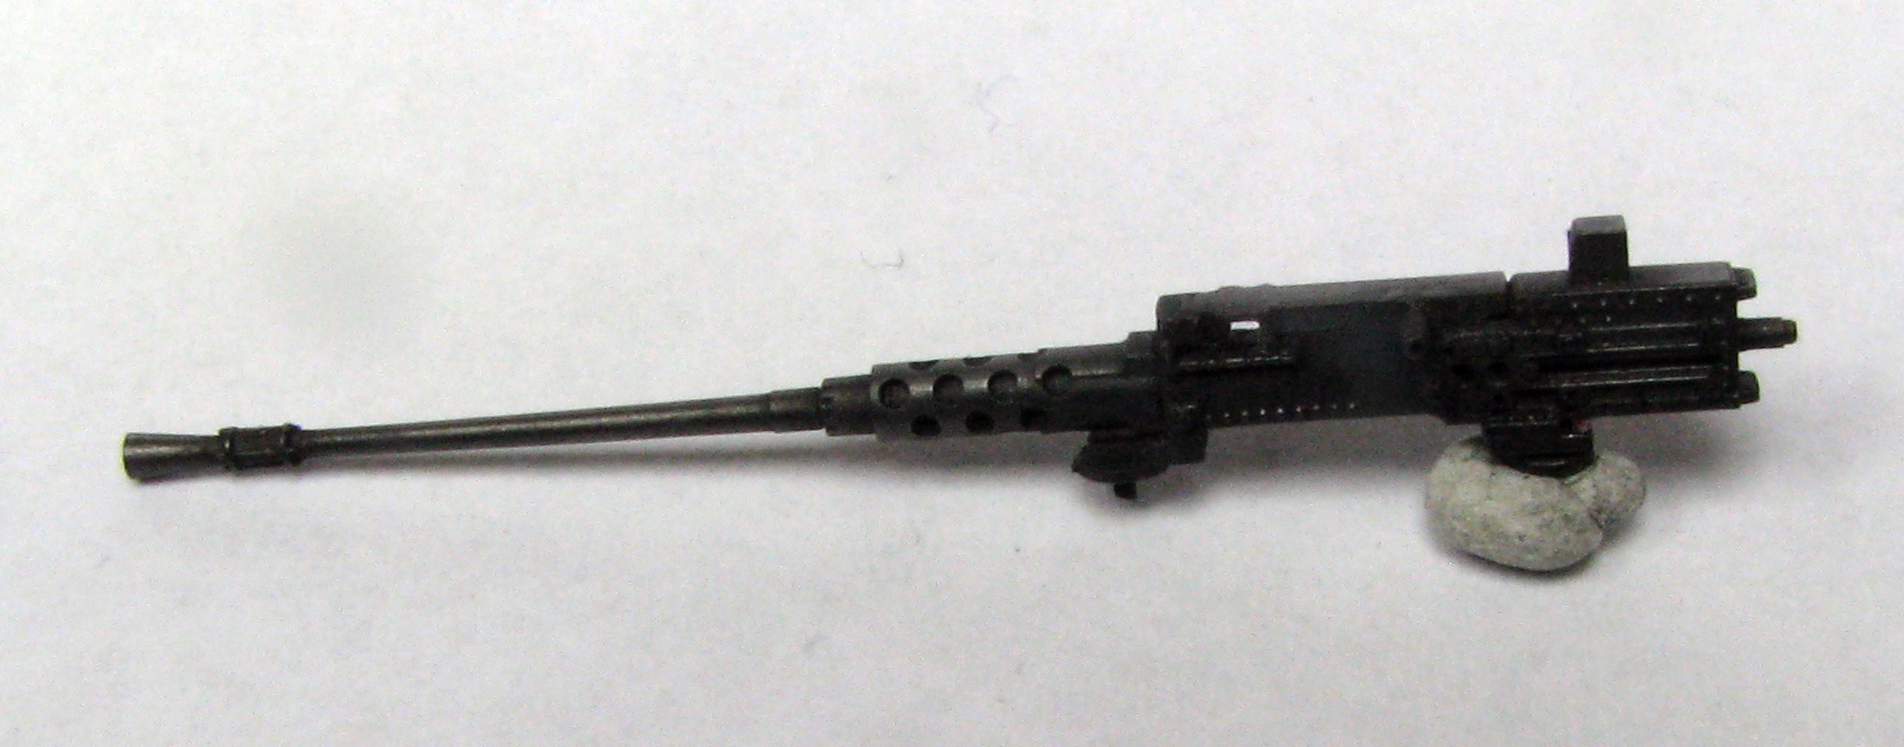
Thanks a lot for reading, have a nice day!

Paweł

Quite literally a “razor [blade] saw” :smiley:

Those are some high-speed prints, to include the tracks for the cams that run the belt-feed.

Sadly, my google-fu is not getting any photos of the internal bits, which have all sorts of metalic hues.

Hello Cap’n!

It’s good to have you on this thread!

Well I made this razor saw about 30 years ago, when my father still was using those blades… I filed teeth on the side using a triangular cross-section needle file. And it still works!

Yeah, those parts really have nice detail on them. Although those belt-feed cam tracks were already done in 1:35 (by Tasca, I believe) this is not an everyday thing…

And I have a new update - the guns on one side after painting and decaling:

1:35 Dynamo Models M55 Quad .50 by Pawel

1:35 Dynamo Models M55 Quad .50 by Pawel

Thanks for looking and have a nice day!

Paweł