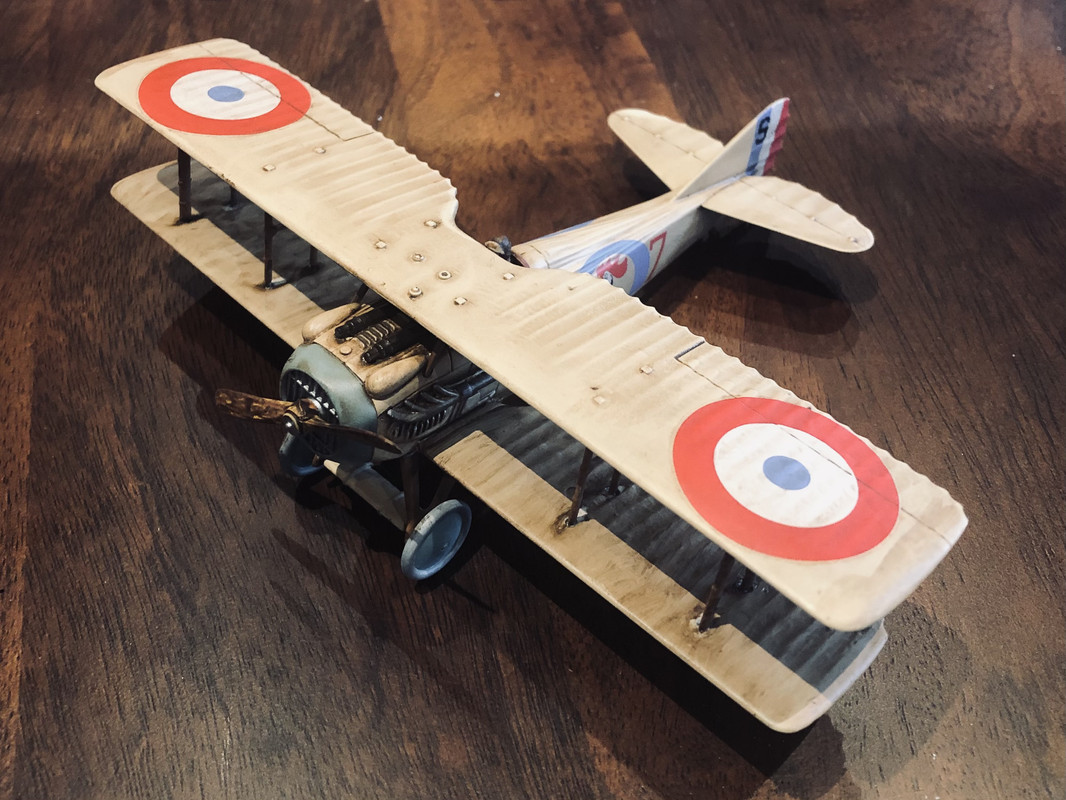
Finished the Sopwith Triplane last night
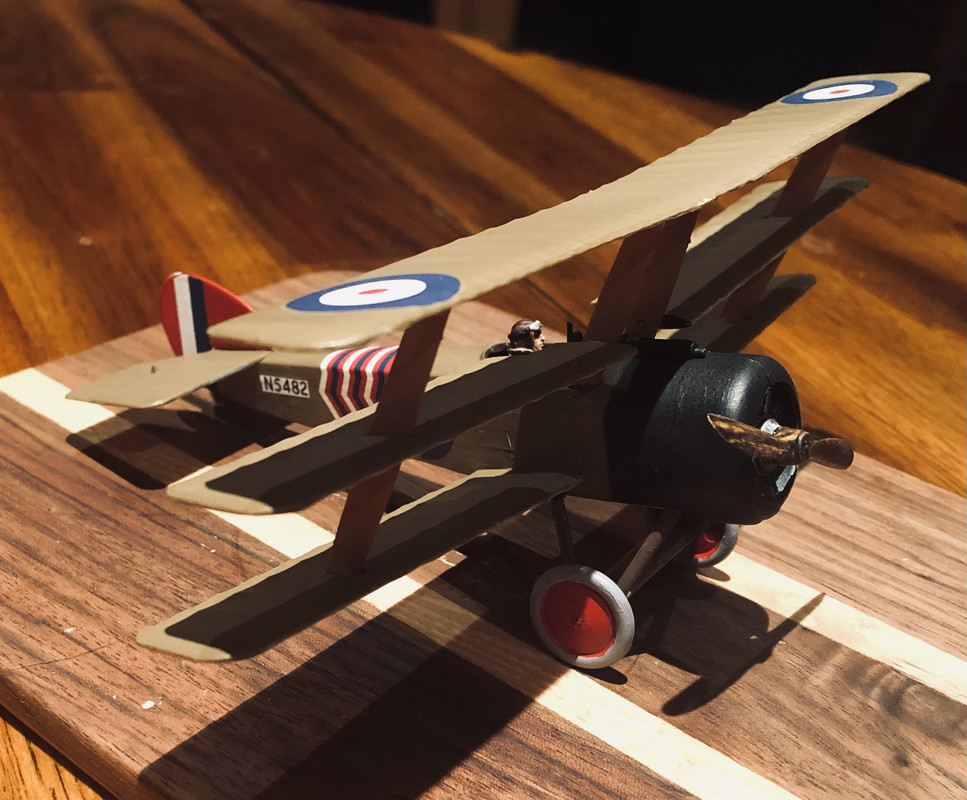
Finished the Sopwith Triplane last night
[Y][Y]
Nice!
You’re making those look like high dollar kits. Wow your paint and decals look super.
Thanks! When I originally built a half dozen of these kits back in the early 60s, I used copious amounts of Testors Glue (in the tube of course) and almost no paint… perhaps a dab or two of Testors enamels. How I ever managed to get the top wings secured on those kits is now a mystery to me. 55 years later: the kits haven’t changed, but I have much better paint (almost exclusively AK Interactive acrylics for these models) an airbrush (!) and lovely thin Mr. Hobby liquid cement. The after market decals (a combination of Eduard, Revell and Roden) are really a necessity; while the plastic pieces in the Aurora kits were unchanged after decades in boxes, the same could not be said of the original decals.
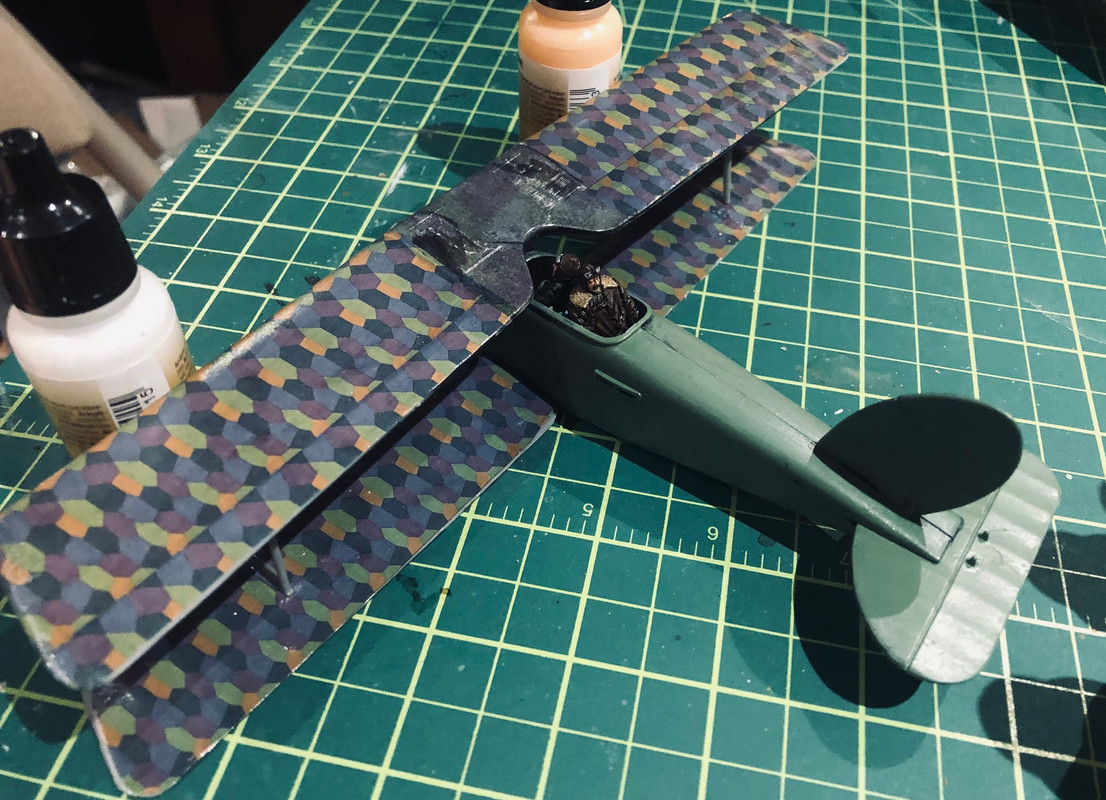
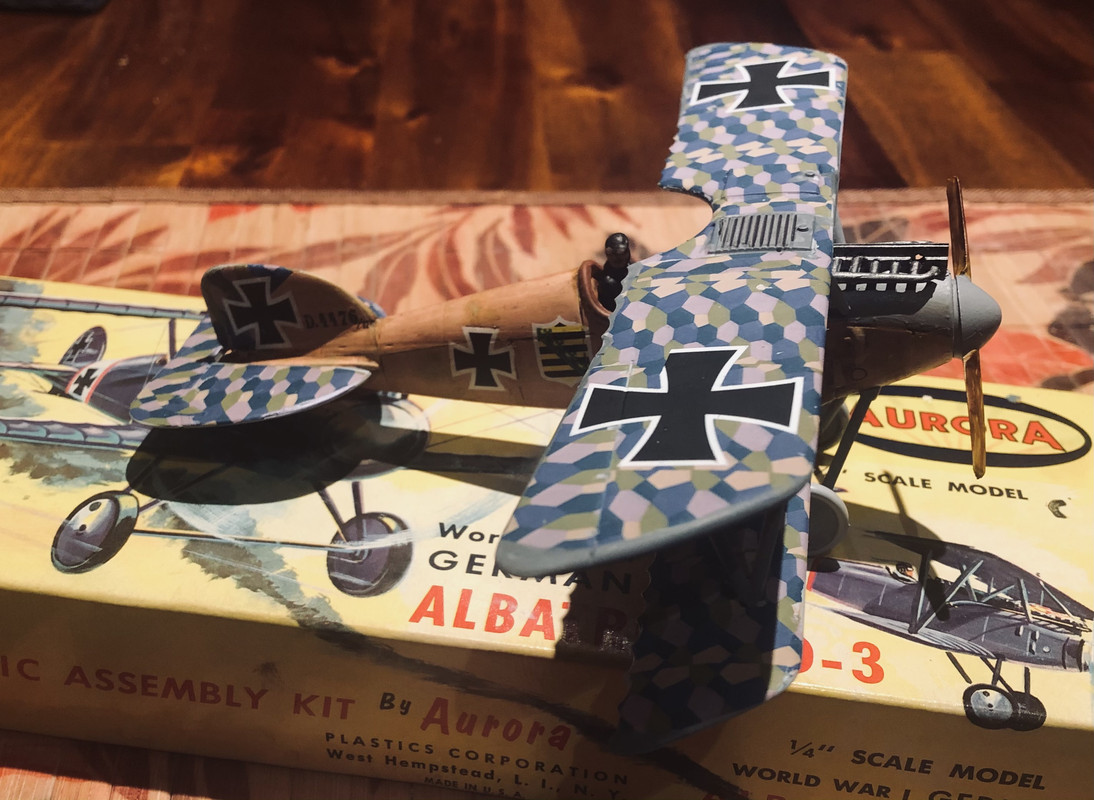
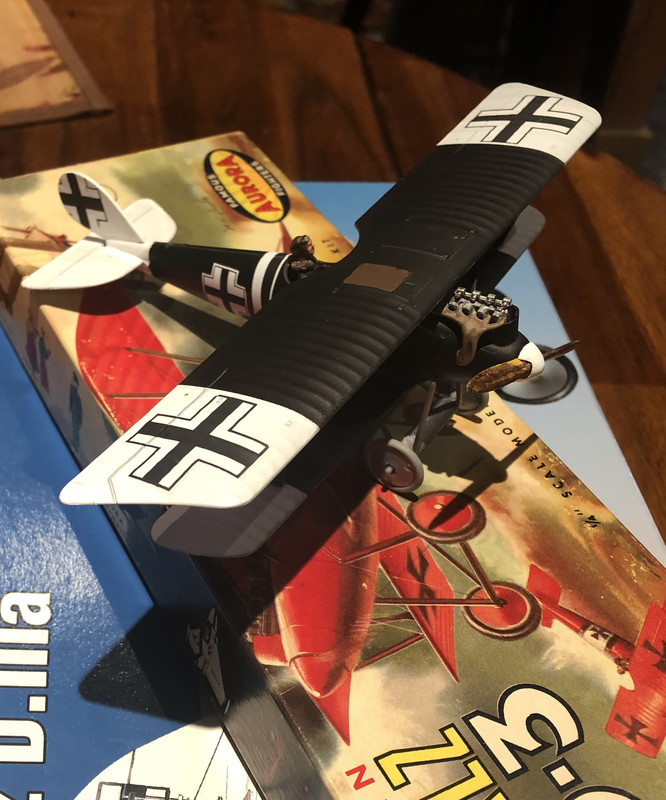
I spent the better part of the afternoon fiddling with some extremely fragile HGW decals for the Albatros DIII. I made a bit of a hash on the plane, but I’m hoping that Abteilung 502 oil paint weathering will distract attention from the mistakes I made on the current build. More about that later. Cheers.
WOW!! Thanks for the ride in the wayback machine! Fond memories of Aurora kits when I was a young’n. Excellent work by the way. You ought to be ready to tackle those other kits!
The pace of the project slowed as I used oil paints for the first time on a model airplane in an attempt to simulate wood grain on the Albatros fuselage. I’m letting that dry for a couple of days (one more day to wait) before I add the landing gear, struts, top wing, machine guns and touch up a few spots. Here’s the DIII as it awaits completion. I used the original pilot figure in this build.
Ohhhh, great job there on the Sopwith Tripe. The Albatros looks good- best of luck on the wood grain. The results look fine so far.
I finished the Albatros DIII this afternoon. I’ll pretend that the nicks and smudges are patched bullet holes even if none of those marks were intentional! I did some decal mix and matching as the livery is (mostly) based on an Albatross DV flow by Ernst Udet in 1917, but the coat of arms comes from a Fokker DVII flown by… (well someone not named Udet). I liked the look so I used the shield rather than have two planes with Lo on the fuselage. Next up is a Pflaz DIII.
Very nice builds. [t$t] [t$t] Keep up the good work and keep the pics coming.
Jim [cptn]
Stay Safe.
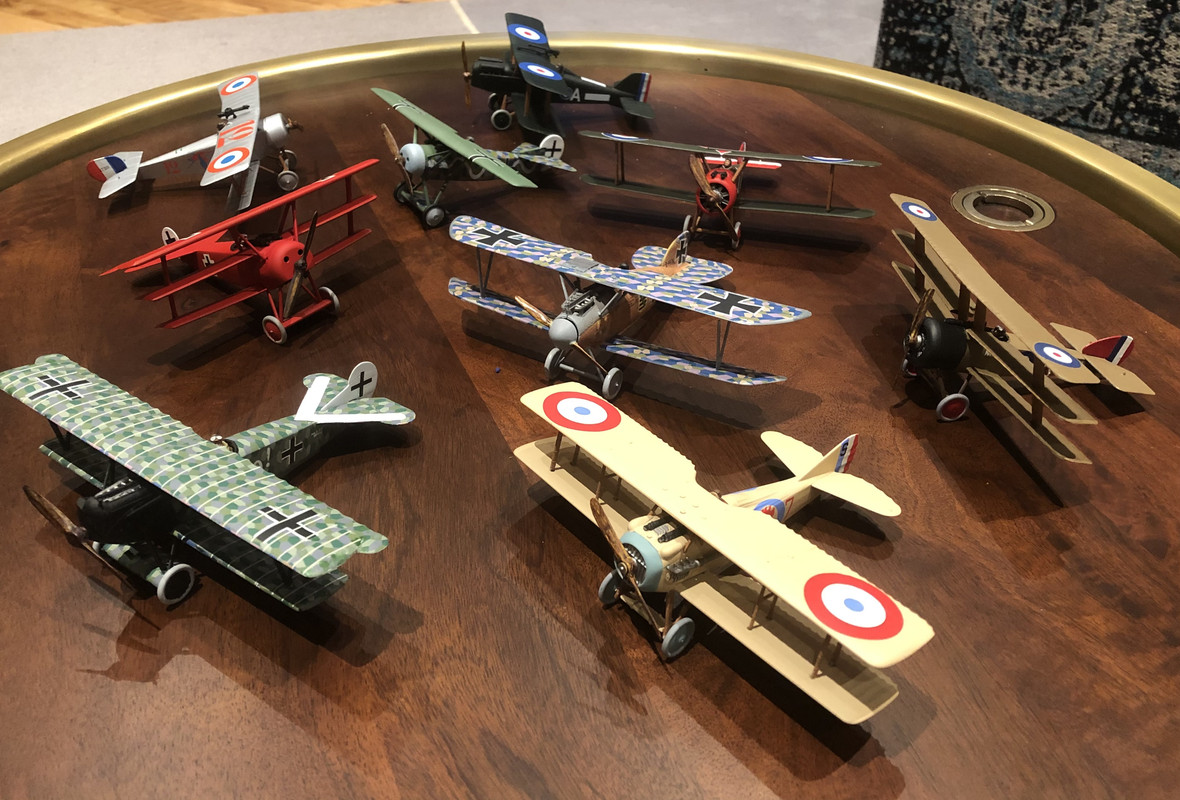
The squadron as of October 31. I need to buy a cabinet for these warbirds. The coffee table is full and I’ve been informed that the squadron needs to relocate to another airfield! There are 7 more planes to build: 3 of them are larger two seaters (Bristol Fighter, Albatros, Halberstadt) and then there’s that Gotha Bomberwhich will be the finale.
Yes, a new larger airdrome is certainly in order! That collection is looking sharp!
Good looking group of aircraft!! Never knew these kits existed and I’ve been at this now for a tad over four decades. I’ve gotta get out from under my rock for a while…[:|]
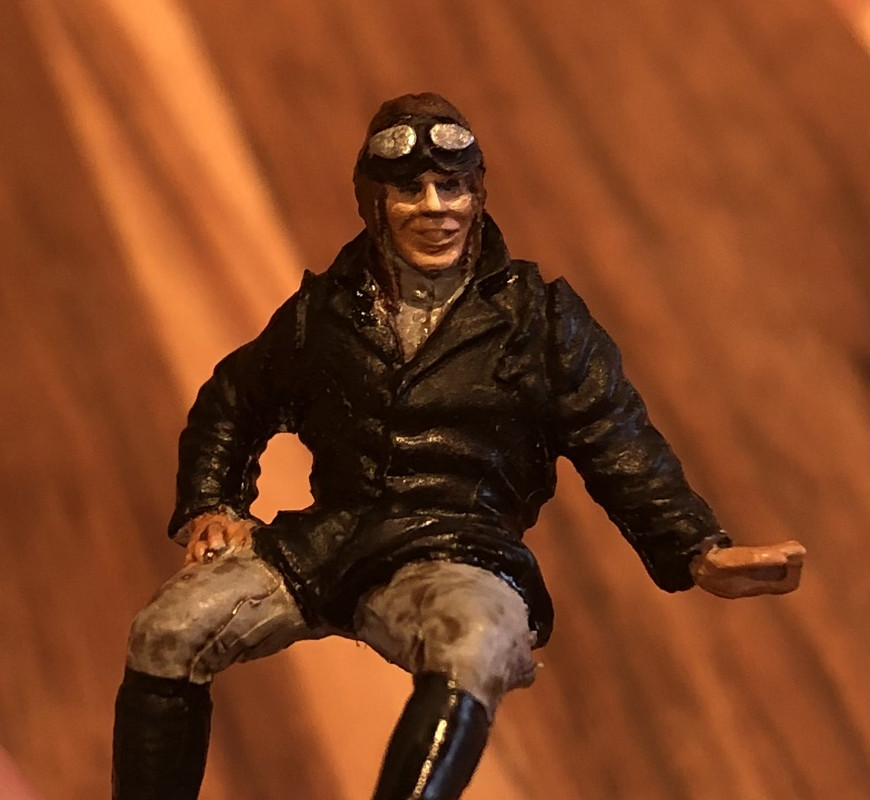
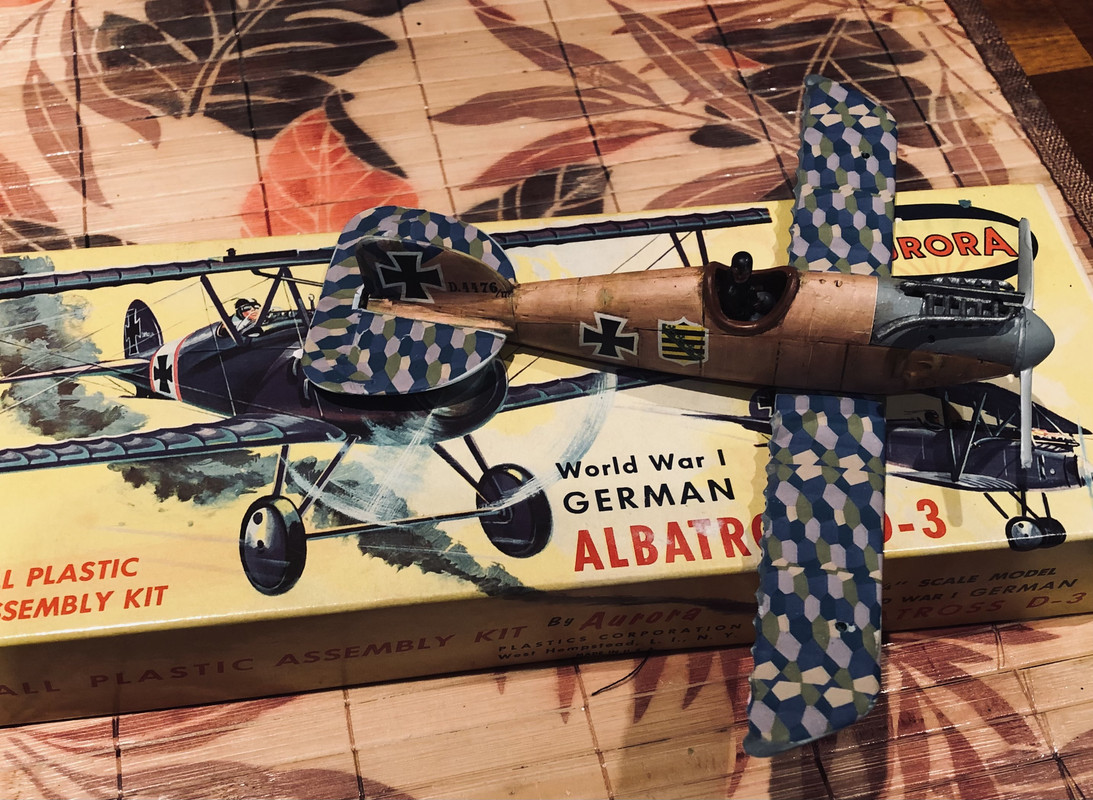
I understand about being under a rock–I hadn’t built a model plane in almost 40 years–which had something to do with me choosing these ‘relatively’ simple kits from my childhood as a start so I was totally under a rock! The fighters have 27-30 parts and, as far as I can tell, the scale is fairly accurate, although I think the Albatros that I just finished is noticeably over sized. Mold quality is decent, but the undersurfaces of the wings are not ribbed and there certainly isn’t any fabric “sag” effects. Some of the struts have given me fits, but that probably has more to do with my shaky fingers than manufacturing issues. The decals were shot, as I expected after decades in a box, and the pilot figures were mediocre at best, which is why I went for aftermarket decals and pilots. Here’s a bit more about the Aurora WWI fighters–which I lifted from The Aerodrome.com 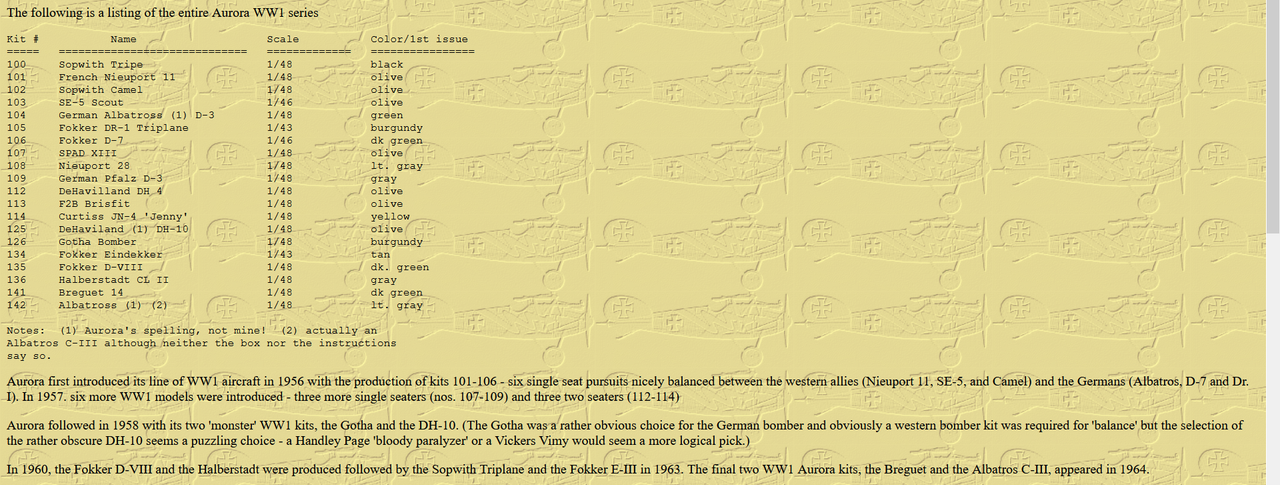
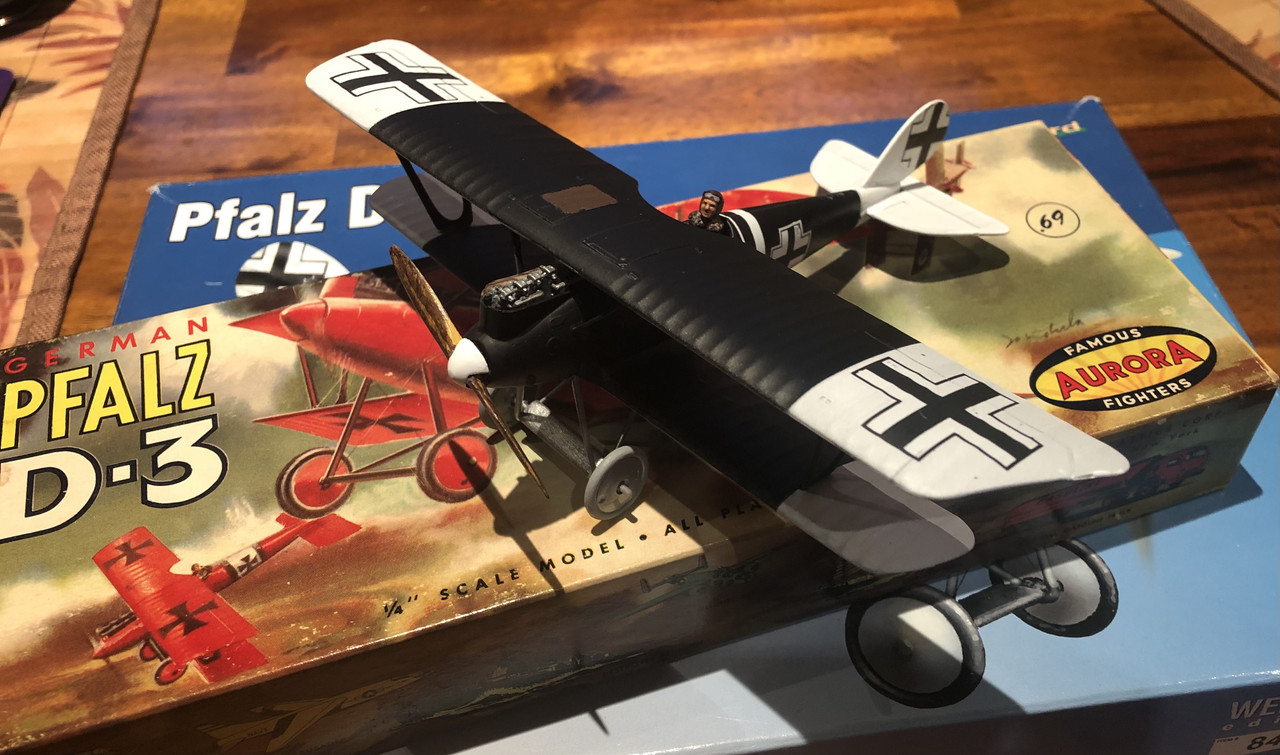
I bought some nifty oil paints (Abteilung 502) and decided to practice on the SPAD which was too glossy despite a couple of coats of flat clear. I’ve almost completed the Pfalz DIII, but this build is quite different from the previous ten, owing to the fact that I lost the top wing for my Aurora Pflaz. How I could lose a piece that big is beyond me… I suppose it’s in another box, which I’ll eventually locate, but I had to plow ahead if I’m going to finish these squadrons before Christmas. In any event, the Pflaz should be done tomorrow when I add the landing gear and finish the decals and coating.
I like they way you’re building them; you’re really keeping in character with the original kits.
Thanks! That was one of my goals when I began the project. I just finished the Pflaz which will have a big asterisk for reasons that are probably obvious. ![]()
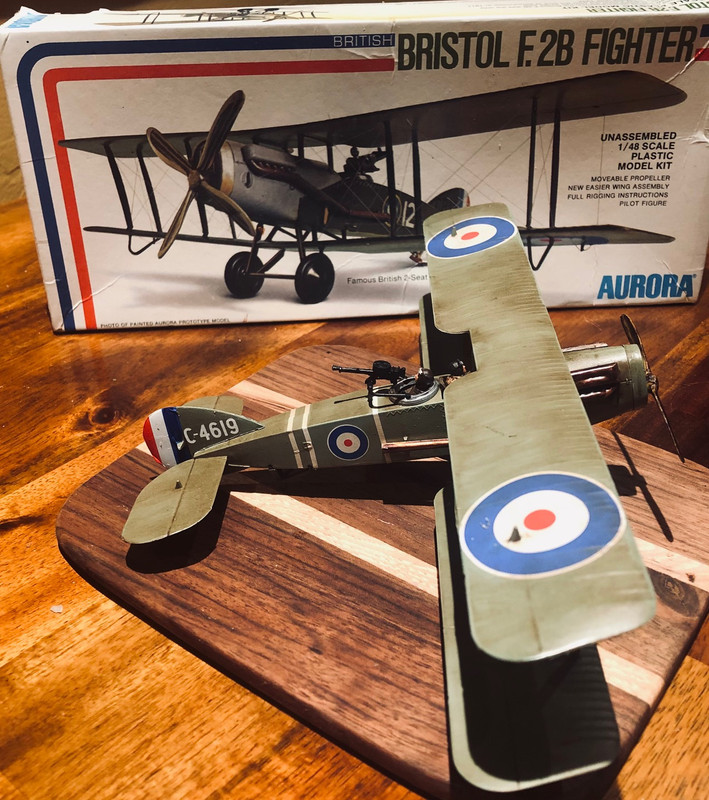
Warbird #11, The Bristol Fighter F2B is coming along. I didn’t have the shade of military gray green I wanted, and I decided to go ahead with a lighter color even though mixing something closer to the picture guide (in an Eduard kit) wouldn’t have been that difficult.
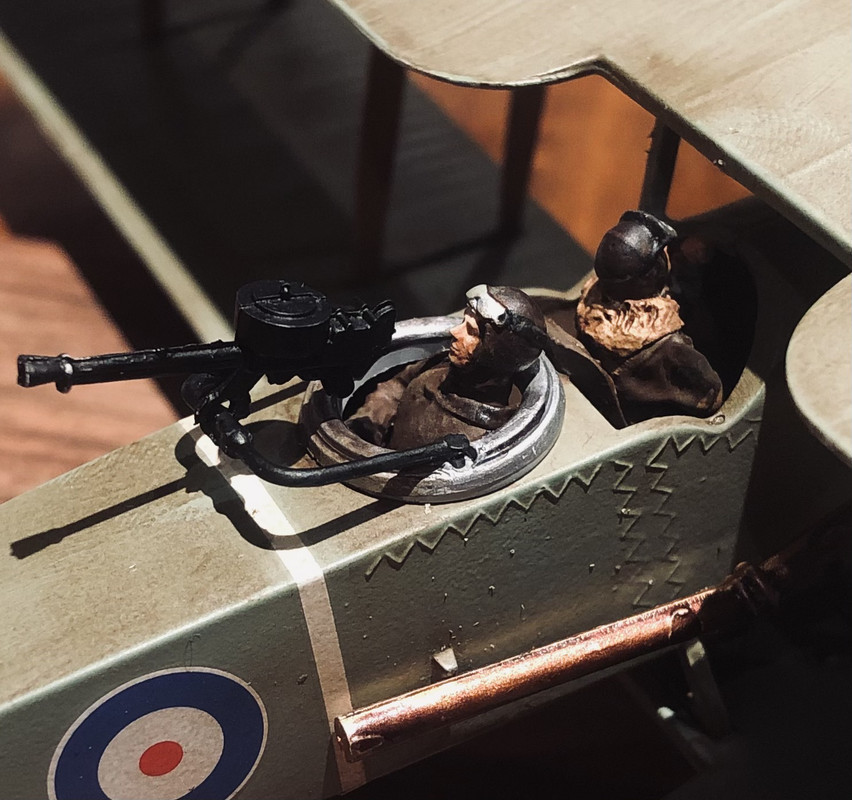
This particular Aurora kit was a reissue, probably from the early 70’s. The box noted that this kit had “new,easier wing assembly” (yes) and “full rigging instructions” (well, sort of). The raised squadron and national markings were gone–a welcome improvement, but the underside of the wings still lack the spar outlines and the pilot and gunner figures are primitive. As with the past builds, I replaced the figures and used Eduard decals. I will probably add a second coat of weathering (Abteilung 502) to darken the wings and fuselage. No more work on this plane until the oil paint dries in a couple of days.
I finished the Bristol Fighter this evening. The kit went together a lot easier than most of the other Aurora planes I’ve built to date; Aurora made some modifations to the reissued kit to make it much easier to attach the wings. Of course, I had to complicate things by losing one of the landing gear struts. Although I had 2 sets of landing gear struts in my Eduard Bristol Fighter kit, neither was an easy fit…a fraction of a mm off is still a fraction of a mm off when it comes to any piece especially one that has to support the model. Anyway, I got it done, and I’ll start on the Halberstadt CII tomorrow (or more accurately, continue on that kit.
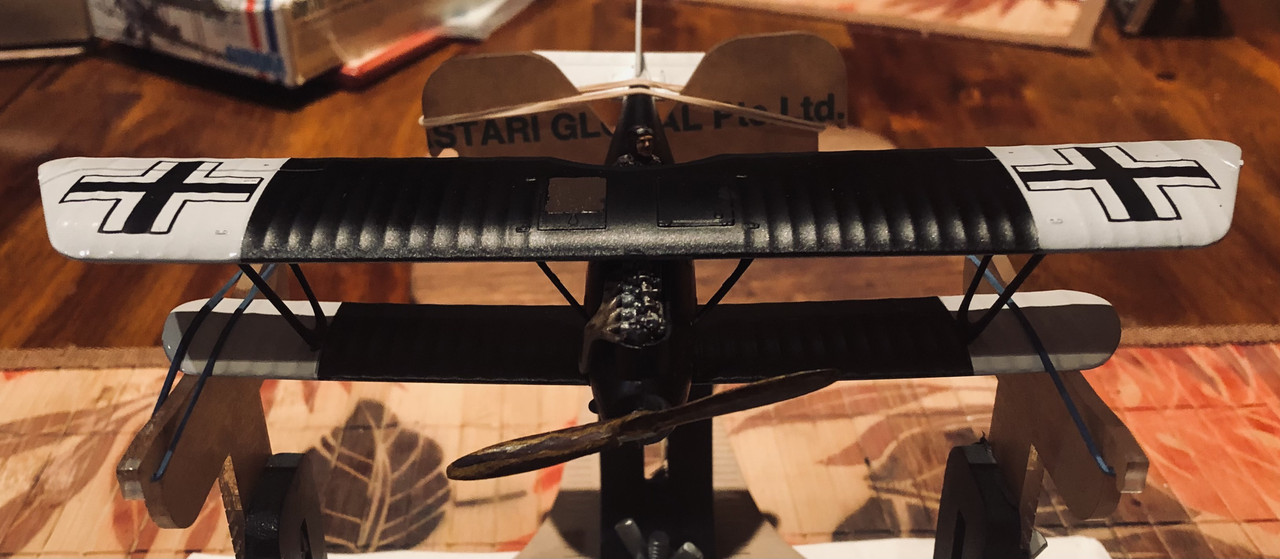
That I was able to test fit the top wing on the Halberstadt CII and (almost) get it to balance without a drop of glue is a promising sign… I think.
The early winter weather is conspiring against me as I need to shoot the fuselage with gloss clear, and the only stuff I have is Tamiya TS13–my partner has made it abundantly clear that rattle can spraying will not be allowed indoors, and I really can’t blame her. What brand of high gloss clear works well in an airbrush and will coexist peacefully with a flat acrylic finish?
In the meantime, here’s a picture of the CII pilot (aftermarket, not the one that came with the kit!) and the aforementioned dryfitting: