MENG A7V "Death to the Defiler!" FINISHED PICS!

Tojo, I have pondered that a bit, and tried to envision how much of the interior you might actually see from just the doors and hatches opened, and I don’t think it would be that visible unless you really had a good light and angle.

You’ll see in my next update that I’ve decided to build this so that the top is removable. It’s going to take some finesse, but it should be easy to just pop the top and look inside when I’m finished. [:)]

Karl, the interior looks amazing!

Funny, I had the pictures open of your interior, and my wife walked by and had to stop to take a look. That is the best compliment you can get! lol

Well I’ve got the driver’s platform assembled. What a genuine PITA this was. Sadly, I think I’m in line for some more frustrating Magyverism coming up here with the fit…

I found that the way that this interior is engineered, the tolerances are VERY tight, and apparently the top and upper hull is designed to be glued tightly against each other—nothing bad there, really–but it has caused problems for the way I want to display it. The top “ceiling” piece wouldn’t fit without hitting the high parts on the driver’s platform. I have had to do some creative re-arranging of some parts–mostly just dropping a piece or two by a few mm here or there to give clearance.

I want to leave the model with a removable top so you will be able to see all of this weathering in there. In order to make this possible without needing the tight “glue and clamp” method of assembly, I’ve had to remove these projections on top of the radiator pieces that act as buttresses to the ceiling. Otherwise, the top “floats”.

I really don’t think this is a big deal, as let’s be honest–there aren’t going to be any A7V engineers or experts in my viewing audience to say “Uh, where are the ceiling braces?” (OK, now I’m CERTAIN that someone will pull that line on me at an AMPS show somewhere. [proplr]) It looks perfectly plausible like it is now, in my opinion, and in any case, the interior is only going to be a secondary aspect of the diorama.

In any case, here’s some angles on the interior work so far.

You can see that the ceiling platform really doesn’t look compromised much by the omission of those braces…

The suspension has been pre-rusted and will receive the salt treatment, etc…

Got a busy weekend so I won’t get much done before Monday. Hope to have another update midweek…

Thanks for looking in and commenting, guys! It’s good to have you all on board! [:D][Y]

That’s some great work Karl! Detail and weathering are top notch here. All I have to say is it must have been one hot mamma jamma on the inside of that beast!! Radiator and powerplant in the crew compartment…the temperatures must have soared in there!

Man that interior looks awful…you know what I mean.

That looks just brilliant Karl, I really like all the crud on the seats.

But there is one thing I have noticed. Where are the ceiling braces? [whstl]

lol…ok, now the curse is broken! [:D]

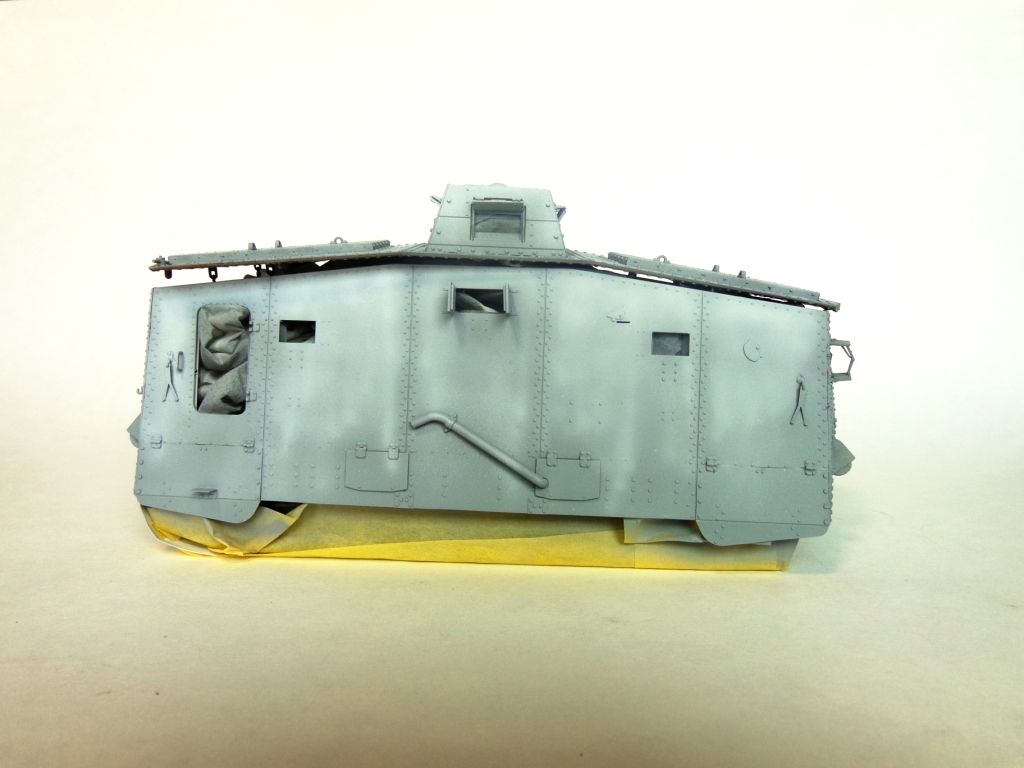
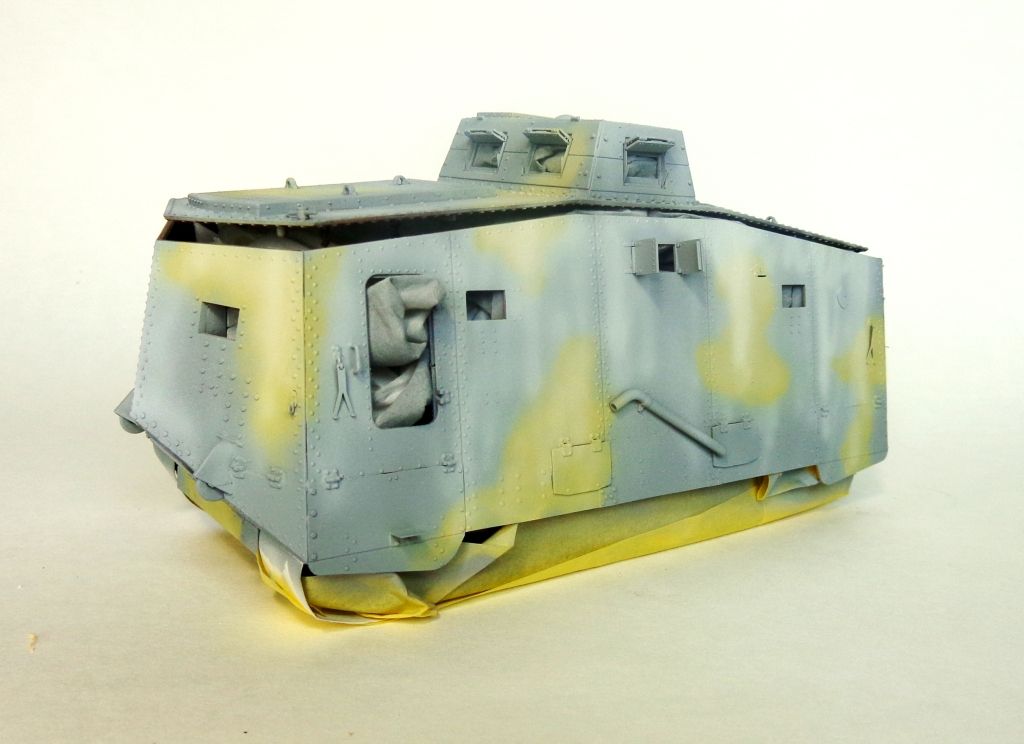
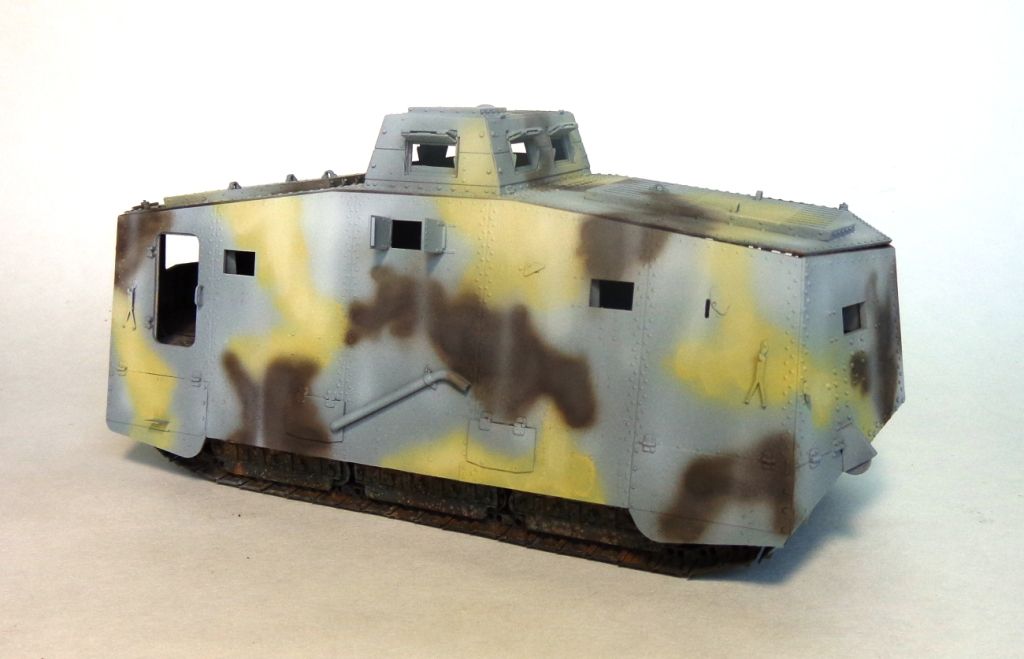
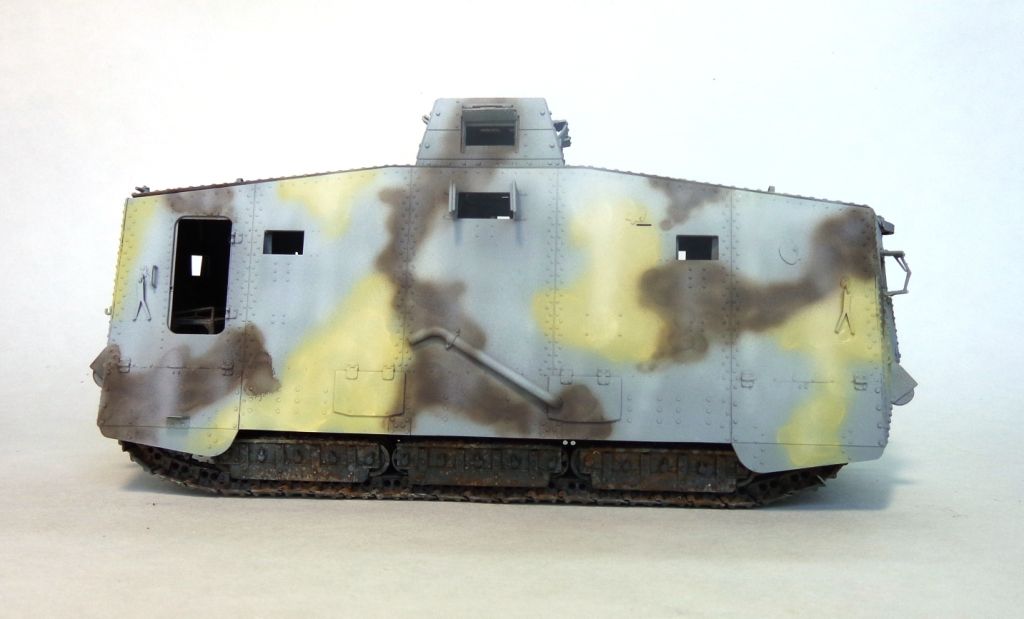
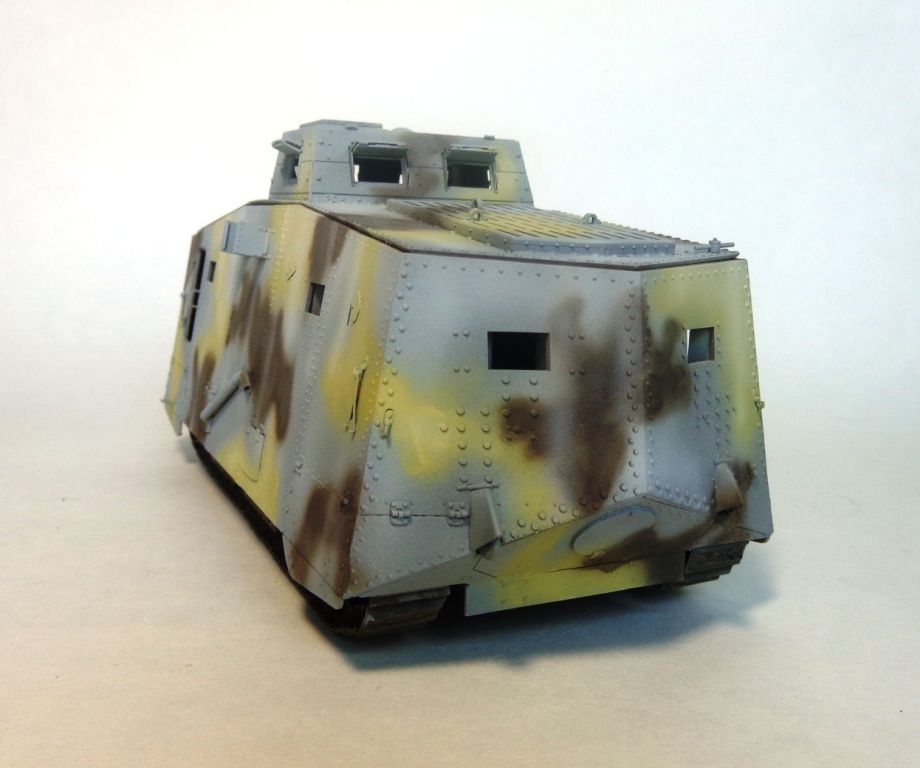
Well, here we go. She’za ready for paint. Finally! It’s been a long, arduous build full of planning stops and delays, but I’m finally ready for a bas coat and camo. Luckily, it’s a soft-edge, so it will go on rather quickly.

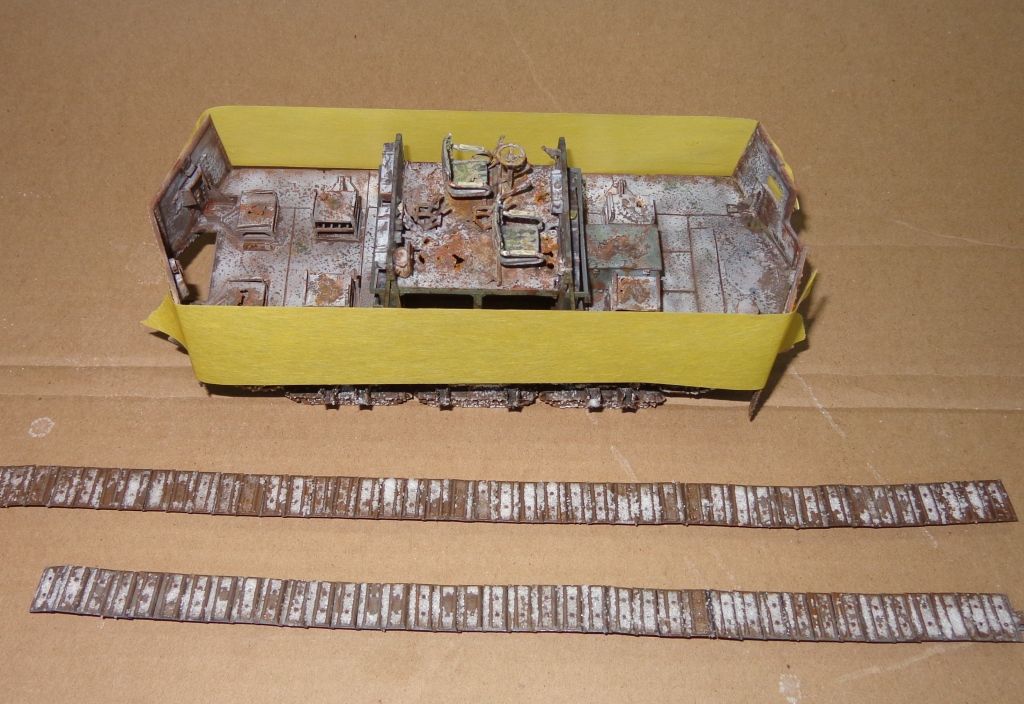
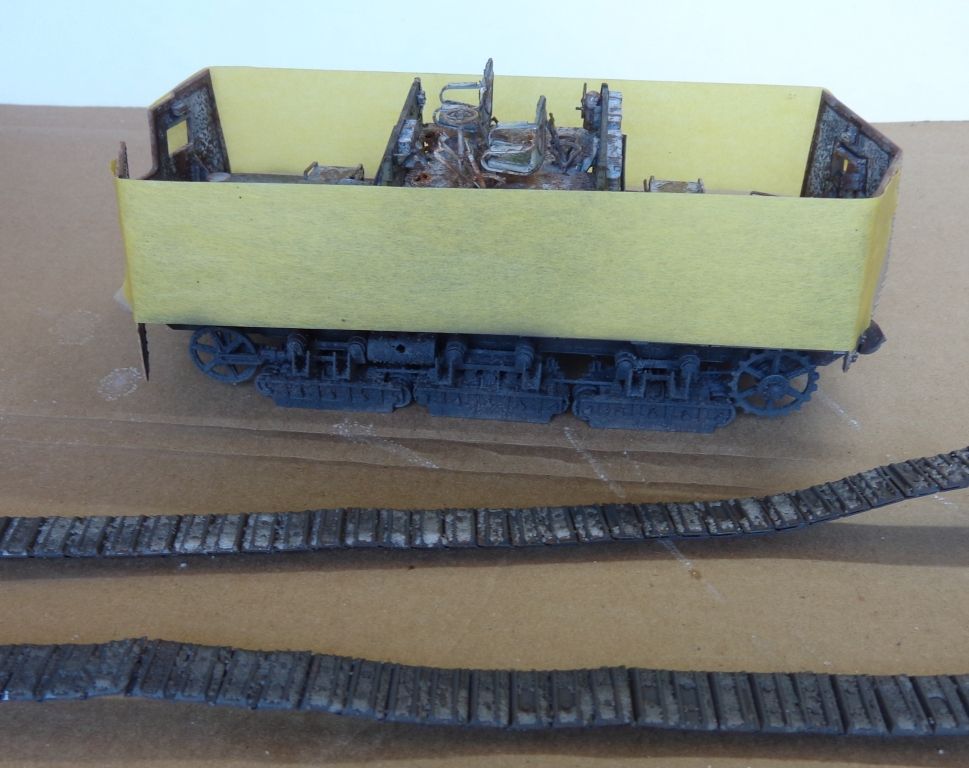
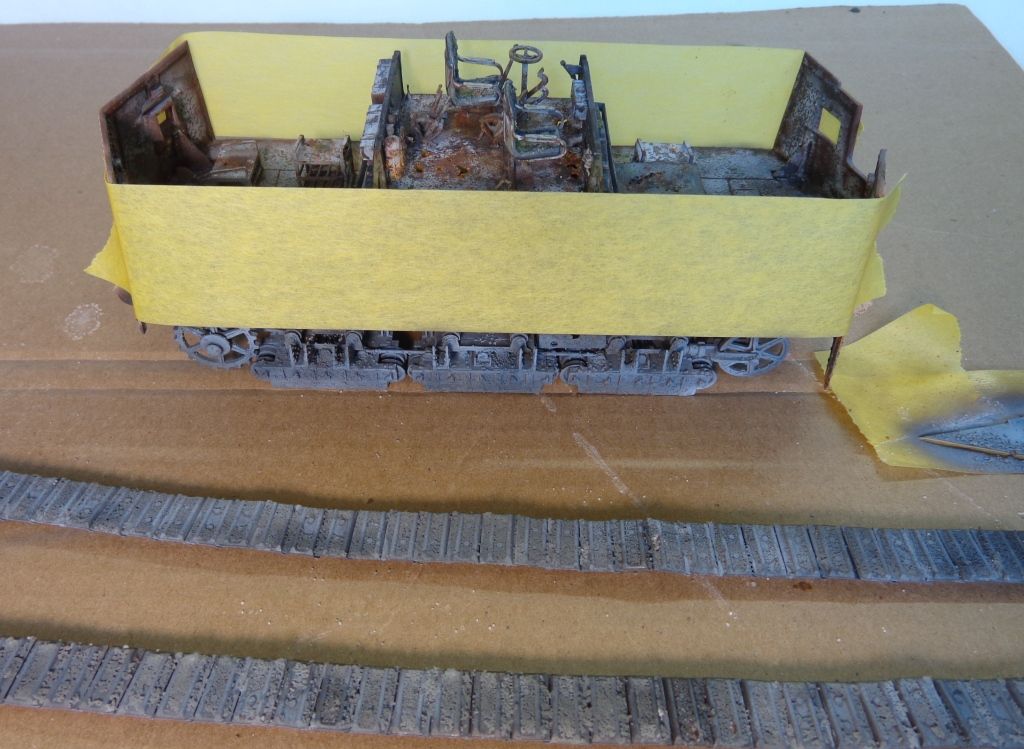
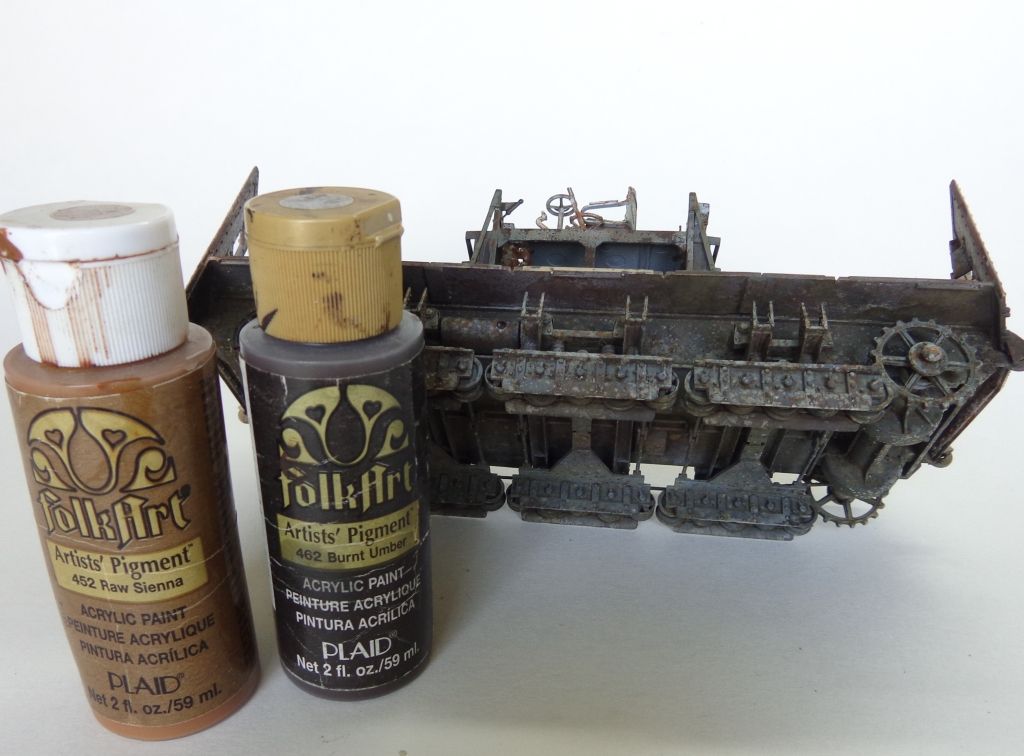
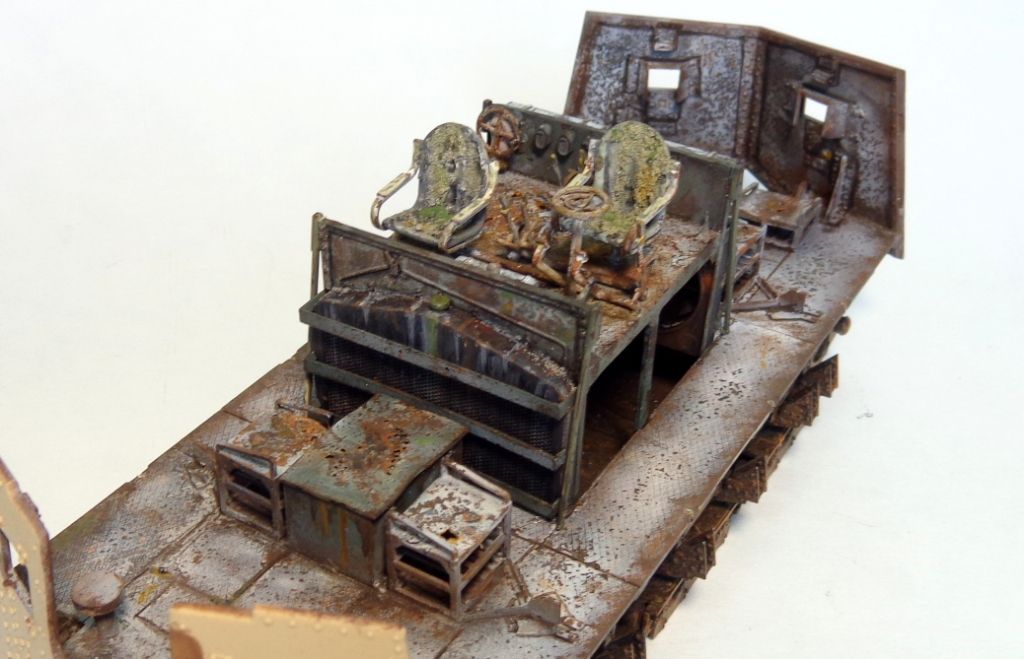
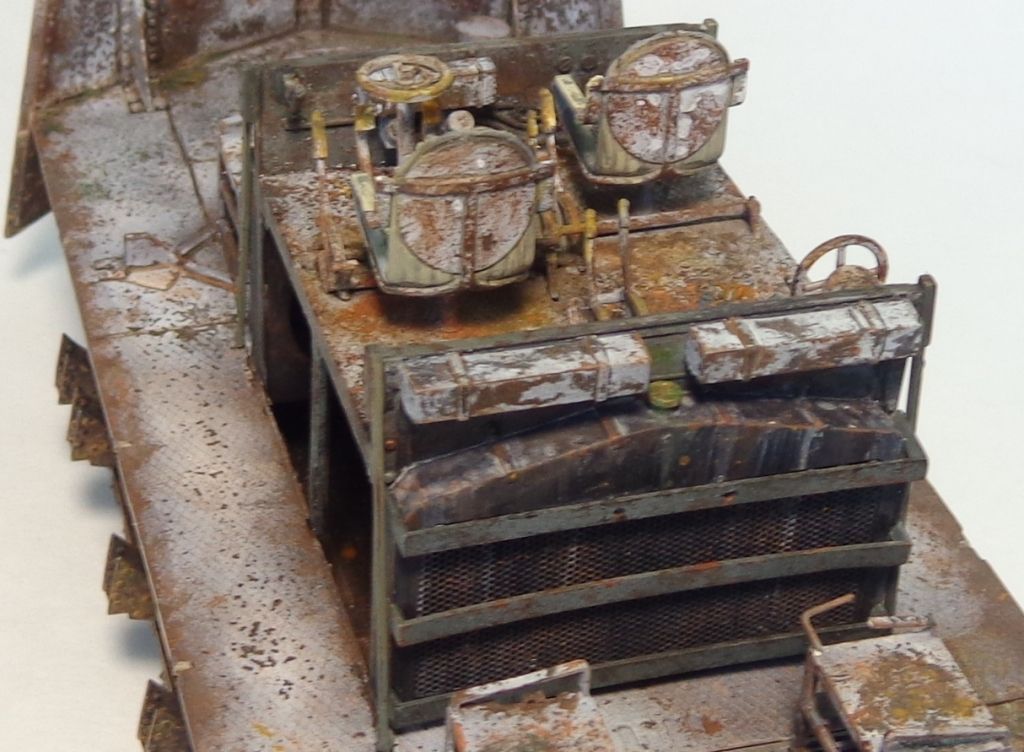
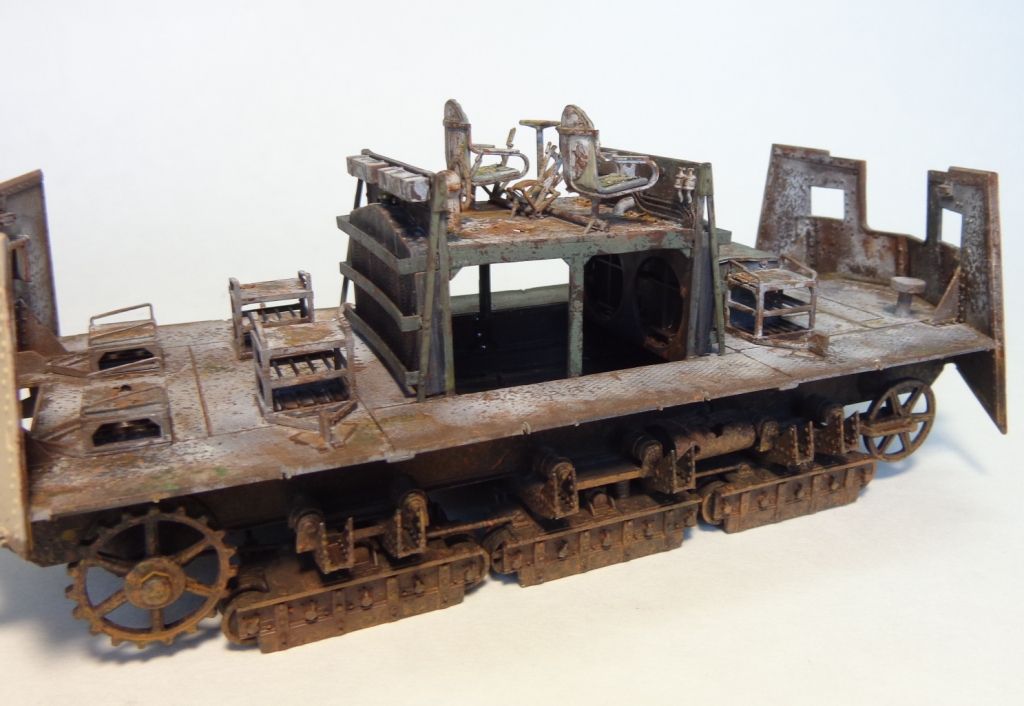
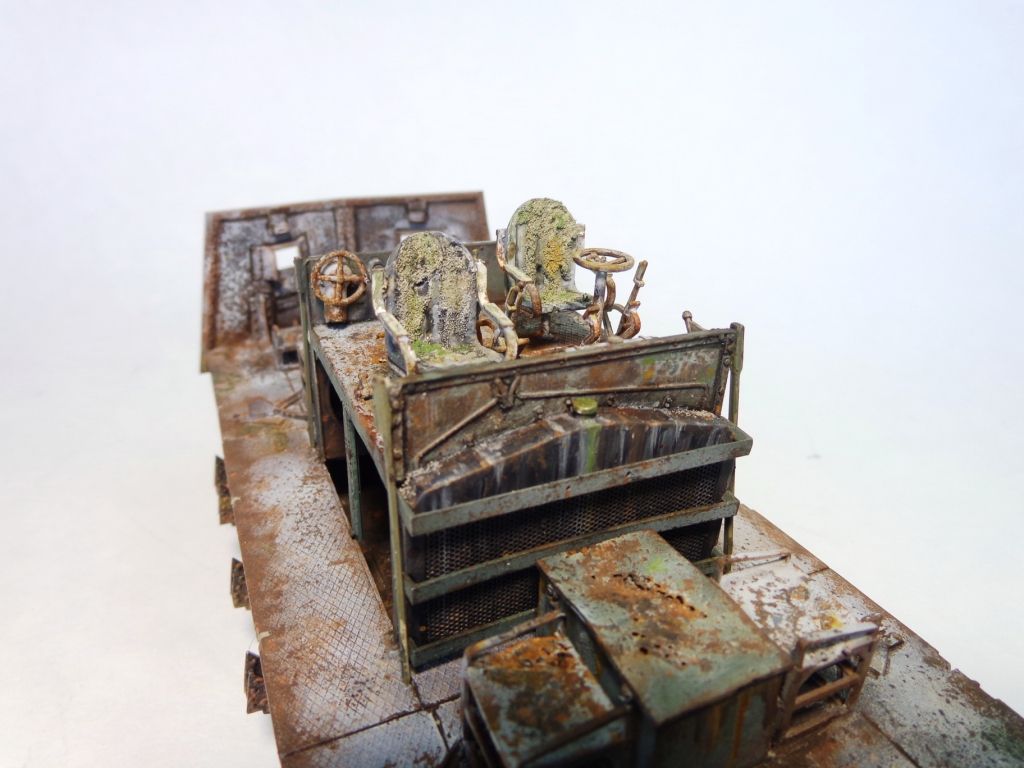
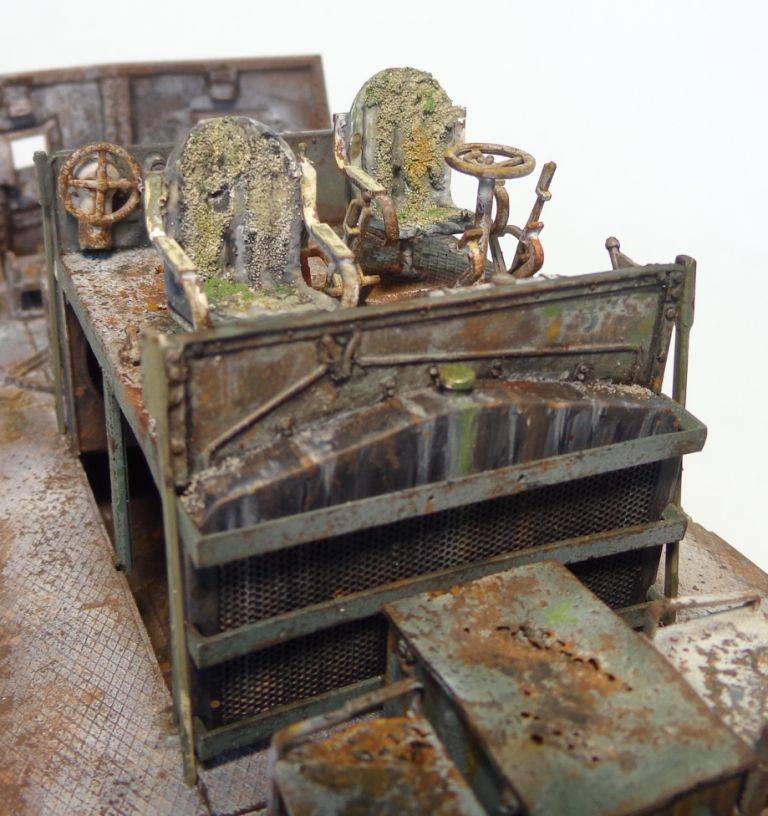
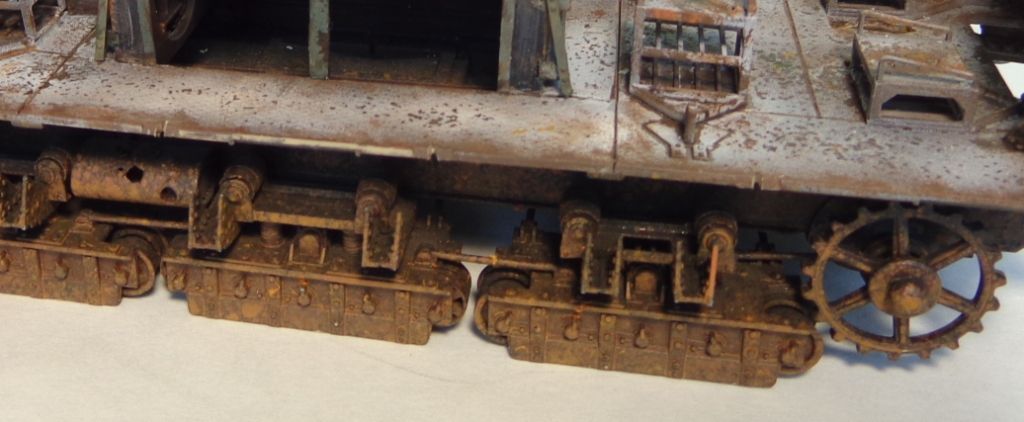
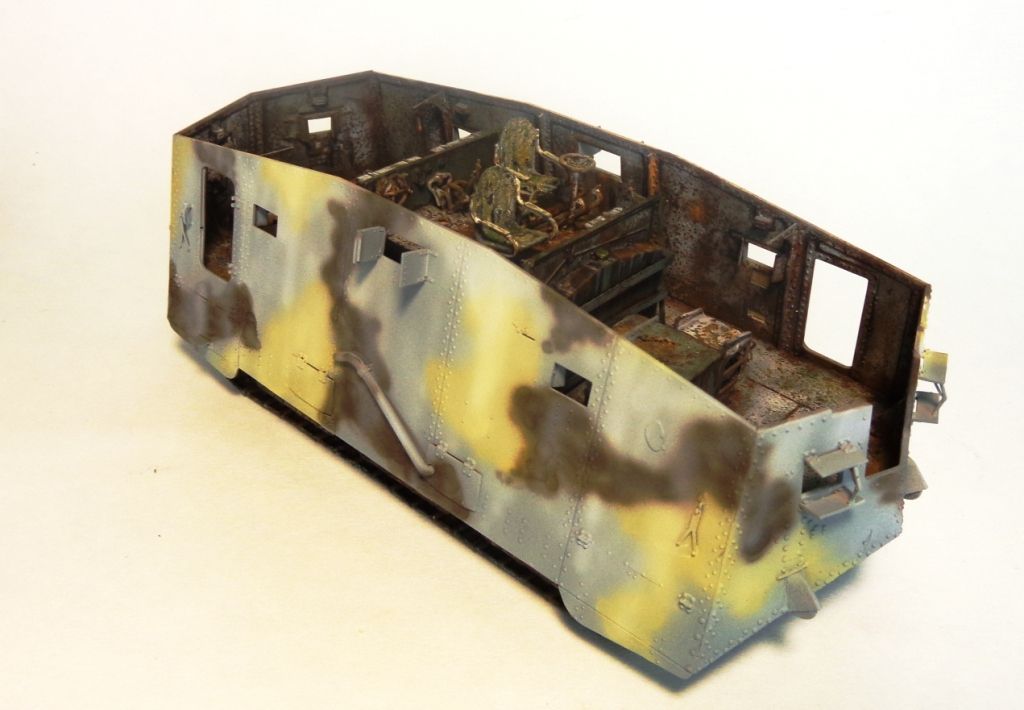
I had to figger out how to do the tracks–this diorama is going to depict a tank that is in a park as a commemorative monument setting, so I have to figure that the tracks would have been painted alonmg with the suspension at some point and then neglected for many years after being rolled into place. I painted appropriate rust tones on the suspension and the tracks in the same manner as the interior, and then salted them up.

Next, I hit them with a dark gray mix of Tamiya German Grey and Light Grey.

Top that with a lighter shade of the same…

I knocked the salt off–well, “scrubbed it” off, more like it; this stuff sticks pretty good under paint–and then gave it an overnight wash of acrylics; Burnt Umber and Raw Sienna, for some more “deep” rust shadows.

Because of the corrosive nature of the salt, a few of the track links had been affected, and rather than go through the rigamarole of repairing what wouldn’t be seen anyway, I removed the damaged links put the tracks on thusly, and glued them in place. The tracks are almost unseen beyond the first few upward-curving links, as you’ll see…

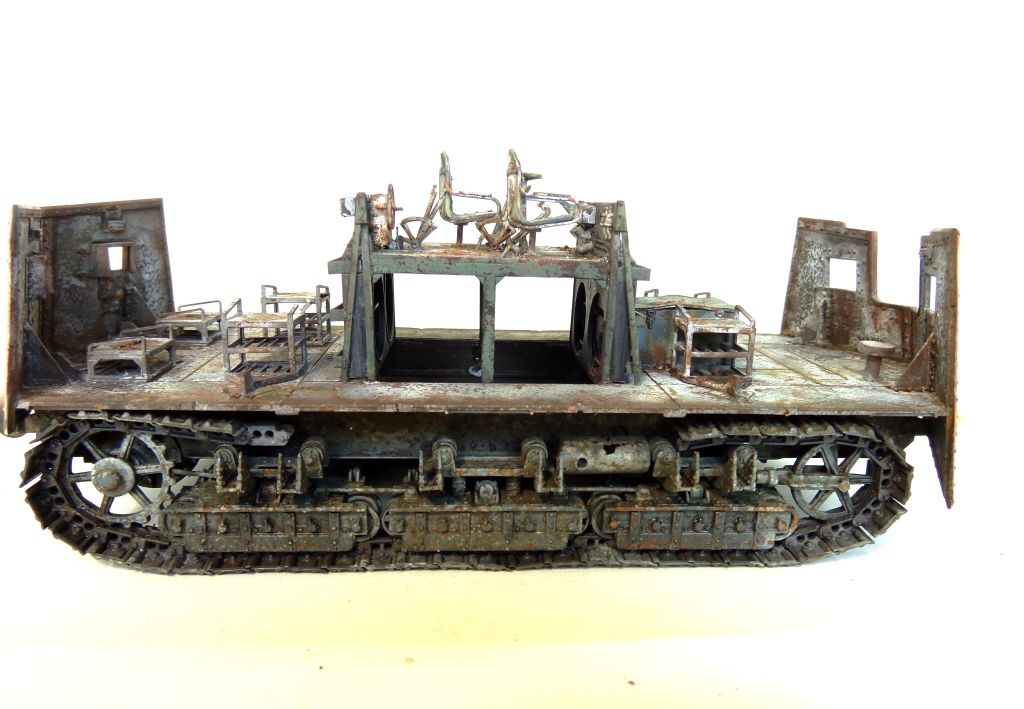
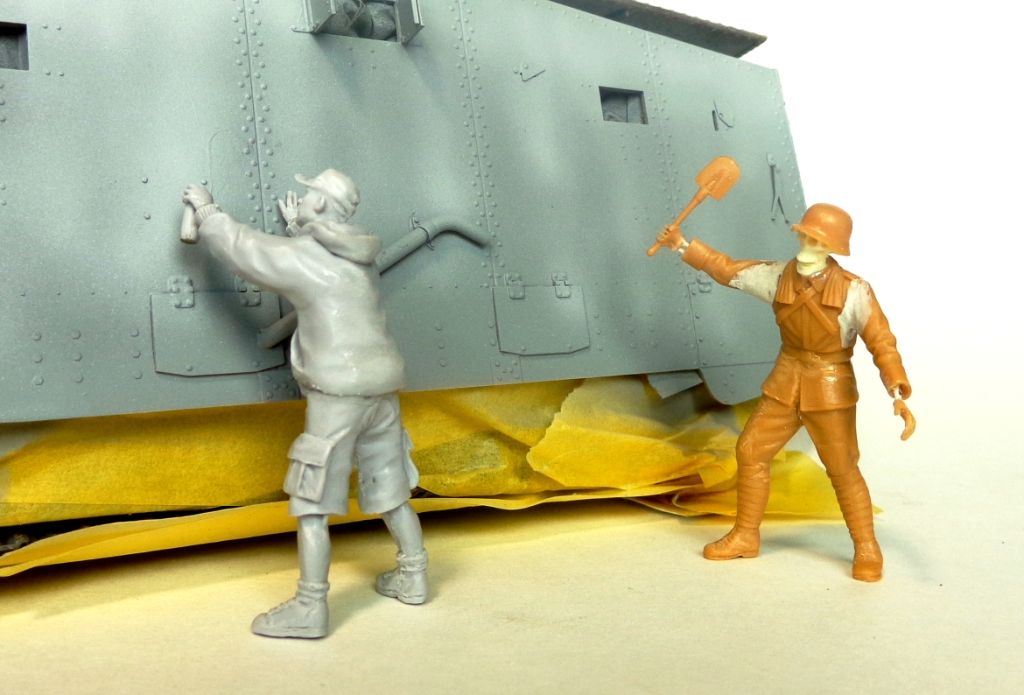
Now I was finally able to put the sides on.

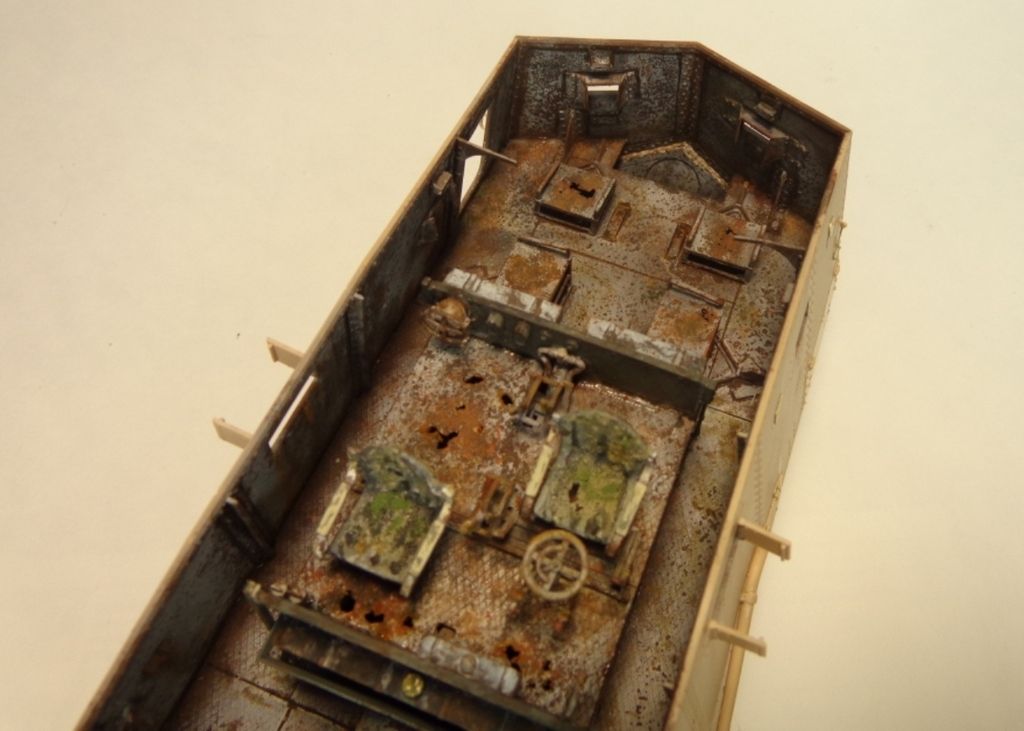
The guns will be put in after painting, lest they present a difficult projection outside the hull that would be a pain to mask. This way, I can easily fill the hull with tissue and spray the exterior.

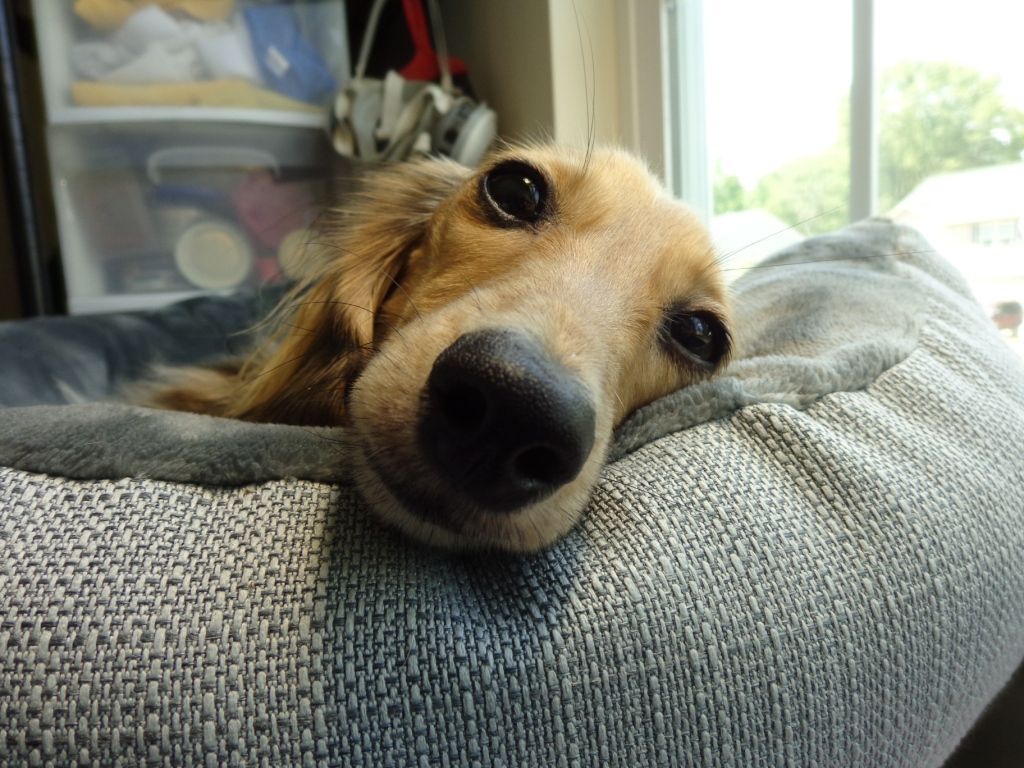
Modeling doog Gerhardt watches in between his nap…HEY DOOG!

The top will be removable. Here you can see that it will sit reasonably well on the walls…

So I’m off to paint the exterior. Stay tuned; the actual diorama should be starting to take place soon once I get all the elements constructed, which shouldn’t take too long!

Comments welcomed! [&]

!http://duralenta.ru/engine/data/emoticons/a14.gifPoor ol’ Gerhardt looks so bored and left out…!http://www.sherv.net/cm/emoticons/dogs/funny-dog-smiley-emoticon.gif

As for the tank.

Um, Um-Um, Ummm, Ummm, Um!

Yeah.

You got a great looking rusted hulk coming on there karl.

Masterful work Karl, so cool…Terry

Just saw this post, Bruce!You must have posted it while I was updating–that’s cool; I hope your wife liked it! Thanks for looking in! [:D]

Bish, Terry, Steve—thanks, guys. I appreciate you taking the time to comment! It’s kinda quiet in here since the “Big Change”! Update next! [;)]

Hi Guys,

Ok, so I got the exterior painted.

I’m going with a 3-color scheme, in what would have been an early color scheme. I’m not too worried about accuracy per se, as this tank is going to represent something like a museum piece on a public plinth, and when have bureaucrats ever done an accurate tank paint job? lol

I started with a quick coat of decanted grey primer from Duplicolor, and then shot a coat of Tamiya XF66 Light Grey. When this was covering the model, I took some Flat White and mixed it into the cup and sprayed fading lines down the side and over the roof. This to simulate sun-fading.

After that, I mixed a shade from Tamiya Buff plus Yellow an White. Once again, after spraying the patches, I “faded” it with another infusion of Flat White.

I then used Model Master Raw Umber, and repeated the fading trick.

Other side…

It looks pretty neat with the top off…

This should make a pretty cool canvas for weathering now. I will be adding the doors and guns now, and the decals as well, which will have to be suitably “aged”.

And here’s a peek at the vandal and the avenging soldier! There will be one more beside this one, and I have something REALLY cool planned for him!

That’s it for now, guys! Thanks for looking in, and comments are of course, always appreciated! [:D]

Ahh,a little reminiscent of “Spooked” gonna be good.

I’d go all the way back up the thread to what Stage Left said. I really CAN smell something dead in there.

The 100 year old weathering project is a real work of art. At every single stage you’ve shown, Mr. Bill has said “nooooooooo!”. But then it just gets better.

There used to be a member here named Vespa Boy. I’m drawing no comparisons in terms of execution, and he didn’t model armor. Stuff like sidewalks and streets. This model is in my opinion the same thing. It is so real and so filled with truly accurate details that are found in real life, that it’s really something special.

Exterior looks just as good as the interior Karl, looking forward to more!

Gee, Bill, that’s generous praise! [;)] Thank you!

I remember Vespa Boy! A temendous artist–is he not with us anymore? He was honestly amazing in his commitment to detail on the most mundane and pedestrian of subjects! I loved his work!

Thanks again, and I hope you’ll stay tuned for more! [Y]

Thanks too, Cliff, for looking in and for the nice comment! [:D]

Nice to see where your going with this. Not sure if i like how your mind is working or if it scares me [:D]

Liking the paint job though.