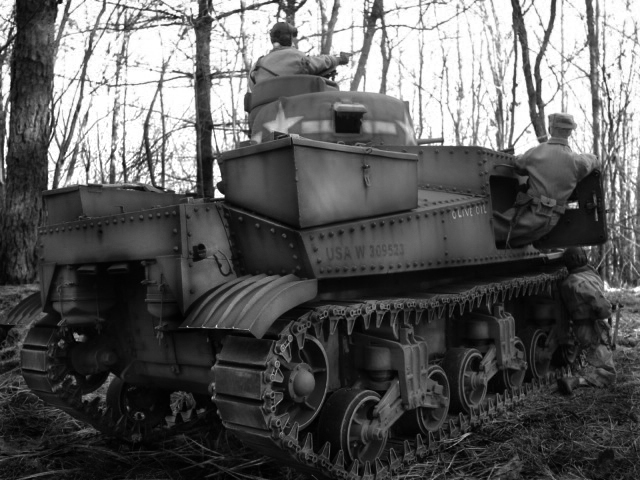
M3 lee Project 1/6th Scale

The tank’s turret has been completed. I will now be focusing on the tank’s commander’s copula. Once the copula is completed the tank will be off to painting [:D]

The turret lift hook bosses were fabricated. The way the bosses worked was the tank would have three eyelets screwed onto the three boss locations. Lift hooks and cables were then connected to the eyelets and were lifted by a crane lifting the turret. The same system was also applied to the M3’s commander’s copula. This system was replaced on the M4’s with three large lift rings.

A Large blister was added to the lower right hand side of the turret. The blister was made from using one of my Resin Panther track aligner.

The rear visor was added and is also functioanl. The surrounding area was built up with epoxie.

Enhanced cast texture was added to the entire turret surface.

The tank’s 37mm turret gun and mantlet were completed and installed.

For the mantlet I reworked the kit supplied resin mantlet. The kit supplied mantlet is a solid cast resin component that is nicely shaped and detailed. The kit mantlet is not designed to elevate.

To make the gun elevate I first needed to remove the molded in sections for the gun, and the optic drum.

A new 37mm mantlet drum and optic drum was created. The optic drum and 37mm drum are connected to each other with a single aluminum shaft. The shaft is mounted to the mantlet. This allows the drums to spin freely and in sync. An extension spring was added to help with barrel droop. The molded in fasteners were replaced with real slot screws.
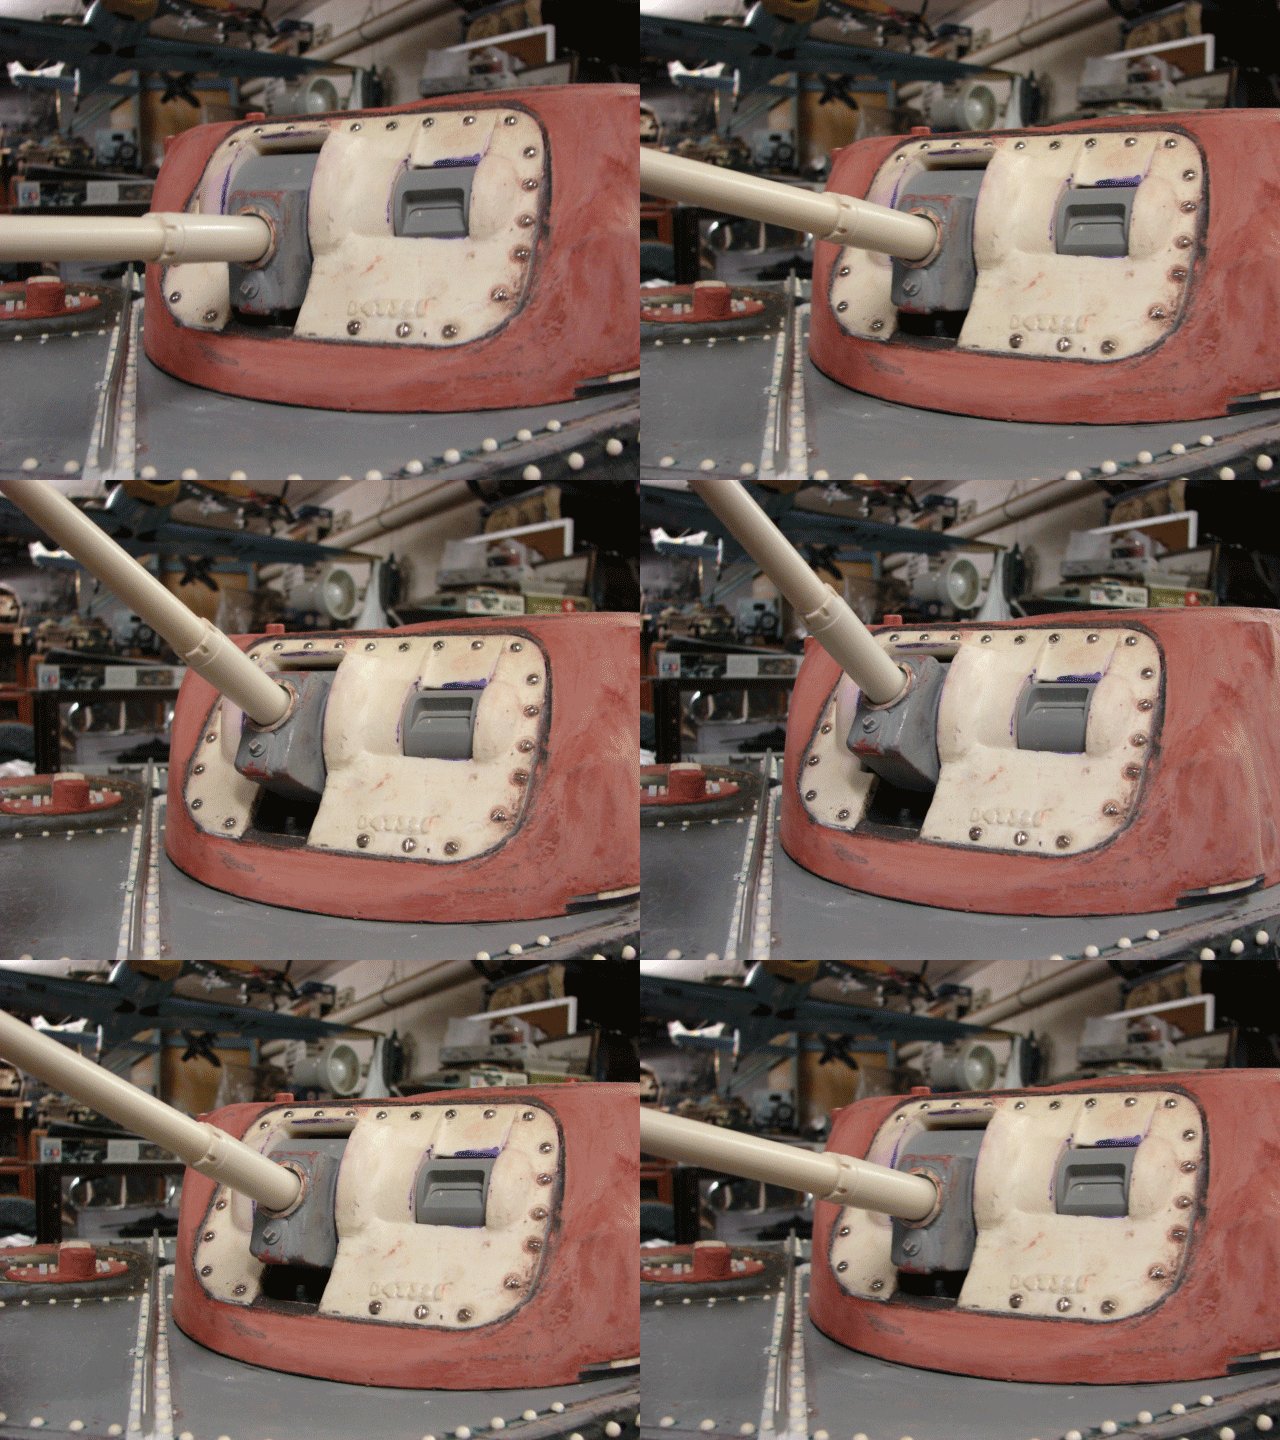
A well was built to the lower portion of the mantlet where the gun drum recess is. This well is present on the real vehicle.

I have also added the M5/M6 37mm Gun barrel to the product line.

http://eastcoastarmory.com/ustankparts.htm

The 75mm Optic slide was also built and added to the 75mm turret drum.
WOW! This is SO SICK! [Y] Wish I can do the same… only in my dream! Keep going… I have been following your process ever since I joined the forum a year ago.

I completed reworking the tank’s commanders copula. The Model is now ready for painting !!

The M3’s copula was my favorite part to build on this tank. What I find interesting is that the concept of the commander’s mini turret was phased out on the Sherman because it made the tank’s silhouette too tall, and made the tank commander’s position too vulnerable. The concept was then brought back on the M48 and M60 tanks, only to be replaced with a low profile Uradan copula because of these same reasons .

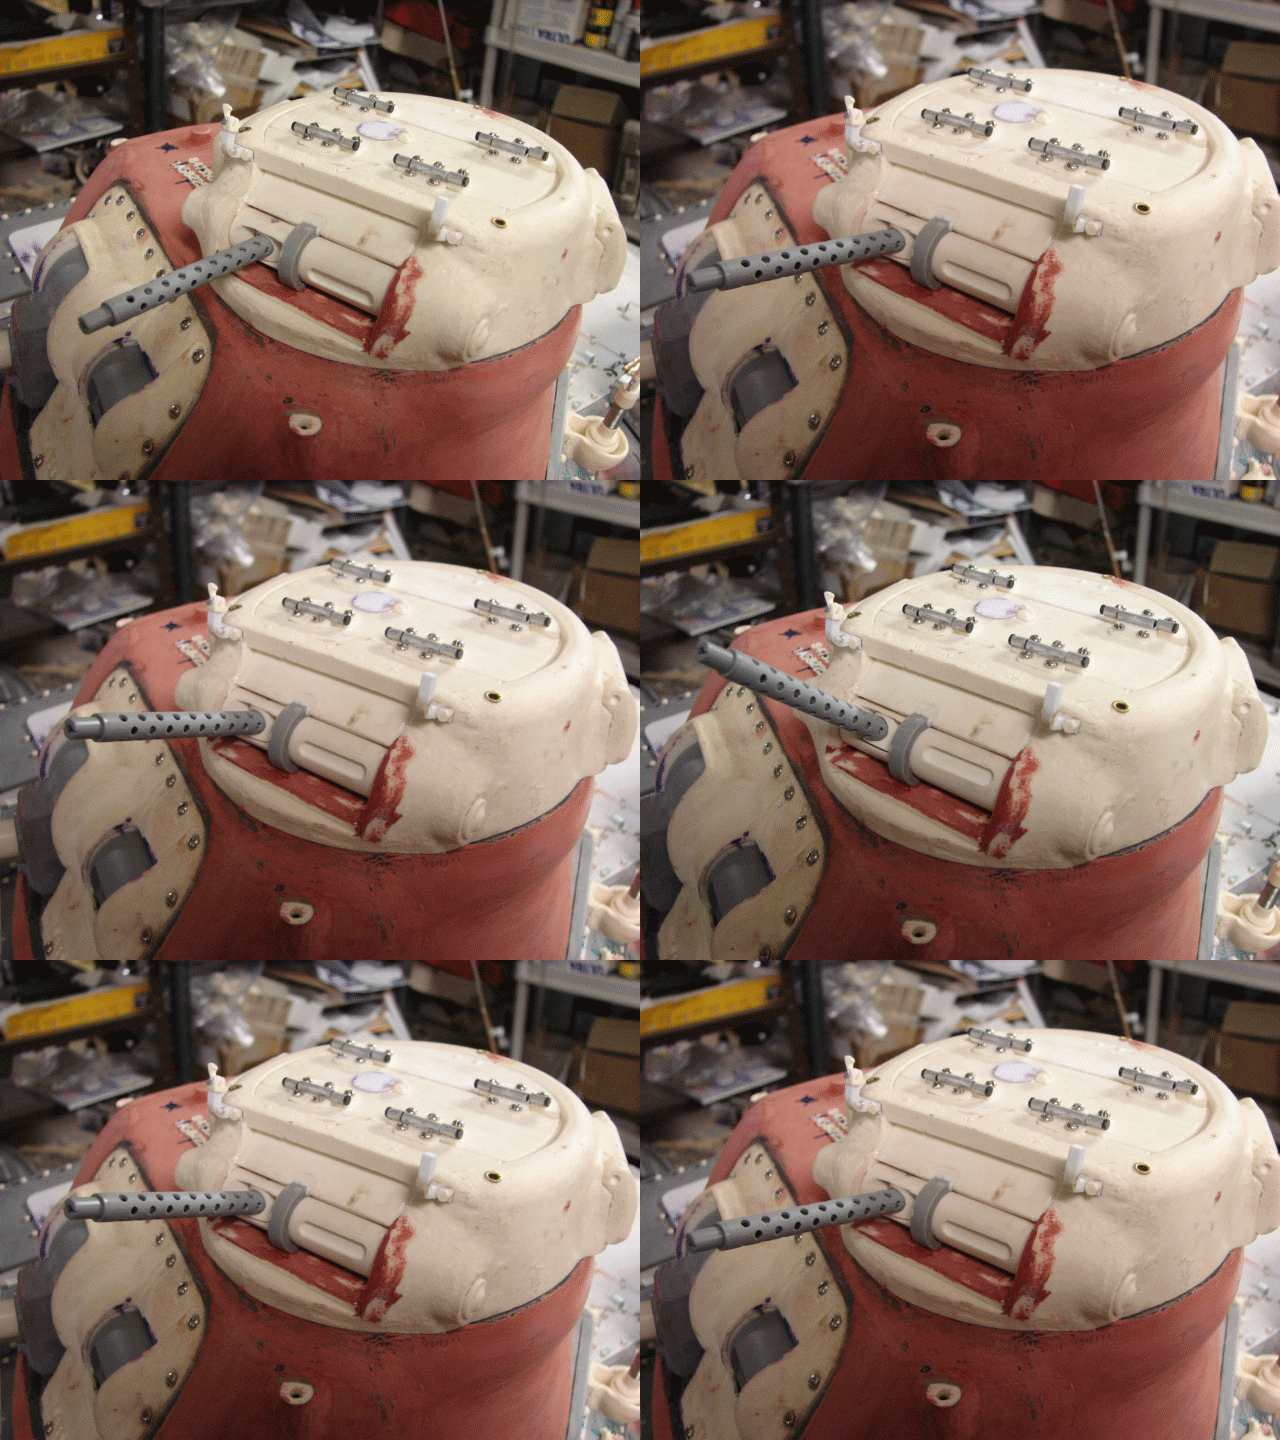
For the Copula I used the kit supplied cast resin copula and hatches. The castings themselves are nicely detailed and casted. The Copula has no interior detailing, and the 39.cal position is molded into the copula and doesn’t elevate. The turret copula is also not designed to rotate separately over the 37mm turret.

When building the tank I specifically wanted to work on this component last, because I wanted to do something special with the copula. I wanted to make the copula full function. This would include making the copula rotate 360 degrees, make the 30.cal elevate, and making the 30.cal itself transverse within the copula turret.

To do this I first removed the molded in 30.cal mantlet. The copula’s interior wall structure was built up with epoxy and resin.

A new 30.cal mantlet was fabricated with the 30.cal optic, and the 30.cal pivot port. For the 30.cal port I machined the pivot mount with the 30.cal cradle built in.

With the new 30.cal mount the gun now elevates and transverses

To make the copula rotate I installed a 4 inch PVC ring to the copula’s bottom. Two resin blocks were mounted to the ring’s lower portion. These blocks act as locks to secure the copula to the turret like on a 1/35th scale tank.

I then added the remaining interior detailing; these would include the various head rests, visor handles, and counter weight spring.

For the hatches I reworked the kit’s hinges to make them operate better. I also added the commander’s pistol port. to the center hatch.

On the front portion of the copula there are two hatch bump stops. On the left hand side bump stop there is a hatch retaining latch built in.

For the Copula MG I used the Dragon 1/6th scale M1919 30.cal kit. Like their 50.cal kit the 30.cal kit is nicely tooled and assembles quickly. The kit comes with components to build the gun with the tripod, or as the A6 version with the shorter barrel. For this tank I didn’t need the A6 Components, and the tripod will be used on the tank’s exterior.

The only addition that was made to the gun was the addition of an expression spring to the bolt assembly. The pre built versions that DML offers has the spring built in.

Unlike the 50.cal kit ammo belt the 30.cal ammo belt is made of flexible DS styrene, and will be used on this model.

I was able to prime and paint the model over the weekend.

Final Prime

When it came to the tank’s base coat I wanted to use a different more lighter shade of OD than I typically use. The shade that I mixed together is suitable for early / mid war vehicles.

The model is now ready for it’s markings.

I’d say you picked the right avatar. [Y]

Tony

If I were only thirty years younger. Big Toys for Big Boys[t$t]

Tony Lee

Nice work, armorguy, looks fantastic!

Are you the guy who built the 1/6 T28 super heavy tank and displayed it at Mosquitocon last spring? Your scratchbuilding shows that level of detail and ingenuity.

Looking forward to more progress!

Regards,

Brad

Great work as always!

I would not have the patience for that, but your progress looks great as usual. [Y]

Really like that .30 cal in the commanders turret.

Thanks guys.

Barron, the T-28 that was at mosquitocon was built by me. I also built the 1/6th M10 that was at th 08 Mcon.

I have completed the tanks markings and weathering.

Weathered.

The model is now ready for the tracks and tire painting.

I thought so, I recognize your work [;)]

This is another great project, can’t wait to see the model up close!

Thanks Baron. The M3 is now on it tracks, and The tank is now 95% complete.

The DML 30.cal and tripod were painted and weathered. For the 30.cal ammo boxes the kit supplies you with a plastic rod to be used on the box hinges. These rods are very flimsy and a sewing pin was used in its place.

The copula’s interior was painted and the copula gun was added.

Most of the tanks details and components have been painted and added. These would include the Antenna, head/ tail light lenses, 30.cal MGs, Air filters, painting the fire extinguisher handles and the grease fittings red.

All that remains now are the fuel caps, and the tank’s tools. The tank will then be complete [:D] !

The tank is now finished. I will now be creating the tank’s gallery webpage. Once the webpage is complete, and the shop gets a good cleaning I will then start on my next project(s) ;).

I have added the last of the parts to the tank including the pioneer tools, and the fuel caps.

I have also added the last of the M3 parts to the product line.http://www.eastcoastarmory.com/ustankparts.htm

I have added the large suspension spanner wrench to the US AFV tool set.

The last parts that have been added are the resin Rivet heads. The heads come in two diameters the smaller 5/32nd which are used on the top deck, and the rear plate

and the larger 11/54th which are used for the tank’s sides plates.

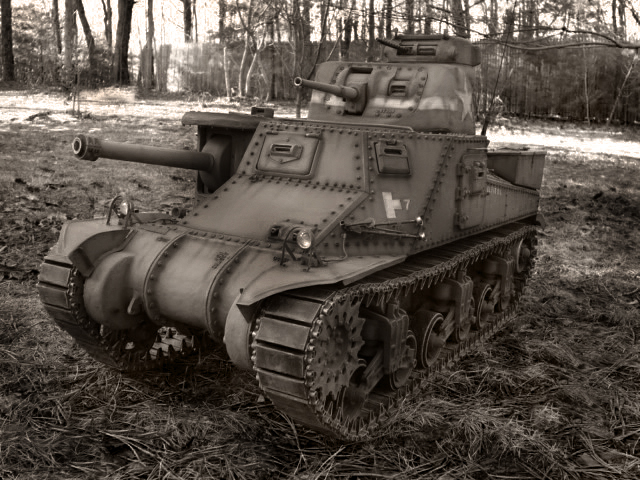
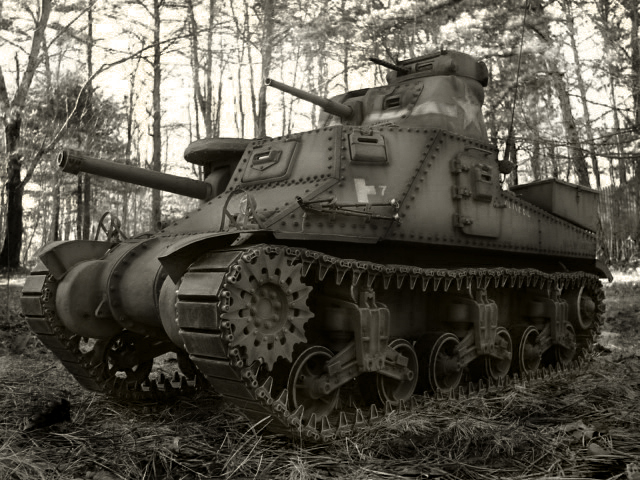
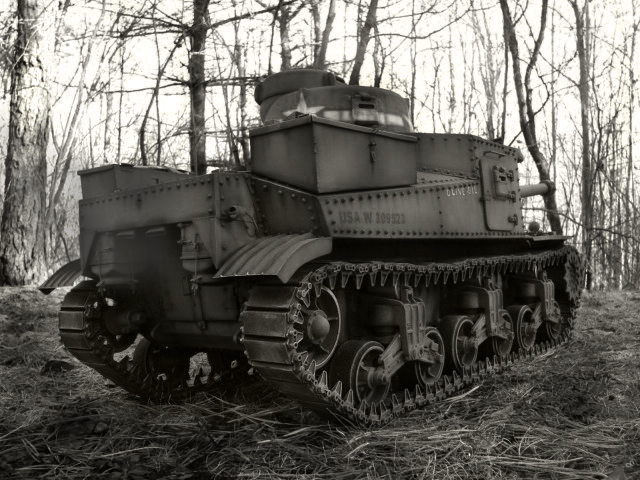
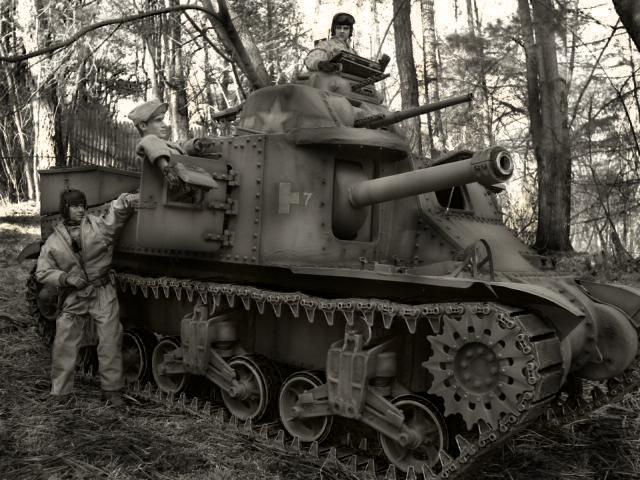
I took advantage of the good weather and I was able to get some pics of the M3 out doors.

I also made a rendition of a propaganda image that was taken in in 1940

The tank’s gallery webpage is complete. The webpage contains all of the construction and diorama pictures that were taken during the build.

http://www.eastcoastarmory.com/m3_lee/olive_oil.htm

With the M3 now out of the way I will be able to focus on my next project. I should have some progress to post on next week [;)]!

Looks good. Where do you put them things when you are finished with them. You must have really big shelves.[:D][:D]

Wow, another excellent job! Your eye for detail and your ingenuity are outstanding.