wow that thing is tiny. great job on the resin. i will waite for the plastic version to come out someday in our lifetime, are yo going to put this in a dioroma?
Hans - I may try to sprinkle a little tan on it if I can. Thanks! As far as the plug…
When I was an XO of a M102 battery, I would carry some items that you always needed, one or two spare lanyards (always got caught in the recoil track and then was be cut), spare pins for the airlift hooks (guys would laeve them undone and then when you needed them…) and muzzle plugs…battery safe and ready and the plug downrange [:O]
GA - I am going to try to replicate the picture at the start of this thread!! Thanks for your comments.
Doc - Many resin kits like Verlinden or Hobby Boss are commercial kits and usaully well made. You just have to get the knack of dealing with resin.
This kit is by a small operation out of Austrailia. Since it is the only M119 on the market, well I was stuck. He is using a more primitive casting process so some of the parts leave a little to be disered on quality.
If you are looking for a rivet counter type model build…this is not it. If you are looking for something that with some TLC, will look good and make an interesting dio, this is fine.
I would suggest you work with some resin assemby on a smaller scale before you tackle a resin kit. Especially at some of their prices. Try an add on kit or a trailer. They are cheaper and you can gain some experience.
Im Not much of a resin guy either but like you say when its the only game in town, still it looks like you have done a great job on it from here MIke looking forward to seeing more.
Working with resin is differnt than plastic. I am stuck with resin for this one (and some others in waiting). Like I said, it won’t be a rivet counter type build but if it looks good and is generally correct, it will make the overall build.
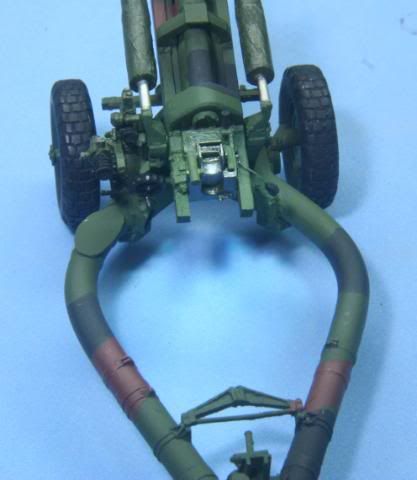
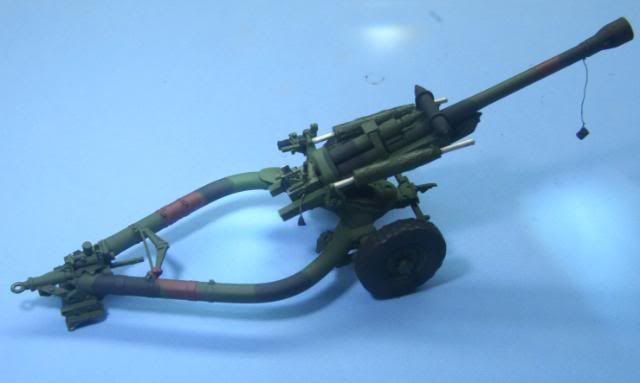
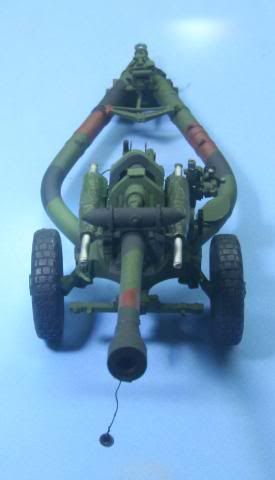
This week I completed the assembly of the sights and equilibrator, added a lanyard, then painted some NATO Brown to the camo scheme(thanks Hans). Then I finished a few touchups, and the M119 is now ready to mount the base plate and weathering. I will wait on the base plate and mount the M119 to the model base and the mount the M119 on top of the base plate. Also need to make a decal with the unit number and one for some barrel art. Here is the finished and painted assembly thus far.
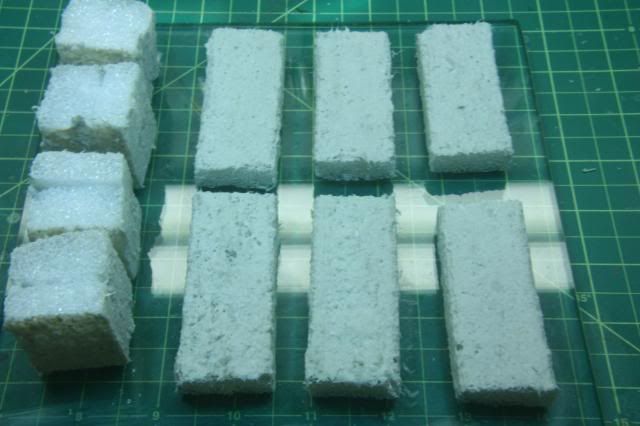
While we are waiting for paint to dry, I went into the wood shop…(next door to the bench room) and made up a base, then stained and coated the edges. I moved on to the barrier wall (see photos at the start of the thread). I am making these by cutting Styrofoam to size, then covering with Celluclay.
Once the Celluclay is dry, I will cover with tissue to give the bag look and then cover with screen. But that is still to come along with a bunch of other emplacement accessories.
That’s it for now. Thanks for looking. All comments welcome.
The M119 camo is looking good. Curious to see how the barrier wall turns out. That styrofoam looks like it has many possibilities. I’ll have to add it to my bench supplies.
Having heard this kit discussed on and off for the last few years, it is good to finally see one being put together. And you are certainly performing a fantastic job with it. Definitely one of my various annoyances is fixing sub-par resin parts.
Wow, you’ve really tamed this beast…from what I saw earlier in your thread you have done a great job with a mediocre resin kit…very nice…what does the texturizing on the green recoil housings represent?