What really bums me out the most about the Abrams is that General Dynamics has had a design which incorporated several features that improved the weakpoints on the Abrams since 2002, but Congress refuses to fork over the extra money to pay for it.
It could be meant as a memorial to all the armor lost in OIF and other places
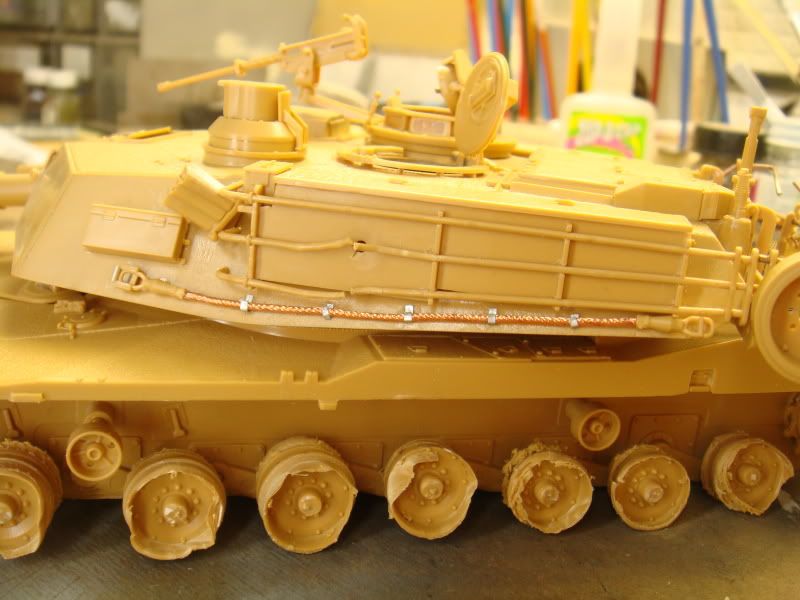
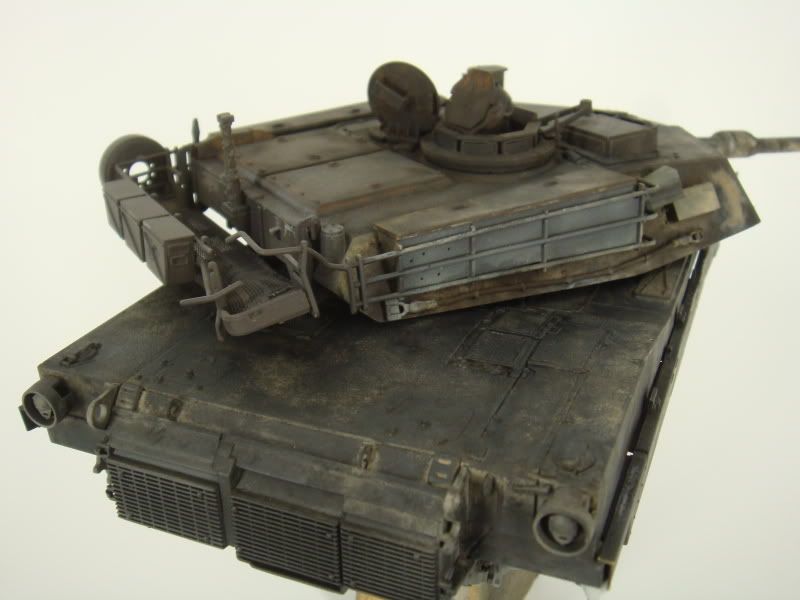
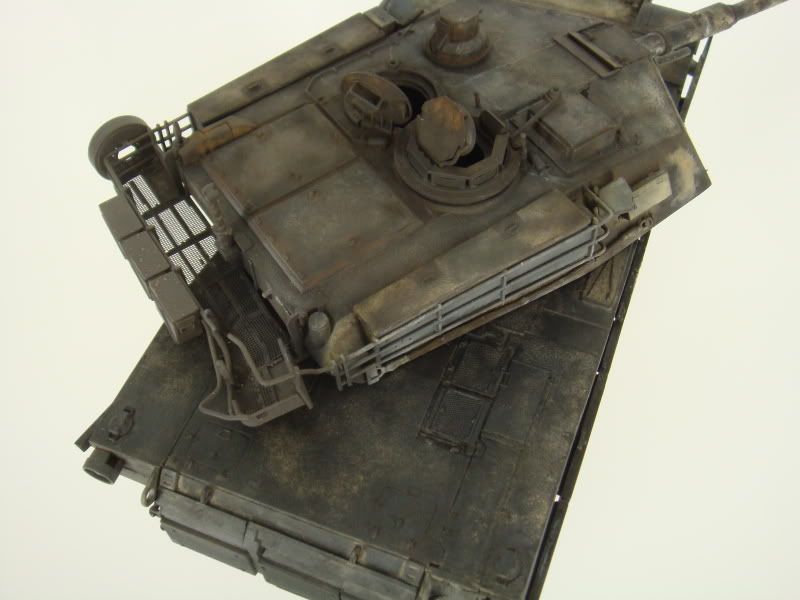
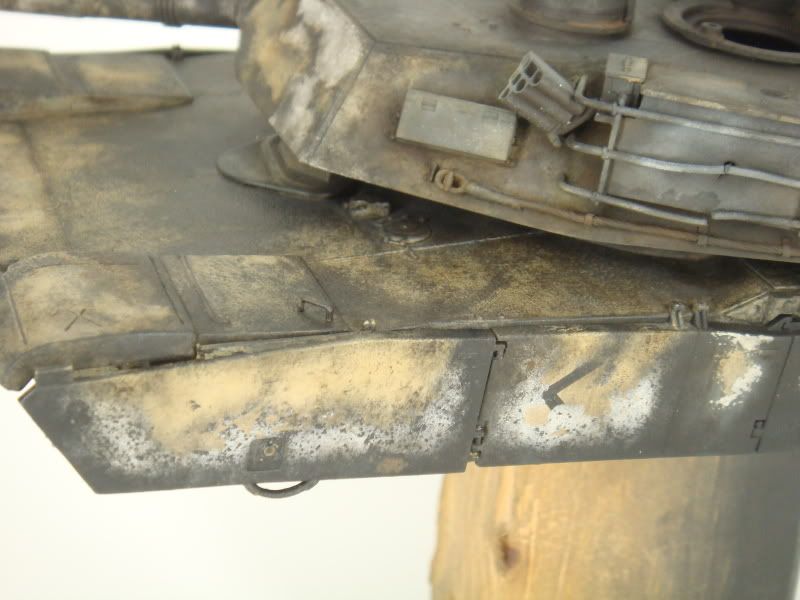
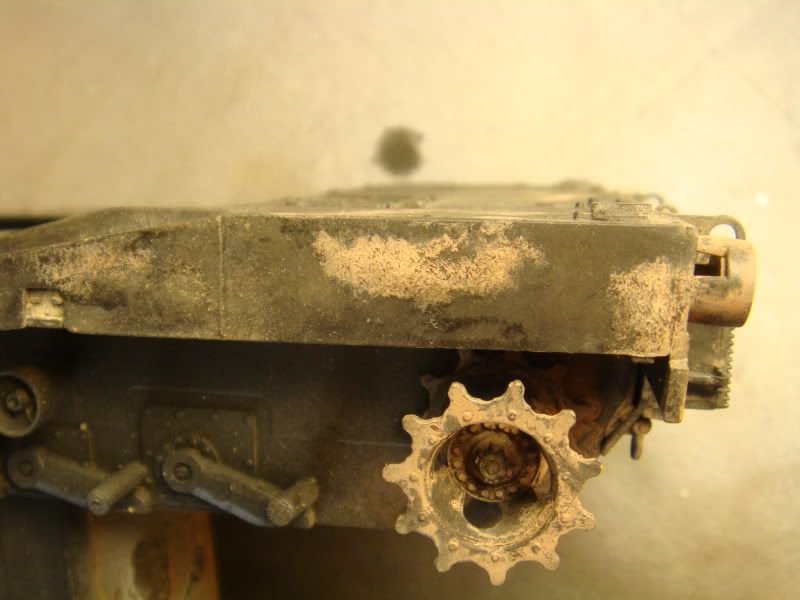
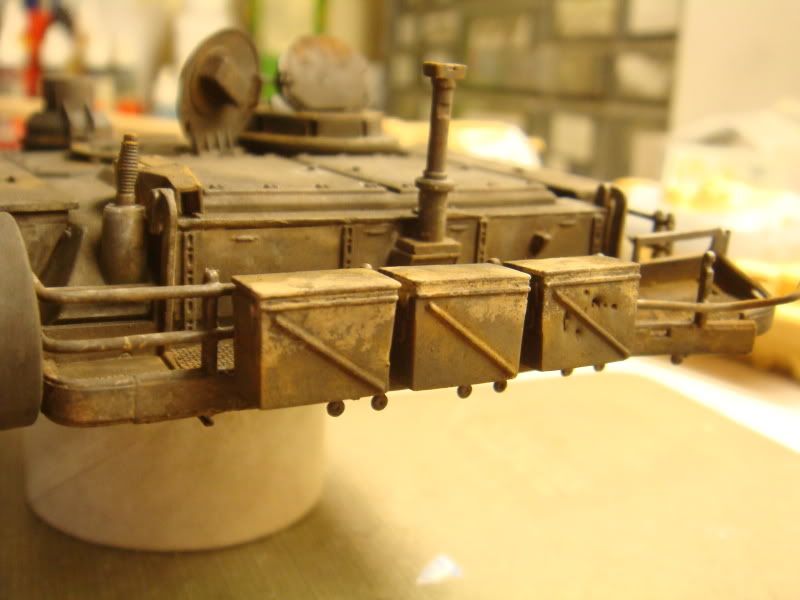
Hi guys and thanks for all the feedback. I haven’t done much to the model, been busy doing yard work and home maint. I had to repllace some of the kit parts that were crap and ended up breaking on me. The two upper bars on the rear of the bustle rack were made from copper wire and i added some battle damage to that area. The next thing that I replaced were the tow cables which were taken from the spares box, I think they belonged to a KV from Trump.
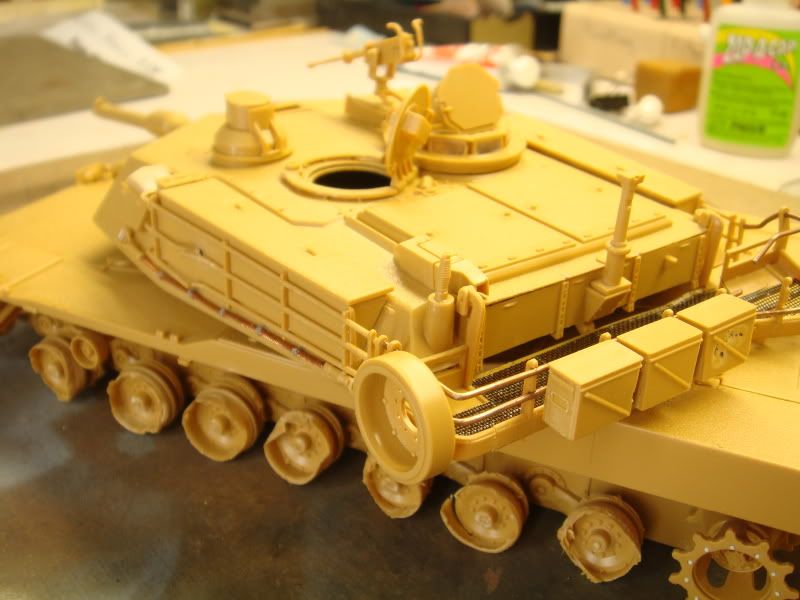
Well here is what it looks like at the moment.
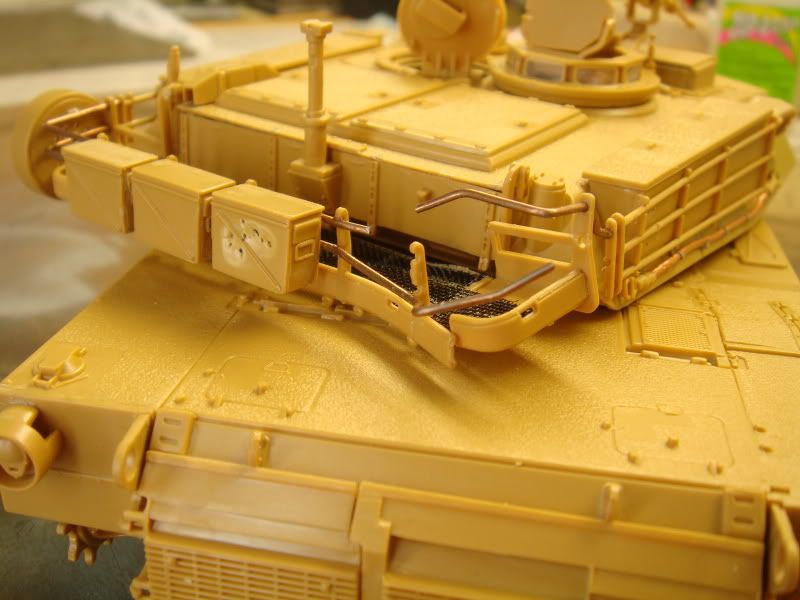
I start painting the turret this weekend maybe. I still have to grind off the track pads from the track links[:(]. Stay tuned for more.
Rob
PS Did some one say teacher!!! Come on Steve, Ive seen your models, you don’t need a teacher dude.
actually a lot of the upgrades were phased in during production, but there are someothers that have yet to be implemented
gary
1:28 - 2:09 on this YouTube video of mine: http://www.youtube.com/watch?v=vWA-ZJY1GRM&feature=related
There you see what mastermodeler Per Olav Lund did on his Abrams. Hope it helps, which it should hopefully do!! =)
Your tank looks very good so far… For what it is intended to. Be sure to take away any rubber on tracks and that sparewheel aswell!! [;)]
hey scratchmod…normally im not this picky…but ya got the tow cabels on backwards!! need to turn them around. but otherwise…looking good! [tup]
Hi guys
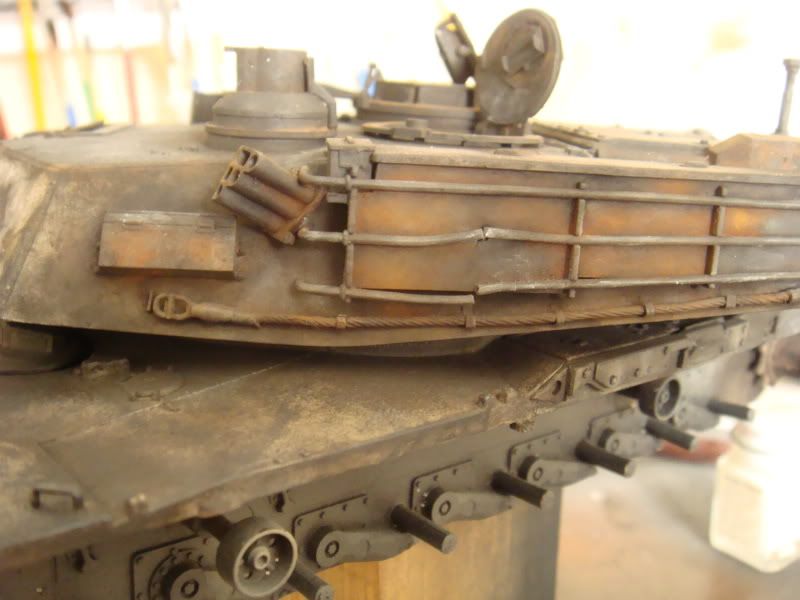
Just popped in to update my progress. I did turn the tow cables around, thanks for the tip camo junkie.
Here are some pics of what it looks like right now.
I’ll try to keep you guys up dated as this build progresses.
Rob
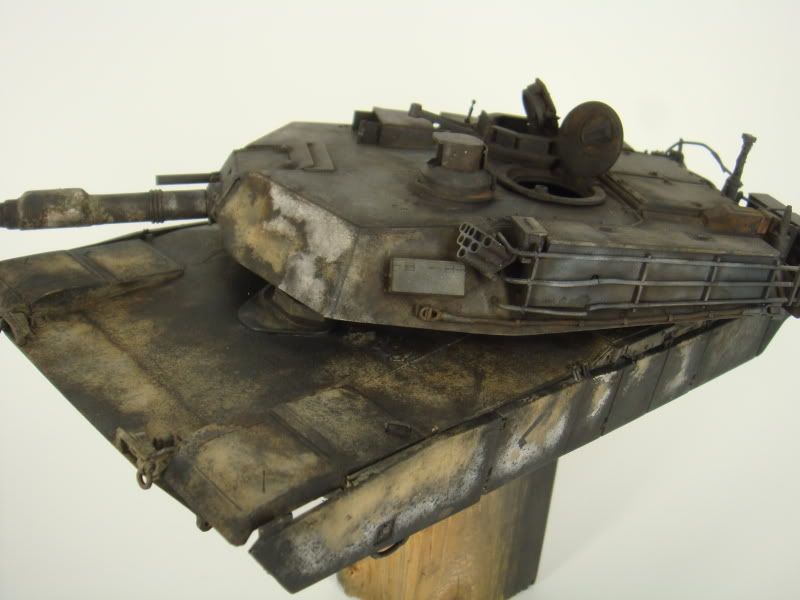
Rob this is really moving along. The burnt and discolored effect of the paint and bare metal is spot on. Can you give us some feed back on your technique?
Thanks, Steve.
Can you provide some insight as to the burned paint technique? It looks, in places, exactly what I’m trying to acheive on German exhausts with burned paint, rather than the typical rust & pastel work I’ve done in the past…
WOW, Rob I could feel the hairs on my arm being scorched looking at your effects. Just beautiful.
Terry.
Hi guys and nice to hear your interested. Here is a link to another blog that is more in detail on how I painted the model.http://www.armorama.com/modules.php?op=modload&name=SquawkBox&file=index&req=viewtopic&topic_id=137763&page=3
I kinda deleted the pics of the painting process, hope the link will help. It’s all new to me and I’m just playing around trying new things.
Rob
Thanks for the tip…
[#ditto] as much as i dont like seeing this tank (is this fashion), your doing a really great job and a short tut. or something would be fantastic!! (paint wise). [:)]
Rob, that’s just so good it’s inspirational. YOu are definitely the master of these type of effects.
I’m blown away!
…Really nice effects…liking your burnt offering so far…
Hi guys and sorry for not being very active here. I pop in once in a while and read what you guys are up to, guess I should speak up more often instead of being in the back round.
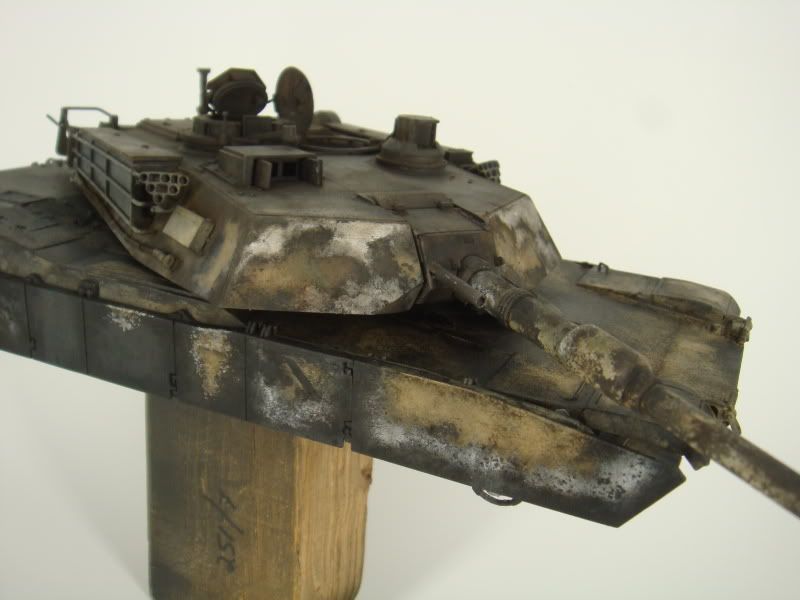
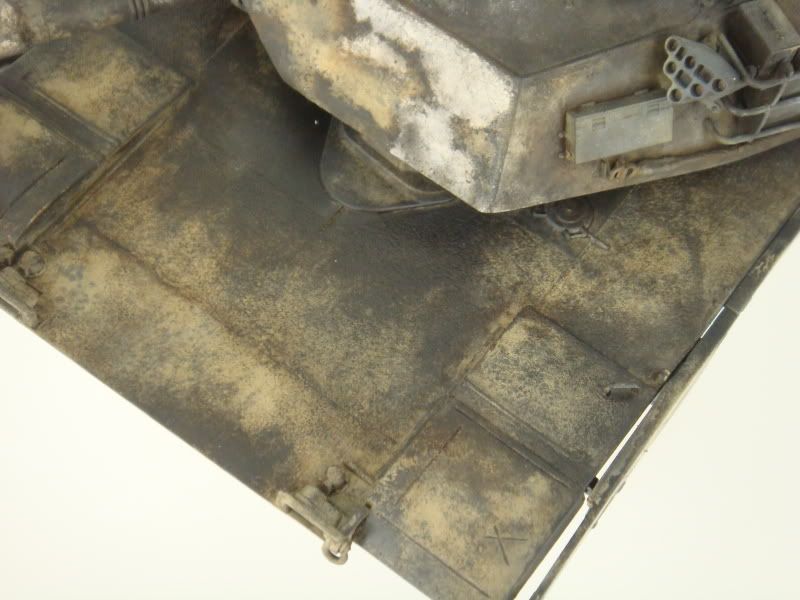
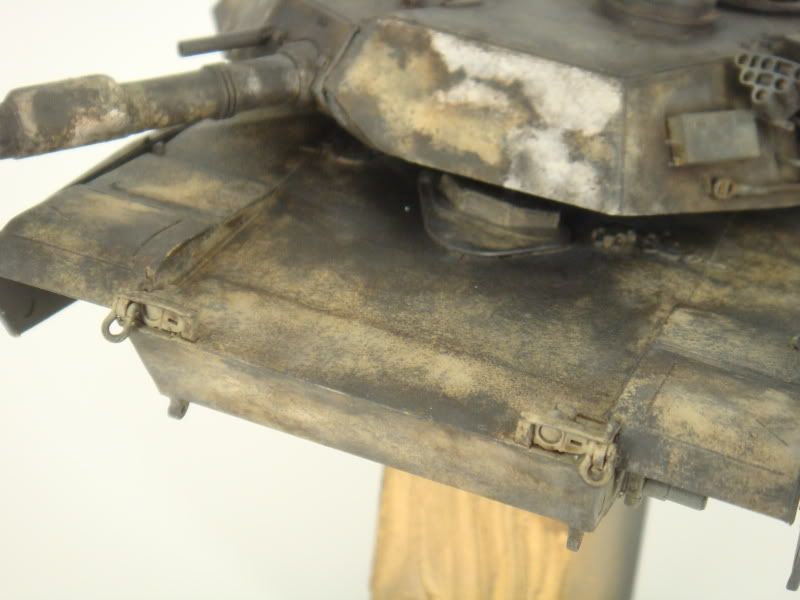
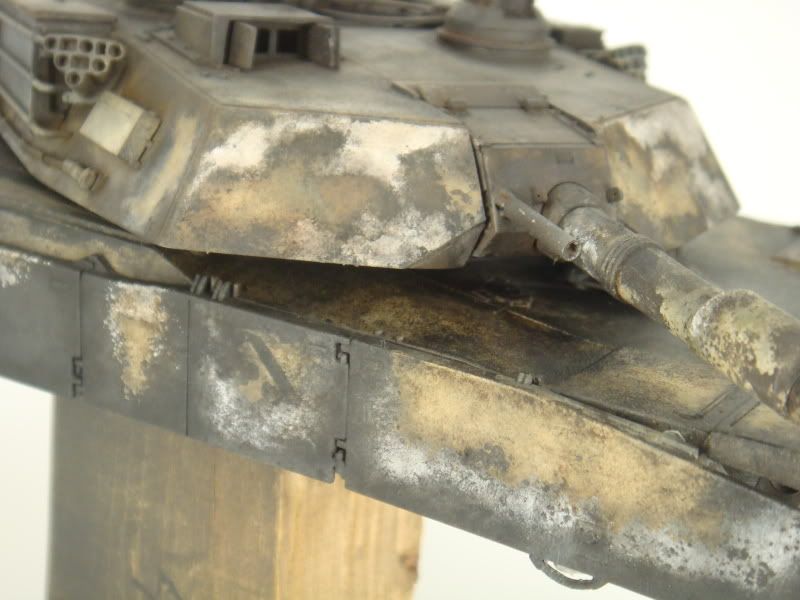
Well I did some more work to the model. I added a bit more color to the rear of the tank and started on some rust too. Here is how she’s looking so far.
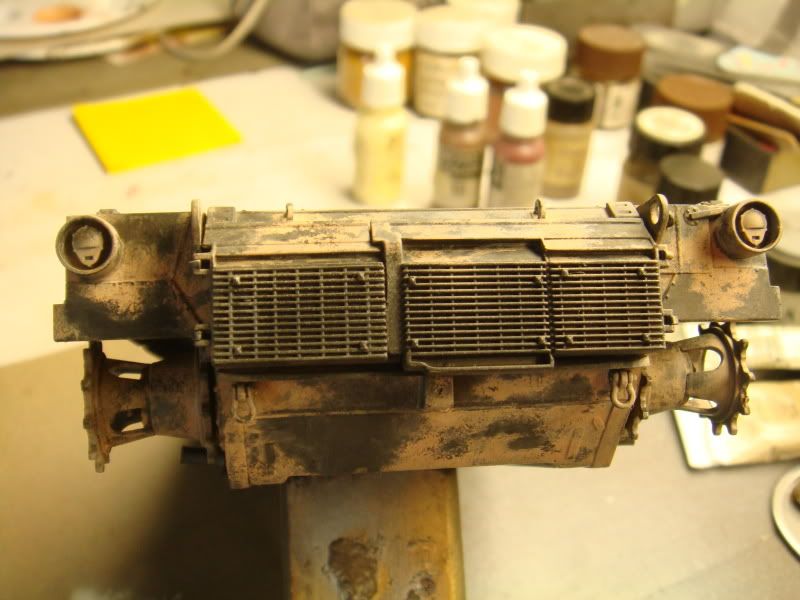
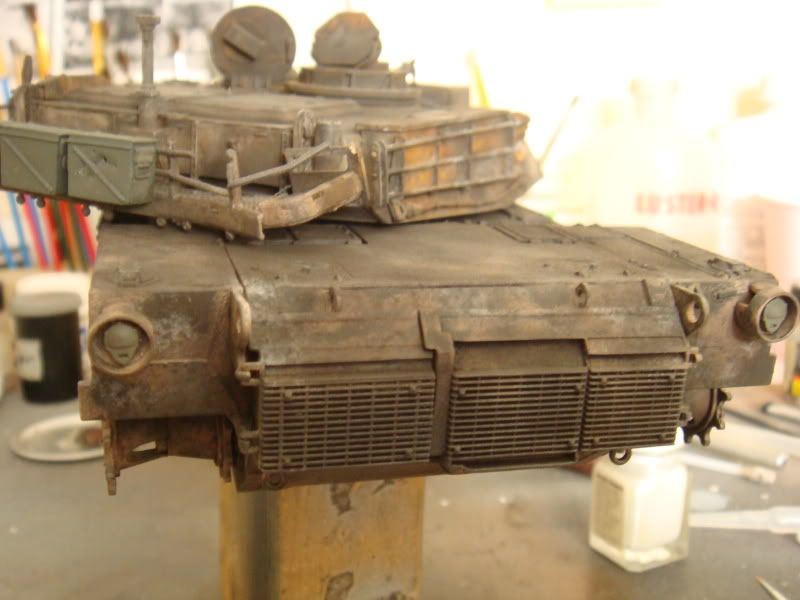
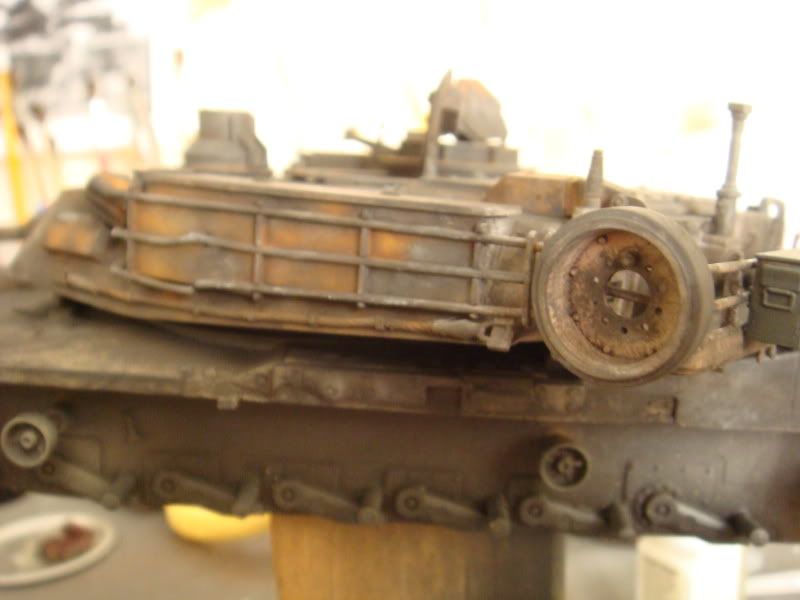
I also cleaned and glued the tracks, when they are dry I’ll start painting them. In the mean time I started my T55’s which I’ll post some time.
Rob
Rob - this looks great! Will check out your Armorama link for some hopeful guidance in how you pulled this off. Nice.
Now that is some skill with paint it’s very convincing effect this will be one to watch to see the final complete build.
Missed the last round of updates but glad I caught this one Rob…the burnt-out/oxidized effects are looking great. [tup] Going to be another fine wreck to add to your shelf.
Guys thanks for the motivation, I was starting to get bored with this build and spent the last two days working on T55’s instead. I’ll have to put those away until the M1 is done.
@ Bill…I doubt that I will keep this one, It’s only a practice model. The next M1 that I do will be from a Dragon kit with a lot more oxidation, I have a couple of ref. pics of such a tank.
I have to get a base or picture frame for this model, then start the ground work before I can go to town on the tracks and roadwheels. I’ll try to post up dates as she moves along.
Rob