Finished her up this morning. Will be posting pics today!!
Congrats Joe!, Cant wait to see!
Doug
Tease [;)]
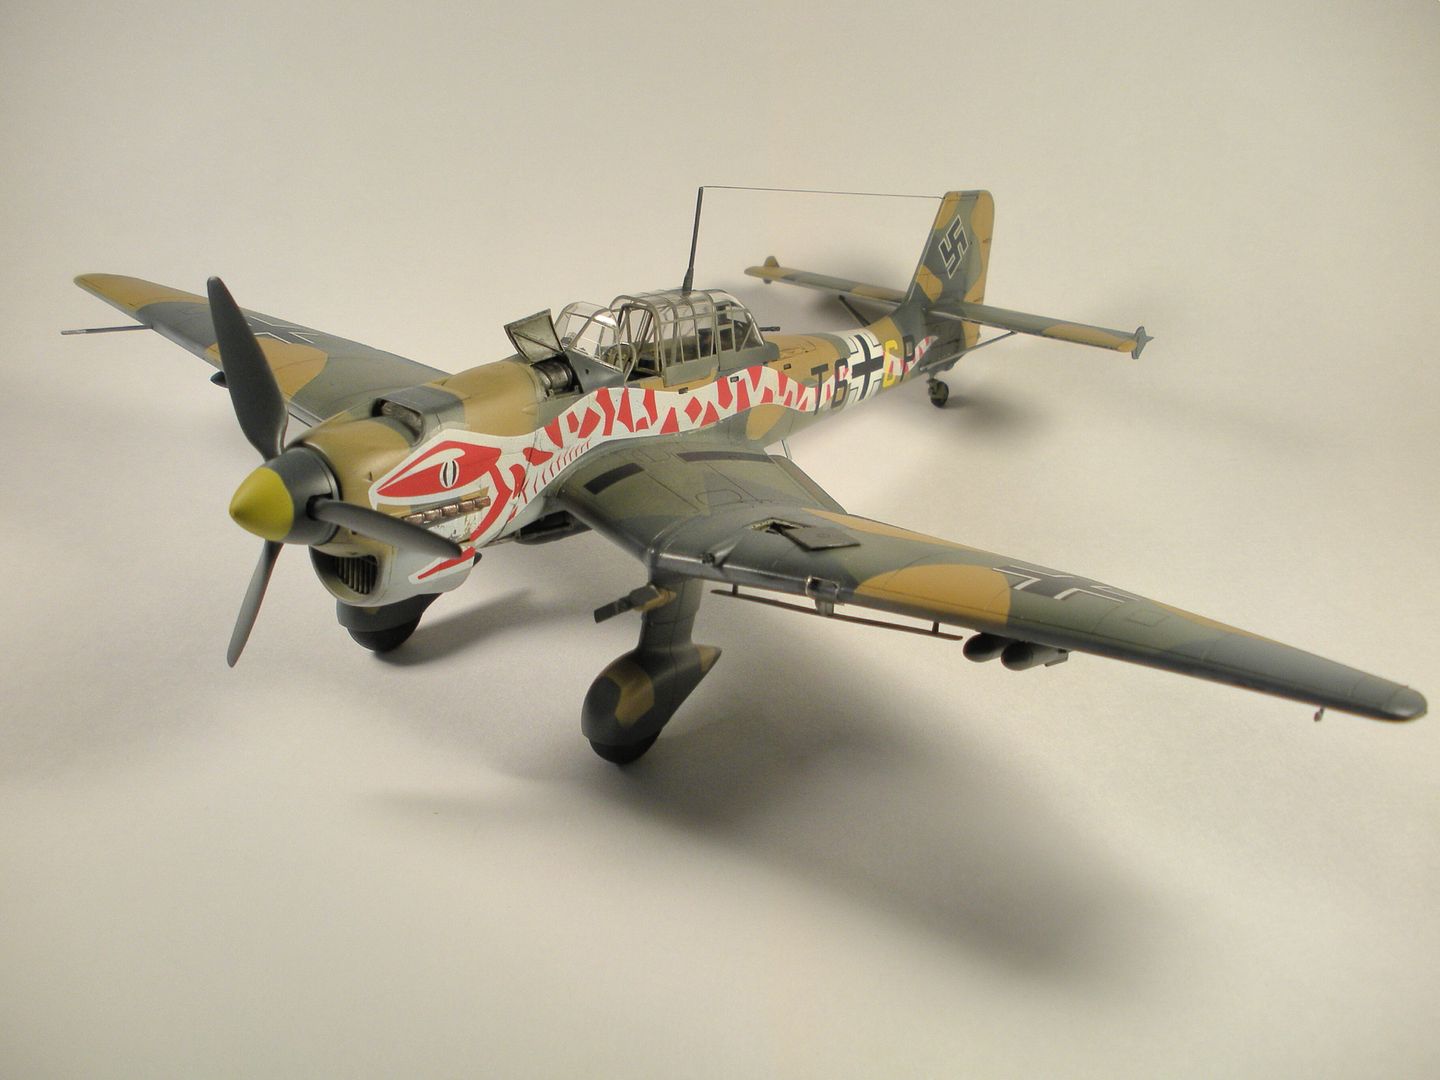
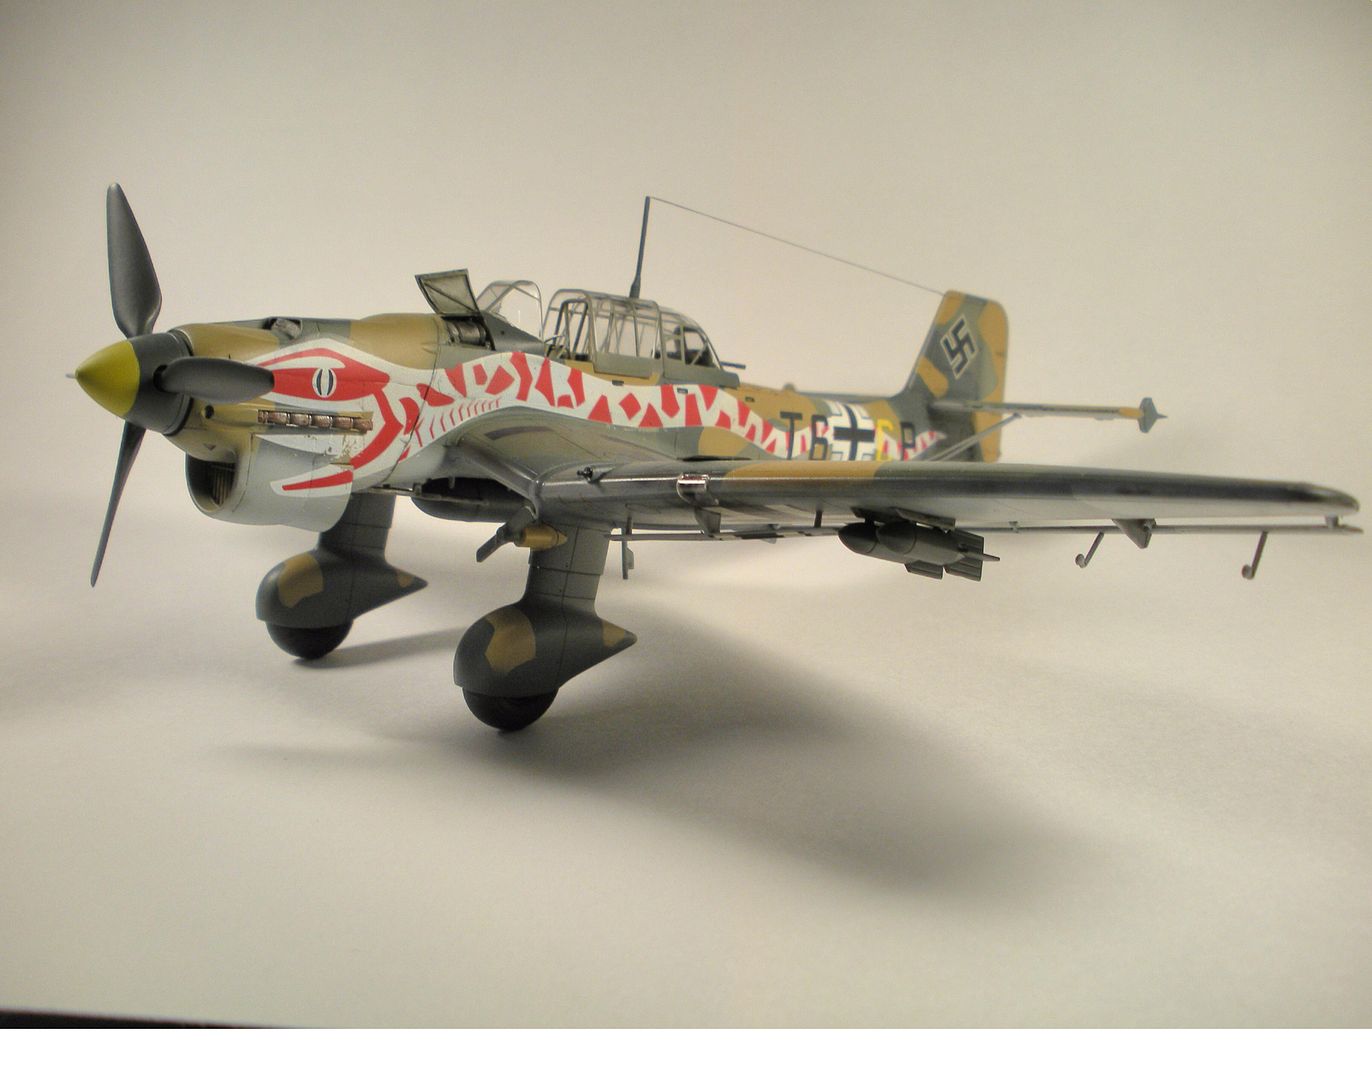
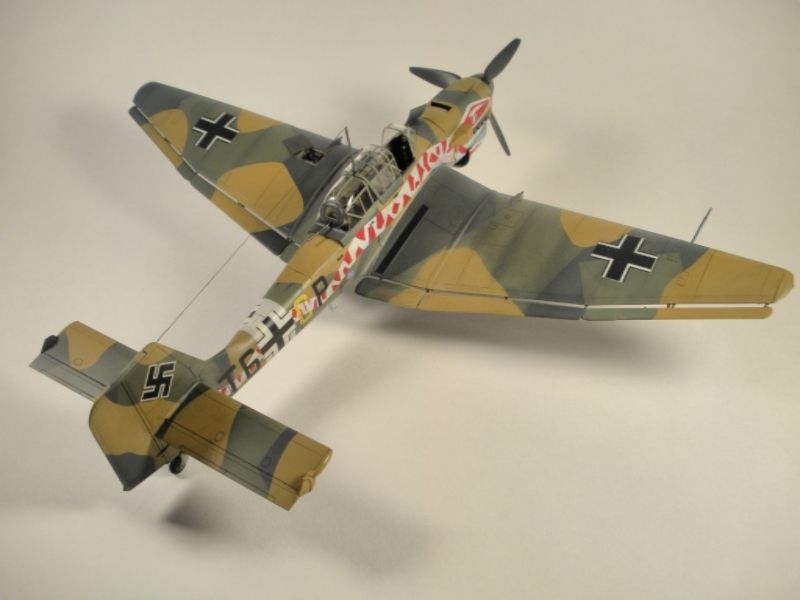
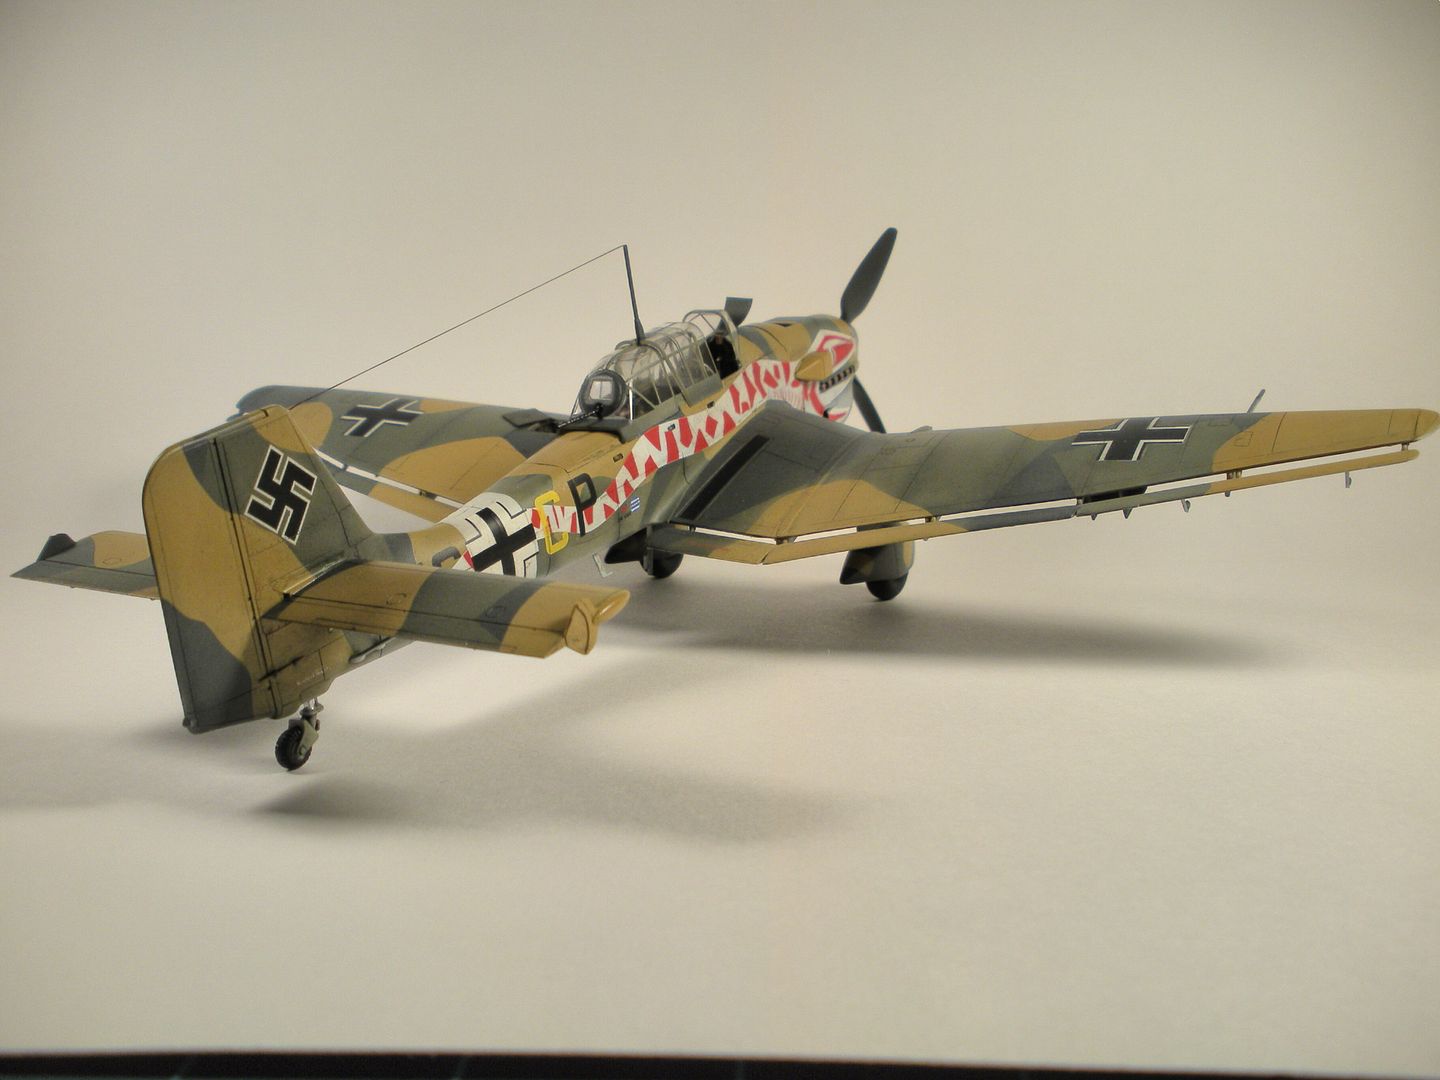
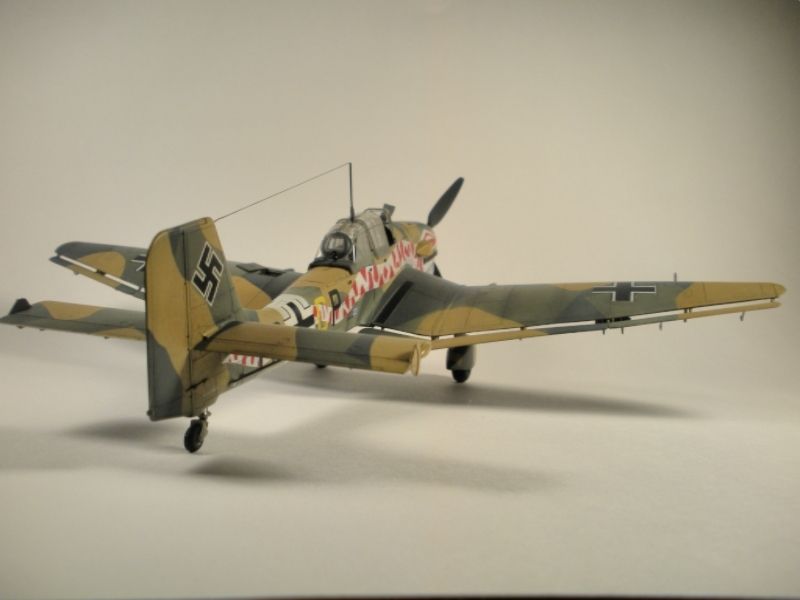
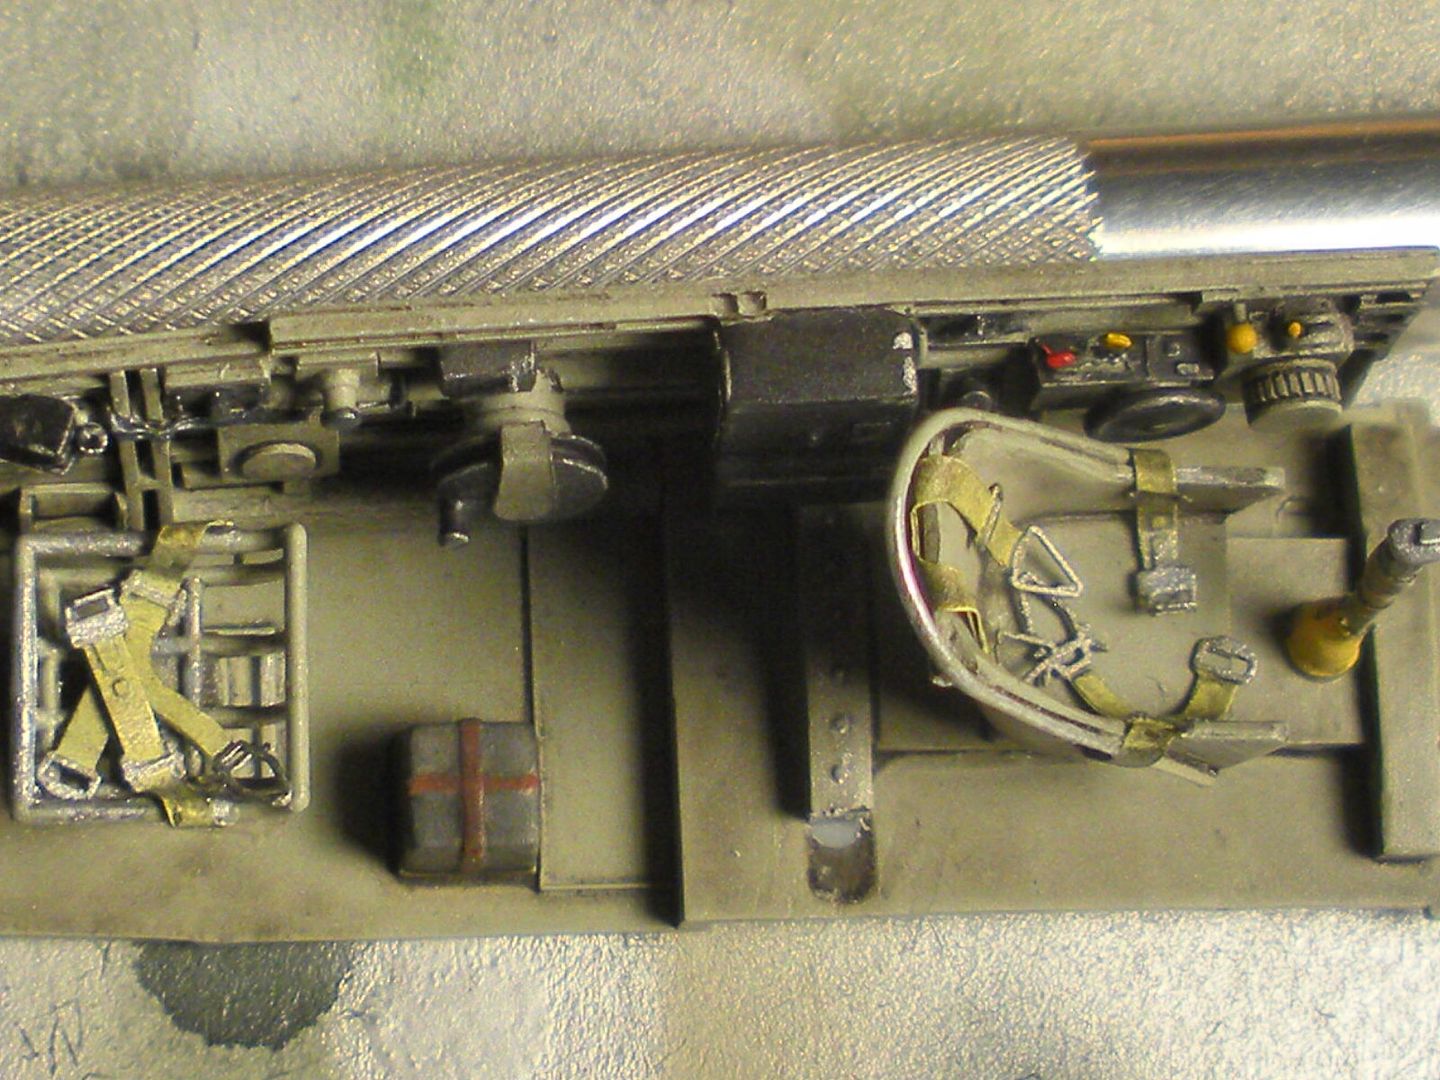
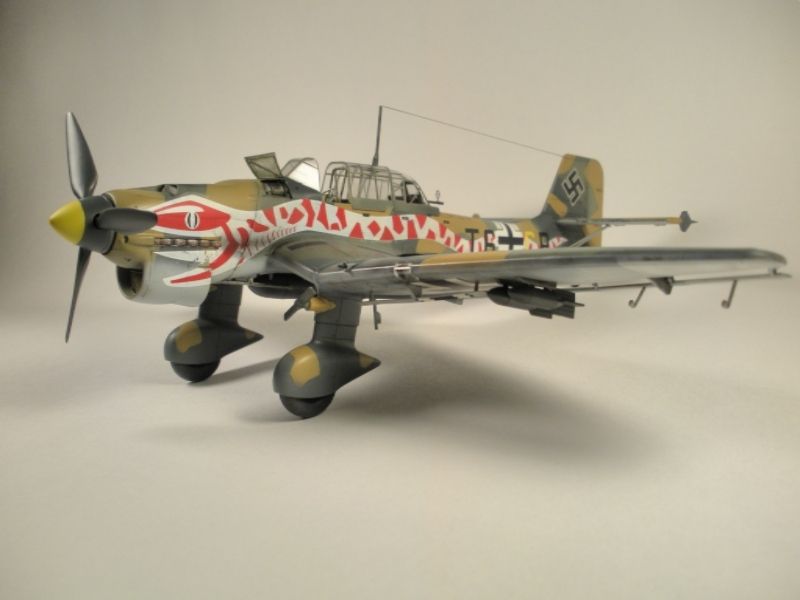
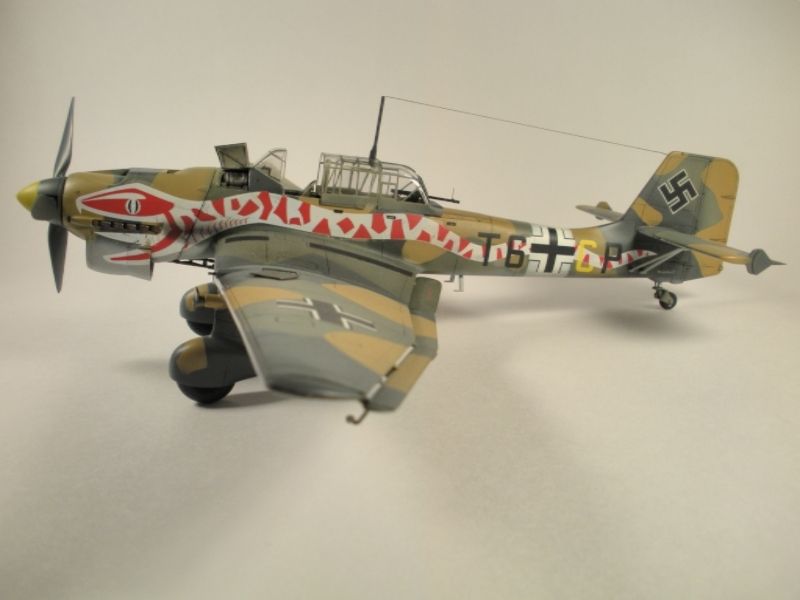
Ok ok ok! After 7 or so months I’m going to call this puppy done. To recap, it’s a 1/48 Hasegawa kit with an Aires cockpit update set (with modified Hasegawa flooring to fit right) , Eduard canopy mask set and Tally Ho decals. I had mixed feelings about the decals as they laid down great but to me they seemed slightly out of scale. The oil reservoir access opening and the wing mounted machine gun are out of the Verlinden update set I had tucked away and had forgotten about until I started building here. I want to thank Bish for hosting such a great GB on one of historys most well known aircraft. Way ta go brutha! [Y]
I also want to thank all those who encouraged me along the way in this build. Thanks for everything guys.

As always… Excellent job Joe! Bravo…
Doug
7 months, its not been that bloody long. Though it might feel like it. [:D]. But it was defiantly worth the wait. That is one nice looking Stuka. The snake does look really nice and some great details as well. Awsome job all round.
Only one problem. Now I know what I have to live up to for the 109 GB. Thanks[:'(] [:D]
That is really nice, Joe. The camo job looks simple at a casual glance, but really looking I can see it is rather complex. Nice work!
What do you use on your panel lines? I really like them. Not overdone, but definitely there and much more uniform than mine seem to turn out.
I wish I’d have been amongst the land of the living to watch this one in it’s earlier stages. Ah, well…
Great work Joe, it’s nice to see it finished. I agree with Bish, the snake looks fantastic. Thanks again for those cockpit peices
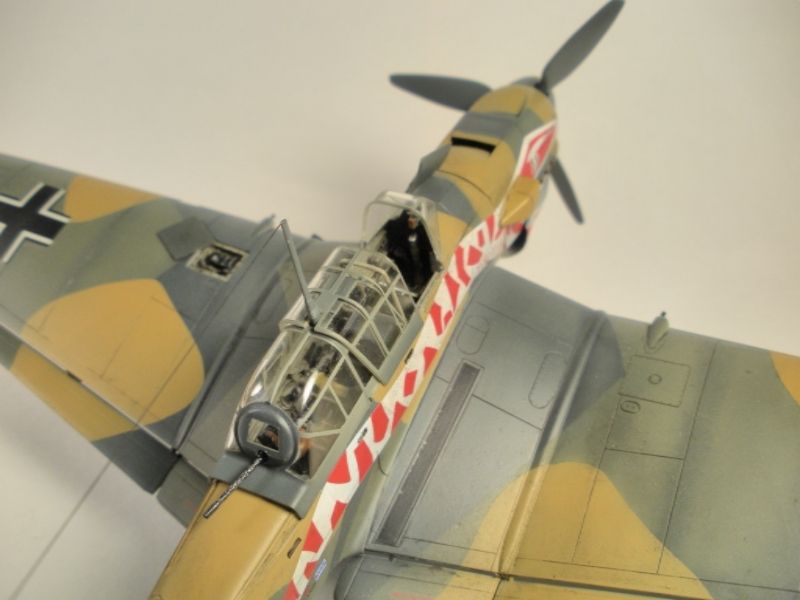
Thanks alot guys. I got a case of bonehead disease and forgot the exhaust soot staining. Guess I’ll be applying that tomorrow morning in addition to the rear machine gun sights. I’ll update the pics as well.
Bish: I’m looking forward to having you in that GB coming up. Thanks for the encouragment pal.
**Doug:**Thanks bubba! Where’s the next build? lol
**Greg:**Thanks for contributing to this build with the extra “goodies”. As far as panel lines goes: I pre-shade, apply really light coats of paint and use MIG productions washes since I paint with acrylics.
**Jim:**Thanks for your comments as well and you are more than welcome for the help bud…anytime.
She’s real beauty! [:D[ Always loved that snake scheme, wish I can find a set in 1/24th. BTW what colors did use you particularly the yellow?
Thanks Scott. Colors are 70, 71 for the initial camo and (I goofed on this one but left it the way it was. It was just too late to turn back) 65 on the bottom. The tan is 79 and the yellow on the spinner is 04. That would be totally cool to find a snake scheme in 24th!!!
Thanks for the info on your fantastic panel lines, Joe. Been meaning to try Mig washes one of these days.
Don’t mean to interrupt Joe’s walk down the runway (that ended up being a pun, didn’t it?), however …
Proof of start and a question:
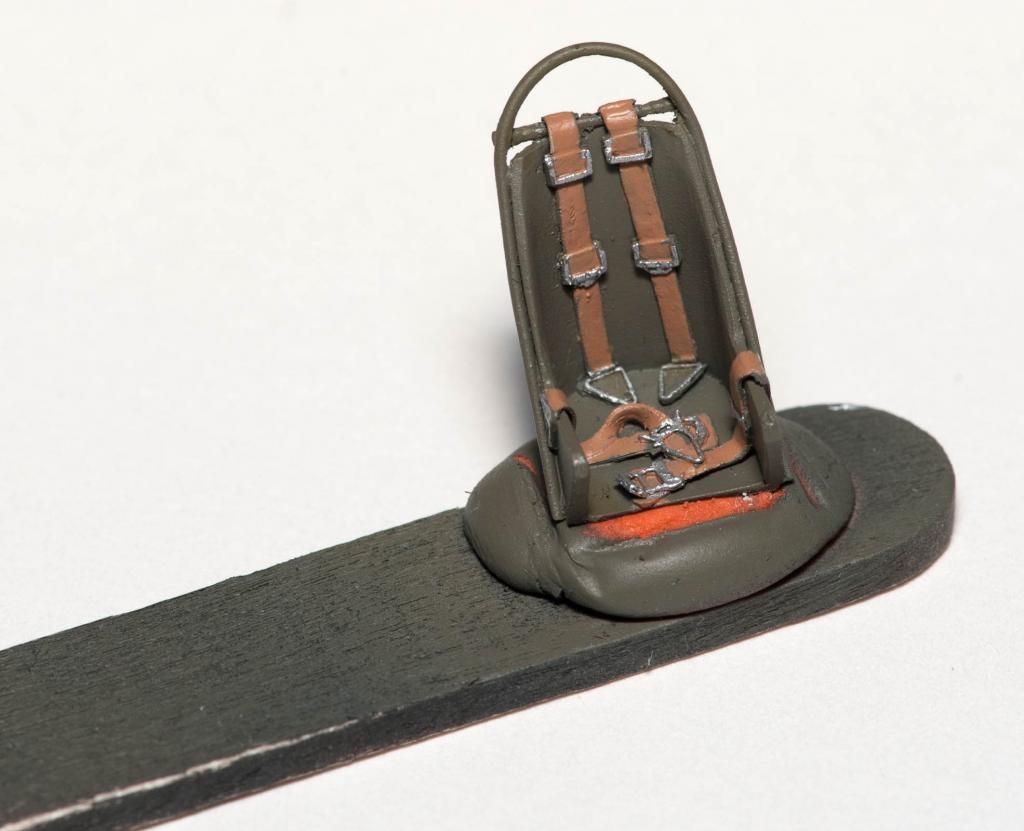
Are Stuka seat belts supposed to be green? I spent most of the week doing this resin seat, (which as it turns out is for the Hasegawa kit, not my Zvezda and I hope it is ok) and I really don’t want to change the color but I reckon I will if this is just wrong.I ask cuz the Svezda cartoon calls out flat green, and I think I saw a green belt or two earlier on in this GB??
In any case, my belts look too dark to me (using the various luftwaffe a/c I’ve seen here. And they looked so good last night. Sigh.
Input?
At the rate I’m going, might have this Stuka done by Christmas. Of 2015 that is.
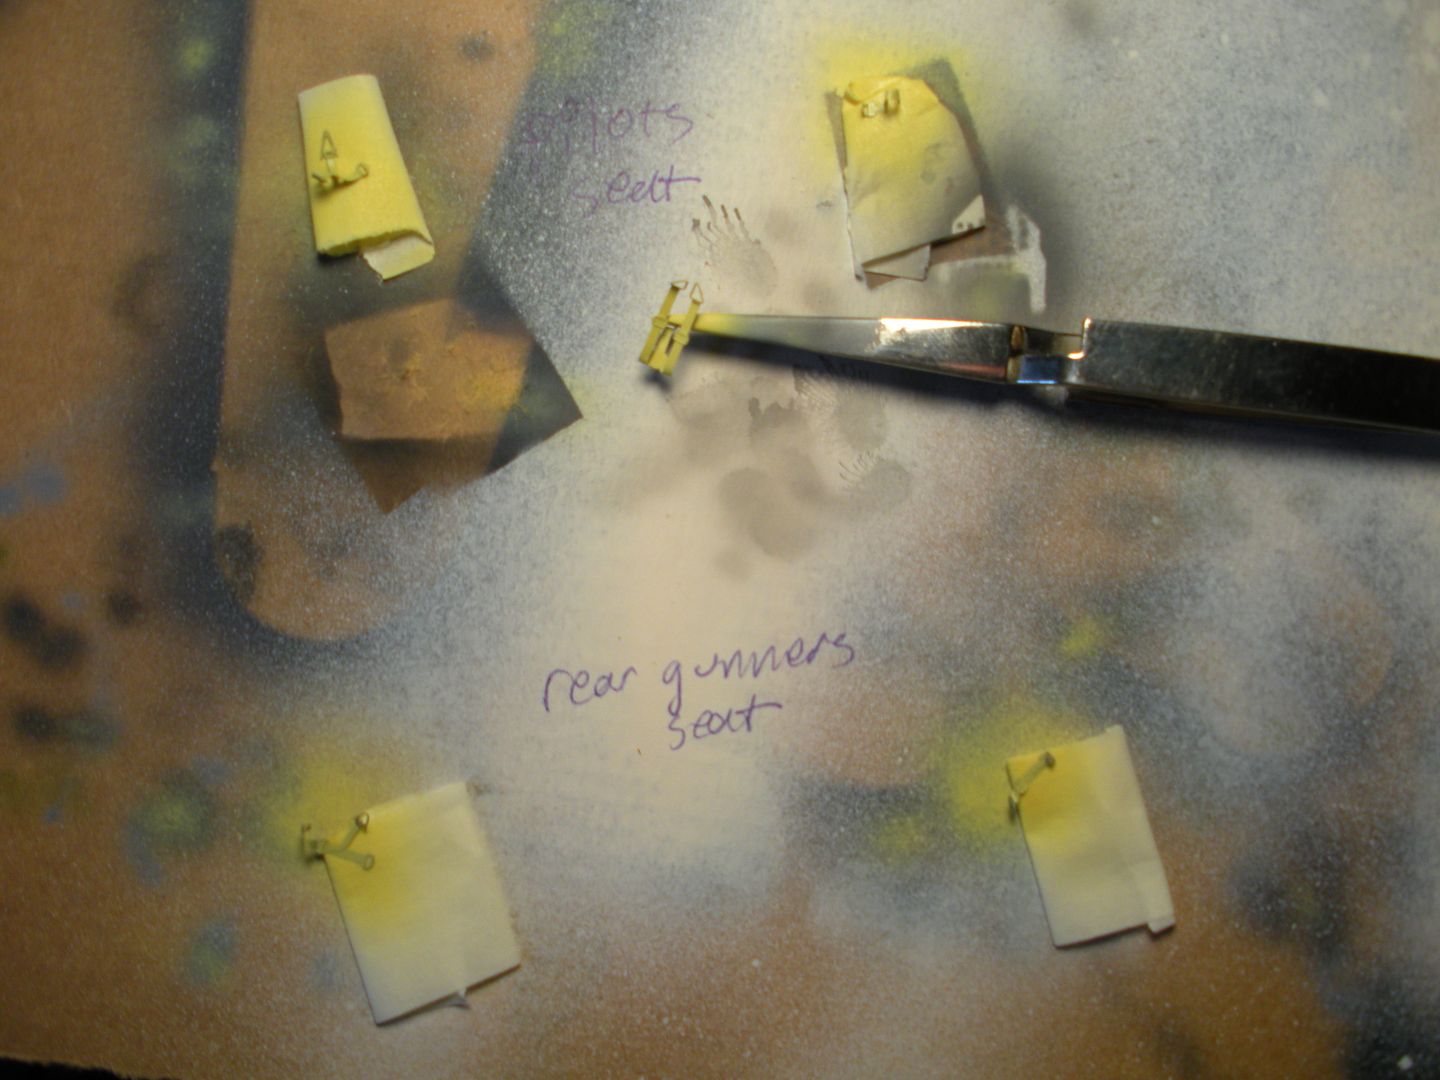
PS, are resin seats avail for 1/72nd? If so, how do you guys paint those things???
Greg German seat belts are normally a light tan colour, not sure where they got green from. If you look at shooters RB belts, that’s the usual colour. As far as the resin set, you should be ok fiting that one in there. Most are designed for specific kits, but can be fitted in others, it might just need a bit of extra trimming and plenty of test fitting.
And yes, they do come in 72nd. Sometimes thee seat belts are moulded on, in others, such as Aires, they come as separate PE parts. As for painting, a steady hand and fine paintbrush. I paint the PE ones on the fret, I find that much easier.
I’m with Bish on the fact that I don’t know why your instructions called out green for the seat belts. I can’t find any research to support that. I usually go with Humbrol “linen” color (which produces a light beige color he was talking about) airbrushed on after forming the seatbelts the way I want em.
Then I apply a really light brown wash *and I have to make sure the linen color is cured out really good because it is enamel based and the wash has to be a light one for this to work) to the belts to break up the monotony of the single color, then paint the buckles an aluminum color and finally grate some black or brown pastel across somoe really rough grit sandpaper to get a powder out of it and dry brush it onto the belts with a worn out paint brush to give them that “dirty” look. It’s been workin’ for me so far.[:D]
Now we’re legitimately finished with the exhaust soot and rear gun sight. Yesterday was a nasty combination of my camera, this site and PB giving me fits and I just threw the pics on there. I felt like this build deserved more than that so I did another photo shoot session and re posted here.
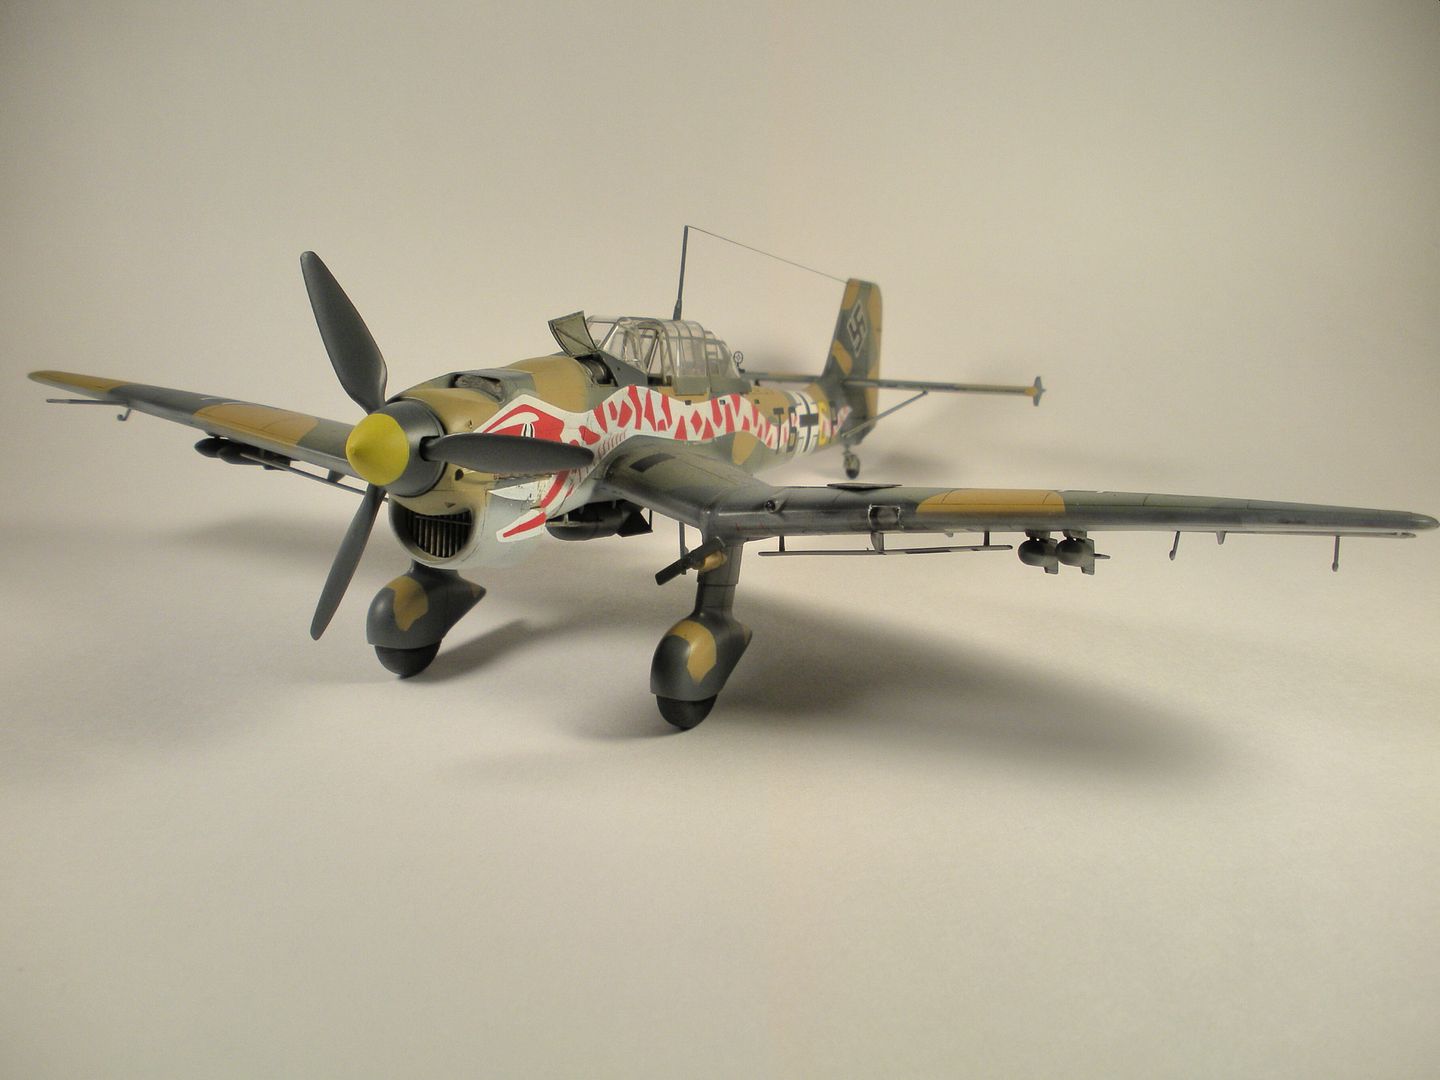
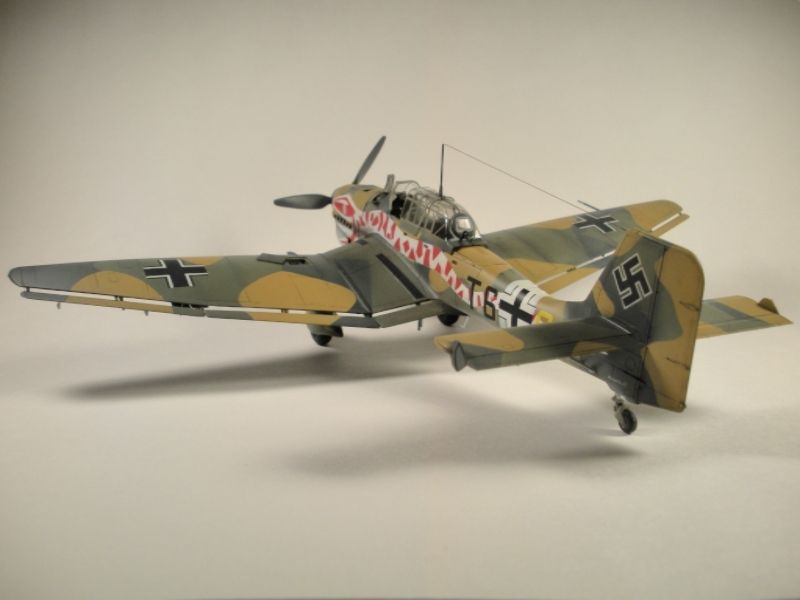
You know that’s something that I forgot to post on the first pic posting. The snake motif decals where too short just in front of the cross on the sides so I had to splice in a section of the aging snake decals I had and pray that it worked. I was surprised that it came out ok.[:|]

Bish, thank for the info re the belts. Knowing what Luftwaffe belt colors are, basically, I don’t know why I let a bad color call out on instruction sheet throw me for a loop. Nor do I know why I chose the color I painted. Re-do time, I reckon.
BTW, all I can say on the 1/72nd resin and PE is Oh My Goodness.
Joe, thanks for the refresher on how you do your belts. I will probably attempt your method.
Those two finishing touches add a lot. I’m surprised how that rear-gunner sight stands out. A really neat finishing touch!
Joe, that really pops! Very nice, clean build and great work on the canopy.
Thanks Greg and Reasoned! I’ll tell you, this build certainly took long enough for me but I’m happy with the results. I’ve been wanting to build a Stuka , particularly this scheme, now for 18 years now. Oh well, better late than never. lol
Belts look great Greg. Very nice job…
Joe, as alwaws a beautiful finish by you!
Doug
Joe, AWESOME finish, man! the bird looks good enough to eat! I’m blown away by the result – I confess in the early stages I couldn’t quite visualise how she was going to look, but this is stupendous! the snake looks painted on! VERY impressed!
You finish inspires me to grab my own kit and kick that cockpit along!
Cheers, Mike/TB379