Really liking all the little details Joe. Once you finish this you need to get back to “The Demon II”…I have been jonesing for that build to return LOL.
Thanks Gamera and Hunter.
BTW…Hunter…I just bumped the “Demon II” back up to the top. It’ll be next.
Joe, god to se you back at this, very nice work on those. Are those AM.
Thanks Martin and yes sir they are AM. You can get them at Scale Auto Equipment.
The website: http://www.seltd.net/products.html
Too cool. Way too cool. They look great Joe.
Thanks Joe!!
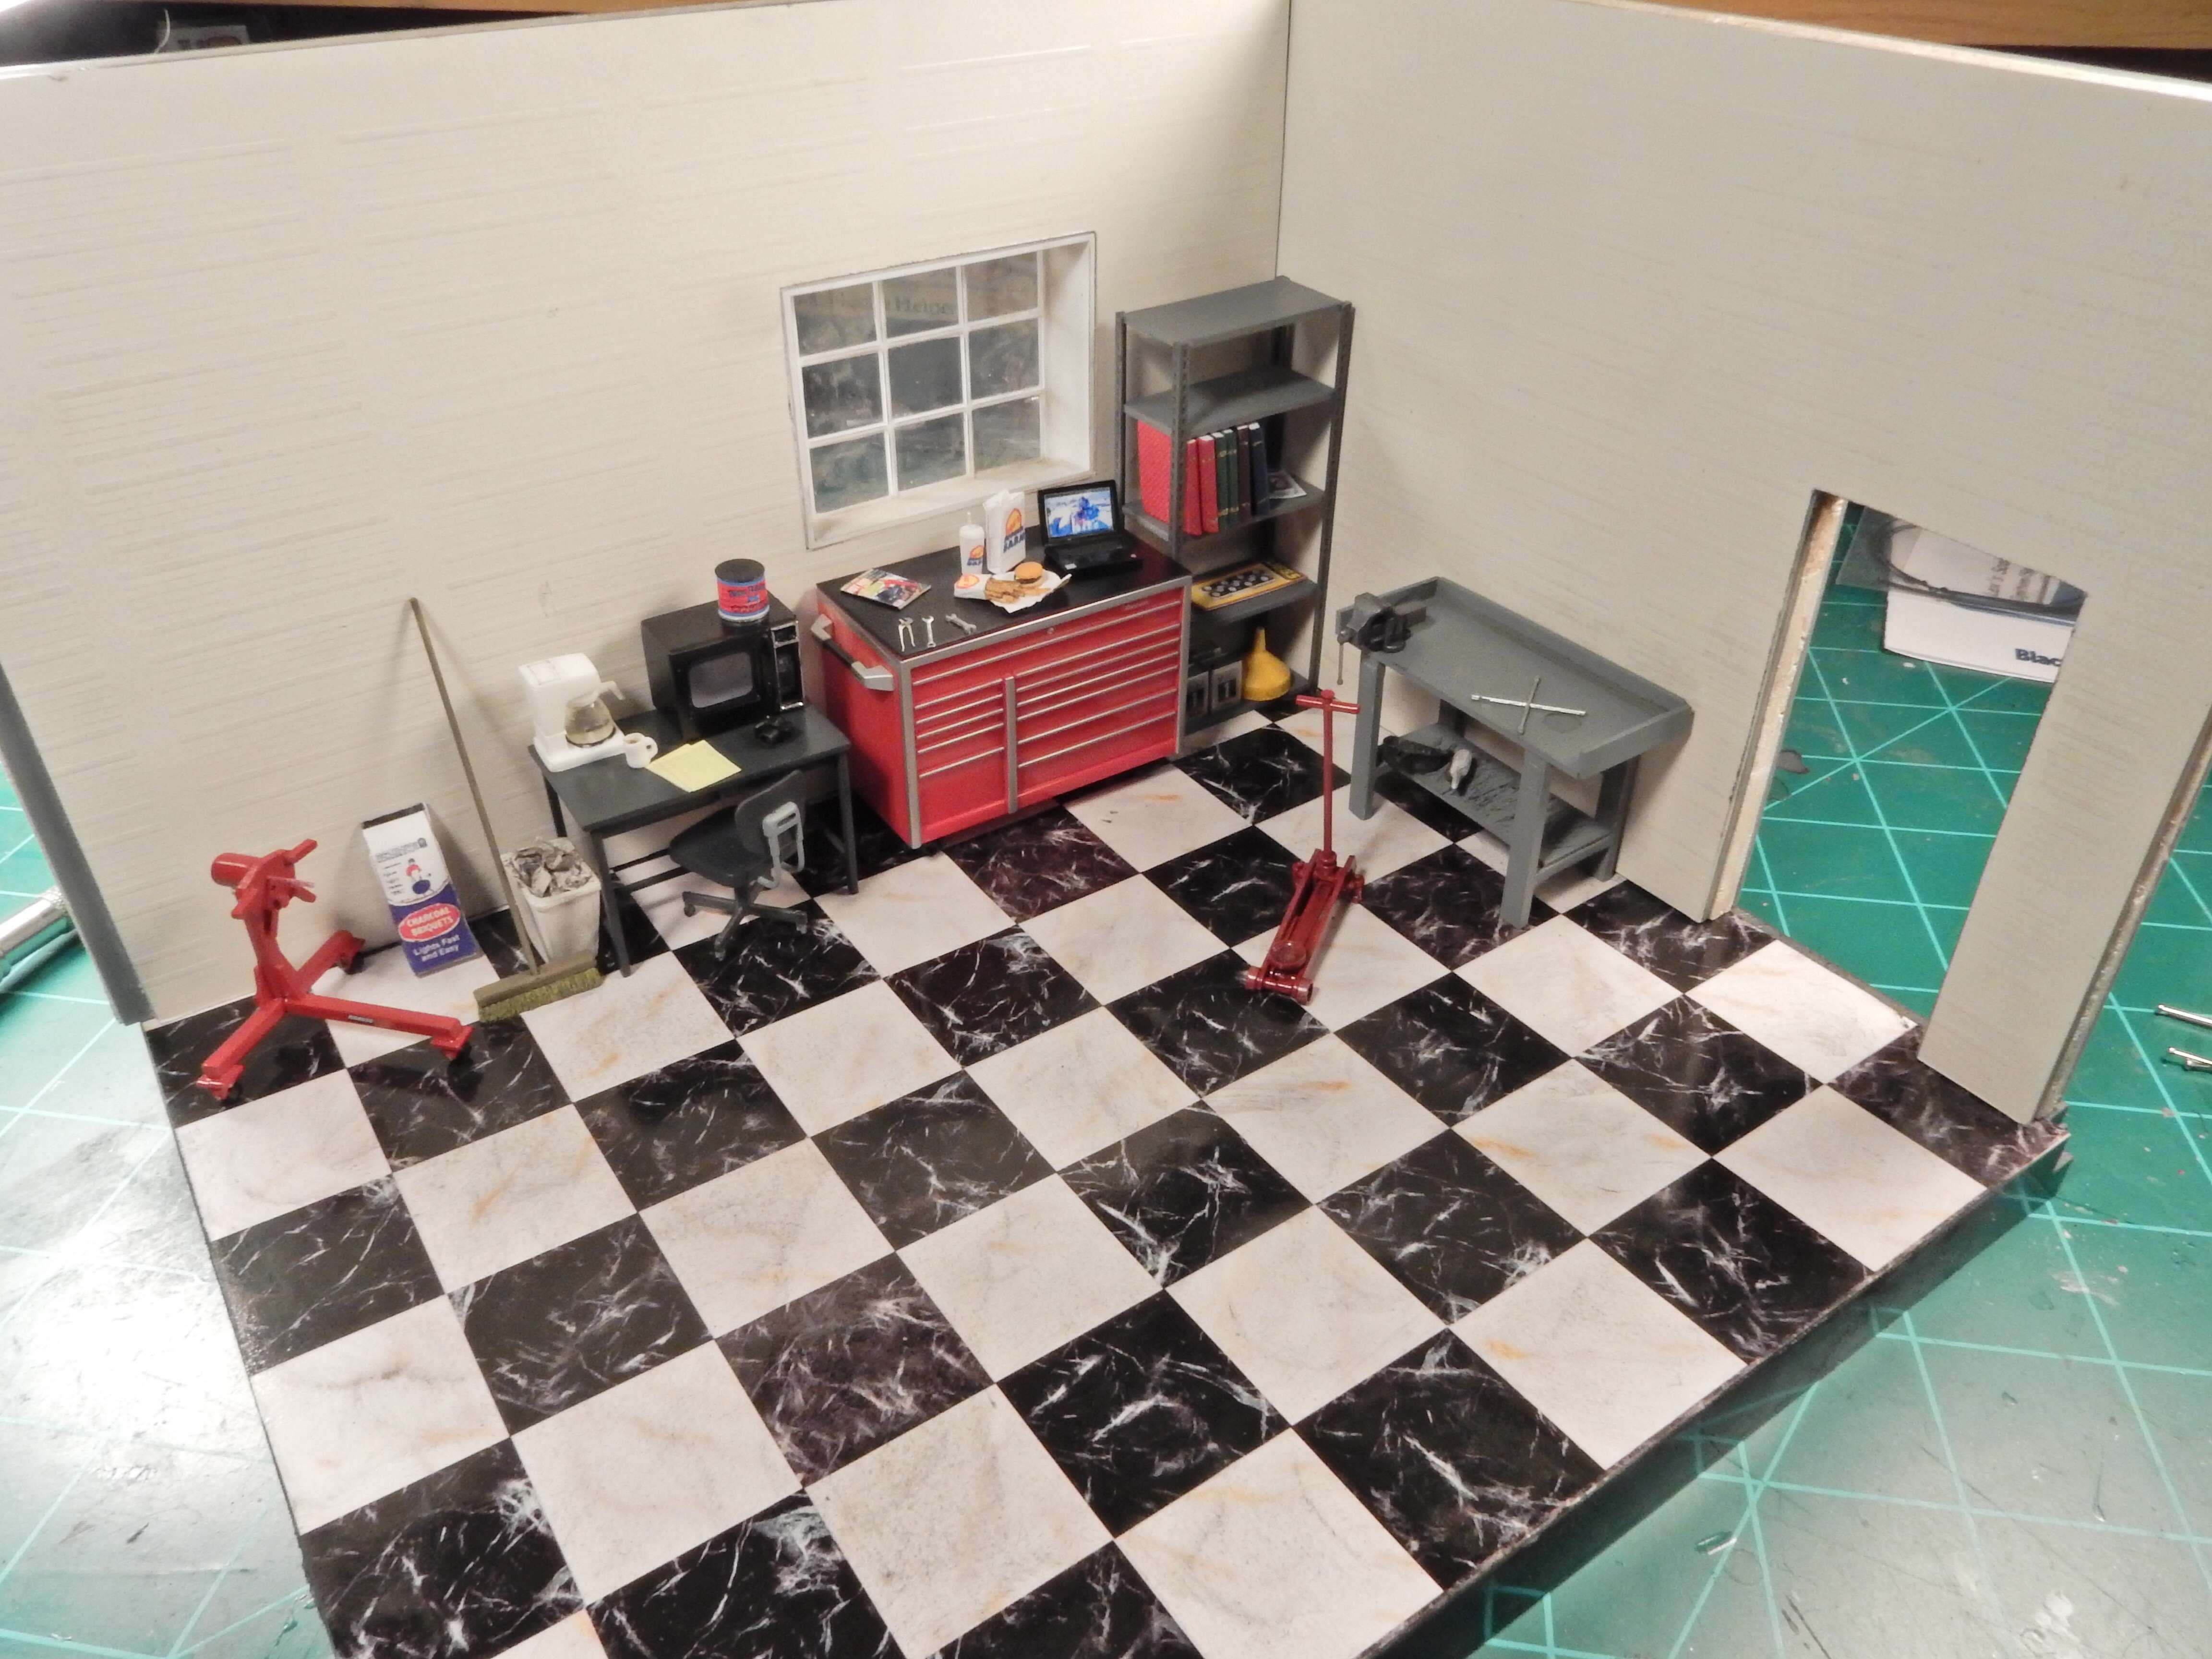
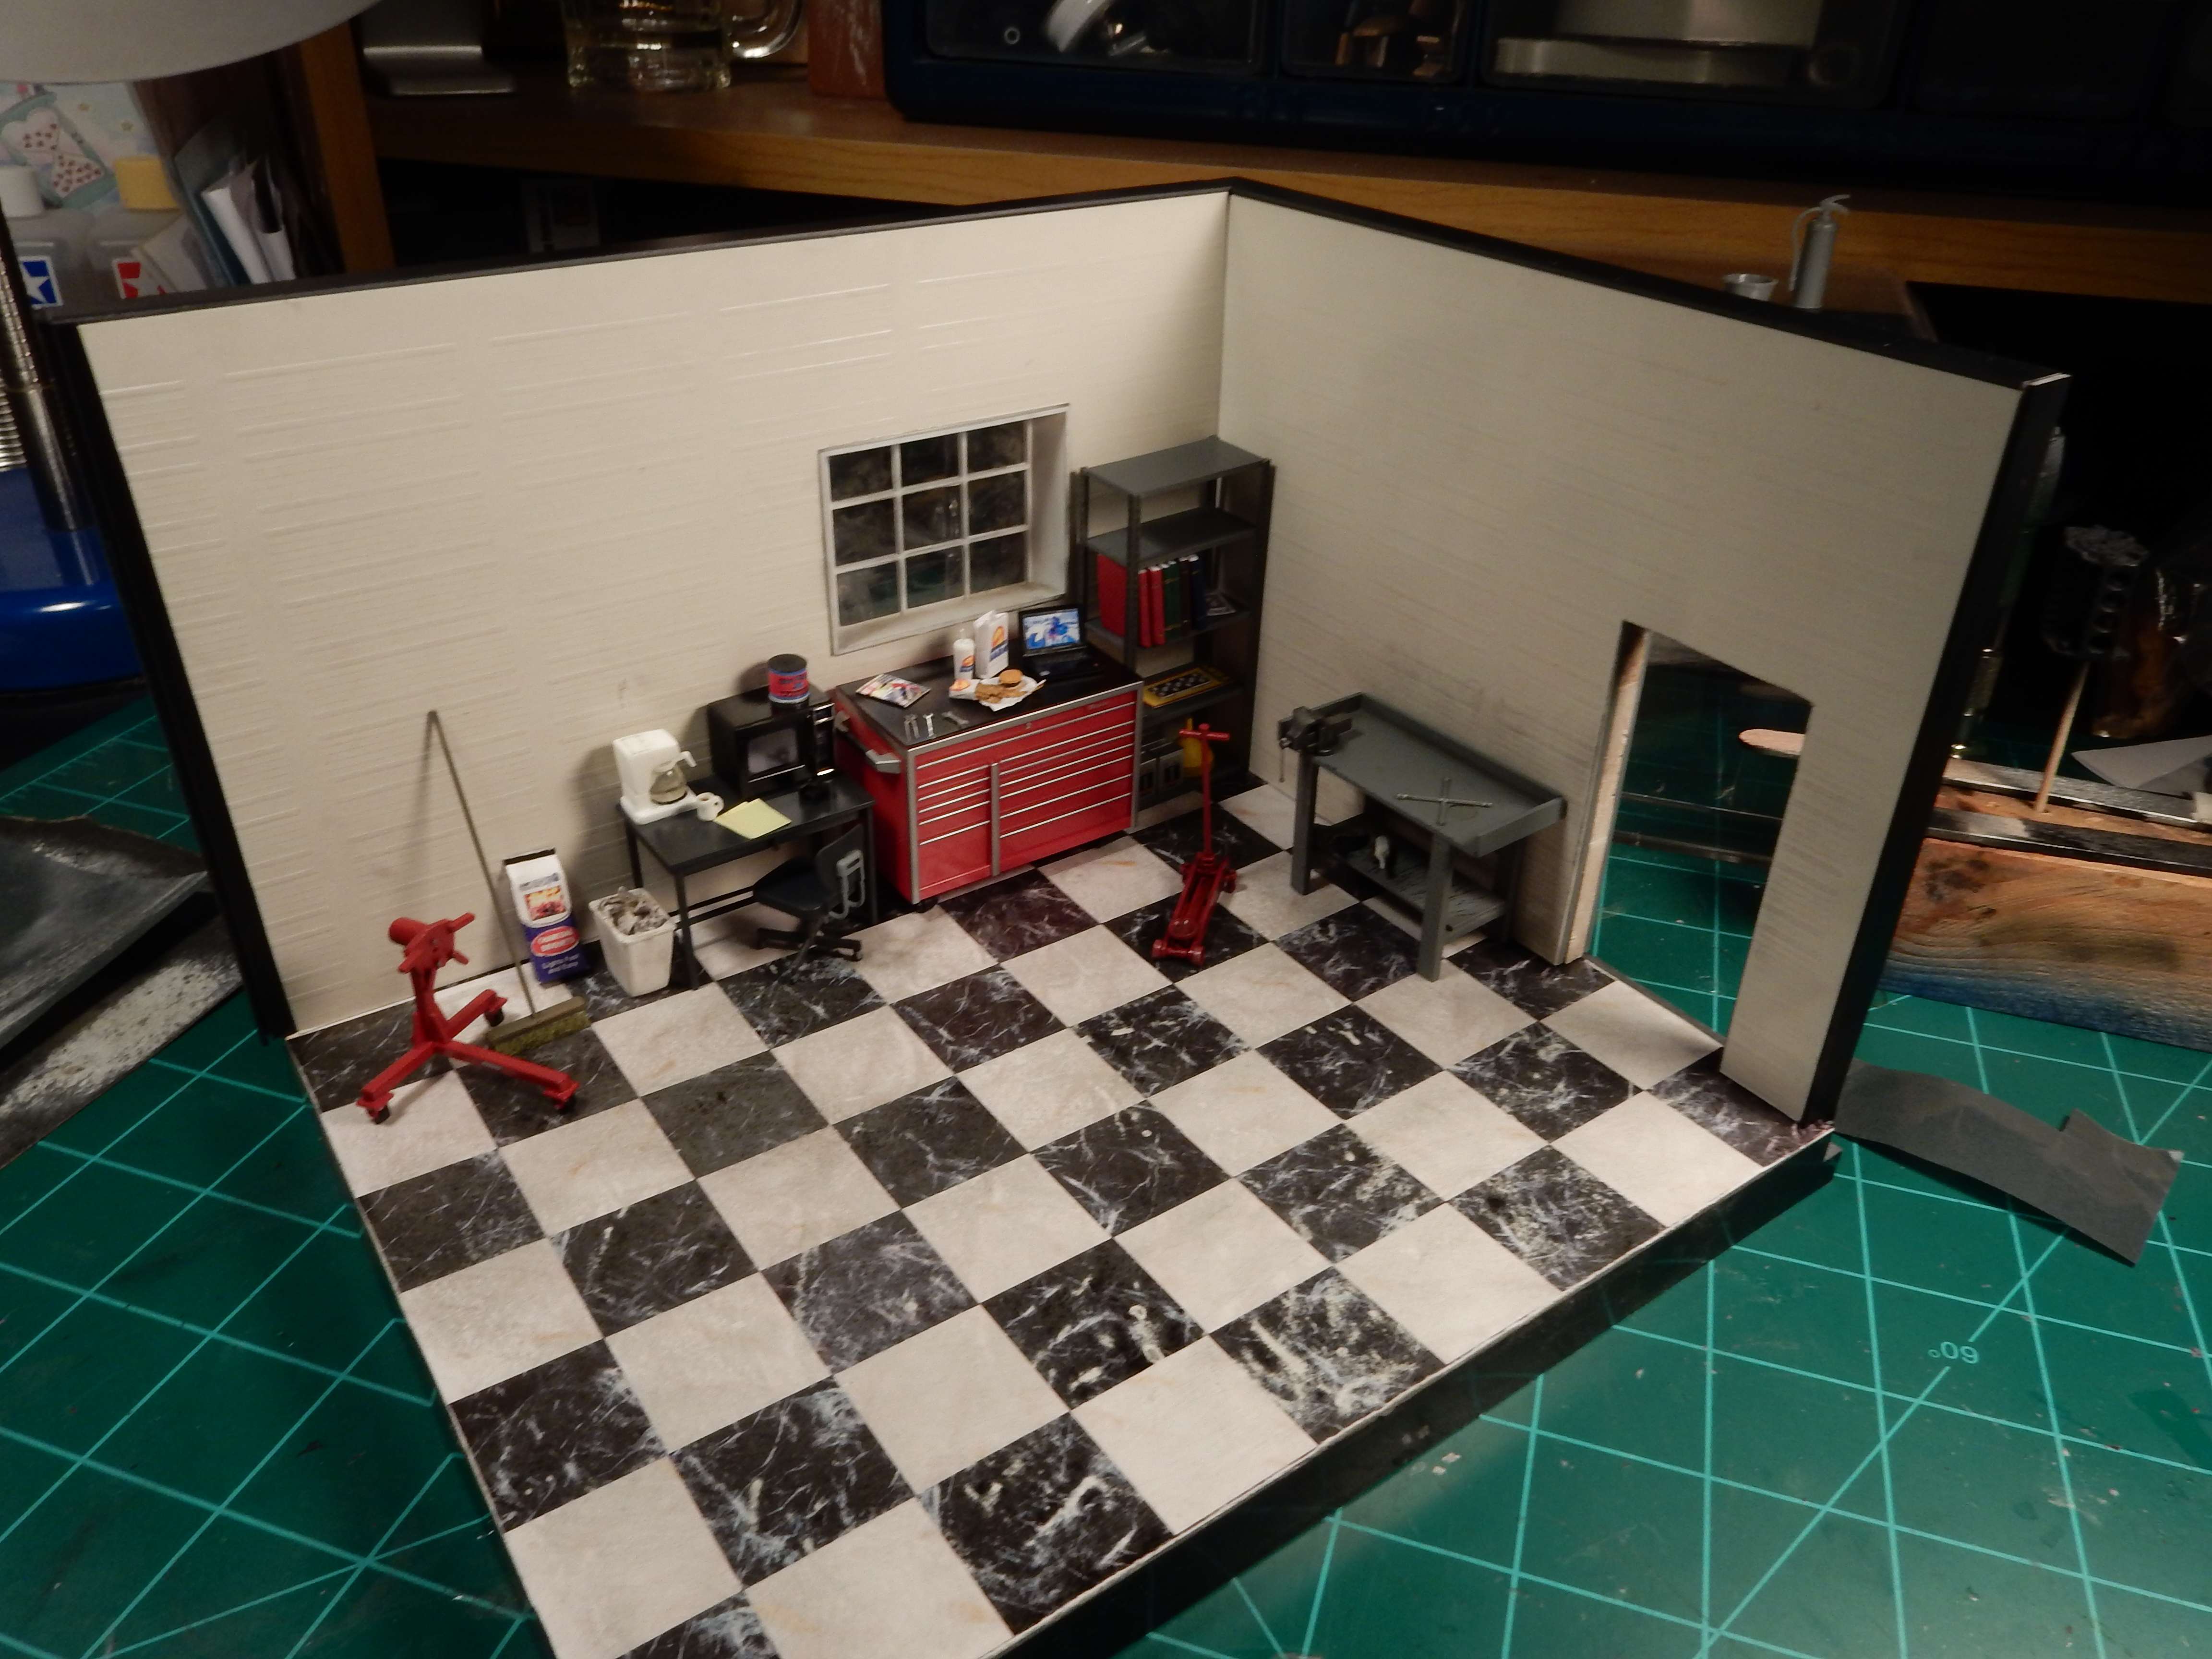
Got the walls free standing now with nothing propping them up. The more I looked at the whole shop floor and walls , the more I felt the need to grime it up just a tad. I didn’t want it nasty, just used somewhat. So I used some ground up black and a little brown pastels and rubbed in some brown to dirty it and smudged some in the window sill and framing for the dust effect. I hit the areas directly behind the work bench and on the sides of the door entrance with some rubbed in black pastel. I’ll be working on the door and putting some other goodies on the walls in addition to panel close outs at the top and end edges of the walls as well.
Here’s a top side view so far:
3 Likes
Looking good Joe.[Y]
'Preciate that Mark. I’m looking forward to having a place to take pictures of my builds besides a white background. lol
Oh the things I would do with a garage like that!
You and me both brutha. [;)]
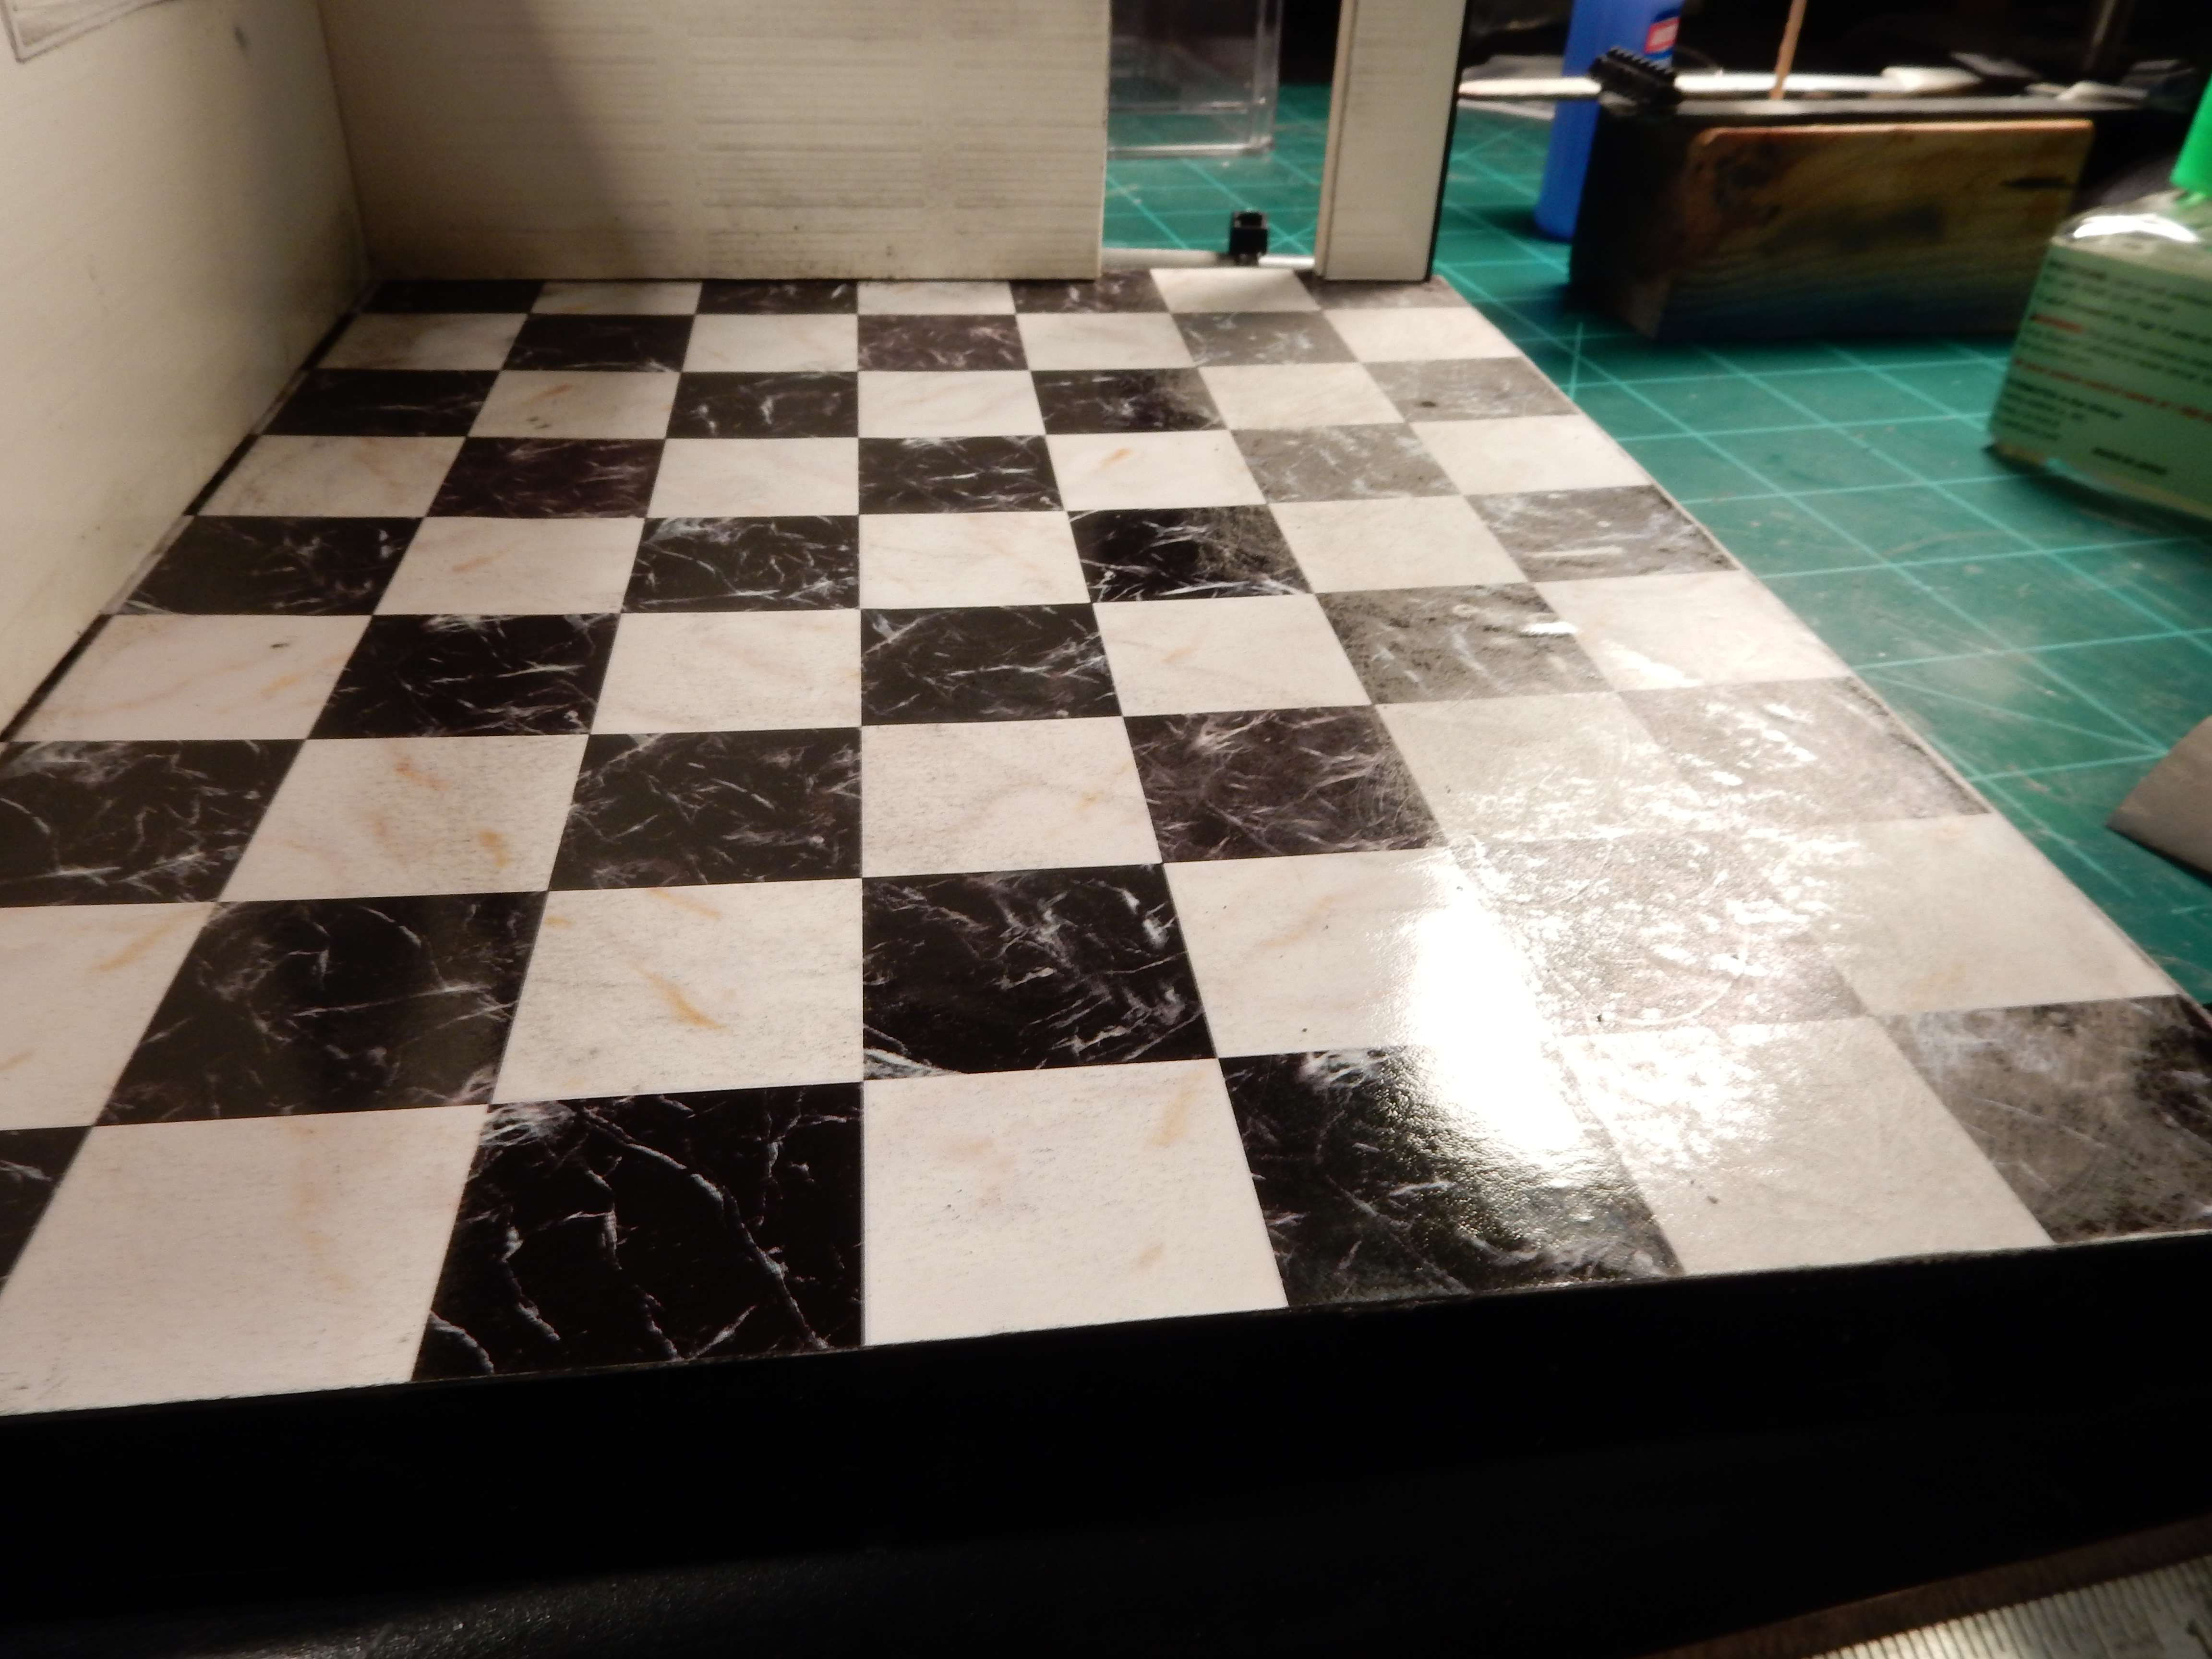
Ok folks. I’ve been rackin’ my brain trying to figure out two of my problems with this build.![]() First off , the floor was just too dang clean. I tried dirtying up the paper based flooring with ground up brown and black pastel rubbed into the flooring but it wasn’t enough. As you all know, it would just rub off. Then my thoughts turned to some 1000 grit sandpaper.
First off , the floor was just too dang clean. I tried dirtying up the paper based flooring with ground up brown and black pastel rubbed into the flooring but it wasn’t enough. As you all know, it would just rub off. Then my thoughts turned to some 1000 grit sandpaper.  . Now that…might just work. So I started on the first two rows of tile and lo and behold…it was just what I wanted!!
You can see the difference between the first two rows and the rest of the flooring in the following photo:
So I sanded the whole floor and put some more “dirt and grime” on the walls:

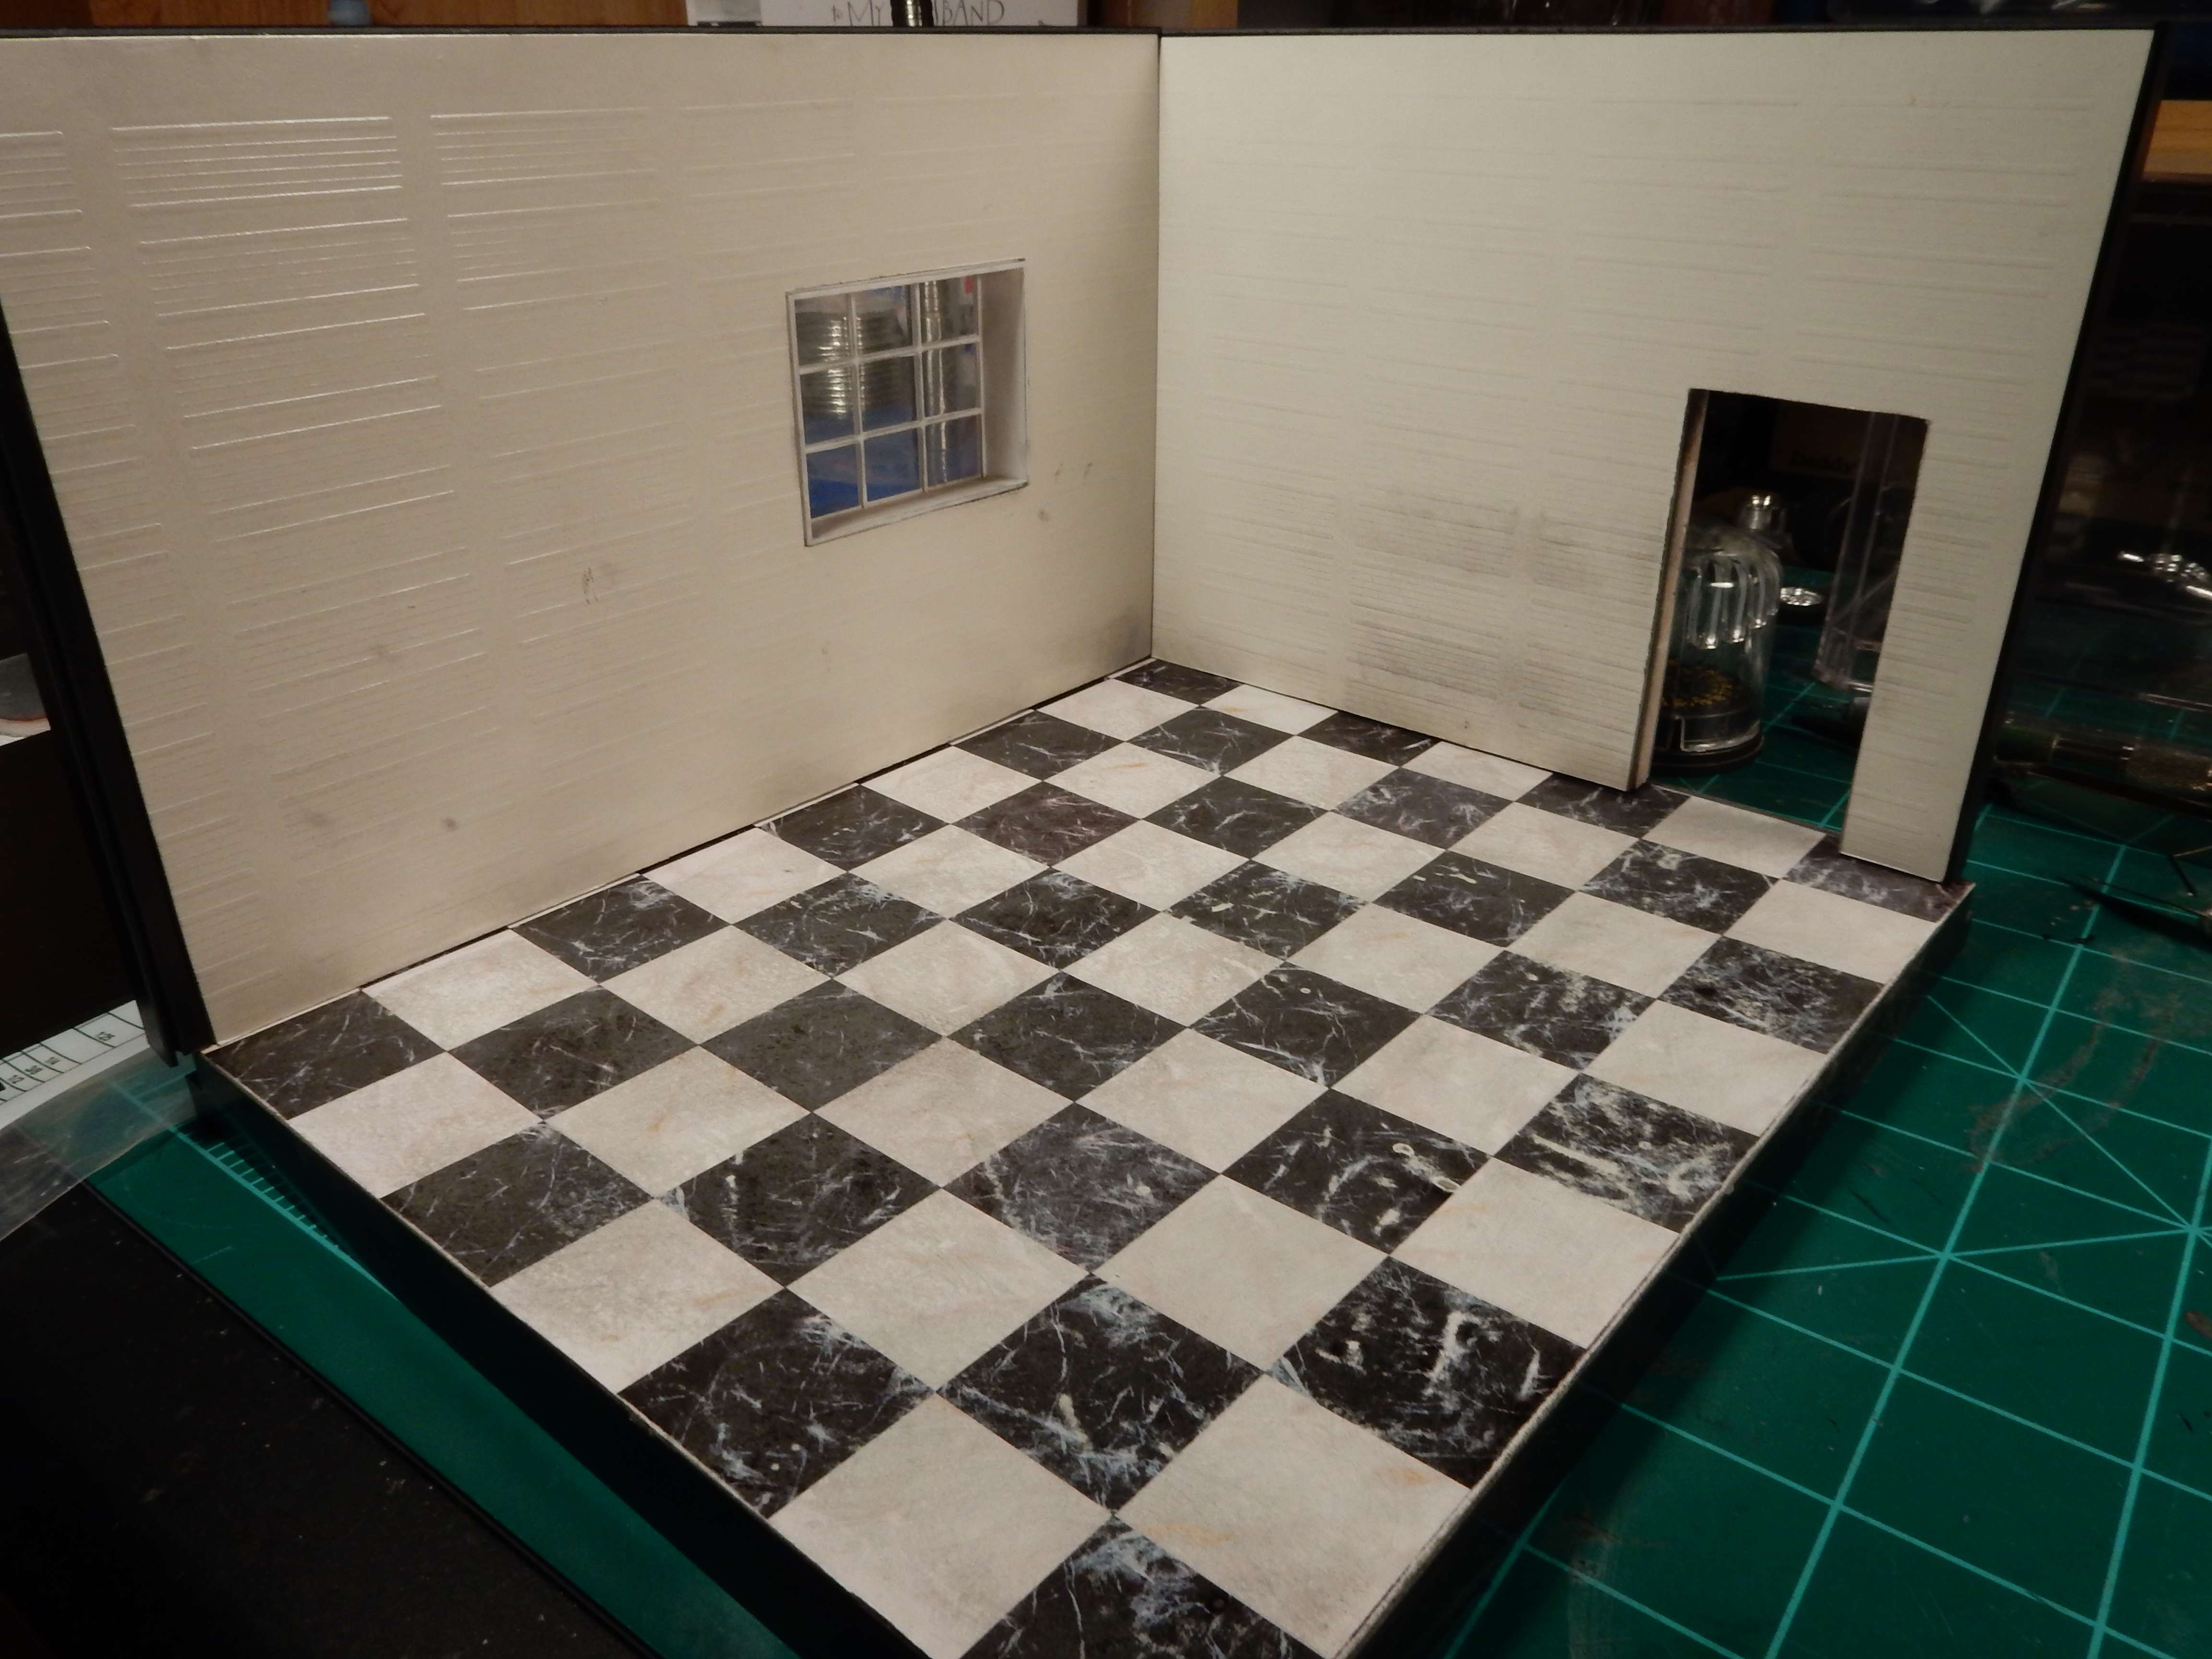
This is also going to be an “inside” display with the only outside reference being seen through the window in the back of the shop so I had to put terminating ends on the sides and tops of the walls. I was at odds on how to accomplish that until this morning. I grabbed some black Evergreen styrene sheets that I had and started measuring, cutting and gluing.
Before:

and after (I’ll be installing a door to hide the doorway wall innards):
Work will resume on Sunday when I get back from Houston. Stay tuned…
1 Like
Sure good to see you back at it, Joe.
Floor looks great. Good idea re the sandpaper.
The little aftermarket accessories are so cool, almost enough in themselves to get me interested in this genre/scale.
Thanks Greg. It’s great to be back at it. All I can say is don’t get bit by the automotive bug. Lol
If I do, I know at least I have a friend to help me along.
Whenever you’re ready brutha. [Y]
Oh Yeah! That is looking marvelous Joe. Excellent call on the sanding to get the pastels to work. This is indeed going to be an excellent showcase for you gorgeous car models.
Thanks Joe. I’ve gotta say that this area of modeling has been some of the best fun I’ve had at the bench. It’s like the ongoing modeling project that never seems to end.
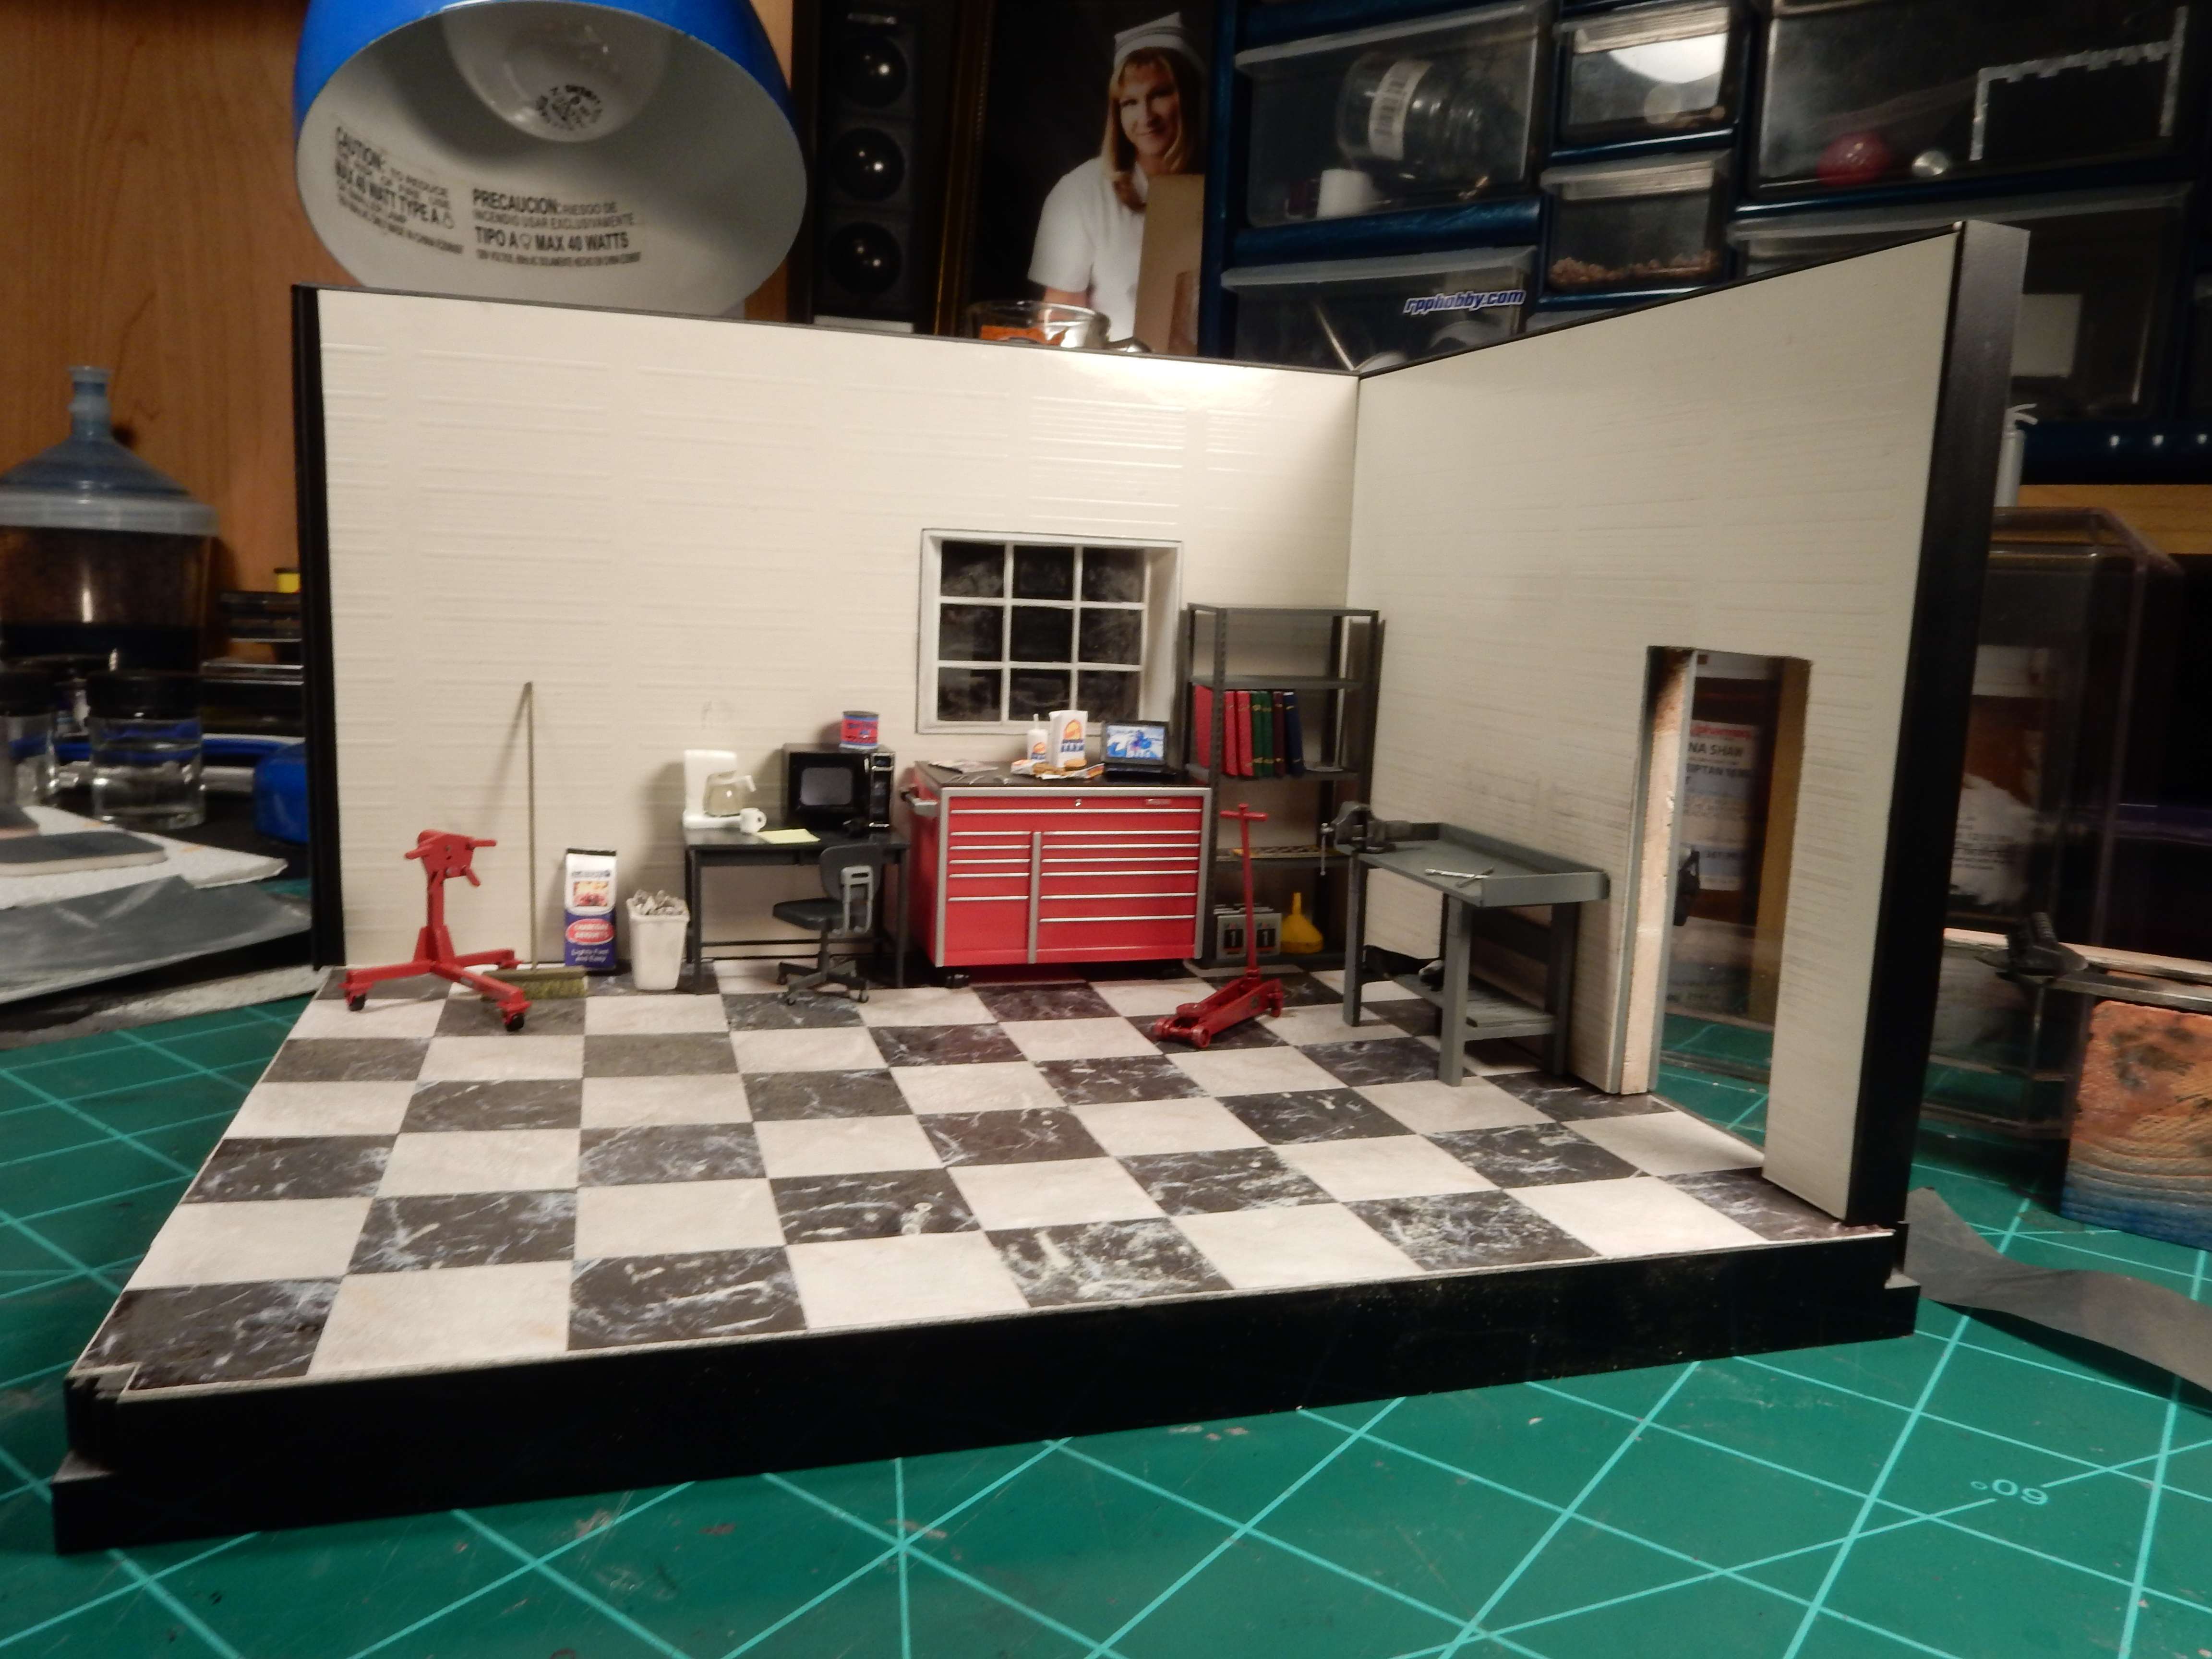
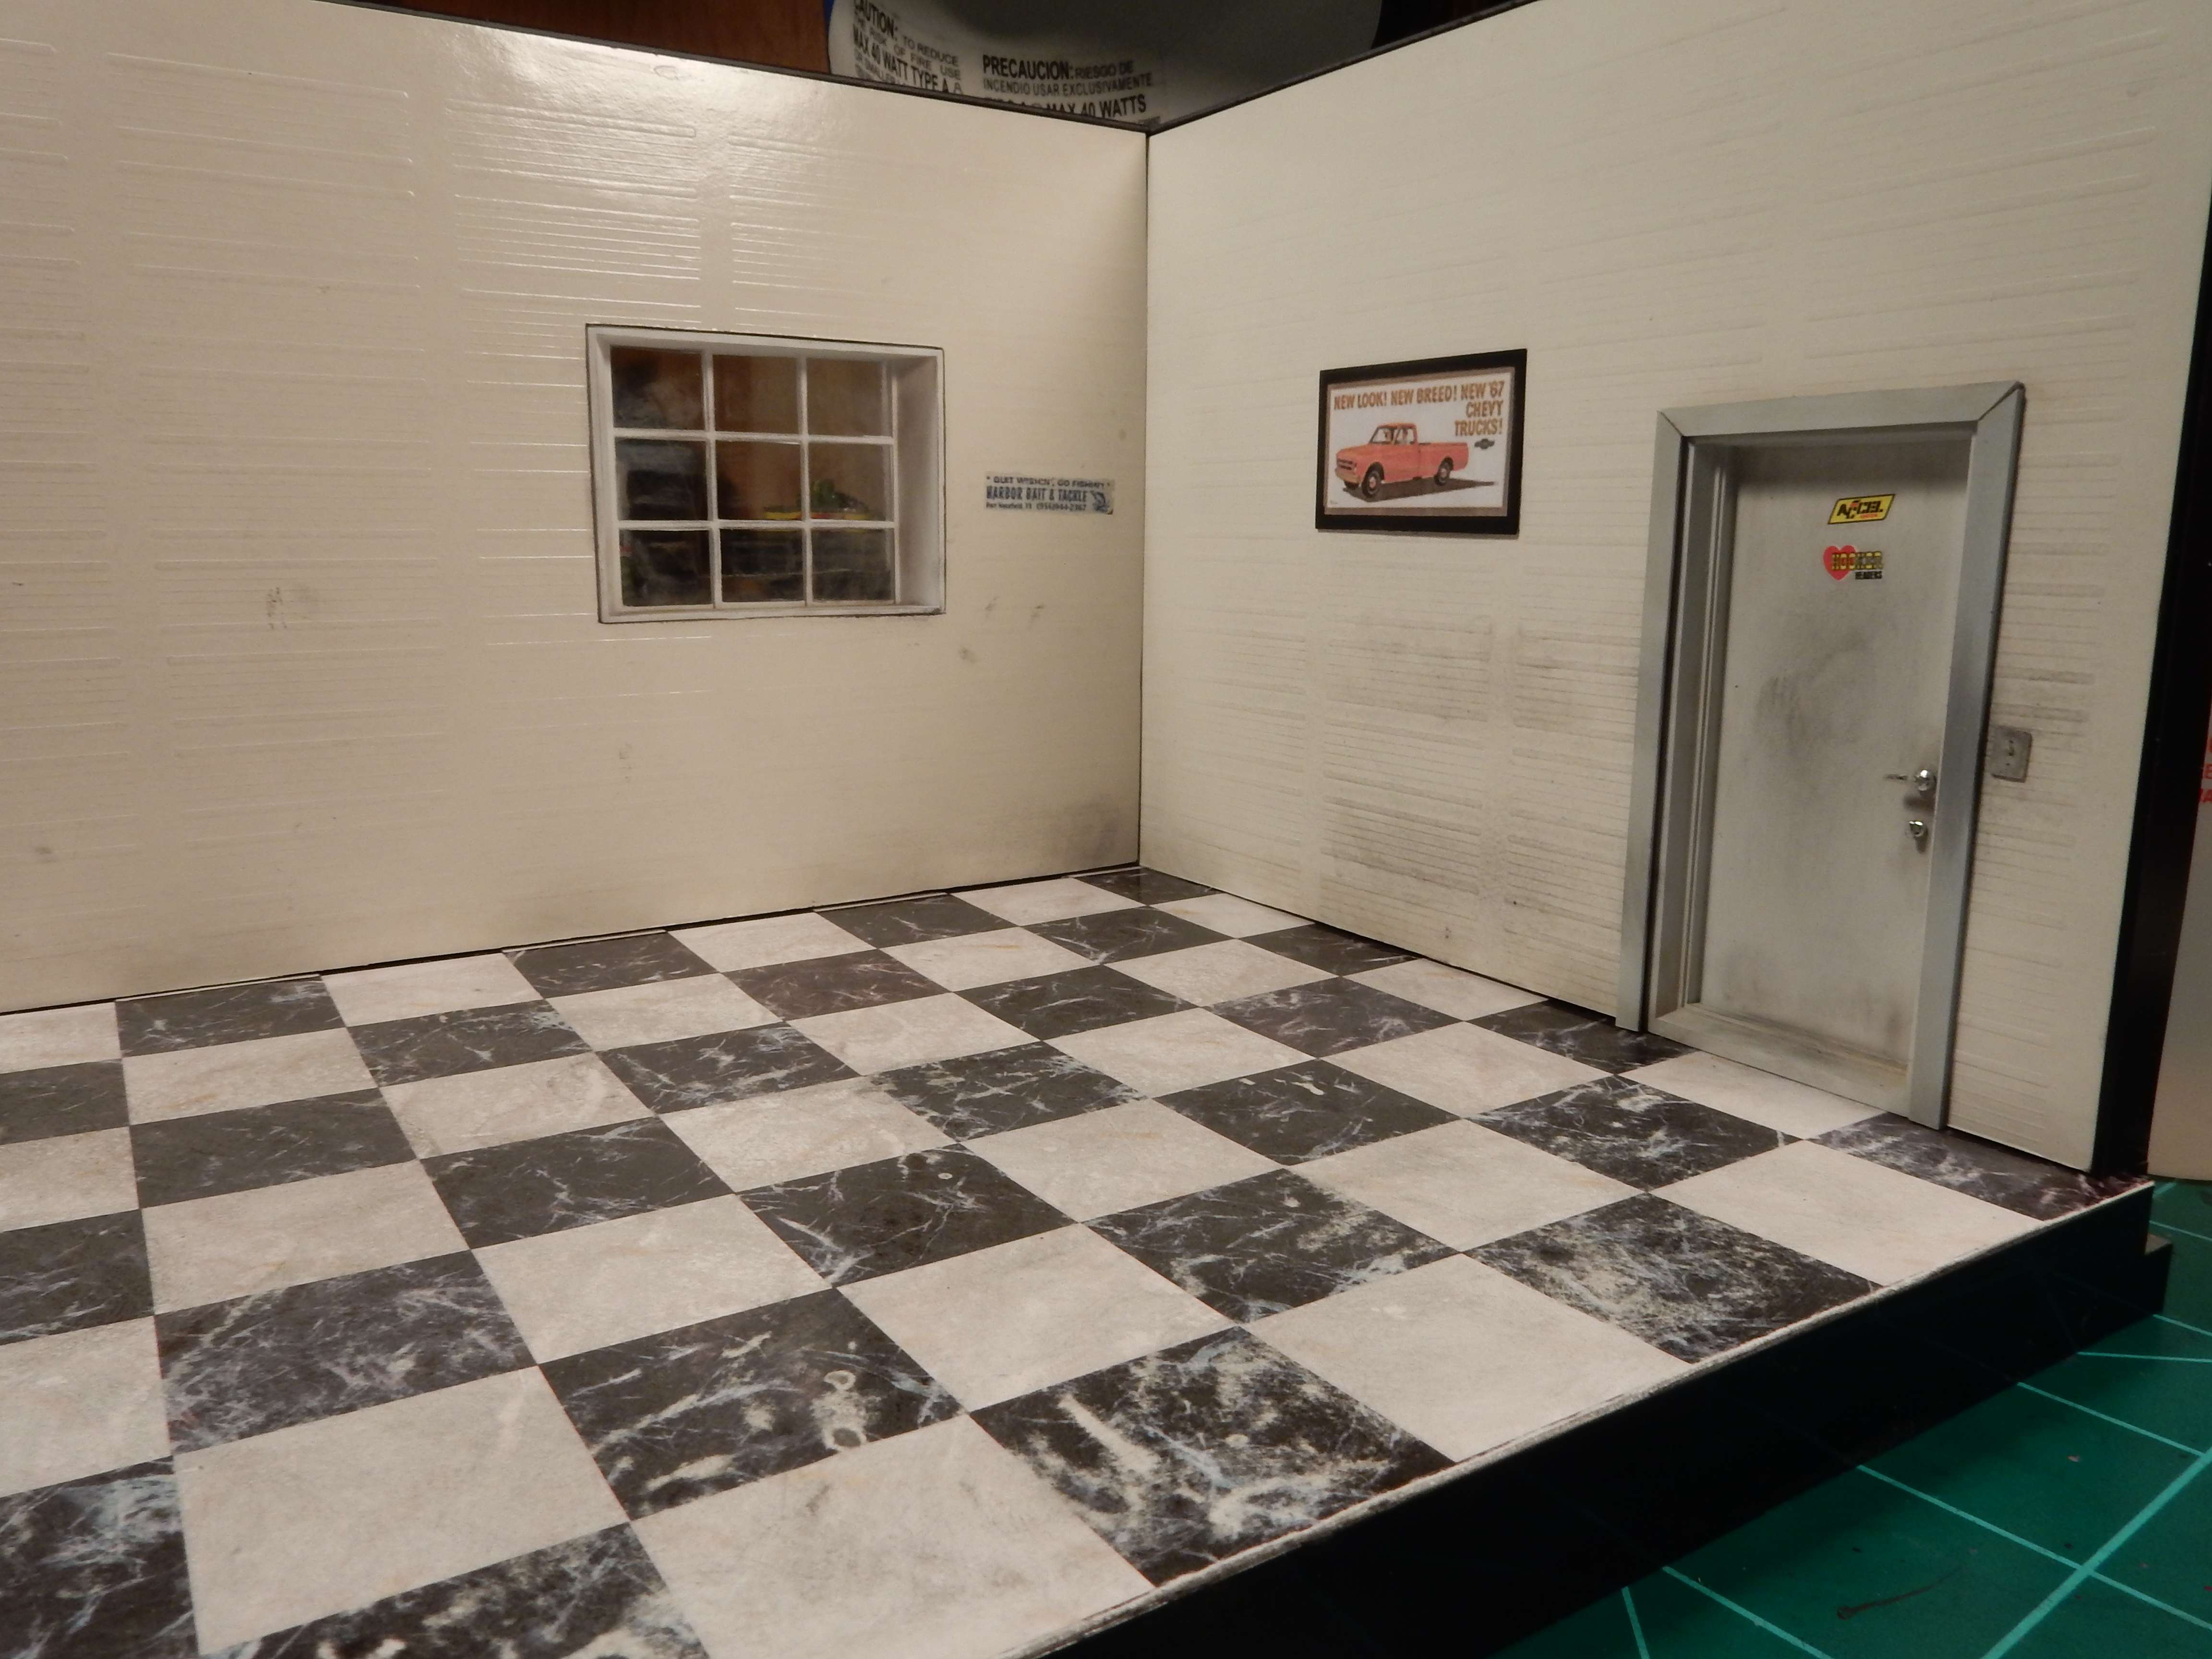
Well fellas I’ve spent the week working on the base garage and have made some satisfactory progress. For starters I installed the door into the opening but it didn’t look right without the door trim around the opening so I cut some Evergreen into strips, painted and cleared 'em, installed them and weathered them some without going overboard. I’ll be doing this with the window opening as well. I also put together an old Chevy Truck advertisement into a picture frame by taping the photo onto the back of some clear Evergreen styrene and then masking and painting a frame onto the front of it. Getting back to the door I dirtied it up a bit and threw a couple of performance decals on it just to give the shop some character. Door handle and lock were painted with a Molotow Chrome pen and installed.
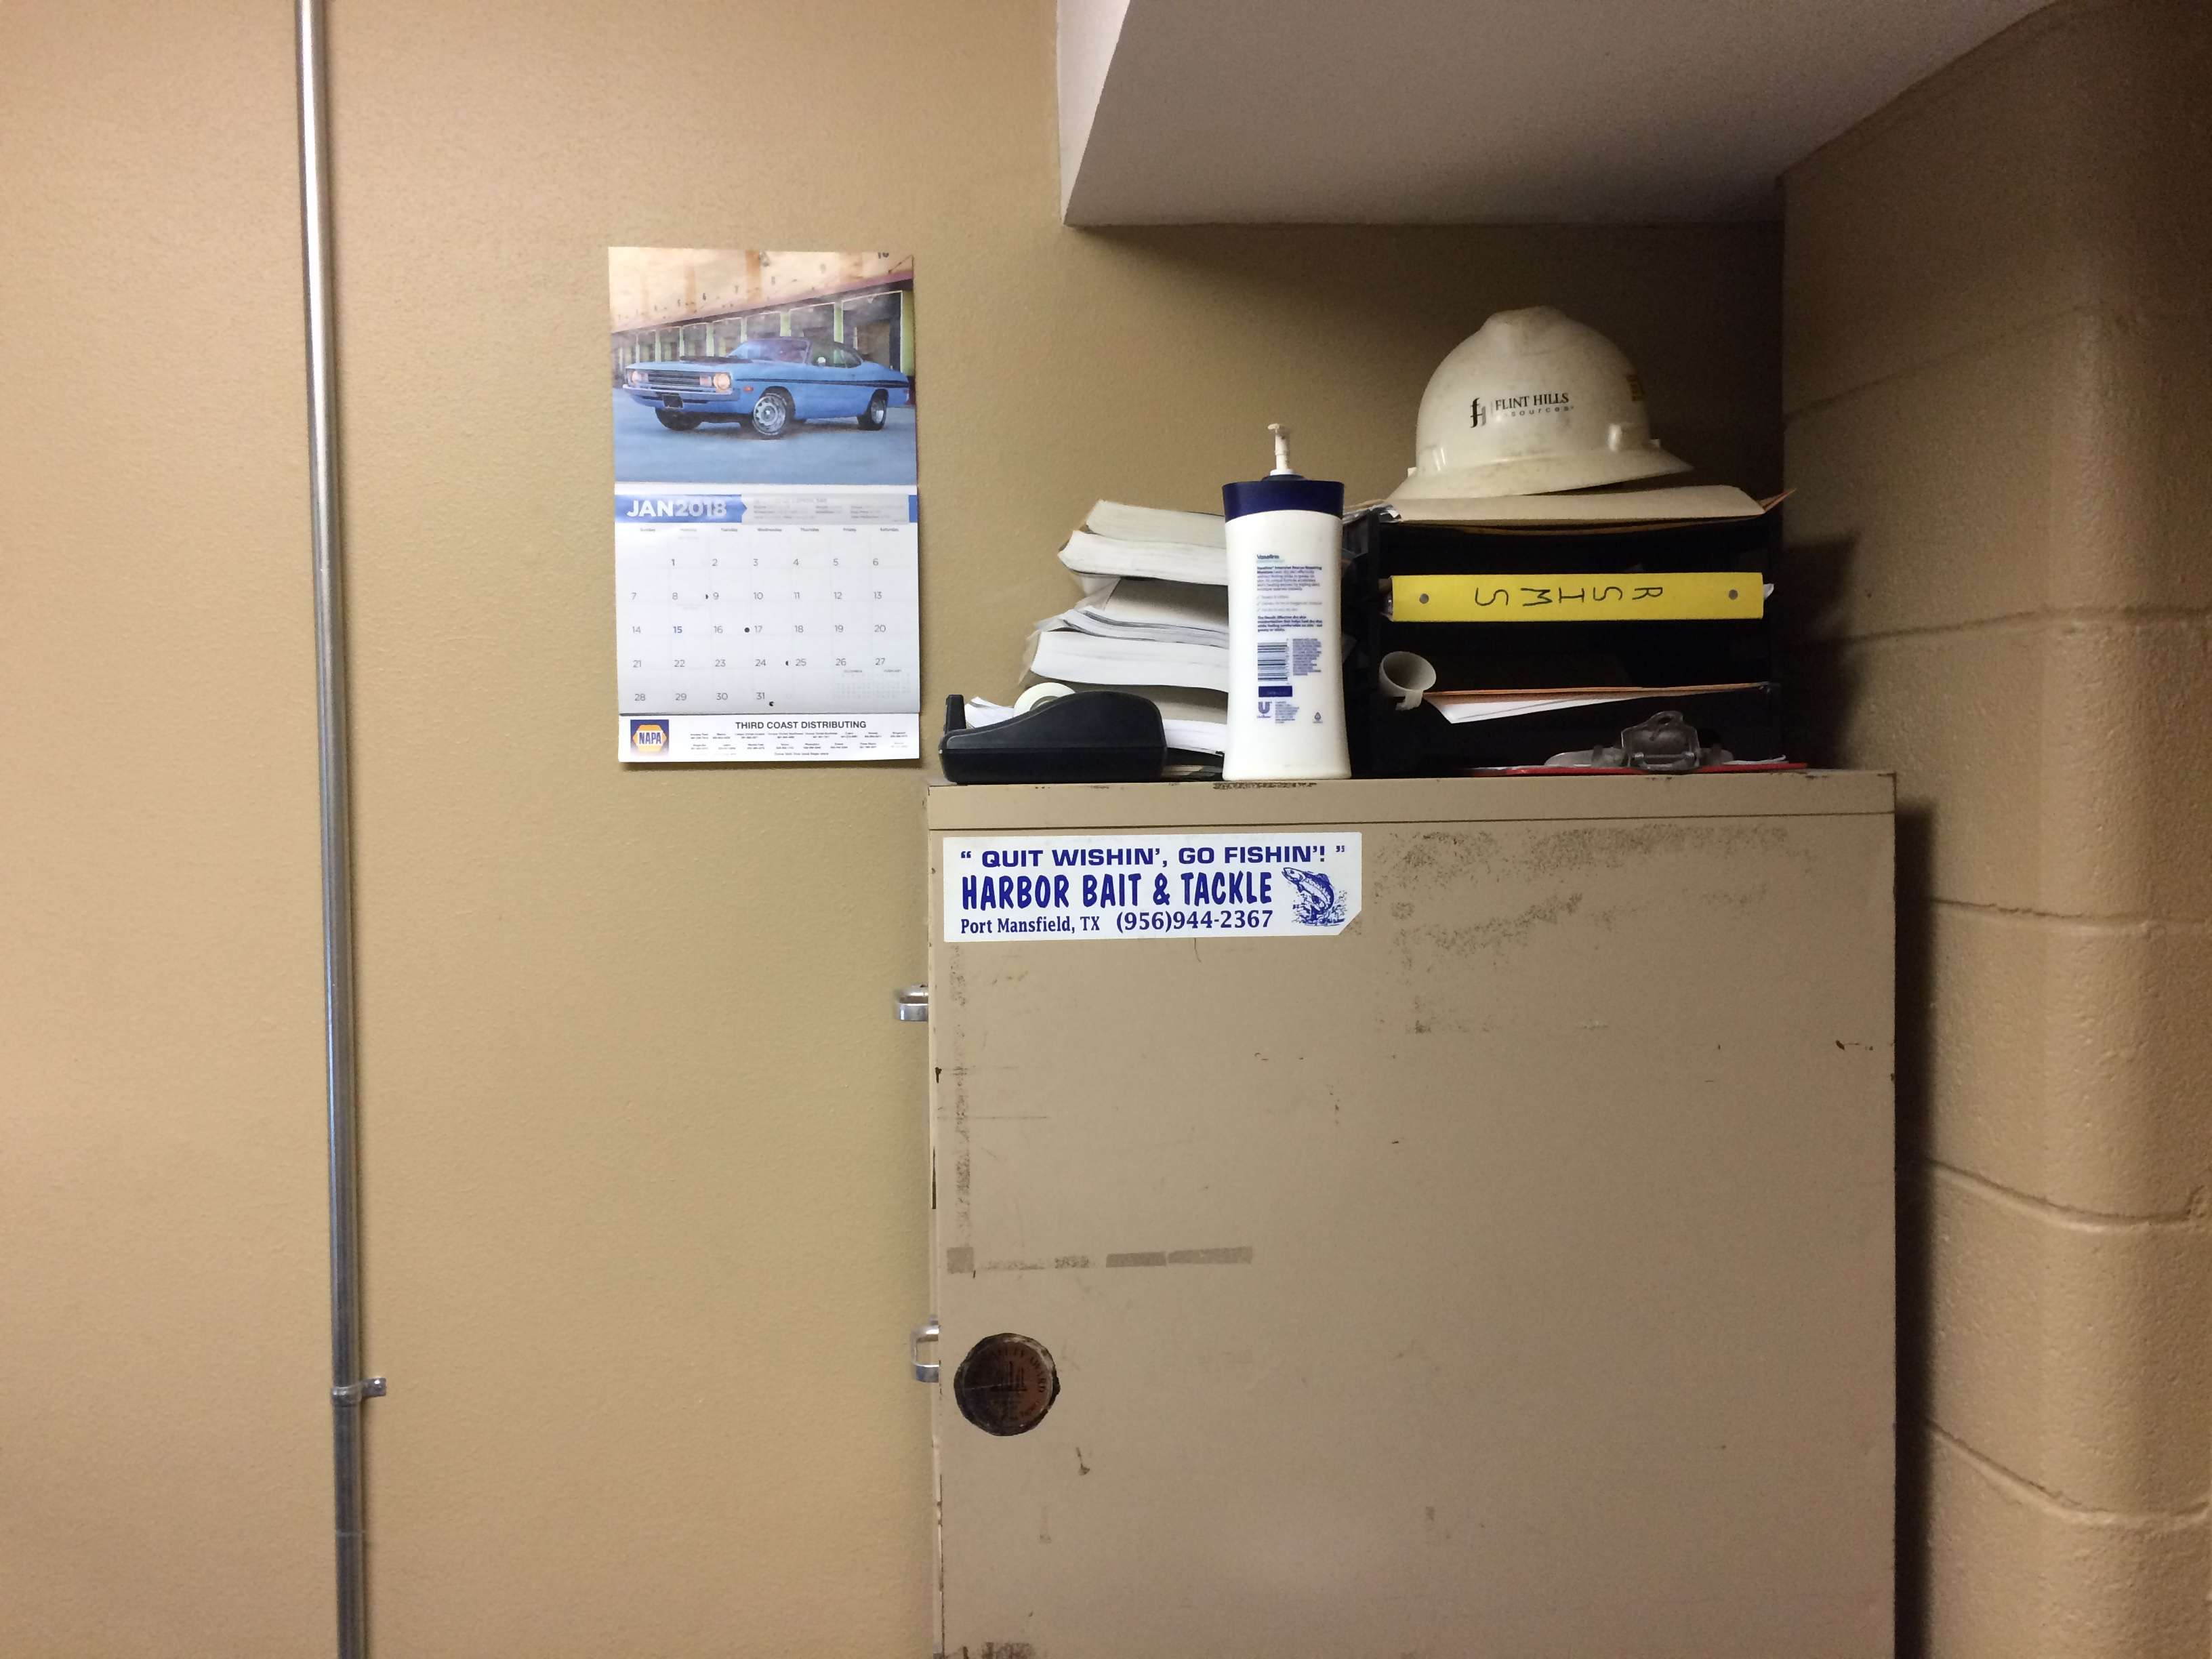
Lastly, I decided to throw something oddball in. In my office is a file cabinet with a fishing advertisement sticker on the side of it and I thought ![]() and decided I could throw it on the wall in between the shelves of my storage shelving that’s going to go into that corner for a subtle addition to the shop.
and decided I could throw it on the wall in between the shelves of my storage shelving that’s going to go into that corner for a subtle addition to the shop.
Here’s the sticker in my office:
Here’s the shop after installing all of what I’ve talked about here this morning. Notice the sticker made into a decal on the wall as well.

1 Like
Looks really good Joe. Great progress.
I need to learn how to do those tiny stickers and magazines.
Well Shoot .
Nice looking space . Can I rent it for rebuilding my Ski Boat ? Your touches are definitely making this look more real , Everytime I check in .