Lol, nope, nope, nope- just couldn’t resist posting two of my favorite things- a cute brunette and a Sherman! [ht]
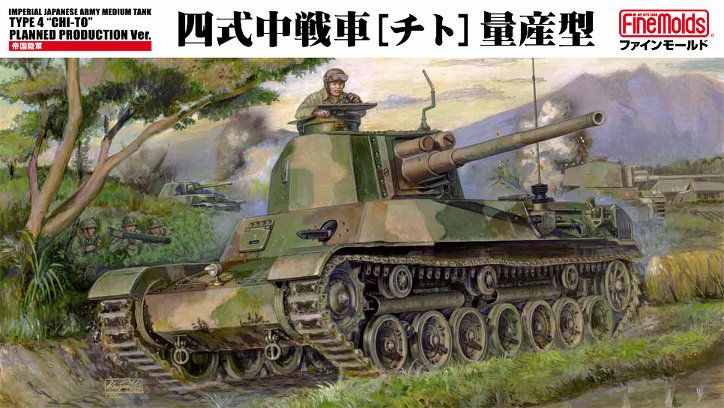
I’m going to try to finish the models I started in GB II (it looks really bad for the host of a GB not to finish his own entries…) and then I’m thinking of doing FineMolds Type 4:
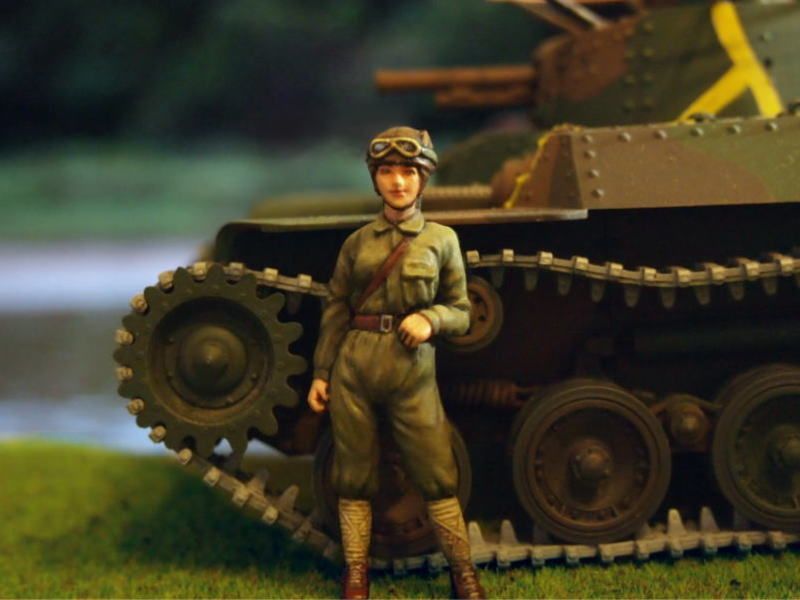
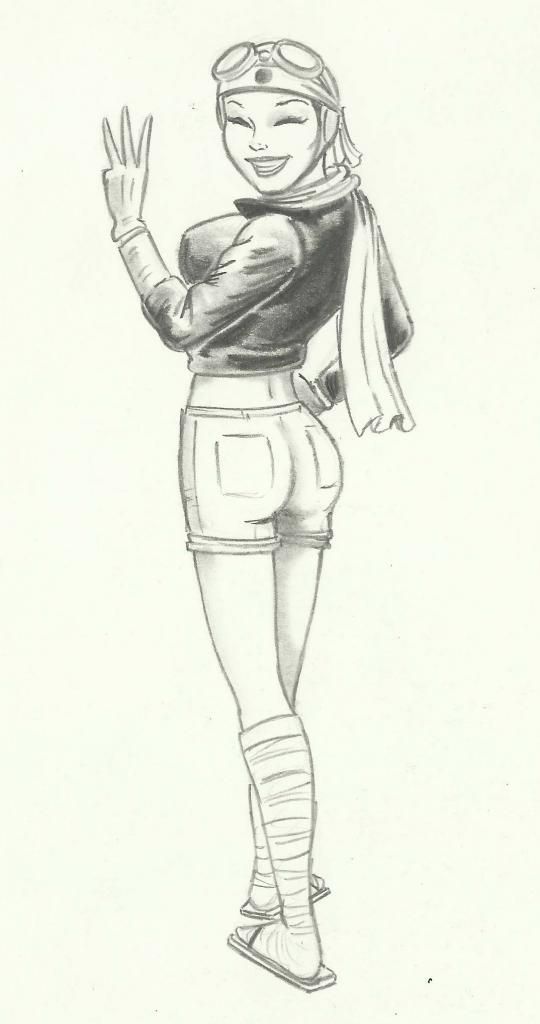
I know Tasca/Asuka Model makes a very nice JSDF Sherman but I don’t have it yet and the only female figure I can find anything like that is this WWII one from Aurora Model Japan…
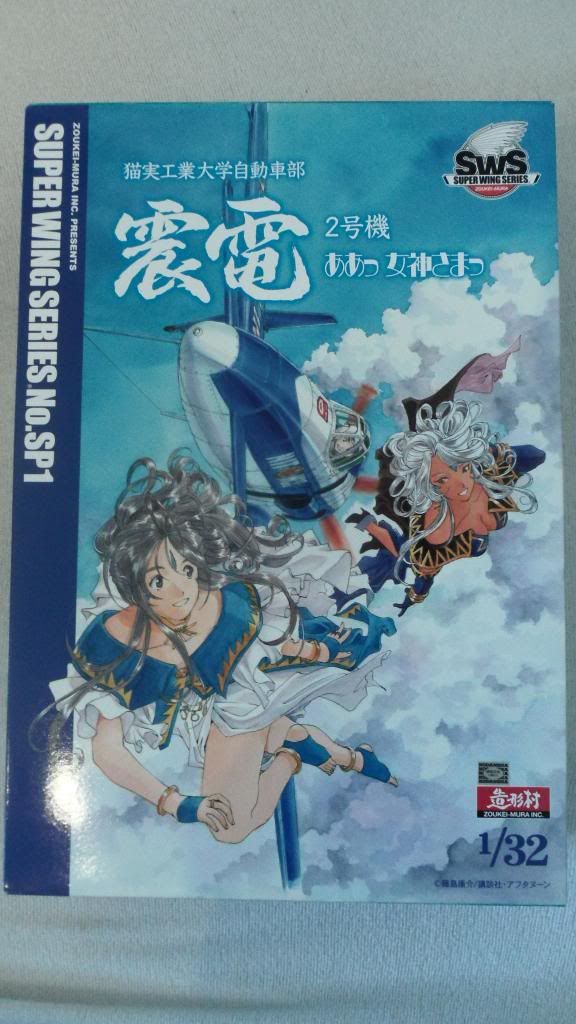
If there’s still place for one more, I’d like to enter with Zoukei Mura’s J7W1 Shinden (the big one of course [:D]) I was only able to get that manga special edition because the normal one was sold out, but it looks like it can be built as a normal Shinden as well (just with all the parts in white styrene).
Waynec did this gorgeous badge here based on the painting ‘The Great Wave’:
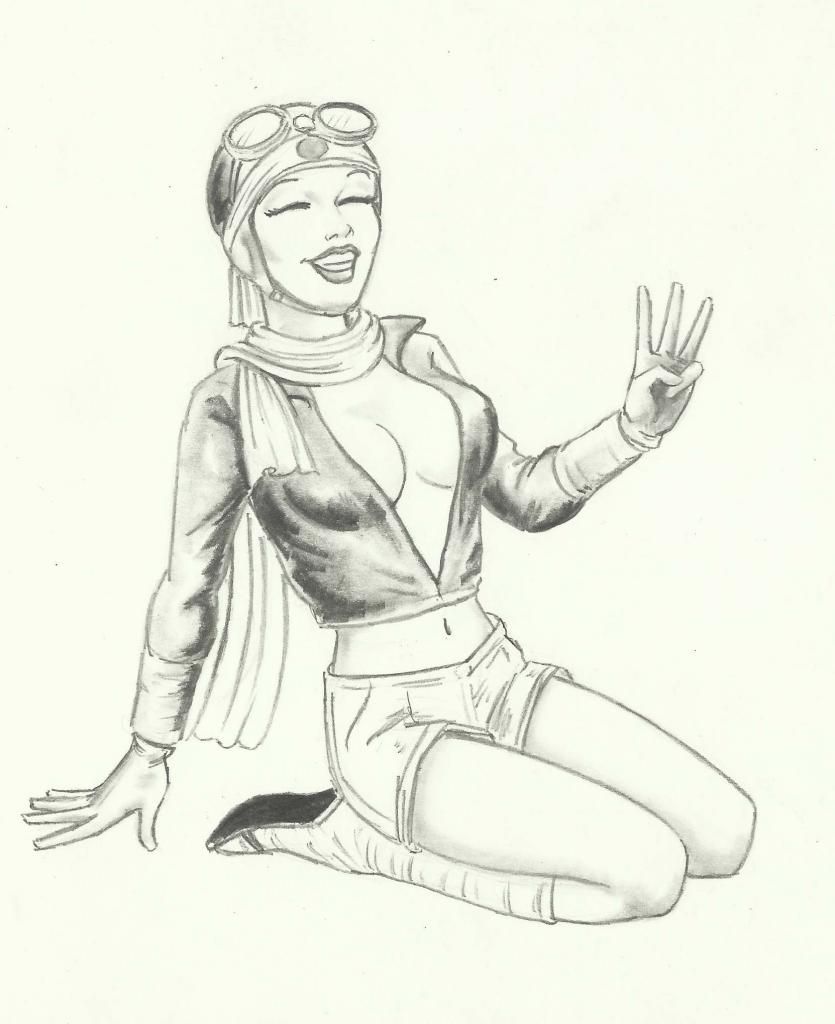
I’d just roll with it but I previously had a friend who does illustrations for comics to do a little mascot. I fooled around a little with it but wasn’t too happy with my results. I’m going to post this original work here and if you artistic guys want to play around with them I’m sure you’ll do a much better job than I did… [:(DD]
I really like that bagde, but the illustrations look fantastic as well! It would be awesome if someone could try to create a badge using one of them (how about having 2 Badges to choose from?)
I’m back into the hobby after a 20 year layoff and would like to join this build. I just finished a P-26 for the Pearl Harbor Build and am about to start an F-102A for the Vietnam Build. Can I get in on this build? I’ll be doing a plane for sure, just gotta go in the stash and find one.
Since we are talking 'bout animes already, I thought I’ll just show you some pics of my Shinden:
How about that for a box art?
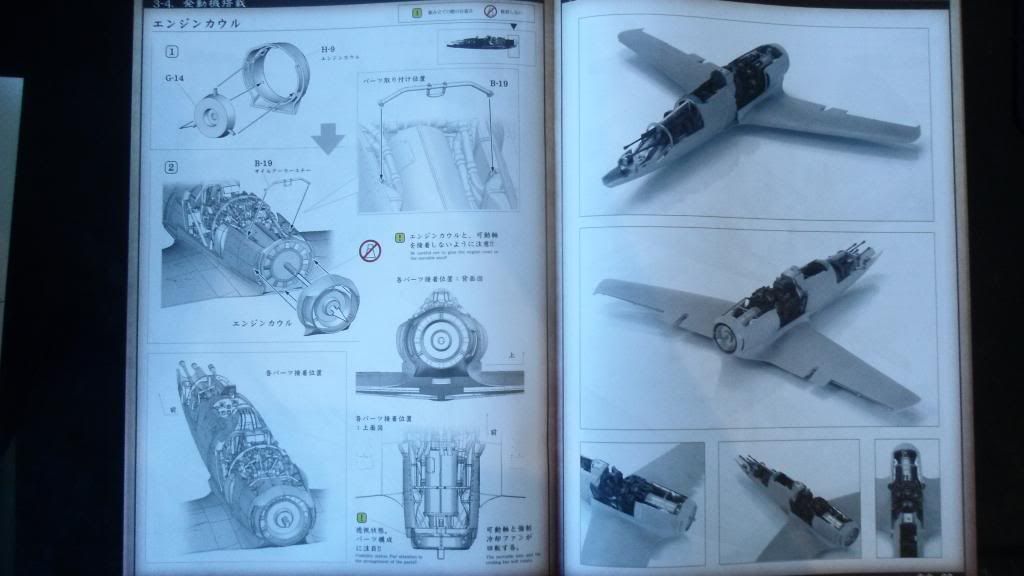
I had a close look at all the stuff in the box and it looks liek ZM supplied everything needed to build a normal Shinden:
Standard ZM instructions (they make the best instruction booklets I’ve ever seen):
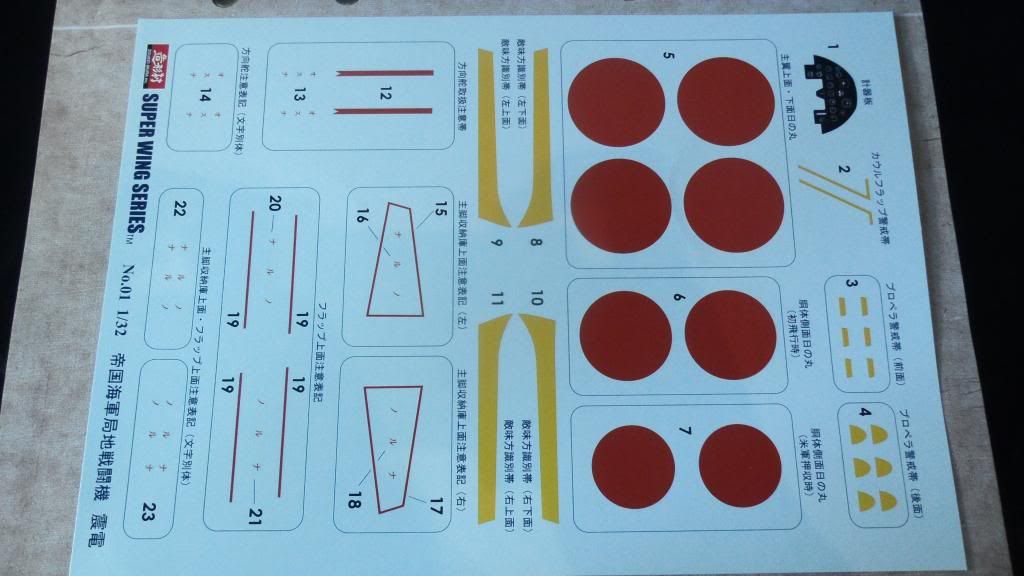
The decal sheet from the normal kit:
Some canopy masks that seem to be made of vinyl (also supplied in the normal kit):
And now to the “special edition” stuff:
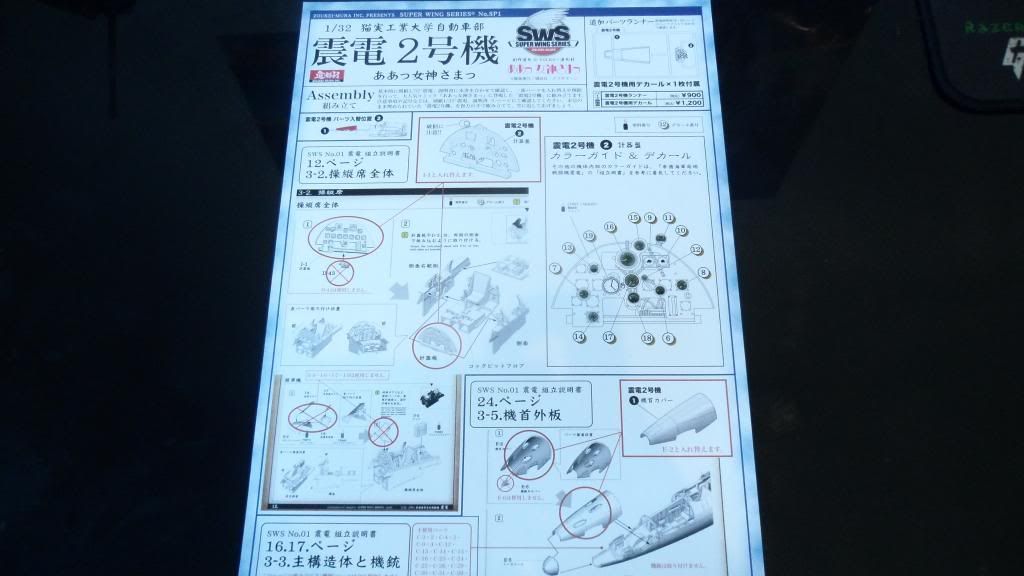
An additional sprue with a new nose section (without openings for the guns) and a different IP for the anime version:
A small instruction sheet with all the steps different from the standard instructions:
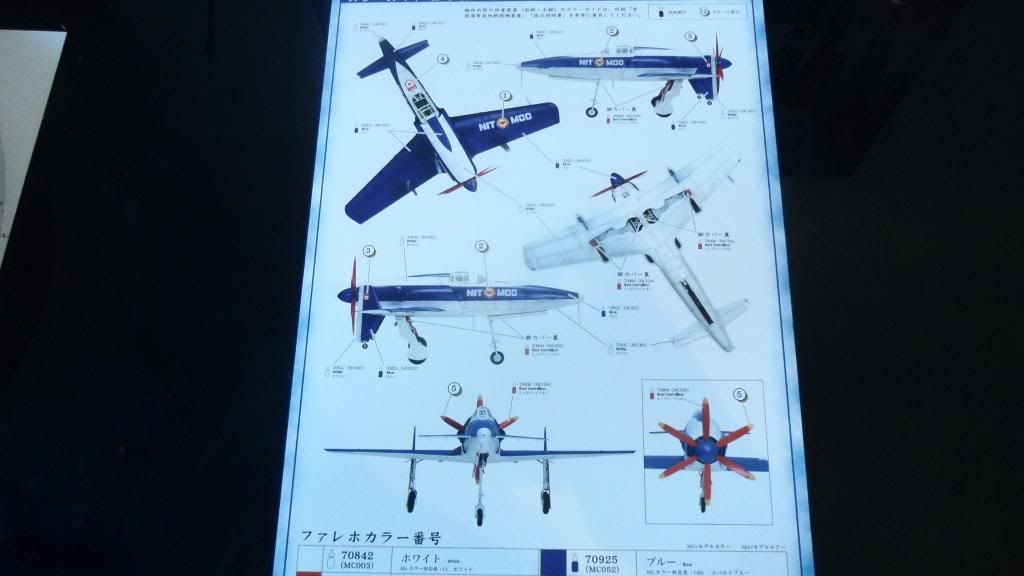
Painting guide:
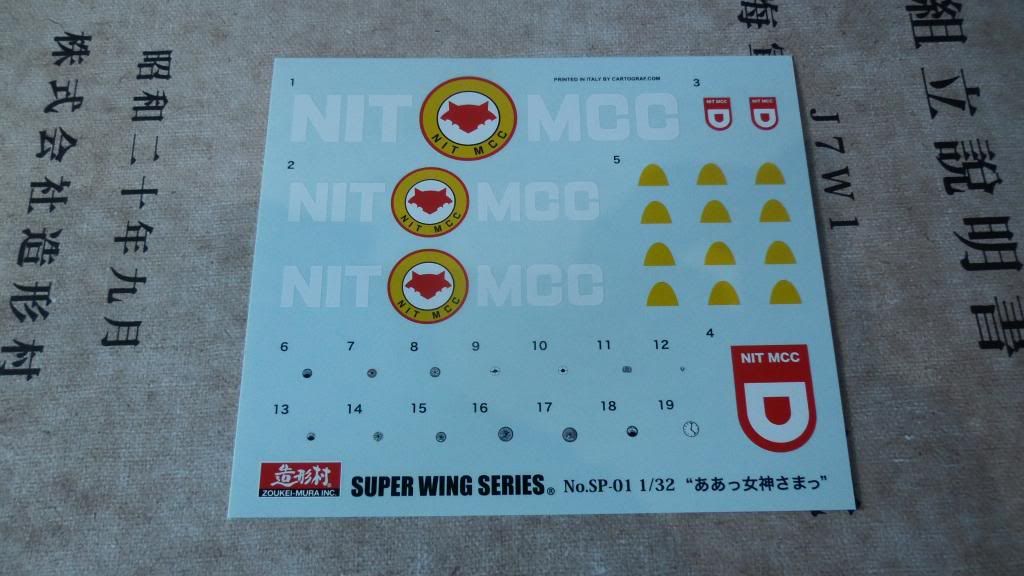
And a decal sheet for the special version:
This kit has a big advantage compared to the standard edition even if you don’t want to build the anime plane. The special decals include individual instrument dials which are a standard feature with all the other ZM kits. The normal shinden boxing is missing them though…
Pete: Welcome back! We’d love to have you. As long as it fits the rules on page one you’re in like Flint. Just as long as the plane is unassembled or light assembly and Japanese- WWII, Cold War, or modern you’re good!
Clemons: Fantastic! I knew the 1/32nd kit comes with a lot of cool stuff the 1/48 doesn’t- though I’m not complaining! That scheme is pretty cool too, does the Shinden appear in that anime? I’ve seen a little but don’t know much about the genre. Still the blue and white scheme looks almost as nice as the real scheme.
BTW: We’d always had two badges. I was going with Wayne’s entry and one with the mascot too.
Let me get straight to where I am at the moment with my other GB entry – the Tamiya Dinah. First let me say that i`m only using the True Details resin set №48462, all other additions to the model will be scratched.
Ive glued the resin inserts by TD and put some different gauge wires on the right side of the pit. Ive scratched the missing rear section of the main fuel tank, replaced the moulded hydraulic pipes, also made the reserve hydraulic pipe from fine solder. In the observers compartment ive erased the moulded pipes and wires and started replacing them with wire, fine solder and bras pipes from Albion alloys. Then I turned my attention to the main wheel wells. Theres a nasty seam right in the middle of the wells which I tried my best to erase but its not perfect. The wells are completely empty while there should be a whole bunch of details so ive started adding the piping and actuators that are clearly visible on the real plane. The other major detail thats missing in the kit is the back of the engines which are visible from the wells. Ive tried to replicate some of the details using different materials. The end result isn`t close to the original but is better than nothing. I also made some adjustments to the wells which were open from behind but actually they were boxed so I replicated this using leftovers from vac plastic sheets. Everything on the photos is primed with Alclad black primer.
That is all for now, hopefully there will be an update on the models soon. Now for some pics!
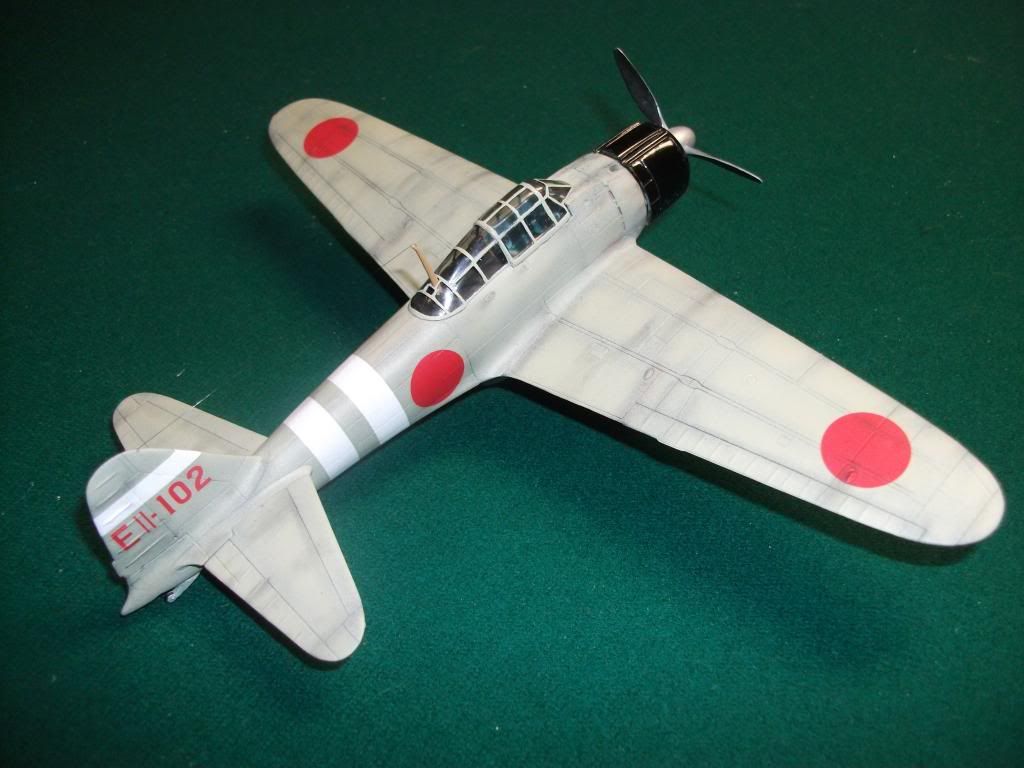
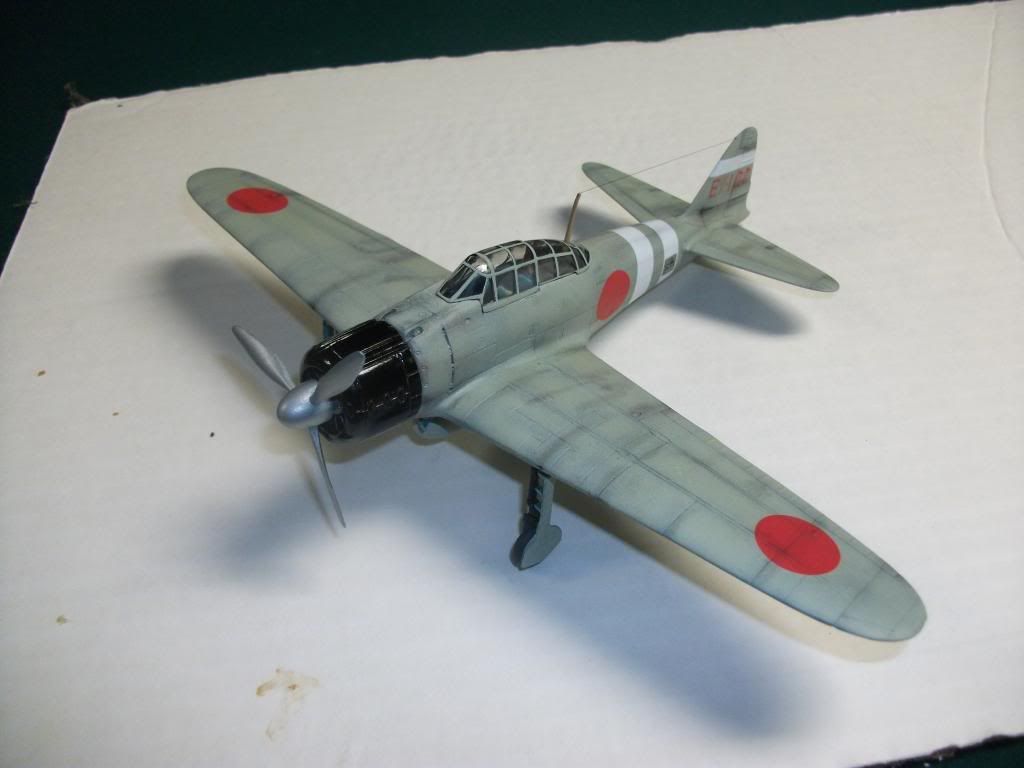
Ok this plane doesn’t count but I thought I’d post it anyway, then I can start my A6m5. This is also posted over in the Pegasus thread for snap together models.
Hey John, that’s beautiful work, I think I saw her over on the Pegasus thread while on my phone and then forgot to comment when I got an actual keyboard in front of me.
Only complaint is you’re setting the bar pretty high there- note to everyone else you don’t have to be that talented to join the GB! [;)]
Gamera-Thanks for the warm welcome. Count me in. I’ve narrowed my choices down to two kits. One is a Ki-84 -IA (Frank) from Tamiya and the other is the 1/32 Oscar from Hasegawa. I’d like to stick with 1/48 (Tamiya), but I’m not finding any after market PE etc. Eduard does have stuff for a 1/48 Hasegawa. Does anyone reading this think I could grab that and use it on the Tamiya kit? If no aftermarket is available for the 1/48 Tamiya, then I’ll go with the 1/32 Hasegawa.
Pete: I wasn’t able to find any AM parts for the Tamiya kit either, but you might want to consider buying this resin set. It’s designed to be used with the Hasegawa kit, but it should fit the Tamiya kit as well (with a bit of trimming). I have the Tamiya Hayate in my stash myself (i got the motorized version at 50% off) and the molded cockpit details look horrible IMO. There is also a pretty large gap at both sides of the cockpit floor and the seat looks really bad (wrong shape, no lightening holes). Replacing the thick clear parts of the kit with a vacuformed canopy is probably a good idea as well. The overall fit of this kit is pretty good though… Just my 2 cents…
The Tamiya Frank is a pretty old kit. The only AM available will be for the newer Hasegawa kit. I would say they could be made to fit the Tamiya kit pretty well with a little trimming and sanding. Most Aires sets fit like crap even in the kit they are designed for, lol!
Thanks for input. I’m going to grab the resin kit for the Tamiya 1/48. Once I get started, I’m sure I’ll have tons of questions. Right now I’m getting started on the Encore version of the F-102A for the Vietnam Group Build. I may just have to try and work on both kits.
Sorry about the bar, but I can blame the 190 group build and the WWI GB, I never built anything like this until I went into those GB’s.[;)] And everyone can be in this GB [:D]
Pete, the only thing I would worry about the Tamiya Ki-84 and using anything designed for a hasegawa kit is that the Tamiya Ki-84 actually scales out to like 1/50-1/51 scale. I read that somewhere and had to see for myself, and lo and behold when I pulled mine out of the stash, it doesn’t measure up to exactly 1/48. I don’t know how much of a difference that would ACTUALLY make with parts that small, but it is something to keep in mind.
Yeah, Ajd3530 is right here, I’ve never built the Tamiya Ki-84 but I’ve seen on several websites that it’s closer to 1/50th. I’m not sure either how much work it would be to get the parts to fit.


