Toshi and Steve, thanks for the kind words. Steve, this kit is 1/48. And by all means, do tag along…
Man, you’re doing a great job on an old kit. Makes me want to get out my GLencoe Pfalz D.III, but I don’t know if I’m up to it. I will happily follow this one and hope it brings your mojo back.
-BD-
Thank you BD. Oh the Pfalz appears to be a FAR better kit. I have that one as well. And yes, this is actually motivating me to get back to the bench.
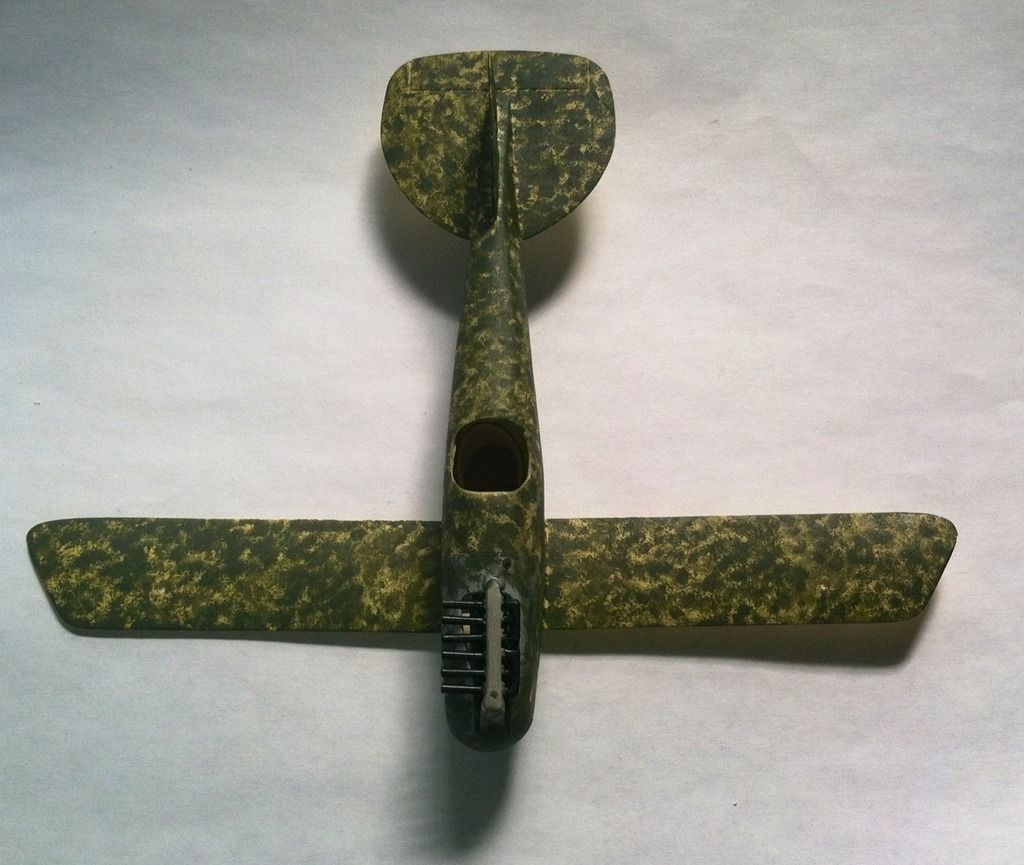
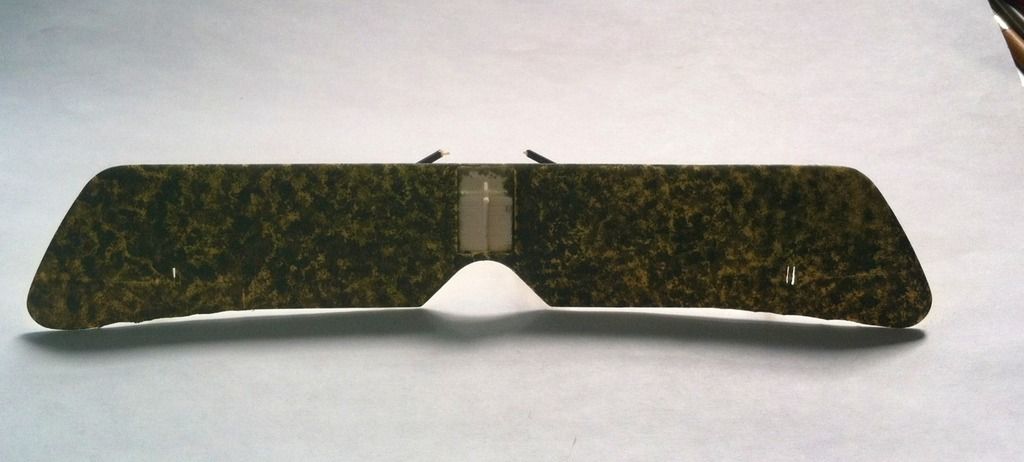
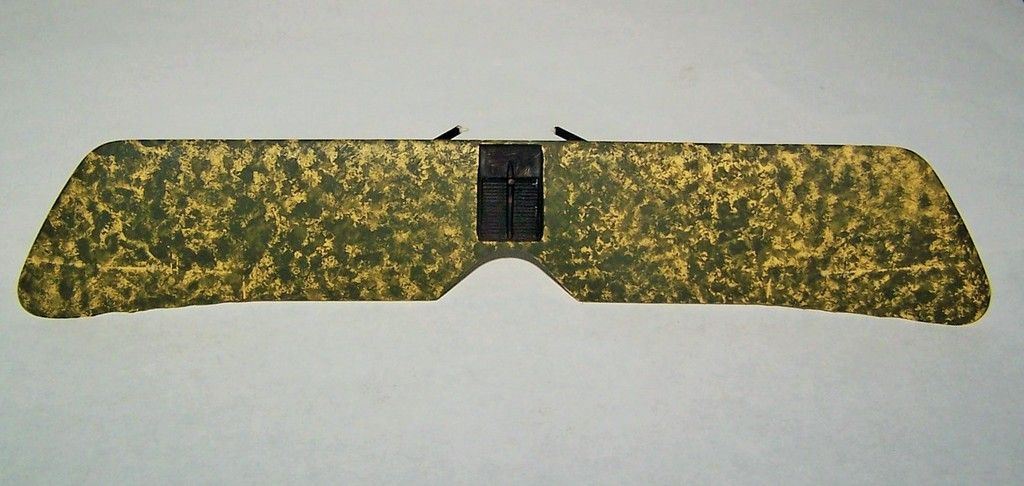
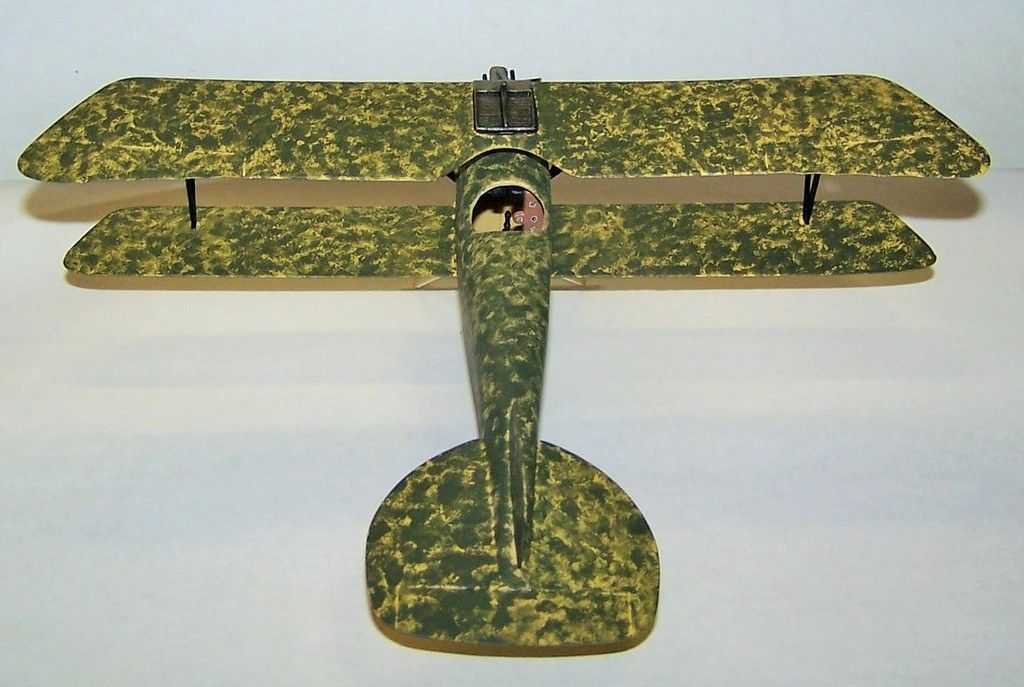
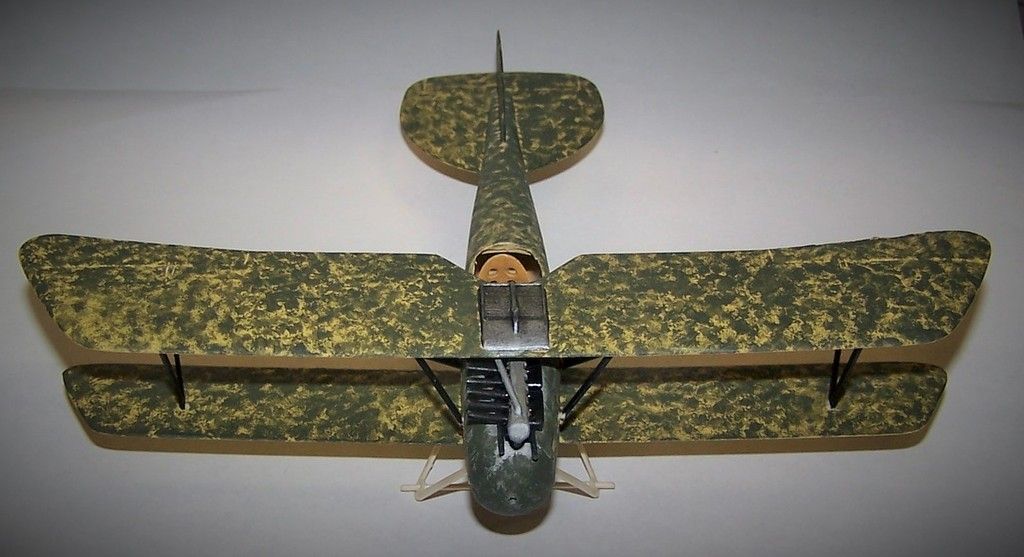
Well here is my latest update. I am building this as the Oeffag D.III as flown by Fiedrich Navratil an Austro Hungarian of Croatian blood, from Sarajevo. His aircraft was camouflaged with dark olive green applied by sponge over the wood and linen. To replicate this, I used a tiny bit of make up sponge superglued to a toothpick and applied Xtra Color enamel Matt Olive Green paint. It actually looks pretty good for concealment purposes. I suspect that whoever thought this up must have had some kind of painter/artist background.
Anyways, here is my attempt at it, photos via my cell phone.
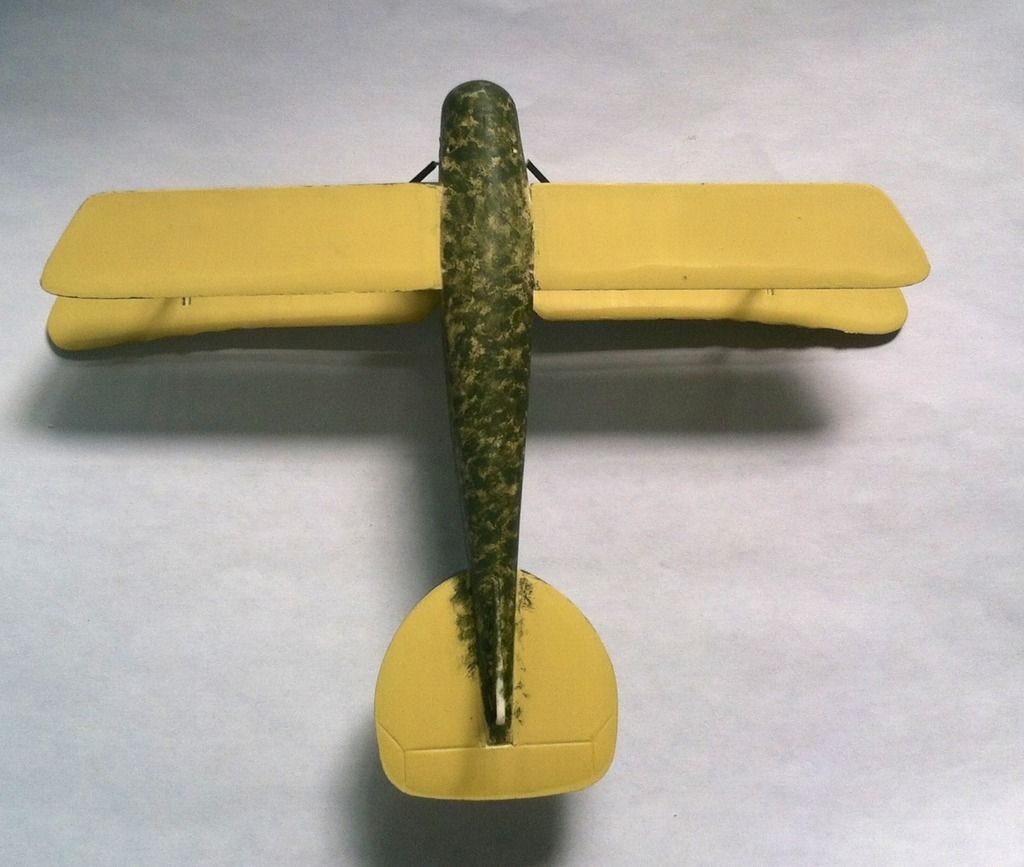
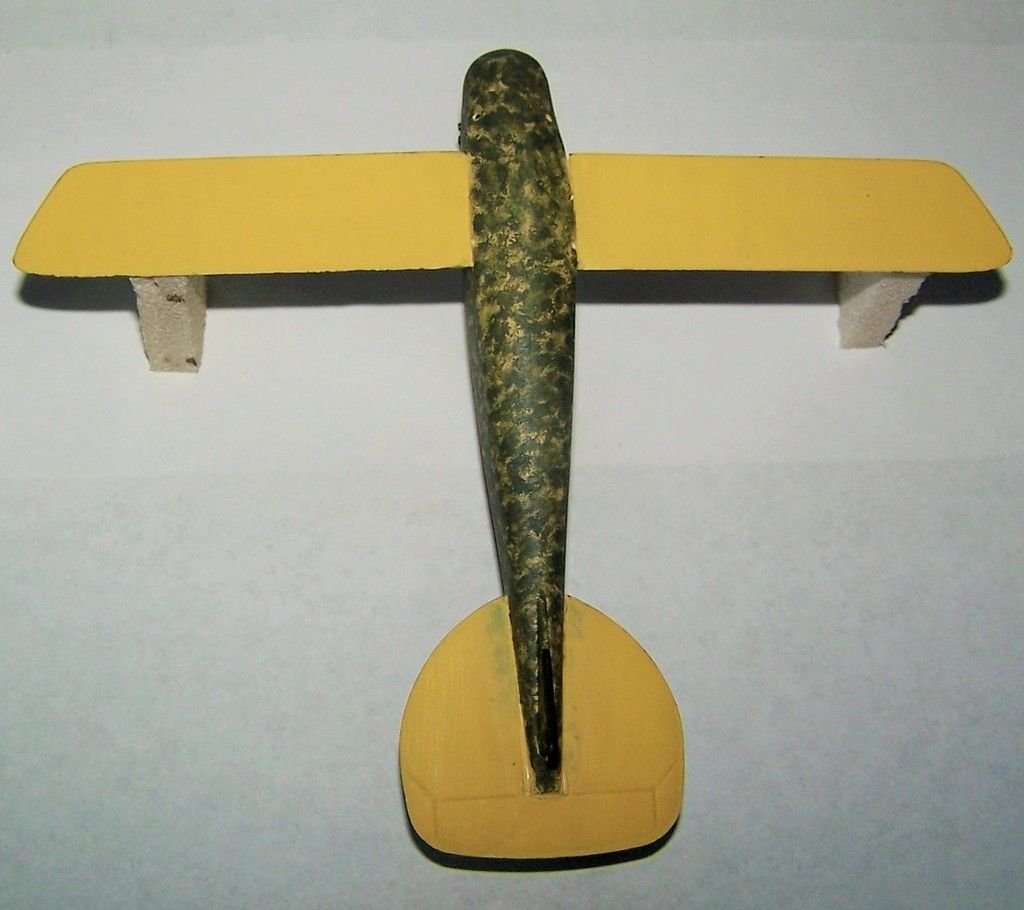
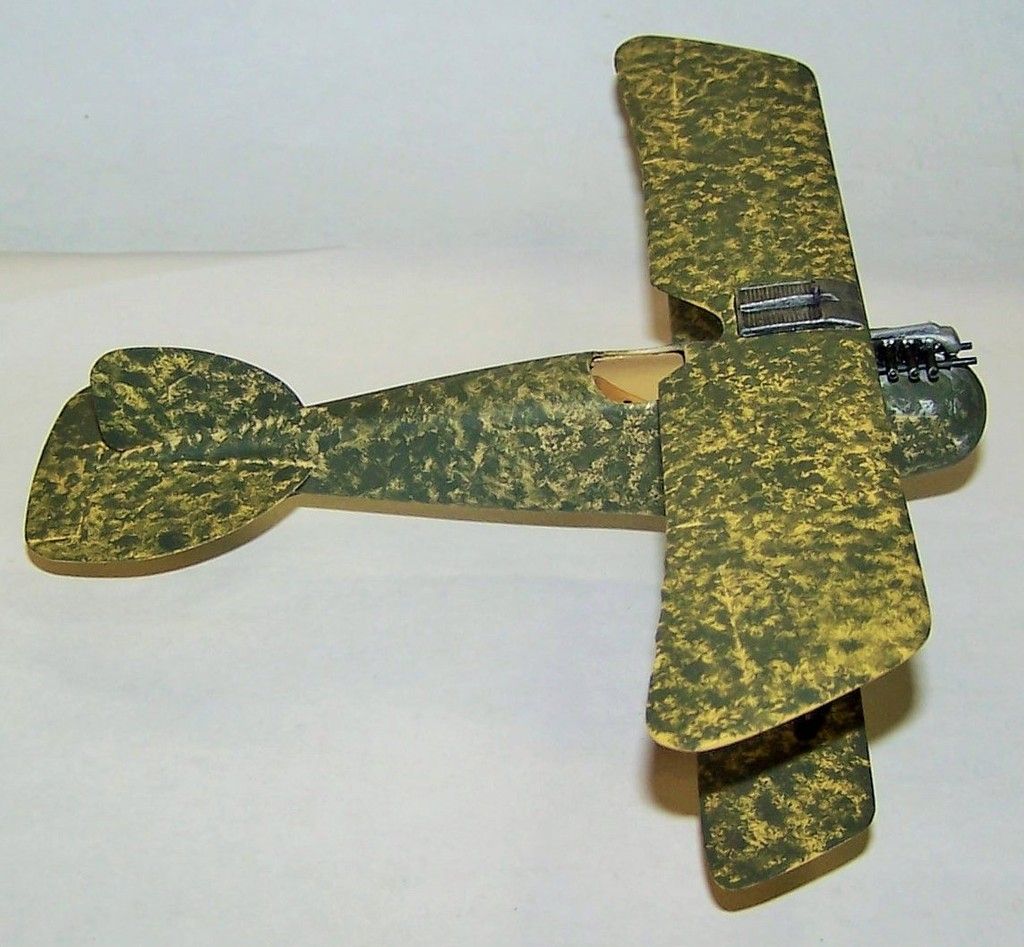
and with the upper wing test fitted

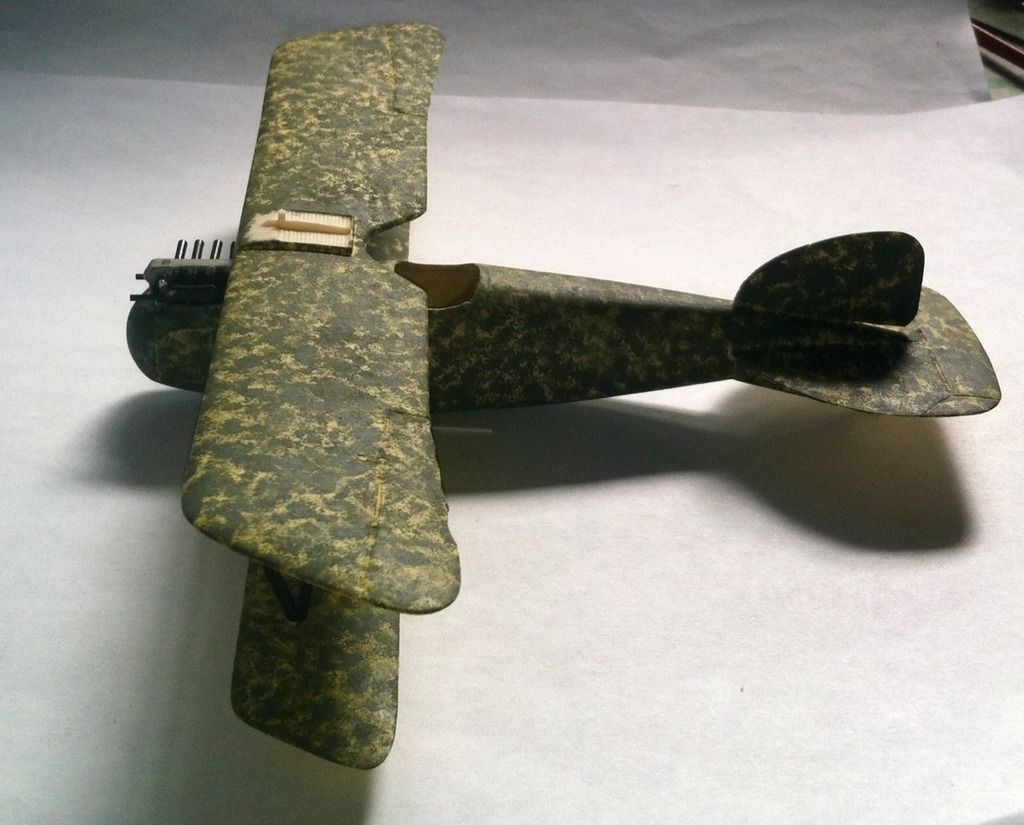
I need to go back and do some touch up on the lower horizontal stabilizers doped linen, but otherwise I am happy with how it turned out.
Oh my ! that camo looks teriffic ! You have the eye of an artist, mate. TY for sharing your technique, that I gotta try.
Thanks JayJay. I really like the look, but I honestly do not know of this camo style being widely used. I have read that JG-2 used sponges to apply the fuselage side mottling on their Bf-109s during the Battle of Britain. I will use this same technique whenever I get around to that build.
Thats a really neat camo indeed! Reminds me of the German Army’s flecktarn. Well ahead of its time.
Yes the dapple effect is very effective looking to me. So simple to apply as well. But like I said, it reminds me of a look often seen in landscape type oil paintings for plants/trees. I truly think that whoever came up with this camo scheme had a artists background. Very contemporary for that era.
What a cool looking camo pattern, and quite clever how you pulled it off. It looks superb, and really brings that kit to life.
BK
Hi Stik, spot on with the camou application, it really does look extremely good.
Best source on this particular Austrian colouring could be found in articles written by Dr. Martin O’Conner. Pheon produced 3 decal sets just for the Oeffag Albatros, with instructions including brief write ups based on the above. Flik 3J in particular would carry the splotch like scheme, believed to have been applied with rags.
regards,
Jack
Brandon and Jack, thanks for the feedback. Jack I must admit that my knowledge of WWI aircraft schemes is minimal so I pretty much tend to go with what is written in the instruction sheets. And the funny thing about these very cheap Glencoe kits is that they reference a then current magazine “Over the Front” for those who want to know more on this subject area. This project does have the added plus for me of pushing me out of my comfort and knowledge sones and learning new stuff as I do so. And lighting the fuse for a desire to do more WWI builds.
Well here is today’s update.
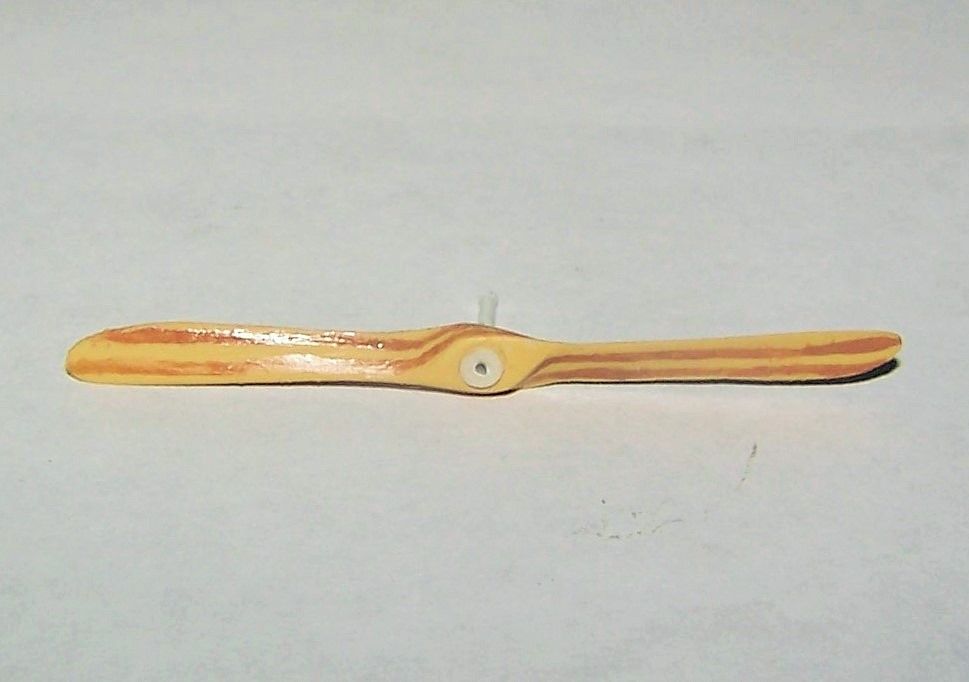
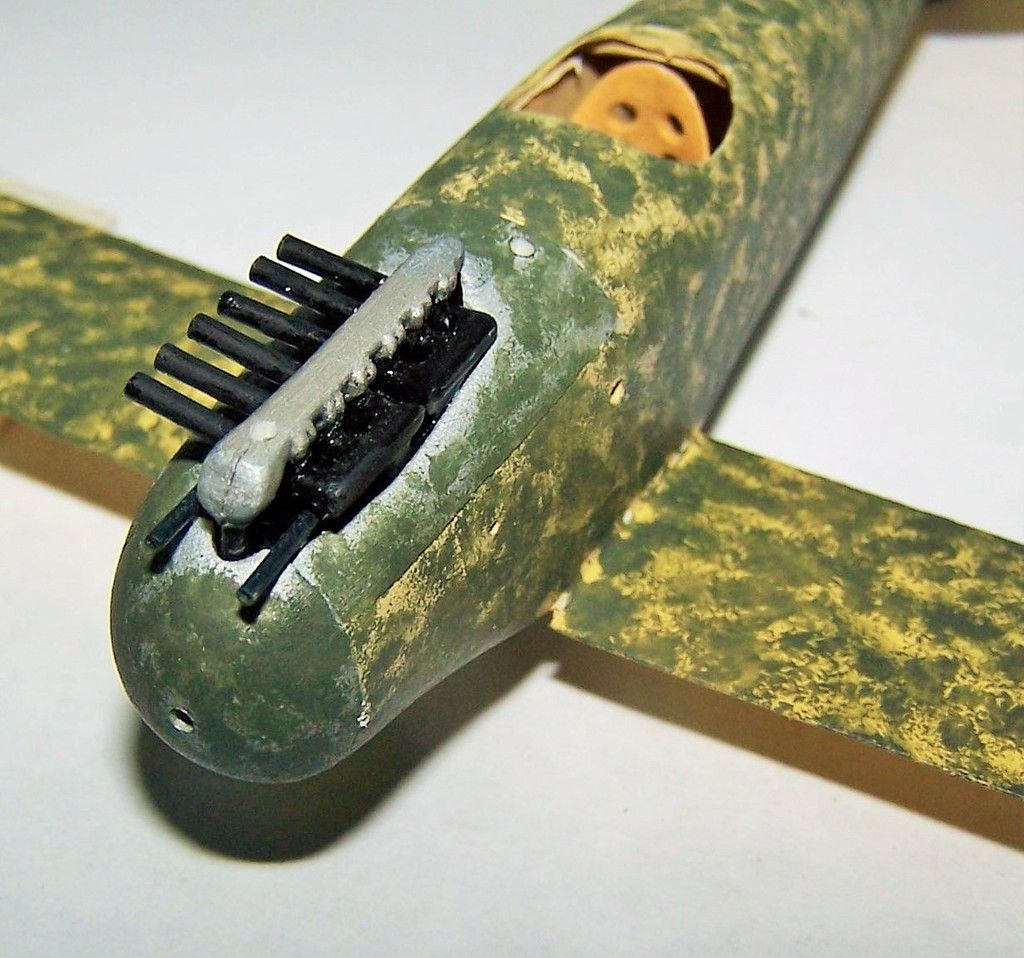
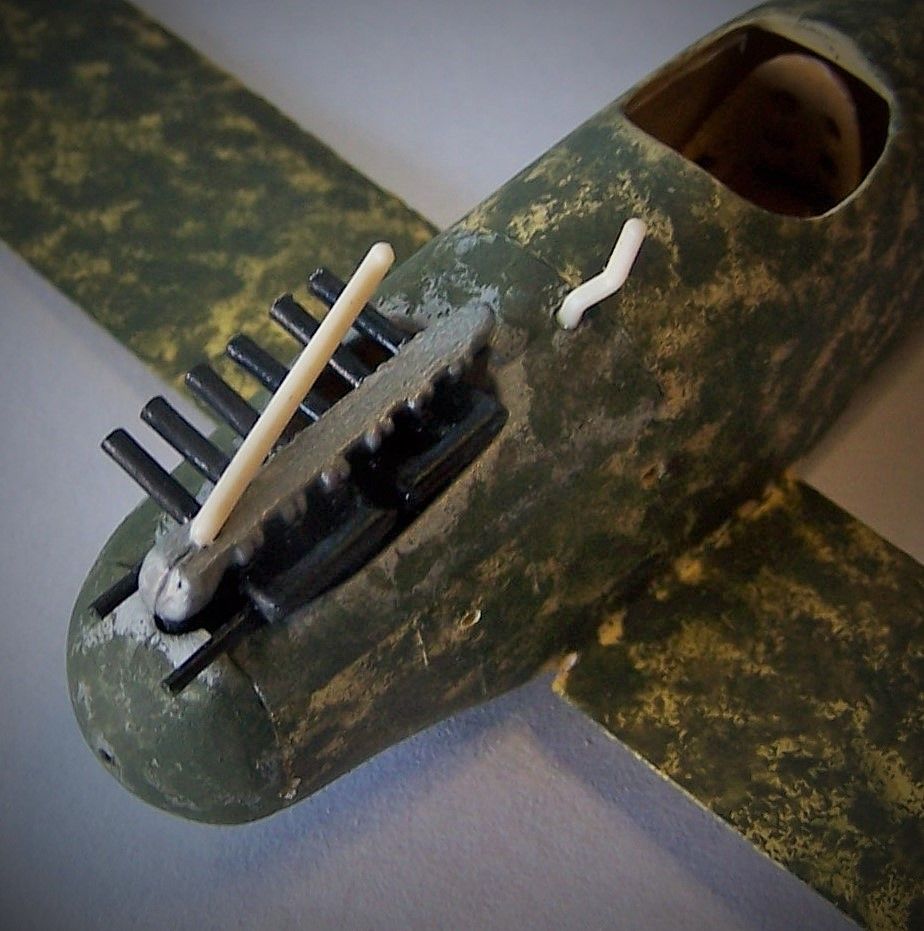
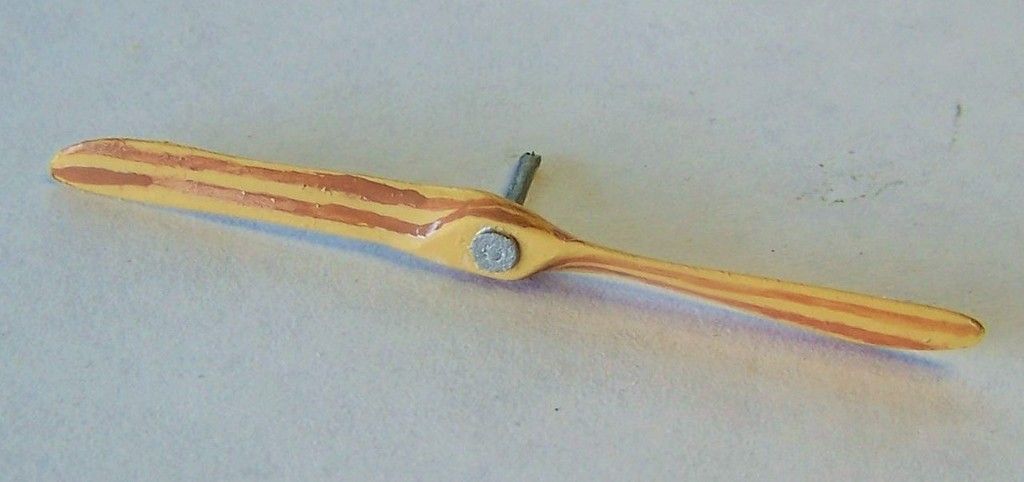
I really did not like the front of the propeller- way too un detailed. But no AM or scratch work allowed… what to do? So I modified an unused kit part to make the front retaining plate. And I painted (weakly) the laminated wood effect of a typical WWI propeller.
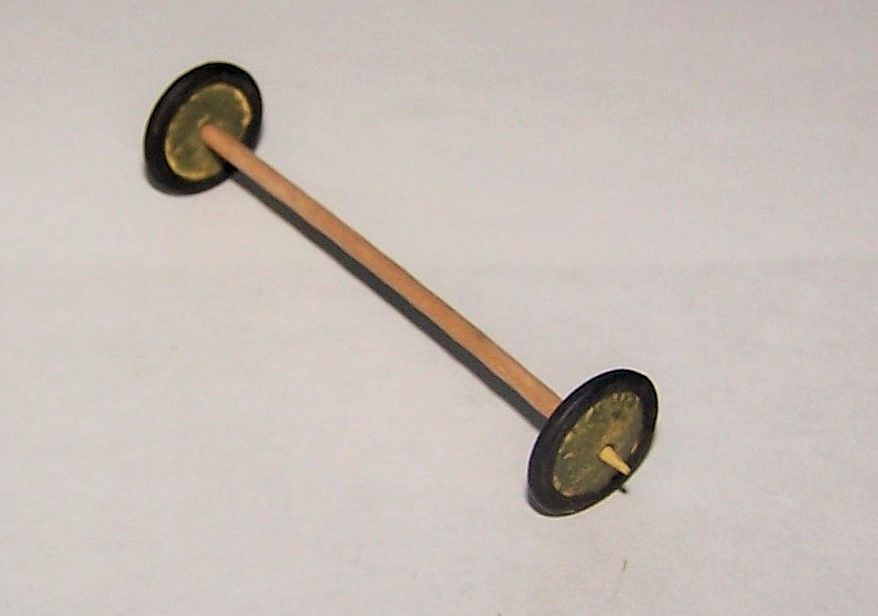
finished painting the wheels for the main gear
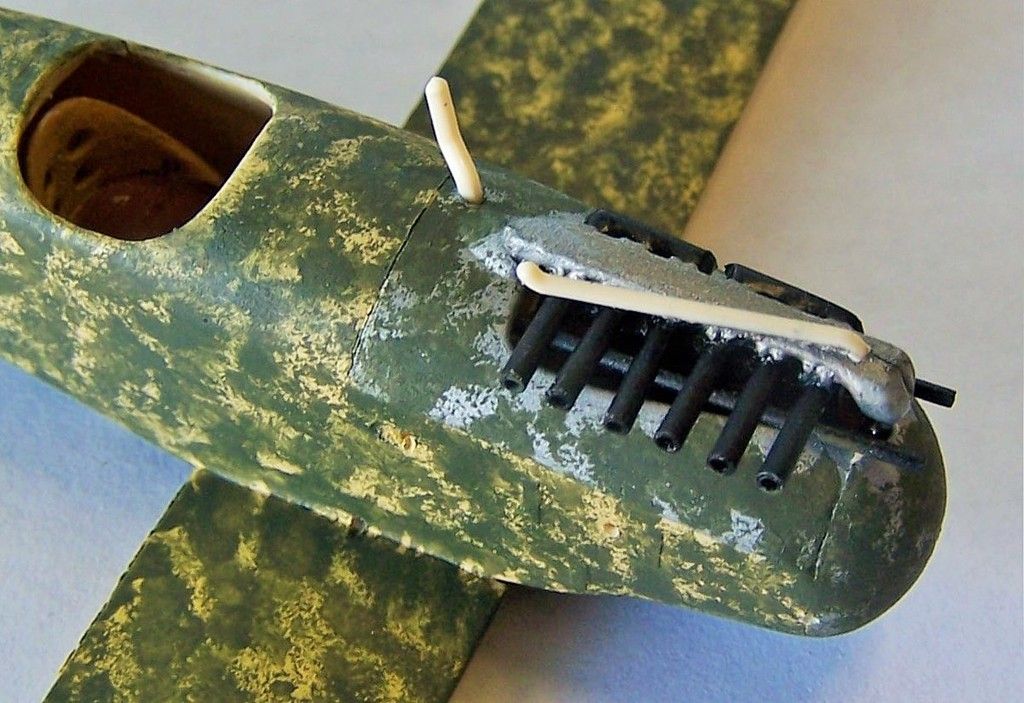
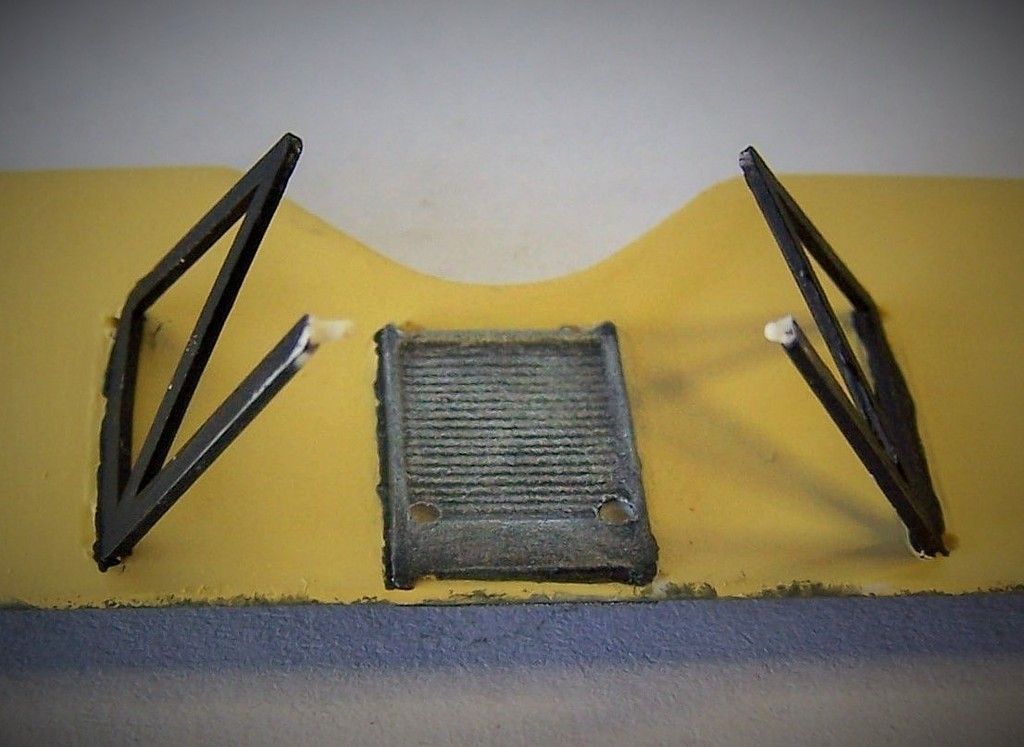
I actually painted the cabane and interplane struts earlier in the week and today was a black base on teh radiator. I still need to dry brush the metalic colors on the radiator now
and finally touch ups on the lower surfaces and painted the metal part of the tail skid black
and touch ups on the engine area
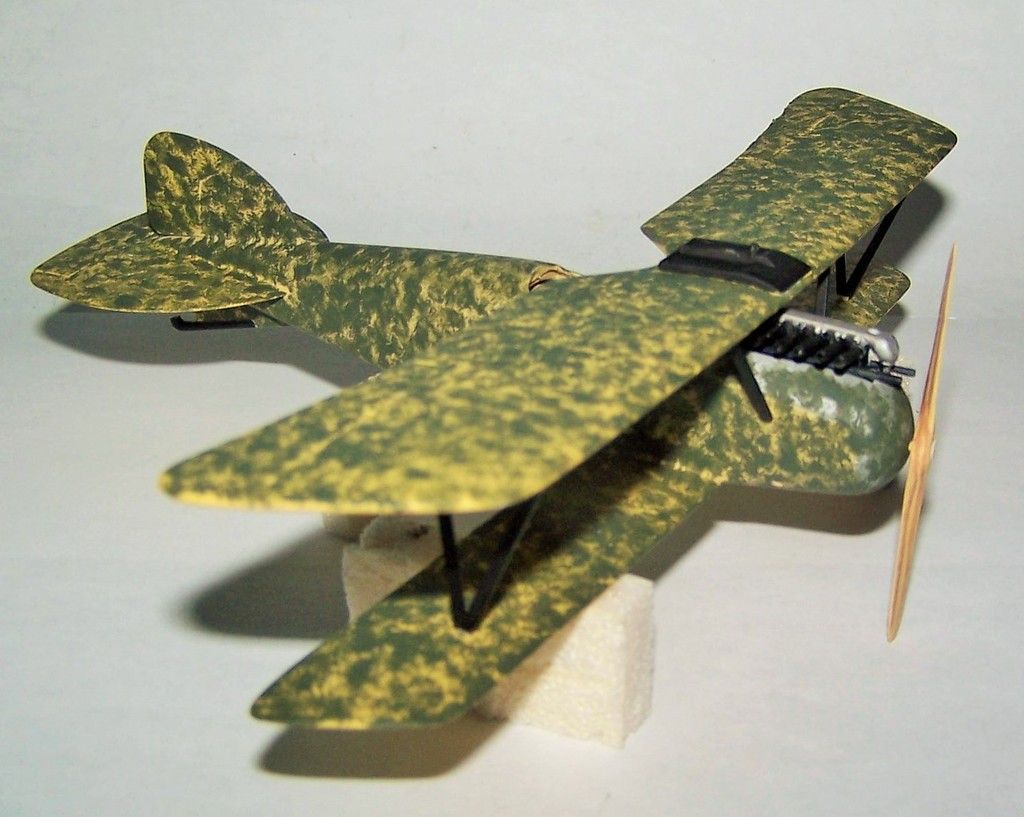
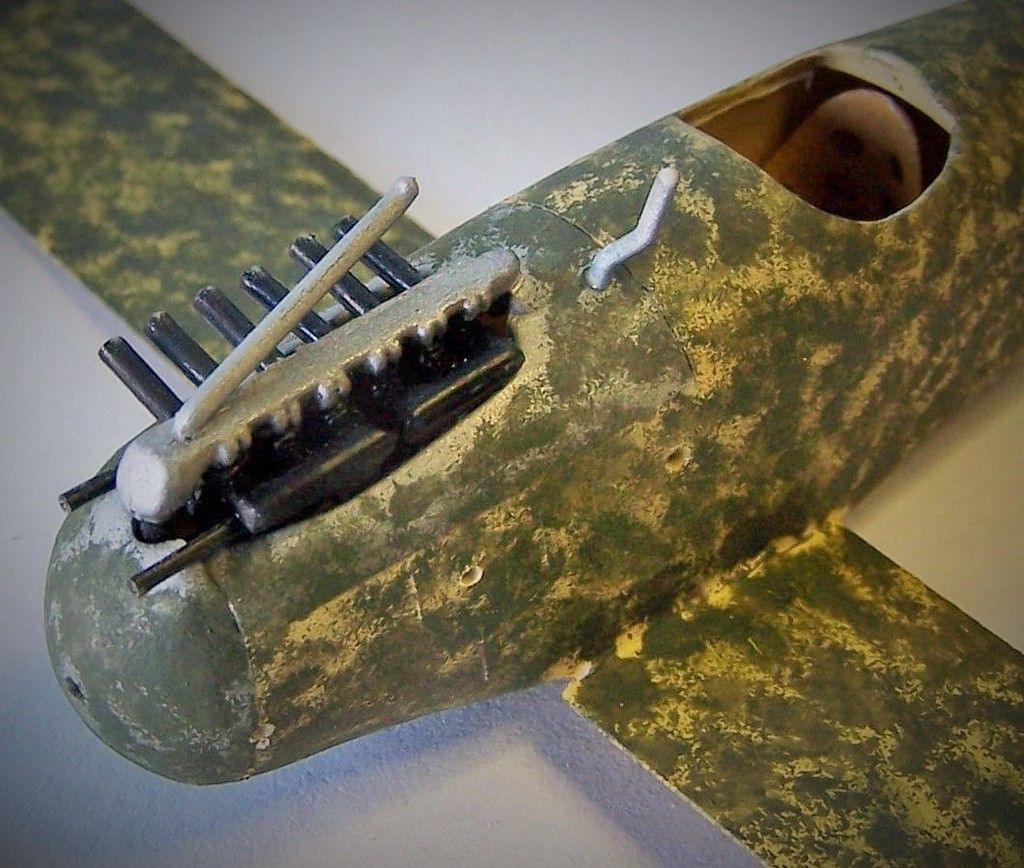
and finally a test of the upper wing and prop in place…

I’m getting impatient to finish this now…
Nice! I like what you did to the prop. Pretty convincing!
Thank you allan. I guess we are our own harshest critic. I see a very weak attempt compared to what others have done…
Well, I have been nickle and diming progress on this build over the past week or so and taking photos along the way. This evening I was finally able to get them uploaded… so here we go
I attached the radiator lines and positioned them so they would sit properly once the upper wing was in place
once they had dried overnite, I cleaned up the split seam and painted the lines
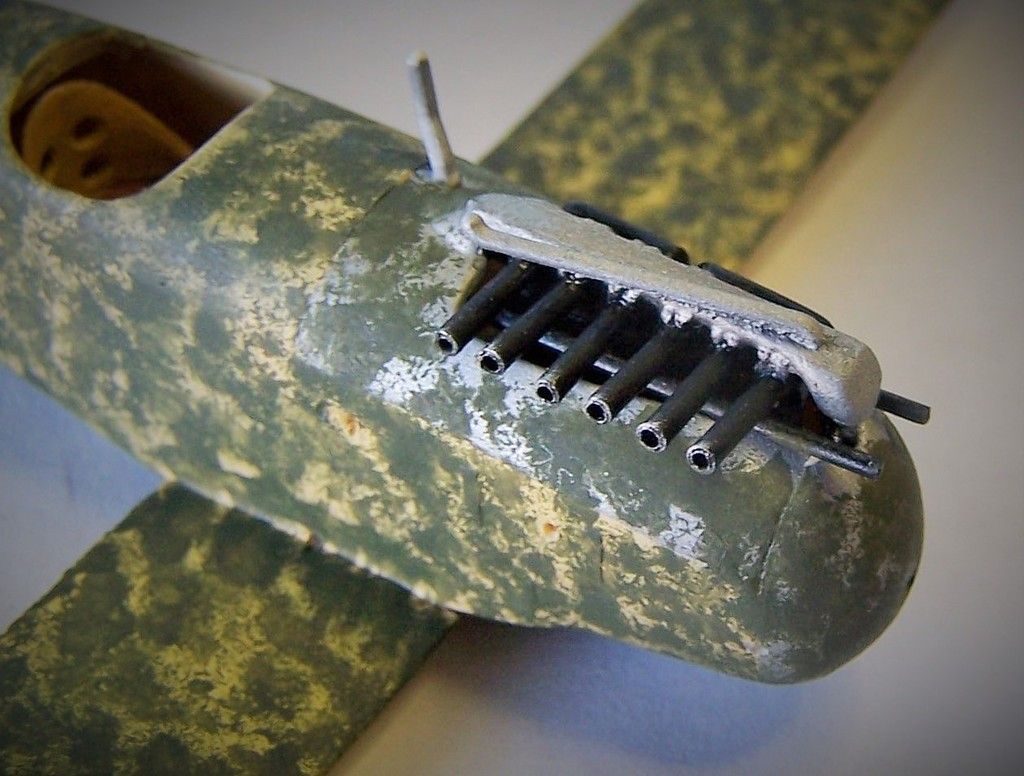
then it was time for a dry brushing of metallic colors over the black base on the radiator
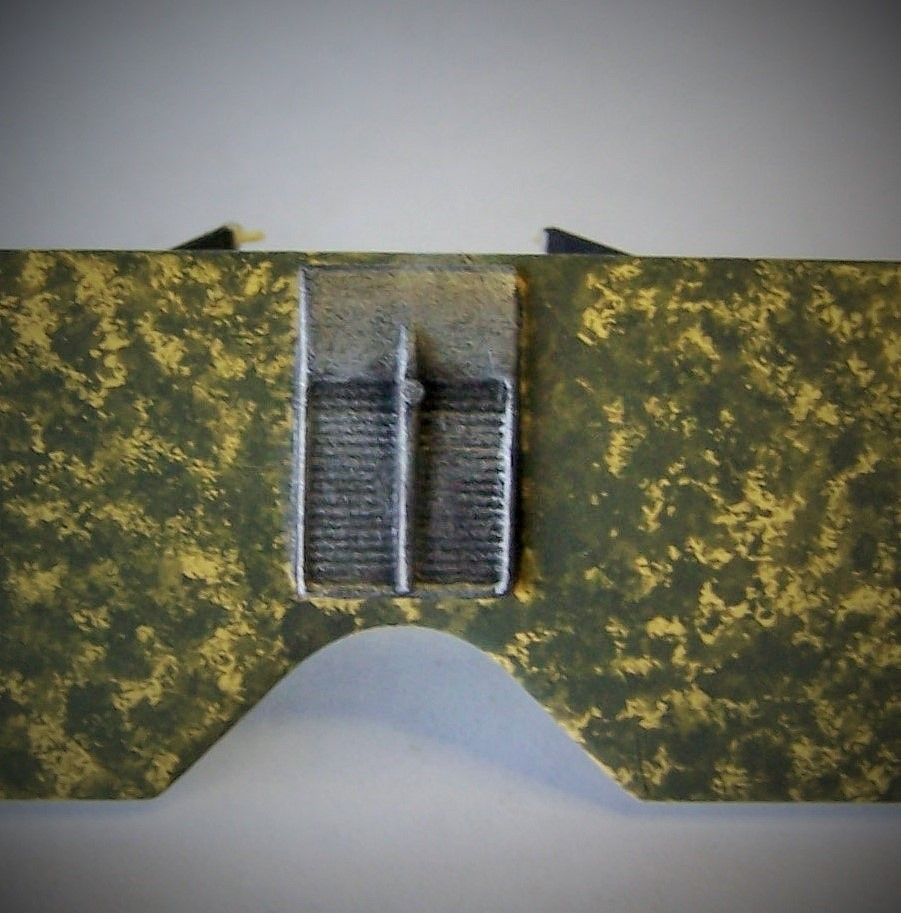
and I painted the prop retaining plate
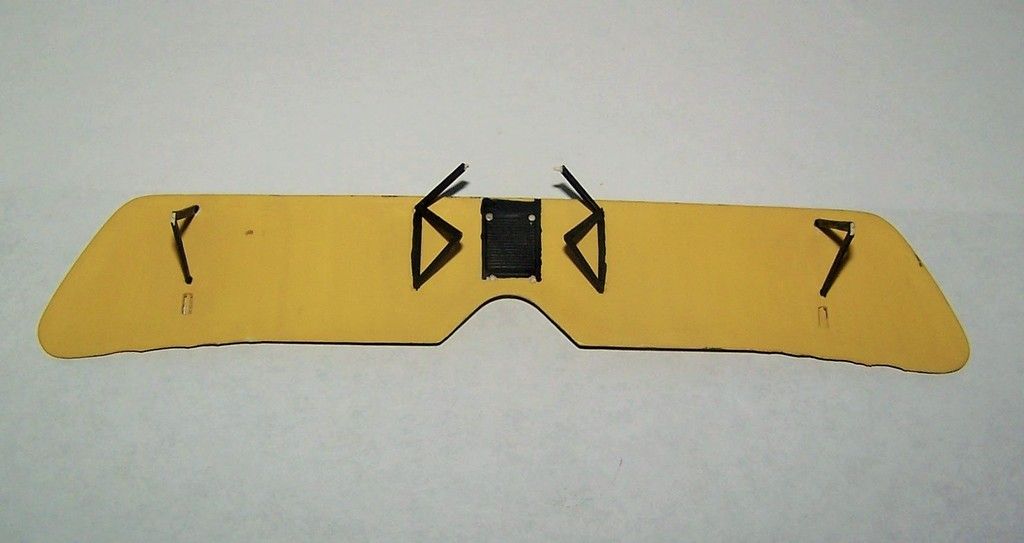
and finally I glued the upper wing in place

after the wings had dried I added teh landing gear struts
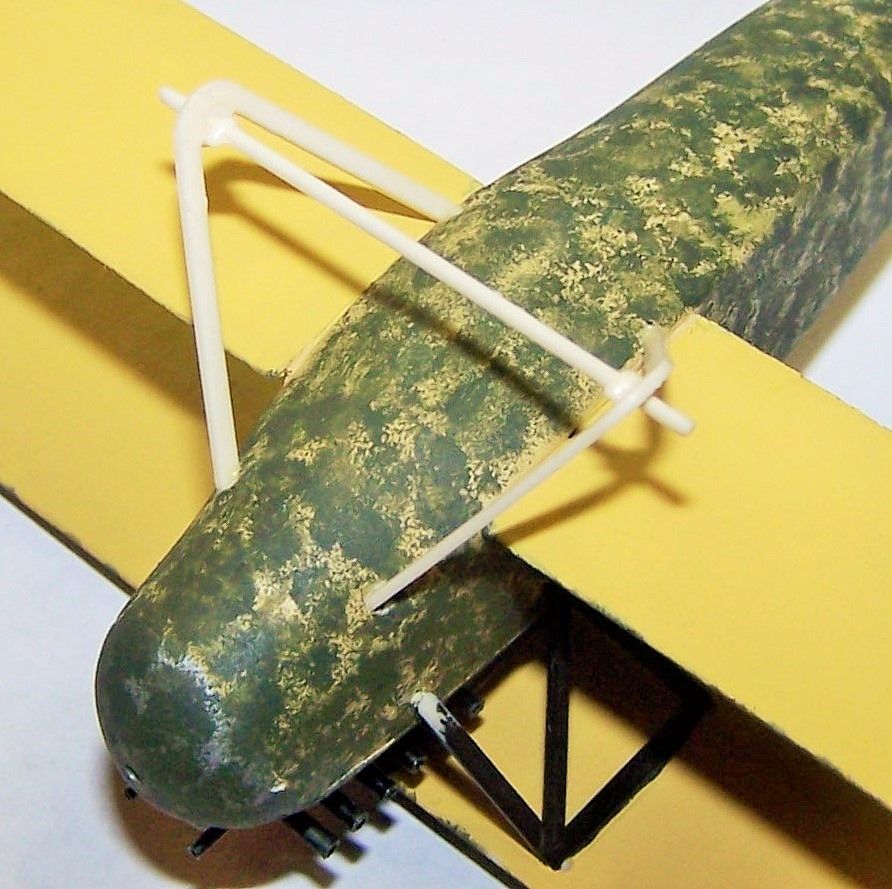
once that had all dried a test fit of the prop and wheels

I need to do touch ups on the areas affected by gluing and paint the landing gear struts, then it will be time for a coat of Future for the decals to go on…
Sorry Stik, seem to have missed this one, not checking the forums properly. That’s a really nice looking aircraft and I love the camo. Great job on the prop as well.
No worries Bish and thanks for looking in and your kind words.
I gotta say that you are doing Damn fine work here. I am too intimidated by these WWI birds to attempt any now. And that prop looks the part, nicely done.
BK
[color=#990000]The curved edge of the prop should lead.[/color]


Aw dang…[blkeye] I dont know how I can fix that now…