Gift GB

Just for fun Bish, I toyed around for about 15 minutes on a badge…certainly don’t have to use if you don’t want. It was just a fun thing I did while working on a drop shadowed image for the CooksonTribute site.

I am perfectly fine with the one you have offered.

[snWow]

Thanks for the info and photo, BL. I asked my daughter about it after seeing Bish’s post. She has a degree in gaming animation, and she told me they were “mech’s,” which left me as befuddled as before. Then, she said, “They’re robots.”

Now, I think I get it, although “animated” to me still mostly means Bugs Bunny.

But back to the GB–I put a coat of paint on the Fairey Battle today, and will start catching up with build pictures soon.

“Work” and the real world has been taking up too much time lately.[:(]

Attractive alternate badge, Z Square. Now, if I could just make up my mind. . .

Oh my…that was not what I intended with the post. It was just a fun thing to kill some time why a download was in motion.

Bish would have to make that call if he wanted to change it so it is consistent to all on the build in my opinion.

Sorry, Z Square. I didn’t mean to cause any issues. I should just: [:#].

As of right now, I haven’t earned any badge/either badge anyhow.

So maybe I should start [:$]

First shot shows a false start. I thought at first I’d close up the canopies, so I painted the interior fuselage (RAF interior green, of course; this from WEM Colourcoats).

Then I got the bright idea of adding some plastic bits to represent instruments, and leaving the canopies open. That meant, I had to go back and sand off the ejection pin marks, and repaint the interior.

I ran across some photos of an after-market cockpit set for the Fairey Battle, so working from the pictures, I cut some bits of plastic sheet to approximate the shapes, and painted them black.

Here are the parts for the pilot’s cockpit.

The brown piece represents a leather padding for the seat. The green bar might be the bomb release lever? I’m not sure, but it appears in photos to the left of the pilot’s seat.

The following photo is of the rear gunner’s compartment, with the plastic bits for details. I have no idea what any of them are.

I also had to repaint the gunner’s seat, after seeing photos. I had painted in a nice leather padded seat and back, but photos seemed to show it was just plain green painted metal. Must have been uncomfortable during long flights, unless the gunner was sitting on his parachute.

This time, for the seat I used MM RAF interior green for contrast, but the WEM and MM paints are almost too similar to see the difference. Maybe if you squint. . .

I have more photos to come, but they’re still in the camera.

Thanks for looking.

Yeah, Checkmate, it’s interesting that the Japanese have used animation in a completely different way than we have in the U.S. All of the Mobile Suit Gundam series I’ve seen are pretty much PG-13, as are most of the other anime I’ve seen (there are ones intended for younger audiences that I stay away from). But there are R rated ones, too. I’m a child of the '70s so I grew up with Speed Racer, Star Blazers and Robotech (American adaptations of Japanese animation), which kind of acted as gateway drugs to the Japanese stuff that wasn’t widely available in the U.S. unless you hunted for it.

Anyway, like you work and the real world (like sick kids) have been eating into my modeling time, but I have some free time tonight so I hope to make some progress…

Interesting information, BL. Thanks.

My two daughters are kids of the '90’s, and both are heavily into anime. Every year, they attend a convention in Chicago near O’Hare International. They’ve been attending since high school, and in those years my wife went with them as driver.

Of course, I got to stay home and work. [:^)]

Z, i rather like that. I did think mine was a bit cluttered and its a bit hard to read the dates especially. I will add it to the opening post and people can choise which badge they like.

CMK, nice work on that, looking forward to seing some more. And certainly no need to zip it, deffinatly no issues caused on my account. If someone mentioned mech’s to me, i would automatically think of Mechanised Infantry. So your not alone.

Bish & ZS8: thank you for the compliments.

ZS8: I dechrome using Westley’s BLECHE-WITE - it’s a whitewall/blackwall tire cleaner.

I have a 20oz bottle I bought 5-6yrs ago. I pour a little in a small Tupperware container - enough to cover the part(s) and put the lid on, wait 1-2 hours and it’s done. I simply remove the part, rinse in water and let dry on an old towel. I keep the used Bleche-wite in the Tupperware container until it turns color (ussually 2-5 uses) and flush it down the toilet.

I have a modeling buddy that lives out your way, in Pataskala - we get together once a month for pizza & modelling at his place.

If you’re interested, every Friday evening (around 6pm) several modelers congregate for modeling and lively model banter at the Graceland Hobbyland on N High St (north of Morse Rd in Graceland Shopping Center, across from Krogers) - feel free to stop by and join us!

CMK- certainly no need to zip it! No badge of any kind earned over here yet.

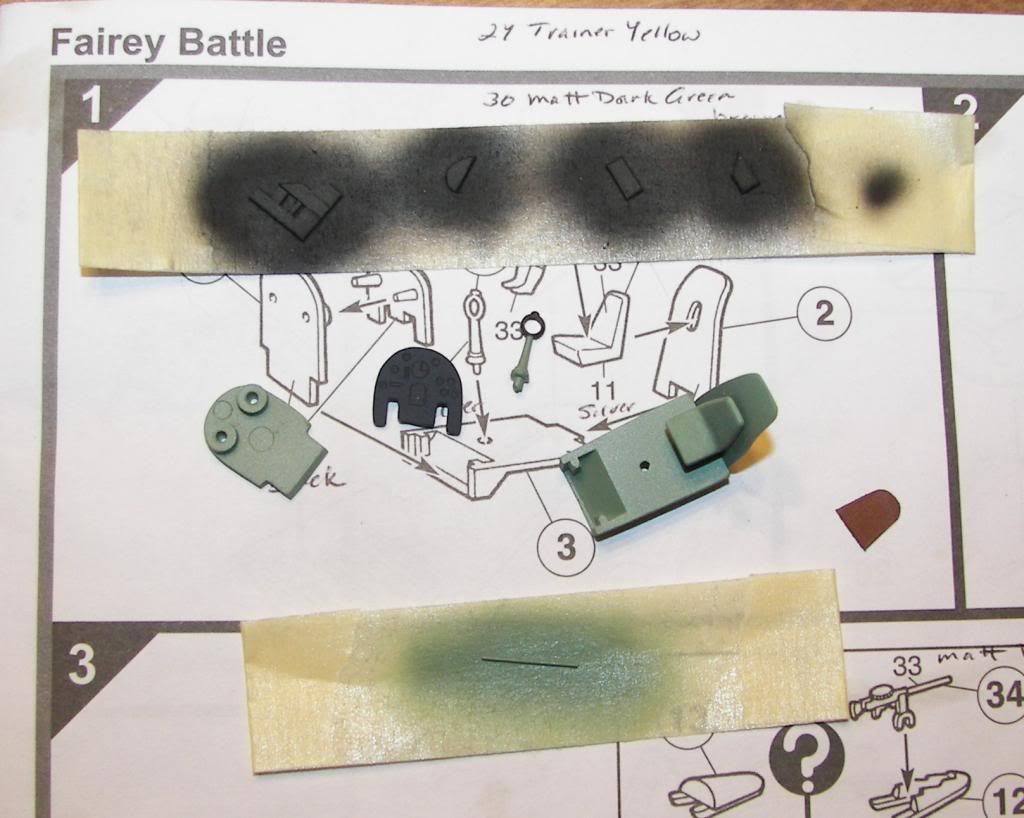
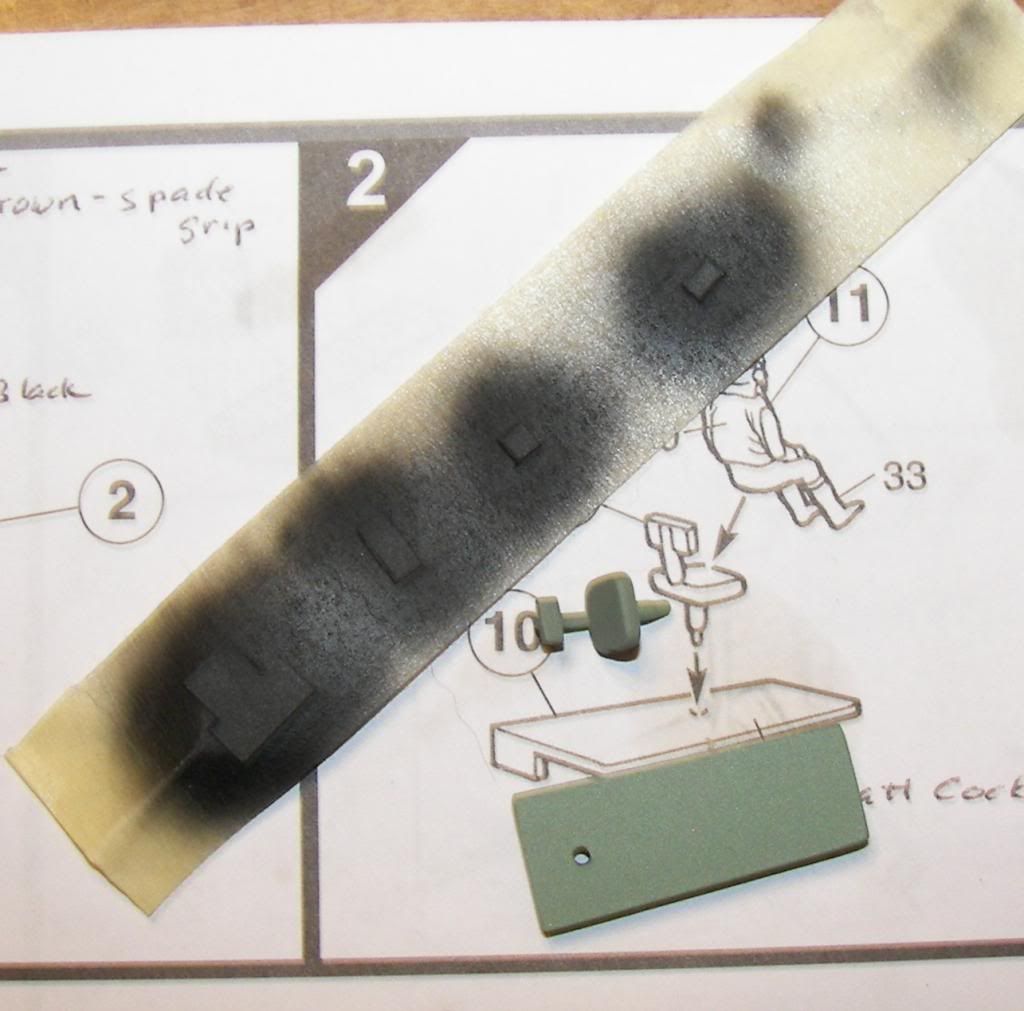
I’m very interested in seeing the F-Battle WIP pics. I did take mental note of of the directions too when I looked at your pics. Looks like it may be an encouragement/advertising effort to keep a new crop of modelers on board while accomplished modelers like yourself can still navigate thru the build,(or maybe its to encourage freelancing by the accomplished genre). LOL

BL- thanks for the clarification and pic. I can recall a few Saturday mornings with Speedracer but graduated to the Ba Ba Blacksheep series with Robert Conrad playing Greg “Pappy” Boyington of the VMF. Regarding the Gundam…well, I am certain that I wouldn’t want the electric bill to charge up a 60’ warrior or the Visa bill from Home Depot for duracell’s and energizers! LOL! I’ll be watching your build progress as I am interested in how you do it because it is such a departure from my very limited build experience, (it’s been ships, planes, cars and one motorcycle over 20+ years ago…the 29 is the first hobby resurection effort). Your build intrigues me.

Pyrman- thank you for the tip on the Westley’s de-chrome. I have used that on actual car tires before but never occurred to me in this arena…got me thinking about other household products like Goo-Gone. Ever used that stuff? I have some glue on that little window on the right side of the 29 build that I had to re-install from the outside. I did use the testors “glass” glue, but did not get it done to meet my satisfaction. Any clean up tips on this would be appreciated.

I’m in Etna which is 3 miles from Pataskala. Thank you for the invite to join you on Fridays at Hobbyland Graceland…I may do just that sometime. I’ll drop a bug early in the week here when it looks like I may get by so we could look for each other. Be my pleasure to meet you and the group that attend.

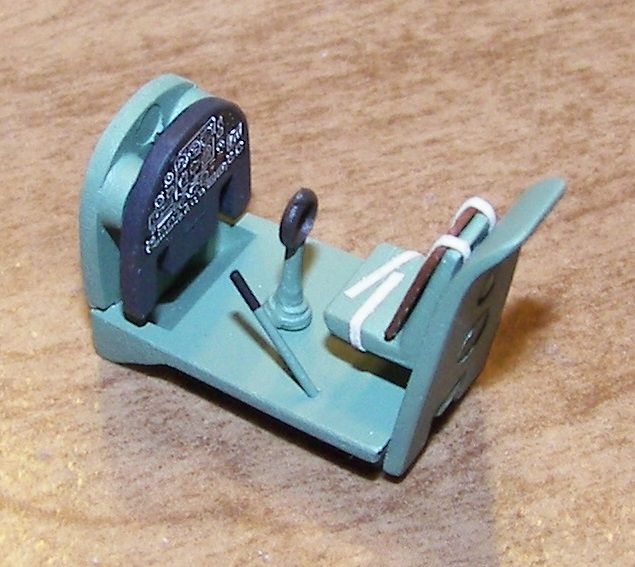
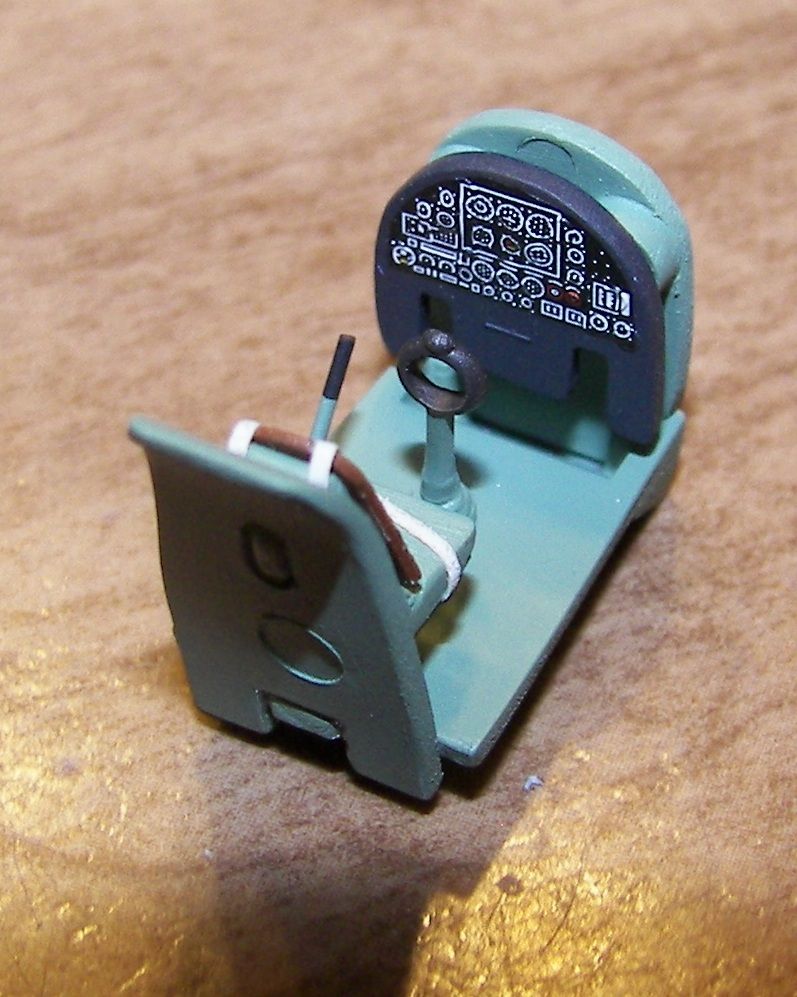
Bish and Group- badge assembly:

Done with Paint.net primarily for layering…used sniping tool for badge sectional grabs.

Background layer: reversed julia fractal

layer 1: gradient with top left being blue, top right being purple, bottom left and right black

layer2: text of GIFT GB

layer3:text of build dates

layers4&5: snipping grabs import/plcmnt

layers 6-8: import/plcmnt of 3 clip art images of gifts

flatten image and save as a .png file

open new imge and enlarge base canvas slightly larger than the .png saved file > used magic wand to click on this new base canvas and hit Cntrl +X to make it invisible.

add a new layer to import the png file > used the object dropshadow plugin > adjusted X and Y calibrations to create the drop shadow > save as jpeg.

Took 15 minutes and most of that was finding suitable clip art. Included the info in case the group ever has time to tinker…after all, everybody loves a drop shadow effect! [H]

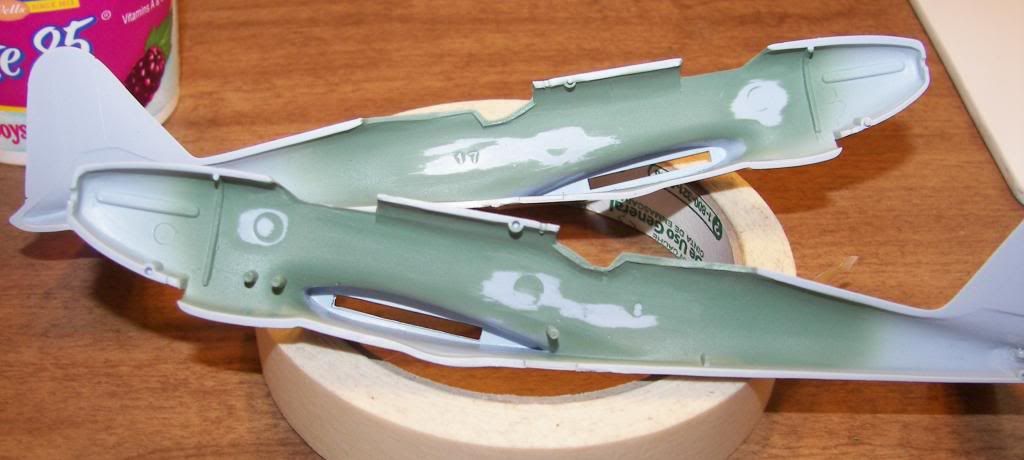
Back to the 29 build update:

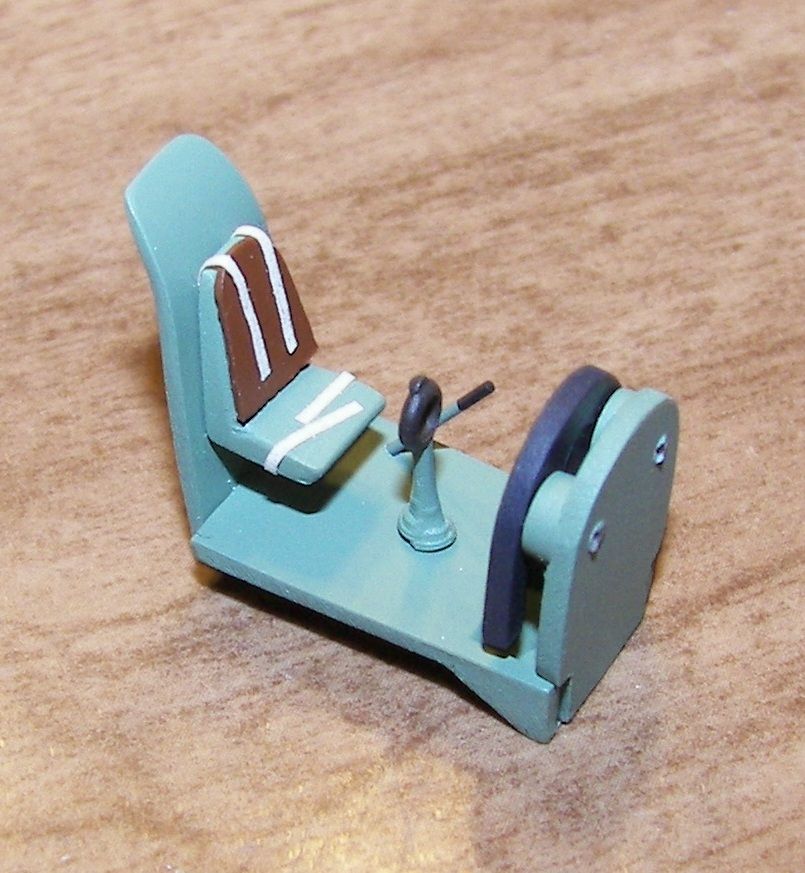
Bit stalled as a neighbor let me borrow his airbrush and compressor. Now, I’m researching masking, airbrushing tips, alclad II, surface prep,…probably making it harder than it needs to be, but am being cautious/patient in my approach since this is finished surface area. Been spending bench time tinkering with dry fits and detail enamel painting of parts.

Once primed and painted, the final assembly/decaling/topcoating should not take too long. (famous last words right? [:O])

I have only just started useing paint.net and still getting to grips with it. I am not the most comnputer savvy person in the world. But seeing some of the resluts that can be done with it, it deffinatly has a lot of potential. I have another badge made up for a GB next year, and i am pretty pleased with that one. Just need some more practice.

What is your GB for next year Bish?

Well i have a couple in mind, ones pure armour the other should be wider rangeing. But keeping it under wraps for now.[;)]

ZS8: Your welcome…part of modelling is sharing ideas and helping others. Yes, I’ve used Goo-Gone…great for removing paint, including lacquers! To remove Testors clear parts cement, I recommend using a small Q-tip or micro-brush dipping in water.

Look forward to meeting you at Hobbyland!

Having trouble with photobucket–still!

But here is the kit cockpit. The only modifications here were to add the lever to the left of the seat, the seatback cushion, and harness made from masking tape. No photoetch buckles–I’m too cheap. I made the lever from 0.20 plastic rod, drilled a hole in the floor and located it.

Airfix included a nifty little IP decal.

That huge sink hole isn’t visible once the 'pit is installed in the fuselage.

My patience with photobucket being exhausted, I’ll leave it at that. Thanks for looking.

Pyrman- I did not know Testor’s clear part cement was water soluable…or did I misunderstand you? Thank you for the tip!

If correct, I’ll try to remember to not leave the 29 out in the rain for two reasons…I don’t want all the glass pieces to fall off or into—

AND,

I don’t have a bucket big enough to accidentally drop the 29 into. [um][st][;)]

Here is a tidbit for the group on the 29:

It is a dry fit test after engine painting was completed earlier this evening.

(it has occurred to this thick head of mine that I should turn the flash off, and remove all other subject matter when taking detail shots after I took this. The camera selects the largest matter and focus is done to that item-- or in this case my hand holding the engine in place in the back of the cowling). I’ll have to test this out tomorrow and see if detail shows better.

** mentally balking at the crankcase color right now as it is a bit light of “aircraft grey”. May be ok once the cowling goes from injection mold grey/prime to Alclad II Airframe. Time will tell.

CMK- love the clarity of your detail shots. Great idea on the tape belts and lever. They look good!

Love the group build and tips…I am so glad I decided to jump in and was so warmly welcomed. Thanks gentlemen!

Z, i have only just started learning how to take decent piccies. I am glad my modelling is better than my photography. And this is one of the reasons i love doing GB’s. That and i find them highly addictive.

ZS8: Yup, you got it right…water should clean it up. Testors “clear cement” reminds me of a slightly thinned Elmer’s glue.

want to get opinions…i used the below photograph as a general reference for engine painting. I have limited knowledge on aviation engines, so I am beginning to think the red are actually colored port covers of some kind for display to protect from debri intake. (this would mean a few minutes of color correction before assembly into the cowling once they have been painted). Any thoughts?

(The image came from the net and is a R-3350 on display at National Museum WPAFB in Dayton, Ohio.

Don’t know anything about engines; not mechanical in the least, but something about red polka dots on a B-29 engine just doesn’t look right to me.