I was able to get back to Airfix’s 1/48 Mosquito over the last couple days. It’s being built with the addition of Eduard’s photoetched detail set (no surprises there, huh?).
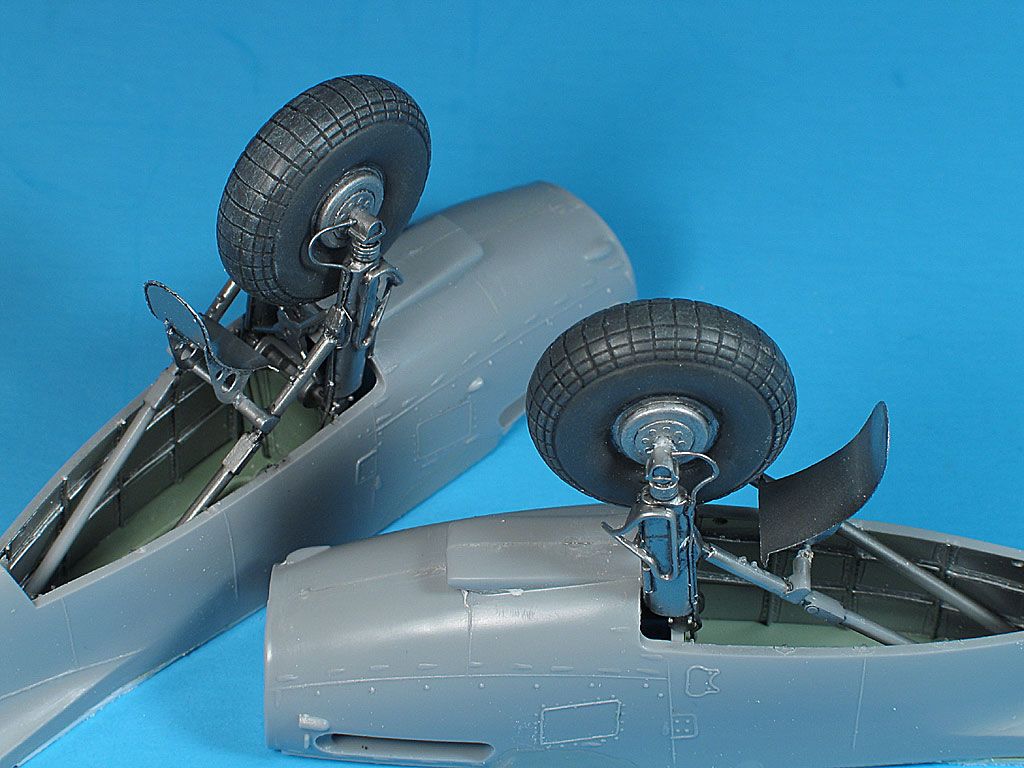
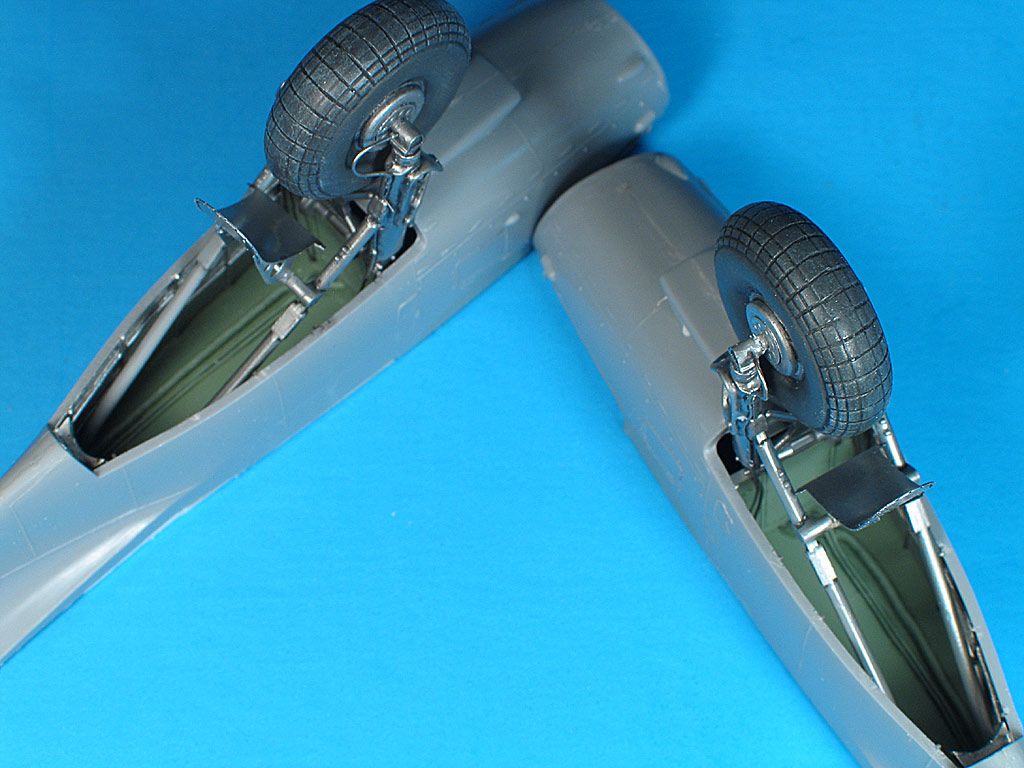
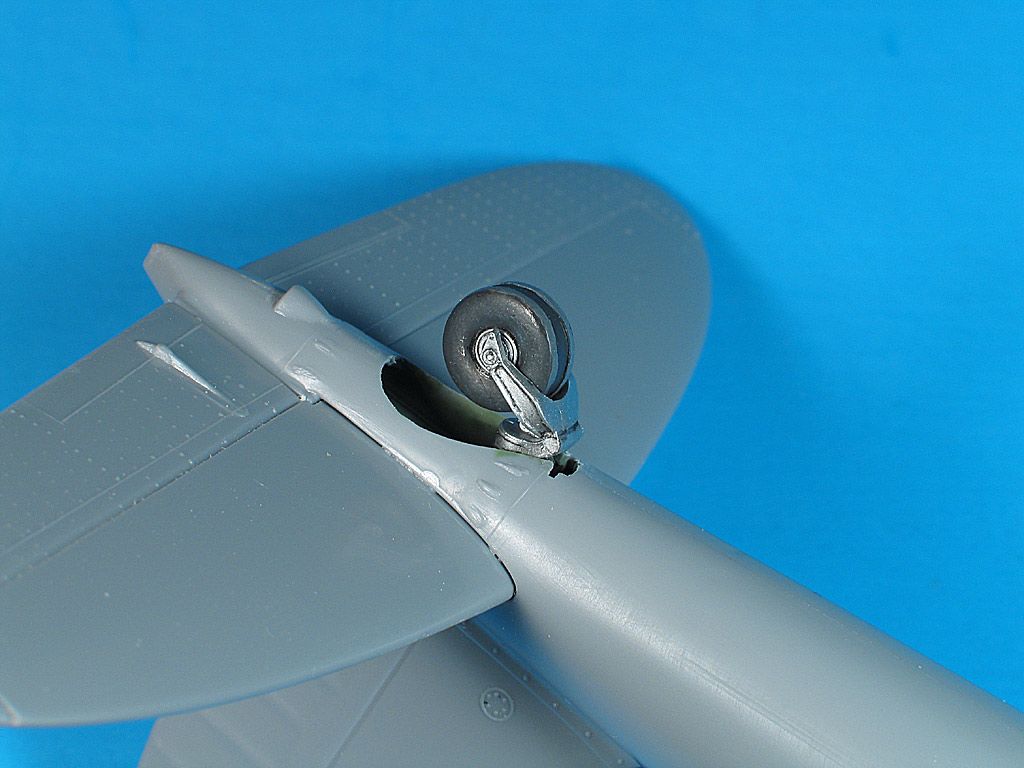
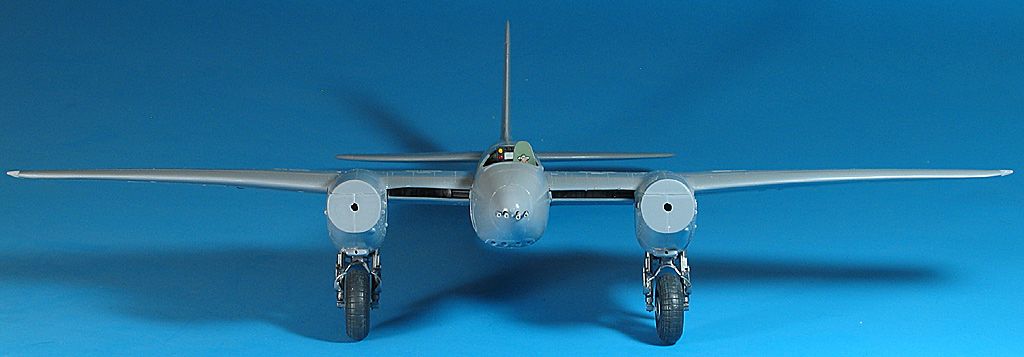
I couldn’t start assembly of the Mossie’s airframe until I finished the tailwheel (it’s trapped between the fuselage halves), so I decided to do the main gear as well. This involved adding the PE mudgards and scratchbuilding the wheel wells. All these components were primed with Future, and sprayed with Alcad II. The tailwheel and mudgards are White Aluminum, the main wheel wells are Aluminum, and the main gear (or undercarriage, since this is a British aircraft) is Magnesium. The tires (again, tyres) are Color of Eagles Tire Black. I still need some filler on the tailplanes.
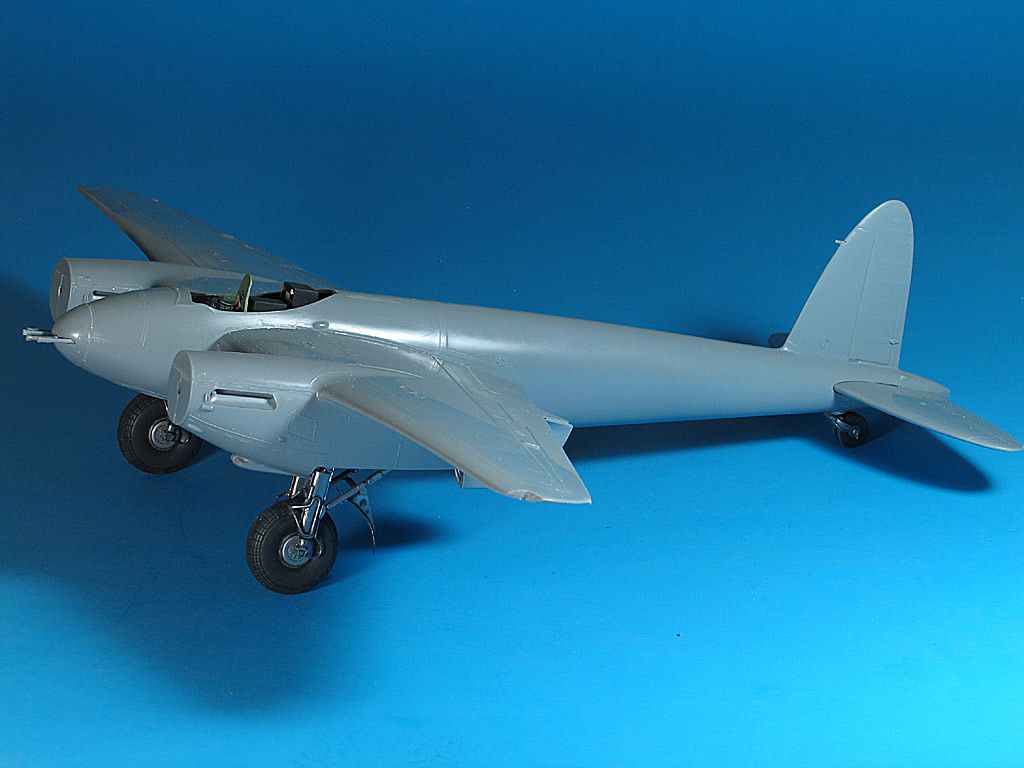
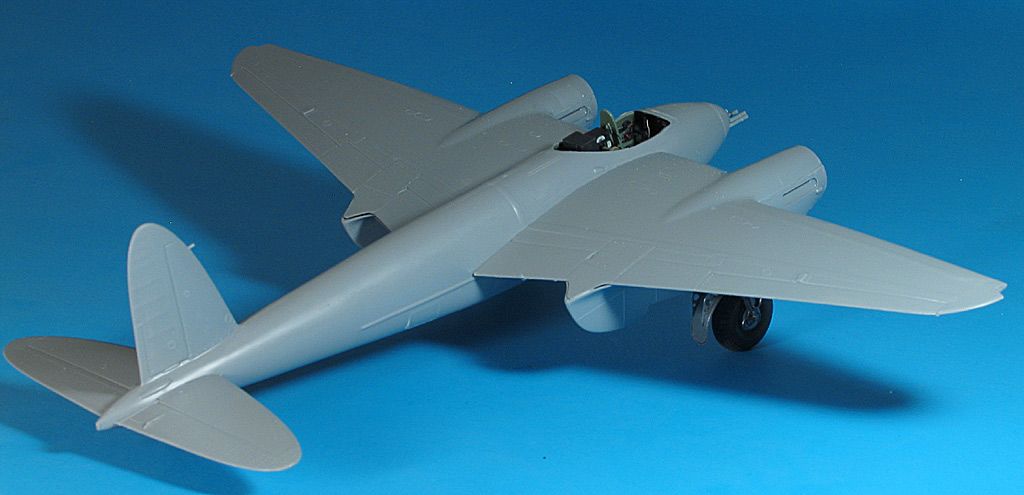
The main components went together pretty well. The only glitch was on the underside of the fuselage. There is a separate piece that includes the cannon bay doors and cannons. The cannon piece is semi-oval, and this part did not fit well at all. I cut them apart and glued them in place after some trimming. Much better ! Only a little filler was needed.
The engine nacelles fit well to the wings, and the wings fit well to the fuselage. I used a little white glue at the wingroots.
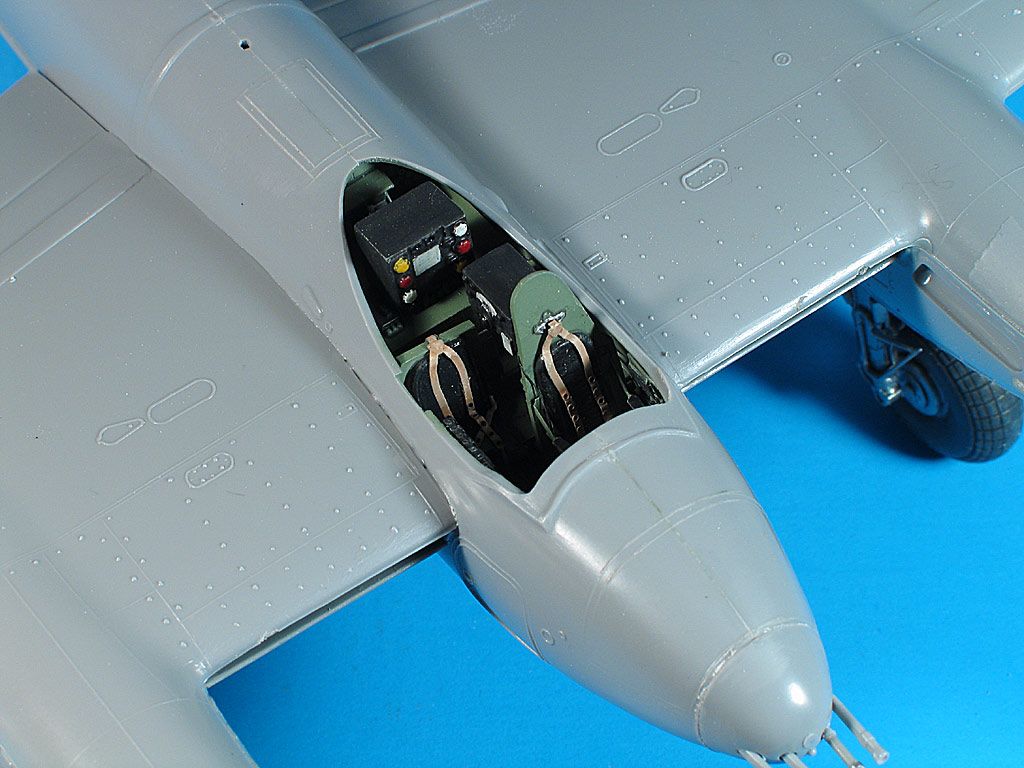
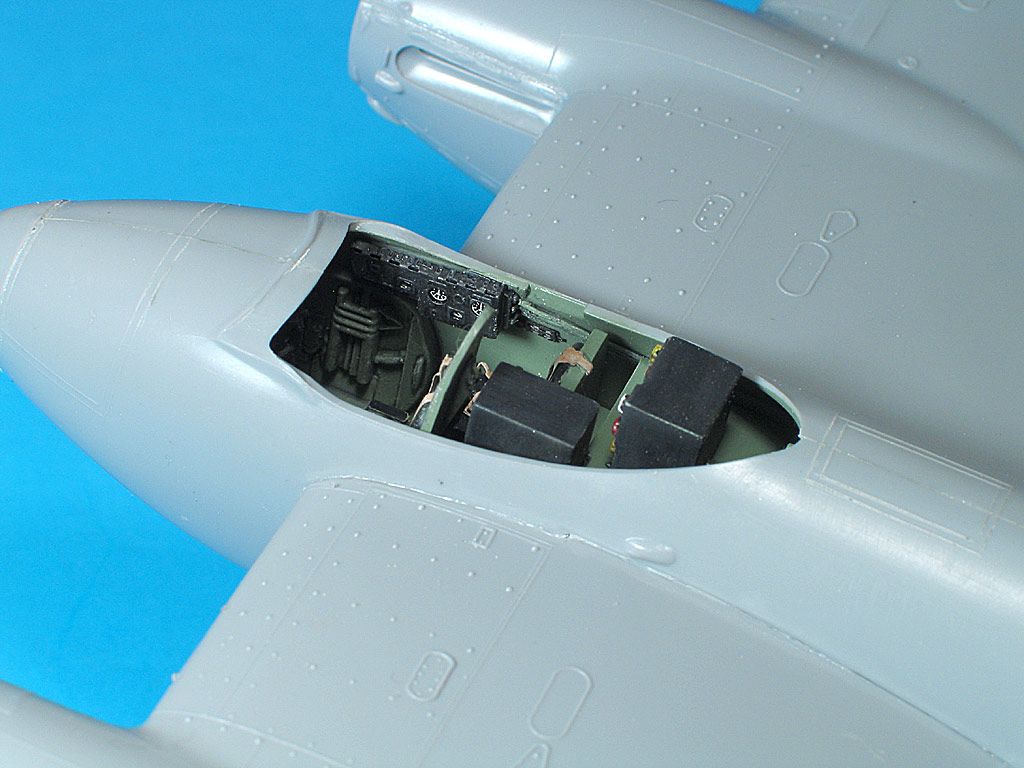
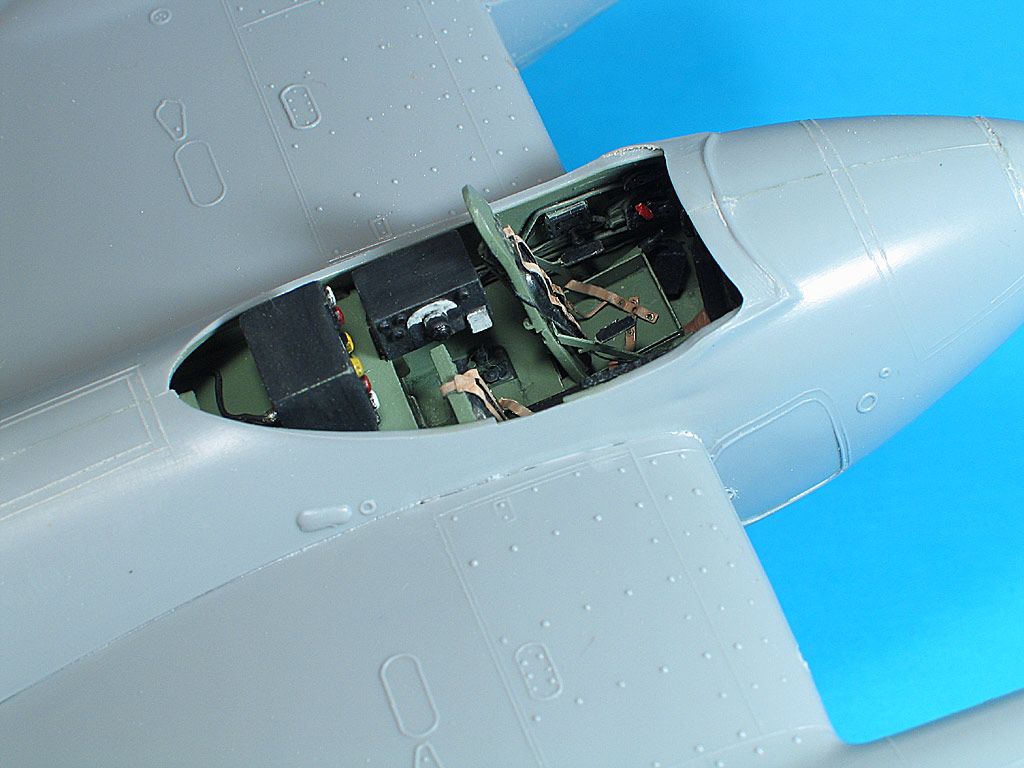
After checking some references, I decided to paint the boxes in the rear of the cockpit black. I had originally left them British Interior Green, but I believe that to be in error.
After I do a little more seam work and sanding, I can start to paint ! YAY !
Looking good. Can I just ask how you got the effect of the bracing inside the main wheel bays? It looks T-shaped, rather than just a rectangle shape as I would have done. The T looks too thin to be Evergreen rod or similar.
Thank you Dave, Lenny, Josh, dragonfly, A6Efan, Thad, and mikeiw !
mikeiw - I first scored the wheel wells horizontally and vertically (to keep all the bracing square and true), according to pics in Squadron’s Mosquito Walkaround. I used micro solder for the bracing, as it is rounded, rather than square. I then scribed outlines around them, including the rivets. I also made the triangular-shaped bulkhead at the rear of the bays (with lightening hole and rivets), and made tops from sheet styrene with solder plumbing.
Nice work Bill. Me and my boy made that kit a few years back, and now my daughter and I are building the Monogram version. And now I’m inspired to pull out my Tamiya version. But after I finish my P-38!
Darren - old? I’m twice as old as the kit ! I enjoy the challenge. The newer kits eliminate a lot of the work I enjoy.
ModelNerd - I’ve built the Tamiya kit (back when I liked their stuff). I’ll be repainting and redecalling that one soon and putting it up on eBay. I actually like the Airfix kit more, raised lines and all.
This is the one I’ve been waiting for. Keep posting your good work. Any chance of the tips and tools and photography items on your website soon? This lesser mortal needs some help!!
I thought you would be the first to reply to this topic !
I need to put down the glue and pick up the camera. I want to illustrate the articles with pics. Then I have to type (not my favorite pastime !) the articles. When I do those (and the photography sections), I’m probably talking more than 100 pics. My bench will miss my presence.
…and thousands of benches the world over will be that little bit richer!!
As for being first a little thing called work gets in the way - but I have been watching!!
Pixi;
Great work!!!, so when are you going to produce an A-20 Havoc/Boston?, you got all of the others, and I know you’ll love to scratch build the bomb bay,
Your incredible skills and attention to detail never cease to amaze me! I am using your procedures as guidelines in hopes of raising my meager skills to a more acceptable level.
Thanks so much for sharing with us, you are an inspiration. My 12 y.o. grandson looked at your P-61 photos and immediately wanted to “build one just like that”, and he never even was interested in exterior painting before!