RLM 75 is on and the next round of putty is in the process. I’ll get some progress pics tomorrow. I hope.
Looking forward to seeing those pics Joe!! I have never tried silly putty myself, but I have used lowtac posterputty with no problems.
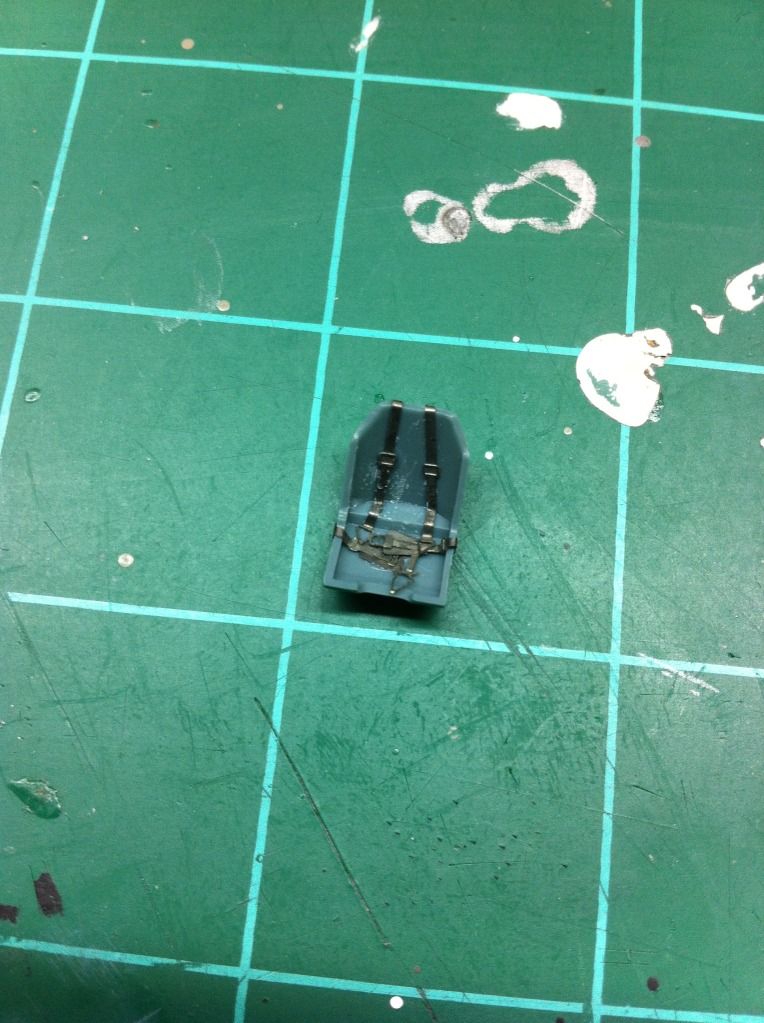
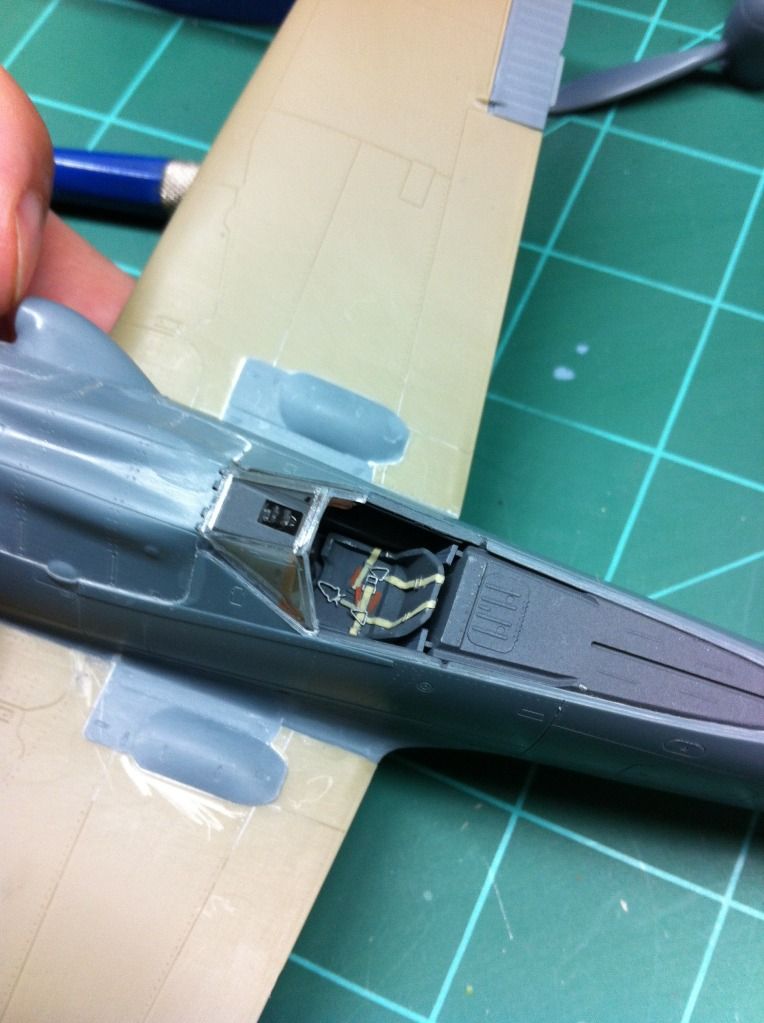
Just a small update as both these birds are going into the spray booth tonight. Finished up the pit on the Dora and got the seat and belts in. Again, not too worried about a lot of detail as this bird will be closed up.
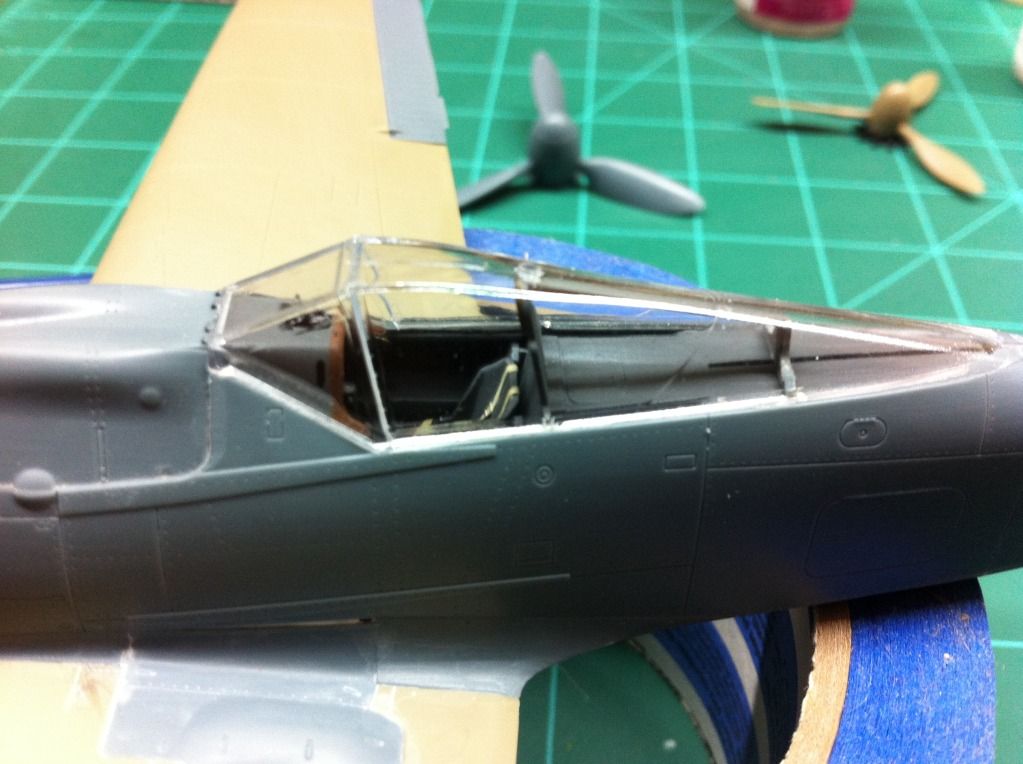
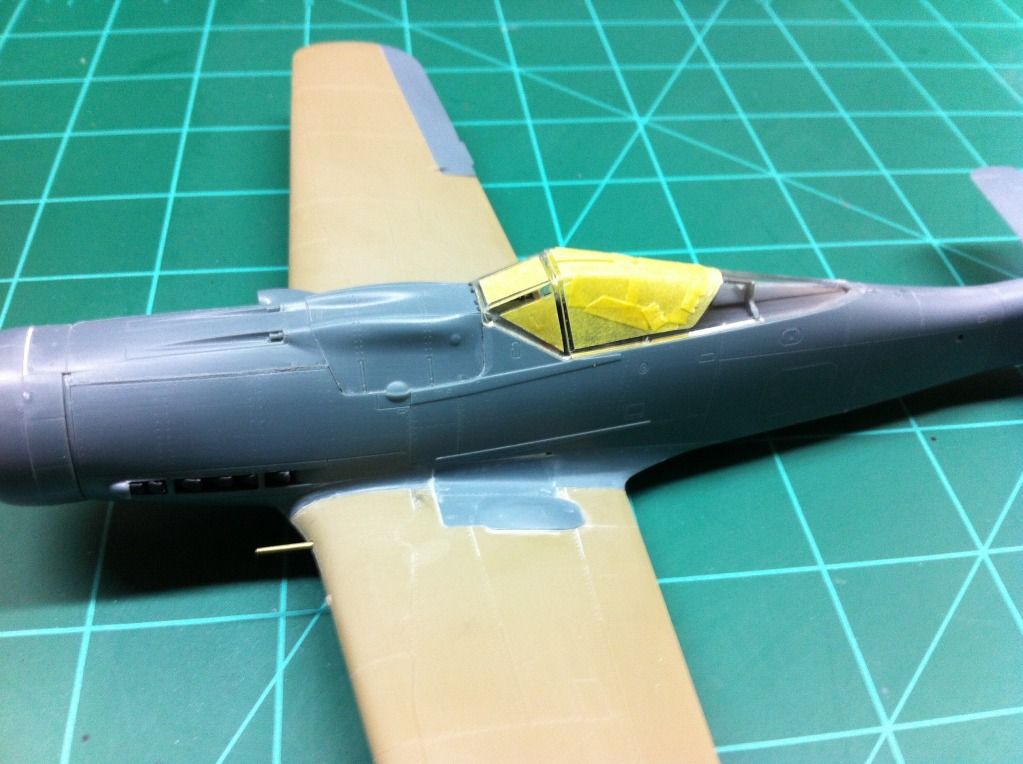
After assembling, painting, and installing the armored headrest, both canopies were glued on using Testors liquid cement with the pink label. The fit of the clear pieces on this kit are superb!
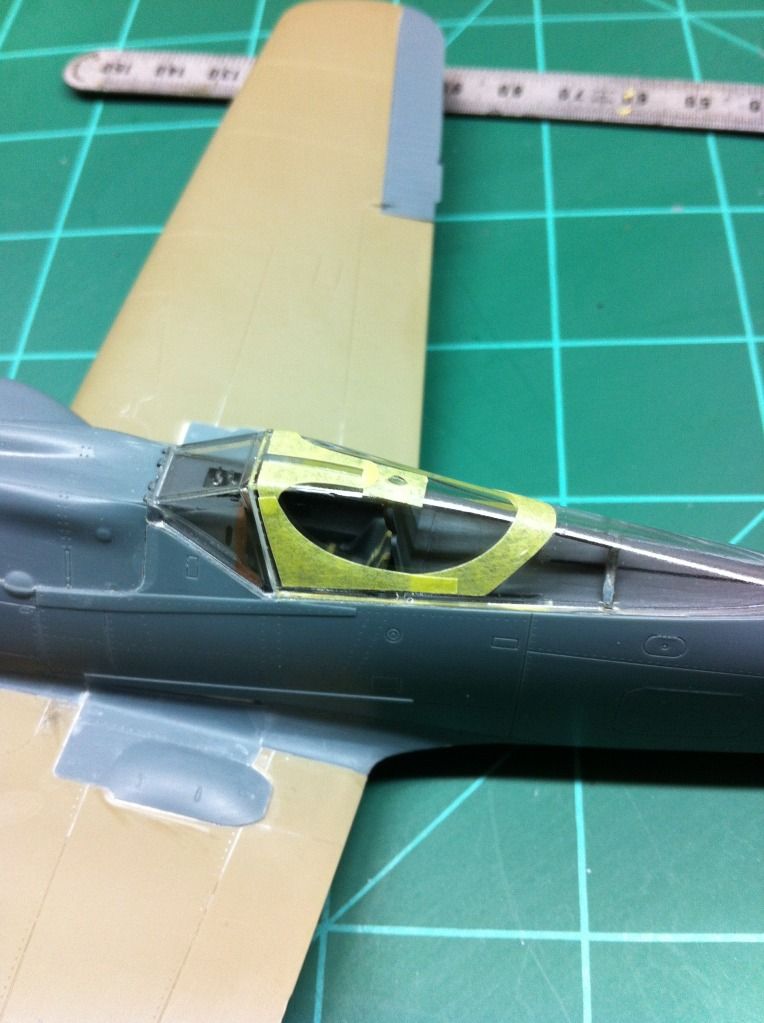
And on with the masking. I had to make my own masks for the windscreen but had a spare flat hood mask left over from my Profipak build so I used it here. These things will definitely spoil a person!!
Also scratched the drop tank hangars like the last kit since none were supplied with the kit. Just used some flat stock styrene strip. There will be no tank on this build.
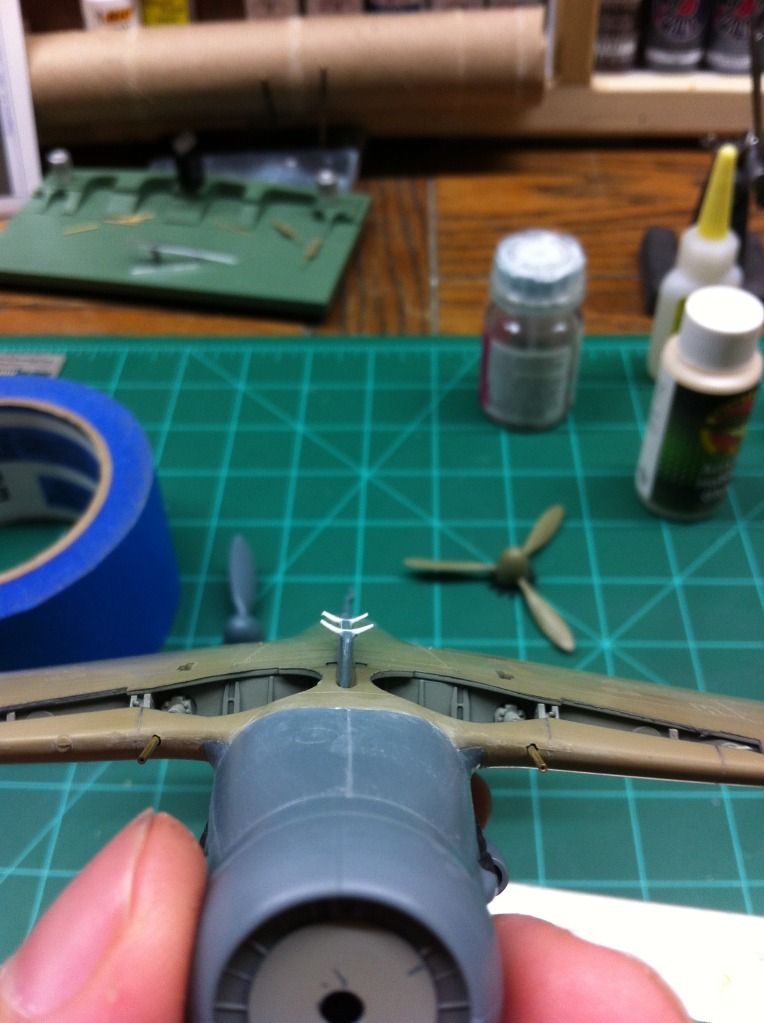
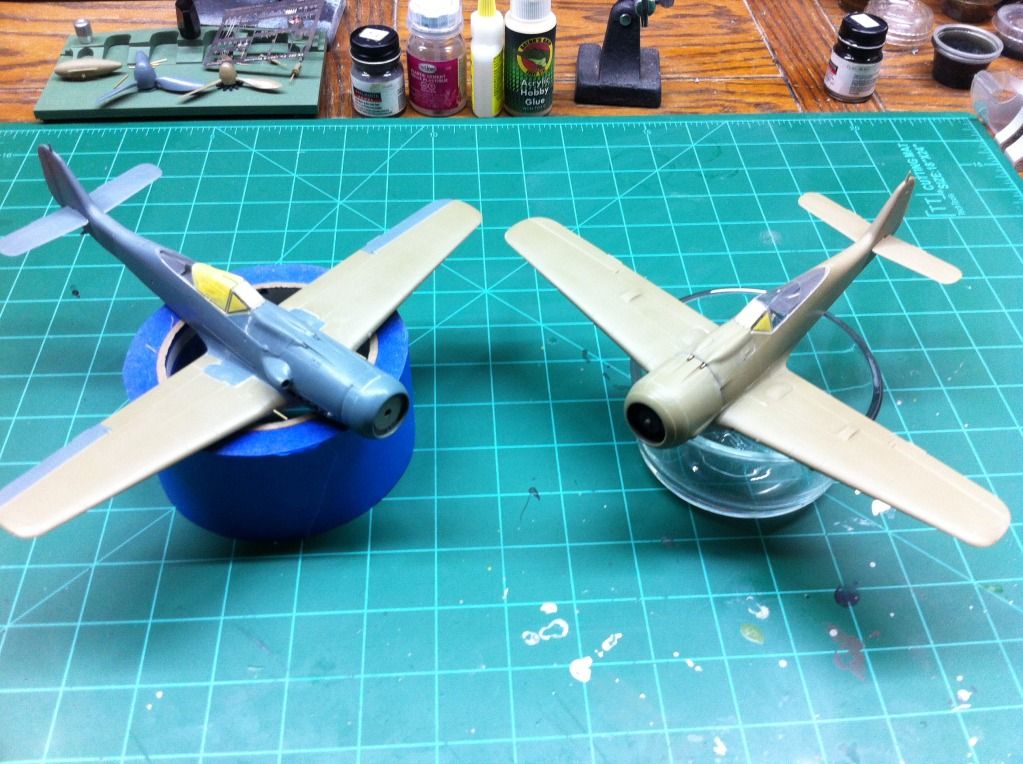
And they are both lined up and ready for primer and pre-shading. Its going to be a long night!!
Eric: Looking good! You are at the fun part of those builds (with mottling?), I reckon.
Joe: Looking forward to some pics!
I’m not making a lot of progress on my 190 sadly. I have to finish 2 Thunderbolts untill the end of this month, so I’m quite busy with those 2 birds right now. It should be a relaxing build though, as both Jugs are the Tamiya kits. The only really challenging part will be the NMF on one of them. The other one will get some really special markings… I just love building me some Thunderbolts anyway (my favorite aircraft of all time!).
I managed to sand the joins on the wings smooth and I’ll start work on the fuselage seam soon…
Cheers, Clemens
Wow! Sometimes I can be away from this GB for a few days and only miss a couple posts. This time, I’m out for a few and, oh boy … lotta stuff happenin. Hope everybody had a great 4th [blns] (well, fellow Americans anyway). I didn’t do too much, grilled some burgers, enjoyed the weather which has been great for a number of days now. unreal.
JOE, Eric, Clemens: Nice work on your birds. I love to see what you truly talented guys are up to. It’s a little intimidating yet, inspiring.
I’ve dabbled a little with Silly Putty myself and found it a pain. It’s very fussy about temperature. Narrow temp range where you can work it properly. I find it handy for stuffing holes though. It’s too bad there isn’t some magical potion to make Silly Putty rock hard instantly. Imagine the uses as a gap and contour filler.
To answer the question about my battle damaged canopy: First of all, the canopy had been dipped in Pledge Future, which may or may not have helped but worth mentioning. I started the hole by slowly pressing and twisting a scribe tool in the plastic, keeping a finger inside to support it. Once I had a decent divot, I used a fine round needle-point file, very handy tool, and carefully turned that, using very little pressure and with my finger still inside, until the file came through. At which point, the file was wanting to grab too much plastic, so I switched to a very sharp blade, turning it until I had my desired hole size. Now, with the very sharp blade point, I very carefully carved randomly spaced deep scratches radiating outward from the hole (it’s important to do this in one non-stop stroke for each line). Some I branched out, some not, but virtually none are straight. I finished by adding some connecting lines between the radials, forming a screwed-up circle around the center. It ends up looking like the glass is broken into chunks, but it’s only scratched. And yes, the pilot was fine. The bullet entered just behind the armored headrest so this wasn’t the kill shot.
Some more nice work there guys. JOE, is that silly putty your using to mask.
Looking great Eric! On larger builds(1/32 and such) I like to use Abetilung liquid mask, but you still need to mask edges as the paint does tend to try and creep under the edges .You are right though, the masking sets do spoil you and are fast becoming a favorite tool. The liquid mask is also good for laying out camo patterns as it stays plyable and just rolls off or peels off with minor effort. Again , Great work and watching with interest!
Doug
PS… if opting to try liquid mask, no matter the brand make sure its compatable with the type paint you use. some do make a differance.
Just checking in fellas and it looks like the perpetual 190 build is still doing great! I like the canopy damage effect, clever way to make lemonade.
Been on a little vacation w/family and away from the bench. Hope to finish up the old Mono P-47 and then tackle the B-36 next.
Looking forward to the paint job Eric. Everything looks excellent on your business end.
Bish - Indeed it is Silly Putty.
Bill, thank you for taking the time to explain your canopy battle damage procedure.
Never would have guessed the cracks were scribed on. You make this look, and sound so easy. Excellent result, cool technique, and thanks again!
Nice to see all the work going on in here. Jester and Rix- Can’t wait to see paint on those birds. Its good to see guys still active in the summer months. I’m not one of them unfortunately as work only gives me enough time to type these days, not build[N]
The second round of putty mask is on and now it’s off to the paint booth for the RLM 83.


Joe, I’m trying hard to picture the end results and am quite sure it will be amazing, Just cant get my head around it yet(LOL) Can the silly putty be used more then once after being painted on? Not trying to be cheap, just dont like being wasteful!~(ha)
Doug
I use poster-tack for that kind of masking, but I think I’ll give the silly-putty a go! (I have to order me some from the states).
I am trying to guess what it’ll look like as well, but no chance here. Too much complicated masking…
Cheers, Clemens
Trust me Doug and Clemens I can completely relate to trying to picture this pattern. It has been a challenge to mask as I was following the pattern given on the decal sheet and the one on the web site with this aircraft. Both have variations in their interpretations. Not to mention the one photogragh of this plane also came in handy. So, my masking of this pattern is take on all examples. It is not dead on but, that’s OK with me as it will be wild looking regardless. I believe i will be applying a dust coat od some kind to blend the pattern together a bit because untouched it is quite stark and eye opening. Thanks for looking and commenting.
By the way Greg… Not ignoring you by any means, but I may have over looked, are you going to build with us or just looking in on this wild and crazy bunch? Either way, welcome and glad to meet you! If I over looked …please forgive, If not …Please Join In!
Doug, I forgot to answer your question regarding reusing silly putty. The answer is yes you can. You just knead the old paint into the putty and after awhile you can barely tell it was painted in the first place. In fact this is the third round for this wad of silly putty.
Hey Greg, I too was wondering if you might cast your lot in with us. It would be great to have you join us.
Thank you Joe… appreciate the reply! Might just give it a try the next time.
Doug
Greg: I have the same question as everyone else: Are you only having a look at this bunch of crazy and maybe a bit masochistic (everyone who is building an Eduard kit) people?
Gentlemen, her she is in all her glory. It is indeed a unique scheme but, I’ll tell you what I think it’s just cool. I have a couple of rough spots I’ll need to touch up but, overall I’m really pleased with how it turned out.


Looks fantastic Joe. I’d love to do that scheme myself, I caught your note on doing a dust coat to blend the colors.
Maybe a filter like the armor boys do will work well ?
Cheers
Tony