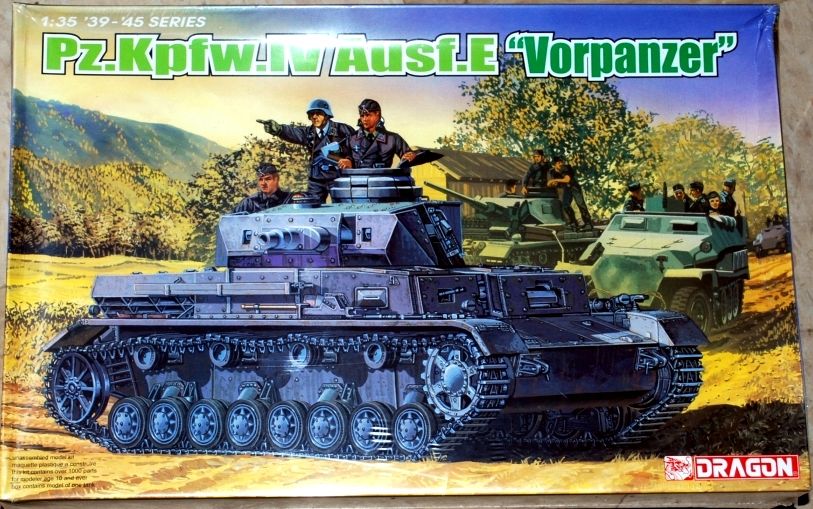
Well, fresh on the heels of my MBT70 disaster, I’ve decided to punish myself for my complacency with that kit and push myself to tackle a kit that I’ve been avoiding for a long time, due to its complexity and daunting parts count—over 1.000 if sources are correct? Anyhoo, it’s the notorious Vorpanzer!
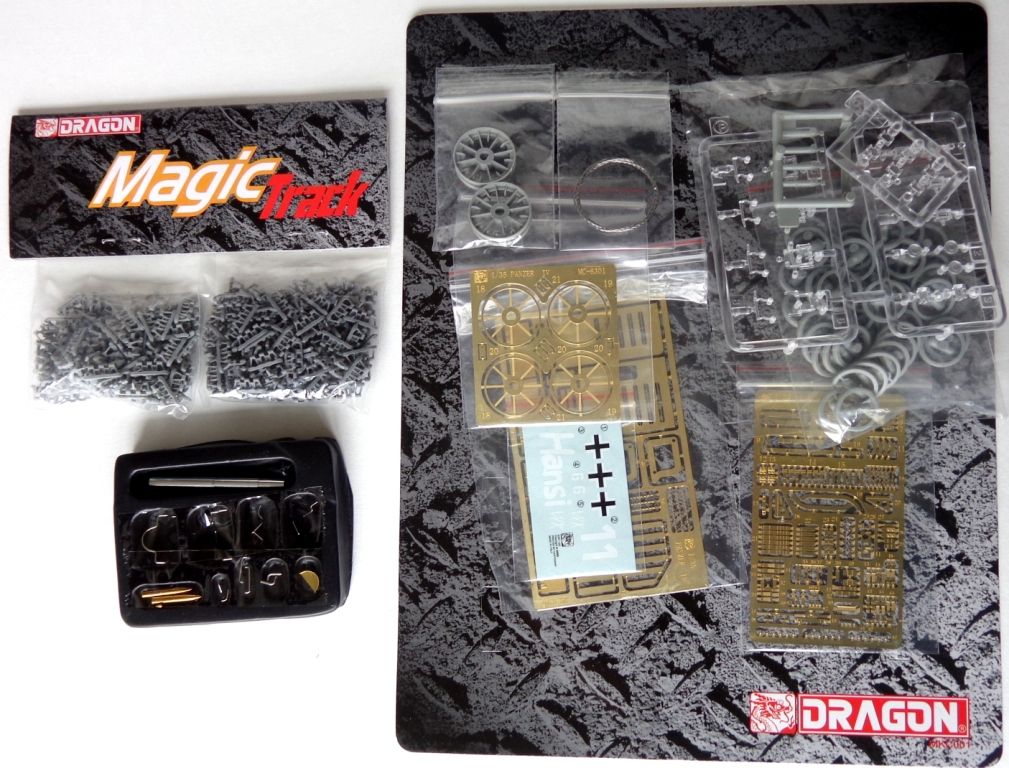
To say that this kit is over-engineered and almost sadistic in its demand of advanced modeling skills is not exaggerating! Alternately, you could look at this model as the penultimate epression of manufacturer generosity. You get oodles of goodies and extras in the box!
Two different choices for so many items! Want PE tool holders? No problem–they’re there! Want a metal barrel? You got it. Wire pieces for things like spare wheel holders, etc? Included!
It’s really quite the stunner of a kit.
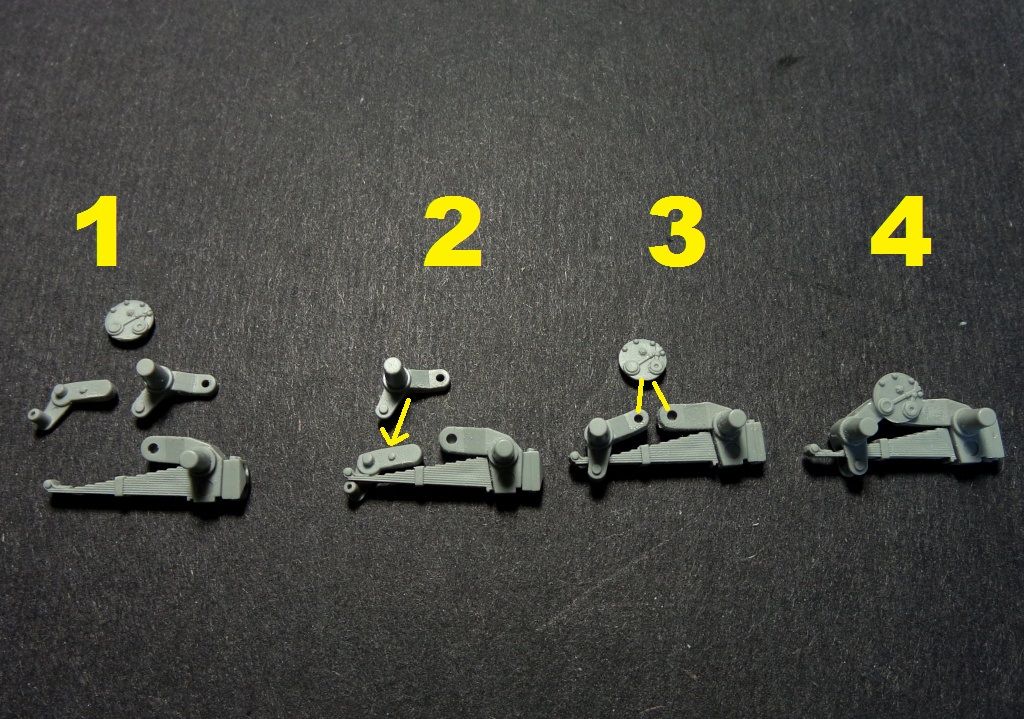
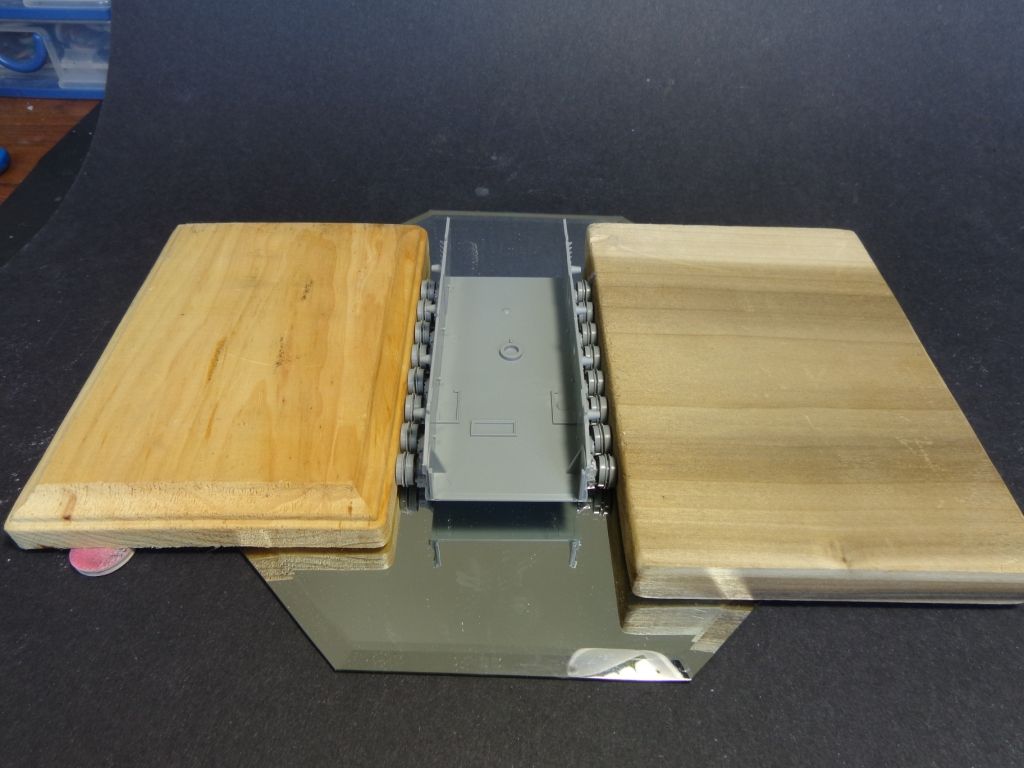
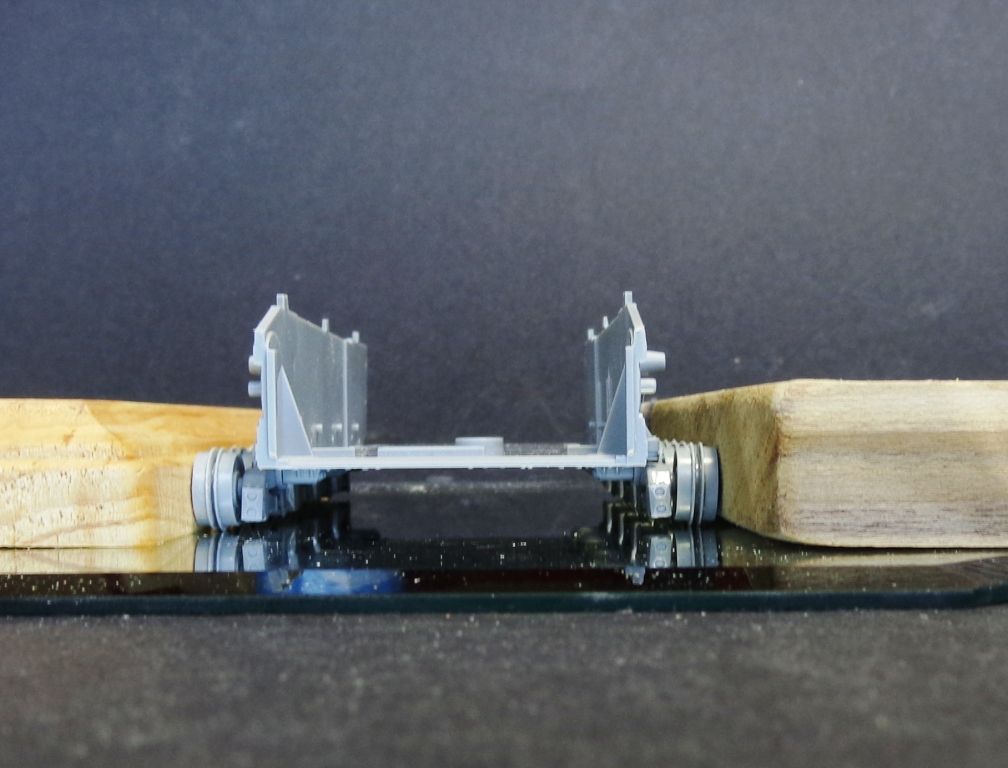
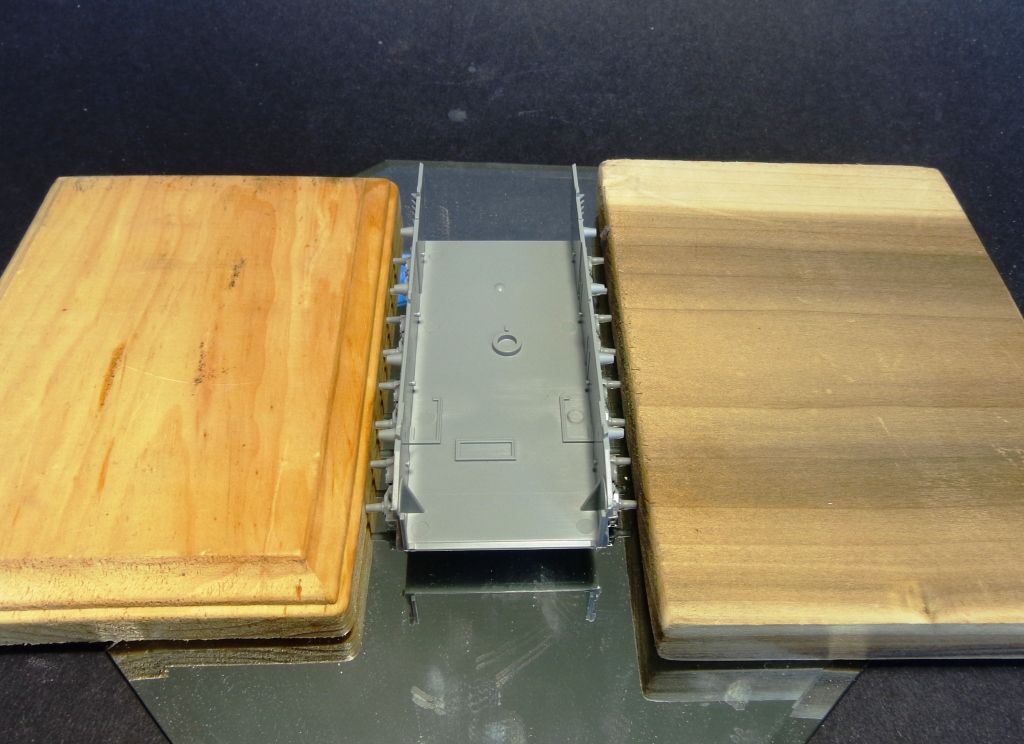
I started at the suspension of course. This requires three hands to do correctly. I varied from the recommended sequence, however, as it was just too risky of losing parts. The sheer number of parts in the bogeys and suspension is mind-boggling. Here’s the parts for the suspension bogeys. I recommend assembling them like this before you try to mount them to the hull, toherwise, you wil find it impossible to properly align the bogeys to get a level lay for the wheels. Attach the parts shown, in sequence, to the small circular covering plates, and THEN attach them all in quick succession to the hull. NOTE–the lower leaf-arms are three separate parts themselves! Put these together FIRST before attaching the parts shown here.
I decided to make a jig of sorts to make sure these parts all lined up and dried correctly. Here I have the wheels half-built; I still have to attach the separate tires.
That’s it for now…I am doggedly determined to make good on this laborious build and to redeem myself for my screwed-up previous project! Please stay tuned! [:)]
I don’t think I have that specific kit in the stash, but I have other Dragon Panzer IVs that were released around the same time with the same gargantuan amount of parts. [:O]
Once I finished inspecting the kits for completeness, I had a hard time fitting everything back in the box! lol!
You do know that Voyager do a photo etch set as well!! I have no idea why you’d need it, unless you want full fenders, bolt on armour and many other bits.
Like a few others I have this in the stash and see it as a kit for “when I’m a better modeller”.
Nice Karl,it is over engineered,but I found it went together pretty nicely.I had to leave off some of the microscopic PE parts,but I do look forward to your handling of this.
Jean-Michel, cool; thanks for following along. There is also an upgunned PZIVD (?) with a KwK or something like that in it. It also has the same crazy parts count and sequences of assembly. I may take a look at that after this if I enjoy the challenge!
Phil H–you’re right about that. Holy cow, the suspension alone took me at least four hours of sanding and assembling!
Tigerman, lol, believe it or not, that’s one of the reasons that I’ve been saying to myself “Aye, while you’re still young…” ha ha. I know what you mean!
Phil–this kit already has enough PE, thank you! If I’m not wrong, I think it actually has fender “ends” that you can bend and simulate damage with? Thanks for looking in!
Tojo—good to hear that it’s “doable”. Can you post a pic of yours for us to ogle?
TIGERMAN that’s funny. i am 63 and got into 1/72 (One True Scale) kits last year though i still build a lot of 1/35. My eyes are weird so i have trouble using magnifiers, especially for painting so i get REALLY close. I think my detail painting is getting better as i get older; experience, patience who knows.
DOOG 1000+ pieces. my K-5 RR gun has only 1200 or so and it’s a tad bigger than than your panzer.
I like the look of bolted-on armor, should be a neat build.
So, high parts count in suspension pieces? Grab a Dragon newer release Sherman with HVSS, like the M4A3/105, it’ll make you glad you’re doing what you have in front of you now. [:P]
Does this kit carry over the option of installing individual bolts on the drive sprocket housing that was in the earlier 3in1 kits? Talk about small parts! I also remember that the turret hooks were multi-part assemblies. That said, there’s nothing there that is overly difficult if one studies the directions carefully beforehand and carefully plans some of the more complex build steps. Seeing that you’re already well along with the assembly of the workable drive train, the tough part is almost over… [;)] Unless of course, you plan to assemble functional PE tool clasps… [whstl]
How can a punishment be so much FUN? I for myself enjoy building, especially in armour kits. But in your case I’m looking forward to the paint scheme - good luck with your build and have a nice day
You know you guys swear by Dragon, and having built some other armor like older tamiya in the past, I get it.
But I recently decided to try an armor model after a long period of ships and wing things, and bought the Dragon SU-152.
What a bad experience. The moldings are really cool, the detail is great, but i’m having a heck of a time getting the parts to fit.
All the stuff that gets stuck to the hull- the holes in the hull are way too small. I finally gave up enlarging them and have been shaving the lugs off the backs of the parts and just gluing them over the holes.
Need to finish it this month for a GB but keep setting it aside.
Wayne, lol, and the funny thing is, this thing is what–1/10th the size? Man, they pack 'em in tight in this little model!
Russ, I remember when the one Sherman model came out about 10 years ago or so (maybe more?) and the tracks themselves had three or four pieces EACH. I was so annoyed, I put it in the stash and never loooked at it again until I sold it on eBay years later. Are they back to that nonsense again? sheesh!
Bob, thanks! I appreciate that vote of confidence after I screwed up that PZk70 so badly! Thanks for looking in.
Don, yes it does—it has some tiny PE bolts that you can choose to put on, but I won’t use those, honestly. I can’t possibly see the benefit in it, and I can’t see how you could realistically round off those tiny brass discs without them winging out of the tweezers into the cornfield somewhere. lol
And yes, I do plan on trying those PE tool holders. Its my “punishment”, ha ha.
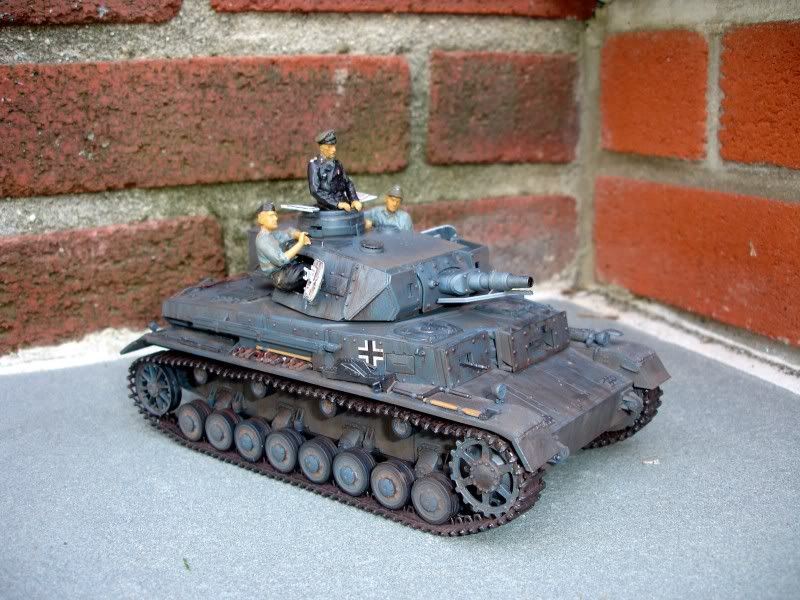
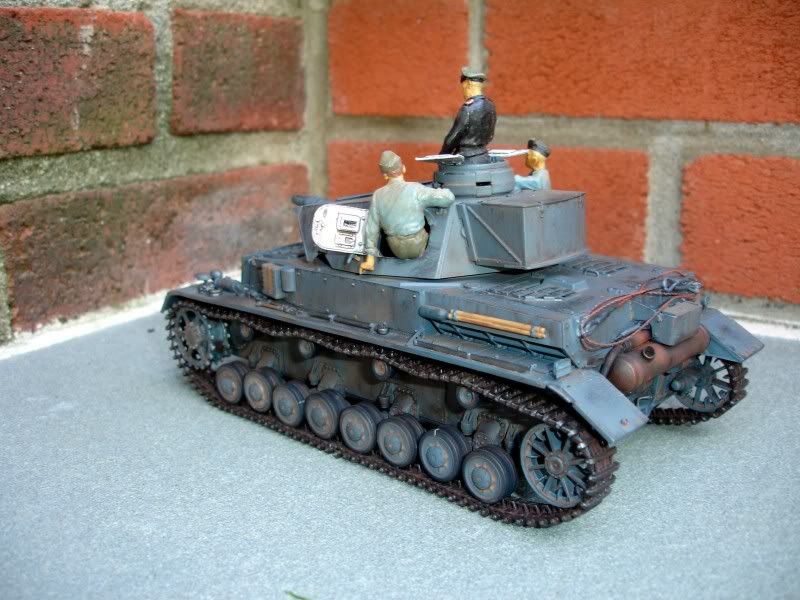
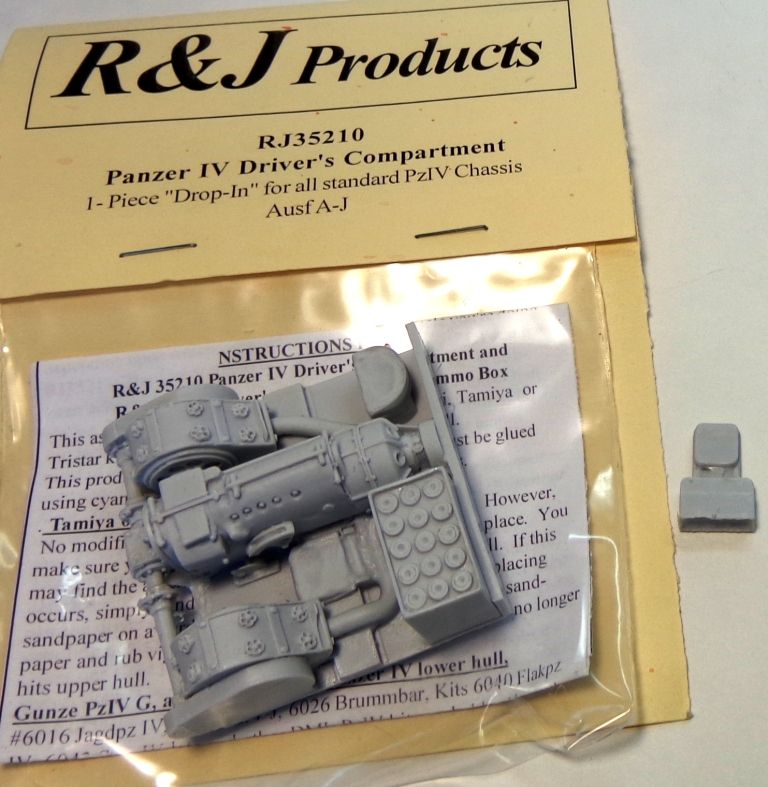
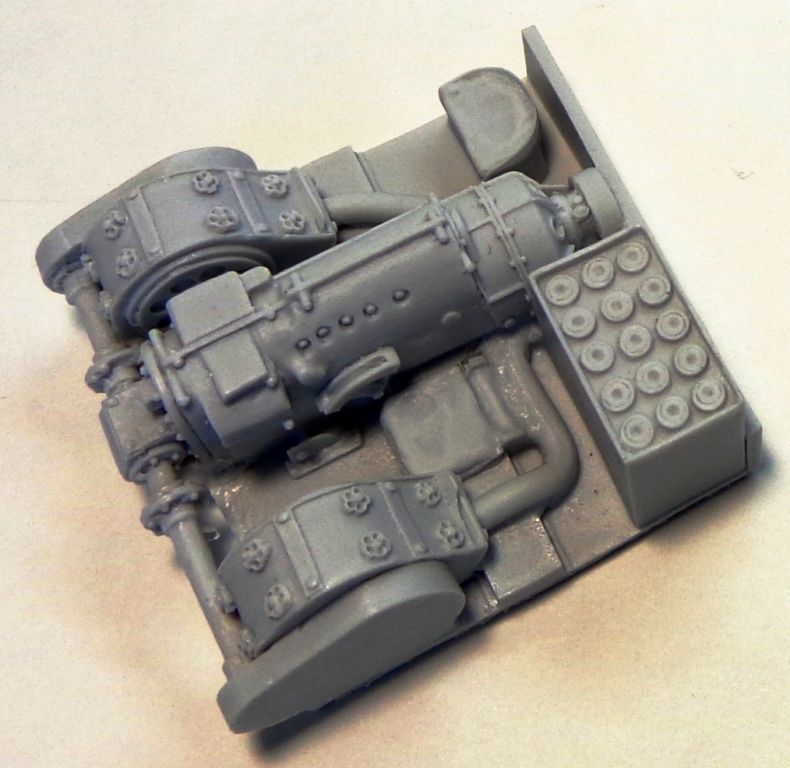
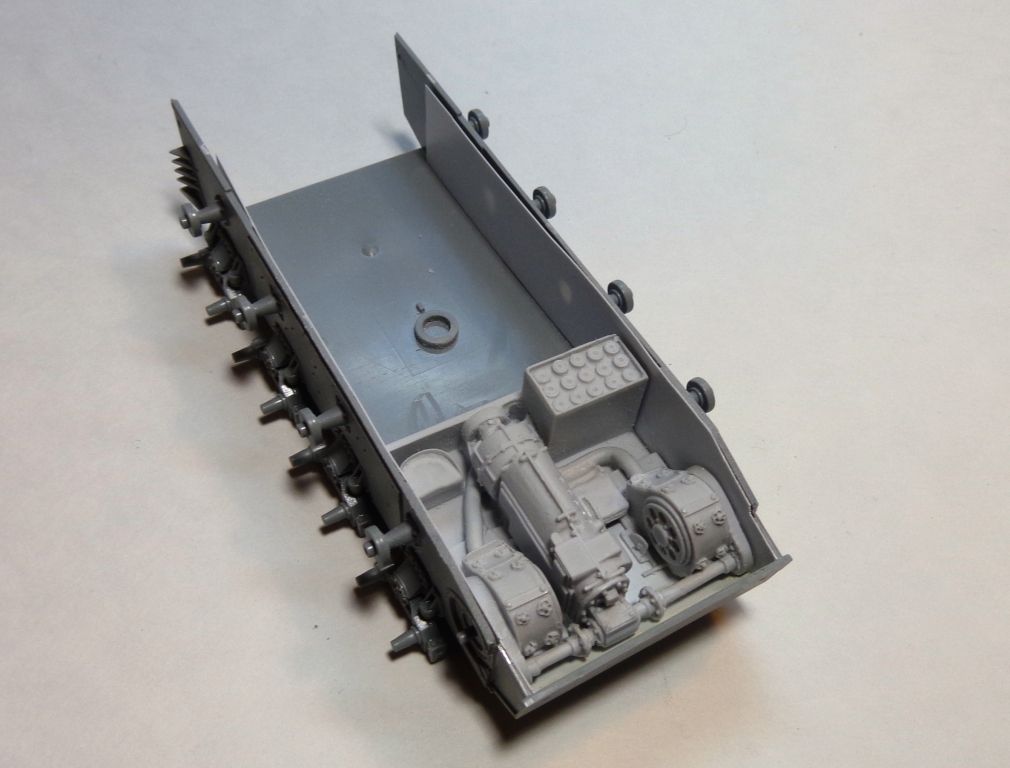
Here’s an update…I have decided to use an R&J Products “drop-in Driver’s Compartment”. Heck, this tank already has a turret basket, and with all those hatches that I can keep open, it seems like a cool place to use it.
It comes without driver’s levers because they were different in different marks, (R&J’s contention) so I’ll have to do a little detailing. But all in all it will make a nice touch.
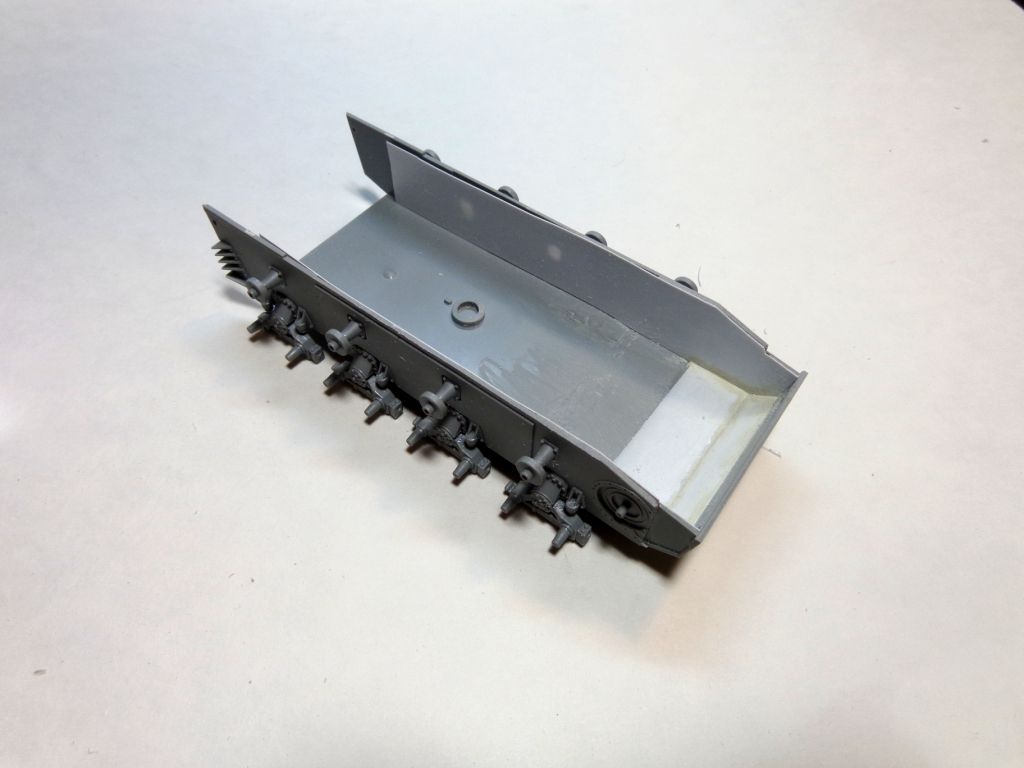
I had to do some serious Dremel work to remove the bottom plug…but it cleaned up perfectly.
The hull needs some cleaning up–I had to remove all those projections and ribs, etc…
After all the scraping and clipping an cutting, I decided to cover the whole hull side and front-bottom in .010 styrene sheet to make it “clean”.
After much trail and error, fitting and sanding, I got the correct depth and width for the piece to “drop in”.
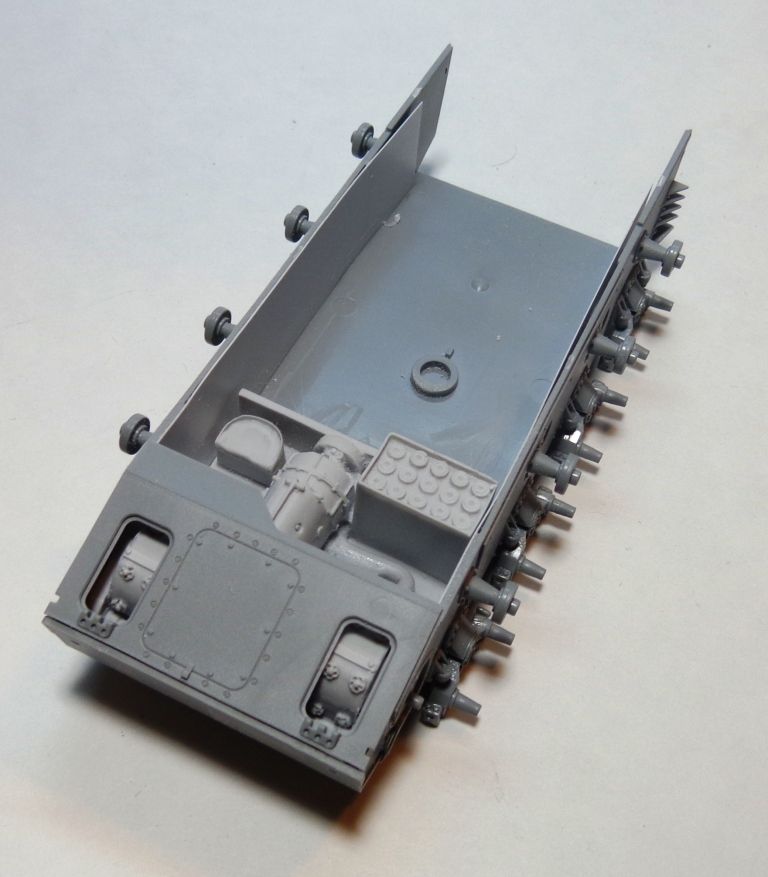
Phew! The top hull fits!
Gonna have to paint this all up and maybe I may even scratchbuild the turret floor area. I mean, I almost have a full interior at this point. Shouldn’t be hard to do a little more, even just a “suggestion” of what is there? I dunno; gonna have to see how much you can actually see…I"m not one to waste time justbuilding something you’ll never see…