I would guess that an Italian pilot probably did not use German gear but I stand to be corrected on that matter.
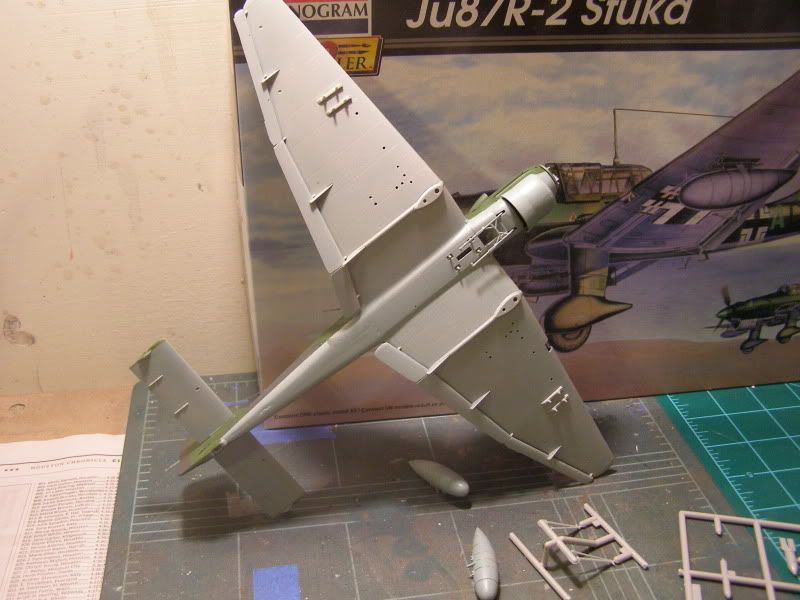
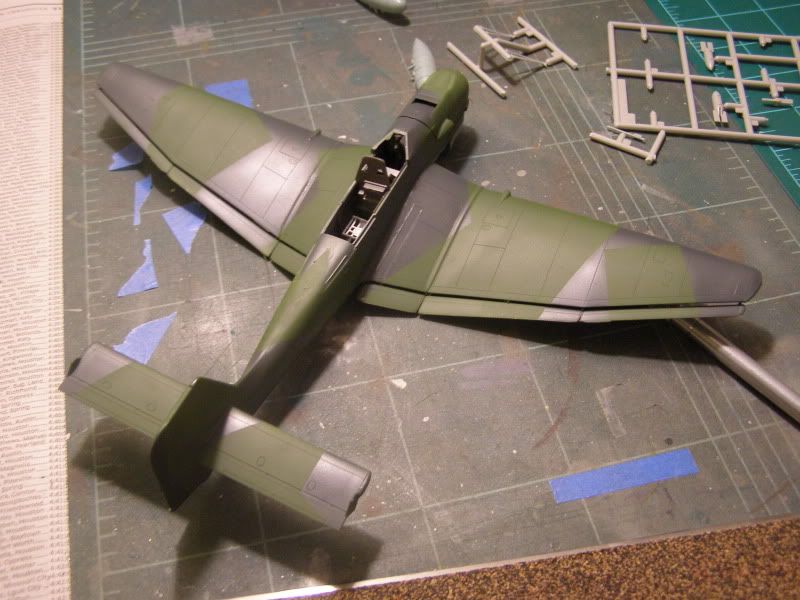
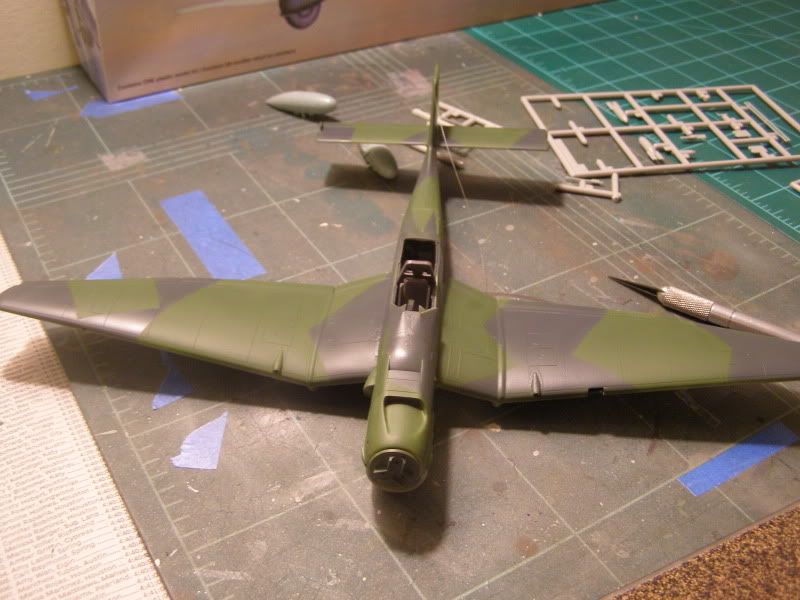
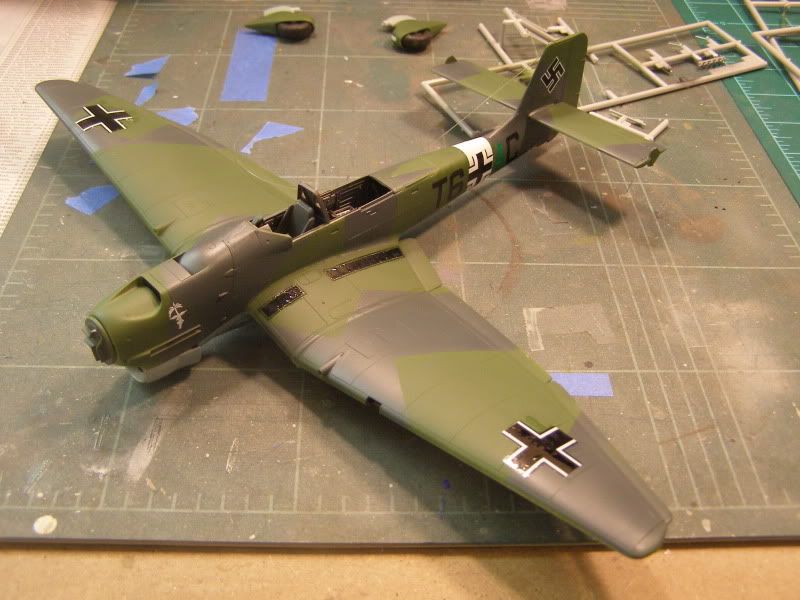
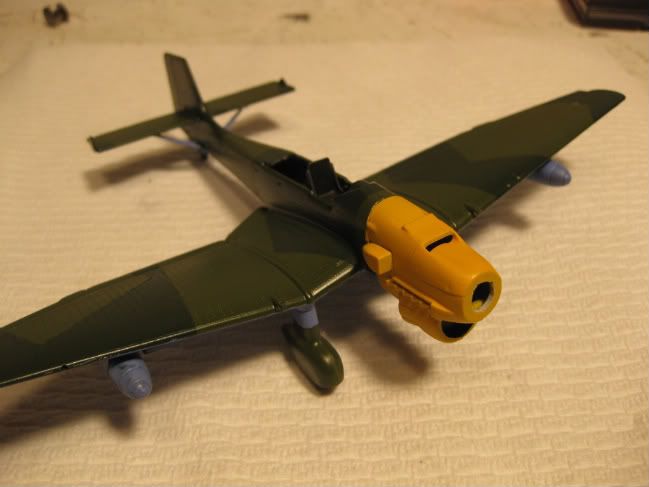
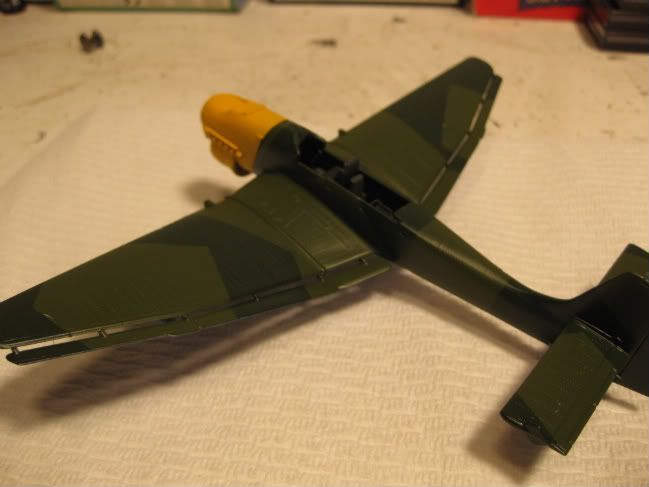
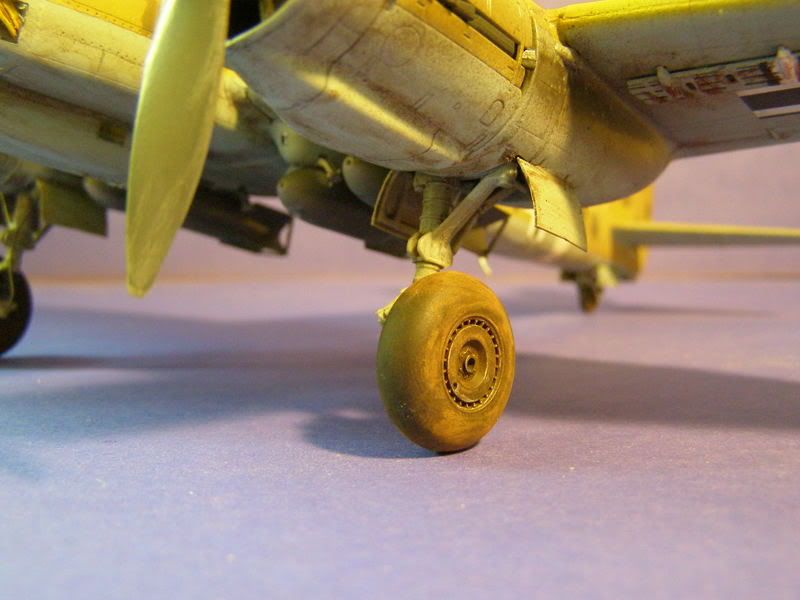
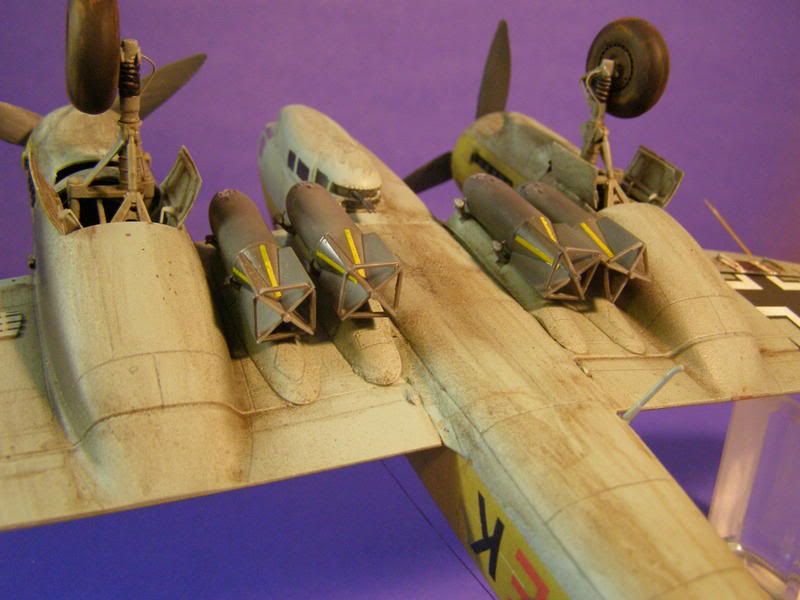
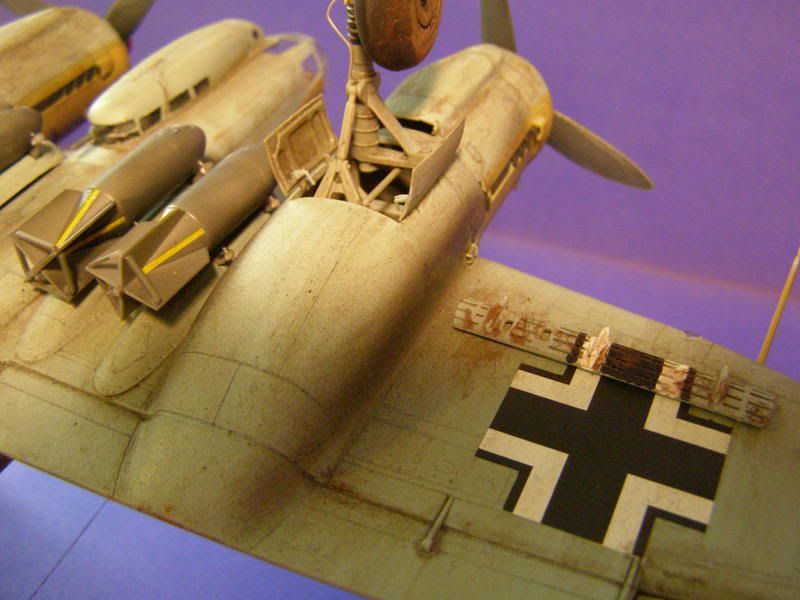
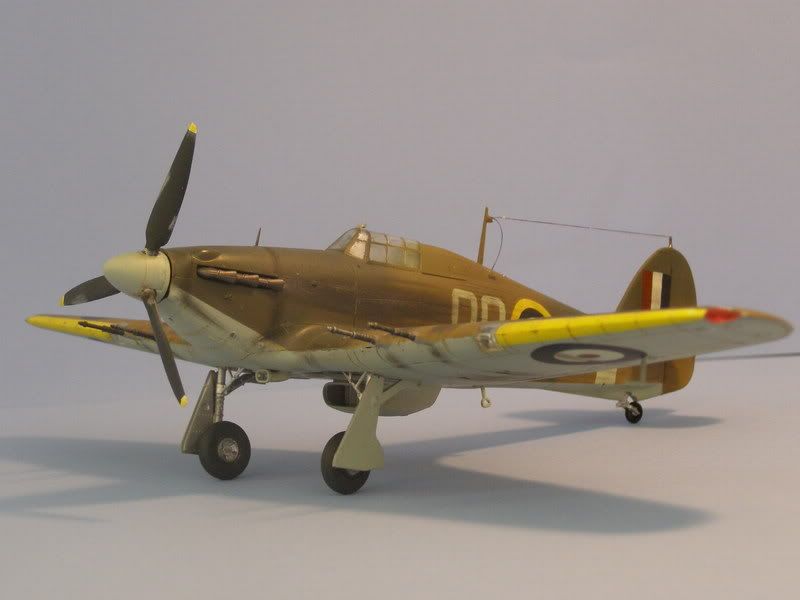
I’ve made what appears to be significant progress on my own Stuka, putting down the entire paint scheme this afternoon. But there is still a lot of work ahead of me in additional detail painting (tires, wheels, guns, etc), weathering what at this point appears as a pristine Nazi splinter camouflage job, and dealing with the canopy paint job.
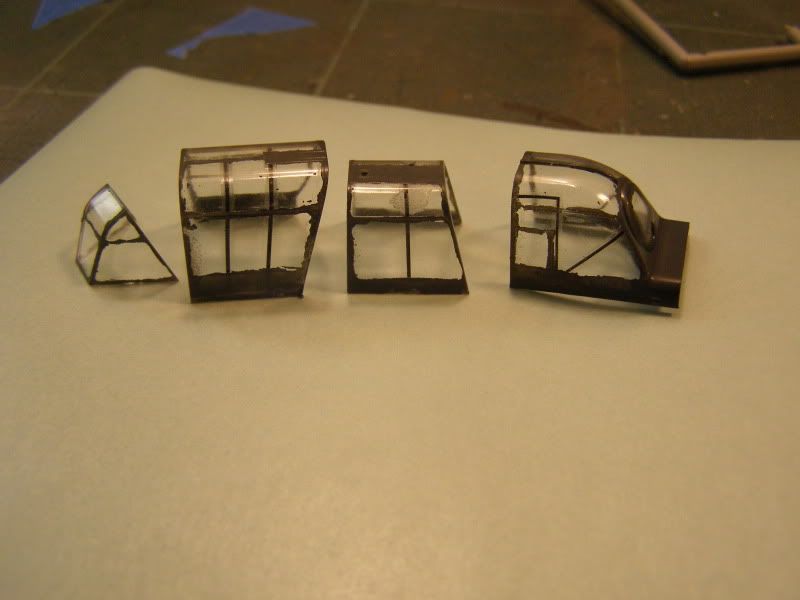
I didn’t photograph the painted canopy pieces as right now they are nothing more than black-green pieces. I masked with a liquid masking solution I have had for a while now, last time I used it was on another Junkers aircraft, the big Ju52 I built about 4 years ago. I don’t know what to expect out of this effort but I’m hoping that this stuff still works. If not I guess I’ll be purchasing a canopy set.
I’m shooting for a nice paint scheme with a bit of weathering.With no LHS available,I’m kinda forced to use what colors I have on hand.This Stuka will not be super accurate,but I hope it comes out nice.I’ll be shooting the base coat as soon as I’m done goofing around here.[tup]
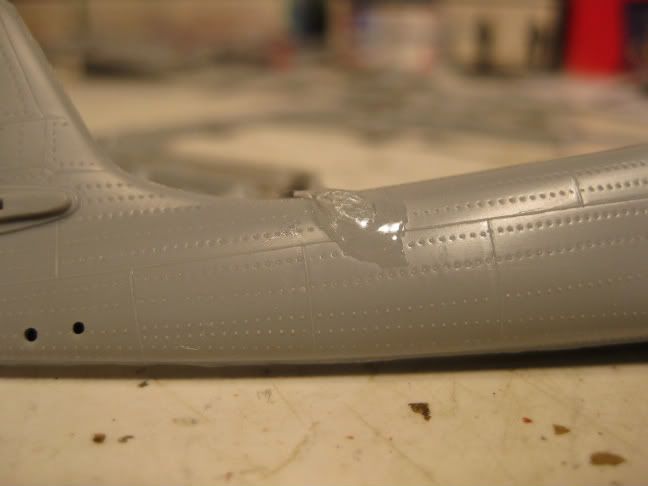
Yack! Hate it when something like that happens! I ran into several areas of paint lifting while completing this splinter scheme, which really annoyed me at the time.
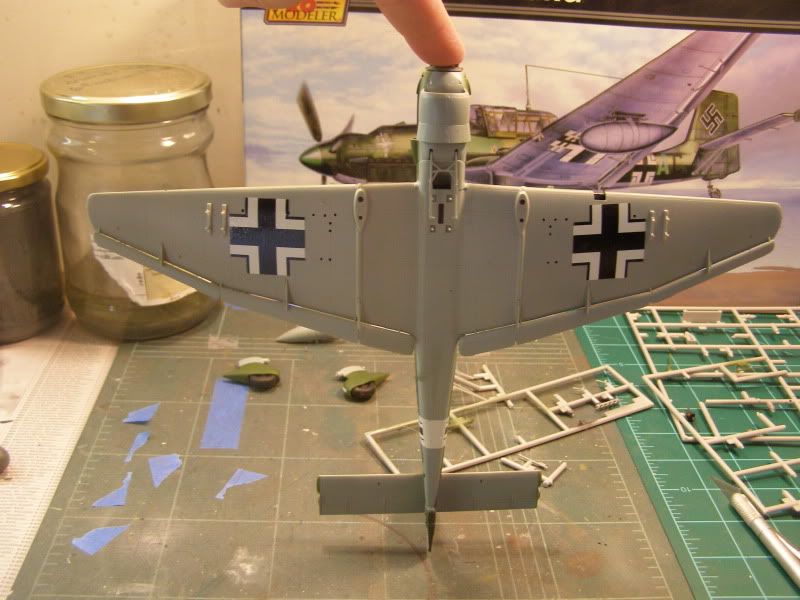
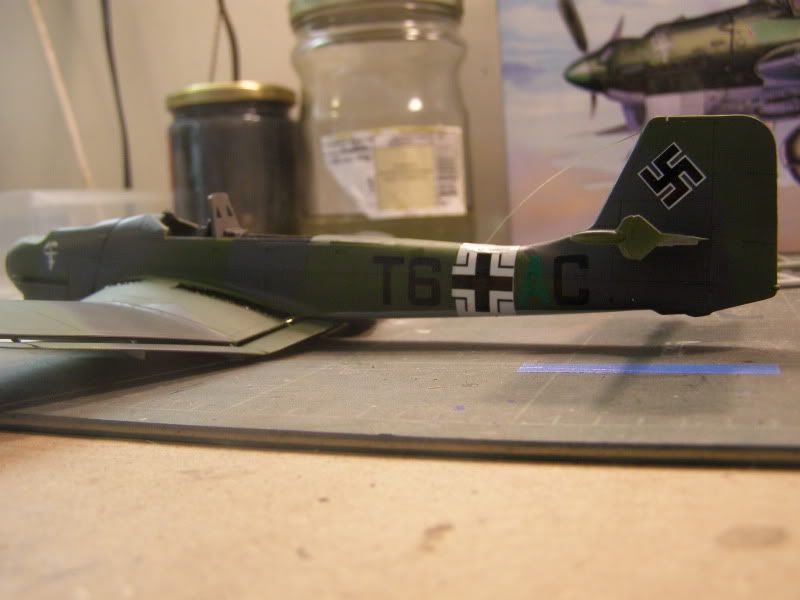
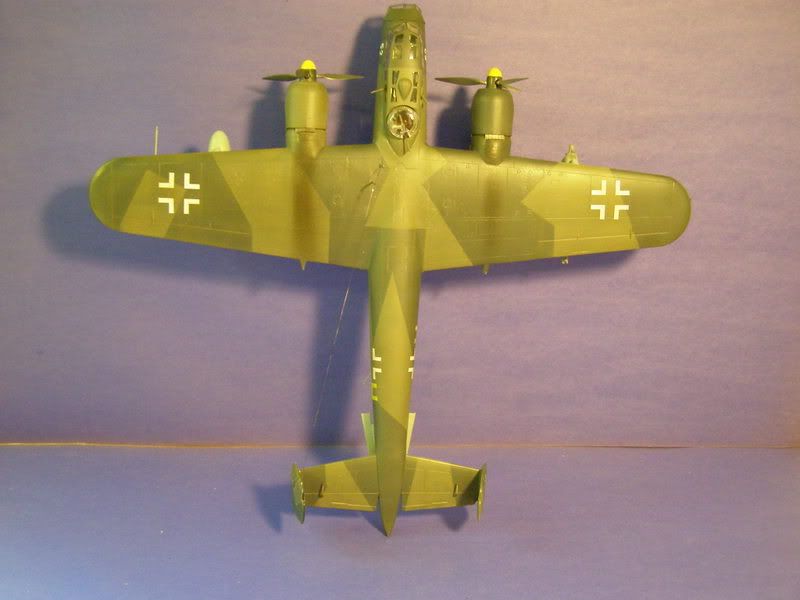
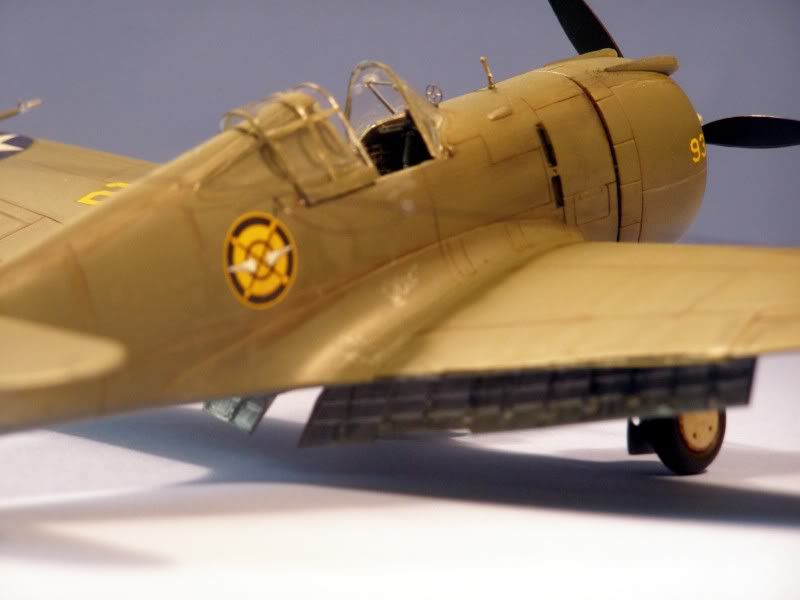
Today - after the yard work was done - I managed to get the national insignia decals on, leaving the stencils and other such decals for later, and scraped away the masking from the canopy pieces. I was pleasantly surprised that the masking still works, and I feel that I did a decent job with the framing. Although the picture does show an area that needs a bit more attention.
The glistening on the decals is the decal setting solution, so hopefully some of those imperfections will settle in. If not, more solution will be in order. And from there it’s on to weathering.
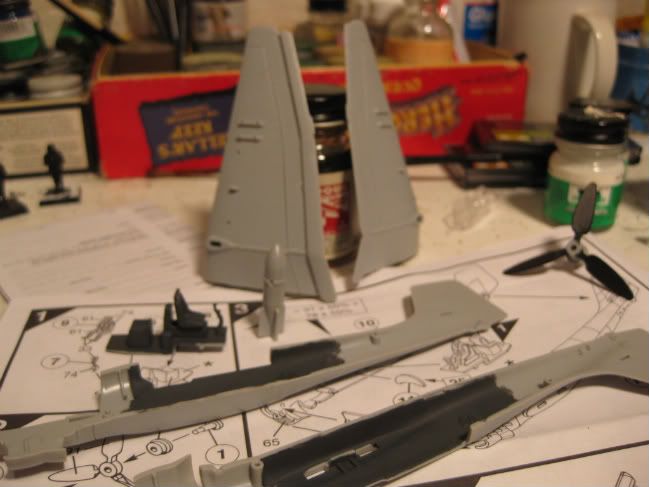
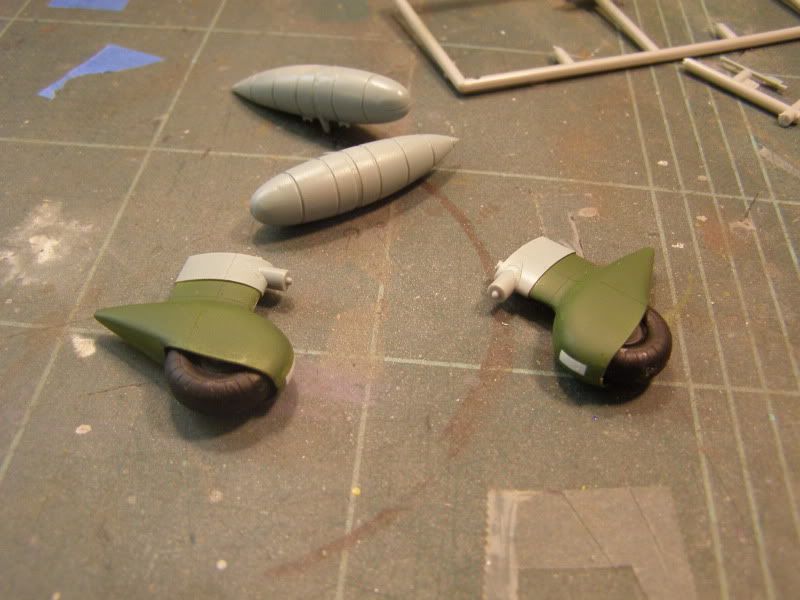
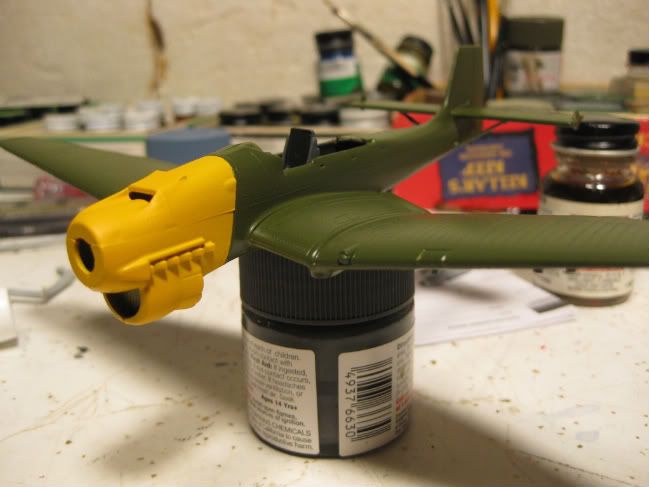
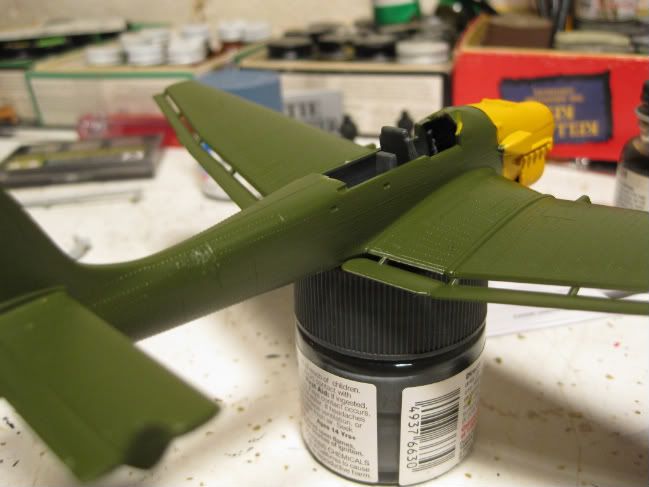
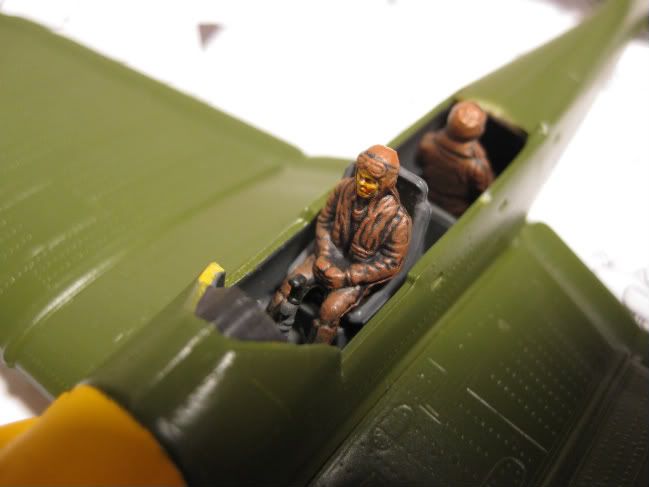
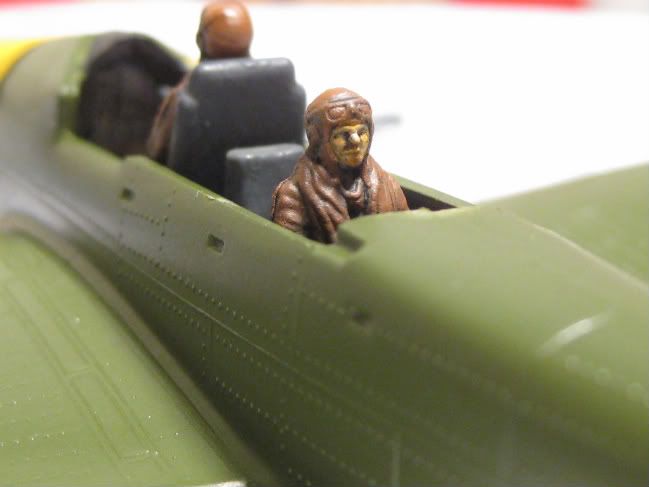
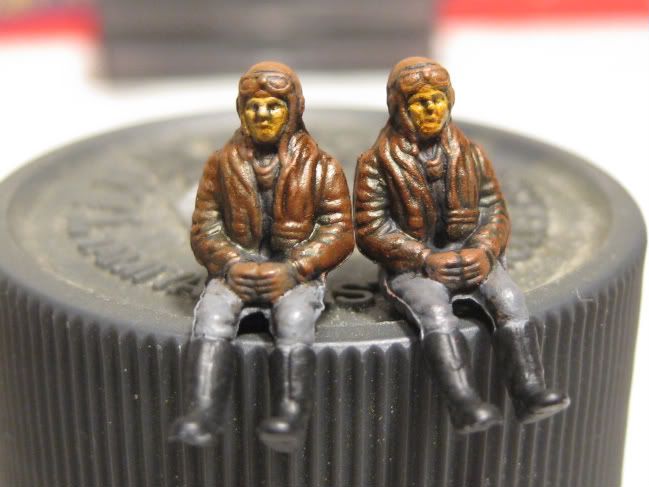
Finally back after having to have a very dangerous Trojan removed from the computer. The pics I had wanted to post were lost in this episode. Adding insult to that injury, somehow the infamous carpet monster ran off with part of one of the crew figures so I’m having to make a new one. Until the crew is installed, I won’t be closing the fuselage. While I’m waiting for the resin to cure, I’ll be working on the engine and prop. I’m going to take clear sprue cut to the same length as the blades and heat it, then flatten it into a rough blade shape. Once formed, I’ll drybrush them to just hint at the colors for a propblur effect. Welcome to all who have joined in. Looks like you’re really flying along on your Stuka, Aggieman.
Made a start of the 88 last night, i am fitting an Aires resin cockpit, should have it painted and weathered by Tues and then i can get the fuselage halves together. I will get some pics taken as i go on during the week and try to post them next weekend.
Aggie, I have a long term project of an old Monogram 1/48 SBD I have been dressing up over the years. Much of the major assembly is done but with all the mods (modified cockpit, drilled out dive flaps, replaced engine, propellor, and numerous other mods) I have made (or planned), it is still quite some time from completion. You did not specify if it has to be a new build to join here in your ground rules. Any chance I can jump on in with mine.
Nice work TD. Looking forward to seeing more (and how your Stuka stacks up against mine, not that anyone is scoring points here…)
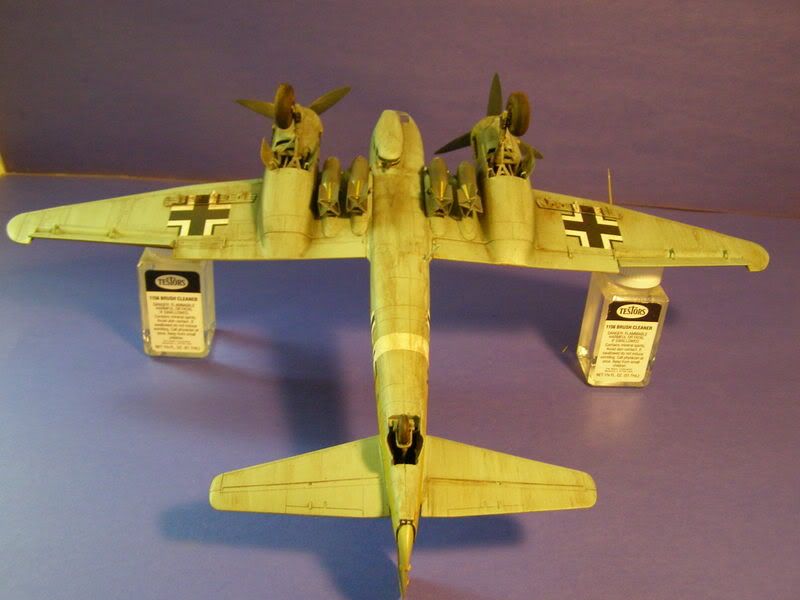
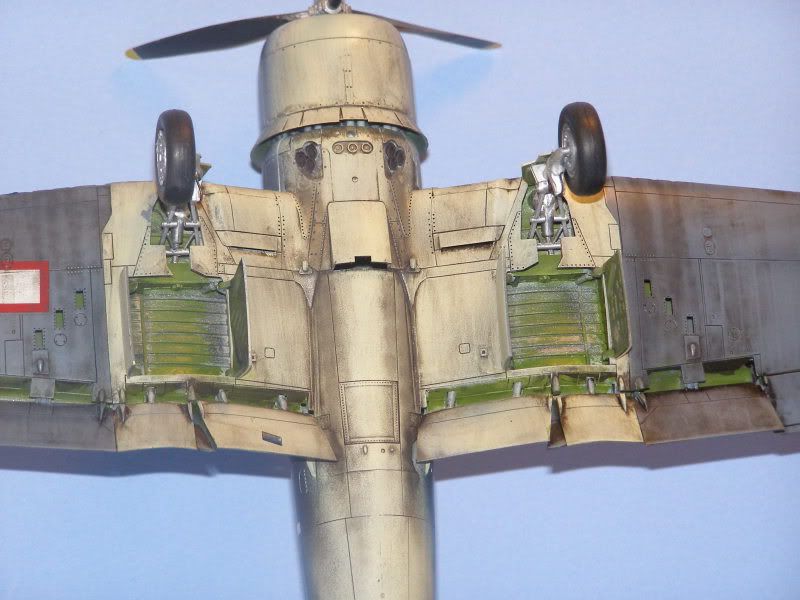
On that note I got a little time at the bench tonight and was able to do an initial layer of weathering. Weathering is so so so easy to over-do but most of the time I feel that I get the look I aim at. Some of my work has been over-done though, most notably according to some on here my Ju 88 that I completed a couple of years ago, so I’m intentionally attempting to tone it down with the Stuka. So far I think I have accomplished this goal (pictures will be forthcoming) but I really don’t like to do my builds as if they are right off the factory floor - given that these were war machines operating out of quite often muddy, dirty fields where appearance was not always the primary factor for ground crews.
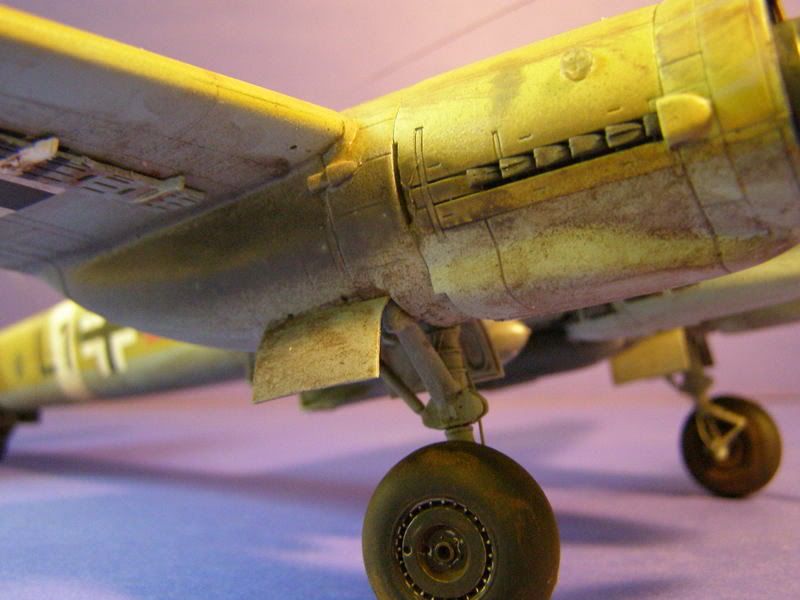
Thanks guys.BTW,how does one go about weathering an a/c?I plan on adding a bit of rust color to the exhausts (which are curently painted black) and some exhaust residue on the sides of the cowling/fuselage.Also maybe some chipped paint on the leading edge of the wings.A little dirt on the landing gear wouldn’t hurt either.
As for the weathering, I look for places where oil or other fluids might pool and leak, and then get blown away in the slipstream (I think that’s the word I’m looking for). Exhaust staining and gun stains are a must, as is paint chipping. I nearly always make my models look dirty via earth-tone pastels, Tamiya weathering pastels, etc - I go after the tires and wheel wells and I will often go for the look of dried mud swept across the underside of an aircraft.
On the top side, I have often tried to vary painting among panels to depict sun fading or perhaps in-the-field repair jobs (pirating panels from non-functional aircraft to repair damaged parts on functional birds, for instance).
With my Stuka, I purposefully toned down the dirty look, but it’s still gonna be a dirty warbird.