Thanks for your feedback. I guess I’m curious did you crimp them on yourself? 10 years ago, you might not remember!
Yes. Note that these things are made of soft copper. There are two tabs on the connector end. I use a pair of long nose pliers and give them a squeeze around the toothpick. I usually shorten the toothpick a bit so that I can crimp them around a fatter part of the toothpick. I’ve even uncrimped them and replaced the toothpick on occasion. You could crimp them to a wire and solder them if you wished (that’s their original purpose). I bought a batch of twenty from Radio Shack when we had one locally. The were co-located with the toothed style on the display wall.
Thanks for the great ideas and descriptions! [Y]
Oh man… No. Mine came already attached. The rods as you call them are more like bare cable. They are tightly wound bundles of wire. The mini cables are stiff. They are probably used as such because they are a cheap solution. The clips are tightly crimped to the cable. The only downside that I see with this cable is that one best not be pushing the bottom cables into styrofoam to create holes for standing because the wires will start coming apart. I used to do that with my homemade wooden dowel versions. So, what I did was is to pre-drill holes in a cardboard box. Problem is solved. I will update this post later with an image.
Yep. Pre drilled like that.
I see. I’m just curious. I wish I’d ordered the ones you have, Steve. Though I sure like those flat ones.
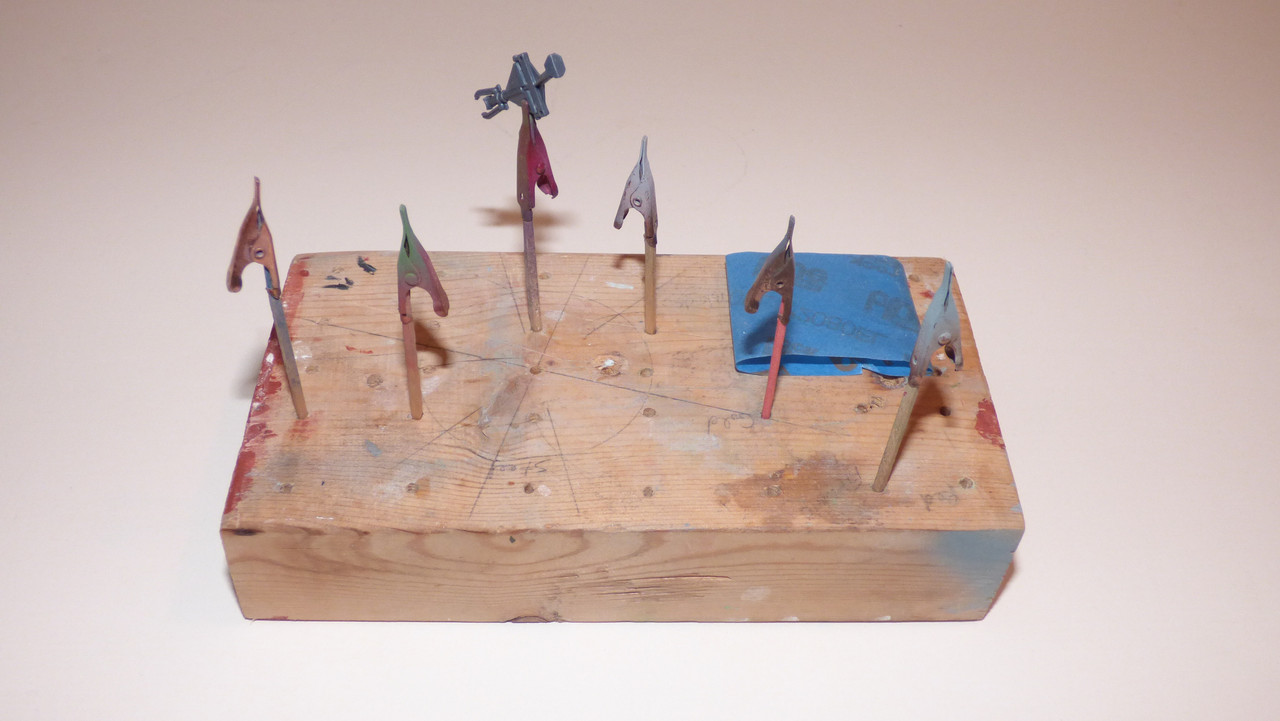
Here is what my clips look like in use. This is a bad example because I would normally clip right to the locating pin on the piece. In this case, I drilled into some sprue and used them as a holder. My old clips were not holding things very well and the clips were becoming loose on the dowel. That, and I was short on clips through attrition. In fact–this job is what prompted me to get new clips. Anyway–I already had them mounted as such and I left them like that for this painting session.
The box is from a holiday light insert that I taped up. I needed something quick and dirty. I will probably get something thicker so that the wires are buried deeper. As it is, it is usable.

Below-- here is an example of my old system. I am noting this because it is a good example of my work flow.

For very tiny parts, my last option is rolling a piece of Tamiya tape onto itself and sticking the part to it. Then, I clip to the piece of tape.
If anyone is interested in my heated sprue process–let me know.
Oh, by all means, please do tell.
Greggie–ask and ye shall receive.
I came up with this trick on my first modeling tour. It works fantastic, if you follow the process closely.
-
Cut a piece of sprue to use as a handle.
-
Get a lighter and hold the flame at the end of the sprue just long enough for the plastic to ignite. You will need to hold the sprue in the flame to accomplish it. Once ignited, pull the lighter away and let the sprue burn on its own.

It will look sort of like this. The camera makes the flame look bigger and hotter than it actually is. No matter, it’s burning.
-
Let the flame burn for 3 seconds. Do the 1 one thousand 2 one thousand 3 one thousand trick.
-
After 3 seconds immediately blow out the flame.

-
After the flame is out, wait 4 seconds and then press the sprue into the unseen side of the piece. Don’t force it. The plastic is soft. Let it do the work for you. Just push it gently until you see the plastic spread out as shown below.
-
Hold the sprue and piece as steady as you can for about 10 seconds. Then set it down to fully cool. It should take only a few minutes to fully cool.

And you are done!

This will not damage the outward facing side as long as you follow my process. If you let the sprue burn too long–it will become hotter–and then it’s a guessing game of how long to wait for attachment.
You get a pretty decent bond doing this. I can even do a final soap wash with them attached if you are careful not to stress the connection too much. But–if you do–just follow the same process. NOTE: If you must redo it–clip off the previous melt point because leaving it there messes up the formula. You risk over-heating the piece and you don’t get as good a connection. Trust me on this, it’s important.
When you are ready to remove the handles you simply bend them away from the piece and they easily pop off. All that remains is a blackened area where it was connected.
I would encourage people to practice on scrap first. The formula is pretty foolproof, but you need to get a feel for how much pressure to exert, and in keeping the piece steady until cooled enough. Trust me. This all sounds harder than it really is. I am giving you all the what nots. But in practice–it is very easy to do. I have been doing this process a long time and it works very well.
Lastly–I would not use this method on very small pieces or–where there is not a lot of plastic to dissipate the heat. The pieces in this post and in my first are good examples of what is safe to do it on.
Oh–and one other thing. The backside of the piece does not need to be flat for this to work. It works perfectly fine on irregular pieces. Like let’s say a car engine that his dips and such.
Now that’s pretty cool! I gotta try that. EJ
The one’s I got like this came from Radio Shack store. The look copper colored, but are actually copper plated steel.
I ordered some from Radio Shacks on line site that looked like them, but they were nickle plated steel.
I use them for tiny clamps, parts paint holders and heat sinks when I’m soldering (the nickle ones work best for that).
EJ
[Y] Let me know how it works out for you.
…
Um, you haven’t met me in person yet, Stevie.
Hey, thanks for the tute. I’ll have to round up my Bic and give it a go.
It tis the season for me to say, Bah, Humbug!
Yeah, give it a try on some scrap. It is very easy.