Fit isn’t too bad but I haven’t glued the wings on yet. Been filling and sanding the missile bay area. I also removed the fence on each wing and opened up the slot.

Fit isn’t too bad but I haven’t glued the wings on yet. Been filling and sanding the missile bay area. I also removed the fence on each wing and opened up the slot.
Looking good ![]()
DUmb question from my side, why did you need to remove the fences on the wing?
AS for my Thud, I have been working allot on it for the past few days, mostly early mornings before the day gets mad.
Yesterday I did the panel wash, the results are way overdone to be real scale, but then if you do not do it the model looks plastic…damed if you do, damed if you dont LOL
I have been building it for uor MOY in Jan, and since most of the judges judge the model as they see it, I have decided to stop trying to replicate what I see on full size planes I work on and go for what modlers do…if that makes any sence.
If I saw a real jet with all black rivets like these I would be extremely concerned about it!! That would usually indicate movement and rotation of the rivets in the holes causing it to make alluminium residue to look like powder called “smoking rivet”
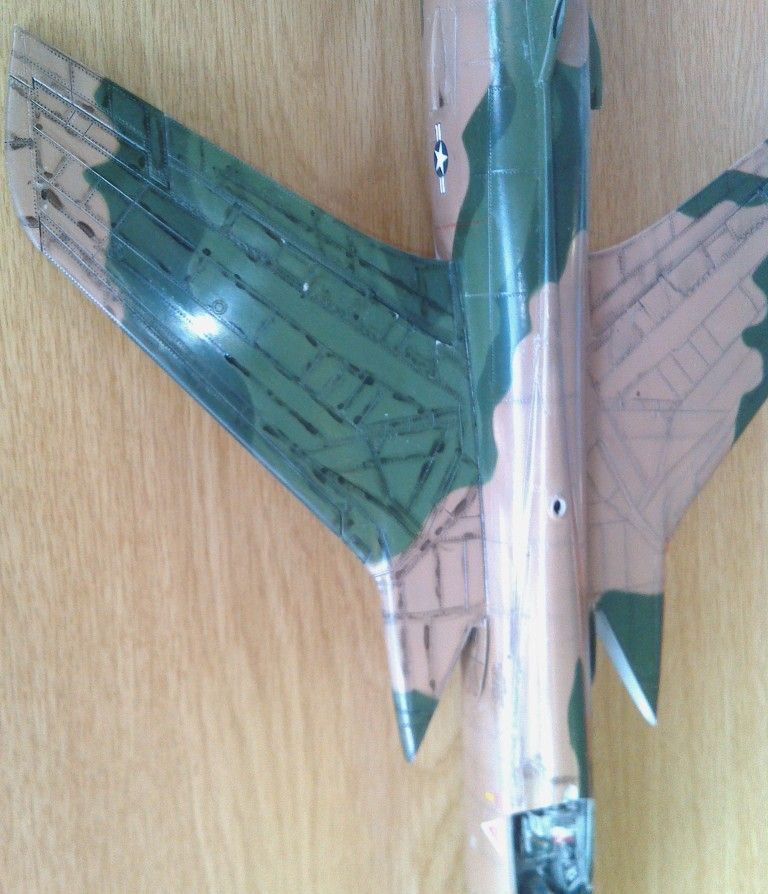
BTW, the left wing shows the result, the right wing needs cleaning off.
Theuns
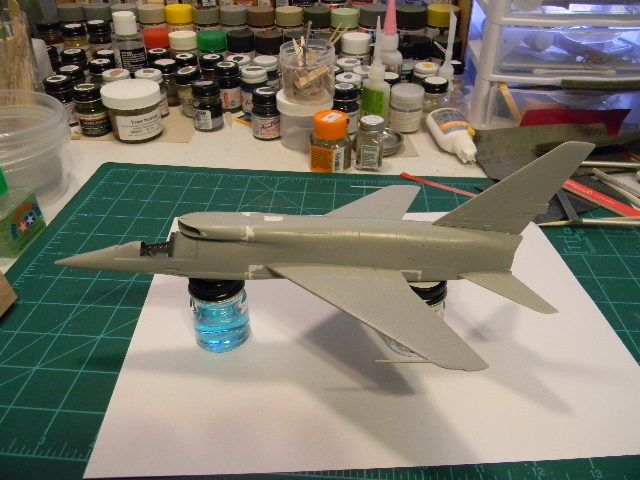
I finally finished my Hellcat for the PCA GB. So now I will dedicate my time here and get crackin’ on this 107. As you can see in the photo, I’m ready to tackle that sanding job. [:(]
Theuns - Nice progress. That 105 should really be impressive when complete.
GT - Good for you taking on that older kit. Every now and then I pull out an old kit to look at for a possible build. Then, I say nahh, and put it back. I really like the new kits.
Craig

Made a little progress this evening. I painted the landing gear and doors in between sanding the fuselage. Sanding is a little tough in some spots. Trying to get it smooth as possible for the NMF.
Craig

Great progress Flyer…making me want this plane to add to my Century collection
.
I remember reading that at some point in time they were removed or started removing them. I noticed in the photos of the one I’m building the fences were not there and the decal instructions also said they should be removed for this bird.
Very interesting ![]()
Theuns
I am close to having the thds done. The mattcoat dulled it down nicely ,the decals went on OK and the final bits need to go on.
The one thing I don’t like about the model is the flimsy long undercart, I think it may become a hassle while transporting it, I will have to make a cradle of sorts for it.
Theuns
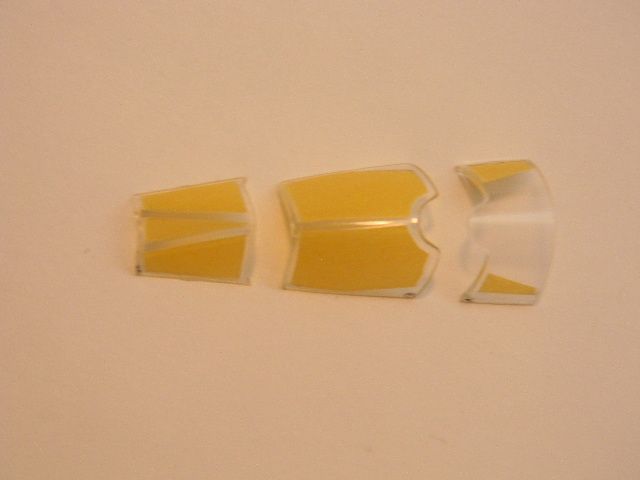
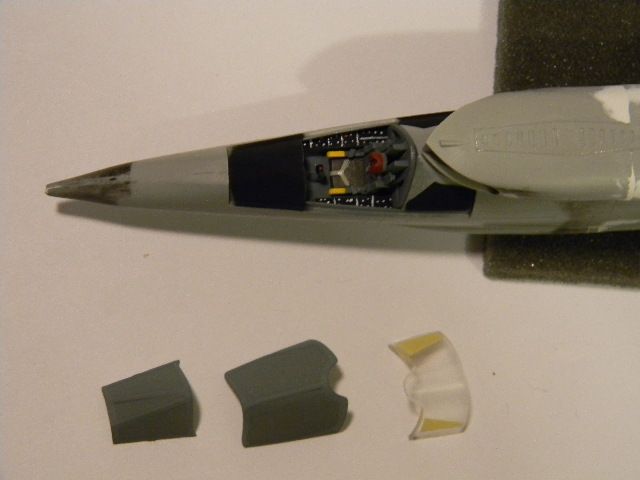
My plane is starting to look like an airplane. After considerable sanding, I glued the control surfaces and air brakes (closed) in place. Still have to do a little sanding and try to make the exterior smooth and clean as possible. I should be ready to paint soon, but I can’t find the Eduard canopy mask for this kit any where except the Eduard site. May have to do do it myself. Once I get the canopy on, I should be rockin’ and rollin’.
Craig


I’ve always had success with Bare Metal Foil for all my masking needs.
How does that work?
As it is self adhesive, you apply it to the clear plastic canopy. You then rub it all over with a cotton swab, and the thin foil will reveal the frame of the canopy. You then trim around the rim with a VERY sharp (new) blade and now the surface is sealed. You paint everything as normal and at the end, you use the tip of a toothpick to raise an edge then using tweezers you peel off the foil mask and discard. If it rips, you work at removing it with the tootpick. If it leaves sticky residue, I remove it easily with GooGone. I buy a sheet of BMF for about 10 bucks every few years. You can get a tremendous amount of masking from one sheet. Highly recommend.
There’s actually a bit on using Bare Metal Foil in either this or last month’s FSM.
Thanks Rob. I’m headed into town tomorrow. I’ll pick some up at the LHS if they have some. Seems simple enough.
Craig
Well, after watching a few YouTube videos, I decided to give the masking a try. This canopy isn’t to complicated, so what the hell. I think it turned out OK. Unfortunately, I cracked the center piece down the middle of the frame. [:@] Hoping it doesn’t show after paint. I couldn’t imaging doing a B-29 nose piece.
Anyways… Hope it stays on while airbrushing.
Craig


Craig, looks like you got it.
I had a little time to do some painting this evening. I painted the canopy a light gray for the interior frame. Also some flat black for the interior. Gonna let the black dry overnight before I glue the back canopy piece in place. Then comes the fun part…
I’ve never done a NM finish before. Any words of wisdom on the subject would be appreciated. Now it’s back to YouTube I guess. Thanks.
Craig

Craig, what “system” OF nmf you going to use?
I prefere Alclad 2 paints as they are real easy to use.
The absolute biggers thing with them is to have a flawless finnish on the model before using.
I will prime the model with tamiya primer, sand it with 8000 micro mesh , then spray on gloss black enamel as a base.
I have not had any luck with alclad’s black primer. Then you start shoting on the alclad you want ot go with. It is so thin that initially it looks like nothing is going on, but it takes about 6 very light coats to get a nice finish.
Then I decal straight onto the paint as it is so smooth, then seal it all with alcla’s clearcoat as it does not affect the look of the metal really.
Spray the alclad at between 12-15psi at a low angle to the model, this way you get a wider cover area.
Hope it helps.
Theuns
Thanks for the advice Theuns. I plan on using Alclad II regular aluminum. So I should lay down a primer coat and sand before I lay down a gloss black coat. OK, I can do that. I guess I really need sand any scratches out before I start painting. I’m also going to mask off the plane to spray the red scheme of the aircraft. I should probably hit the Alclad coat with a coat of Future before masking?
Craig
es, Craig.
I allways prime first to show any potential hassles that will show up under the alclad.
The thing you NEED is a very smooth surface for the alclad.
That is why I sand the primer with 8000 and the enamel gloss black when cured with 12000.
Then the alclad gets built up over that in thin coats. If you want some variation in panel color I don’t use different shades of alclad, I just shoot 3-4 coats on, by now you have a dark alluminium look to it and then mask off the panels I want dark and shoot 3 or so more coats on.
The more coats that go on, the lighter it becomes.
Even with airframe allu , over the gloss black you get a high shine look.I usually tone it down a little with a pannel line wash and the alclad light sheen (IIRC) gives is a slight toned down look.
If you want a pollished shiny look shoot some alclad gloss clear over it.
I mask off for all colors after the allu is on, the stuf is rather hardy, but I wear cotton gloves not to tarnish the paint and use tamiya tape that I remove CAREFULLY.
Remember, alclad uses a relatively low PSI to paint. And don’t flood the alclad on, it will eat the plastic…I know! LOL
The biggest thing with alclad it to go for it and have fun.
Theuns