oops… not both… it will do either…
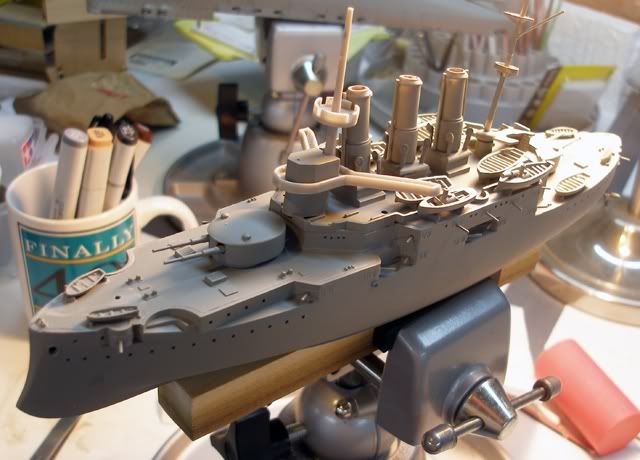
here is the latest. took y=the base off to prime and there is enough cleanup work to put the base back on and stick it in the vise. i will do this for all future ship models. MY MISTAKE, THE BASE IS 3/4" X 3/4" NOT 2"X2". must gace gad 2s on my mind. everyrging is just set on there. notes to date. i think all the yards are goung to be brass wire and i have to figur out how to secure the mast to the ship in a more solid way. might mean cya a plastic rod and somehow cya that through the deck to the bottom of the hull. tried hiding sink marks inside the boats with mr surfacer but that didn’t go well and the squares are too obvious so will ponder that. the hull turned out nice and the deck fit isn’t great but not as bad. i fear the tan wood deck will show up “missing” planks. given i am painting the hull dark gray or black, i will paint the decks first and mask them off for the superstructure. btw not everything in the pics is primed or glued on.
might be time to pull out ZRZ-99 chinese mbt and do something easy relative to this like building the indy tracks. actually i think with effort this will look nice on the shelf and will be good practice. of course if thety have a dumb asses who enter 50 year old models in contests and expect to place catagory i’m all set.
nice Wayne…[t$t]
I don’t plan to start until early spring when we make the trek to St. Paul. If possible, keep me in mind after you start. It would be nice to have railings. If not, I’ll try to do some scratch building. Chat over at ModelShip is that both Oregon and Olympia are pretty decent efforts despite their age.
Eirc
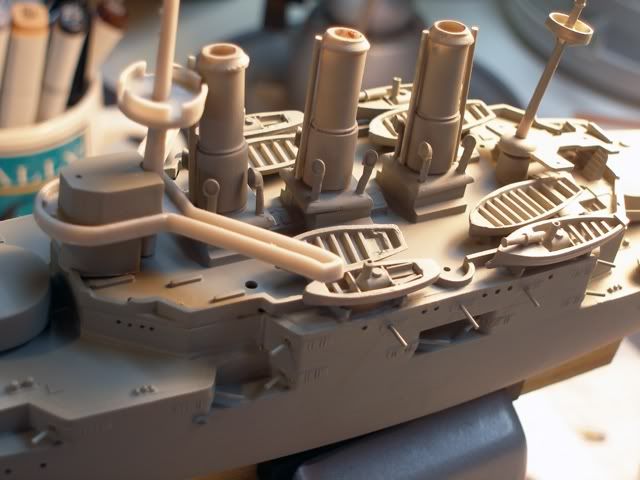
thank you. definitely a 3 footer. i used my microchisel to fet the medal deck edge closer to the deck height in some spots. have to be slow and careful but with some sanding will be good enough for this model. if you recall the boat pics i had white plasticd covering the sink marks. that didn’t work but i was able to chisel them out using micro chisel, xacto, and, surprisingly, my pointu axacto hole punch. i obviouslt floode the area with enough plastic glue that something melted into the holes. my question is
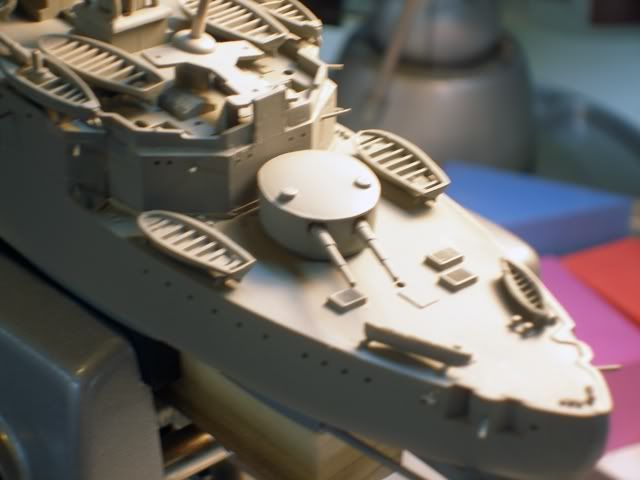
what does anyone suggest to “fill in” the roughness without having to sand. i’m thinking judicious use of mr surfacer 1200, maybe rhinning my 3m red body putty w/ acetone or maybe a drop of thin cya and just let it flow and fill. on these ships the boats capture a lot of attention. this one has 10 4 of which are rather crude plus 4 steam launches which turned out quite nice. they woill be painted hull color plus waterline. the other boats are shown hull color but i may paint them light grey with brown seats which will show up the marks more. now to fix my steam launched on BORODINO which i have screwed up.
another question. obviously the flying bridge railings look like 3 " armor thickness. any suggestions on thinning them. i’m not thinning the same on the boat deck because they don’y look too bad but i may have to trace out the bridges and make a new one. probably plastic with the “railing” in brass.
i think GMM has a set for oregon and olympia.
Is Borodino an old kit? Hadn’t dawned on me it might be a rebox although I know Zvezda does it. I got the IPMS journal with photos of all of the category champs from their last national show (winning Flak Panzer is an absolute jaw dropper) and it’s startling how many categories they have. Didn’t see anything for Eastern European antiques though. Maybe it goes under the scratch build category.
Been going through the ShipModeler to check scratch railings. Did see one really neat idea. Some gent downloaded the plans for a 1/96 free turn of the century British armed river boat. It’s from a place that provides plans etc for card modelers. He used the plan for a scratch-built plastic kit. Hasegawa it isn’t but it is very neat and looks like a mortal could handle it.
So the PE was either/or? Knew it was too good to be true. There are generic railings for 1/192 but they’re not cheap. We’ll see, maybe just get the PE.
Eric
it Says it will work on either ship, just not both together… if thats not true, when I’m done, ur welcome to what ever is left over…
The Borodino is a reissue of an Eastern Express kit.
Wayne that’s a real eye opener, what an unusual subject. I would get rid of those bridge railings. Unless they are rows of sandbags, which was not uncommon; but probably not here. My choice for this, and I’d replace the fighting tops too, is sheet brass. Look though your PE fret supply, because the borders of those things usually yield a number of inches of brass.
compared to my alanger kit it looks new. haven’t gotten far enough along on her or MARKGRAF to address the fir issues. the deck sits on the hull nice on both so the only “serious” issue is the superstucture that holds the raised forecastle as it projects over the lower deck. DREADNOUGHT looks ok.
nationals was a hoot. 2013 is up the road so i will be stating big cased models in miscellaneous and submarines. not even going to compete in cars, tanks, planes, figures, or sci-fi. obviously that still leaves a lot.
i laid out a pe set of reailings for a friend. i think they were 1/192, not sure since it was a wooden scratchbuild and they scale differently ie 3/16", quarter scale most of which i habe never figured out. he gave me dimensions and i created the artwork and we had it printed in cal. think it was $275 for a 12" long, not sure how wide, sheet. and that didn’t include graphics since he is a club member and we swap experience. the GMM set has a twofer BORODINO and VARYAG. yes i have a couple of them and all 3 BORODINOs. and an old soviet kit (probably a pyro) of a 1/110 or /144 lightship. i will scratch build railings for her bit it’s all straight lines. guess i’m just a glutton for punishment.
i think my lightship is an eastern express. already have one mast done so the fighting tops are out unless i drop the damn thing again. am using brass rod for all the spars. may use thin styrene for the railing to. i have a lot of luck with cya and i have some real thin stuff plus accelerator. i have a generic GMM 1/450 merchant ship set i will use for the railings. i chose that over the 1/400 naval set because i have some 1/400 or 1/500 freighters and it has ratines which i may need while the naval set had a bunch of radars i will never use. this was the armoured castle british design of the RENOEN and MAJESTIC class and was the last pre-dreadnought design before HMS DREADNOUGHT.
I didn’t need to know about another Eastern European model company. Especially one that sells a WWI German torpedo boat. Or a 500 scale Royal Sovereign. (Maybe wearing WWII warpaint because it was Rooskie for a while: that would spoil the fun.) This is a bad influence. Pretty soon I’ll be thinking of resin.
Eric
I have made progress on the Ting Yuen, finishing a couple of other projects first.
After a little debate I stuck with the earlier Victorian paint scheme, as I’d like her to be fully rigged as she was for the delivery sailing from Germany, and it’s then the earliest pre-dread in my collection.
I probably will leave one of the barbette covers off though as the big guns look nice.
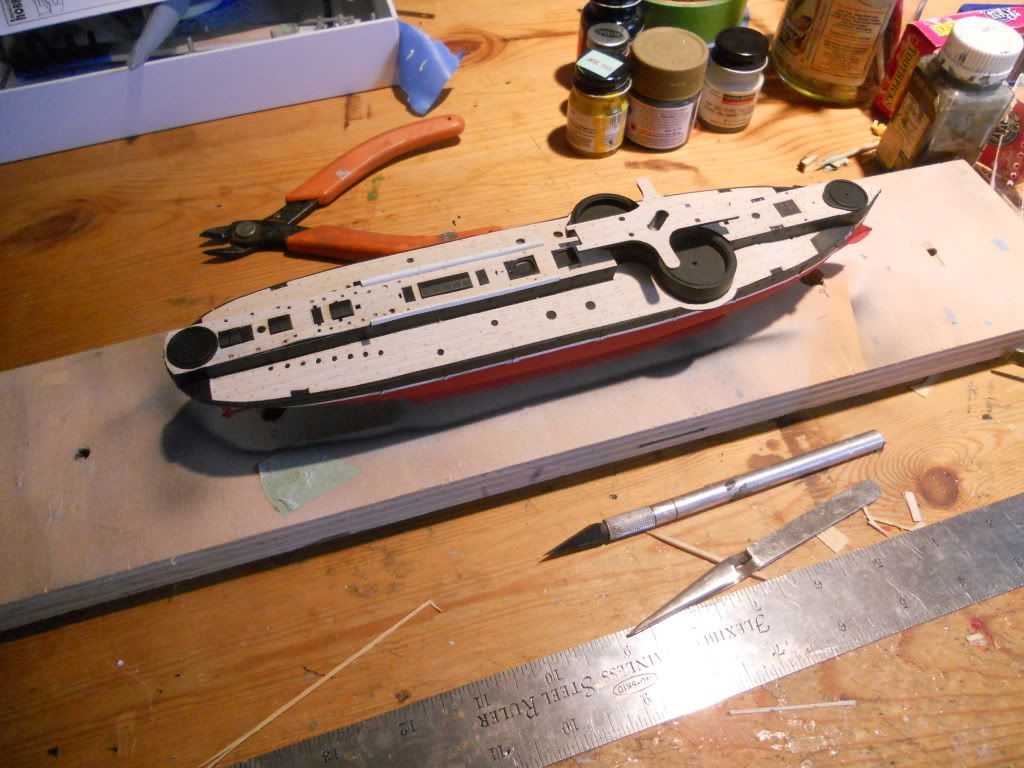
I stained the KA decks with a semi transparent stain I have called “coastal boards”, a warm gray.
Big word of caution- if you use the wood decks, they are cut to go down BEFORE the midship structure. I don’t understand that, as it would make those sit high, but there it is. So I of course found out the hard way and had to peel the first one back off and trim the two main deck pieces, but not a big deal.
Nice work, M0J0’s!!! [t$t]
Quite the fleet being assembled here folks - looking good!
I am having nothing but trouble.with the decking. I can’t get it to stay flat. Some additional trimming on the main deck, in place, will help. Up on the boat deck, it’s harder because it didn’t fit too well between the various skylights. oh well, should have done more trial fitting. live and learn.
Maybe Fermis has some tips?
bump…
Fist Bump!
Right, well, the 60 day test of the deck glue has gone well, so, on to modeling!
Time to shoot some yellow!