Where’d SubRevolution go? I’ve got some Canadian decal goodness for him!
hmmmm he’s been quiet for about a week…
I’ve started filling, so this weekend I will be sanding the mess I made of applying the putty and priming.
So what markings do you have planned for the Arrow Chris? Sticking with prototypes or some in-service markings?
I’m probably sticking with prototype markings for this one.
But that might be an interesting idea for the future. Do up a fantasy build with ordnance and some type of grey paint scheme.
Gap filling, sanding and priming done.
here’s arrow beside a CF-18 I’m doing for the 1/72 build.
![]()
I have to get some white paint tomorrow then I can start painting.
This is the release of Chippy that I’ve got. It contains Canadian markings so it should be pretty easy.
Cheers
Tony
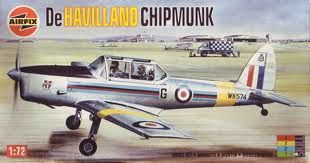
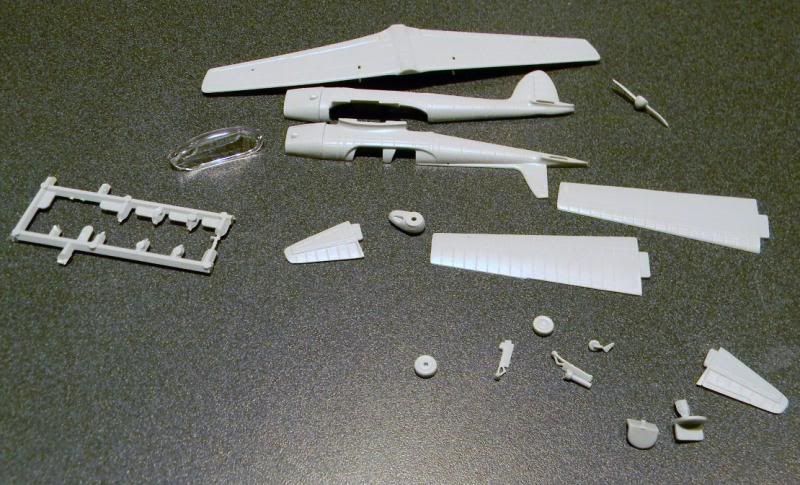
Made a start on the Chippy. All of the parts are off the sprue. It looks like the mad Airfix riveter had his wicked way with this one.
The kit looks like a sixties or early seventies Airfix kit. The cockpit it a bit threadbare, and there isn’t much aftermarket around. I’ll have to figure out how to spruce it up a bit without spending a lifetime on it.
Cheers
Tony
Hi guys,
Finally I have a clear bench and will be starting tonight. I will be building a Hasegawa 1/48 CF-104 Starfighter. The kit comes with the Tiger Meet decals but I’m not too keen on them. I think I will order a set from Belcher Bits and perhaps a recce pod as well. Other than that it will be OOB. Anyone have experience with Belcher Bits resin sets? I like their decals but haven’t tried their resin. Also, are there directions anywhere for posting pictures on this forum? I will post pics in the next day or so.
Thanks.
Hey Caveman, first you need a image file sharing site i.e. photobucket.
Once you upload, copy the direct link to the image, then come into the thread you want to post to. Click Use rich formatting, then click on the button for picture (looks like a picture). Paste and voila.
Canopy is done in its future dip, landing gears are installed and first couple coats of white are on it.
![]()
Always loved the look of the Arrow. Even as a model it looks fast. You going to finish it in a gloss or semi gloss?
I’m leaning towards a semi-gloss
I have hit a snag on masking the canopy.
It doesn’t have any conventional lines so taping it won’t work, maybe silly putty? Afraid of the residue.
I read another review of a similar kit, and the modeller cut out the windows, painted and then was going to add krystal clear later.
They give you so much clear plastic but need so little.
Or do I just keep trimming tape until it fits. I figure it’ll have no adhesive once I’m done with it.
What abiut trying a liquid mask
Chris: maybe you’ve seen it, but here’s a link to an FSM article about masking with Silly Putty. It’s specific for ships, but might be useful for an aircraft, too.
http://www.finescale.com/~/media/Files/PDF/How%20To/2012%20Update/FSM_JAN2009_52-56.pdf
I haven’t used Silly Putty, so I don’t know about residue, but I have used poster tack, and that has worked OK. If residue is left, you just press more tack on top, and usually it all pulls off then.
The problem I’ve seen with Krystal Klear is that it dries leaving the window with a concave shape to it–not flat.
Whatever you try, good luck with it.
I thought about the liquid mask but I don’t have it.
Putty and blue tack I have so I will give that a shot.
Hi Chris,
I’m not familiar with the canopy on that thing. The way I mask the complex ones is to cut up little tiny squares and triangles from masking tape, then add then like a mosaic to each panel to be masked. They can and should overlap. The only line you need to be good is the masking line.
It’s a very easy technique.
Let me know if it helps.
Cheers
Tony
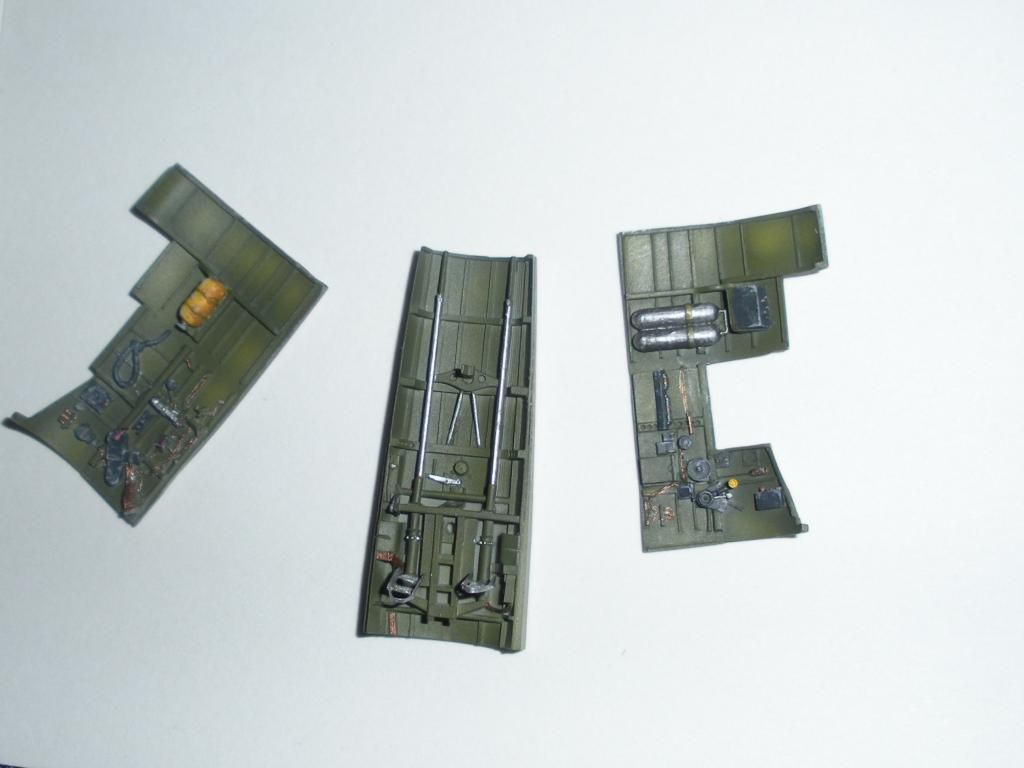
Having arrived home last night, and after a long welcome from the dogs and a little time with the little lady, I unpacked my spitfire set full of goodies. The cockpit had arrived while I was away, and that was the last part of aftermarket that I had ordered up for the kit. Laid out is the kit, an engine, cockpit, gun bays, DeHavilland prop / spinner and a radio compartment. Of course, the Eduard big ed kit, a pair of Master Hispano cannons, stencils and decals, True Details wheels, an extra pair of exhausts just in case I don’t like those supplied with the engine and control surfaces.
Starting to look like a bit of a daunting job, given the short times I get to work on it. Today’s task will be washing all the parts and allowing them to dry.
In the end, she’ll wear a simple mediterannean blue top side and sky under belly, and the markings T.L for George Buerling. I’ve got the Vallejo paints already, just a matter of playing with how I want to shade, but that’s a while off yet. I also plan to play with Vallejo’s matte and gloss mediums during the paint to see if I can’t increase the translucency of the paint.
Wow Andrew you certainly have your work cut out for yourself.
I do, Chris. The spitfire is a kit I seem to keep revisiting, and each time I get a little more daring in what I alter. My last one had the brass Hispanos and Eduard’s etch, so I figure I have to push myself harder this time. That’s all the fun of it for me, see how far I can go and still pull it off.
At this point, I’ve stripped off Tamiya’s details from inside the fuselage, dry fit and primed the Aires cockpit and started fitting the wall opposite the radio opening. It’s slow progress, but I want it all to fit up right. I’m hoping today or tomorrow I can start getting some paint and shade down in the cockpit and inner fuselage walls. I have a little more fit to do to the pit walls first, but that should be fairly quick. At least the engine looks like a relatively uncomplicated assembly, it’s made by CMK and I’ve had good luck with their resin in the past.
In the end, I’m hoping this will be the first Spit I’ve done that I can look at and not find a fault. It’s a big hope, and I’m probably setting myself up for disappointment, but I will try.
A starting point.